
Why ProWax Polish™?
A sacrificial finish that sits on top of your sealer and takes the scuffs, grit and foot traffic. When the shine dulls, buff it or add a coat. Your sealer never gets touched.
Need help?
Talk to one of our project coaches.
Request a Callback
Leave your number and our team will call you back.
About: ProWax Polish™ Concrete Floor Wax
Thanks — we'll call you back!
Our team will reach out shortly during business hours.
Trusted by pros & DIYers
ProWax Polish™ Concrete Floor Wax
ProWax Polish™ Concrete Floor Wax
ProWax Polish™ takes the daily scuffs and traffic so your stain and sealer don't. A non-yellowing wax in Satin or High-Gloss that mops on, dries clear, and refreshes anytime — no stripping, no resealing.
Shipping details · Estimate shipping in your cart.


Calculate how much you need
Enter your floor’s dimensions to see how many gallons to order.
Number of coats
Estimated wax needed
Suggested sizes & quantities
| Size | Qty |
|---|---|
| — | 0 |
One gallon covers about 1,000 sq ft per coat: about 500 sq ft at 2 coats, 330 at 3, 250 at 4.
Gloss or Satin: one formula, two looks
High Gloss
A deep, reflective wet look that makes stain and dye colors pop.
Build 4–5 coats and burnish them for a showroom-level gloss.
Satin
A soft, low-sheen finish that hides light scuffs and footprints.
Either way
The same durability from the same formula. Water-based, low odor, non-yellowing and clear-drying.

Made for sealed interior concrete
Use it on
- Stained and dyed concrete floors
- Sealed kitchens, living areas, basements and entryways
- Showrooms, lobbies, offices and restaurant dining rooms
- Bar tops and kitchen islands, over cured HydroCryl™
Not for
- Bare, unsealed or densified concrete: seal it first
- Outdoor concrete: it isn’t made for sun or freeze-thaw
- Damp floors: wait until the concrete is completely dry
- Floors below 60°F
Wax a floor in four steps
-
Start clean, dry and sealed
Wax goes on top of a cured sealer; it doesn’t replace it. Remove any old wax, then let the floor dry completely: 24 hours if it got wet.
-
Check the room
Between 60°F and 95°F, below 70% humidity, with the wax within 5–7°F of the floor.
-
Mop on thin, even coats
Start at the far corner with a microfiber mop and work toward the door. It goes on milky and dries clear. Recoat after 30–45 minutes.
-
Let it cure
Foot traffic after 6–12 hours; furniture and rugs after 24. Tools clean up with ProClean Daily™ and warm water.
Keep every coat thin. Wax that pools in low spots, goes on a damp floor, or goes on below 60°F dries milky white.
Keeping the shine
When it dulls
Clean the floor with ProClean Daily™, our neutral cleaner, and mop on a fresh coat. No new sealer needed.
A home floor needs one about every 6–8 months, depending on foot traffic. Spot-wax entryways and hallways in between. If the wax turns cloudy or hazy, strip it before recoating.
Burnish for a harder shine
Build 4–5 coats. Once the last one has cured for 24 hours, run a low-speed buffer (175–300 RPM) with a white or red pad. The finish comes out harder and glossier than mopping alone.
Re-burnish every 6–12 months to bring the gloss back.
White spots?
Remove the excess where wax pooled, let the area dry completely, and bring it above 60°F. Then reapply a thin coat.
Clean it without dulling it

ProClean Daily™ Neutral Cleaner
1 quart. Safe for polished coatings: it won’t dull the gloss or haze the finish.
$34.95
Shop the cleanerBefore you start, read the application guide and the data sheets for your finish. Gloss: TDS · SDS. Satin: TDS · SDS.
Floors finished with ProWax Polish™
Waxed concrete floors in High Gloss and Satin. Tap the first project to compare before and after.


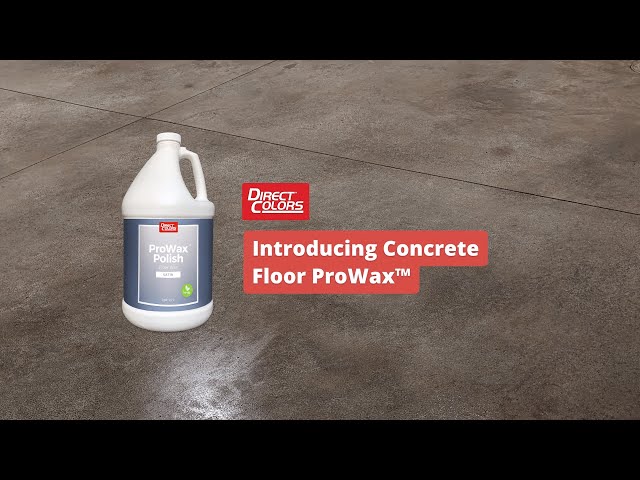
ProWax Polish™ is a water-based wax for sealed interior concrete. It sits on top of your sealer and takes the daily wear, so the stain and sealer underneath don’t.
- Use on
- Sealed interior concrete: stained and dyed floors, kitchens, basements, entryways, showrooms and offices.
- Finishes
- High Gloss for a deep, reflective wet look; Satin for a soft sheen that hides light scuffs and footprints.
- Coverage
- About 1,000 sq ft per coat per gallon: about 500 sq ft at 2 coats, 330 at 3, 250 at 4.
- Application
- Thin, even coats on a clean, dry floor at 60°F or warmer. Recoat after 30–45 minutes.
- Foot traffic
- After 6–12 hours.
- Upkeep
- Reapply every 6–8 months at home, or spot-wax worn areas. When the shine dulls, buff it or add a coat.
Not a sealer. Wax protects the sealer; it doesn’t replace it. Apply it over a sealed floor.
Full product information
ProWax Polish™ is a water-based floor wax that adds shine and a sacrificial wear layer to sealed interior concrete. Its polymer formula takes the daily abuse — scuffs, grit, foot traffic — so your sealer and stain underneath stay protected. When the shine dulls, you clean the floor and mop on a fresh coat. No stripping, no downtime, no reapplying sealer.
Choose High Gloss for a deep, reflective wet look that makes stain and dye colors pop, or Satin for a soft, low-sheen finish that hides light scuffs and footprints.
Why customers choose it
- Protects the finish you paid for — the wax wears instead of your sealer, so color and topcoat stay intact underneath
- Refresh with a mop, not a strip — clean the floor and apply a new coat whenever the shine fades
- Built to take traffic — the polymer resists scratching, scuffing, and daily wear for a long service life
- Two finishes from one formula — the same durability whether you want a mirror shine or a quiet satin sheen
- Buff it brighter — build four or more coats and burnish the final one for a showroom-level gloss
- Water-based and clear-drying — low odor, non-yellowing, and safe to apply indoors
Where to use it
- Stained and dyed concrete floors — deepens color and brings out depth in acid-stained work
- Sealed residential floors — kitchens, living areas, basements, and entryways
- Commercial and retail interiors — showrooms, lobbies, offices, and restaurant dining rooms
ProWax Polish™ Specifications
| Recommended Uses | Sealed interior concrete floors. Not for use on bare or unsealed concrete. |
|---|---|
| Location | Interior surfaces only. |
| Finish | Satin gloss, non-yellowing, machine-burnishable. |
| Application Tools | Trim pad, foam mop with wringer attachment, or microfiber push mop. A spray bottle may be used for controlled application in tight areas. |
| Coverage |
Approximately 1,000 sq. ft. per gallon, per coat. Since most floors need more than one coat, one gallon covers:
|
| Number of Coats |
|
| Application Temperature | Best between 60°F–95°F (15°C–35°C), surface and air. |
| Re-Coat Time | 30–45 minutes minimum. Allow longer in cool or humid conditions. |
| Dry Time — Foot Traffic | 6–12 hours after the final coat, varying with environmental conditions. |
| Dry Time — Furniture | 24 hours before replacing furniture, rugs, or other heavy objects. |
| Cleanup | Clean tools while wet using ProClean Daily™ and warm water. |
| Maintenance | Clean with a neutral pH cleaner such as ProClean Daily™ Neutral Cleaner. Dry buff or burnish to restore sheen. |
| Storage | Keep container tightly closed. Protect from freezing. |
Test a small, inconspicuous area first to confirm compatibility and appearance.

Frequently Asked Questions
How often should I reapply ProWax Polish™?
How often should I reapply ProWax Polish™?
For residential use, reapply wax every 6-8 months depending on foot traffic. High-traffic areas like entryways and hallways may need more frequent spot treatments. For commercial applications, waxing may be needed more frequently. You can spot-wax high-traffic zones as needed between full applications.
Does wax replace the need for sealer?
Does wax replace the need for sealer?
No! Wax does not replace sealer. Sealer penetrates deep into the pores of your concrete, protecting the surface and maintaining your concrete's true color. Wax is a topical application designed to protect and enhance the finish of the sealer. Think of it as a protective layer on top of the sealer – the wax protects the sealer while the sealer protects the concrete.
Why are there white spots on my concrete after applying wax?
Why are there white spots on my concrete after applying wax?
Uneven Surface and Pooling: If the concrete surface is uneven with low spots, wax can pool in these areas when applied too heavily. This pooling can cause the wax to become milky or white, especially noticeable in rounded spots where the accumulation is significant. Moisture Trapped Under the Wax: Any remaining moisture on the surface or within the pores of the concrete that gets trapped under the wax layer can lead to a milky or hazy appearance. This moisture needs to evaporate completely; otherwise, as it tries to escape, it clouds the wax. Application on Cold Surfaces: Applying wax to a concrete surface that is below 60°F can prevent the wax from curing properly, leaving it white and milky—similar to its appearance when first applied. The wax doesn’t bond well with cold surfaces, resulting in an undesirable finish.
How can I prevent white spots from forming when waxing concrete?
How can I prevent white spots from forming when waxing concrete?
Ensure Even Application: Avoid applying wax too heavily, especially on uneven surfaces. Aim for a thin, even coat to prevent pooling. Dry the Surface Thoroughly: Make sure the concrete is completely dry, with no moisture on the surface or within its pores, before applying wax. Apply at the Right Temperature: Apply wax only when the concrete surface temperature is at or above 60°F. For optimal results, the wax should be within 5-7 degrees of the floor temperature during application.
What should I do if I already have white spots on my waxed concrete?
What should I do if I already have white spots on my waxed concrete?
Remove Excess Wax: In areas where wax has pooled, carefully remove the excess. This may involve reapplying a thinner layer of wax or using a wax stripper followed by a proper application. Address Moisture Issues: If moisture is the culprit, allow the area to dry thoroughly. This might mean using dehumidifiers or fans to speed up the drying process. Once dry, reapply the wax as recommended. Adjust Temperature: If possible, increase the temperature of the area to above 60°F and allow the surface to reach this temperature before reapplying wax.

People Frequently Also Purchased


AcquaSeal™ Water Based Acrylic Concrete Sealer
Choose your option


EasySeal™ Solvent Based Acrylic Concrete Sealer
Choose your option
Related Links


