
Staining transforms an outdoor patio — and the right product makes it last. Antiquing™ Stain is our preferred stain for patios: versatile, durable, and easy to apply on stamped, brushed, broom, swirled, and poured concrete. It penetrates the surface for long-lasting color and, because it doesn’t react chemically, it blends patchy areas rather than exposing them — with 30+ colors to choose from. Here’s the step-by-step. (Browse real results first in our Stained Concrete Patio Ideas gallery.)
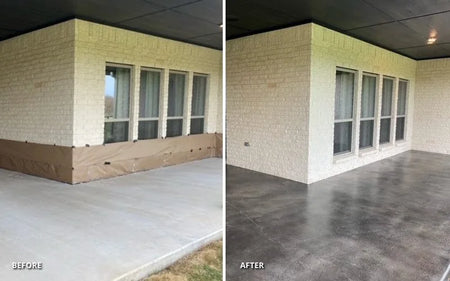
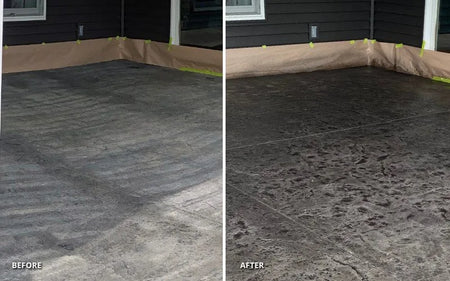
Step 1: Preparation
Let newly poured concrete cure 30 days before staining. Cover walls, landscaping, and nearby items with plastic or paper to protect them from over-spray. Remove any paint or old sealer, then clean the surface of oils, dirt, and debris with a scrub brush and ProClean Degreaser™. Test absorption by pouring a cup of water in a few spots — if it isn’t absorbed within five minutes, etch with CitrusEtch™, neutralize with ProClean Neutralizer™, and rinse thoroughly. Let the concrete dry completely before you start.
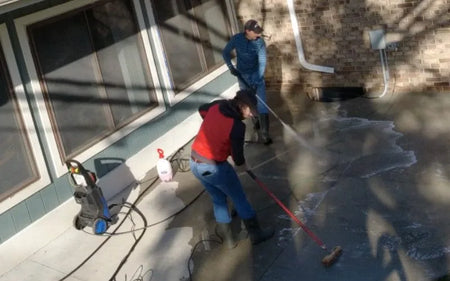
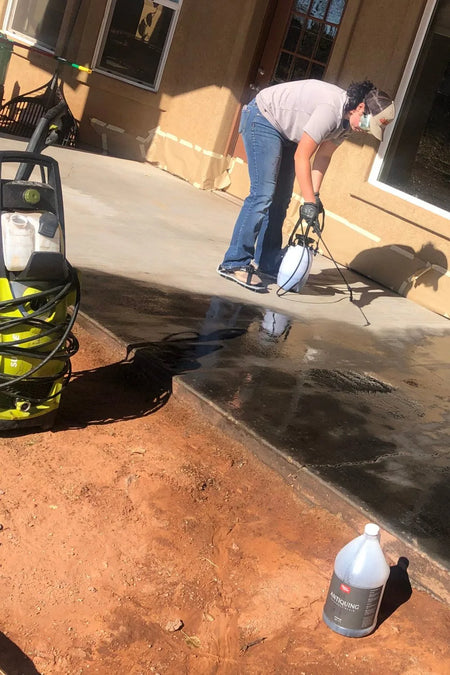
Cleaning the patio with an organic degreaser and pressure washer before staining.
Step 2: Application
NOTE: Only apply Antiquing™ when the surface temperature is between 40°F (4°C) and 95°F (35°C).
CAUTION: Antiquing™ is flammable and harmful if swallowed or inhaled. Use with adequate ventilation, away from heat, sparks, and flames. Open windows and doors and extinguish open flames before applying; don’t smoke or do anything that could cause a spark.
- Remove all filters from the pump-up sprayer.
- Shake Antiquing™ well before pouring it into the sprayer.
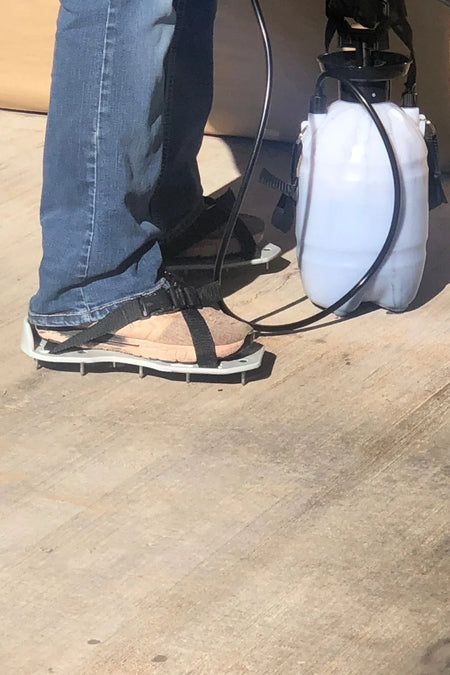
- Spray in circular motions with random overlaps for an even, flawless finish. Wear spiked shoes so you don’t leave prints.
- Shake the tank frequently for consistent color, and start from the corner farthest from your exit. A second coat can go on without waiting for the first to dry. To prevent drips, rest the sprayer tip in a bucket before releasing the trigger.
Don’t be alarmed if the color looks faint once the stain dries — the sealer is what brings it to life and makes it vibrant.
Step 3: Seal & protect
Sealing is what bonds the color to the concrete — it’s not optional. Use a fresh pump-up sprayer for EasySeal™.
CAUTION: EasySeal™ is flammable and harmful if swallowed or inhaled. Use with ventilation, away from heat, sparks, and flame; extinguish open flames (including pilot lights) before applying.
- Remove all filters from the sprayer.
- Begin from a far corner and apply EasySeal™ in circular motions with random overlaps.
- Apply thin coats to prevent puddling; wait 8 hours before a second coat.
- Check the cure with a thumbnail — if it dents or scratches, wait longer before recoating.
- Clean the sprayer with Xylene after use (recycled Xylene works — one quart covers the whole project). Allow foot traffic after 16 hours.
Staining a Patio: FAQs
How long must new concrete cure first?
30 days. Cover walls, landscaping and anything nearby with plastic or paper against over-spray, and remove any existing sealer before you start.
What temperature can I apply Antiquing™ in?
Between 40°F and 95°F surface temperature. Outside that window, wait.
Is sealing optional?
No. Sealing is what bonds the color to the concrete. Use a fresh pump-up sprayer for EasySeal™ — and note that both Antiquing™ and EasySeal™ are flammable, so ventilation and no ignition sources.
What’s Next
- Color ideas & real projects → Stained Concrete Patio Ideas
- Want the acid-stain look? → How to Acid Stain a Patio
- Restore an old, faded slab → Make an Old Concrete Patio Look Beautiful Again
- Shop → Antiquing™ Stain · Sealers · Trial Kits
Direct Colors. Shawnee, OK. Manufacturing the full decorative concrete system since 1997.


