
A stamped or textured concrete patio, driveway, pool deck, or walkway is one of the best canvases in your whole yard — but once the original color fades to a flat, washed-out gray, it can make the whole space look tired. The good news: you don't have to tear it out or hire a crew to bring it back. Antiquing™ Stain lets you re-color and revive that surface yourself in a single weekend, with nothing more than a pump sprayer and a little patience. It's forgiving, you're in full control of how light or deep the color goes, and it comes in over 24 colors you can layer for a realistic stone or wood look.
This guide walks you through the entire project the way we'd talk you through it on the phone — what to buy, how to prep, how to apply, how to seal, and how to avoid the handful of mistakes that trip people up. By the end you'll see exactly why this is a project you can absolutely do yourself — and why, for the true antique look on stamped concrete, nothing else on the market comes close.
Prefer to listen? Shawna Turner compared reactive acid stain against topical Antiquing™ for outdoor concrete. The player is at the end of this article.
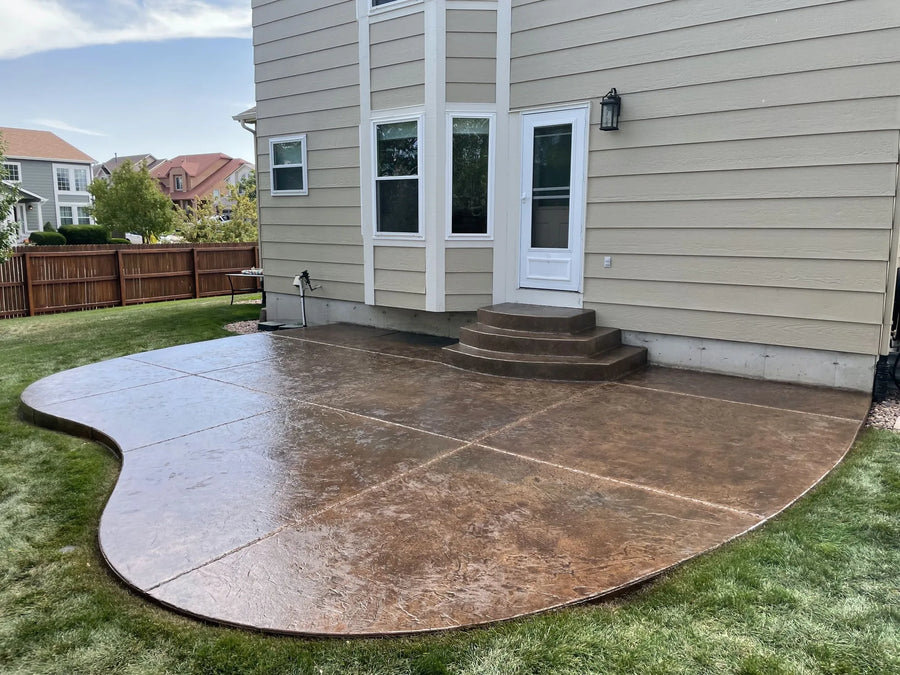
A tired stamped patio brought back to life with Antiquing™ Stain in Driftwood and Chocolate.
In this guide
- The antique look no other stain can copy
- The three ways to color concrete
- What you'll need
- Colors & combinations for a realistic look
- Prep: clean, dry, and ready
- Step 1: Test your color
- Step 2: Apply the stain
- Step 3: Seal it in
- Pro tips & mistakes to avoid
- Keeping it beautiful
- Common questions
The antique look no other stain can copy
Here's the magic, and it's worth understanding because it's the whole reason this product exists. Antiquing™ carries finely ground pigment lightly suspended in a solvent. When you spray it onto stamped or textured concrete, the liquid flows across the surface and settles into the low points, grout lines, and recesses of the pattern. As the solvent evaporates, it leaves the pigment behind — concentrated exactly where shadows naturally fall on real stone and wood. Then you seal, which locks that pigment permanently into place.
That sequence — suspend, settle, evaporate, lock — is what creates the true antique look: light on the high points, rich and deep in the recesses, with the kind of aged depth you'd normally only get from decades of weathering. No other stain reproduces it. Acid stain reacts with the concrete for a marbled effect; water-based stains lay down smooth, even color. Only Antiquing™ deposits pigment into the texture the way time and weather would — which is exactly why it's the go-to for stamped and textured concrete, and why the look is impossible to fake with anything else.
It's also the friendliest of the three to apply yourself. You're in full control of the depth — the more you build up an area, the more pigmented it gets, so soft-and-weathered or rich-and-saturated is entirely your call. And there's no neutralizing and no acid cleanup, which is a big reason the whole project fits in a single weekend.
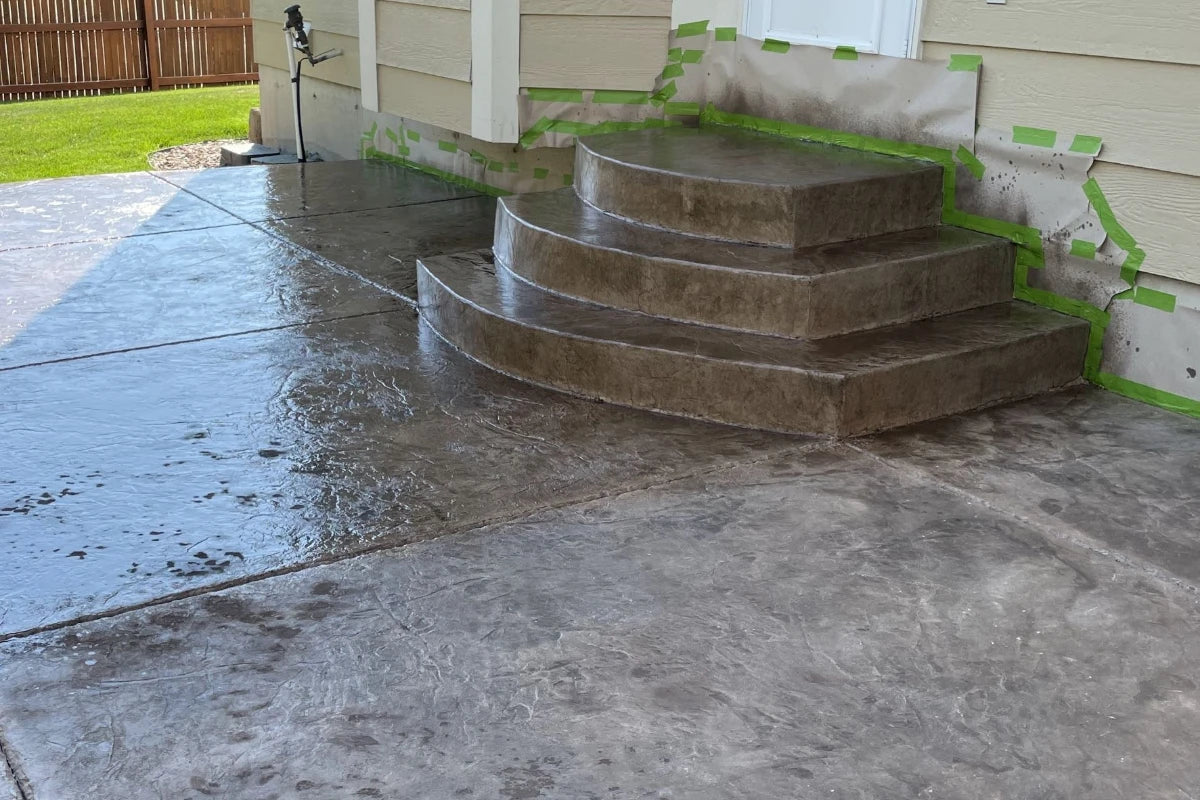
Antiquing™ going down on a stamped patio — the color settles into the low points of the pattern and instantly adds depth.
The three ways to color concrete — and when to use each
Most people are surprised to learn you can color concrete at all, let alone dial in the exact look you want. There are three main families of stain, and choosing between them really comes down to the look you're after. Antiquing™ owns the antique, settled-in look for stamped and textured surfaces; the other two are there for different goals.
| Antiquing™ Stain | ColorWave™ (water-based) | Acid Stain | |
|---|---|---|---|
| How it colors | Pigment settles into the texture, then seals in place | Fine pigment lays down smooth, even color | Reacts chemically with the concrete |
| The look | True antique look — light highs, rich recesses, natural depth | Even, uniform, consistent coloration | Marbled, variegated, one-of-a-kind |
| Best for | Stamped & textured concrete; renewing faded color | An even, modern, all-over color | Clean, bare, good-quality slabs |
| Neutralizing? | No | No | Yes |
- Antiquing™ Stain — pigment settles into the texture and seals in place for the true antique look (light highs, rich recesses). Best for stamped & textured concrete and renewing faded color. No neutralizing.
- ColorWave™ (water-based) — fine pigment lays down smooth, even, uniform color. Best when you want consistent all-over coloration. No neutralizing.
- Acid stain — reacts with the concrete for a marbled, one-of-a-kind look. Best for clean, bare, good-quality slabs. Requires neutralizing.
What you'll need
This is a short shopping list, and you may already own half of it. Gather everything before you start so you're not running to the store mid-project.
- Antiquing™ Stain in your chosen color(s) — buy a little extra so your color stays consistent across the whole surface
- A trial kit or small amount for testing first
- A pump-up sprayer (and you'll remove the filters — more on that below)
- Sponges, rags, or a brush for accents and detail work
- A stir stick or paint mixer — you'll stir often
- Xylene (or acetone) to remove test color you don't like, and to clean up
- A concrete cleaner/degreaser for prep
- EasySeal™ acrylic sealer (25%+ solids) plus a short-nap roller or clean sprayer
- Painter's tape and plastic to protect walls, siding, and landscaping from overspray
- Gloves, eye protection, and a respirator, plus knee pads for detail work
- Optional: a non-slip additive for the sealer on pool decks, steps, and walkways
Not sure how much stain and sealer to buy? Coverage depends on how saturated you want the color and how porous and textured your slab is. Use our coverage calculator for your square footage, and round up — it's better to have a little extra than to run short mid-project and risk a color mismatch.
Colors & combinations for a realistic look
Antiquing™ comes in over 24 colors, and the secret to a high-end, realistic result is layering — real stone and wood are never one flat color. Start with a base shade, then add one or two accent colors into the pattern for depth. Here are the combinations our customers reach for most on stamped concrete.
| Look | Colors to layer | Great for |
|---|---|---|
| Slate / bluestone | Silver Gray base + Light Charcoal + Charcoal + Tweed accents | Patios, pool decks, walkways, a modern gray look |
| Weathered wood / driftwood | Driftwood base + Chocolate accents | Wood-plank stamps, warm rustic patios |
| Natural stone / flagstone | Driftwood or Russet base + Chocolate + Terracotta accents | Flagstone and ashlar stamps, earthy palettes |
| Warm earth | Russet + Terracotta + Chocolate | Southwest and terracotta-toned spaces |
| Single-color refresh | One shade (e.g. Driftwood or Charcoal) | The fastest way to renew faded color |
- Slate / bluestone — Silver Gray base + Light Charcoal + Charcoal + Tweed accents. Great for patios, pool decks, and a modern gray look.
- Weathered wood / driftwood — Driftwood base + Chocolate accents. Great for wood-plank stamps and rustic patios.
- Natural stone / flagstone — Driftwood or Russet base + Chocolate + Terracotta accents. Great for flagstone stamps.
- Warm earth — Russet + Terracotta + Chocolate. Great for Southwest palettes.
- Single-color refresh — one shade like Driftwood or Charcoal. The fastest way to renew faded color.
See every option on the color charts — but remember, screens lie. Always confirm your final choice with a physical test on your own concrete (that's Step 1).
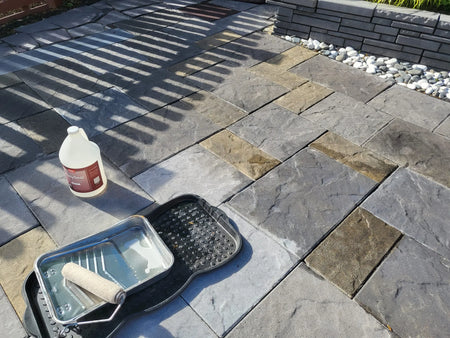


Warm earth tones on an ashlar stone stamp — Auburn, Khaki, Terracotta, and Yukon Gold, during application and finished.
Working a wood-plank stamp instead? See our full guide on making concrete look like wood with Antiquing™.
Prep: clean, dry, and ready
Antiquing™ is topical, so it can only grip a surface that's genuinely clean and dry. Prep is quick, but don't skip it — it's the difference between color that looks even and lasts, and color that goes on blotchy or lifts later.


Before and after — a faded stamped patio brought back to life with Tweed Antiquing™. This is exactly the transformation this guide walks you through.
Step 1: Test your color
This is the step that turns a nerve-wracking project into a confident one. Choose your color, then test it in a discreet corner or a spare piece of concrete before you commit to the whole surface. Two things to know while you test:
First, the true color only comes to life once it's sealed — the stain always looks a little muted when dry and unsealed, so dab a bit of sealer (or a wet rag) over your test spot to preview the finished tone. Second, if you don't love it, it's not permanent yet — scrub the test area with Xylene and try another shade or a different layering combination. Test until you're genuinely excited about the color; then you can commit to the full surface with zero anxiety.
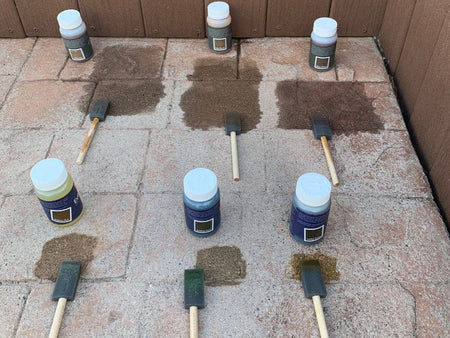
Testing Antiquing™ colors in a small area before committing to the full surface.
Step 2: Apply the stain
Here's the part you've been building up to — and it's genuinely enjoyable once you start. Work on a dry day out of direct blazing sun, ideally between 50–90°F, with no rain in the forecast for 24 hours.
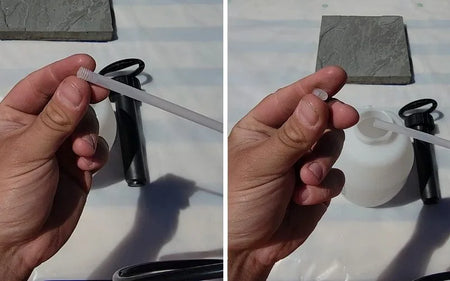
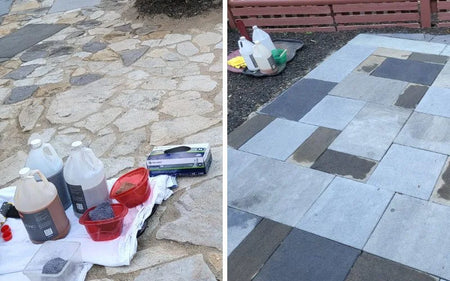
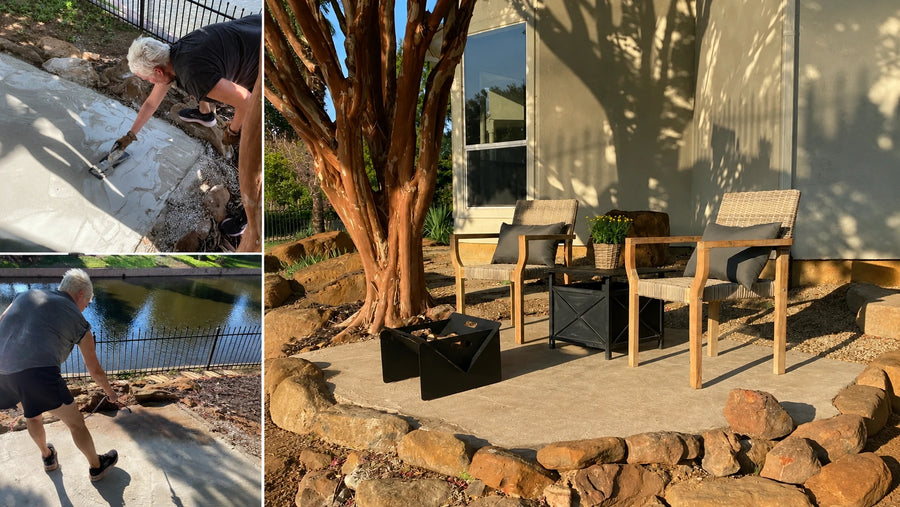
Spraying an even base coat with a pump sprayer (filters removed) — here in Cumin on a hand-troweled surface.
Step 3: Seal it in
Sealing is what makes the color pop and what protects your work — it's not optional. Once the stain is completely dry, lock it in with an acrylic sealer of 25%+ solids, like EasySeal™.
Pro tips & mistakes to avoid
Almost every issue we hear about on the phone comes down to one of these. Knowing them ahead of time is what separates a great result from a redo.
Keeping it beautiful
Maintenance is easy, which is part of why stained stamped concrete is such a smart upgrade. Rinse or sweep it as needed and clean up spills so they don't sit. The color itself is protected under the sealer and won't fade the way bare, un-sealed concrete does. The sealer is the wear layer, so plan to reseal every 2–3 years outdoors — you'll see the sheen dull and water stop beading when it's time. Resealing is a quick refresh: clean, dry, and roll on a fresh coat. No re-staining needed.
Common questions
How is Antiquing different from other concrete stains?
There are three main ways to color concrete. Antiquing™ deposits pigment into the texture of the surface and seals it there, creating the true antique look — light on the high points, rich in the recesses. ColorWave™ water-based stain uses finer pigment to lay down smooth, even color. Acid stain reacts chemically with the concrete for a marbled, one-of-a-kind finish. All three are sealed afterward, but only Antiquing™ gives that settled-in, aged look on stamped and textured concrete.
Can I get the antique look with acid stain or a water-based stain?
No — and this is the key point. The antique look comes from pigment settling into the low points and recesses of the texture, then being sealed in place. A water-based stain like ColorWave™ gives beautiful, even color but won't concentrate in the recesses that way, and acid stain creates a marbled chemical reaction rather than that settled, shadowed depth. If the aged, antique look on stamped or textured concrete is what you want, Antiquing™ is the only stain that delivers it.
Do I need to neutralize Antiquing stain?
No. Neutralizing is only required for reactive acid stain. Antiquing™ isn't acid-based, so you skip that step entirely — you go straight from a dry stained surface to sealing.
Can I apply Antiquing over previously sealed concrete?
Not directly. Because Antiquing™ needs to absorb into the surface, it can't grip through an existing sealer. If your concrete was sealed, strip the old sealer and clean the surface first. A quick water test tells you: if water beads instead of soaking in, there's sealer to remove.
How many colors should I use?
One color gives a clean, even refresh. For a more realistic stone or wood look, use two to four — a base plus one or two accents worked into the pattern and grout lines. Layering is what creates natural-looking depth.
How long does stained stamped concrete last?
The color is protected under the sealer and stays put. The sealer is the part that wears, so reseal outdoors every 2–3 years to keep the color rich and protected. Resealing is a simple clean-and-recoat — you won't need to re-stain.
What if I don't like the color after I apply it?
As long as you haven't sealed yet, you can scrub the stain off with Xylene and start that area over. This is exactly why we push testing first — but it does mean the project is forgiving even if you change your mind.
Listen to this episode
Direct Colors DIY Home Improvement · Episode 15
Acid Stain or Antiquing for an Outdoor Project?
Amie Nolen and Shawna Turner · 4 min 59 sec · read the full transcript
What's Next
- New to staining outdoor concrete? → Outdoor Concrete Stain: Which One to Use
- Even, all-over color → ColorWave™ Water-Based Stain
- Reactive, marbled look → How to Apply Acid Stain to Concrete
- Patios → Stained Concrete Patio Ideas
- Driveways → Concrete Stain for a Driveway
- Shop → Antiquing™ Stain · Trial Kits · EasySeal™ Sealer
Direct Colors. Shawnee, OK. Manufacturing the full decorative concrete system since 1997.


