Skip to content
FREE Shipping on Trial Kits
Acid Stain

Black Concrete Stain: Project Gallery

Black is the most dramatic color Direct Colors makes — and the one with the most nuance. Blackish EverStain™ acid stain is semi-transparent and reacts with the lime in your slab, so it often finishes closer to a deep, dark brown than a true black. If you want a flat, opaque black, a tinted sealer or dye will get you there instead. This gallery covers both: real acid-stain projects first, then black projects in our other product lines.
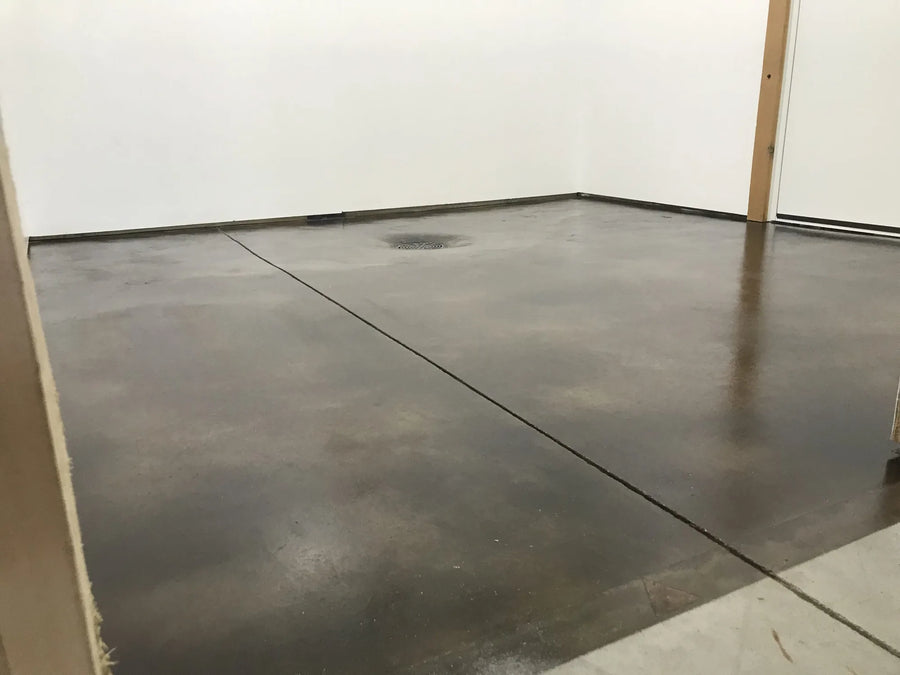
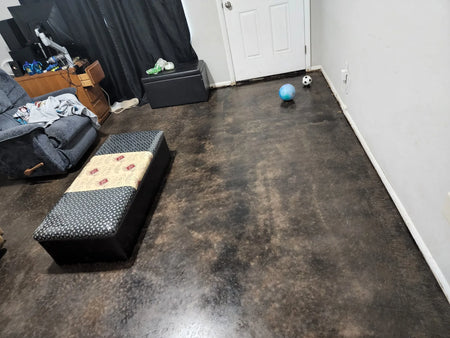
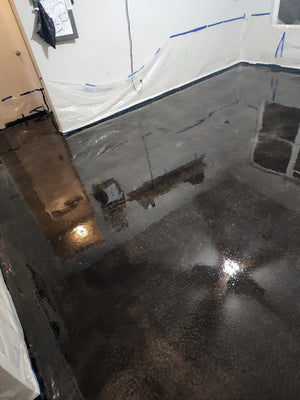
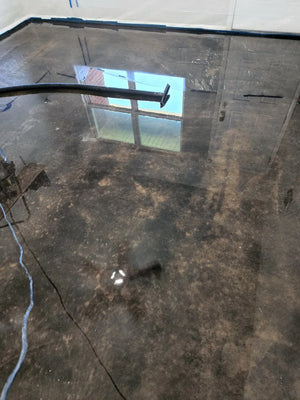
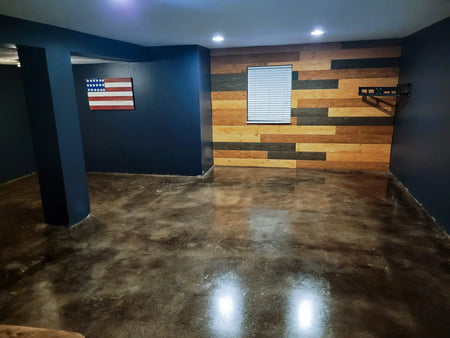
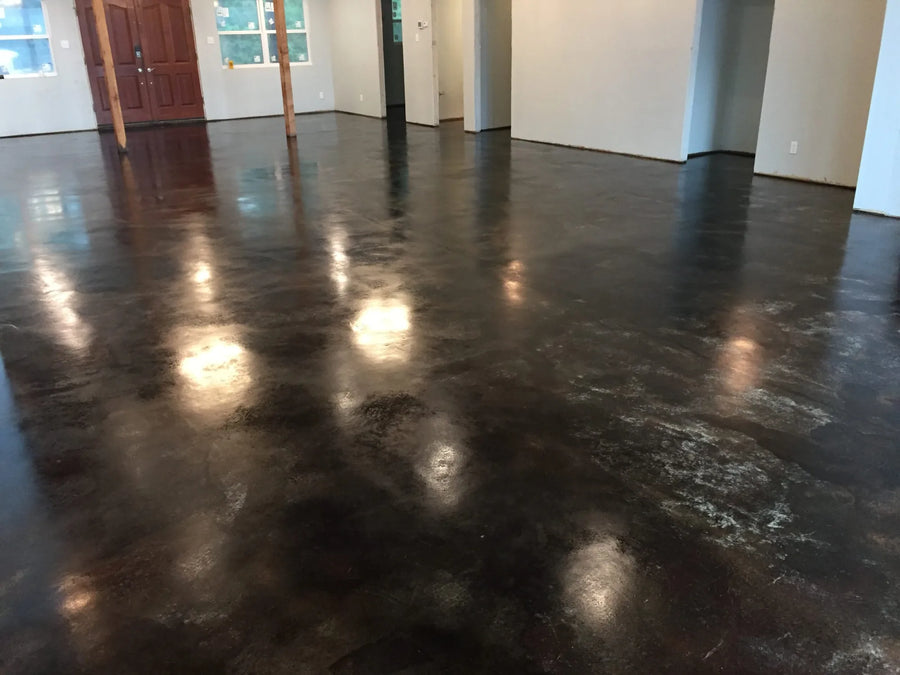
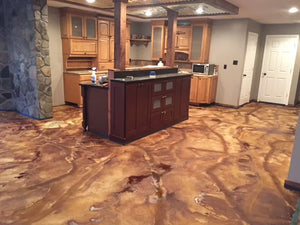
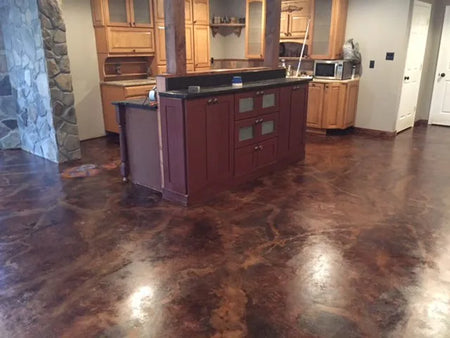
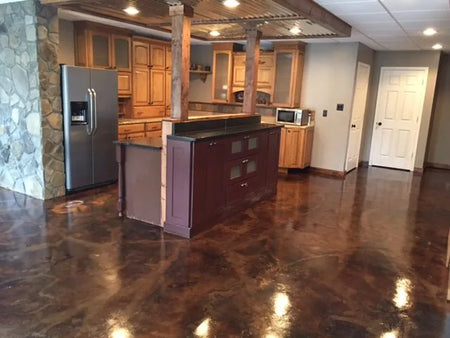
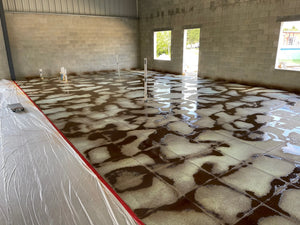
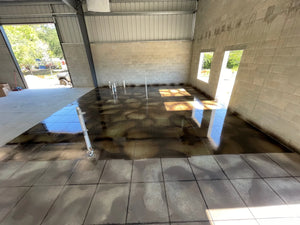
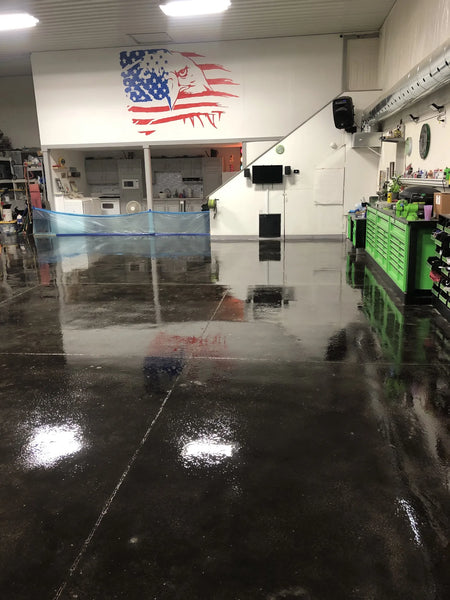
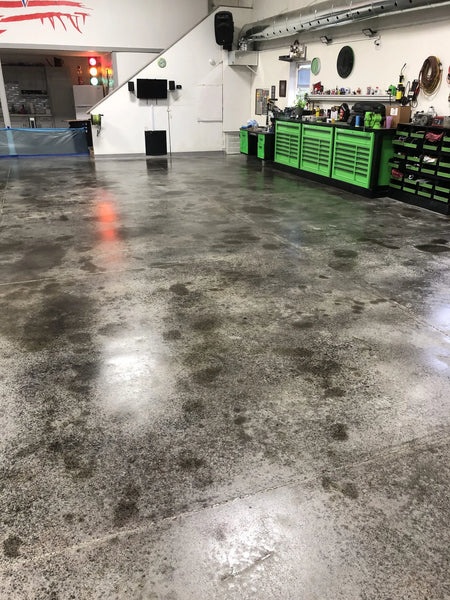
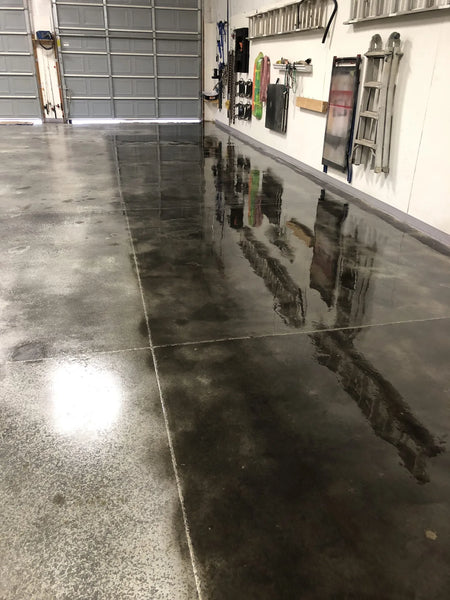
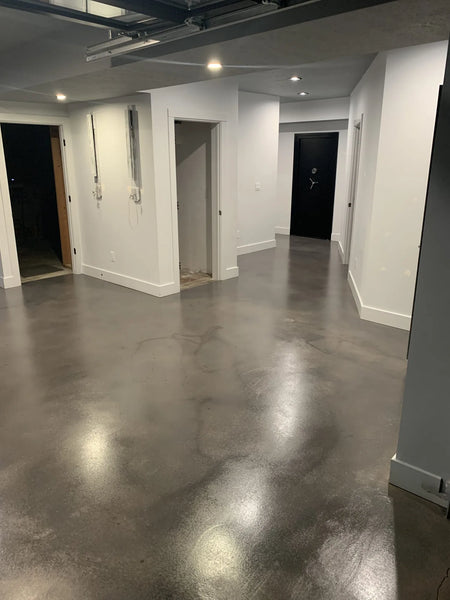
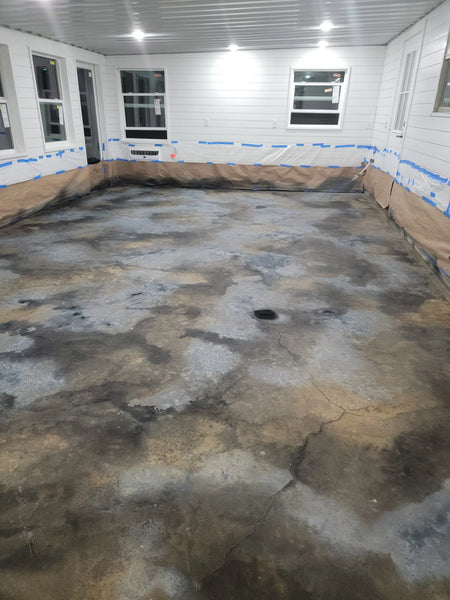
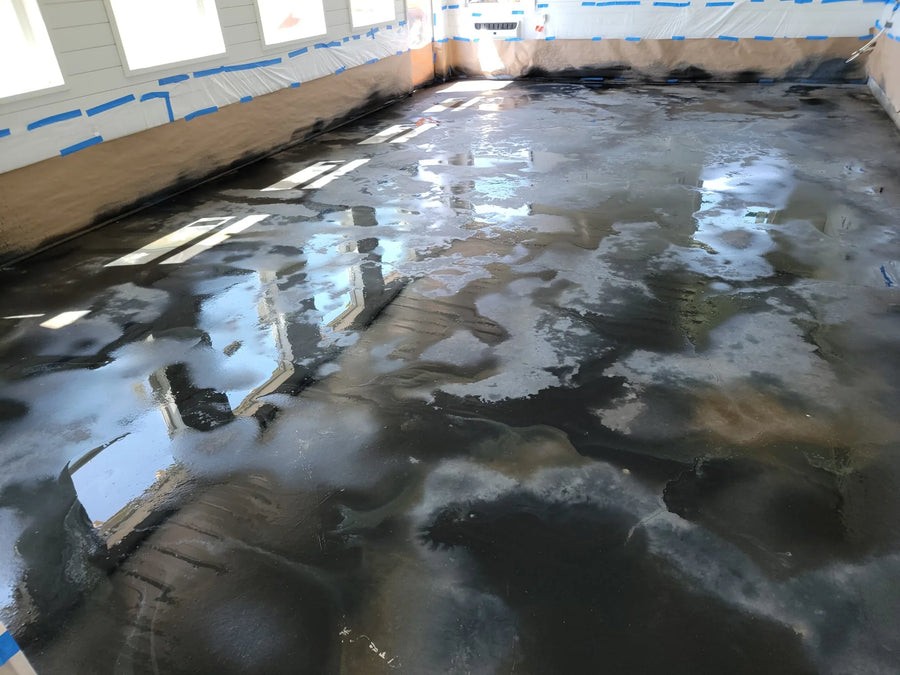
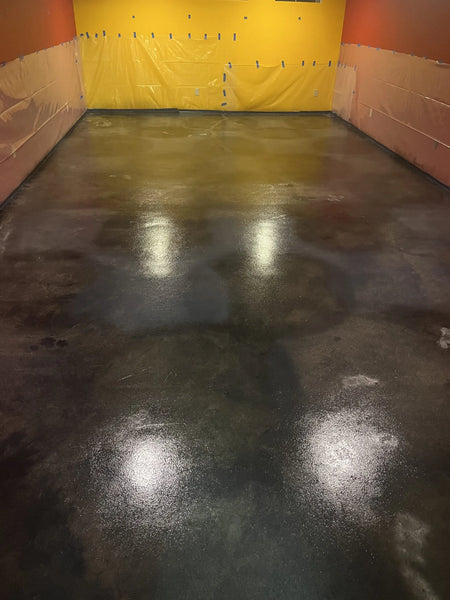
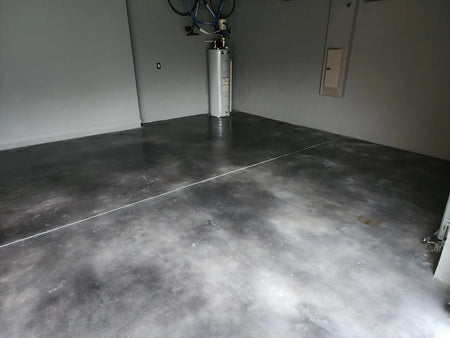
The renovated mechanical room with a black acid-stained floor exhibiting brown hues, sealed with a satin finish

A renovated mechanical room with a black acid-stained concrete floor.

Shop EverStain™ Blackish DIY Kits →

Note on results: every photo here is a real customer project. Our colorants are semi-transparent, so the starting color and condition of your concrete will influence the final look — results vary. Always test a small area before doing the whole project.

Blackish EverStain™ acid stain

Reactive, permanent, and never quite the same twice. These floors were all stained with Blackish EverStain™.

Garage to apartment

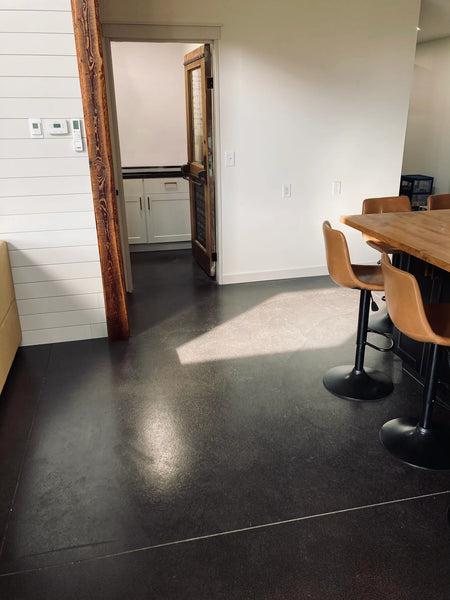
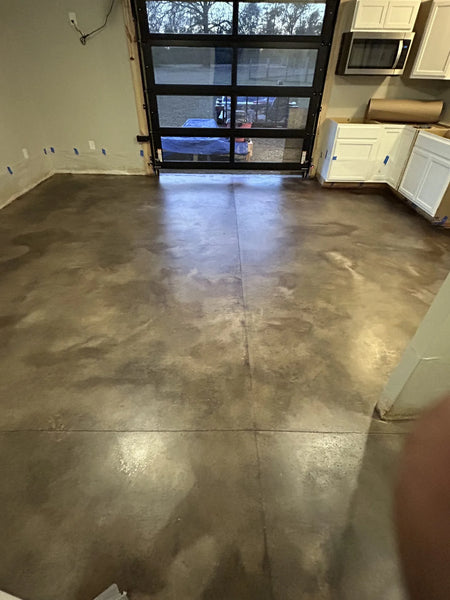
A garage became a modern apartment, and the sleek black acid-stained floor carries the whole space.
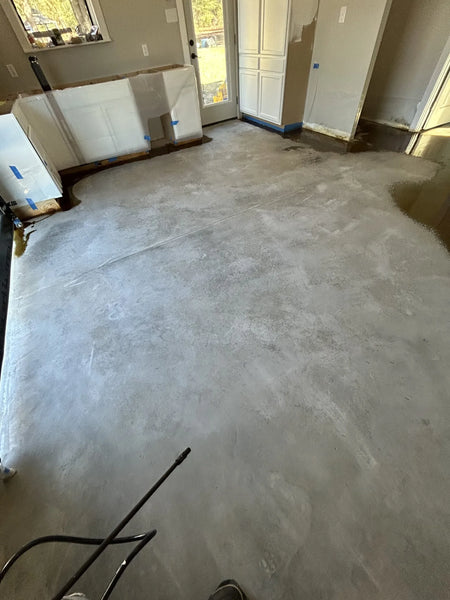
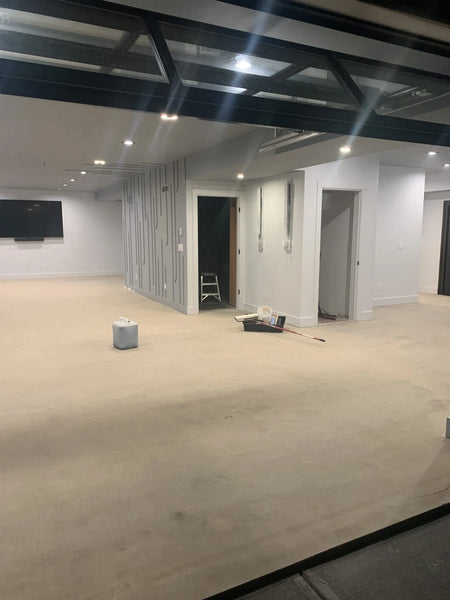
Plain garage interior before EverStain black acid stain
Before — the plain garage interior.
Apartment with EverStain black acid stained concrete floor
After — a black acid-stained apartment floor.

Ditching the carpet

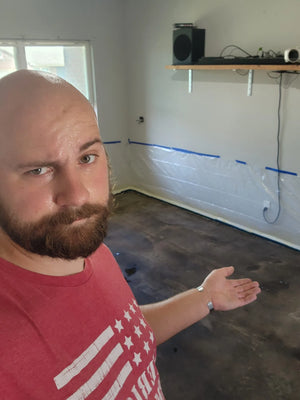
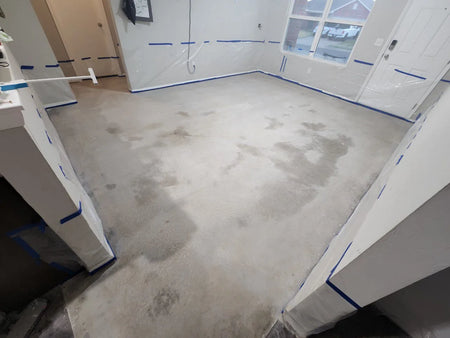
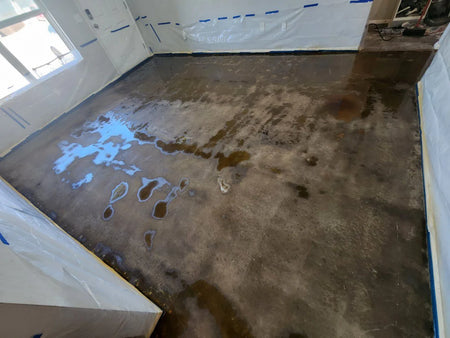
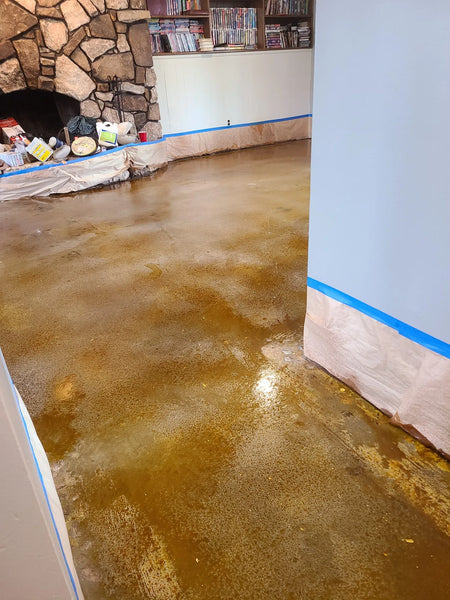
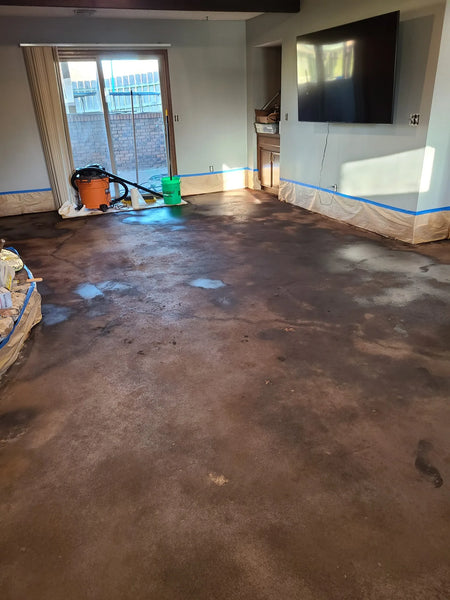
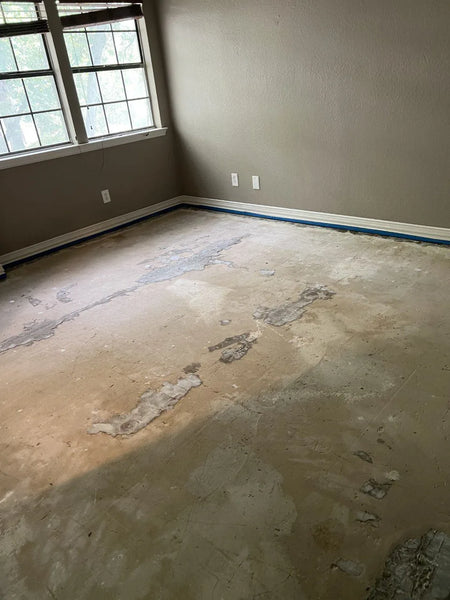
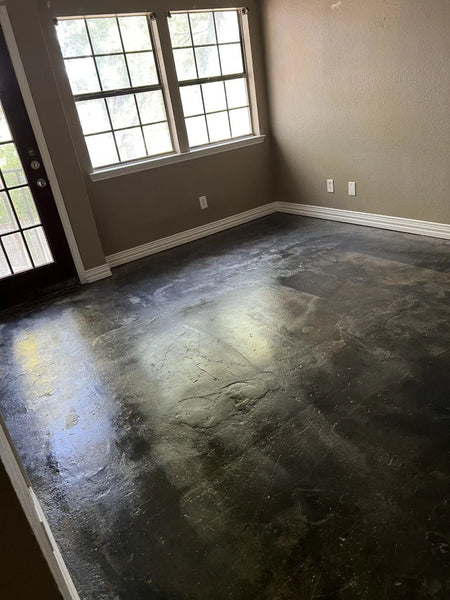
The carpet came up in the front room and hallway to reveal a mess left behind by the builders. After a week of scrubbing and an angle grinder for the stubborn lines around the walls, the stain went down in overlapping circles — about a gallon and a half — then the floor was flooded, scrubbed, dried, and sealed with two coats in opposite directions.
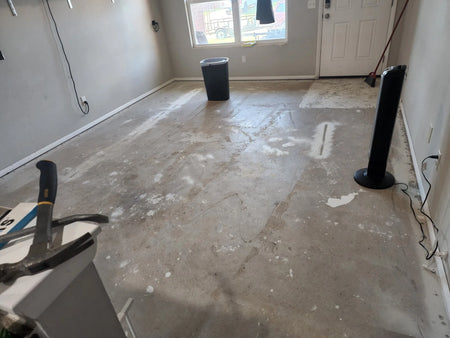
Concrete floor after removing carpet
Before — carpet up, contractor mess exposed.
EverStain black acid stained concrete floor after carpet removal
After — a finished black acid-stained floor.
Blackish acid stain application
Blackish acid stain application.
Allowing black acid stain to react
Allowing black acid stain to react.
Neutralized and rinsed black acid stain
Neutralized and rinsed black acid stain.
After cleaning and grinding concrete floor
The cleaned slab before staining.
neautralized everstain black acid stained concrete floor carpet removal
The floor after neutralizing.

Carpet begone: a man cave basement

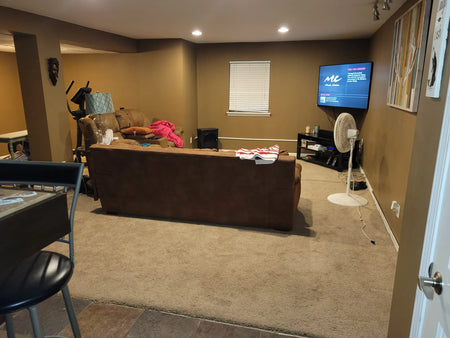
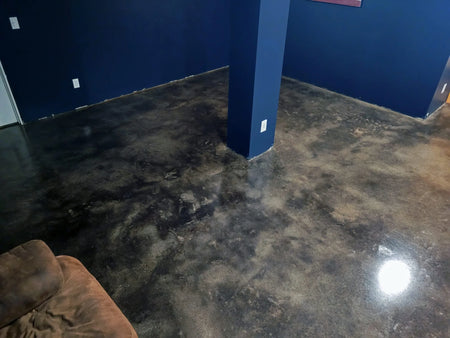
Carpet out, surface prepped, then Blackish EverStain™ applied with a pump sprayer in a circular motion and lightly scrubbed. The acid etched for eight hours before neutralizing, then acrylic sealer went on with a roller — second coat 24 hours later — and the floor was waxed three times.
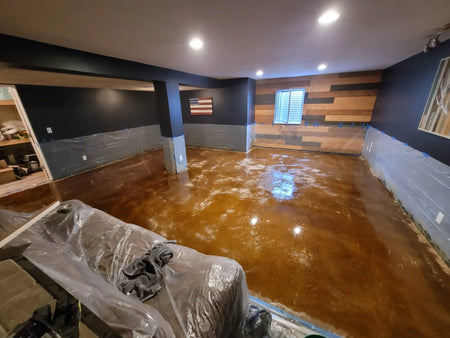
Carpeted Basement
Before — the carpeted basement.
Blackish acid stained concrete floor
After — a black acid-stained man cave floor.
Blackish Acid Stain Application
The stain developing.
Polished black acid stained concrete floor
The finished floor after waxing.
Lesson learned: this customer recommends using a higher-quality concrete patching compound — one closer in color to your slab that will take the stain better. Patches show.
— DIY Customer

From flood-prone to fabulous

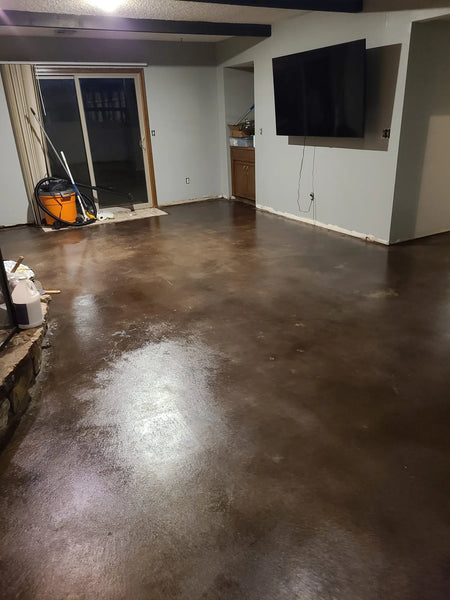
A basement floor with a history of water got a fresh start in Blackish EverStain™, finished with Satin ProWax Polish™. The customer used Klean Strip floor adhesive remover for the stains their degreaser wouldn't touch.
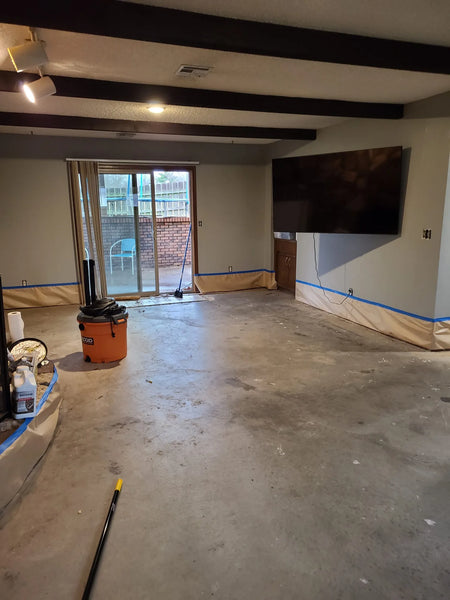
Flooded concrete basement
Before — the bare, flood-prone basement slab.
Polished black acid stained concrete basement floor
After — waxed and polished black acid stain.
Developing black EverStain acid stain
The stain developing.
Neutralized black acid stain
The floor after neutralizing.
Their advice: proper prep work is the whole game — the parts of the floor that turned out best were the ones that got the most attention to detail. It took a few days longer than expected, and it was worth it. Be flexible: imperfections add character and make the project your own.
— DIY Customer

The mottled black technique

Applying black in a random, mottled pattern gives a natural, modern finish that suits floors, countertops, and more — and it needs very few tools.

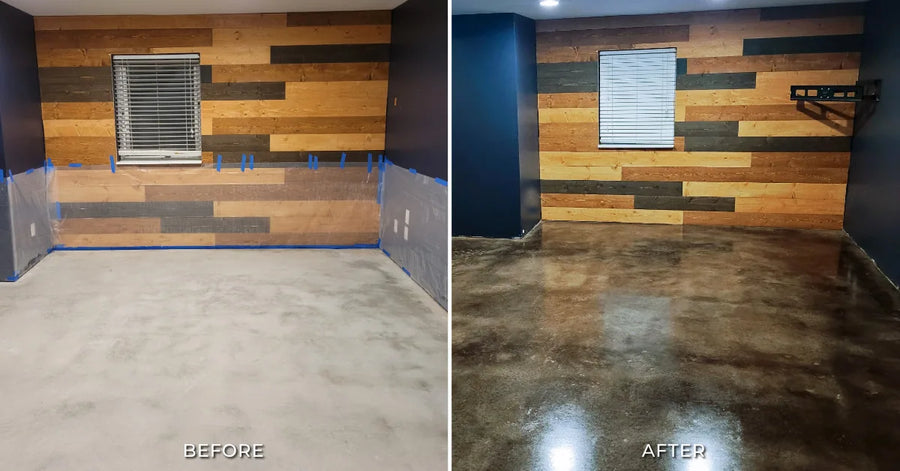
Man Cave Stained Concrete Floors Before and After Photos

Before and after — the mottled black acid-staining technique on a basement floor.

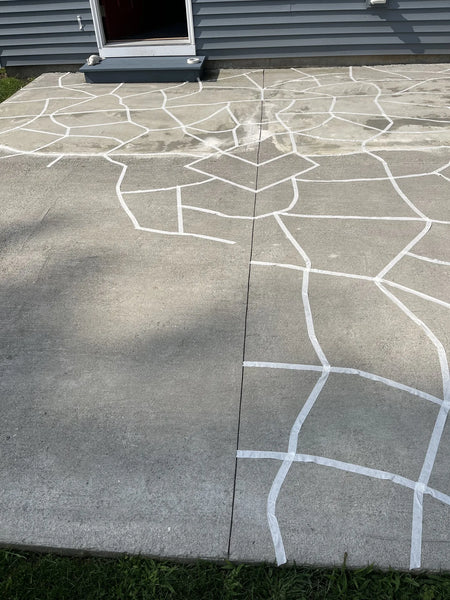
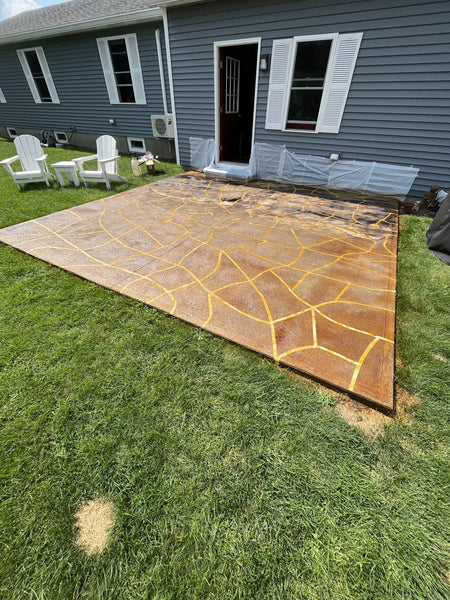
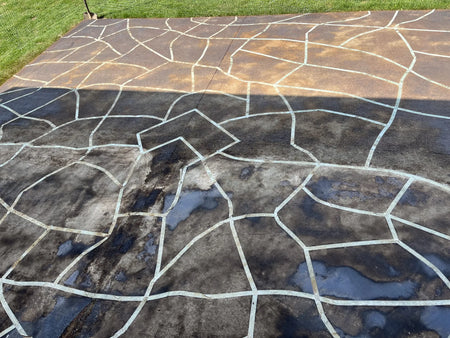
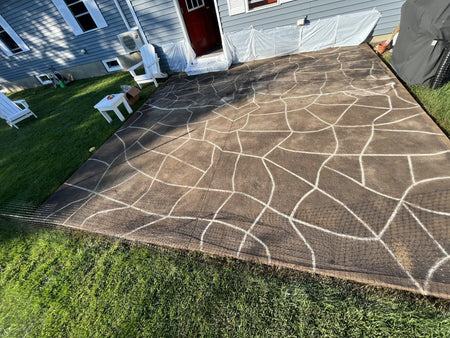
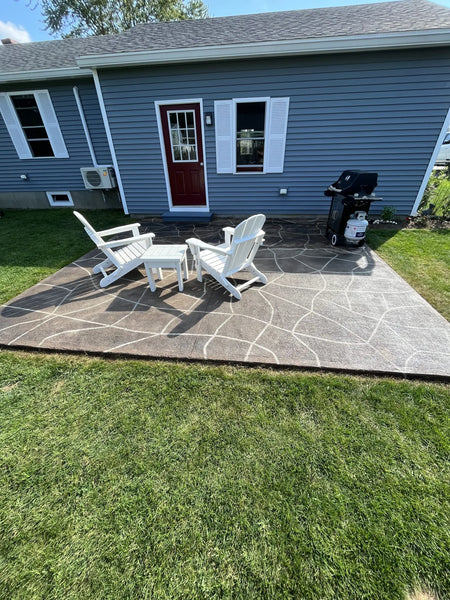
A cracked patio becomes faux flagstone

Rather than fight a large repaired crack, this customer designed around it — masking a faux-flagstone pattern and spraying Blackish acid stain to turn the flaw into the feature.
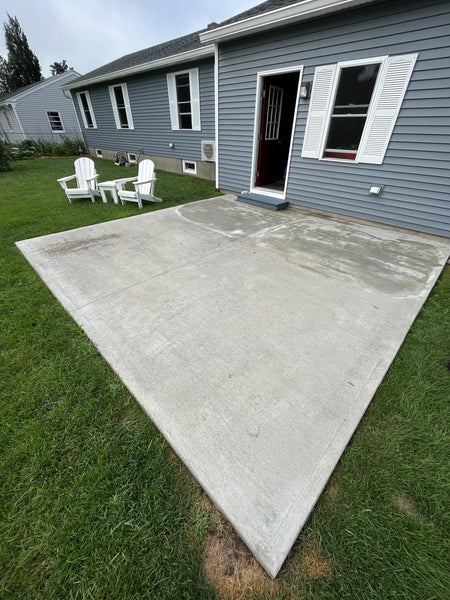
A cracked patio surface with a cement repair visible across it before black everstain acid stain
Before — a cracked patio with a visible cement repair.
The transformed patio featuring the faux flagstone design, furnished with outdoor chairs and tables
After — a faux-flagstone design that hides the crack.
Patio floor marked with masking tape to outline faux flagstone design
Masking tape outlining the flagstone pattern.
The taped concrete patio floor immediately after being sprayed with Blackish EverStain acid stain
The patio immediately after spraying.
The patio surface showing a deepened color, 6 hours after black EverStain acid stain application
The color deepening six hours later.
Patio surface post black EverStain acid stain neutralization, wash, and sealing
The surface after the neutralization wash.

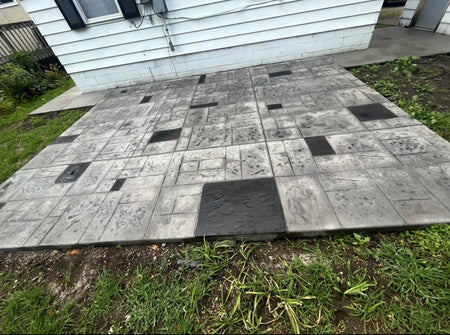
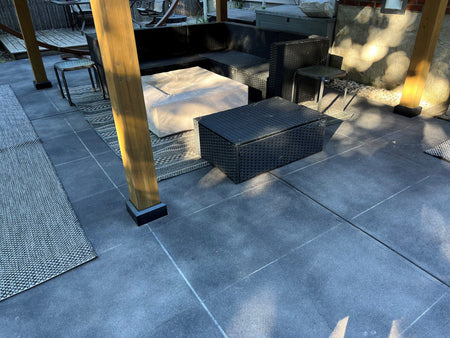
Patio pizzazz: black on black

A stamped, black-antiqued patio got extra depth by picking out select tiles with Blackish acid stain — a subtle move that adds real intrigue to the pattern.
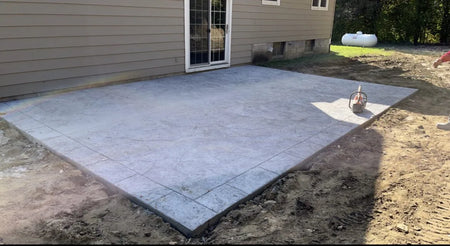
A black antiqued stamped concrete patio without border detailing or sealer
The stamped patio without border detailing.
Stamped concrete patio with distinct tiles accentuated by the added Blackish EverStain Acid Stain
The same patio with tiles accentuated in black.

Retaining wall revival

Buff retaining-wall blocks installed in 2014 had gone blotchy with mold and mildew. After pressure washing and testing color on sample blocks, a bold black stain went on and was sealed — now the wall stands up properly next to the brick.

Surface
Buff retaining wall blocks (2014)
Prep
Pressure washed, color tested on sample blocks
Size
1,000 sq. ft.
Time
5 days
A blotchy buff-colored retaining wall with visible mold/mildew marks and red clay stains
Before — blotchy, mildew-stained buff blocks.
A rejuvenated retaining wall, uniformly stained in black, showcasing a fresh and cohesive appearance
After — a bold, naturally varied black wall.

Blackish & Coffee Brown together

Blackish is often at its best as the accent rather than the field. Layered with Coffee Brown it produces depth that neither color reaches alone.
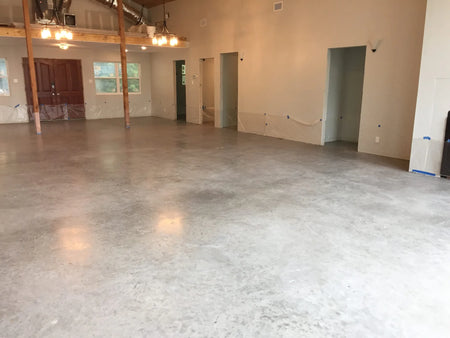
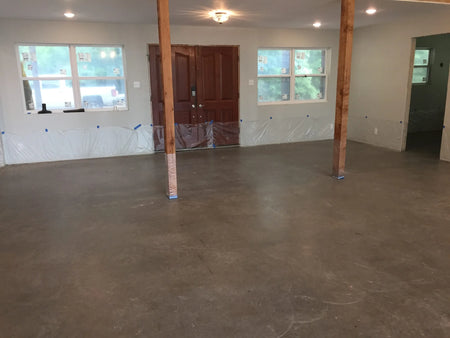
Before Staining
Before — the bare interior slab.
Blackish and Coffee Brown Acid Stained Floor
After — Blackish layered with Coffee Brown.

developing black and coffee brown acid stains

The two colors developing across the floor.
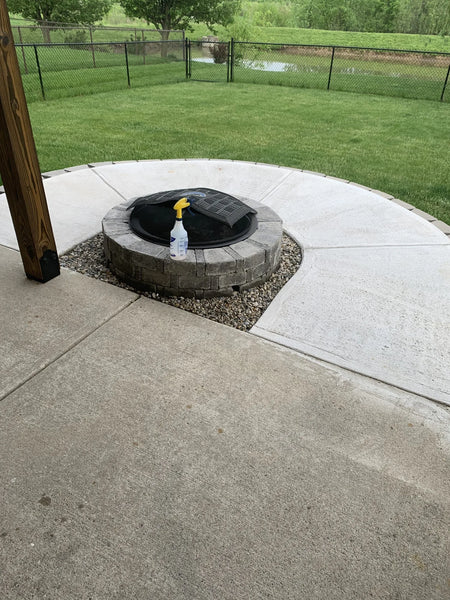
A round patio showcasing the contrast between the newer, fresh concrete and the adjacent aged, weathered concrete
Before — a round patio where new concrete met old.
The patio, post-staining, with a harmonized blend of Coffee Brown and Blackish EverStain, diminishing the distinction between the old and new concrete
After — Coffee Brown and black harmonizing the two pours.

The veining technique

Blackish veins blended into a Coffee Brown field — the marbled look that only reactive acid stain really delivers.
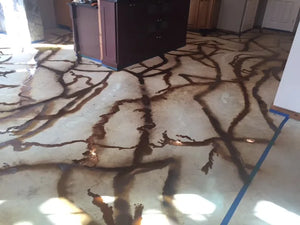
Blackish acid stain veining technique application
Laying in the black veins.
Coffee brown EverStain acid stain application over black acid stain veins
Blending them against the Coffee Brown.
Acid Stained Concrete Floor
The floor mid-process.
Sealed acid stained concrete floor
Sealed acid stained concrete floor.
Polished acid stained concrete floor
Polished acid stained concrete floor.

A commercial floor in Blackish & Azure Blue

On a commercial slab, an Azure Blue base with black highlights produced a dramatic, high-traffic-ready floor.

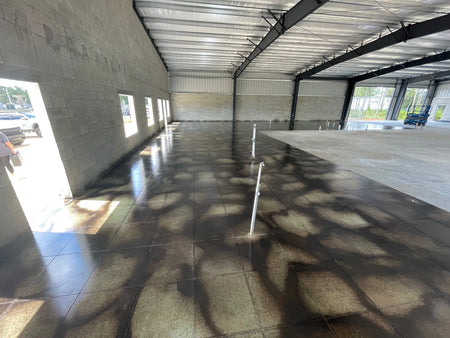
Commercial Concrete Floor
Before — ground zero on the commercial slab.
Blackish, Azure Blue Acid Stained Commercial Concrete Floor
After — an Azure Blue base with black highlights.
Photo of a concrete floor displaying the subtle Azure Blue base color after applying and allowing the lighter acid stain to activate
The Azure Blue base going down.
Black Highlights 1 Black Azure Blue Acid Stain Commercial
Black highlights layered over it.
Sealing Acid Stained Commercial Floor
Sealing the finished floor.

Black in our other product lines

If you want black that reads black — flat, opaque, and predictable — these are the products that do it. They don't react with the slab, so what you see is what you get.

Black Antiquing™ on patios

Antiquing™ works on previously poured, stamped, and even sealed concrete, which makes it the go-to for refreshing an existing patio.
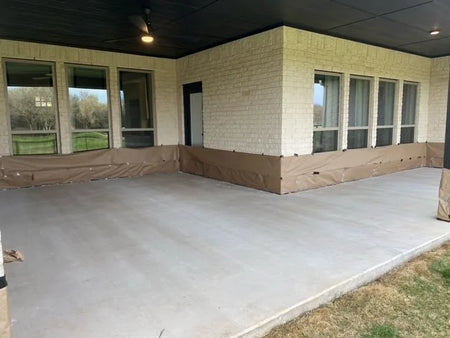
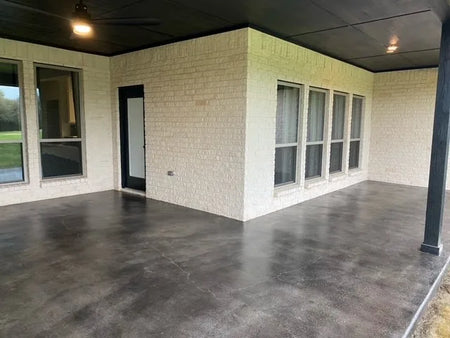
Clean and ready concrete patio, pre-stain application
Before — a tired covered patio.
Back concrete patio freshly stained with Black Antiquing for a modern appearance
After — black Antiquing™ over a broomed finish.
Alternate angle of the finished back patio, highlighting the refined black-stained concrete
A back patio freshly stained in Black Antiquing™.
Finished stained and sealed concrete patio, radiating in its sleek elegance Antiquing Black
The finished sealed surface.
Covered scored concrete patio surface with tape creating a large tile design pattern, ready for staining
A scored concrete patio before.
Black Antiquing stained concrete patio surface with tape creating a large tile design pattern
After black Antiquing™.
Scored concrete patio
Scored concrete patio.
Black Antiquing stained scored concrete patio
Black Antiquing stained scored concrete patio.

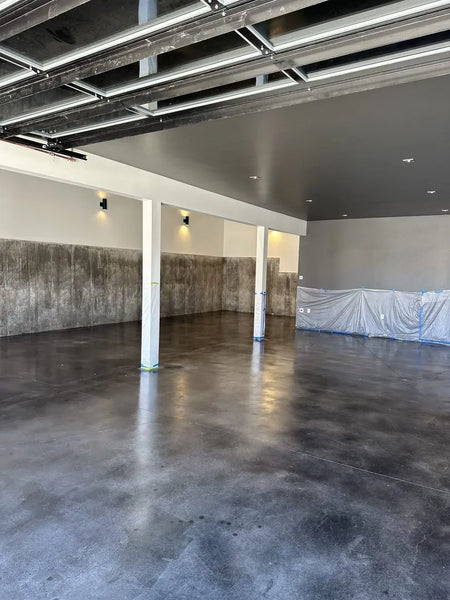
Monochrome modernity: a garage floor

A standard garage floor was given a nuanced, mottled finish with Antiquing™ Black — style without complexity. (The project details attached to this one in our old gallery belonged to a different customer's paver project, so we have left them off rather than repeat them.)
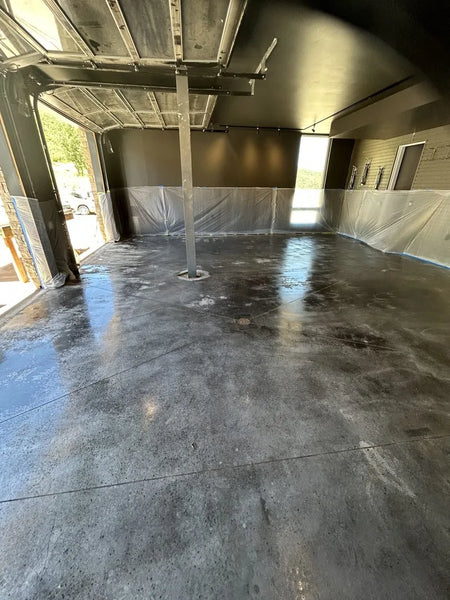
Freshly Applied Antiquing™ Black Stain on Garage Floor
Antiquing™ Black freshly applied.
Garage Floor Transformed: Post-Antiquing™ Black Stain and Sealing
The same garage floor once sealed.

Pool decks in black & charcoal Antiquing™

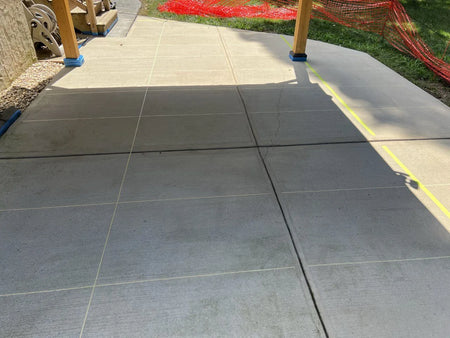
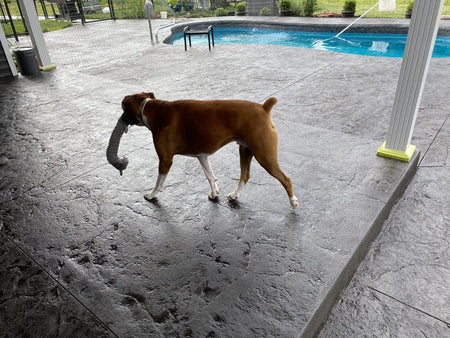
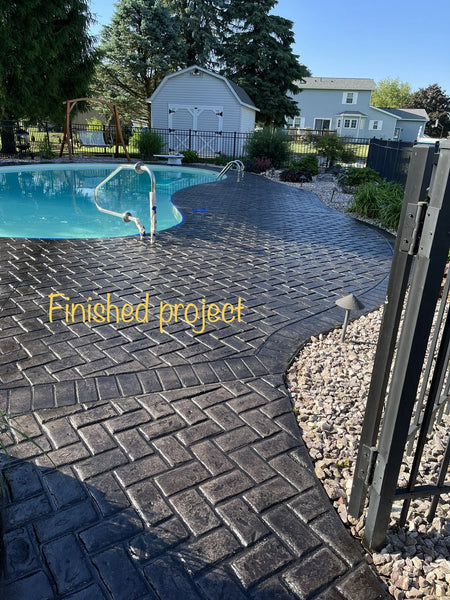
On stamped pool decks, black and charcoal Antiquing™ restore faded color — with anti-slip additive in the sealer where bare feet are involved.
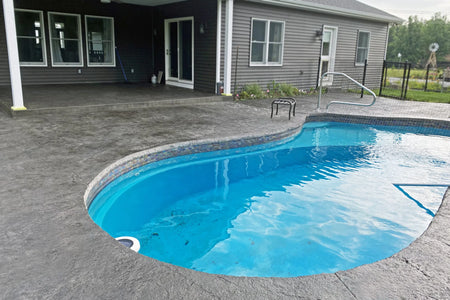
Rejuvenated stamped concrete pool area after application of Black Antiquing stain and EasySeal high gloss sealer
Refinished stamped pool decks in Charcoal.
Black Stained Concrete Pool Deck
Black Antiquing™.
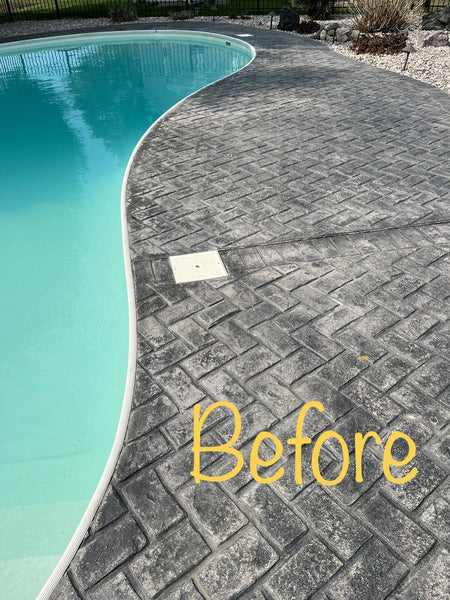
Neglected stamped concrete pool area prior to restoration
A faded black stamped-paver deck.
Revitalized concrete pool area after application of antiquing stain and sealer
The same deck after a second coat of Antiquing™.

Black EasyTint™: a barn shop floor

A barn shop used for automotive repair took two coats of black EasyTint™ to unify years of oil stains and overspray — a functional floor that's now good enough for family gatherings.

Before photo of a barn shop floor with visible oil stains and wear
Before — oil stains and heavy wear.
Finished barn shop floor with a reflective finish from the black concrete stain
After — a reflective, unified black floor.
First coat of black concrete stain applied to barn shop floor
The first coat of black EasyTint™ Satin.
Barn shop floor after second coat of black concrete stain, showing improved uniformity
The floor after the second coat.

A scored porch & basketball driveway

A scored front porch and driveway finished in high-gloss black EasyTint™ — with the driveway doubling as a basketball court, complete with professionally marked lines and a contrasting free-throw area and three-point arc.
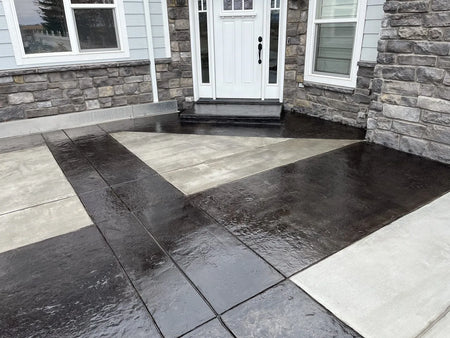
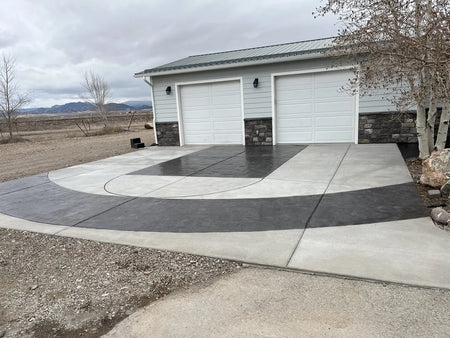
Image showcasing a scored concrete front porch stained with black EasyTint tinted sealer in a high gloss finish
The scored front porch design.
Image of a driveway stained with black EasyTint tinted sealer, featuring basketball court lines and accents
The driveway court with its marked lines.

Black EasyTint™ on a retaining wall & stamped patio

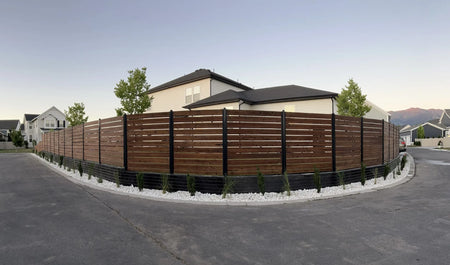
A concrete retaining wall first stained in 2021 was refreshed with a second round — brush into the crevices, roller for the broad areas, two coats — finished just in time for planting season.
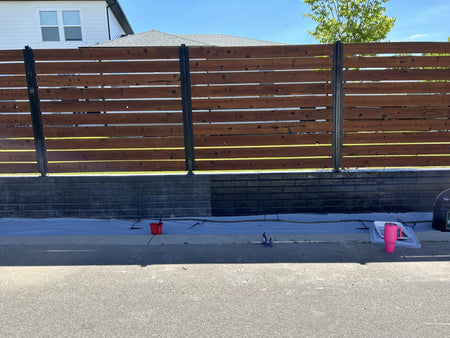
A black concrete wall with a wooden fence above, during staining
Midway through restaining the wall.
A backyard fence with a black concrete retaining wall and fresh landscaping
The finished EasyTint™ black retaining wall.
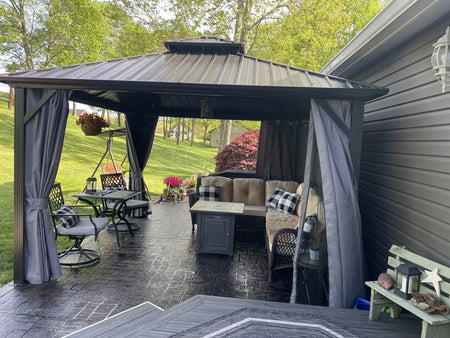
A cozy outdoor patio under a gazebo with comfortable seating and a stamped concrete floor stained in a sleek black finish
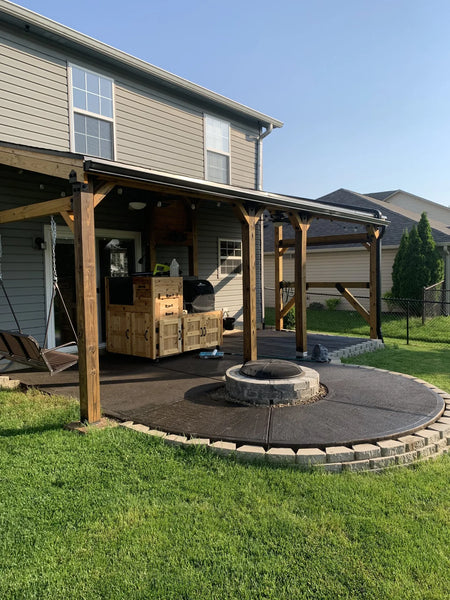
A cozy outdoor patio under a gazebo with comfortable seating and a stamped concrete floor stained in a sleek black finish.
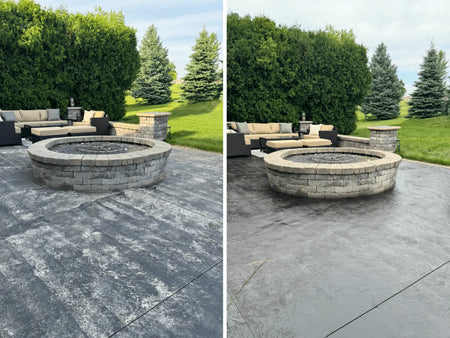
Before and after: Renovating a faded stamped concrete patio with Black EasyTint, transforming it from worn to refreshed and vibrant
Before and after: Renovating a faded stamped concrete patio with Black EasyTint, transforming it from worn to refreshed and vibrant.

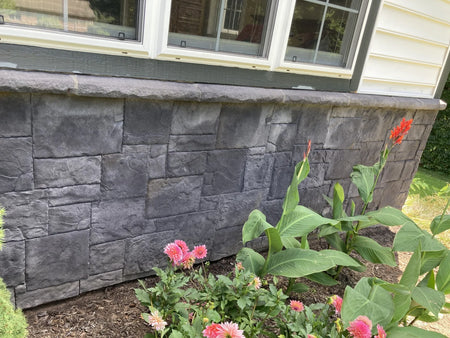
Black Portico™ on a stone facade

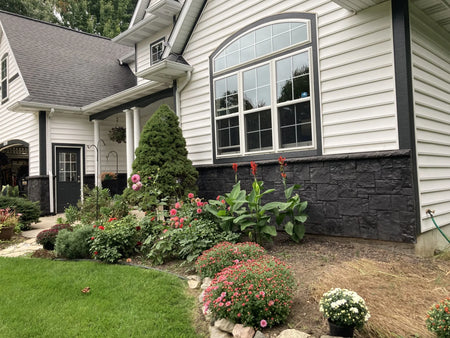
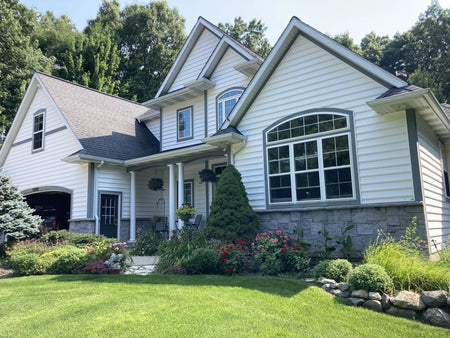
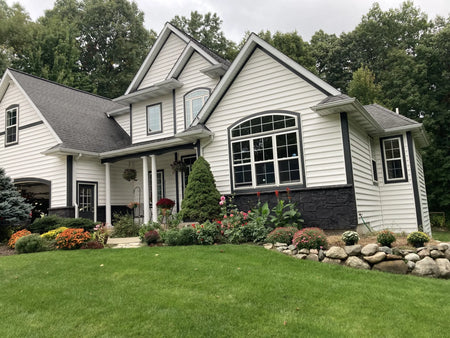
Not every black project is a floor. Swapping grey for a dark charcoal Portico™ gave this home's stone facade a complete change of character, with the wood trim following suit.
Full view of the house showcasing its original grey stone facade before staining
Before — the original grey stone facade.
Full view of the house showcasing its finished black Portico stone facade transformation
After — a finished black Portico™ facade.
House facade after the first coat of black Portico stain, showing a darker shade
After the first coat.
Full view of the house showcasing its finished Portico Black stone facade transformation
The color deepening with the second.

Black AcquaTint™: color and sealer in one

AcquaTint™ colors and seals in a single step. On a new build, the hardest part wasn't the color — it was removing the sealant the concrete crew had applied at the pour.

Product
Black & Charcoal AcquaTint™ + ProWax Polish™ Satin
Size
1,500 sq. ft.
Time
7 days (plus 1.5 weeks of sealant removal)
“The hardest part of the floors for us was removing the old sealant that was put down on our new concrete at the time of pouring. That took us about 1.5 weeks to remove before applying this stain and wax. Applying it was quick and easy… We love the way they turned out!”
Tip: “Don't get sealant on existing concrete at the time of pouring if you plan to do any staining.”
— DIY Customer

Basement redo: the second attempt

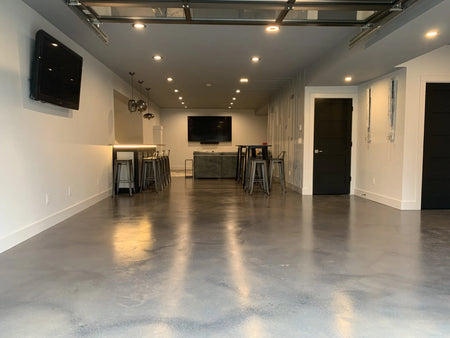
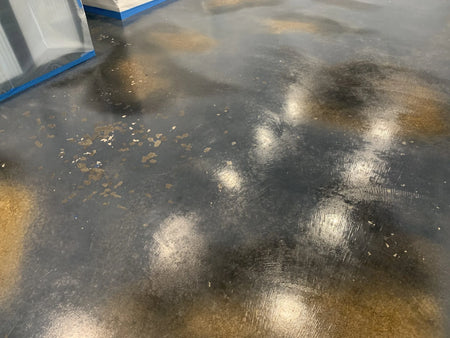
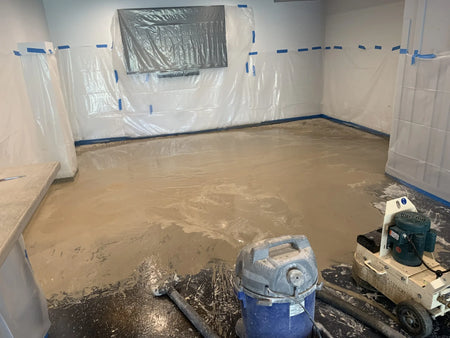
This is the most instructive project in the whole gallery. The first attempt failed — a very smooth, non-porous new slab that the etcher didn't open properly, so the color looked fine but flaked and lifted with tape. For the redo, they rented a floor grinder, switched to AcquaTint™, and mixed gray with black at a 3:1 ratio for a marbled look.
Product
Gray + Black AcquaTint™ (3:1) + ProWax Polish™ Satin ×5
Prep
Rented concrete floor grinder (~24 hrs grinding)
Size
1,200 sq. ft.
Time
10 days
A concrete floor with patches where stain and wax have flaked off, exposing bare concrete. The surface is smooth and reflective, showing poor stain adhesion
The failed first attempt — poor adhesion from inadequate surface prep.
A room with plastic sheeting covering the walls, showing a concrete floor being ground down with a floor grinder, with debris scattered around
The grinder opening the slab for the redo.
A basement with protective coverings on the lower walls and bar, showing the floor after the application of the first coat of AcquaTint stain
The first coat of gray-and-black AcquaTint™.
A basement floor with a smooth, polished appearance after the application of the second coat of AcquaTint stain
The second coat.
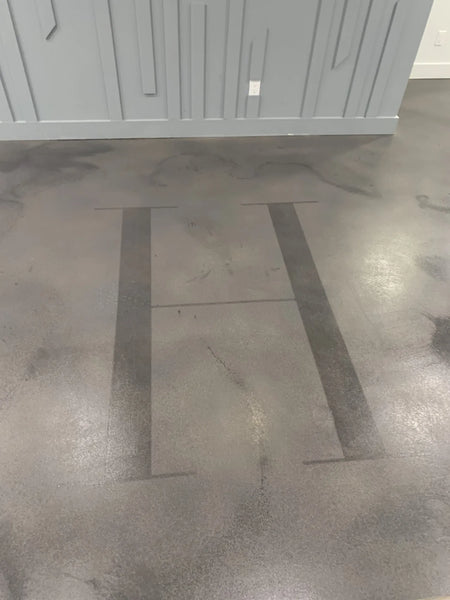
A concrete floor with a large, stylized letter "H" stenciled onto the surface, set against a faux polished finish with subtle color variations
A stencil detail.
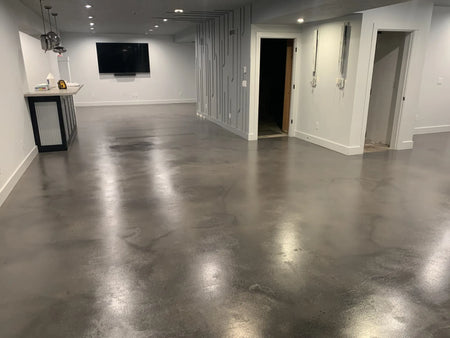
A basement hallway with a faux polished concrete floor, featuring smooth, reflective surfaces and light-colored walls
The finished faux-polished hallway.
Overhead view from a staircase showcasing a gleaming finished floor stained in rich black AcquaTint
Overhead view from a staircase showcasing a gleaming finished floor stained in rich black AcquaTint.
The concrete floor has been cleaned and prepped, ready for the application of stain after thorough surface preparation
The concrete floor has been cleaned and prepped, ready for the application of stain after thorough surface preparation.
“I failed to properly prep the concrete floor on my first attempt… The finished product looked good but was not durable at all. It would flake and pull up very easily — painter's or Scotch tape would remove the wax and stain.” After the redo: “I have since tested the floor in several areas for durability and it has passed. Had 10 kids over for New Year's Day and unknowingly found them using hockey sticks on the floor — durability test two… PASS, haha.”
Tips: “Have multiple pump sprayers available; mine gummed up easily. I found it difficult to walk in spike shoes, so I attached spikes to an old pair of rubber crocs to slip on and off. Test the color on an area you may not see. And can't stress enough about proper prepping — if there's any doubt, grind it, especially hard-troweled concrete.”
— DIY Customer

Black ColorWave® water-based stain

ColorWave® blacks and grays give a controlled, predictable finish — here blended with Stone and Iron Gray for a monochrome, marbled effect.
Prepped and Clean Concrete Floor Ready for Staining
Prepped and Clean Concrete Floor Ready for Staining.
Dry ColorWave Stains in Black, Stone, and Iron Gray on Concrete Floor
Dry ColorWave Stains in Black, Stone, and Iron Gray on Concrete Floor.

ColorWave Stains in Black, Stone, and Iron Gray Applied Using Puddling Method on Concrete Floor

The three colors being blended during application.
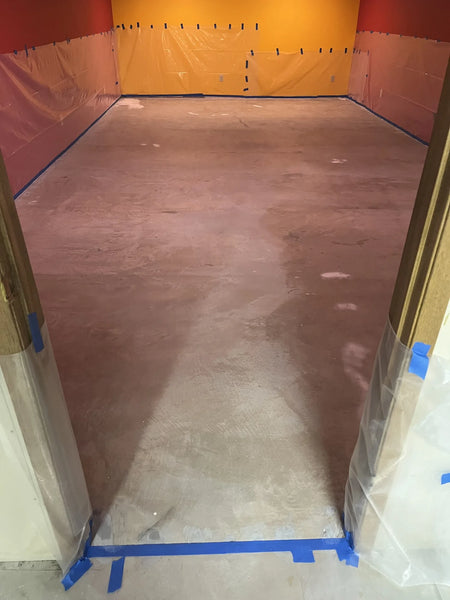
Unfinished floor with visible imperfections and paint spots prior to staining
An unfinished floor with paint spots.
Monochrome floor showcasing a fusion of black and steel grey stains
The monochrome black-and-steel ColorWave® result.
Concrete floor with repaired cracks using CementAll
A condo floor patched after carpet removal.
Black stained concrete floor beautifully transformed with black, stone gray, and iron gray ColorWave water-based concrete stains, showcasing a stunning and unique color blend
Then stained in black ColorWave®.

A tribute to Prince

A faded concrete patio built around a monument to Prince was brought back with black ColorWave®. The square monument carries the artist's signature symbol engraved in gold, and the darker field makes it read properly for the first time.
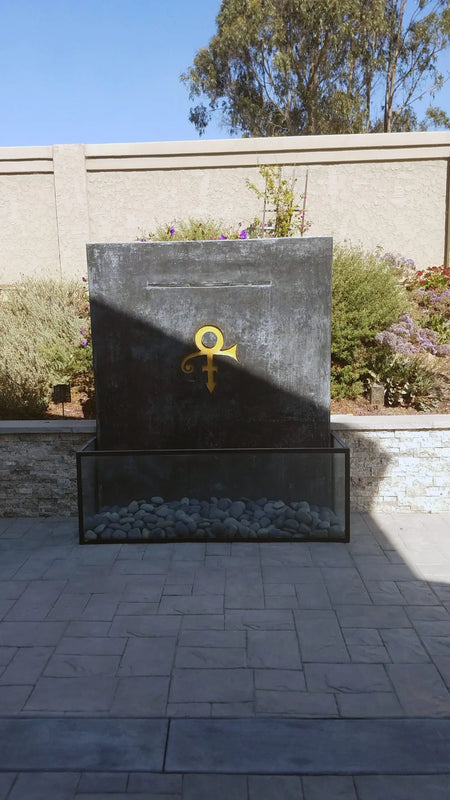

Before image showing a faded concrete monument dedicated to Prince, with his signature symbol engraved
Before — the patio and monument faded and washed out.
After image displaying a refreshed concrete monument to Prince, restained with black ColorWave and featuring the Prince sign engraved in gold
After — black ColorWave® with the gold symbol standing out.

From play space to living area

Raw concrete the kids had been making the most of became an elegant finished living area — adhesive marks and all disappearing under Black AcquaTint™ with a satin ProWax Polish™ top coat.

Three playful children having fun on an untreated concrete floor, showing its raw state prior to staining
Before — bare concrete doing duty as a play space.
Sleek and polished living area floor, beautifully stained with AcquaTint™ Black and finished with ProWax Polish™, reflecting the ambient lighting
After — a finished, elegant living area.

Black Vibrance™ dye

For the most even, opaque black, Vibrance™ dye is the tool — acetone-based and fast, shown here blended with Stormy Gray and White.
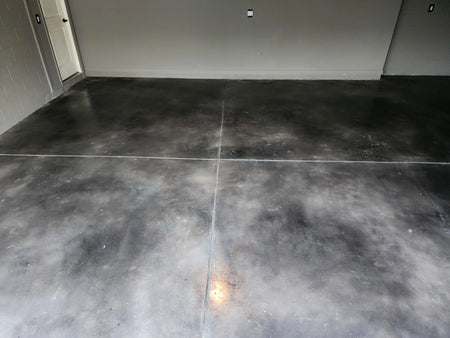
Garage space with a faux polished concrete floor using Black, Stormy Gray, and White Vibrance Dye
Garage space with a faux polished concrete floor using Black, Stormy Gray, and White Vibrance Dye.
Garage space with a faux polished concrete floor using Black, Stormy Gray, and White Vibrance Dye
Garage space with a faux polished concrete floor using Black, Stormy Gray, and White Vibrance Dye.
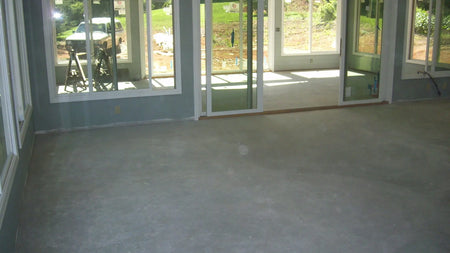
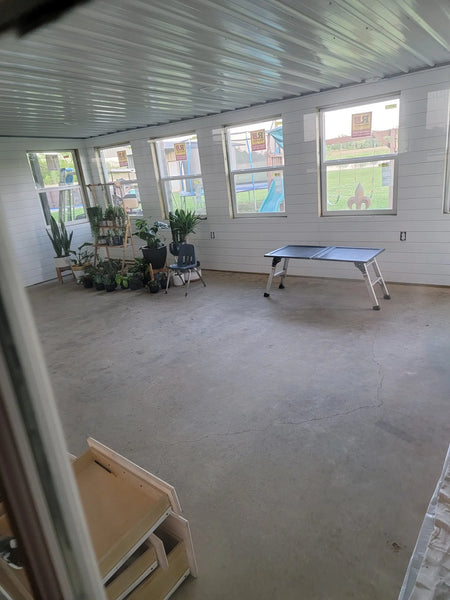
Unfinished concrete sunroom floor
Unfinished concrete sunroom floor.
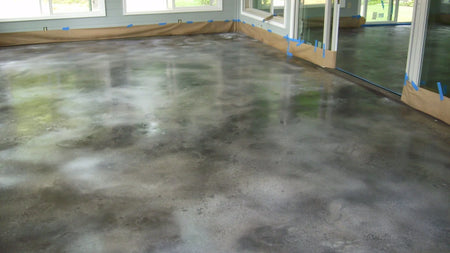
Sunroom floor stained with black and white Vibrance Dye in mottled technique
Sunroom floor stained with black and white Vibrance Dye in mottled technique.

Black on furniture & commercial spaces

Black tinted sealer and pigment also work beautifully on cast furniture and small commercial floors.
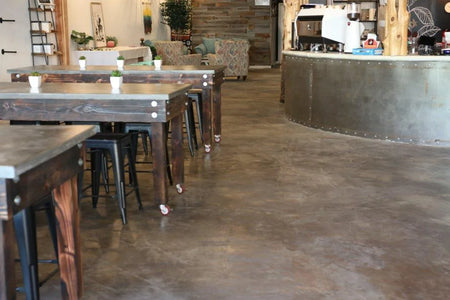
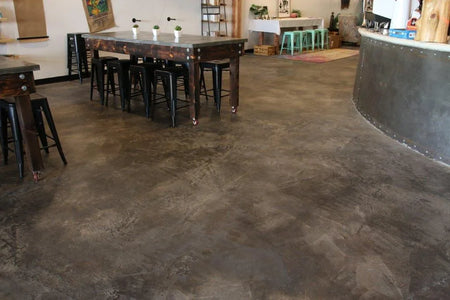
Coffee N' Crafts Shop
A coffee shop floor stained.
Coffee N' Crafts Concrete stained and sealed floor with tinted concrete sealer
Sealed with tinted concrete sealer.
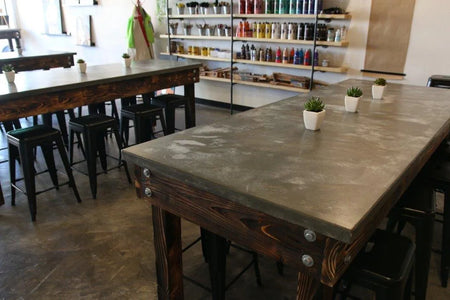
Pre-cast Concrete TableCoffee N' Crafts Concrete Stained tables

A black pigmented and tinted-sealer concrete table, and stained cafe tables.
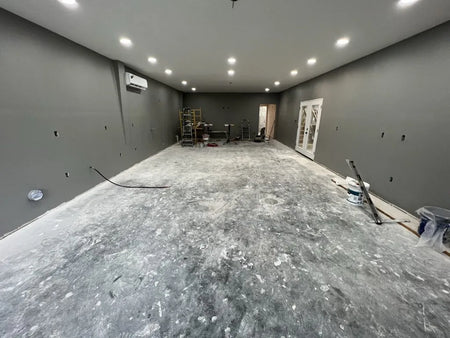
Shop floor in its basic state, waiting for a touch of color and design
Before — an unstained shop floor.
Handmade, uneven swirl patterns across the shop floor, resulting from the sponge staining technique, showcasing its distinct charm
After — hand-made swirl patterns in AcquaTint™ Charcoal.

Shop EverStain™ Blackish DIY Kits →

What's Next

  1. Tinted sealer projects → AcquaTint™
  2. See every acid-stain color → Concrete Acid Stain Colors Guide
  3. How to apply acid stain → How to Apply Acid Stain to Concrete
  4. Layer two colors → How to Layer Two Acid Stain Colors
  5. Shop → EverStain™ DIY Kits · Trial Kits

Direct Colors. Shawnee, OK. Manufacturing the full decorative concrete system since 1997.

Previous Post Next Post

Before You Checkout

EasyTint™ and OxiGrip™ are not compatible when used together directly. For slip resistance, use EasyTint™ as the color layer and apply OxiGrip™ only with a clear solvent based sealer as the topcoat.

Before You Checkout

AcquaTint™ and OxiGrip™ are not compatible when used together directly. If you need added slip resistance, apply AcquaTint™ as your color layer first, then use OxiGrip™ in a clear topcoat with AcquaSeal™ or HydroCryl™.