
Staining concrete to look like wood is one of the most requested decorative-concrete looks, and one of the most flexible, because there are several ways to get there. On the simple end, you can tape off plank shapes on a bare slab and stain them; on the ambitious end, a contractor pours integrally colored concrete, stamps it with a wood-plank texture, and stains the grain by hand. This guide walks through five ways to make concrete look like wood, from a weekend DIY project to a full stamped installation, plus exactly which Direct Colors stains, dyes, and tinted sealers get each wood tone. Every photo here is a real customer project.
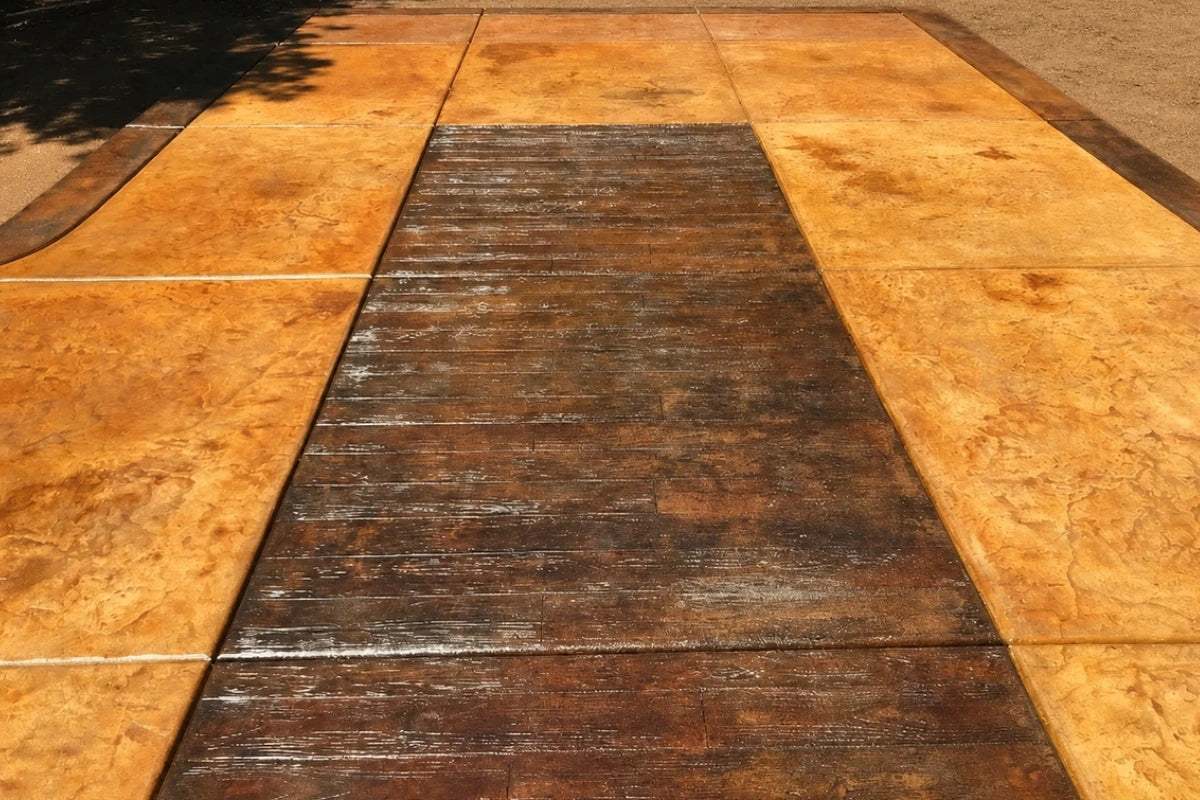
Concrete stamped and stained to look like wood: a Coffee Brown EverStain™ acid stain base with Cola and English Red highlights worked along the grain. A customer project by the Koons family.
The 5 ways to make concrete look like wood
Every method uses the same two ingredients: a plank pattern (stamped or taped) and wood-tone color (stain, dye, or tinted sealer). What changes is how much texture and realism you want, and whether you're working with a bare slab or pouring new concrete. Use the table to find the right method for your project, then jump to it below.
| Method | Difficulty | Texture | Best for |
|---|---|---|---|
| 1. Tape stencil + stain | Easy (DIY) | Flat, drawn plank lines | Existing smooth slabs, interior floors, patios, budget projects |
| 2. Tape stencil + overlay + stain | Moderate (DIY) | Light raised grain | Existing slabs where you want real plank texture without a stamp |
| 3. Color existing stamped concrete | Easy to moderate | Full wood-plank stamp | Slabs already stamped with a wood pattern, or faded stamped concrete |
| 4. Overlay + wood-plank stamp + stain | Advanced | Full wood-plank stamp | Resurfacing a sound but plain existing slab |
| 5. Poured, integrally colored + stamped | Pro / contractor | Deepest plank texture | New pours, driveways, large patios |
- 1. Tape stencil + stain: Easy DIY. Flat plank lines. Best for existing smooth slabs, interior floors, patios, and budget projects.
- 2. Tape stencil + overlay + stain: Moderate DIY. Light raised grain. Best for existing slabs where you want plank texture without a stamp.
- 3. Color existing stamped concrete: Easy to moderate. Full wood-plank stamp texture. Best for already-stamped or faded stamped slabs.
- 4. Overlay + wood-plank stamp + stain: Advanced. Full stamp texture. Best for resurfacing a plain existing slab.
- 5. Poured, integrally colored + stamped: Pro/contractor. Deepest plank texture. Best for new pours, driveways, and large patios.
What colors and stains make concrete look like wood?
This is the part that makes or breaks the wood illusion. Real wood is never one flat color: it's a base tone with darker grain running through it, so you layer colors, lightest first, worked along the plank direction. Two things to keep straight before you pick colors:
First, each Direct Colors product has its own color names. EverStain™ acid stain, Antiquing™ stain, and the EasyTint™/AcquaTint™ tinted sealers are separate lines: a "Coffee Brown" acid stain and a "Cafe Royale" Antiquing are not interchangeable. Pick your product first, then its colors. The table below is grouped by product so the colors always match.
Second, if you combine products for grain, sequence matters. See the rule below the table.
| Wood look | Colors | Product line |
|---|---|---|
| Light oak / pine | Malayan Buff base + Desert Amber | EverStain™ acid stain |
| Golden / honey oak | Malayan Buff base + Cola | EverStain™ acid stain |
| Warm oak / light walnut | Coffee Brown base + Cola | EverStain™ acid stain |
| Medium brown / walnut | Cafe Royale, or Maple | Antiquing™ stain |
| Weathered gray / driftwood | Driftwood or Silver Gray base + Charcoal grain | Antiquing™ stain |
| Reclaimed / barn wood | Driftwood + Charcoal + Chocolate + Russet + Terracotta | Antiquing™ stain |
| Rich walnut / espresso | Coffee Brown base, then Charcoal grain | EverStain™ + Antiquing™ (sequence: see rule) |
| One-step warm brown | Cafe Royale, Chocolate, or Maple | EasyTint™ / AcquaTint™ tinted sealer |
| One-step weathered gray | Gray or Silver Gray | EasyTint™ / AcquaTint™ tinted sealer |
- Light oak / pine: Malayan Buff base + Desert Amber. EverStain™ acid stain.
- Golden / honey oak: Malayan Buff base + Cola. EverStain™ acid stain.
- Warm oak / light walnut: Coffee Brown base + Cola. EverStain™ acid stain.
- Medium brown / walnut: Cafe Royale or Maple. Antiquing™ stain.
- Weathered gray / driftwood: Driftwood or Silver Gray base + Charcoal grain. Antiquing™ stain.
- Reclaimed / barn wood: Driftwood + Charcoal + Chocolate + Russet + Terracotta. Antiquing™ stain.
- Rich walnut / espresso: Coffee Brown base, then Charcoal grain. EverStain™ + Antiquing™ (see the sequencing rule).
- One-step warm brown: Cafe Royale, Chocolate, or Maple. EasyTint™ / AcquaTint™.
- One-step weathered gray: Gray or Silver Gray. EasyTint™ / AcquaTint™.
Which product should you use: acid stain, Antiquing, dye, or tinted sealer?
All four give a wood look; they differ in realism, control, and effort. You can also combine them: an acid-stain base for reactive variegation, then Antiquing or dye grain on top (following the sequencing rule above).
Method 1: Tape stencil + stain (the easiest DIY)
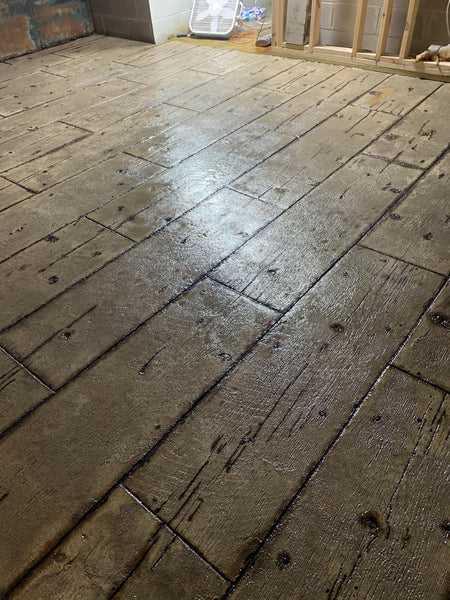
This is the method most people mean when they search how to stain concrete to look like wood. No stamp, no overlay, no special equipment: you mask off plank shapes with tape on a bare, clean slab, stain the exposed concrete in wood tones, pull the tape, and seal. The tape lines become your "grout" or plank gaps. It's the cheapest way in and works beautifully on interior floors like the bathroom floor below, a customer project by David Martinez.

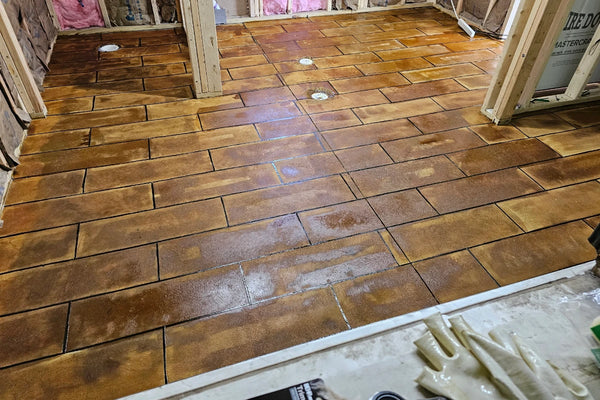
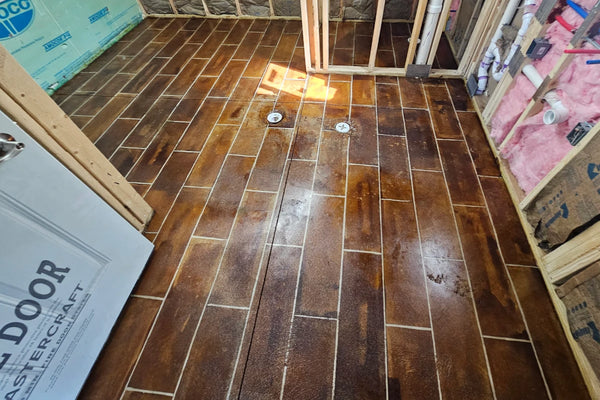
- Clean and prep the bare slab: remove any coating or sealer so the stain can react (see surface prep).
- Lay out plank widths in pencil, then mask the plank gaps with tape. Vary plank lengths and stagger the ends so it reads like real flooring.
- Stain the exposed planks in wood tones. With EverStain™ acid stain you can layer light-to-dark acid-stain colors wet, along the plank length, for grain. (Want extra-dark grain or knots from Antiquing™ or dye? Add those after neutralizing; see the layering rule above.) Layering two or three colors is what sells the wood look.
- Let the acid stain react (about 4 to 8 hours), then remove the tape while the stain is still slightly damp for the cleanest lines.
- Neutralize, rinse until the water runs clear, and let it dry completely.
- Seal. For interior floors, add a wax topcoat for extra wear resistance.
Watch the technique: layering wood-tone stain along the plank grain.
Method 2: Tape stencil + overlay + stain (add real texture)
Same tape-stencil idea, but before staining you trowel or spray a thin concrete overlay into the taped planks to create a slightly raised, textured surface. When you pull the tape, each plank stands just proud of the gap lines, so it not only looks like wood, it feels like it underfoot. Then you stain the overlay in the same layered, along-the-grain way as Method 1. This is the middle ground between a flat stencil and a full stamp: real plank relief, no stamping equipment.
- Prep the slab and tape out the plank pattern as in Method 1.
- Apply a thin coat of stampable/spray concrete overlay over the taped area, enough to build light texture and grain, not a thick pour.
- While the overlay is still workable, texture the grain (broom, brush, or a wood-grain tool), then pull the tape to reveal crisp plank edges. Let it cure.
- Stain the cured overlay in wood tones, layering light to dark along the grain. If you use acid stain and want Antiquing or dye grain on top, add it after neutralizing and drying.
- Neutralize (if using acid stain), rinse, dry, and seal.
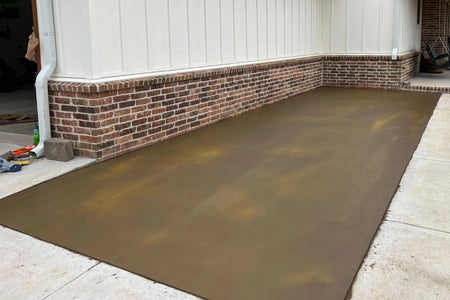
An overlay also lets you add color to the mix itself: an integrally colored overlay gives you a built-in base tone before you ever stain. The driveway below is a customer project done exactly this way: a tape-stencil wood-plank overlay, then stained with Driftwood and Aztec Brown Antiquing™.
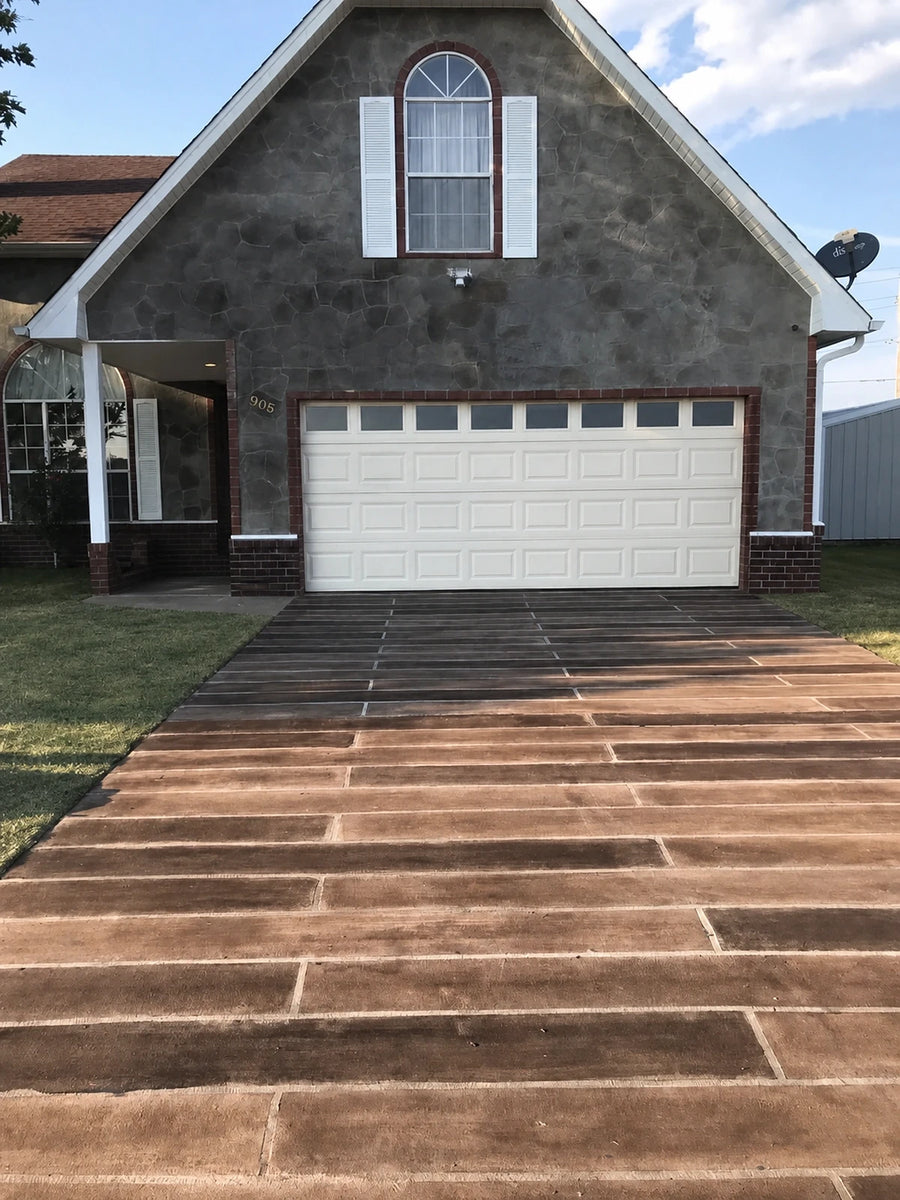
A tape-stencil wood-plank overlay on a driveway, stained with Driftwood and Aztec Brown Antiquing™. A customer project.
Method 3: Color existing (or faded) stamped concrete
If your slab is already stamped with a wood-plank pattern (or you have faded, tired wood-plank stamped concrete), you don't need to stamp anything. You just add or restore the color. This is the fastest path to a great wood look, and it's the single most common project we help with: a homeowner whose integrally colored stamped patio has faded to a flat, washed-out tone, wanting a realistic, vibrant wood color back. The stamp texture is still good. Here's how to color it:
Acid stain for the most realistic grain
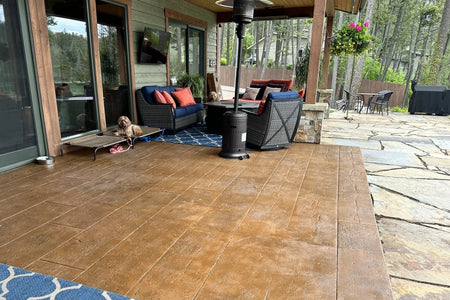
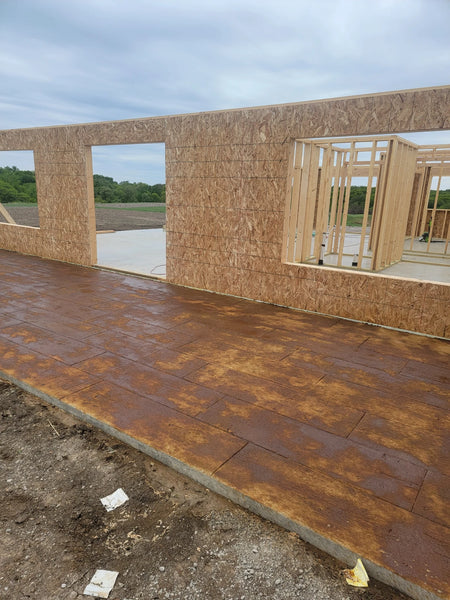
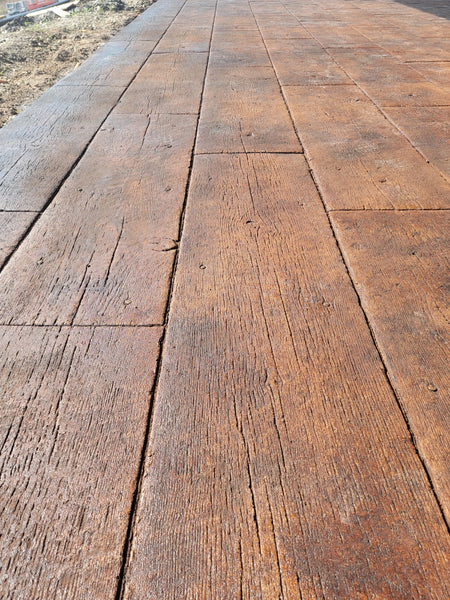
EverStain™ reacts into the stamped texture for permanent, variegated color that settles into the plank recesses and grain lines, exactly where real wood is darkest. Apply your base acid-stain color, layer acid-stain accents along the planks, then neutralize and seal. (For extra grain from Antiquing or dye, add it after neutralizing and drying.) The stamped patio below (a customer project by Tami Bingham) was colored with Coffee Brown EverStain™.
Vibrance™ dye + Antiquing for controllable, layered grain
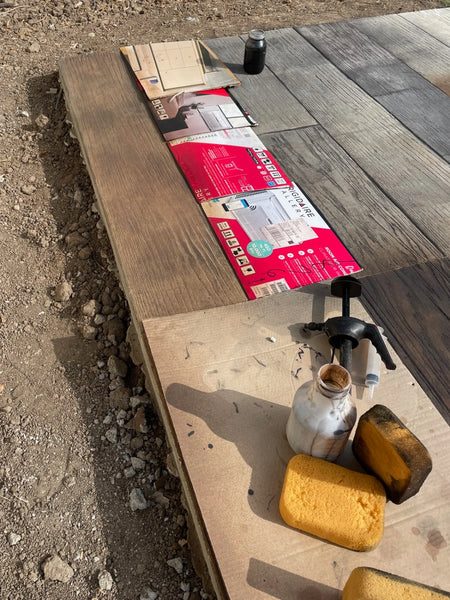
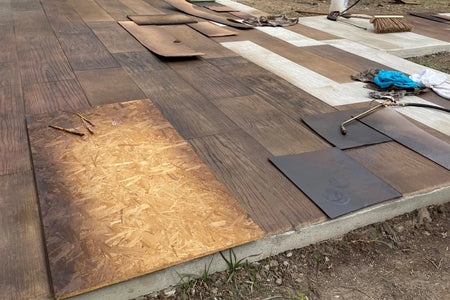
Dye is the go-to when you want a specific brown with hand-placed grain. The 335 sq. ft. patio below is a customer project by Jason Davis: a neighbor's freshly poured, wood-grain-stamped slab that he colored board by board. He sponged a Coffee Brown Vibrance™ dye base onto each plank, mixed different browns and reds into that base so no two boards matched, then used Charcoal and Black Antiquing™ stain to build the grain and knots. Because the base is a dye (not an acid stain), there's no neutralizing step. The Antiquing grain layers straight over the dye, no washing off.
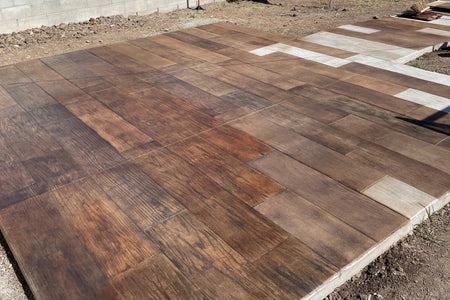
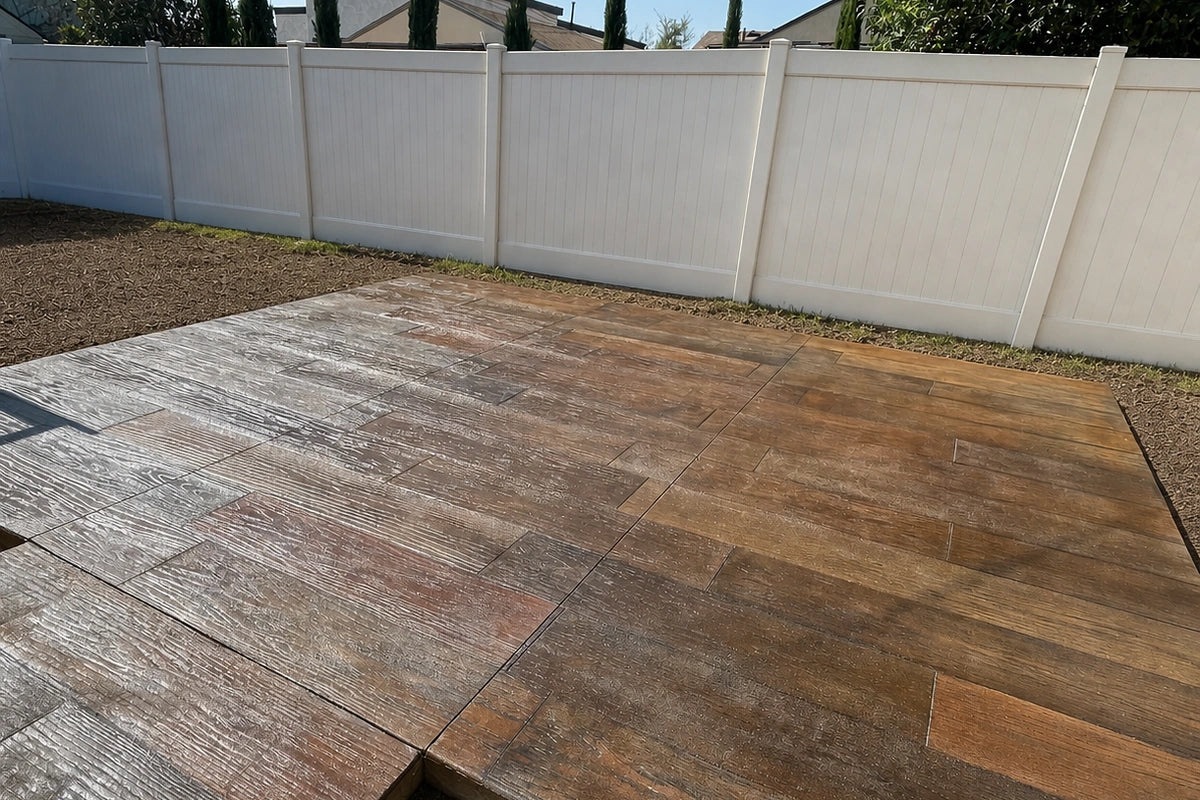
The finished patio: a Coffee Brown Vibrance™ dye base with Black and Charcoal Antiquing™ grain, no two boards alike. Jason Davis's project.
Layered Antiquing™ stain: the simpler route
Don't want to work with a reactive acid stain or a dye at all? You can get a convincing wood look on stamped concrete with Antiquing™ stain alone, with no neutralizing and no rinsing. Lay down a base color and layer two or three accents into the grain. The patio below started from a Charcoal base layered with Chocolate, Driftwood, Russet, and Terracotta for a reclaimed-wood look.
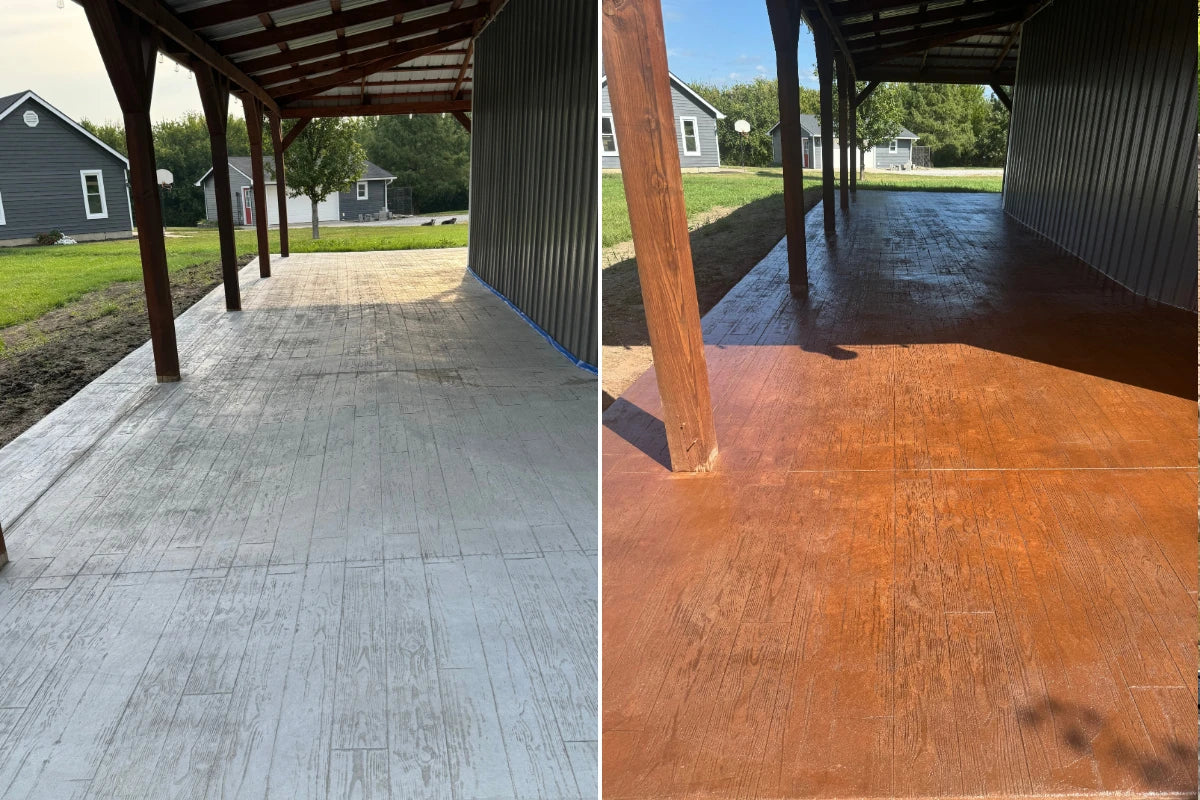
Before and after, Antiquing™ stain only: a Charcoal base with Chocolate, Driftwood, Russet, and Terracotta layered into the grain.
One-step tinted sealer for speed
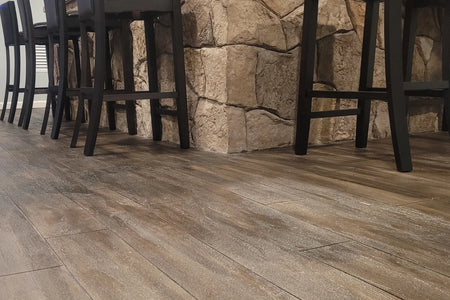
For the fastest finish, a tinted sealer colors and seals in one step. EasyTint™ and AcquaTint™ in wood tones (Cafe Royale, Driftwood, Gray) give an even, uniform wood color, with less variegation than acid stain and far less time. See the porch and interior examples in the color section above.
Restoring faded wood-plank stamped concrete
Sun and weather fade stamped concrete over time, and this is where most homeowners find us, with an integrally colored stamped patio that has gone flat and washed-out. Recoloring is straightforward: an Antiquing™ stain like Driftwood or Maple restores rich wood tone and settles into the grain, no stripping and no neutralizing required. Both patios below are customer projects: one restored with Driftwood, one with Maple.
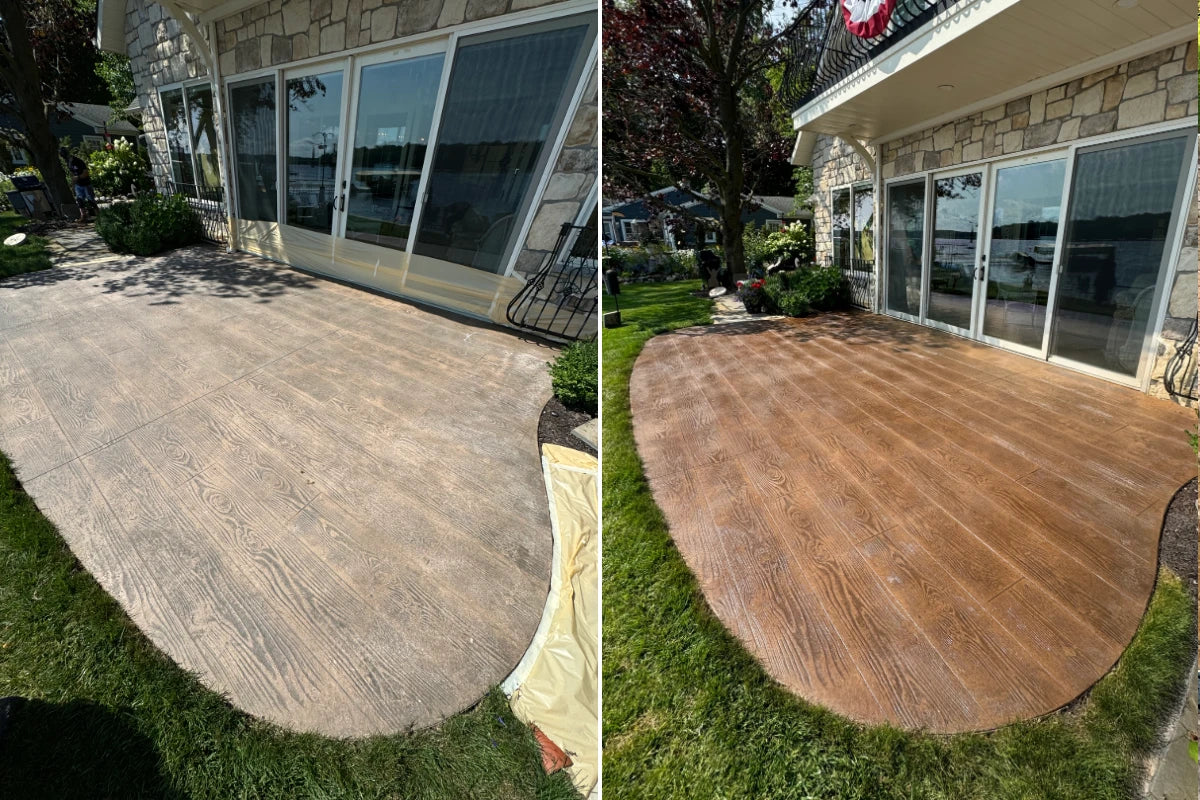
Before and after: a faded integral-pigment stamped patio restored with Driftwood Antiquing™.
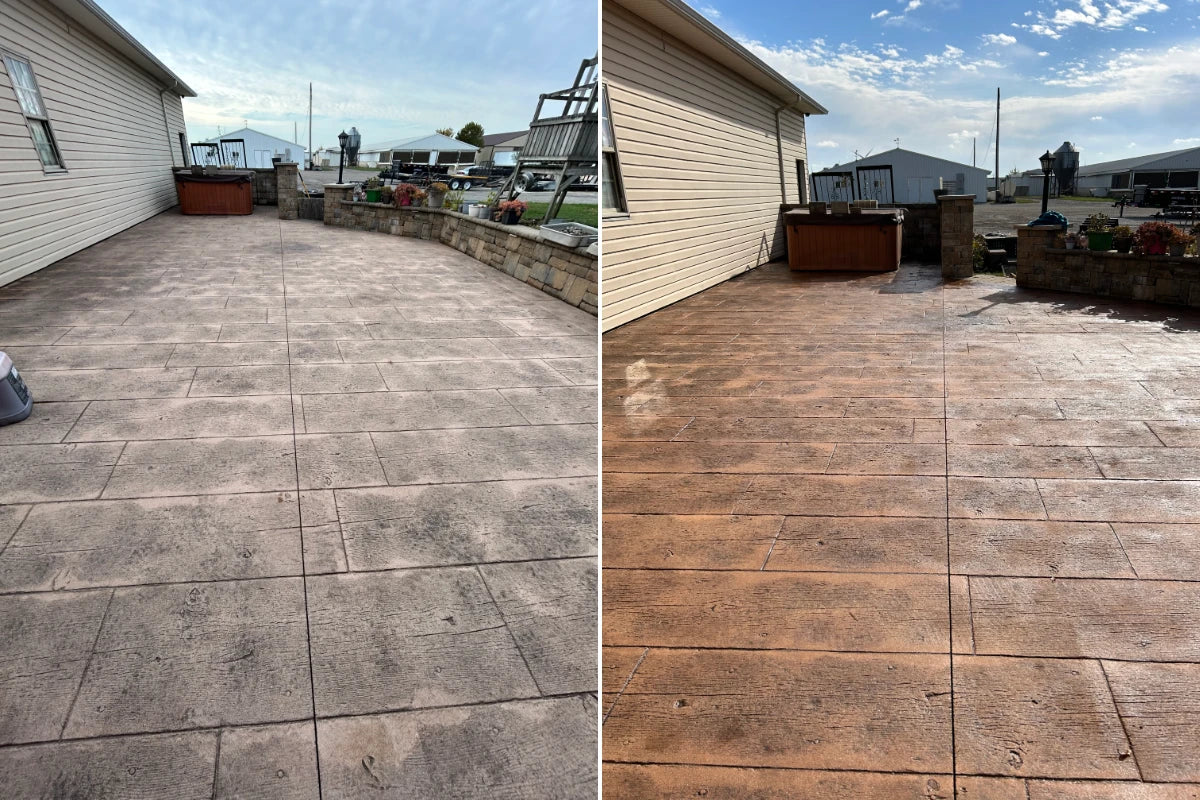
Before and after: a faded integral-pigment stamped patio restored with Maple Antiquing™.
Method 4: Overlay + wood-plank stamp + stain
If your existing slab is sound but plain (no wood pattern), you can resurface it with a stampable concrete overlay and stamp the wood-plank texture into the fresh overlay, with no need to tear out and re-pour. Once it cures, you stain it exactly like stamped concrete. This gives you the full, deep plank texture of a stamp on top of an existing slab.
- Prep and profile the existing slab so the overlay bonds.
- Apply the stampable overlay (integrally colored or plain) to the right thickness for stamping.
- While the overlay is workable, press a wood-plank stamp (a 6-inch boardwalk-with-knots mat is a popular choice), using release agent so it lifts cleanly.
- Let it cure fully (about 30 days for acid staining), then color with acid stain, dye, Antiquing, or a tinted sealer.
- Neutralize (acid stain), rinse, dry, and seal.
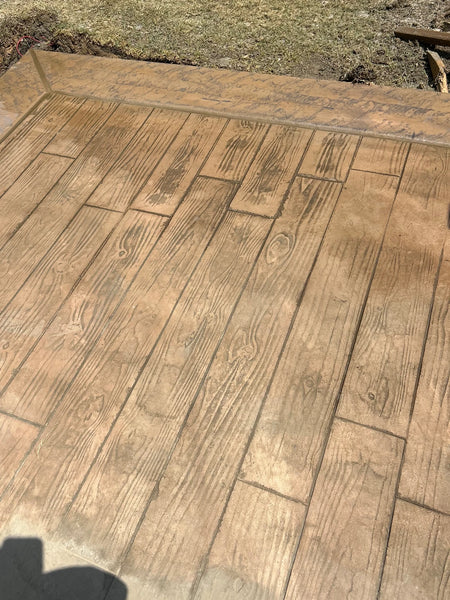
Once it cures, the stamped overlay is stained just like any wood-plank slab. The finished patio below started from an integral color base, then earned its realism from multicolor Antiquing™ accent planks (Crimson, Cumin, Aztec Brown, and Fern Green), hand-varied board by board over a boardwalk wood-plank stamp. A customer project by Jorge Gomez.
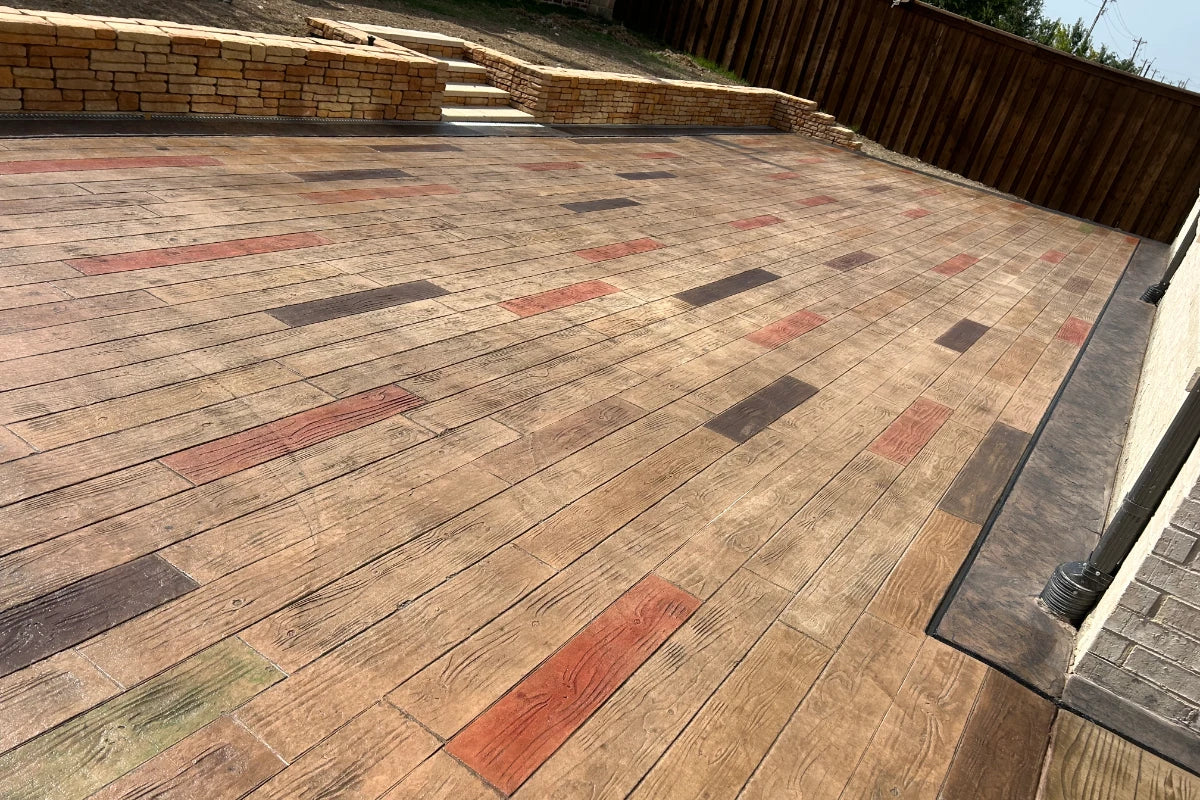
Finished with multicolor Antiquing™ accent planks: Crimson, Cumin, Aztec Brown, and Fern Green. A customer project by Jorge Gomez.
Method 5: Poured, integrally colored + stamped (a from-scratch pour)
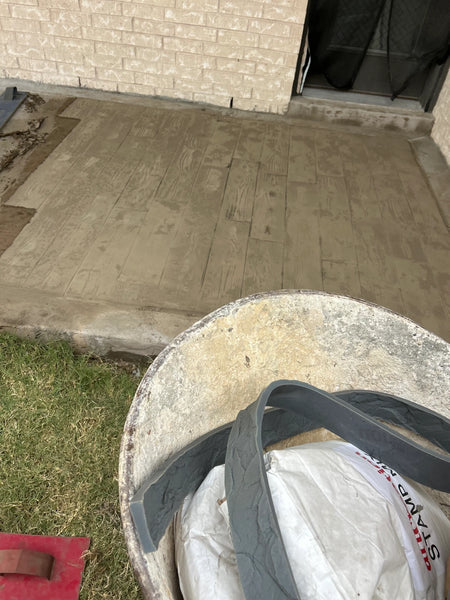
This is the from-scratch, contractor version: color the concrete as it's poured with integral pigment, broadcast a color hardener over the fresh surface for strength and a second tone, then stamp the wood-plank texture into the wet slab. It gives the deepest plank texture and the most durable base for a wood look on new pours, driveways, and large patios.
But integral color alone rarely looks convincingly like wood. Poured in a single flat tone, it reads more like colored concrete than timber, and it tends to fade noticeably within a few years. The realism comes from the color work: a skilled contractor broadcasting a second pigment while the slab is wet, and staining the grain by hand after it cures. Not every contractor has that artistry, which is why many homeowners come to us with a stamped-but-flat (or already faded) slab, wanting the richer, more vibrant, more wood-like color that stains and dyes deliver. If that's you, you don't need a new pour at all. The stamp texture is still good; it just needs realistic, layered color. See Method 3 above to recolor stamped concrete you already have.
Here's how a from-scratch pour comes together:
- Add integral pigment to the mix for the base wood tone (Tobacco is a classic warm brown base).
- Place and finish the slab, then broadcast a color hardener over the surface for a second tone and a harder wearing surface.
- Apply release agent and stamp the wood-plank pattern into the wet concrete.
- Cure, then stain or accent the grain and seal, layering colors along the planks for realism.
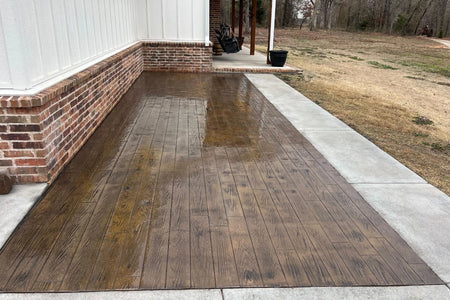
Bonus: wood-grain concrete countertops
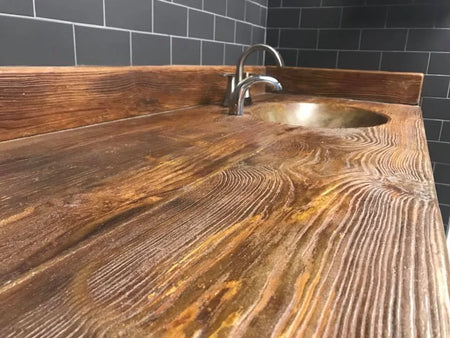
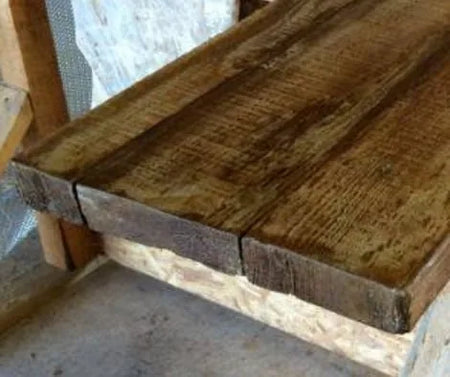
The same idea works on countertops, with an extra step for realism: cast the top against wood or a silicone mold, sand-blast to raise the grain, then hand-stain along it. This method comes from William B. Carlisle Design, who shared it with us.
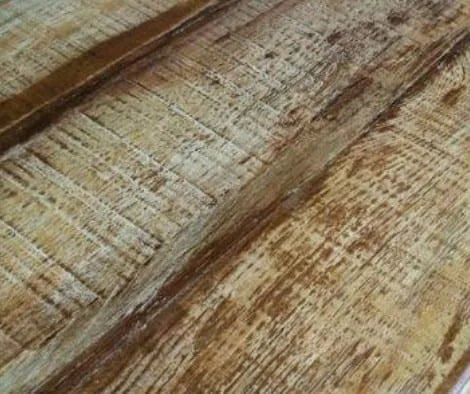
A concrete countertop stained to look like wood.
- Reinforce the cabinetry (a concrete countertop can weigh up to 900 lb) and build the form; take a silicone mold off resawn lumber to capture the edge grain.
- Cast the countertop mix, spraying a thin coat over the whole mold first to prevent pinholes, then fill and cure.
- Demold and sand-blast the surface to raise the wood grain.
- Mist with water, then brush diluted EverStain™ acid stains along the grain, lightest first: Malayan Buff, then Cola, then Coffee Brown.
- Sand back high-contrast areas to blend, then neutralize, dry, and seal with a high-quality acrylic sealer.
Making Concrete Look Like Wood: FAQs
How do you stain concrete to look like wood?
Mask plank shapes with tape (or start with wood-plank stamped concrete), then layer wood-tone EverStain™ acid stains along the plank length, a light base color first, with darker accents for grain. Let the acid stain react, remove the tape, neutralize, rinse, and let it dry. For deeper grain and knots, add Antiquing™ stain or dye after the acid stain is neutralized and dry, then seal. Layering along the grain is what makes it read as wood rather than flat brown.
What is the best stain color to make concrete look like wood?
Warm browns layered together. In EverStain™ acid stain, Malayan Buff as a light base with Cola and Coffee Brown for the grain covers most oak-to-walnut tones. In Antiquing™ stain, Driftwood, Cafe Royale, and Maple read as wood instantly, and Charcoal adds grain. For a reclaimed barn-wood look, layer Antiquing™ Driftwood, Charcoal, Chocolate, Russet, and Terracotta. Keep each recipe within one product line, since the color names don't cross over.
Can you mix acid stain and Antiquing stain for the wood grain?
Yes, but the order matters. Acid stain reacts into the concrete and survives the neutralizing rinse; Antiquing stain and dye sit on the surface and would wash off in that rinse. So apply the acid-stain base first, neutralize, clean, and let it dry completely, then add Antiquing or dye for the grain, and seal.
Can you make concrete look like wood without stamping?
Yes. Tape off plank shapes on a bare slab and stain between the tape; the tape lines become the plank gaps. It's the easiest, cheapest method and works well on interior floors and patios. For a little real texture without a stamp, add a thin concrete overlay in the taped planks before staining.
Should I stain or paint concrete to look like wood?
Stain. Paint sits on top as an opaque film that hides the concrete and eventually peels, and it looks flat and fake. Stain and dye soak into or react with the surface for translucent, layered color with real grain, and sealed stain lasts the life of the slab instead of peeling.
Does wood-look concrete need to be stamped?
No. Stamping adds realistic plank texture, but the wood look comes mostly from the layered color and plank lines. A taped stencil with well-layered stain looks convincingly like wood on a flat floor; stamping just adds the feel of grain underfoot.
How long does wood-look stained concrete last?
Because stain colors the concrete itself rather than coating it, the color is permanent: it won't peel or flake like paint. The sealer wears over time; reseal an exterior surface every 2 to 3 years to keep the color and protection intact.
Can you do wood-look concrete on interior floors?
Yes, interior floors are one of the best applications. Use a water-based option like AcquaTint™ or a well-ventilated acid stain, seal for interior wear, and add a wax topcoat in high-traffic areas.
What's Next
- The full staining method → How to Acid Stain Concrete
- Layering colors for grain → Layering Acid Stains
- Neutralizing before you seal → How to Neutralize Concrete Acid Stain
- Wood-plank patios at scale → Stamped Concrete Patio Ideas
- One-step color options → Tinted Sealer Colors: Before & After
- Shop → EverStain™ Acid Stains · Antiquing™ Stains · Tinted Sealers · Trial Kits
Direct Colors. Shawnee, OK. Manufacturing the full decorative concrete system since 1997.


