
A hard-troweled floor is the one people give up on. The slab looks perfect — flat, clean, faintly shiny — and the stain still sits on top of it in blotches, or barely colors at all. Nothing is wrong with the concrete. The surface is simply closed, and closed is the one condition every colorant we sell has an opinion about.
This page is for interior floors that are smooth by trowel. It settles three things before you spend anything: what hard-troweled actually means, what "hard-troweled pre-treatment" is and whether it is something you have to buy, and what a dense slab does to your choice of colorant. The prep work itself is written up in full elsewhere, and this page hands you straight to it.
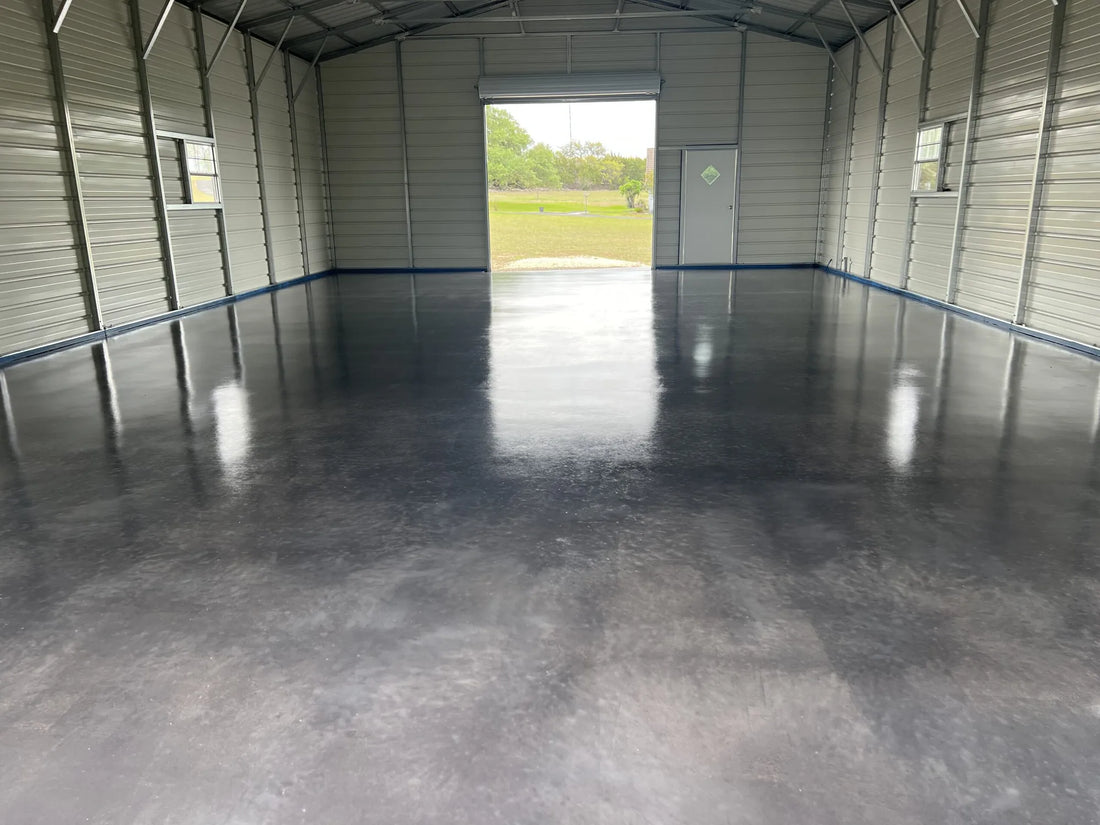
A hard-troweled interior slab, etched open, rolled in Charcoal AcquaTint™ and finished with ProWax Polish™. The floor was always smooth — the work was making it absorb, and that shine is wax, not grinding.
Smooth by trowel is not the same as polished
These get used interchangeably and they are different jobs with different outcomes.
Hard-troweled — also machine- or power-troweled — means the finisher ran a power trowel over the slab until the surface tightened and closed. It is smooth and dense on purpose: harder wearing, easier to sweep, less dusting. Almost every interior slab poured for a garage, a basement or a commercial space is finished this way.
Polished means the cured slab was mechanically ground and honed with progressively finer diamonds. That is a machine process that removes material and exposes sand and aggregate.
So a hard-troweled floor is not a polished floor, and grinding one would change how it looks entirely. If what you actually want is the look of polished concrete, you do not need days of progressive diamond grits to get it — see Faux Polished Concrete Floor on a Budget, which builds the same look out of Vibrance™ Dye. Read its prep section before you plan, though: that floor is ground open rather than etched open, because dye is thin and hides nothing.
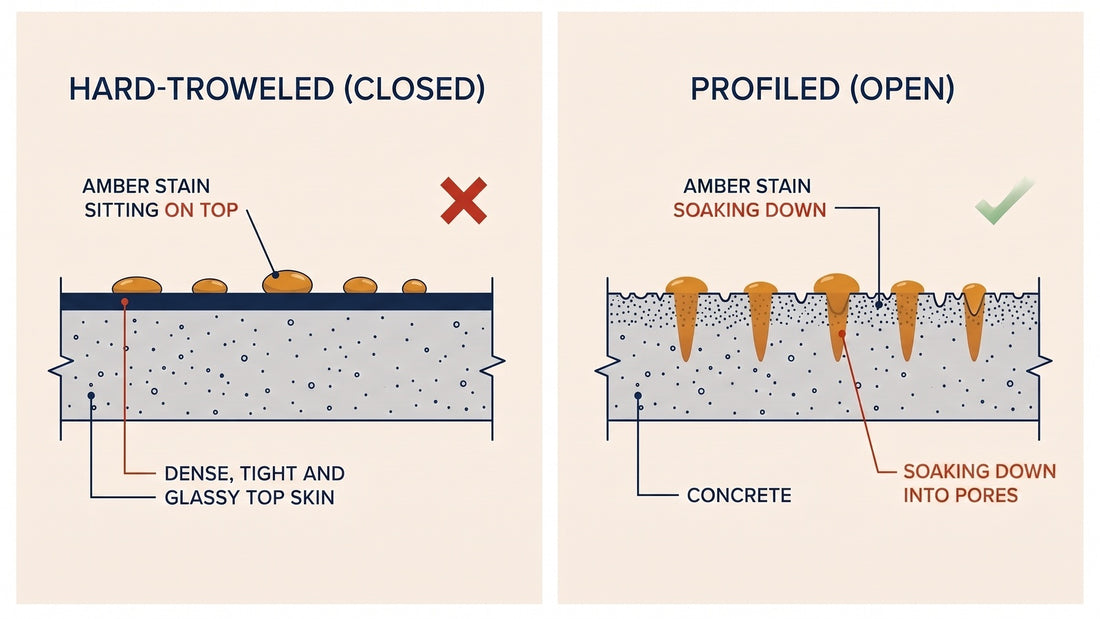
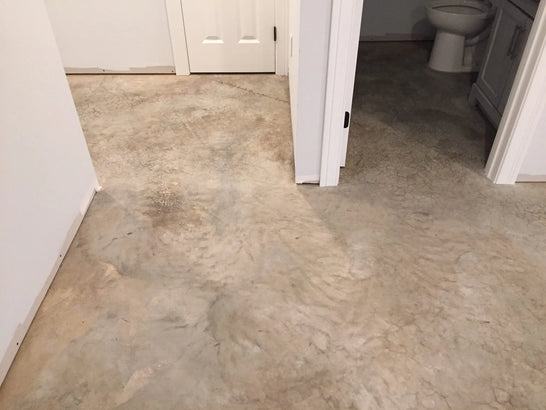
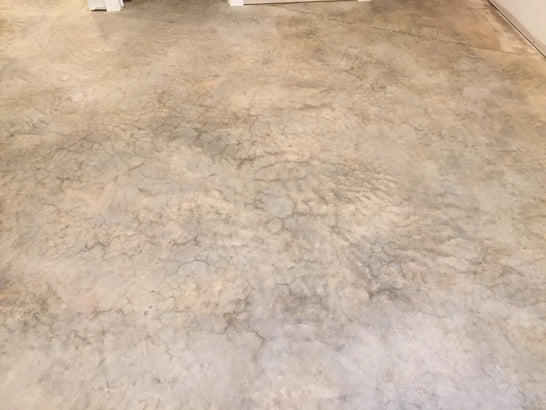
The whole problem in one picture. Left, a closed troweled surface — color has nowhere to go. Right, the same stain on a slab whose pores have been opened.
The only question that matters: is it open?
Not "is it smooth" — is it open. Spray water on a few spots across the room and watch for three to five minutes. Soaks straight in and the slab is open — clean it and you can color it, no etching needed. Beads and sits there and something is stopping the water, but not necessarily the trowel: a sealer, paint or old carpet mastic beads exactly the same way, and an etcher put on a coating only etches the coating. Strip whatever is on the floor and re-test before you buy an etcher. A rainbow sheen in the bead is oil, which is a third job again.
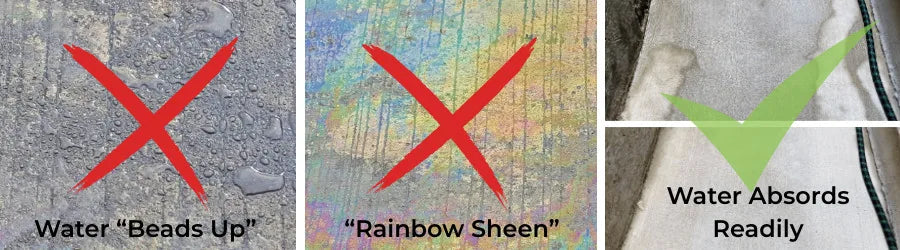
Three possible answers, and only one of them means go. The middle one — a rainbow sheen — is contamination, not density.
You cannot tell by eye, and a clean shiny floor is exactly the case that fools people. What each of those answers costs you — and the decision table for whether a given floor wants etching or grinding — is in Concrete Surface Preparation, along with cleaning, sealer stripping and glue removal in the order they have to happen. The short version: etching opens pores that already exist, which is what a clean troweled slab needs; grinding removes the top layer and makes new ones, which is what a contaminated or damaged slab needs.
"Hard-troweled pre-treatment" is CitrusEtch™
You will see that phrase in our galleries and on customer project notes. It is not a separate product and there is nothing extra to buy. It is the name for etching a closed, hard-troweled slab with CitrusEtch™, neutralizing with ProClean Neutralizer™, and rinsing until the floor will take water.
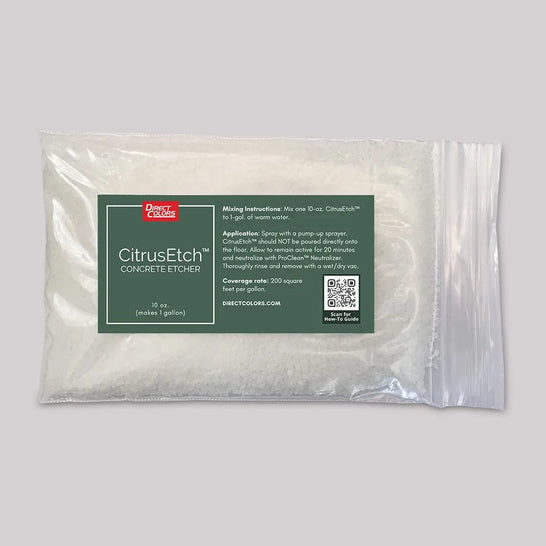
The product behind the phrase — CitrusEtch™, the same etcher used on any dense slab.
Dilution, coverage, dwell time and how many passes it takes are all on the preparation guide, along with the texture check that tells you when to stop. Two things worth knowing before you start: wear spiked shoes from the moment the etcher goes down. Walking on a wet, chemically active dense slab compresses the surface underfoot, those areas etch deeper than the rest, and the footprints appear as it dries. They are recoverable, in that order: rent a floor scrubber first — that is how one customer cleared etch marks from a 1,400 sq ft basement, four passes and eight hours — and only rent a grinder if scrubbing will not level them. Neither is how you wanted to spend the weekend. Read Concrete Etching Gone Wrong first: one of its two failures was a machine-troweled slab exactly like yours, and the other shows what invisible grinding dust does to an etch.
Choosing color for a dense slab
This is where a smooth floor changes the decision, and it is the part most people get backwards. Once the slab is open, the question is not "which color" but "which kind of colorant", because they fail for different reasons.
Reactive stains need two things, not one
EverStain™ and DecoGel™ are acid stains: they have to get into the pores and react with the lime in the concrete to make color. That is two dependencies, so there are two ways to be disappointed. A dense slab starves the first one. A slab that was ever cleaned with muriatic acid or TSP has had the lime stripped out and starves the second — and no amount of extra product fixes it.
Non-reactive color drops one dependency — not both
This is the misconception worth killing. ColorWave®, Vibrance™ Dye and AcquaTint™ deposit color instead of reacting with the slab, so they do not care about lime. That makes them genuinely more forgiving on concrete whose chemistry has been compromised.
They still need the surface to be open. ColorWave® works by leveraging the natural porosity of the concrete and its data sheet sends you to an absorption test and then to CitrusEtch™ if the slab fails it. Vibrance™ penetrates too, and its data sheet warns that it tends to highlight differences in porosity rather than hide them — so an unevenly opened floor shows up more, not less. AcquaTint™ does form a film rather than soaking in, and its data sheet is the bluntest about what that costs you: on hard-troweled surfaces, or pores smaller than its particles, the colored sealer "risks drying without adhering properly." It is not the exception either — ColorWave® and Vibrance™ carry the same warning in almost the same words. All three name your floor by name, which is the plainest evidence there is that the slab has to be opened first.
So switching away from acid stain is not an escape from preparation. It is a way to keep going when the slab's chemistry is spent — not when its surface is still closed.
What a dense floor will actually look like
Expect a properly etched dense slab to read lighter than an old porous one — there is less open pore for the color to sit in. One customer’s 1950s basement came out a noticeably lighter Azure Blue for exactly that reason (Azure Blue gallery). And any unevenness in how you opened the floor will show, because these products highlight differences in porosity rather than hide them. Neither is a defect — but decide whether you want that look on a test patch, before you commit the whole floor.
Do not take our word for it on your own concrete. Put a trial kit on the slab you have actually prepared, in the room's own light: EverStain™, ColorWave® or Vibrance™ or the AcquaTint™ Trial System. A swatch cannot tell you how a dense floor will take color; a test patch can.
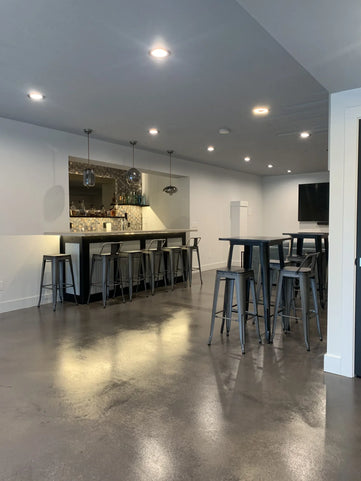
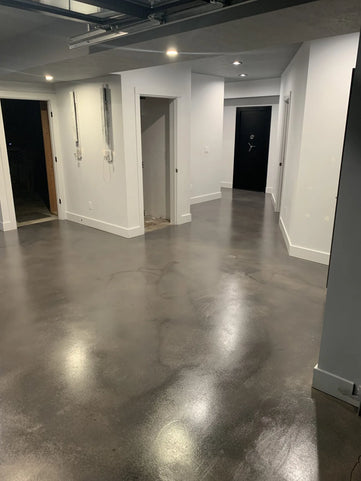
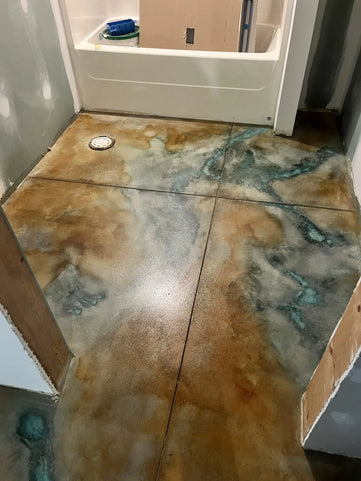
All three started as smooth interior slabs.
Find your room
The slab problem is the same everywhere. What sits on top of it is not.
| Your room | What bites first, on top of the smoothness | Where to go next |
|---|---|---|
| Basement | Moisture and vapor drive, then decades of carpet mastic | Staining Basement Floors |
| Garage | Unknown history — oil, chemical spills, old coatings | Garage Floor Stain |
| Living areas and kitchens | Evenness carries the room, so the test patch matters most | Acid-Stained Concrete Floors · Gray Gallery · Charcoal Gallery |
| Bathroom | Small area, so a premium colorant costs very little here — and the finish shows every flaw | Bathroom Floors |
| Commercial and traffic | Downtime, cure windows and abrasion resistance | Commercial Floors |
- Basement — Moisture and vapor drive, then decades of carpet mastic. Staining Basement Floors
- Garage — Unknown history — oil, chemical spills, old coatings. Garage Floor Stain
- Living areas and kitchens — Evenness carries the room, so the test patch matters most. Acid-Stained Concrete Floors · Gray Gallery · Charcoal Gallery
- Bathroom — Small area, so a premium colorant costs very little here — and the finish shows every flaw. Bathroom Floors
- Commercial and traffic — Downtime, cure windows and abrasion resistance. Commercial Floors
Hard-Troweled Floors: FAQs
Is hard-troweled the same as polished concrete?
No. Hard-troweled means the finisher ran a power trowel over the slab until the surface tightened and closed — smooth and dense on purpose. Polished concrete is ground and honed with diamonds. Different processes, different outcomes.
Does a smooth floor always need etching?
Not necessarily — the question is not whether it is smooth but whether it is open. Spray water on a few spots and watch for three to five minutes. If it soaks straight in, clean it and color it, no etching needed. If it beads, you need to open the surface first.
What is "hard-troweled pre-treatment"?
It is CitrusEtch™, and there is nothing extra to buy. The phrase is just the name for etching a closed, hard-troweled slab with CitrusEtch™, neutralizing with ProClean Neutralizer™ and rinsing.
Which colorant is safest on a dense slab?
A non-reactive one, but understand why. EverStain™ and DecoGel™ need two things — to get into the pores and to react with the lime — so there are two ways to be disappointed. ColorWave®, Vibrance™ Dye and AcquaTint™ deposit color instead of reacting, so they drop the lime dependency — but they still need the surface to be open.
Will the color look the same as it does on an old porous floor?
Expect it to read lighter. There is less open pore for the color to sit in, even after proper etching. One customer’s 1950s basement came out a noticeably lighter Azure Blue for exactly that reason.
What’s Next
- Open the slab properly → Concrete Surface Preparation
- Learn from two floors that went wrong → Concrete Etching Gone Wrong
- Then apply it → Acid Stain · DecoGel™ · ColorWave® · Vibrance™ Dye · AcquaTint™
- If the color still comes out uneven → Fixing Acid Stain Problems
- Seal it for indoor traffic → Choosing a Concrete Sealer
- Shop → Surface Preparation · Interior Floor Stains


