
A stencil turns a slab into a floor with a pattern on it, and stain is what makes the pattern permanent. The nine projects below cover the whole range — a marble-effect porch with Damask panels at the door, a bathroom floor cut into 8 x 24 in. faux planks with tape, a traveler’s compass traced into a sunken patio, faux flagstone over a crack that would not stay hidden, and 1,200 sq. ft. of barn floor turned into art. Read the tips inside each one. Between them they answer the only question that really matters on a stencil job: will the line stay crisp?
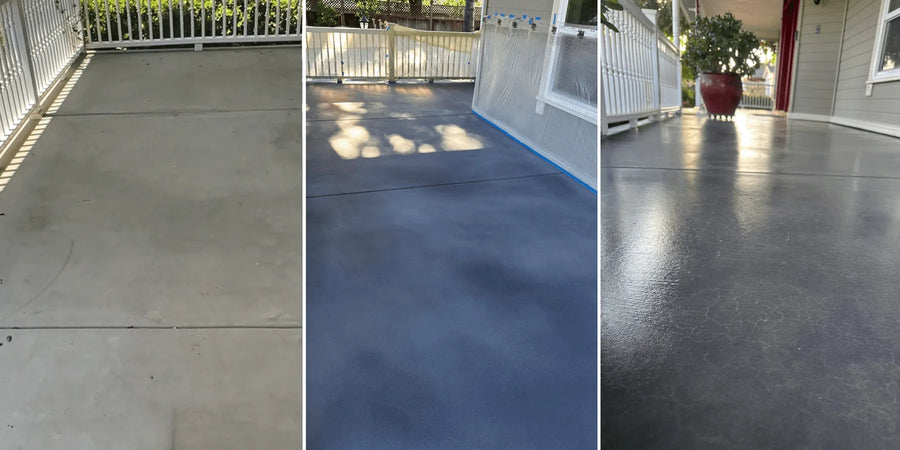
A 1980s patio taken to a marble effect with three Antiquing™ grays, then stenciled at the entry.
Shop EverStain™ Acid Stain Kits →
A 1980s patio, turned marble, with Damask panels at the door
Three Antiquing™ grays sprayed in sequence — Gray as the base, Light Charcoal for the highlights, then Silver Gray over the top to blend the transitions and stop it reading as three separate colors. The stencil work came after the first coat of EasySeal™ Gloss, in two Damask patterns either side of the entry, to match a Victorian house. A second sealer coat locked it in.
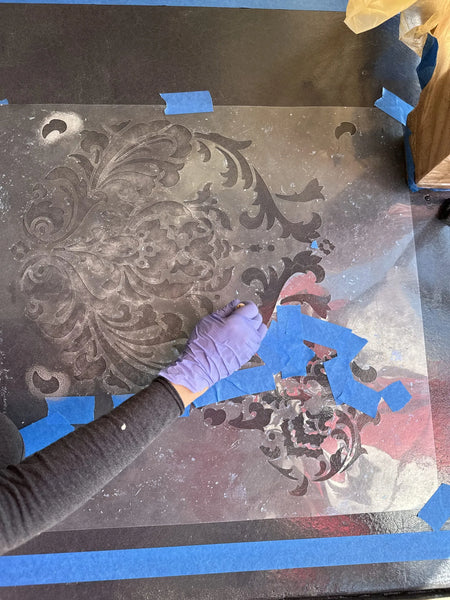
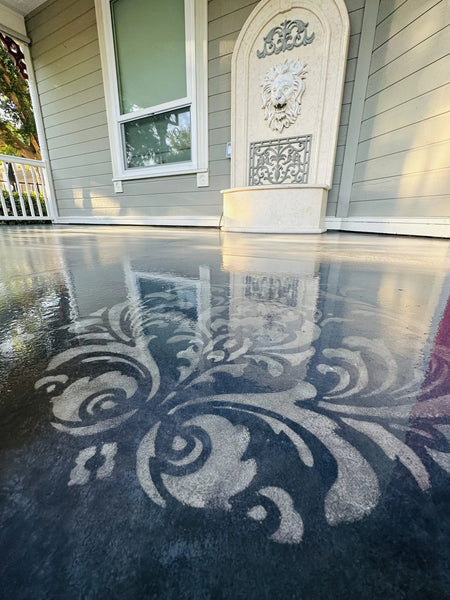
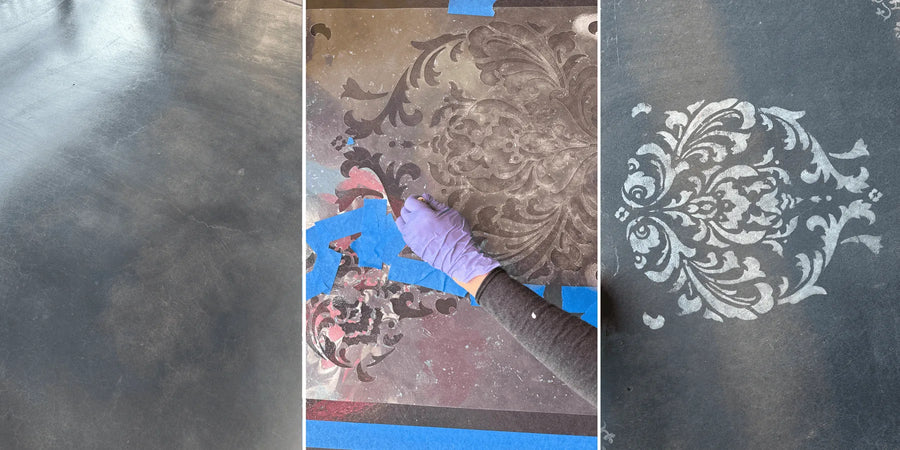
The Damask panels were painted over the sealed surface, then sealed again.
Their three tips: “1. Don’t use any applying methods other than spraying! 2. Use shoes covers while applying highlights and sealer, but don’t worry too much about small foot prints, they won’t be visible eventually. 3. Never apply sealer too soon after applying colors, there will be bubbles and you would have to redo it.”
— DIY Customer
A mismatched pour, fixed with pattern
This one started as a problem, not a design project. A concrete company poured a new section of patio and it did not match the old one. Stain evened out the color and a pebble-pattern stencil at the entry turned the repair into a feature. White acrylic paint filled the stencil over the stained base.
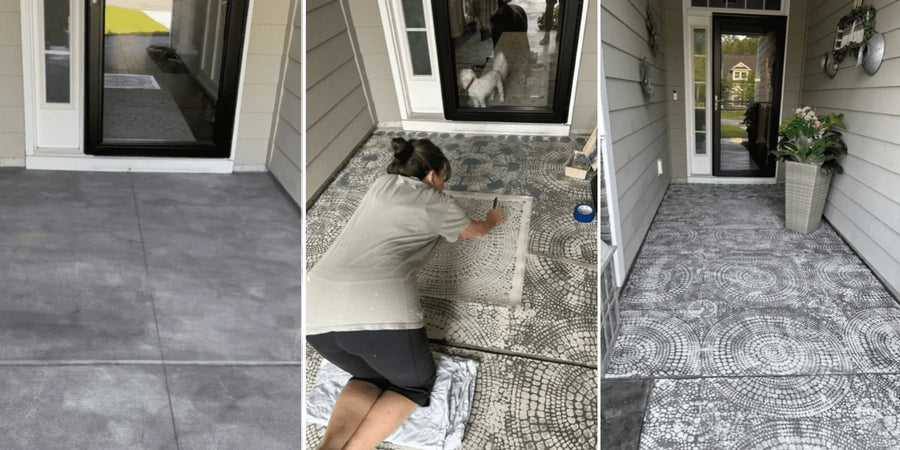
The finished porch — stained field, stenciled entry.
The warning worth reading twice: “We’d advise that you do not put on the sealer in weather that is in the high 80’s or more. Unfortunately, it got into the 90’s when we were at the end of our second coat of sealing and the next day we noticed some bubbling in a couple of areas. We were able to fix them when it got cooler.”
— DIY Customer
Faux wood plank, in tape, in a bathroom
No stencil at all on this one — the pattern is tape. The couple chose an 8 x 24 in. plank over 6 x 24 in. specifically to cut down the number of lines, chalked the layout, and laid tape trimmed to about a quarter inch. Then they ran a science experiment on tape, which is the part everyone should copy.
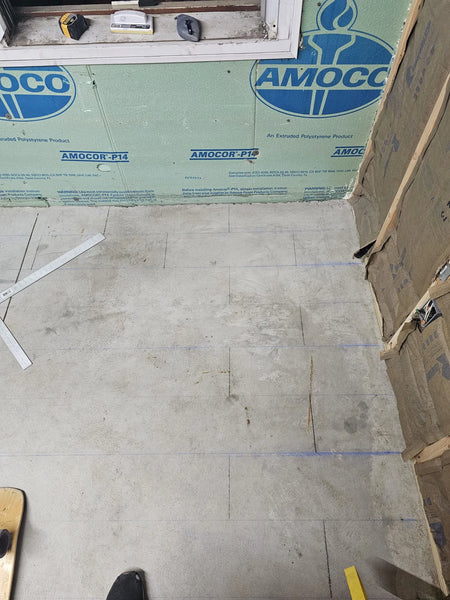
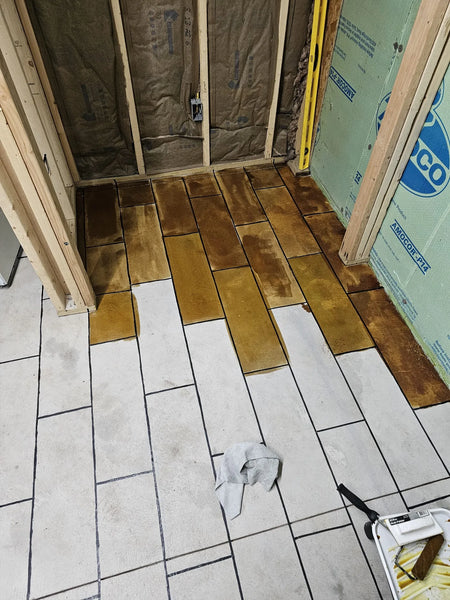
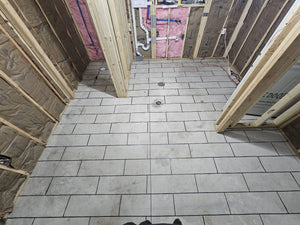
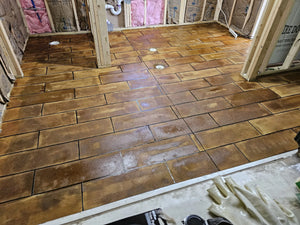
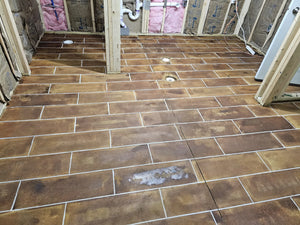
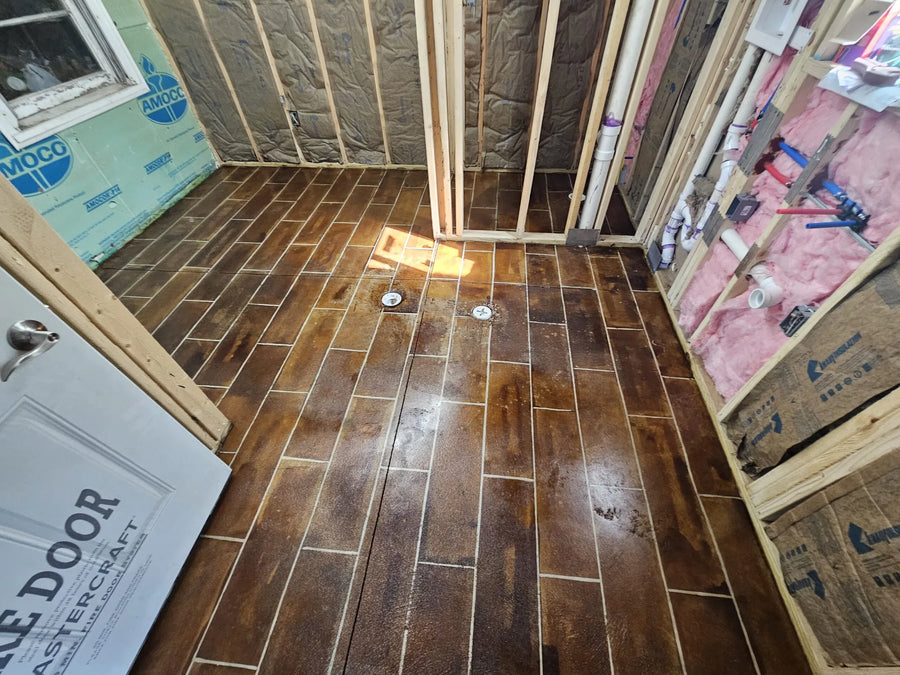
Two coats of sealer later — the grout lines left natural concrete for contrast.
Their tip: “Test test test, use a inconspicuous area to find out if you can do what you want. Take your time, and don’t wipe with straight lines, go in circles.”
— DIY Customer
Two things in there are worth pulling out. The circular wiping motion is standard practice for acid stain — straight strokes leave streaks that show up under sealer. And leaving the joint lines as bare concrete is free contrast: no second color, no second masking pass.
A traveler’s compass, traced into a sunken patio
Two EverStain™ colors sprayed as the field — Shifting Sand and Cola Buff — then the compass itself taped out and filled with three DecoGel™ colors: English Red, Coffee Brown and Black. Gel stain is the right call inside a traced design because it does not run, and this patio had drainage slope working against it.
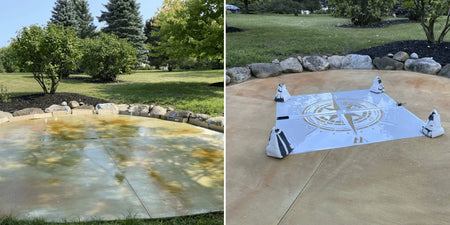
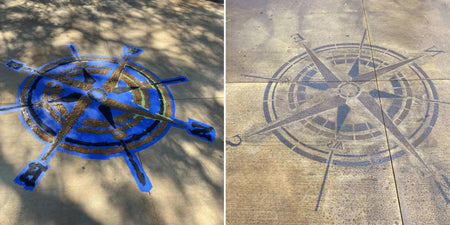
Four hard-won tips: “Be aware that outdoor concrete will have sloping for drainage, and adding too much water or stain may cause the stain to run across the surface. Some stains colors set in faster than others, and if you don’t allow for the full set up time, you may get an entirely unexpected color as a result - not a lighter one! Black deco gel and Coffee worked very well with the painter’s tape, however English Red overpowered the tape and bled. When using gallon sprayers - the ones that have a side valve to release pressure are great so you don’t get a face full of acid when you have to open the top.”
— DIY Customer
Faux flagstone, found on this blog
This customer came to faux flagstone from our own concrete patio ideas page, on a hand-troweled slick porch slab that had cured a little over a month. Coffee Brown ran down the walkway, English Red marked the borders, and Malayan Buff plus mixtures filled the stones.
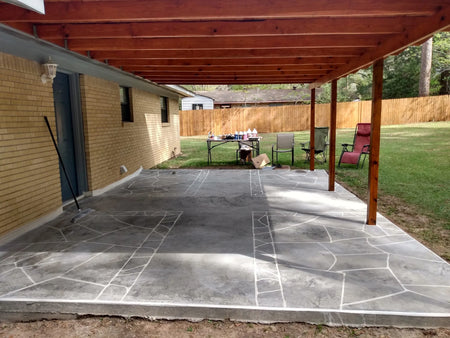
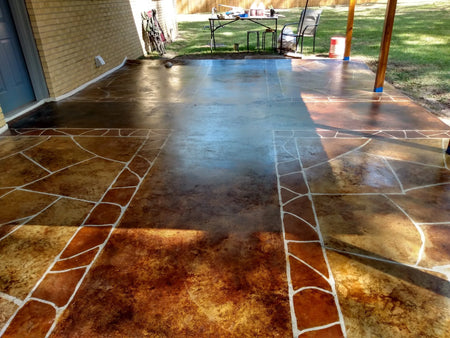
The border lesson: “Some colors (on my floor English Red) will overpower everything else losing the contrasting tones I desired for this project…note that I used a spray bottle, and yep it bled over everywhere even though I thought I was going light. Were I to do this again, I’d use a brush and LIGHTLY keep it in the borders even if multiple passes were necessary… Patience with a project of this nature pays off! Spike shoes are mandatory!”
— DIY Customer
That is the second independent report of English Red bleeding past a mask. If your design depends on a hard border in red, brush it in, keep the load light, and plan on more than one pass.
Faux flagstone over a crack that would not stay hidden
A crack ran right across this patio. Filling it did not work. Cementing over it did not work either — it still looked wrong. Instead of hiding the repair, this customer taped a flagstone pattern across the whole slab and sprayed Blackish EverStain™. Two days, no other materials than tape, water and a sprayer.
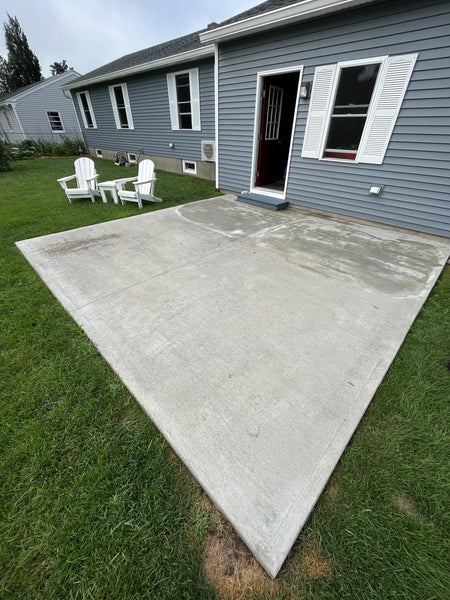
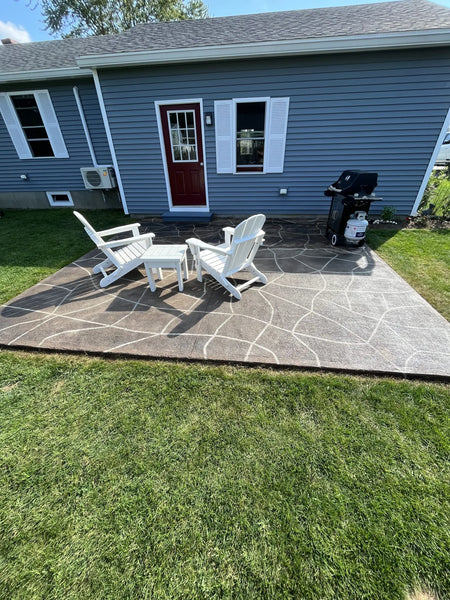
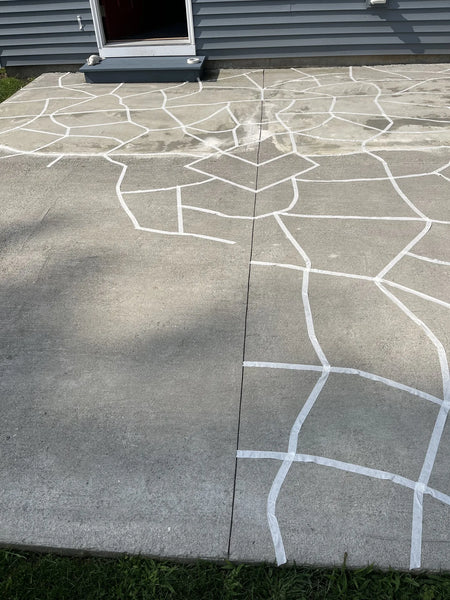
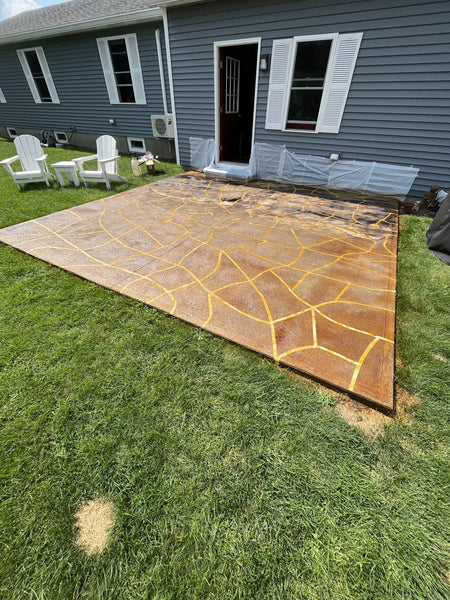
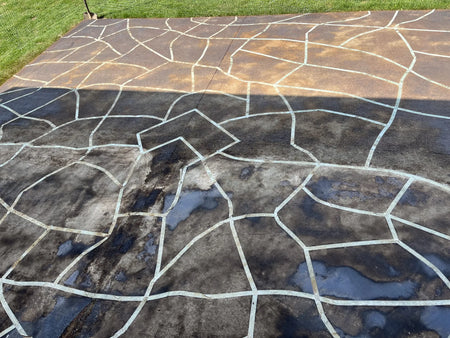
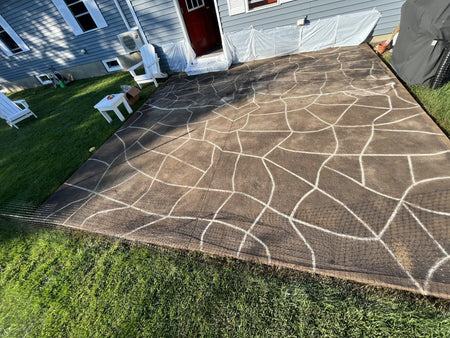
Their tip: “Using sprayer is very easy. Make sure that you tape all around. It gets everywhere!”
— DIY Customer
Worth noting how much the color moves between those last two frames. Acid stain keeps developing for hours, and it changes again at the neutralizing wash and again under sealer. Nothing you see on day one is the finished color — which is exactly why the tip further up says not to judge it before sealing.
1,200 sq. ft. of barn floor, stenciled because the floor was beyond saving
Two years of clearing thirty years of neglect got this couple to a barn floor they could finally see. It was worn and full of imperfections, and they decided that was an advantage rather than a problem — stencils and acid stain turned the flaws into part of the art. The plan for the space is venues, retreats and yoga.
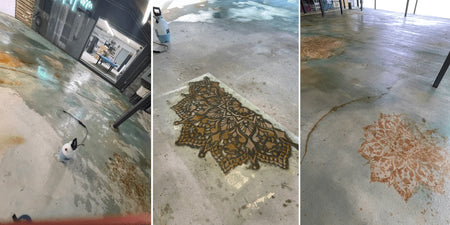
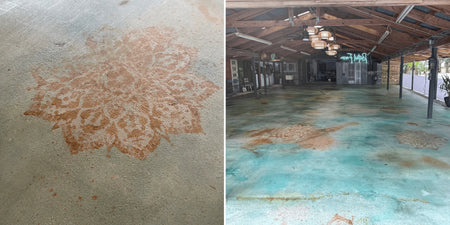
Budget warning: “We ended up using a lot more stain and sealer then first anticipated, we had to put our project on hold to order more. Keep in mind the condition of your concrete when ordering your supplies.”
— DIY Customer
That last point applies to every job on this page. Rough, porous, weathered concrete absorbs far more than a smooth slab of the same square footage. If the floor is in bad shape, buy for the absorption, not the area.
A 6 x 6 ft. carpet stencil on a screened porch
A 10 x 12 ft. screened porch addition, four colors, and a large custom carpet-and-ceiling stencil laid into the middle of the floor. The interesting decision here is what the customer left out: no stain at all inside the stencil, because bare concrete gave better contrast than a fifth color would have.
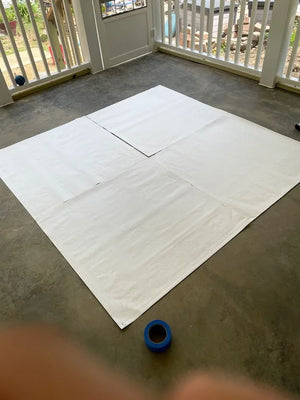
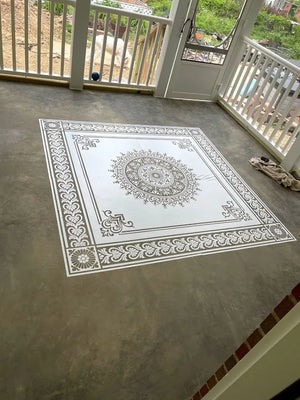
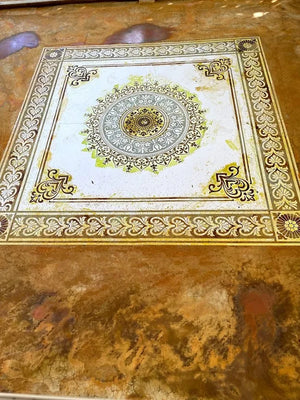
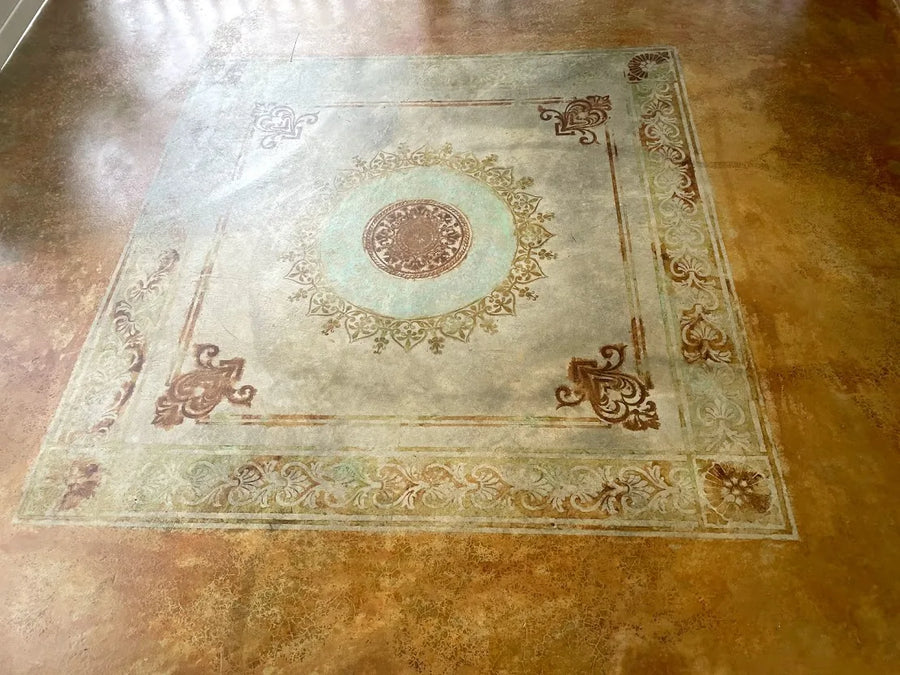
The finished floor — border sprayed, pattern sponged, center left bare.
— DIY Customer
A bird pattern, in gel stain
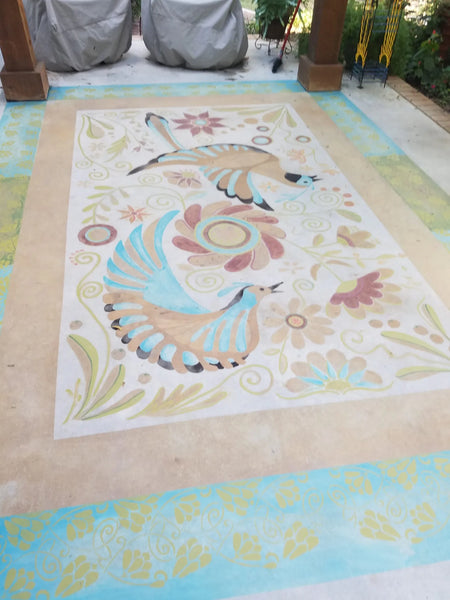
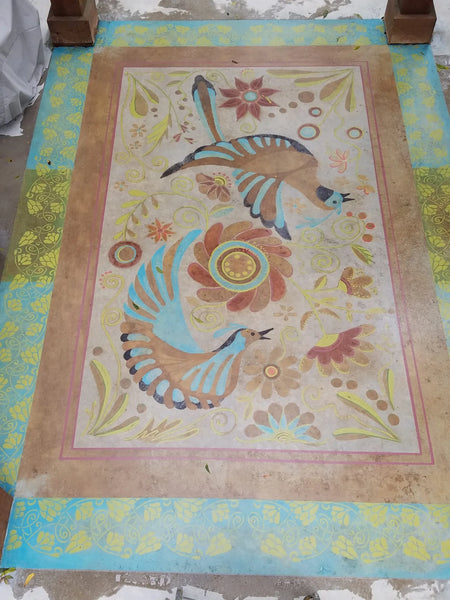
The last one is short on paperwork and long on effect: a porch floor given a bird-themed pattern in DecoGel™ colors, so the concrete reads as a rug. Gel is the sensible product for detail work like this — it stays where you put it instead of chasing the slope of the floor, which is the whole problem with liquid stain inside a fine pattern.
What all nine projects agree on
Read them together and the same handful of lessons come back:
- Test your tape on your slab. One customer tried four tapes before finding one that held a line. Do that test on an inconspicuous patch, with your color, before you mask 300 sq. ft.
- English Red is the bleeder. Two unrelated projects reported it creeping under tape and stencil while Blackish and Coffee Brown behaved. Brush it, keep the load light, expect multiple passes.
- Gel stain for detail, liquid for the field. Outdoor slabs slope for drainage; liquid stain follows the slope, gel does not.
- Sponge inside a stencil, spray the open areas. A sprayer pushes color under the edge of a cut pattern.
- Let every color reach full set-up time. Cutting it short does not give you a lighter version of the color, it gives you a different one.
- Sealer is where jobs go wrong. Too soon over damp stain, or applied in 90°F heat, and it bubbles. Both are fixable, but neither is fun.
- Do not judge it before the sealer. Everybody says this. The color you spent a week on does not show up until the first coat.
- Spiked shoes. Mandatory, in two customers’ words.
Stenciled Concrete: FAQs
What is the single most important thing to get right?
The tape. One customer tested four tapes before finding one that would hold a line without bleeding, and that is the difference between a crisp pattern and a ruined one.
Are some colors more likely to bleed under tape?
Yes — English Red specifically. Two separate projects here reported it creeping under tape and stencil when the other colors on the same floor did not.
Why does my stencil work look flat and disappointing?
Because you are judging it too early. Colors look flat until the first coat of sealer goes on. Do not seal over stain that is not dry, though, and do not seal in 90-degree heat — both bubble.
Do I need an actual stencil?
No. Two of the projects here use nothing but tape — a faux wood-plank bathroom floor in duct tape trimmed to about 1/4 in., and faux flagstone taped out freehand. Choosing an 8 x 24 in. plank over 6 x 24 in. was a deliberate decision to cut down on taping.
Can a stencil hide a crack or a mismatched pour?
That is one of the best reasons to use one. One patio here had a crack that filling and cementing both failed to hide, so the owner worked it into a faux flagstone pattern instead. Another used pattern to reconcile a new section of patio that did not match the old.
What’s Next
- Gel stain for detail and vertical work → DecoGel™ Acid Stain
- Stencil brick onto a wall instead of a floor → DIY Faux Brick Design on Concrete Walls
- Cut the pattern instead of taping it → Stained Scored Concrete: Before & After
- The method, start to finish → How to Apply Acid Stain to Concrete
- Pick the colors → Acid Stain Colors Guide · Trial Kits


