Skip to content
FREE Shipping on Trial Kits
AcquaTint

Charcoal Concrete Floors: Interior Project Gallery

Charcoal is the most widely stocked color we make, and indoors it is the one customers reach for most — a dark neutral gray that turns a bare basement slab into a floor without pretending to be anything other than concrete. Two products do the work here: 506 AcquaTint™, a water-based colored sealer that colors and seals in the same coat, and Charcoal Vibrance™ Dye, the acetone-based dye that gives the most even result of anything we sell.

This gallery covers interior floors. For patios, walkways, and driveways in Antiquing™ and Portico™, see Charcoal Concrete Stain: Outdoor Project Gallery.
Jump to
AcquaTint™ floors · Charcoal as a dye · Outdoor projects →
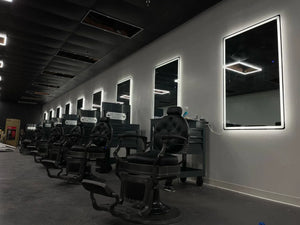
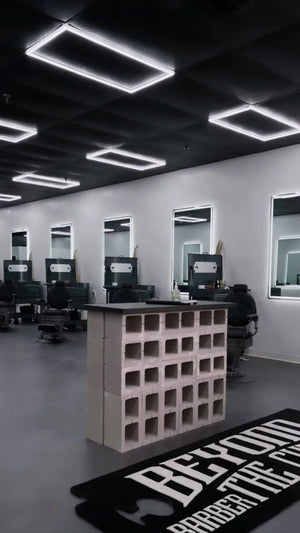
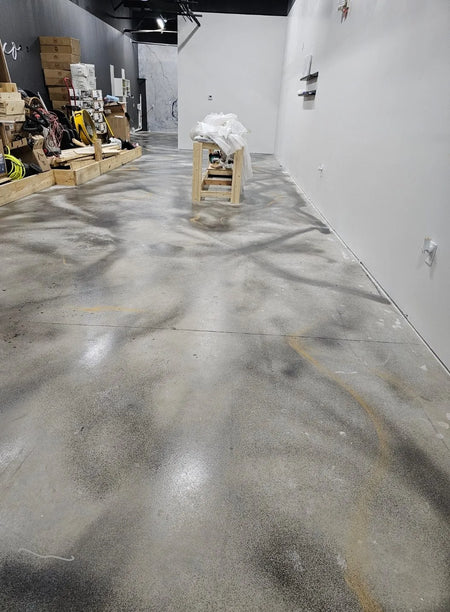
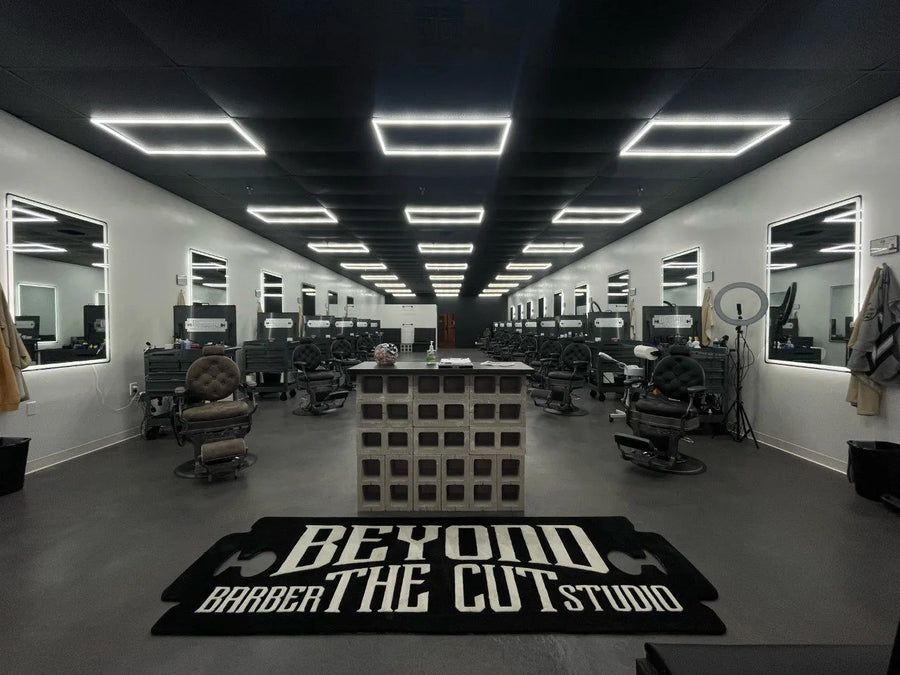
Finished, modern industrial-style barbershop floor, featuring gray and black tones, with freshly painted ceiling, creating a sleek and masculine ambiance

A barbershop floor in Charcoal AcquaTint™, where adhesive-backed carpet tiles used to be.

Shop AcquaTint™ in Charcoal →

Available in
AcquaTint™ · Vibrance™ Dye · EasyTint™ · Antiquing™ · Portico™
Note
indoors use AcquaTint™ for a colored sealer or Vibrance™ Dye for a polished floor. Light Charcoal is stocked in the same lines when you want a mid gray instead of a near-black.
Note on results: every photo here is a real Direct Colors customer project. These products are semi-transparent, so your slab's original tone and condition shape the final color — always test a small area first. Almost every project below spent more time on prep than on color, and every one of them says so.

Interior floors: Charcoal AcquaTint™

AcquaTint™ is a water-based colored sealer — low odor, no solvents, colors and seals in the same coat — which is why it dominates the basement, salon, and shop floors below. Finish it with ProWax Polish™ and it will hold a satin or gloss sheen. Almost every project here spent more time on prep than on color, and every one of them says so.

Isaiah's barbershop: from carpet to industrial concrete

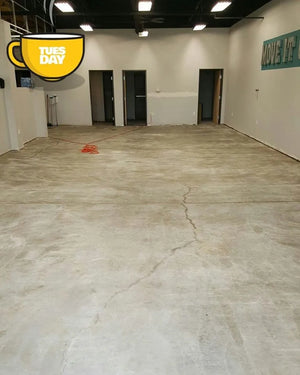
First-time floor DIYer Isaiah Medina and his wife turned a carpeted space into their barbershop. The hard part was not the color — it was the carpet adhesive, which took a rented grinder to remove properly.

Image of the original interior space, covered in adhesive carpet tiles prior to renovation
Before — adhesive-backed carpet tiles.
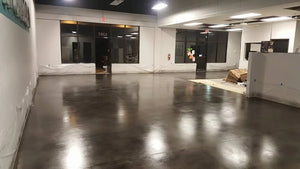
Finished, modern industrial-style barbershop floor, featuring gray and black tones, with freshly painted ceiling, creating a sleek and masculine ambiance
After — Charcoal AcquaTint™ over bare concrete.
Image showing the floor covered in mastic after removing carpet tiles, along with paint splatters from the freshly painted black ceiling and white walls
The adhesive left behind.
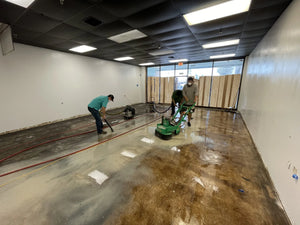
Image showing the dual disk grinder in action, methodically grinding down and cleaning the entire floor area
Grinding it off.
Finished, modern industrial-style barbershop
The finished shop floor.
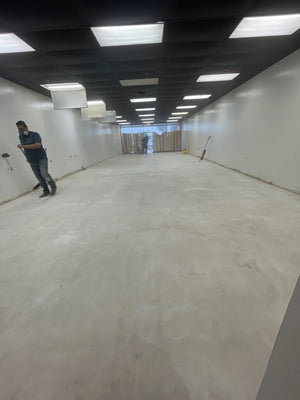
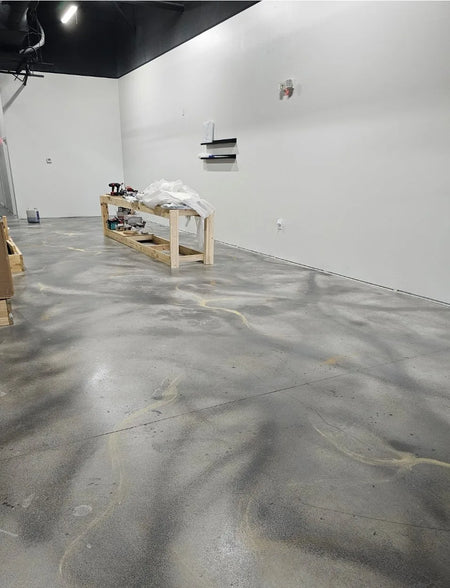
Image showing the thoroughly cleaned and fully dried concrete floor, prepped and ready for the application of Acquatint
Thoroughly cleaned and fully dried concrete floor, prepped and ready for the application of Acquatint.
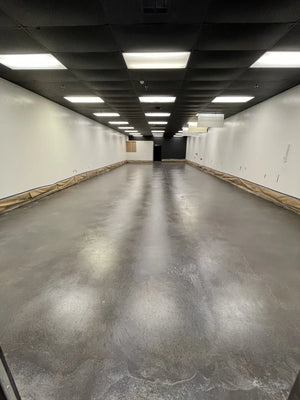
Image showing the floor after the application of the second coat of Charcoal Acquatint, as it awaits curing before the application of ProWax Polish
Floor after the application of the second coat of Charcoal Acquatint, as it awaits curing before the application of ProWax Polish.
Image showcasing the modern, industrial-styled entrance of Beyond the Cut Barbershop, a testament to the diligent DIY efforts of the owner
Modern, industrial-styled entrance of Beyond the Cut Barbershop, a testament to the diligent DIY efforts of the owner.
Their tips: “Dig deep into your pockets for that extra cash — it's worth it to grind down your floors when battling stubborn adhesive. It's a game-changer for stain and sealer penetration, ensuring a resilient bond. Be prepared for a dust storm — grinding can get messy, so use water for wet grinding to keep the dust at bay. Slow and steady wins the race. Don't rush the process… And last but not least, remember to have fun.”
— Isaiah Medina

A whole house, with an 18-inch squeegee

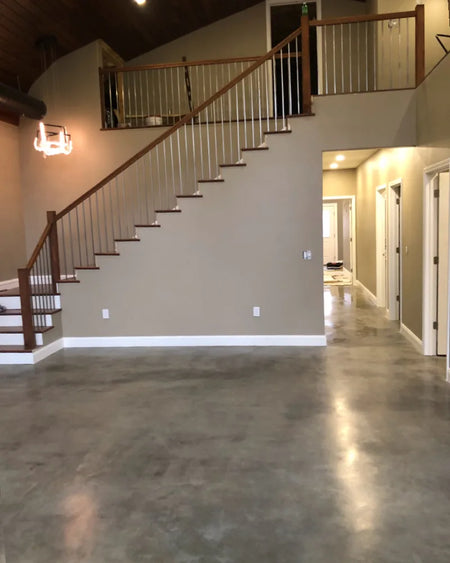
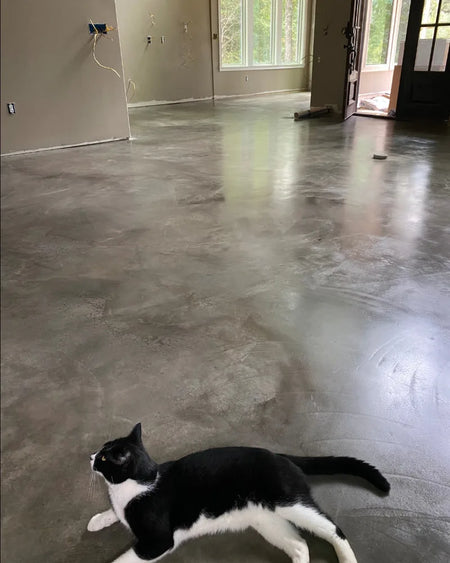
This family used their move as the moment to redo the floors. They wanted the concrete's own swirls and marbling to show through, so they needed a transparent but tough stain rather than a coating. After a lot of testing they found an 18-inch floor squeegee gave them the look — then finished in satin wax, which makes the floor appear to change color as the light moves.
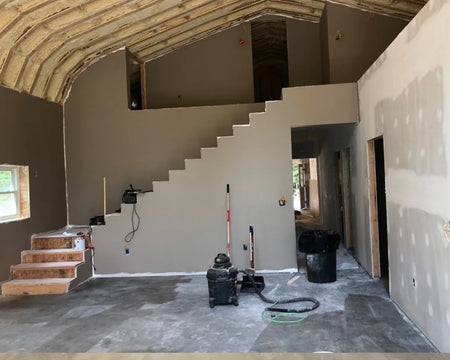
Home interior before renovation with plain concrete floor
The bare interior slab.
using a shop vac to clean the concrete floors before staining
From two rooms.
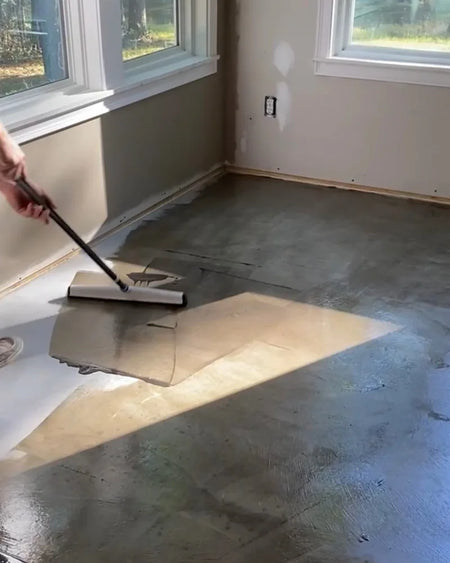
Homeowner applying Charcoal AcquaTint™ using an 18" squeegee for a swirl finish
Charcoal AcquaTint™ going down.
Finished and polished concrete floor with a transparent Charcoal AcquaTint™ finish
The finished floor.
Close-up view showcasing the swirls and marbled effect on the finished floor
The finished floor across the room.
Close-up of the finished floor with a relaxed cat enjoying its new spot
The household inspector.

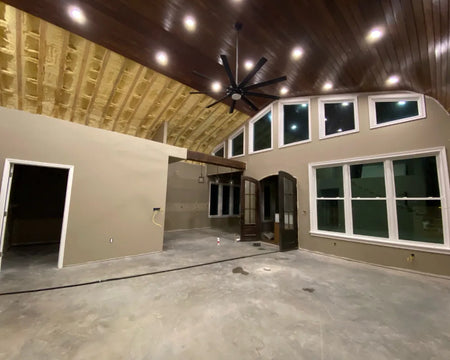
A new barndominium

Brand-new concrete, which is the easiest possible starting point: etch, then apply. This owner combined spraying and rolling — spray for coverage, roller to work it in — and finished with ProWax Polish™ Satin.
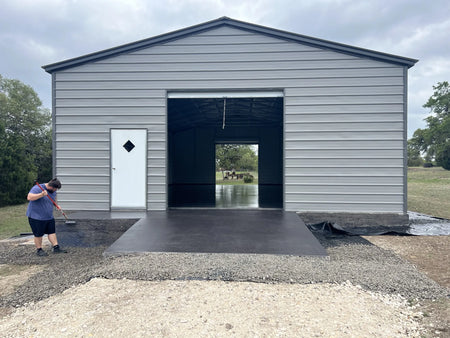
DIYer in action, rolling Charcoal AcquaTint™ onto the new concrete floor after spraying
Rolling Charcoal AcquaTint™ in after spraying.
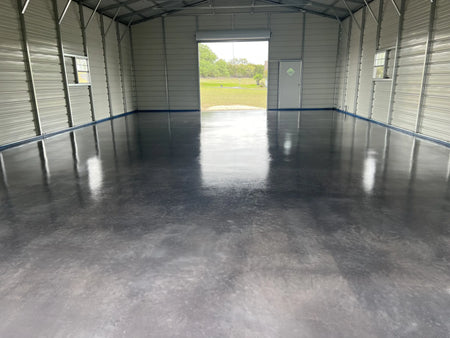
Finished modern and sleek barndominium floor showcasing the glossy effect of Charcoal AcquaTint™ with satin ProWax Polish
The finished barndominium floor.

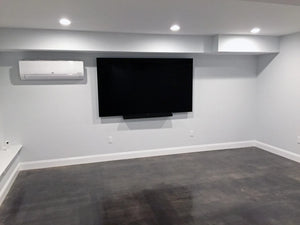
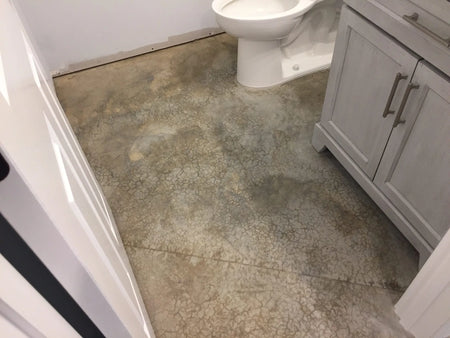
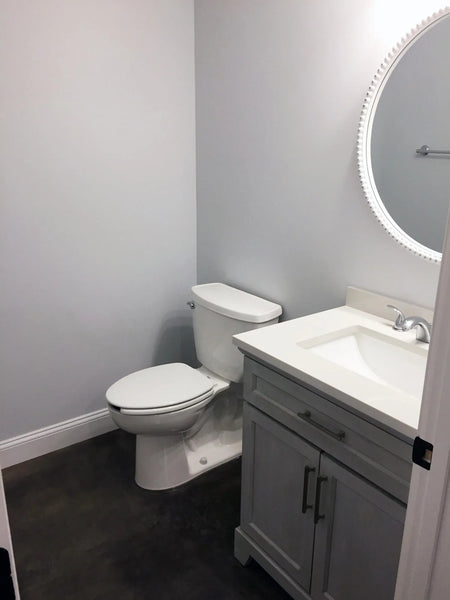
A 600 sq. ft. basement in five days

Treated, cleaned, sanded, then two rolled coats of Charcoal AcquaTint™ and two coats of ProWax Polish™ for a satin finish. The bulk of those five days was prep, not color — which is the honest ratio on almost every interior floor.
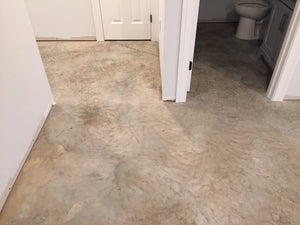
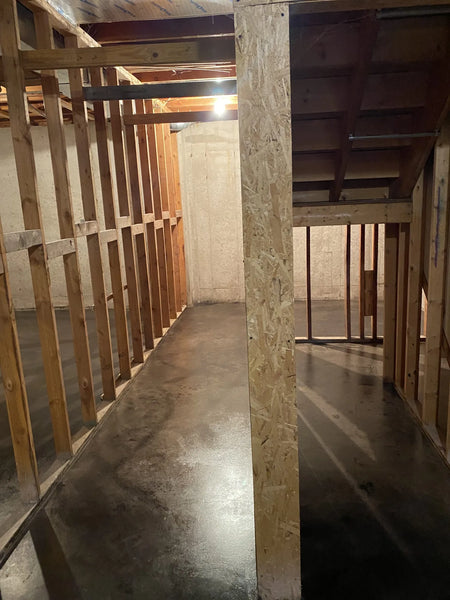
Basement floor after the etching process in preparation for the application of Charcoal AcquaTint
The hard-troweled floor after pre-treatment.
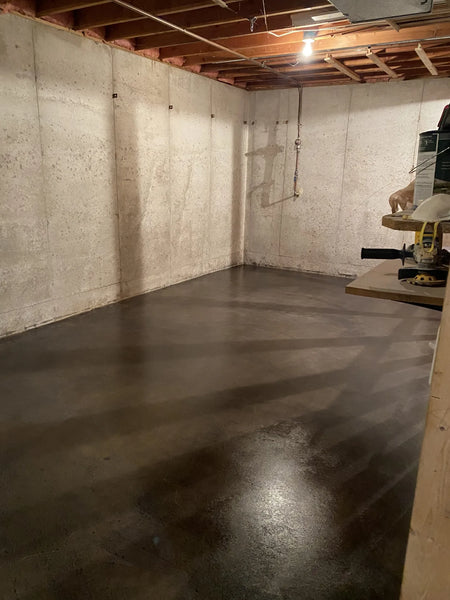
Fully transformed basement floor featuring the Charcoal AcquaTint™ sealer
The basement in Charcoal AcquaTint™.
Renovated basement room with a TV, showcasing the gleaming floor finish
The same floor waxed.
Unfinished bathroom area with bare concrete floor
Unfinished bathroom area with bare concrete floor.
The same bathroom after applying Charcoal AcquaTint™, exhibiting a sophisticated and polished look
The same bathroom after applying Charcoal AcquaTint™, exhibiting a sophisticated and polished look.

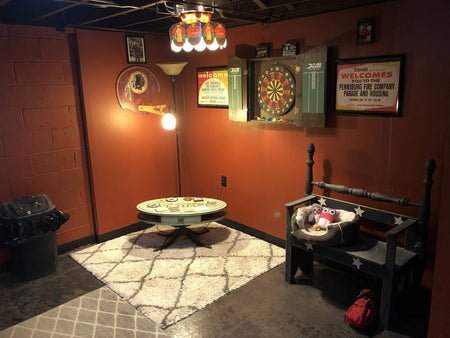
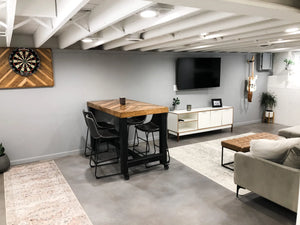
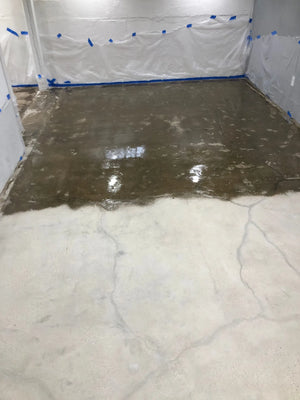
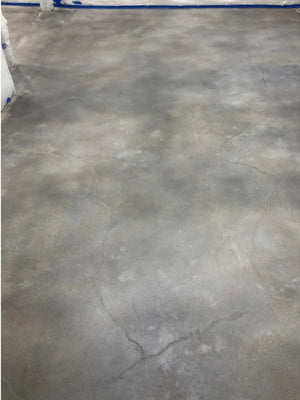
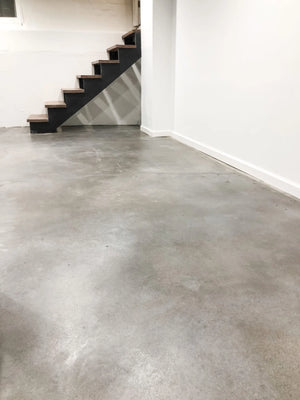
A gloomy basement turned family hangout

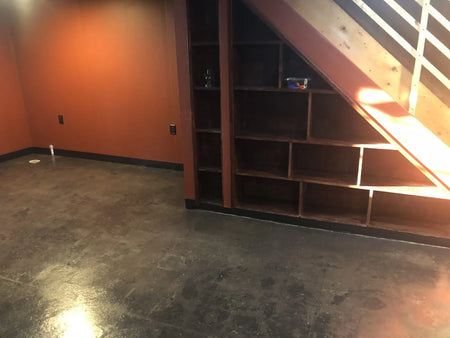
Three thin coats rather than two thick ones — the better approach with AcquaTint™, because thin coats level out and thick ones show every lap mark.
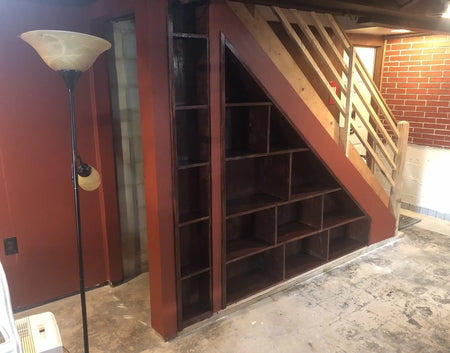
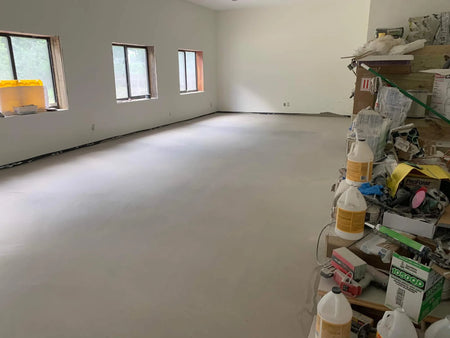
Unfinished, unpolished basement floor
Before — an unfinished, unpolished basement slab.
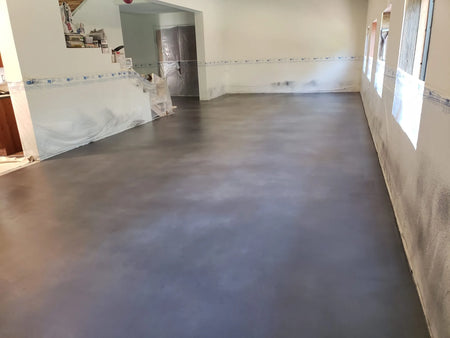
Basement floor after AcquaTint application showing improved appearance and color
After — Charcoal AcquaTint™.
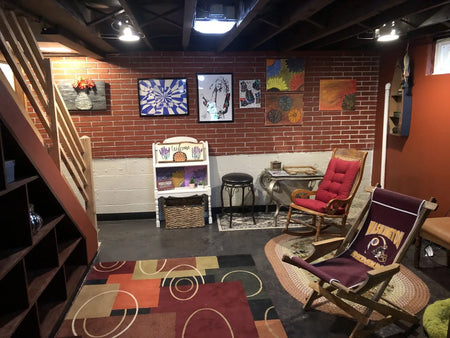
Newly revamped basement featuring a dart board and various fun posters on the walls
The finished basement as a games room.
Cozy basement living space with two chairs, artfully decorated with paintings on the walls
As a living space.

A salon floor that keeps its own blemishes

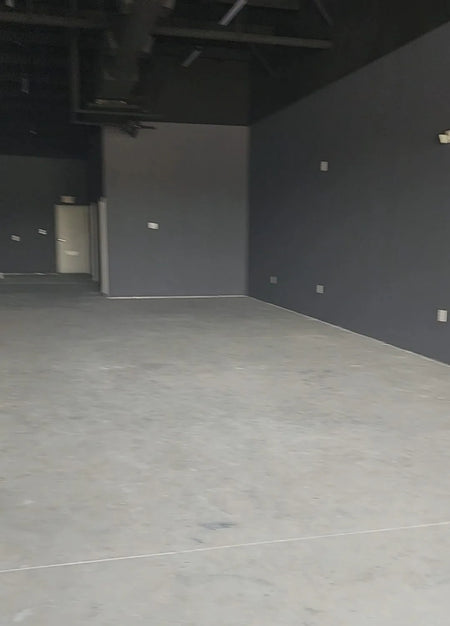
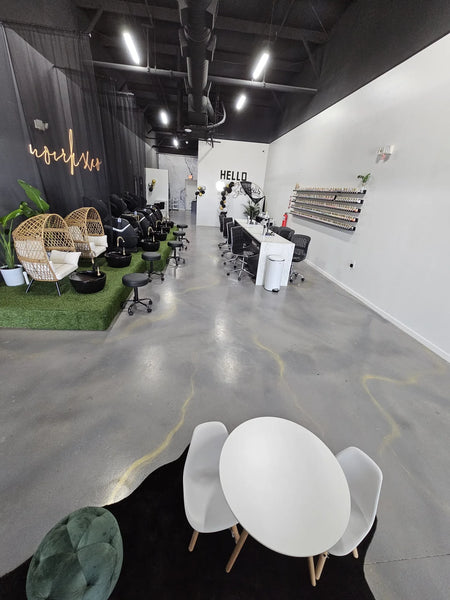
NoirLuxco Nail Studio and Spa in Katy, Texas took the opposite approach to most commercial floors: rather than hide the concrete's flaws, they made a feature of them. Charcoal AcquaTint™ swirled on by hand with Mica powder for sparkle, then Silver Gray AcquaTint™ over the top to diffuse the swirls, and ProWax Polish™ to seal it non-porous.
Unfinished concrete floor in a salon waiting for transformation
Before — an unfinished salon slab.
The finished product - a chic salon floor showcasing the synergy of Charcoal, Silver Gray and sparkling Mica highlights
After — Silver Gray over Charcoal swirls with Mica highlights.
Progression of the floor detailing with continued application of Charcoal AcquaTint and Mica
The detailing in progress.
Artistically applied swirls of Charcoal AcquaTint and Mica highlights on the concrete salon floor
The Charcoal-and-Mica swirls before the Silver Gray went over them.

An 1,800 sq. ft. basement, painted by an artist

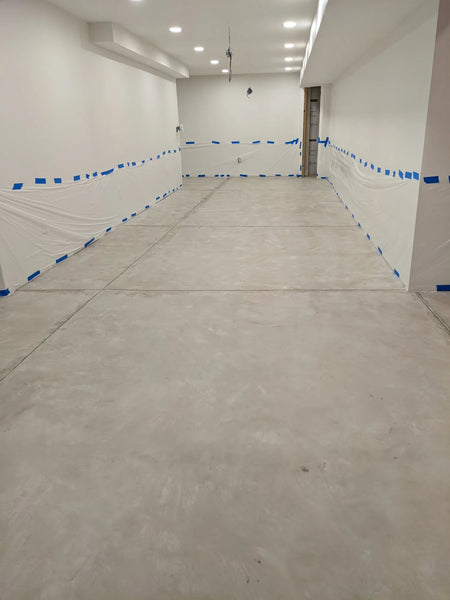
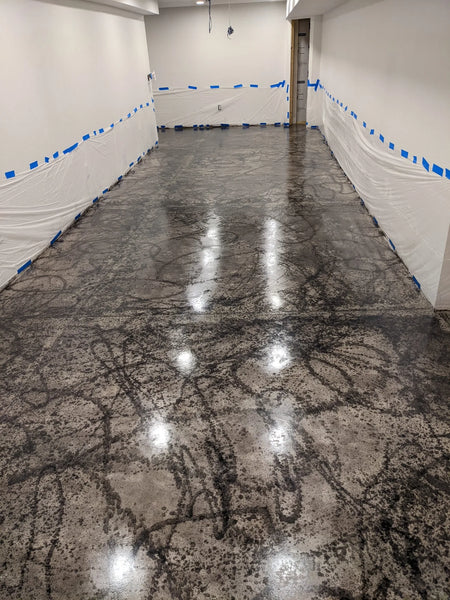
A professional artist splashed Charcoal AcquaTint™ across this basement floor and then laid a lighter gray over it. Three coats of wax later, the mottled result is unlike anything you could achieve with even application. The practical note from this one: stir AcquaTint™ often, and work in good light.
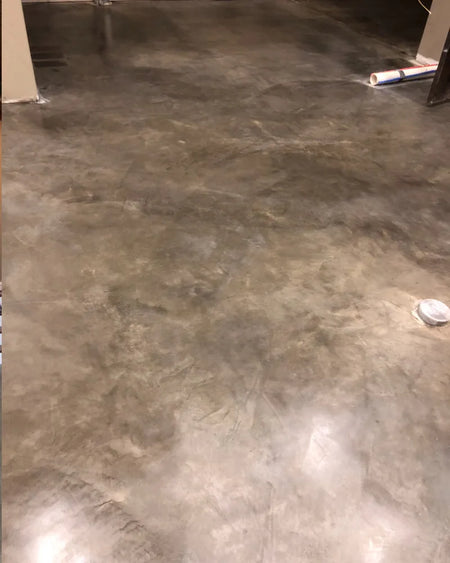
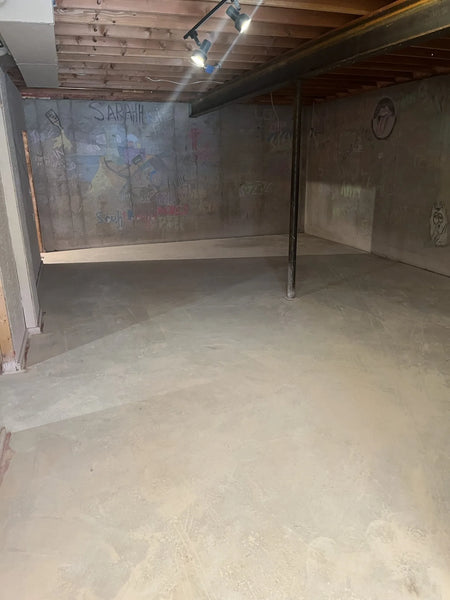
concrete basement floor
Before — a bare basement floor.
Tinted Sealer Design on Concrete Basement
After — a mottled Charcoal and gray finish.

Red floors to basement speakeasy

Garish red painted floors, weeks of learning, grinding, staining, and sealing. To get a marbled, natural look they used paint rollers for the base coats and a spray bottle for the textural nuances on top — a technique worth stealing.

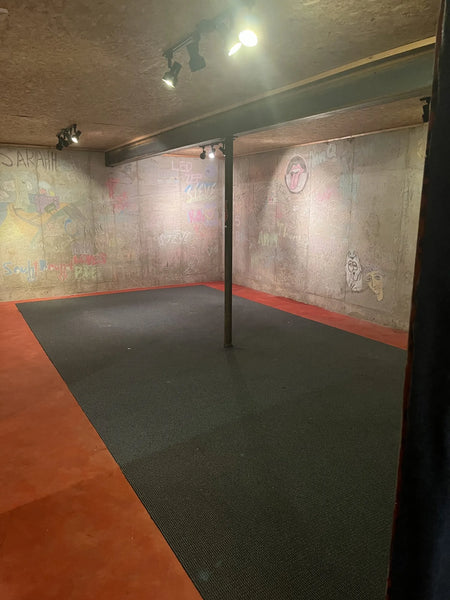
Bright red, neglected basement floor before refinishing
Before — bright red neglected basement floors.
Finished basement showcasing the marbled look of Charcoal AcquaTint
After — the marbled Charcoal AcquaTint™ finish.
Basement floor after grinding process, preparing for staining
The floor after grinding.
Alternate angle of the transformed basement floor with the natural, nuanced effect of Charcoal AcquaTint
Another angle of the finished basement.

A 40-year-old basement covered in paint drips

Etch, neutralize, then an AcquaTint™ stain-and-wax kit. It took a few passes to land the right shade — which is normal, and is why you build the color up rather than trying to hit it in one coat.
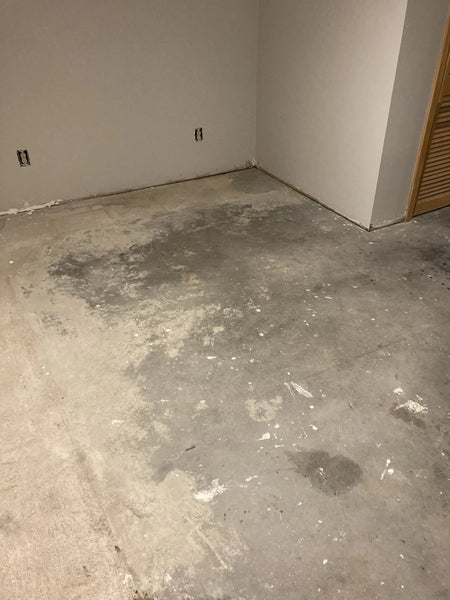
Poorly maintained basement floor, covered in paint drips and stains
Before — 40 years of paint drips and stains.
Revamped basement floor after treatment with Charcoal AcquaTint
After — Charcoal AcquaTint™.

A whole house in Light Charcoal AcquaTint™

Light Charcoal indoors, finished with satin ProWax Polish™. Two useful failures reported here: the citrus etch did not do enough on this slab and a buffer machine was needed instead, and the sprayer clogged overnight. Either clean the sprayer thoroughly at the end of each day or start the next day with a new one.
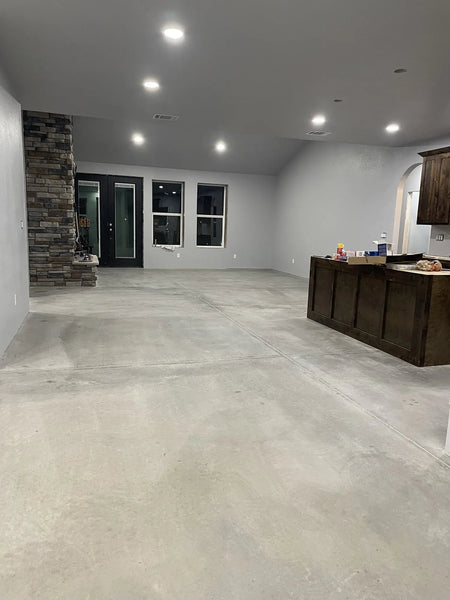
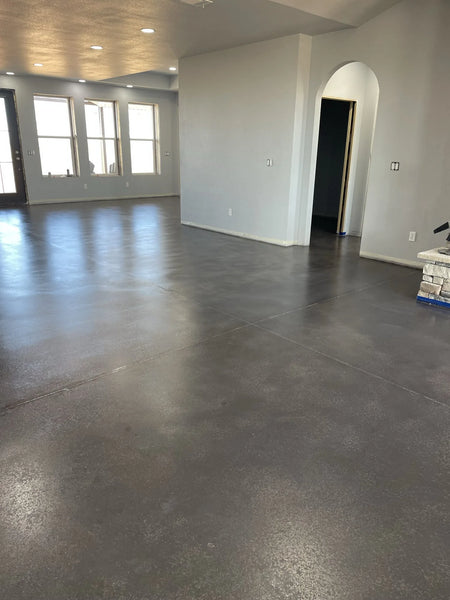
Overcoming challenges - swapping Citrus etching for a buffing machine to achieve a smooth concrete surface
Before — the bare living-room slab.
Gleaming concrete floor showcasing the result of two coats of light charcoal Aquatint and two layers of ProWax Polish gloss finish
After — two coats of Light Charcoal AcquaTint™ with ProWax.

A 2,300 sq. ft. basement, safe for an asthmatic family member

A three-year-old slab that had been painted black, pressure-washed, sanded, and polished before staining. The reason AcquaTint™ was chosen here matters: it is low-odor and water-based, which made it usable in a house with someone who has asthma. Finished glossy, as a children's play area.
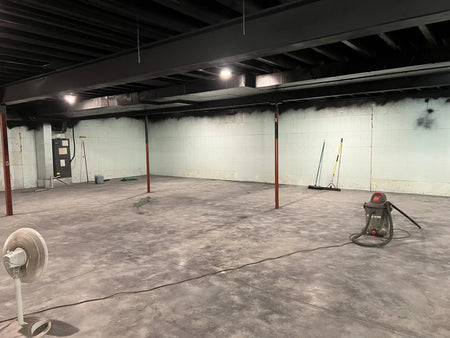
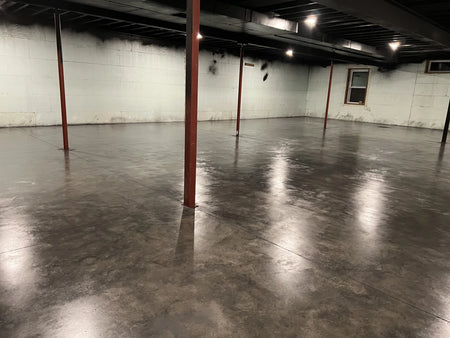
An image showing a concrete basement floor prepped for AquaTint application, having undergone power washing, stripping, and sanding
Before — the stripped and sanded basement slab.
Image of the basement floor after the second coat of AquaTint
After — the second coat of Light Charcoal AcquaTint™.

Charcoal as a dye

Vibrance™ Dye is the acetone-based option and the most predictable color we sell — it penetrates rather than sitting on the surface, so it gives the most even result of anything here. It is the right choice on a polished or ground floor, and it is almost always used as part of a blend: Charcoal with Stormy Gray and White is the combination you will see over and over below.

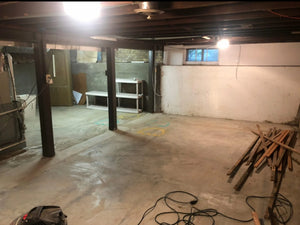
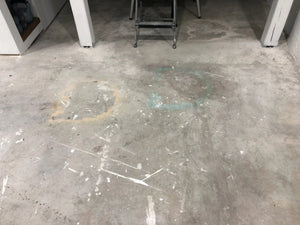
An extremely unlevel 1,600 sq. ft. floor

The most heroic prep job in this gallery. The owner ground down about 400 sq. ft. by an inch, raised another 300 sq. ft. by an inch, poured 180 bags of floor leveler — and came up 16 bags short, leaving a cold joint they then turned into a deliberate vein. Ground to 200 grit, then dyed in Stormy Gray, White, and Charcoal.
Colors
Stormy Gray + White + Charcoal Vibrance™ Dye
Prep
Grind, level (180 bags), grind to 200 grit, blend the cold joint
Size
1,600 sq. ft.
Time
5 days
Concrete basement
The floor before leveling.
Concrete FLoor Not Ready for Staining
From two angles.
Refinished Concrete Basement with Vibrance Dye
The finished dyed surface.
AcquaSeal base applicatiopn
AcquaSeal base application.
Stained Concrete Basement Floor
Stained Concrete Basement Floor.
Faux polished concrete floor in Stormy Gray, White, Charcoal Vibrance Dye, creating a modern and sleek look
Faux polished concrete floor in Stormy Gray, White, Charcoal Vibrance Dye, creating a modern and sleek look.
“Headache!!! I had an extremely unlevel floor… Then I had to pour 180 bags of the floor leveler and of course I was 16 bags short. This meant I was left with a cold joint for the final finish which I tried to accentuate and create a vein out of… Finally it was time to stain and stormy gray, white, and charcoal created one beautiful stained floor.”
Tips: “If possible to test your stain application and top coating method exactly as you plan to beforehand, do it… Also, with the Vibrance dye, don't be dumb like me and step in it right after you spray it — I didn't enjoy working those prints out. Finally, I may have applied too much stain, but I found when applying my finish some dye would come up, especially when brushing the edges. If possible, roll the edges when cutting in.”
— DIY Customer

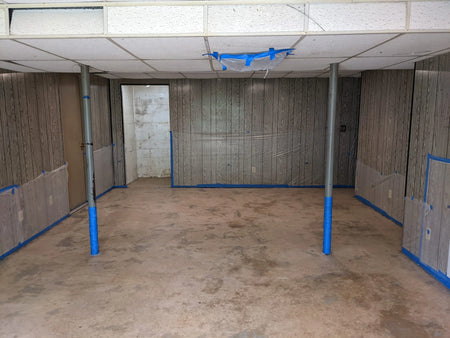
A 400 sq. ft. garage in three days

Stormy Gray with Charcoal and White, sprayed with an acetone-rated sprayer. Two specific pieces of advice from this one.
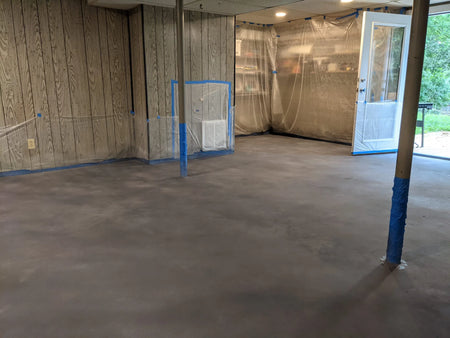
Concrete basement floor
Before — a bare garage and basement slab.
Stormy Gray, White & Charcoal Vibrance Dye on Concrete Basement Floor
After — Stormy Gray, White, and Charcoal dye.
Tips: “I would suggest waiting the complete 6 hours for dye to cure. It's better to be safe, and let it completely cure. Also, the Stormy Gray will come out a little darker at first — you will need to spray some in a bucket at first to get that out. Otherwise, it will look like a charcoal color.”
— DIY Customer

That second tip is genuinely useful and applies to any dye: the first pull out of a fresh sprayer runs concentrated. Spray a little into a bucket before you touch the floor.

Industrial-chic living space

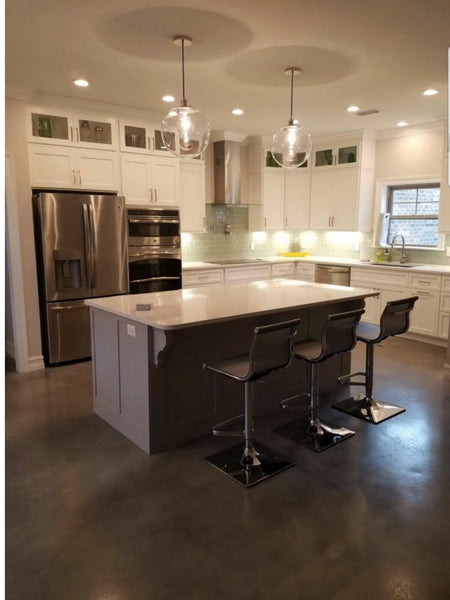
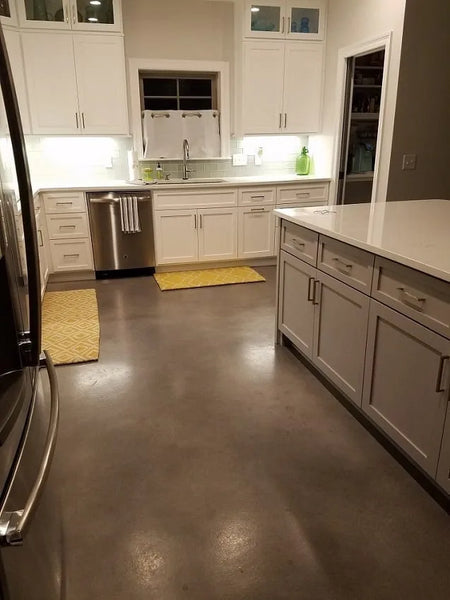
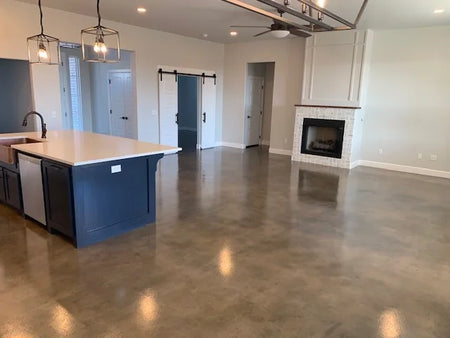
Stormy Gray and Charcoal dye run through a whole house — kitchen, living area, bathroom, and mud room, all the same floor. This is what dye is for: continuous color across rooms with no visible transitions.
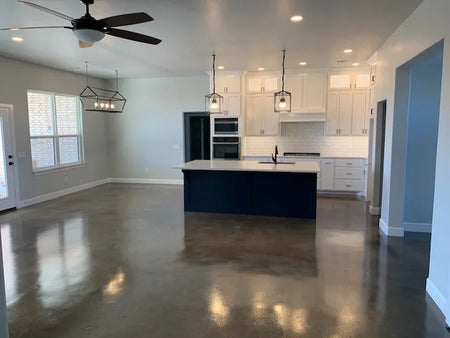
Concrete kitchen floor showcasing a modern mix of Stormy Gray, Driftwood, and Charcoal Vibrance Dye
Concrete kitchen floor showcasing a modern mix of Stormy Gray, Driftwood, and Charcoal Vibrance Dye.
Living room concrete floor beautifully stained with Stormy Gray, Driftwood, and Charcoal Vibrance Dye
Living room concrete floor beautifully stained with Stormy Gray, Driftwood, and Charcoal Vibrance Dye.
Concrete bathroom floor dyed with a blend of Stormy Gray, Driftwood, and Charcoal Vibrance Dye
The same dye in the bathroom.
Foyer featuring a concrete floor dyed with an elegant combination of Stormy Gray, Driftwood, and Charcoal Vibrance Dye
The mud room.

Dye over an overlay

Here the dye went onto a fresh overlay rather than onto the original slab — a good route when the existing concrete is too damaged to stain directly but you still want dye's evenness.
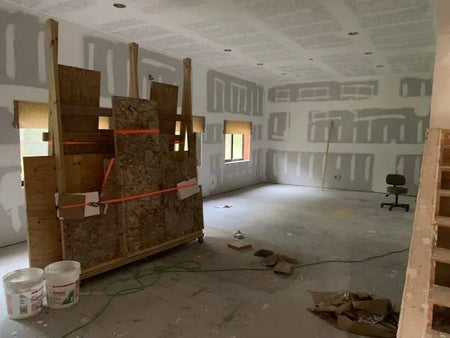
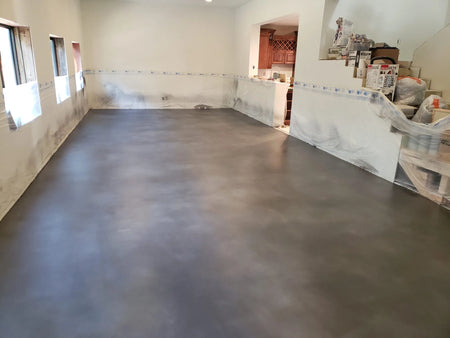
Damaged concrete floor
Before — the original floor.
Charcoal, stormy gray and white Vibrance dye
After — Charcoal, Stormy Gray, and White dye.
Leveled concrete floor
The overlay before dyeing.
Charcoal, stormy gray and white Vibrance dye
The finished floor.

A patio, dyed to match the house

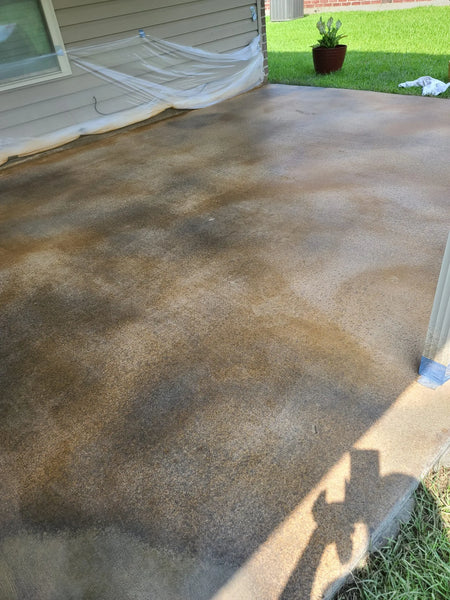
Dye outdoors is less common than Antiquing™, but this owner was tired of a plain concrete patio that always looked dirty and wanted to match the colors of the house. Khaki, Goldenrod, and Charcoal, scored, with a stencil design.
Colors
Khaki + Goldenrod + Charcoal Vibrance™ Dye
Finish
Solvent-based acrylic satin sealer
Size
225 sq. ft.
Time
3 days
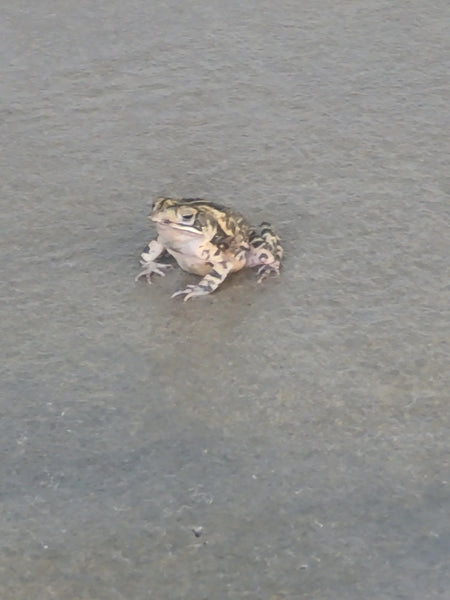
Concrete Patio Floor Frog
Before — plain patio concrete, and the resident amphibian.
The finished patio, featuring a vibrant blend of Khaki, Goldenrod, and Charcoal dyes
After — Khaki, Goldenrod, and Charcoal dye with a scored design.
“I was basically tired of looking at my patio — regular concrete, it would appear dirty… I wanted to keep the colors close to my home colors. I love the outcome.”
Tip: “Just do it and have fun — you can't go wrong!”
— DIY Customer

More Charcoal dye floors

A few more, including a kitchen that adds Light Slate to the Charcoal-and-Stormy-Gray blend, and a wall — dye works vertically too.

Blend of Stormy Gray, White, and Charcoal Vibrance Dye to create a sleek, modern concrete floor
Blend of Stormy Gray, White, and Charcoal Vibrance Dye to create a sleek, modern concrete floor.
Sleek, modern concrete floor showcasing a blend of Stormy Gray, White, and Charcoal Vibrance Dye
Sleek, modern concrete floor showcasing a blend of Stormy Gray, White, and Charcoal Vibrance Dye.
Commercial Concrete Floor
A floor before staining.
Gray Tinted Satin Acrylic Sealer and Charcoal Concrete Dye
The same floor in Charcoal dye.
Quick Affordable Gray Concrete Flooring
Charcoal dye under a gray tinted sealer.
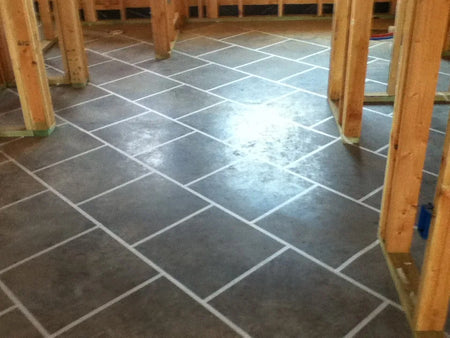
Charcoal & Aztec Brown Scored Concrete Floor
A residential floor blending a brown dye with Charcoal.
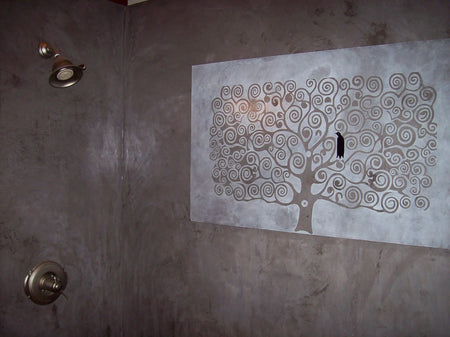
Charcoal & White Stenciled Concrete Shower Wall
A Charcoal-and-White dyed wall.

More gray-family dye work → Gray Concrete Stain Gallery.


Shop AcquaTint™ in Charcoal →

What's Next

  1. Outdoor Charcoal projects → Charcoal Concrete Stain
  2. Grays → Gray Gallery · White Gallery
  3. Darker still → Black Gallery
  4. How to do it → How to Stain a Basement Floor · Basement Floor Ideas
  5. Applying stain outdoors → How to Apply Outdoor Concrete Stain
  6. Choosing a sealer → The Best Concrete Sealer
  7. Prefer a reactive, mottled look? → Acid Stain Colors Guide
  8. Shop → AcquaTint™ · Vibrance™ Dye · EasyTint™ · Trial Kits

Direct Colors. Shawnee, OK. Manufacturing the full decorative concrete system since 1997.

Previous Post Next Post

Before You Checkout

EasyTint™ and OxiGrip™ are not compatible when used together directly. For slip resistance, use EasyTint™ as the color layer and apply OxiGrip™ only with a clear solvent based sealer as the topcoat.

Before You Checkout

AcquaTint™ and OxiGrip™ are not compatible when used together directly. If you need added slip resistance, apply AcquaTint™ as your color layer first, then use OxiGrip™ in a clear topcoat with AcquaSeal™ or HydroCryl™.