Skip to content
FREE Shipping on Trial Kits
AcquaTint

Gray Concrete Floors: Interior Project Gallery

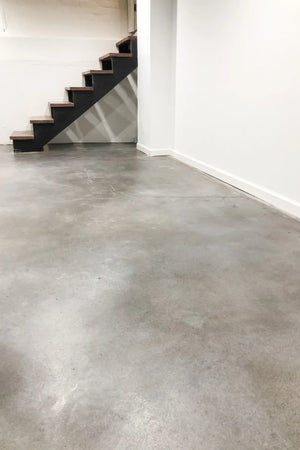
Gray is the default for an interior concrete floor, and for good reason — it is what the slab already almost is, so it reads as the material rather than as a coating. Two products do this work indoors. Vibrance™ Dye gives the most even, predictable color and is the choice on a ground or polished floor; its grays are Stormy Gray and Light Slate, almost always blended with White and Charcoal. AcquaTint™ is a water-based colored sealer that colors and seals at once, in Gray, Silver Gray, Light Charcoal, and Charcoal.

For patios, pool decks, and driveways, see Gray Concrete Stain: Outdoor Project Gallery.
Jump to
Stormy Gray & the dyes · Silver Gray & AcquaTint™ · Outdoor projects →
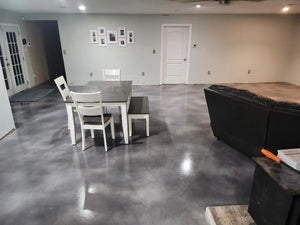
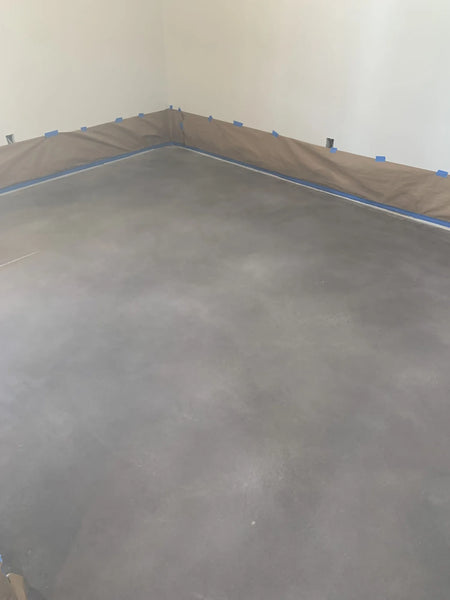
After Applying AcquaSeal Satin Sealer - Concrete floor with a protective coating of satin sealer, enhancing the vibrancy of the dye

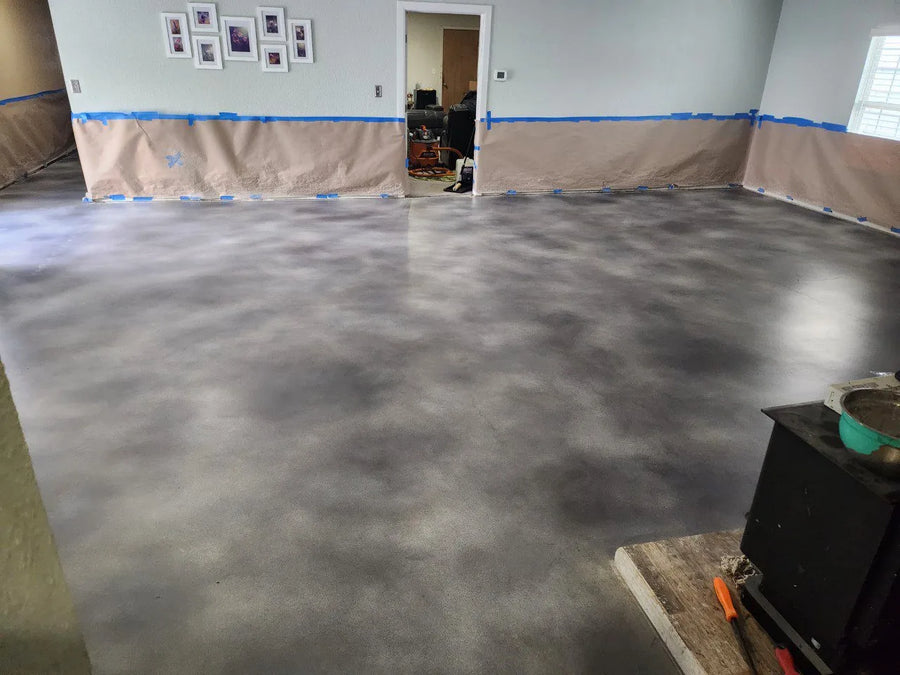
A living-room floor in Charcoal, Stormy Gray, and White Vibrance™ Dye, sealed.

Shop Vibrance™ Dye in Stormy Gray →

Available in
Vibrance™ Dye · AcquaTint™ · EasyTint™ · Antiquing™ · Portico™
Note
indoors, dye for evenness and AcquaTint™ for color-plus-sealer. Stormy Gray and Light Slate are dye-only names; Silver Gray and Light Charcoal are AcquaTint™ names.
Note on results: every photo here is a real Direct Colors customer project. These products are semi-transparent, so your concrete's original tone and condition shape the final color — always test a small area before you commit to the whole surface.

Stormy Gray and the dyes

Stormy Gray is our most popular interior gray, and it is almost never used alone. The combination that appears again and again below is Stormy Gray + White + Charcoal — the white opens it up, the charcoal gives it depth, and the Stormy Gray holds the middle. One warning that comes straight from a customer: Stormy Gray sprays darker on the first pull, so run a little into a bucket before you touch the floor or your first pass will read as charcoal.

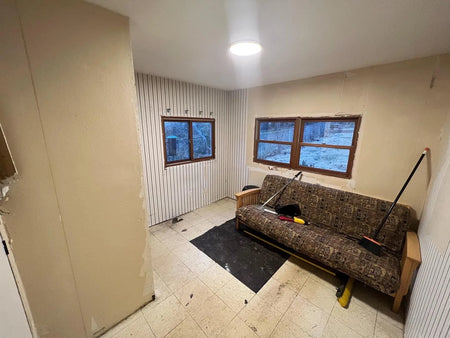
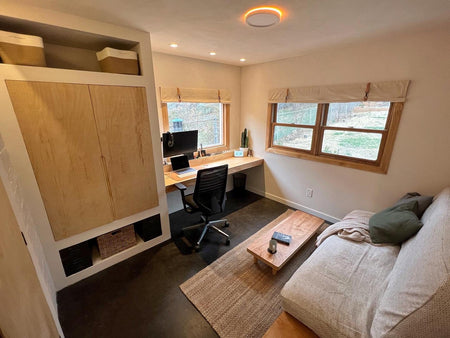
A guest bedroom, out from under the linoleum

Old linoleum scraped up, the slab ground, patched, and cleaned back to bare concrete, then dyed in Charcoal and Stormy Gray. Note the sponge in the third photo — sponging rather than spraying is how you get the soft, cloudy variation here.
DIYer using a floor scraper to remove old linoleum tile and mastic from a concrete floor
Before — old vinyl over the bedroom slab.
Fully furnished guest bedroom showcasing a beautifully dyed concrete floor
After — Charcoal and Stormy Gray Vibrance™ Dye.
DIYer grinding the concrete floor with an angle grinder and diamond pad and filling cracks with a concrete patching compound
Before — the bare, patched slab.
Concrete floor showcasing a sophisticated blend of Stormy Gray and Charcoal Vibrance Dye after the final coat
After — the finished bedroom floor.
Concrete floor showing the depth and variation in color after a second coat of Charcoal Vibrance Dye applied with a sponge
Applying the Charcoal by sponge.
Final look of a concrete floor gleaming with a matte finish after the application of Behr Concrete Sealer
The finished floor in matte.

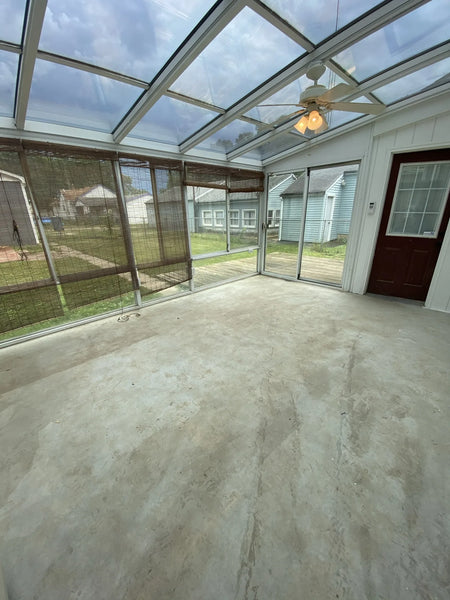
A sunroom that had gone dusty

A dull concrete sunroom floor turned into a dining area with Stormy Gray dye and sealer. Small room, one color, and it reportedly draws more compliments than anything else in the house.
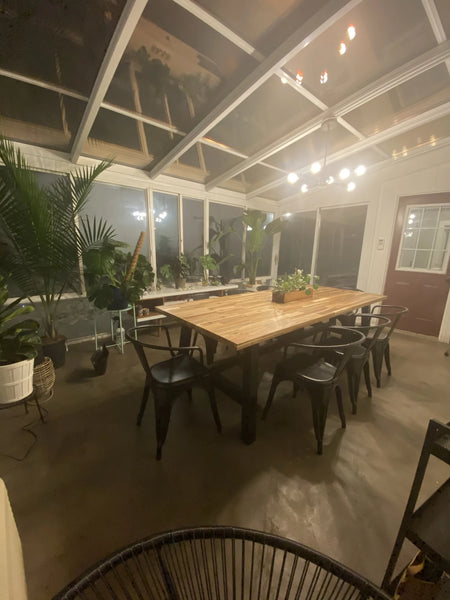
Unfinished sunroom concrete floor
Before — a dusty, plain sunroom slab.
Sunroom concrete floor transformed with Stormy Gray Vibrance acetone dye stain
After — Stormy Gray Vibrance™ Dye.

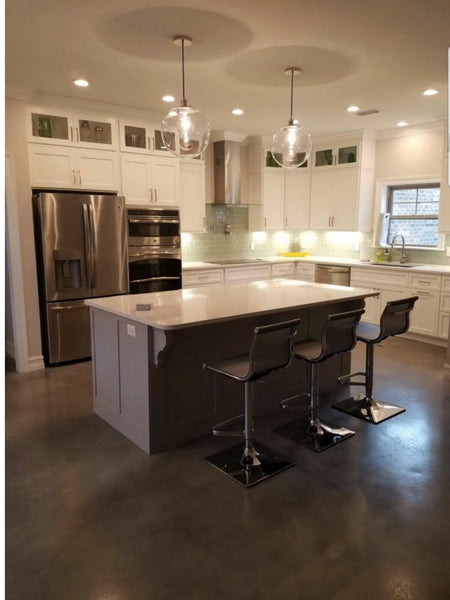
A modern kitchen in four grays

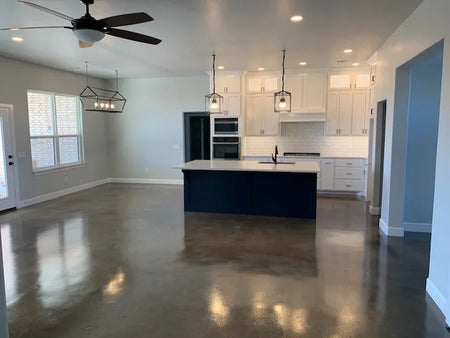
Stormy Gray, White, Charcoal, and Light Slate, mottled. Four grays sounds excessive until you see it against white cabinets — the variation is what keeps a large pale kitchen from feeling clinical.
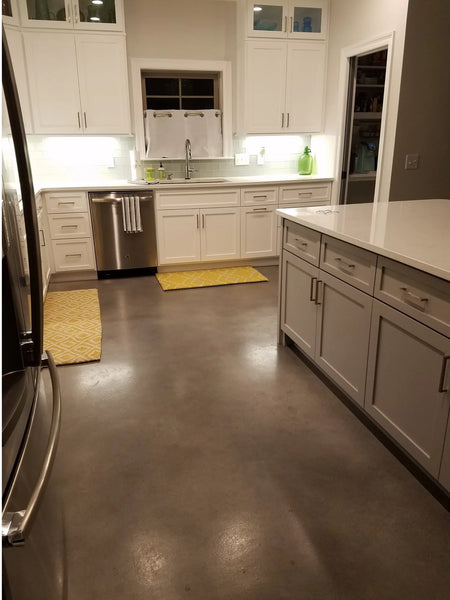
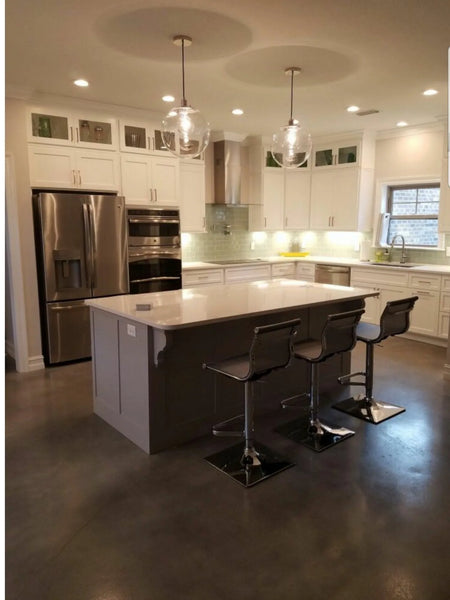
Stormy Gray, White, Charcoal & Light Slate Concrete Dye Stained Kitchen Floor
Stormy Gray, White, Charcoal & Light Slate Concrete Dye Stained Kitchen Floor.
Stormy Gray, White, Charcoal & Light Slate Vibrance Dye Stained Kitchen Floor
Stormy Gray, White, Charcoal & Light Slate Vibrance Dye Stained Kitchen Floor.

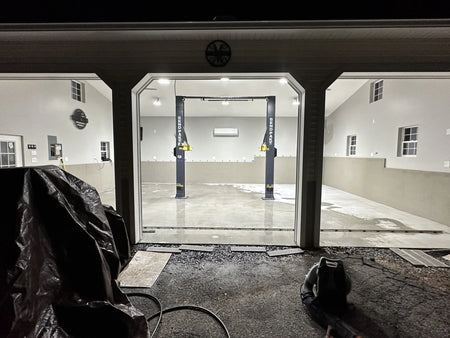
Two garages

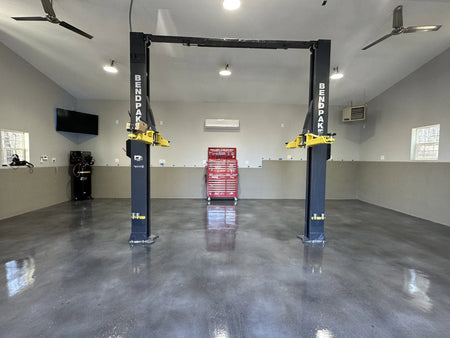
Garages are where dye is at its most practical: it will not chip like a coating, and with the right clear coat over it, it takes tires. The first of these is a mottled Stormy Gray, White, and Black. The second is the more instructive one.
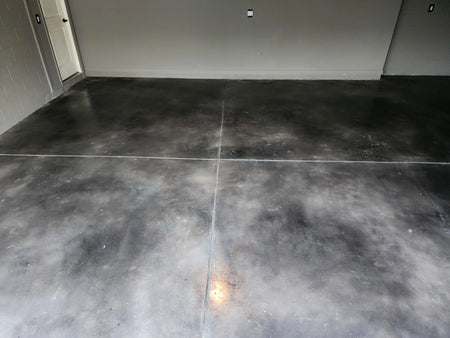
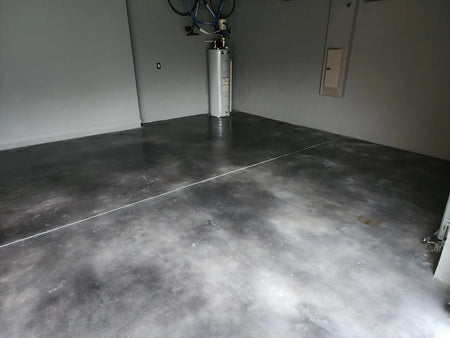
Garage space with a faux polished concrete floor using Black, Stormy Gray, and White Vibrance Dye
Garage space with a faux polished concrete floor using Black, Stormy Gray, and White Vibrance Dye.
Garage space with a faux polished concrete floor using Black, Stormy Gray, and White Vibrance Dye
Garage space with a faux polished concrete floor using Black, Stormy Gray, and White Vibrance Dye.
Colors
Charcoal + Stormy Gray + White Vibrance™ Dye
Prep
Rented concrete grinder, then pressure wash
Repair
Patch-Rx™ Concrete Repair
Top coat
Polyaspartic clear, for garage duty
Size
1,000 sq. ft.
Time
3 days
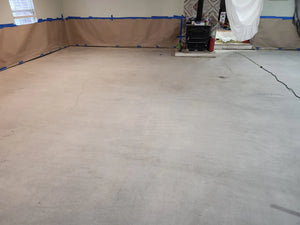
New concrete garage floor prepped for dye application
Before — a bare new garage slab.
A striking transformation of a plain concrete garage floor into a unique, eye-catching surface using Vibrance concrete dye in charcoal, stormy gray, and white shades
After — Charcoal, Stormy Gray, and White dye under polyaspartic.
“Was looking to finish my new concrete garage floor with something other than flakes and paint… I rented a concrete grinder to prep floor for dye. Spraying the three colors of dye was a very easy process. Topped the floor with a polyaspartic clear coat so floor would be suitable for intended garage use. I can't be any happier with the results. All my neighbors and friends can't believe I did this myself.”
Tips: “Take your time and prepare floor accordingly. I used grinder, then pressure washed concrete. Let concrete dry before applying product. And please use a good acetone-approved sprayer.”
— DIY Customer

That last line is not optional. Vibrance™ Dye is acetone-based and will destroy the seals and gaskets in an ordinary pump sprayer.

Carpet up, concrete down

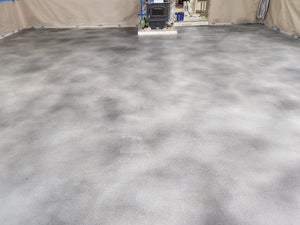
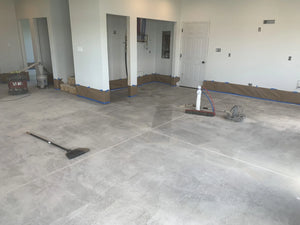
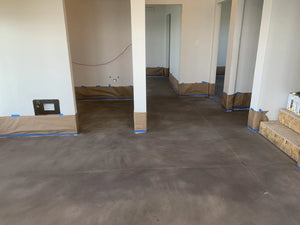
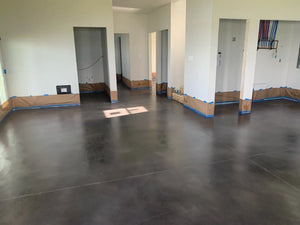
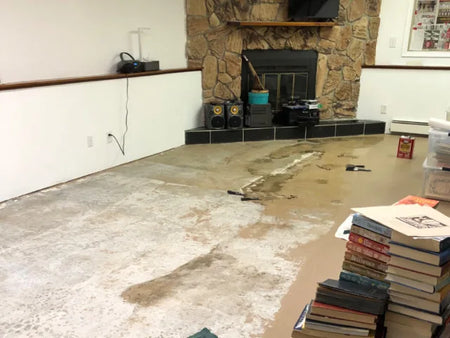
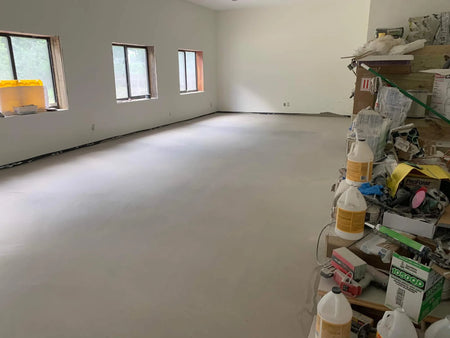
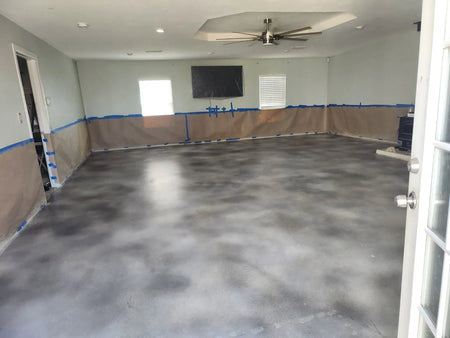
A living room taken back to the slab — carpet out, glue ground off, polished, then White, Stormy Gray, and Charcoal. The middle photographs are the useful ones: this floor looked like a mess right up until the sealer went on.
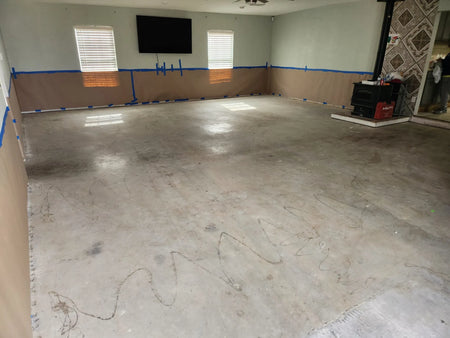
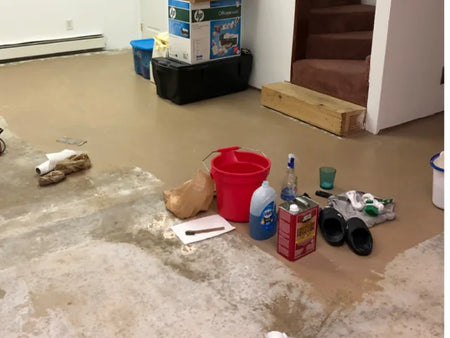
Cleaning - Concrete floor covered in residual carpet glue, creating a textured and uneven surface
Before — carpet glue across the living-room slab.
polished concrete floor post ProWax polish application
After — sealed and finished.
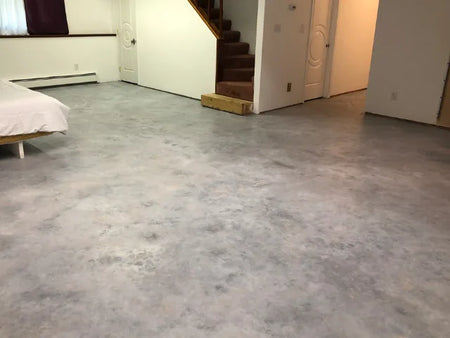
After Cleaning - Smooth, clean concrete floor, free of carpet glue and ready for dye application
After Cleaning - Smooth, clean concrete floor, free of carpet glue and ready for dye application.
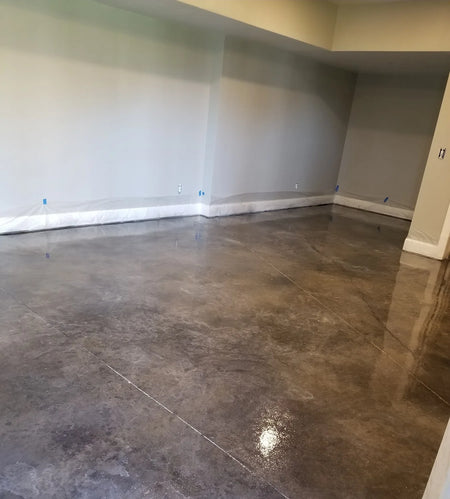
After ProWax Polish - A shiny, fully furnished room showcasing the final result of the concrete floor transformation, reflecting the light beautifully
After ProWax Polish - A shiny, fully furnished room showcasing the final result of the concrete floor transformation, reflecting the light beautifully.
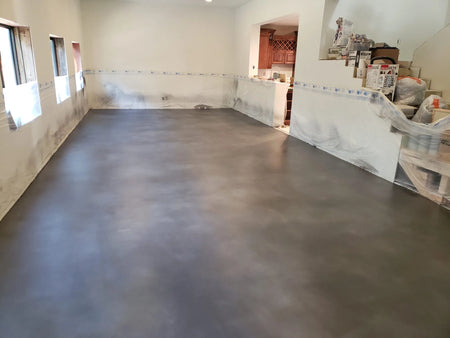
After Applying Vibrance Dye - Concrete floor freshly coated in hues of White, Stormy Grey, and Charcoal, showing a beautiful marbled effect
After Applying Vibrance Dye - Concrete floor freshly coated in hues of White, Stormy Grey, and Charcoal, showing a beautiful marbled effect.

After Applying AcquaSeal Satin Sealer - Concrete floor with a protective coating of satin sealer, enhancing the vibrancy of the dye

The first sealer coat, where the color finally comes together.

A cabin floor

Stormy Gray with Charcoal and a touch of White, sprayed in layers. Patching and leveling came first — the damaged areas had to be dealt with before any color, because dye will not fill anything.
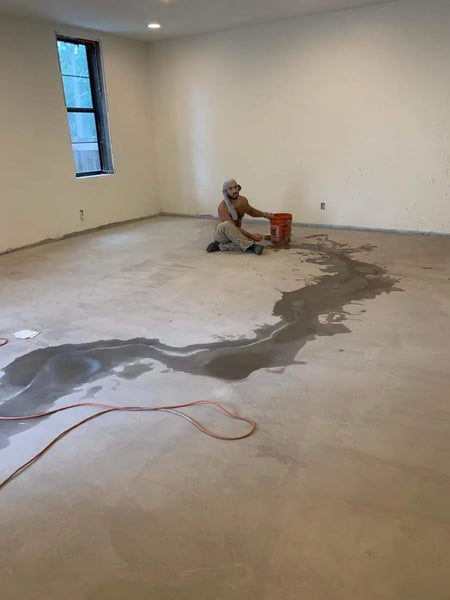
patching and leveling damaged concrete floors
Patching and leveling damaged concrete floors.
Concrete floor after additional spraying, with dominant white hues blending into charcoal Vibrance Dye
Concrete floor after additional spraying, with dominant white hues blending into charcoal Vibrance Dye.
Freshly ground concrete floor of a cabin with a broom laid across, indicating recent cleaning
Post-grinding cleanup.
Cabin concrete floor showing the initial coat of Stormy Gray Vibrance Dye
The first coat of Stormy Gray.
Finished cabin concrete floor, showcasing the rich blend of Vibrance dyes
The finished cabin floor.

A 100-year-old basement

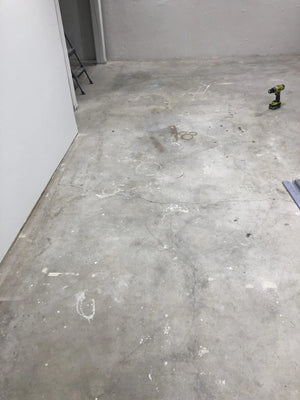
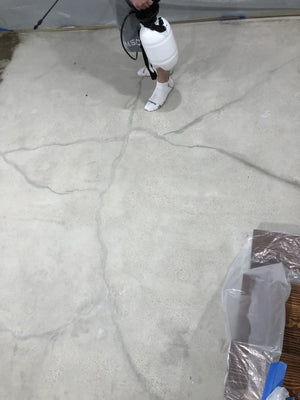
Old stains, spray paint, and overspray across a century-old slab. Rented walk-behind grinder for the field, hand-held angle grinder for the corners, hairline cracks patched with a hardware-store cement mix, then mopped three times. The color went on in sequence — solvent satin sealer first as a base, then two coats of White, then Stormy Gray, then Charcoal for dimension, then two more coats of sealer.
Basement Concrete Basement
Before — old stains.
After grinding and patching up cracks
Overspray. After grinding.
Stained Concrete Basement Floor
Patching. And the finished floor.
Their tips: test your sprayer before you start; do not skimp on prep; keep a bucket and rag on hand for drips and clogs; wait about an hour and a half for the dye to be ready before spraying; and respect the drying times between coats. “Our biggest issue was with sprayer malfunctions, but don't let that deter you!”
— DIY Customer
Concrete Basement
Concrete Basement.
Stormy Gray, Light Slate & White Vibrance Dye on Concrete Basement
Stormy Gray, Light Slate & White Vibrance Dye on Concrete Basement.
Concrete Basement
And a third.
Stormy Gray, Light Slate & White Vibrance Dye on Concrete Basement
Same three colors.

Condos, and dye across a whole floorplan

What dye does that nothing else does: run one continuous floor through every room with no thresholds and no visible transitions. These are Stormy Gray with Charcoal and Driftwood, sealed gloss and polished.
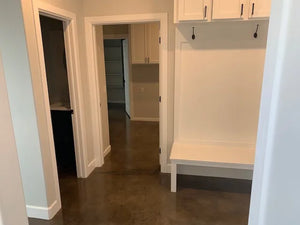
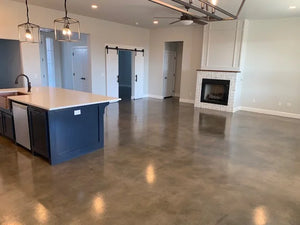
Stormy Gray and Charcoal Vibrant Dye Sealed with Water-Based Acrylic Sealer and Floor Wax
Stormy Gray and Charcoal Vibrant Dye Sealed with Water-Based Acrylic Sealer and Floor Wax.
Stormy Gray and Charcoal Vibrant Dye Sealed with Water-Based Acrylic Sealer and Floor Wax
Stormy Gray and Charcoal Vibrant Dye Sealed with Water-Based Acrylic Sealer and Floor Wax.
Stormy Gray and Charcoal Vibrant Dye Sealed with Water-Based Acrylic Sealer and Floor Wax
Stormy Gray and Charcoal Vibrant Dye Sealed with Water-Based Acrylic Sealer and Floor Wax.
Stormy Gray and Charcoal Vibrant Dye Sealed with Water-Based Acrylic Sealer and Floor Wax
Stormy Gray and Charcoal Vibrant Dye Sealed with Water-Based Acrylic Sealer and Floor Wax.
Dye Stained Concrete Living Room Floor
Dye Stained Concrete Living Room Floor.
Leveled concrete floor
Before — a bare interior slab.
concrete dye stained leveled floor
After — Charcoal and Stormy Gray dye.
Stormy Gray and Driftwood Vibrance Dye on Concrete Floor
A living floor in Stormy Gray with a warm brown dye.
Blend of Stormy Gray, White, and Charcoal Vibrance Dye to create a sleek, modern concrete floor
A four-gray kitchen floor.

Countertops and tables

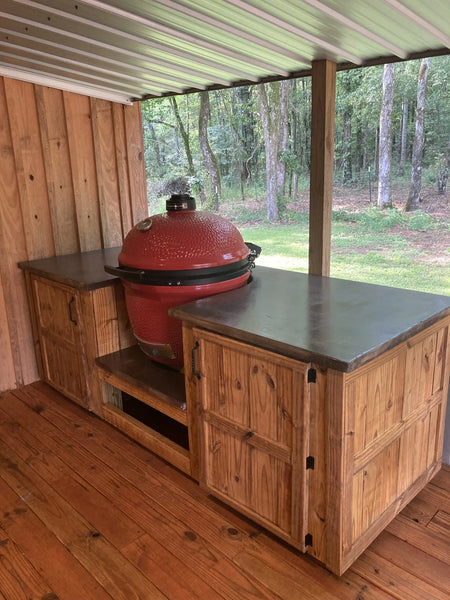
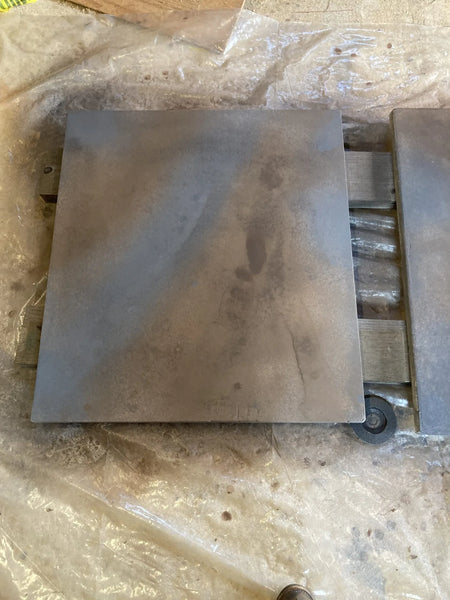
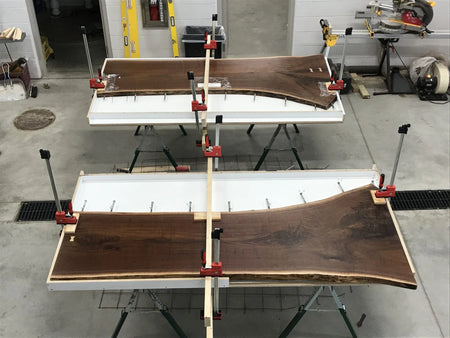
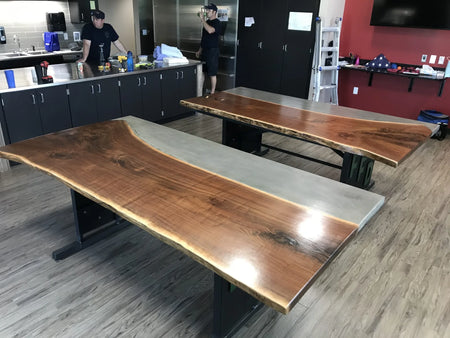
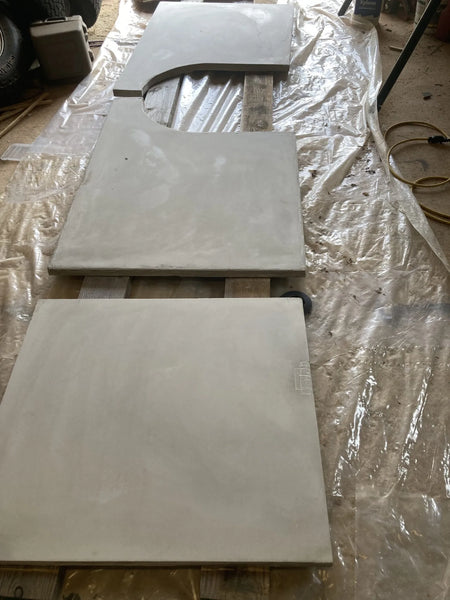
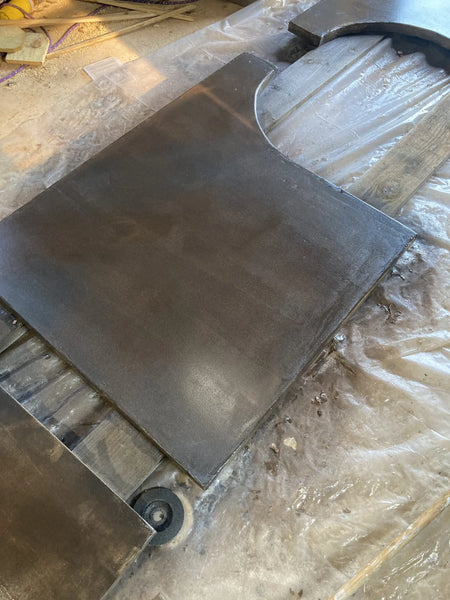
Dye is not only for floors. These concrete countertop slabs use a Driftwood base with Stormy Gray worked over it in bold strokes, sealed glossy. The dining tables below pair dyed concrete tops with reclaimed wood.
Freshly cured concrete slabs awaiting transformation
Before — cured, unfinished concrete slabs.
Concrete slabs, glossy and protected after sealing
After — sealed Driftwood and Stormy Gray countertops.
Concrete countertop perched on a rustic wood base featuring a round red BBQ with its lid
The countertop on its rustic wood base.
Concrete slabs displaying the depth of Driftwood and Stormy Gray Vibrance Dye
The Stormy Gray accents up close.
DIY concrete and wood dining tables
Concrete-and-wood dining tables.
Charcoal Dye stained concrete and reclaimed wood dining table
One with a Charcoal-dyed top.

Dye outdoors: driveway lines and steps

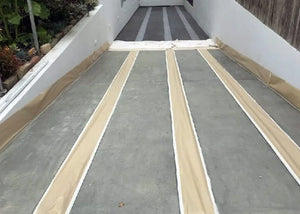
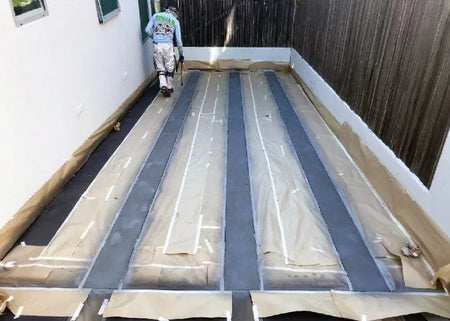
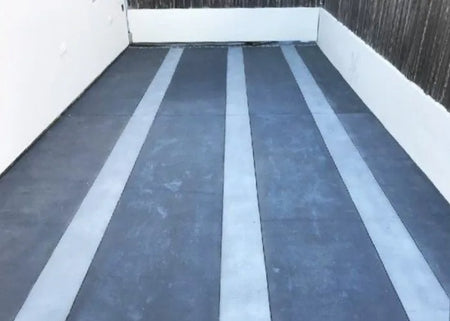
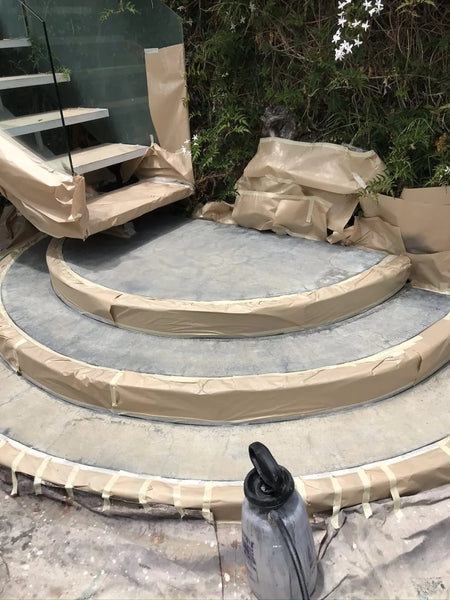
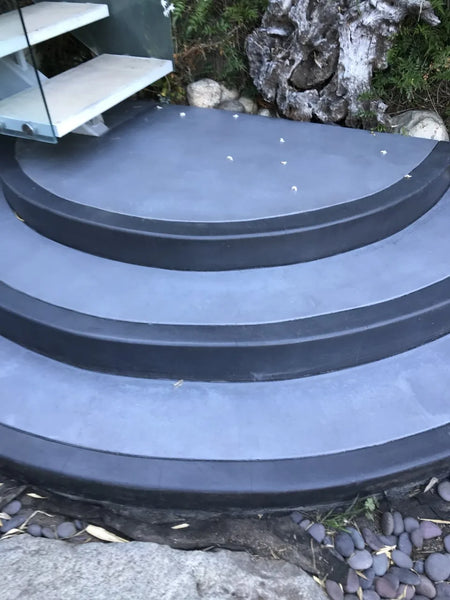
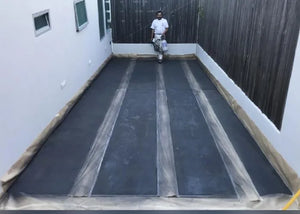
Two exceptions to the interior rule, included because they are the cheapest design ideas in this gallery. The first is a driveway with clean lines laid out in two grays — Stormy Gray and Light Slate — and sealed. The second is a set of steps in the same two colors. Neither needed more than a quart of anything.
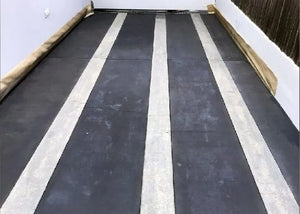
Concrete Driveway Stormy Gray Vibrance Dye Application
The first coat.
This is an image of a concrete driveway after the second coat of Stormy Gray Vibrance dye has been applied
The second coat.
Concrete driveway after the application of Stormy Gray Vibrance dye has dried, revealing a lighter shade that will be accentuated with the application of sealer
The dry Stormy Gray driveway.
Concrete Driveway Light Slate Vibrance Dye Application
Light Slate going on.
Final Result of Stained Concrete Driveway with a Stunning Design featuring Stormy Gray and Light Slate Color Bands
The finished two-color line design.
Concrete Steps
During — Light Slate on the steps.
Dye Stained Concrete Steps
After — Stormy Gray and Light Slate together.

More outdoor gray → Gray Concrete Stain: Outdoor Gallery.

The unlevel floor

One more dye project worth knowing about, though its photos live in the Charcoal gallery: a 1,600 sq. ft. floor so unlevel it took 180 bags of leveler, ground to 200 grit, and finished in Stormy Gray, White, and Charcoal.
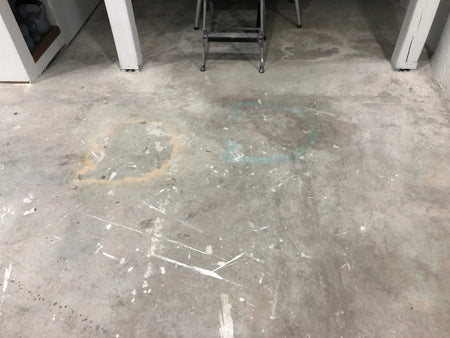
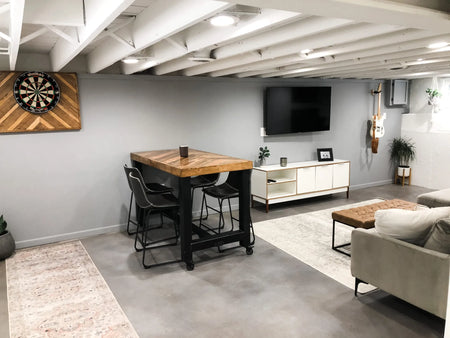
Concrete FLoor Not Ready for Staining
Before — an extremely unlevel slab.
Gray Stained Concrete Basement Floor
After — Stormy Gray, White, and Charcoal.

Full details → Charcoal Concrete Floors.


Silver Gray and AcquaTint™

AcquaTint™ behaves differently from dye. It sits closer to the surface, it is water-based and low odor, and it colors and seals in one product — which makes it the usual choice for occupied houses and for commercial floors that have to go back into service quickly. Silver Gray is the commercial favorite; Light Charcoal and Charcoal are the residential ones.

Two things every project below independently reports: stir it constantly, because the pigment settles fast, and do not overlap a wet edge with a roller, because it dries with lines if you do.

A coffee shop floor, without touching the slab

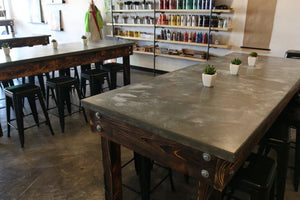
Coffee N' Crafts, designed by Brad Carlisle of William B. Carlisle Design. The brief was a marbled, varied gray — and the whole space was upgraded without ripping out the concrete floor, which is most of the reason the budget worked.
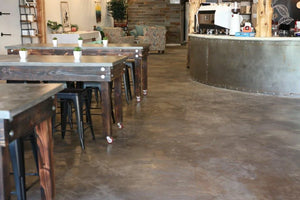
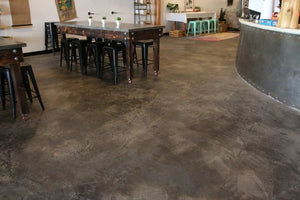
Coffee N' Crafts ShopCoffee N' Crafts Concrete stained and sealed floor with tinted concrete sealerCoffee N' Crafts concrete with pigment tables

The marbled gray tinted-sealer floor, and the colored concrete tables that match it.

Coffee N' Crafts Owned by Steiger & Kelsey Hart

The owners in the finished shop.

Two commercial floors in Silver Gray

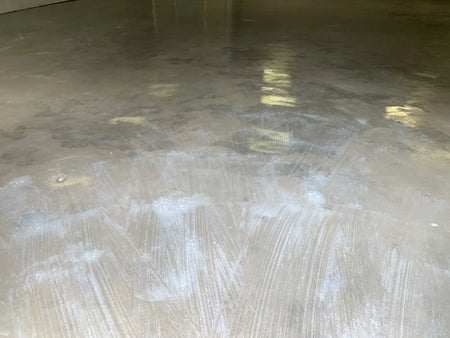
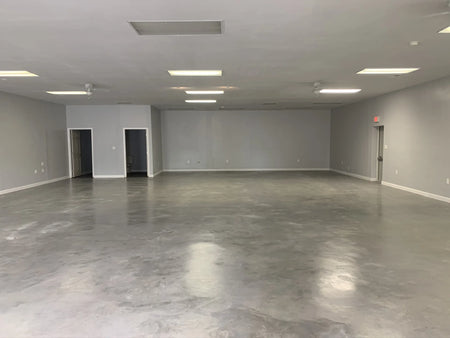
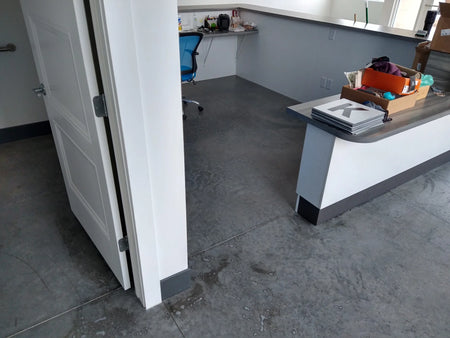
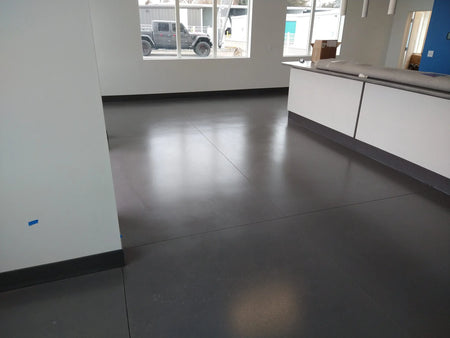
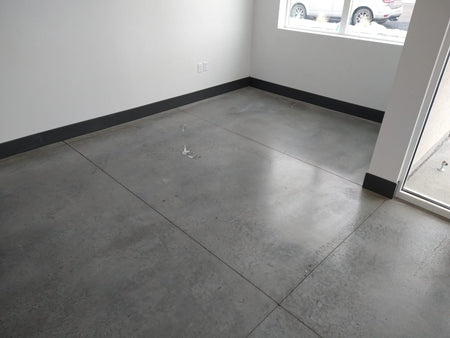
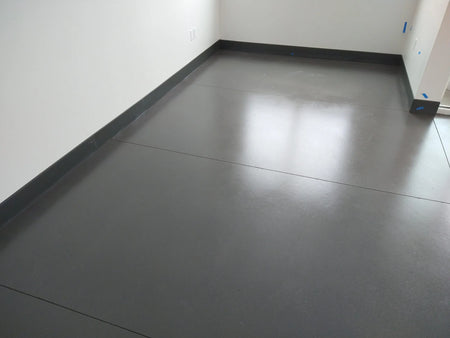
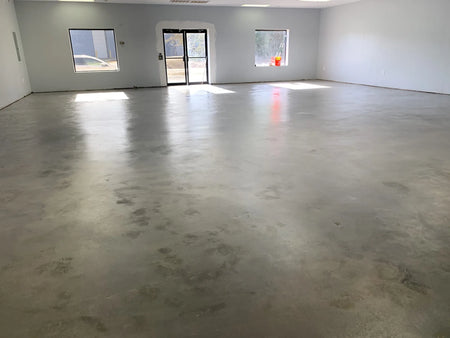
The first is a commercial space over an existing colored concrete floor. The second is an office, photographed coat by coat — which is the clearest demonstration in this gallery of how much the second coat matters.
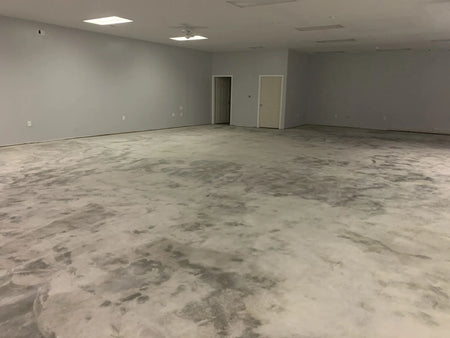
Cleaned Concrete Floor
Before — the cleaned commercial slab.
Silver Gray Stained Concrete Commercial Floor
After — Silver Gray AcquaTint™.
Applying with nap roller
Applying Silver Gray with a nap roller.
Silver Gray Stained Concrete Floor
The finished floor.
Faded concrete stain
Before — a bare office floor.
After two coats of Silver Gray AcquaTint and ProWax Polish
After — Silver Gray AcquaTint™.
First coat of Silver Gray AcquaTint
After the first coat.
After two coats of Silver Gray AcquaTint and ProWax Polish
After the second.

What each coat actually does

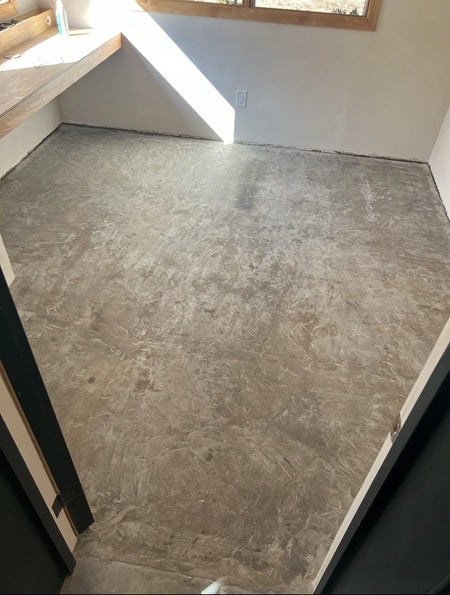
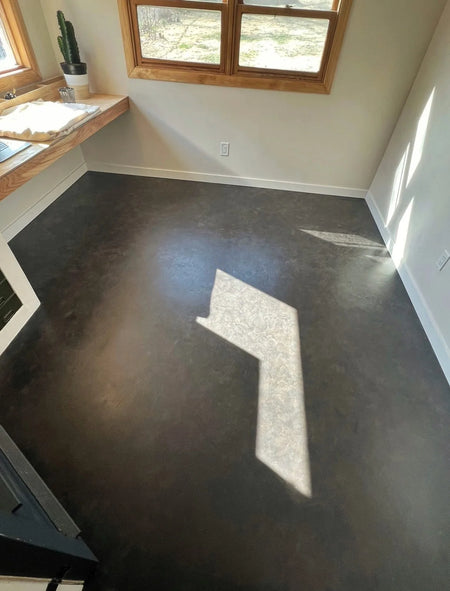
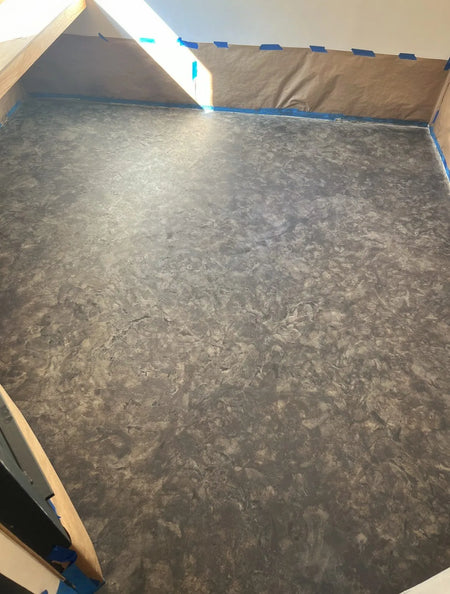
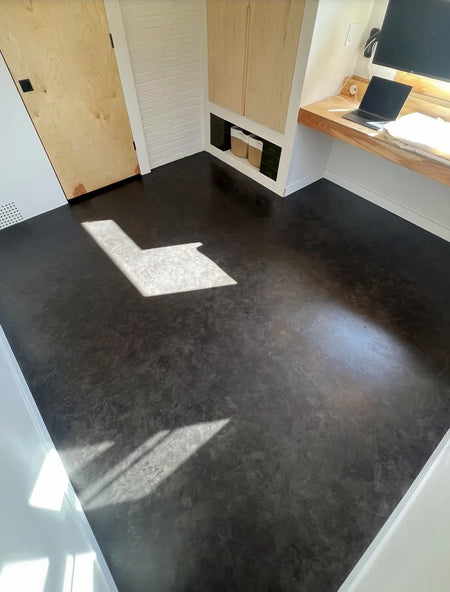
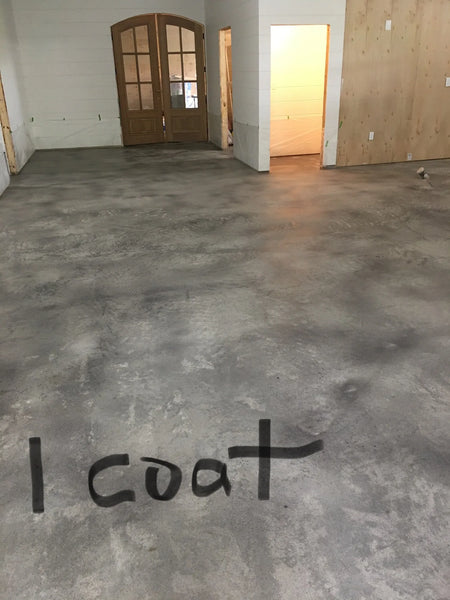
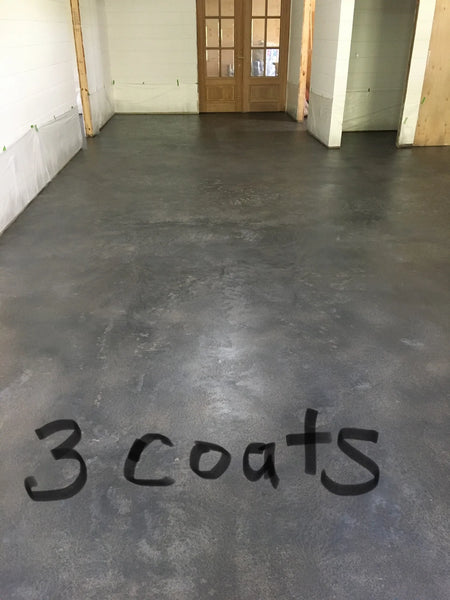
The single most useful sequence we have. Same floor, photographed bare, after one coat of Light Charcoal AcquaTint™, after three coats, and after sealer. If you have ever wondered whether to stop at one coat, this is your answer.
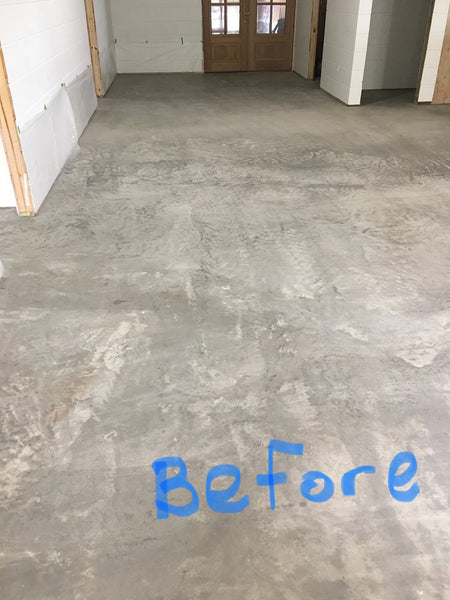
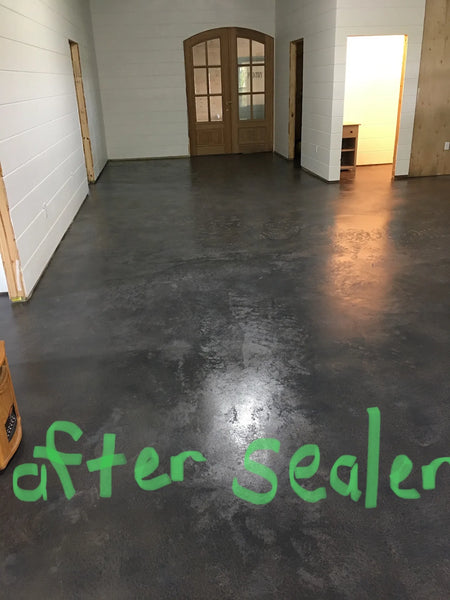
Concrete Floor
Before — the bare interior slab.
Sealed Charcoal AcquaTint
After — three coats plus sealer.
One Coat of Charcoal AcquaTint
After one coat.
Three Coats of Charcoal AcquaTint
After three.

A residential floor in Charcoal

Straightforward, and a good look at the mid-application stage where the color is uneven and it is tempting to panic.
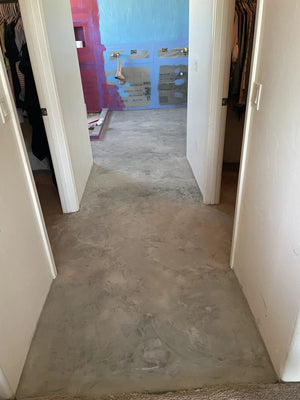
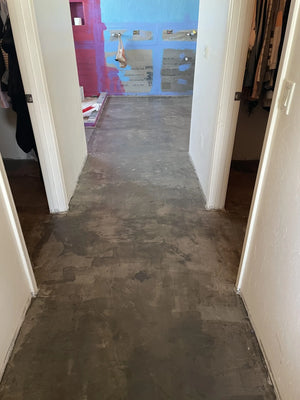
Overlay on Concrete Floor
Overlay on Concrete Floor.
AcquaTint Stained Concrete Floor
AcquaTint Stained Concrete Floor.
Two Coats of AcquaTint on Concrete Floor
Two Coats of AcquaTint on Concrete Floor.

A bedroom, carpet to Charcoal

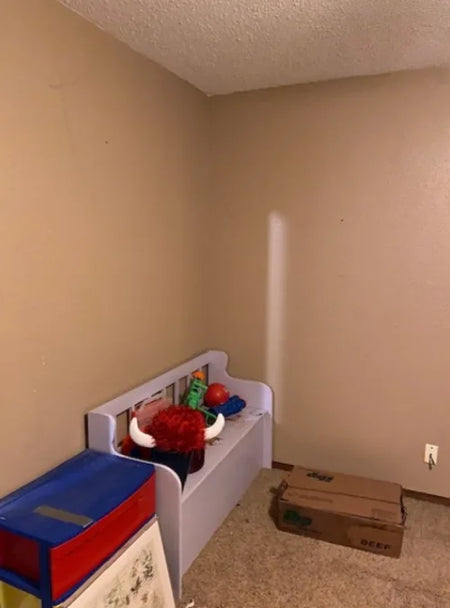
Carpet pulled up, slab cleaned, Charcoal AcquaTint™ over the top. A bedroom is a good first project — small, low traffic, and you can close the door on it while it cures.
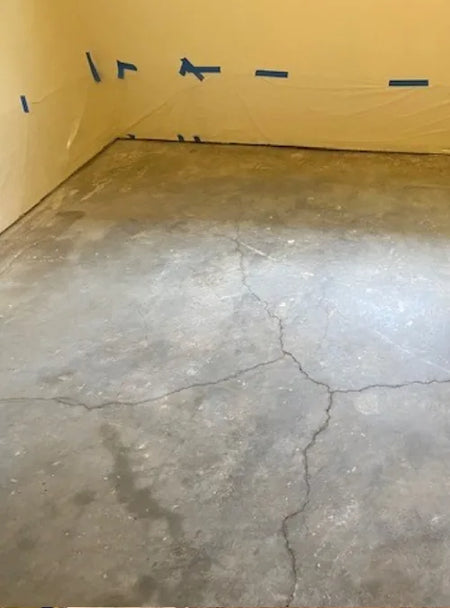
Concrete Floor Under Carpet
Before — the bare bedroom slab.
One Coat of AcquaTint Charcoal
After — Charcoal AcquaTint™.
Carpeted Room
The carpet coming up.
Two Coats of AcquaTint Charcoal
The finished bedroom floor.

An 1,800 sq. ft. basement, splashed on by an artist

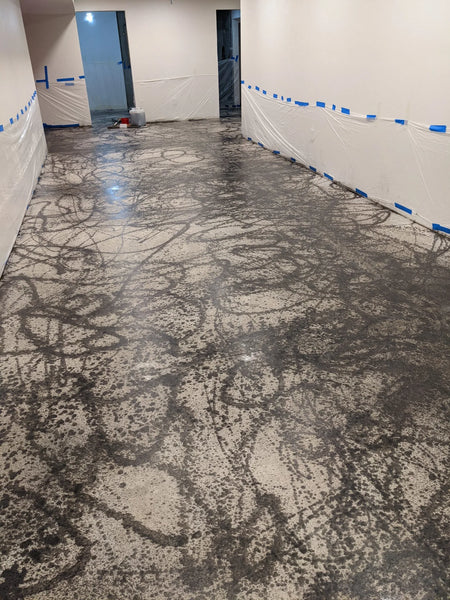
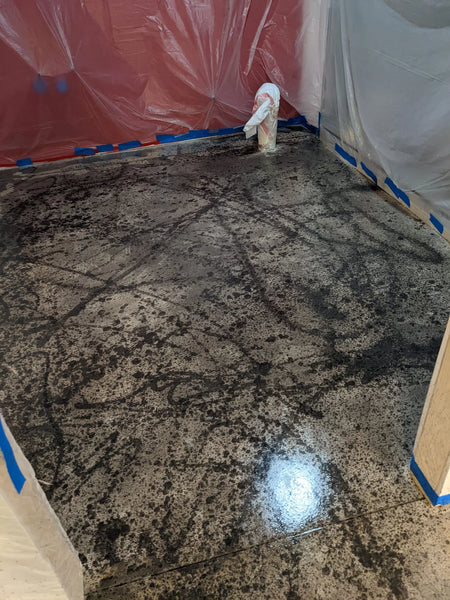
A professional artist's first concrete project, and the sprayer failed. Rather than stop, they changed the plan: random graffiti-like splashes of Charcoal, then a lighter Gray rolled over the top to soften the contrast, then three coats of high-gloss wax. Six days, and the improvisation is the reason it looks like this.
Colors
5 gal. Charcoal AcquaTint™ + 5 gal. Gray AcquaTint™
Finish
Three coats high-gloss wax
Size
1,800 sq. ft.
Time
6 days
AcquaTint - Basement Floor - Charcoal Application
The Charcoal splashes going down.
Stained concrete basement floor with Charcoal & Gray AcquaTint
After — three coats of high-gloss wax.
Used a roller to apply a lighter gray color over the splashed charcoal, creating a mottled, random look
The lighter Gray rolled over the Charcoal.
Stained concrete basement floor with colored concrete sealers
The finished gloss.
“The sprayer I used spit and dripped out the paint so I had to change my original plan to random graffiti-like splashes of the charcoal color… Because I was creating a mottled, random look, it was impossible to roll on in one direction as is suggested — it created lines I didn't like. Rather, I went heavy in some areas and left the lightness of one coat in other areas, always careful to cover bare concrete.”
Tips: “AcquaTint settles very quickly and must be constantly stirred. Enjoy the way the stain works when using more than one color. Make sure you have very good lighting to apply both stain and wax.”
— DIY Customer

A modern basement, and a concrete table

A basement finished in AcquaTint™ to protect the slab while adding just enough color, plus a Light Charcoal concrete table from the same customer set.
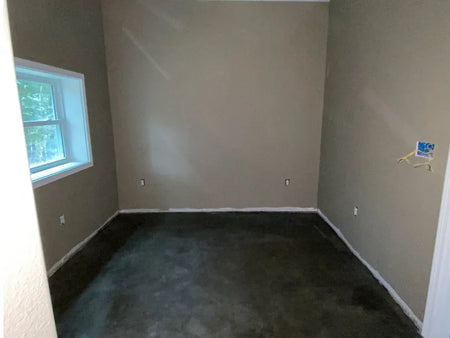
Basement Concrete Floor - Before
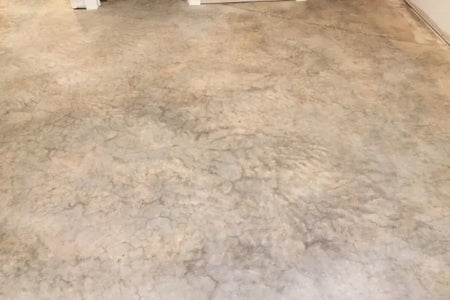
Before — a bare basement slab.
Charcoal stained concrete basement floor
After — Charcoal AcquaTint™.

Stained Concrete Table

A concrete table finished in Light Charcoal AcquaTint™.

Three more, and what they each learned

These three did not photograph their process, but their notes are the most practical in the whole gallery.

A 1,600 sq. ft. barn house in Light Charcoal, 5 days: “I was so afraid of messing up with the sprayer that my first coat was way too light. I applied 2 more coats and it looked great — I believe the AcquaTint is very forgiving when sprayed on. I followed up with 2 coats of the solvent-based satin sealer. Make sure you can open up plenty of windows because this stuff STINKS! Even though my concrete is not perfect I love my floors. Make sure you cover walls and doors — and keep grandkids out!”
— DIY Customer

Our note on that one: for interior sealing we recommend our water-based AcquaSeal™ sealers instead. They are low-VOC, so you will not have to open every window in the house.

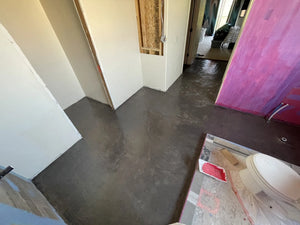
A 250 sq. ft. bathroom, hallway and closets, 3 days: “We started by laying the concrete and then sanding. Then we used Charcoal AcquaTint, applied using a roller… The color deposits at the bottom of the bottle so the first few coats are somewhat lighter. We left about 10% in the first bottle and mixed it in when starting the second bottle. It helped create a more even second application.”
— DIY Customer
A 1,000 sq. ft. basement that flooded twice, 21 days: “After my basement flooded for the second time I decided no more carpet… I rented a concrete grinder for the day and etched the floor. My basement was sealed when my house was built so it was a necessary step. I mopped the floor two times to remove any dust or residue. I applied two coats of AcquaTint™ Silver Gray, waiting 24 hours in between each coat… I used a dollar store sponge mop to apply three layers of floor wax, waiting three hours in between each layer. I waited 24 hours before placing furniture on the floor.”
Tip: “Be careful when rolling on stain not to overlap, because it can dry with lines.”
— DIY Customer

Accentuating the slab's own marbling

One more, whose photos sit in the Charcoal gallery: a 1,500 sq. ft. house where the owners specifically wanted the power trowel swirls and marbling to show through, tested for hours under where the cabinets would go, and landed on an 18-inch floor squeegee as the applicator. Full sequence → Charcoal Concrete Floors.


Shop AcquaTint™ in Silver Gray →

What's Next

  1. Outdoor gray → Gray Concrete Stain
  2. Darker → Charcoal Concrete Floors · Black Gallery
  3. Lighter → White Gallery
  4. How to do it → How to Stain a Basement Floor · Basement Floor Ideas
  5. Applying stain outdoors → How to Apply Outdoor Concrete Stain
  6. Choosing a sealer → The Best Concrete Sealer
  7. Prefer a reactive, mottled look? → Acid Stain Colors Guide
  8. Shop → Vibrance™ Dye · AcquaTint™ · EasyTint™ · Trial Kits

Direct Colors. Shawnee, OK. Manufacturing the full decorative concrete system since 1997.

Previous Post Next Post

Before You Checkout

EasyTint™ and OxiGrip™ are not compatible when used together directly. For slip resistance, use EasyTint™ as the color layer and apply OxiGrip™ only with a clear solvent based sealer as the topcoat.

Before You Checkout

AcquaTint™ and OxiGrip™ are not compatible when used together directly. If you need added slip resistance, apply AcquaTint™ as your color layer first, then use OxiGrip™ in a clear topcoat with AcquaSeal™ or HydroCryl™.