
AcquaTint™ is colored sealer — translucent color and protection in a single step. That is genuinely convenient, and it is also the reason technique matters more here than with almost anything else we make: because the pigment is in the sealer, every inconsistency in how you apply it becomes an inconsistency in the color. Thin even coats and constant stirring are not fussiness, they are the whole job.

A floor 24 hours after the second coat of wax over AcquaTint™.
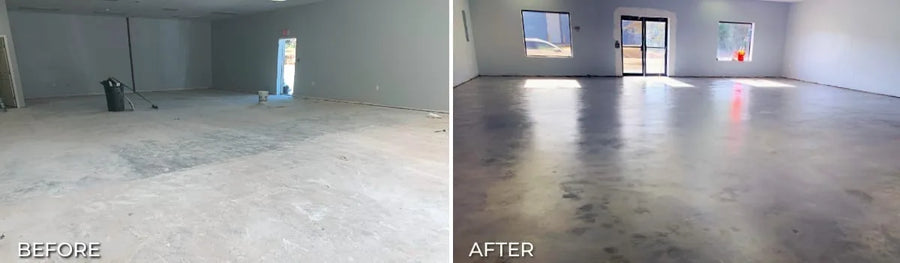
Before and after applying colored concrete sealer.
Before you begin
AcquaTint™ works best on clean, porous, fully dry concrete — or over a previously sealed surface where the existing sealer is still well adhered and compatible. Before you start, the concrete must be:
- Clean and free of dust, dirt, oil, wax, glue, paint and loose sealer.
- Dry.
- Able to accept a water-based coating.
- Protected from overspray, splatter and foot traffic for the duration.
Carpet glue, paint, failing sealer or heavy contamination all have to be removed first — none of them can be coated over.
What you need
- AcquaTint™ water-based colored concrete sealer
- ProClean Degreaser™
- CitrusEtch™ 2-Step Etching System
- Spiked shoes, especially while etching
- Pump-up sprayer or paint tray
- A 3/8 in. nap roller, frame and extension pole
- Drop cloths and cardboard
- Plastic bags or shoe covers
- Microfiber mop or clean broom
- ProWax Polish™ for interior floors
Step 1: prepare the surface
Sweep, vacuum or dust mop thoroughly to remove loose dirt and debris. Clean with ProClean Degreaser™ to lift oil, grease and grime, rinse thoroughly, and let it dry.
Previously carpeted concrete needs all glue and mastic removed — a glue remover or mechanical grinding. Paint, failing sealer, peeling coatings or heavy buildup must be stripped or ground off. On bare concrete, use CitrusEtch™ where the pores need opening, then rinse until no residue remains.
And never apply over flaking, peeling, tacky, milky or damaged sealer. An existing sealer has to be firmly bonded to the concrete or everything you put on top of it will fail with it.
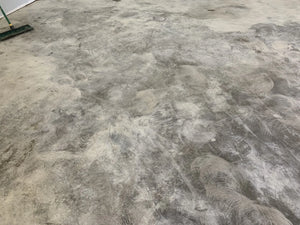
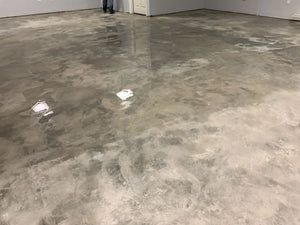
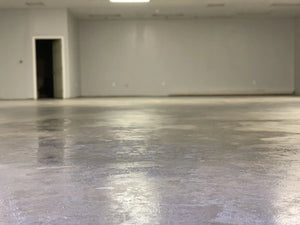
Step 2: mix it thoroughly, and keep mixing
Shake or stir well before use. Because AcquaTint™ carries color, it has to stay mixed during application as well as before it, or the tint separates and the floor records it.
- Pour out only a small amount at a time.
- Stir before adding more product to the tray.
- Keep the roller evenly loaded, but not dripping.
- Do not let product sit in the tray for long periods without stirring.
Step 3: the first coat
Protect everything first — walls, baseboards, doors, cabinets, landscaping, anything within reach of splatter or overspray. Do not tape onto surfaces that have been recently coated, because the adhesive will pull the fresh coating off.
Then apply thin, even coats. Avoid puddles, heavy application and overworking the material.
- Pour a small amount into a paint tray or pump-up sprayer.
- Apply a light coat to the concrete.
- Back-roll with a 3/8 in. nap roller to even the coating out.
- Work in small, manageable sections and keep a wet edge as you move.
- Keep the roller consistently loaded, but avoid drips.
- Do not walk on wet AcquaTint™.
Step 4: let the first coat dry
Roughly one hour under normal conditions, or until the surface is dry to the touch and no longer tacky. Cool temperatures, high humidity, poor airflow or a heavy coat all extend that. Before the second coat, the first must look dry, feel dry, not be tacky, and show no wet or milky areas. Do not rush it.
Step 5: the second coat
Stir thoroughly, pour a small amount, apply another light even coat, and back-roll as needed. The second coat is what builds the color depth and finish consistency — most projects need two.
Then allow at least 12 hours before applying wax, moving anything back, or using the floor normally.
Drying and return-to-service times
These figures are deliberately conservative. They exist to protect a finish you have just spent a weekend on.
Step 6: protect interior floors with wax
Indoors, finish with ProWax Polish™ or a compatible concrete floor wax. Wax adds a sacrificial wear layer and makes long-term maintenance far easier.
- Apply only after AcquaTint™ has dried at least 12 hours.
- Use a trim pad, microfiber applicator, or foam mop with a wringer attachment.
- Dampen the applicator with warm water, then wring out the excess.
- Pour wax into a clean paint tray or wallpaper tray.
- Saturate the applicator, then press out the excess.
- Apply a thin, even coat, smoothing out any foaming before it dries.
- At least 12 hours between coats, and add thin coats to the level of protection you want.
- 24 hours after the final coat before furniture goes back.
Step 7: maintenance
- Sweep or dust mop regularly.
- Clean with a mild, pH-neutral cleaner.
- Avoid harsh chemicals, ammonia, abrasive pads and solvent-based cleaners.
- Felt pads under furniture, and never drag heavy or sharp objects across the floor.
- Reapply wax as needed in high-traffic areas.
- Clean spills promptly.
Keeping up with the wax is the whole maintenance strategy, because the wax protects the sealer underneath it. Refreshing wax is easy. Repairing worn sealer means stripping it first.
Common mistakes
- Skipping surface preparation.
- Applying over dirty, damp or contaminated concrete.
- Applying over failing paint or peeling sealer.
- Letting the pigment settle without stirring.
- Applying heavy coats, or leaving puddles and thick areas.
- Walking on wet sealer.
- Moving furniture back too soon.
- Applying wax before AcquaTint™ has dried.
- Using harsh cleaners once the floor is finished.
Troubleshooting
AcquaTint™: FAQs
What surface does AcquaTint™ need?
Clean, porous, fully dry concrete — or a previously sealed surface where the existing sealer is still well adhered and compatible. Free of dust, dirt, oil, wax, glue, paint and loose sealer.
How do I apply it without streaks?
Spray or pour into a tray, then back-roll every section with a 3/8 in. nap roller before moving on. Work about 6 ft. by 4 ft. at a time and keep a wet edge, move steadily and never stop in the middle of a section, use light even roller pressure, and never pour large amounts directly onto the floor. Stir constantly — the color settles, and unstirred product means an uneven floor.
How long between coats?
About an hour between AcquaTint™ coats, or once it is dry to the touch and not tacky. Then 12 hours after the final coat before wax or light use, at least 12 hours between wax coats, 24 hours after the final wax before moving furniture back, and 48–72 hours where there will be heavy use or parked vehicles.
Why does my floor look streaky, uneven or tacky?
Streaky usually means it went on too heavily or the roller was not kept evenly loaded. Uneven color is more often the concrete itself — porosity, previous coatings or surface contamination. Tacky means too heavy, poor drying conditions, or a coat applied before the one under it had dried. Peeling means the surface was not fully clean, dry, porous or compatible to begin with.
Do I really need spiked shoes?
While etching, yes. Walking through etched areas without them leaves footprints in the profile, and that can mean re-etching. Plastic bags or clean shoe covers work if you must step near a finished area — but never on wet sealer.
What’s Next
- See it in use → AcquaTint™ Gallery · Tinted Sealer Colors
- Prep and etching → Surface Preparation · Etching Gone Wrong
- Choosing a sealer → The Best Concrete Sealer
- Maintenance → Care & Maintenance
- Shop → AcquaTint™ · Trial System · ProWax Polish™ · Colored Sealers


