
Matthew Sutter is a full-time firefighter in Fitchburg, Wisconsin, and a carpenter and woodworker — he built two new firehouses as his department’s designated carpenter, and then got to build the kitchen tables for them. The walnut was donated by the city, harvested from nearby road construction and milled locally into live-edge slabs. We were glad to be part of it, and the color decisions he made are the reason this table works.
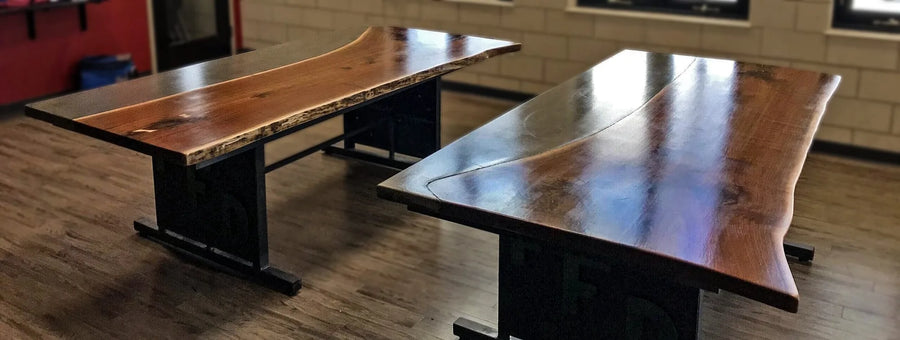
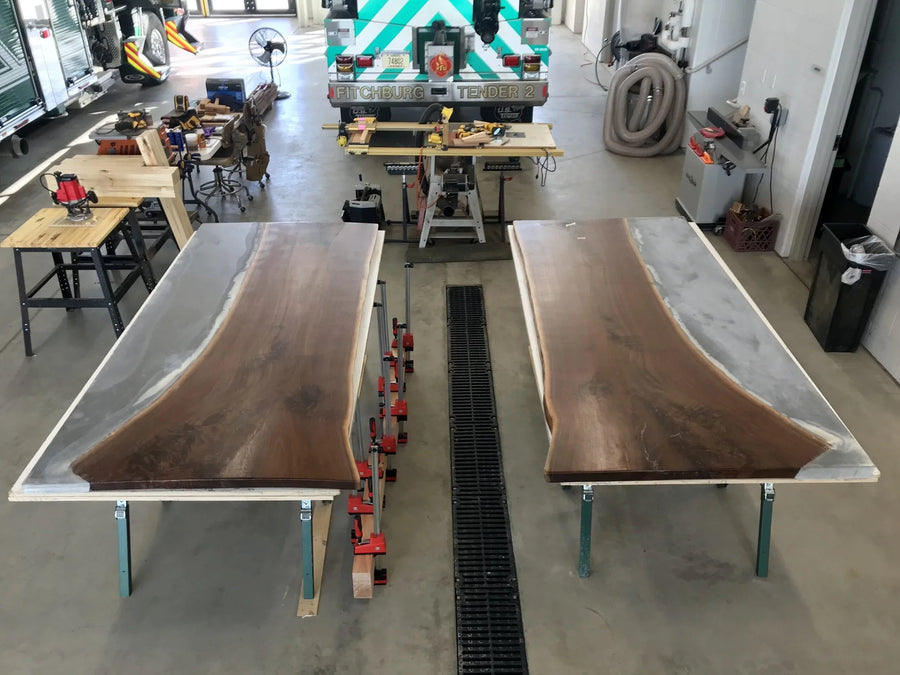
Two concrete and walnut dining tables, the concrete colored with Vibrance™ Dye.
Building it
The sequence is short but the order matters, because the concrete is cast onto the wood rather than fitted to it afterwards.
- Mill and flatten the wood slab.
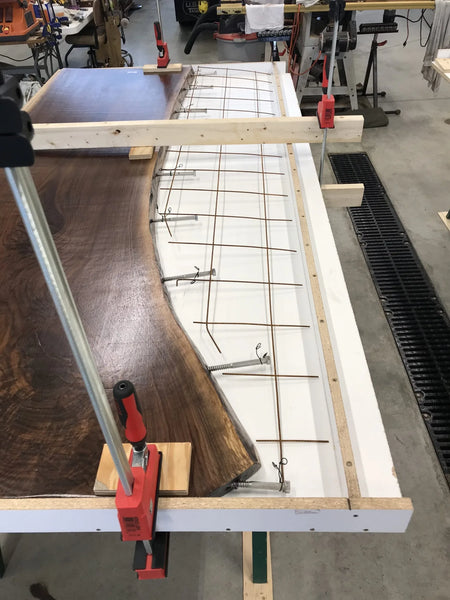
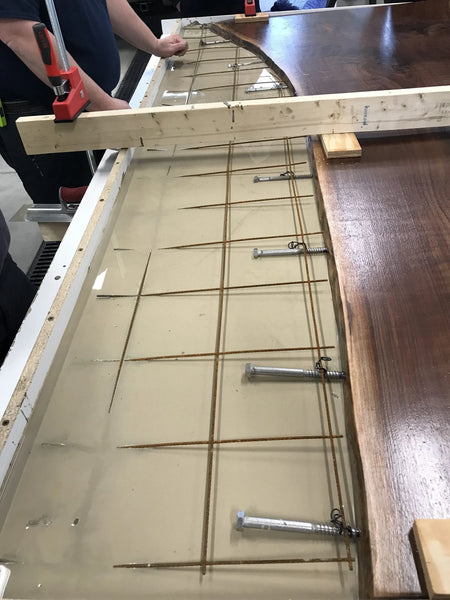
- Attach 1/2 in. stainless steel lag bolts to the edge of the slab, on the side the concrete will meet. These are the mechanical key — the concrete grips the bolts, not the wood.
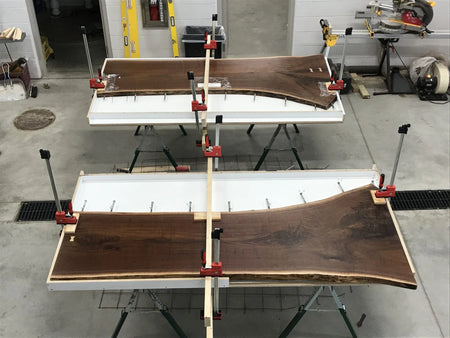
- Build the form from melamine sheet. The melamine face is what gives the concrete its finish.
- Secure the wood slabs into place in the form.
- Coat the form thoroughly with a release agent, so the melamine lets go cleanly. Ours is NoStick™ Liquid Release Agent.
- Place wire mesh or fiberglass net reinforcement inside the form.
- Mix and pour concrete countertop mix.
- Tap the sides of the form to bring the air bubbles out.
- Cure a minimum of 15 days.
Stainless for the bolts rather than plain steel, and it is not fussiness — the bolts are permanently embedded in damp concrete against wood that will move with the seasons. Countertop mix, melamine sheet, wire mesh and fiberglass net all come from a building or countertop supplier; we do not sell them.
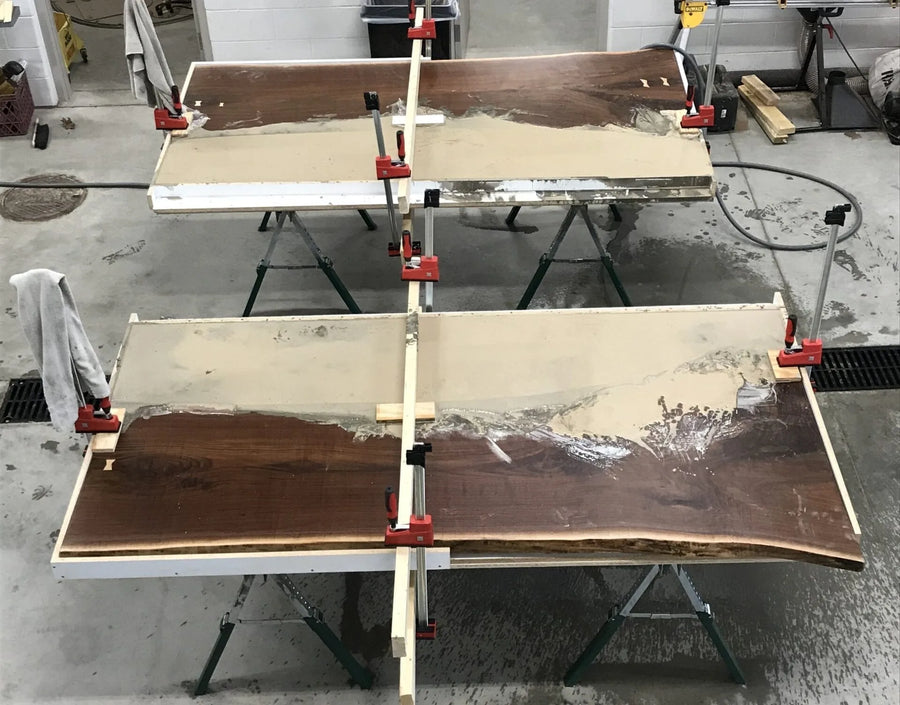
The two slabs and the concrete section under construction.
Coloring it: dye, not stain
This is the interesting decision. He wanted color in the concrete that would accent finished walnut without competing with it — and for that, Vibrance™ Concrete Dye is the right product rather than acid stain. Dye is translucent and goes on polished concrete predictably; acid stain reacts, and next to a live-edge walnut slab the variation would have fought the grain.
— Matthew Sutter
— Matthew Sutter
Dye going onto the polished concrete section.
The sprinkling technique is worth stealing whether or not you have fire trucks to commemorate. Dye applied evenly gives one color; dye flicked or dabbed over a base coat gives depth and reads as mineral variation in the concrete rather than as a second color. A dye trial system is the cheap way to work out the combination on an offcut first.
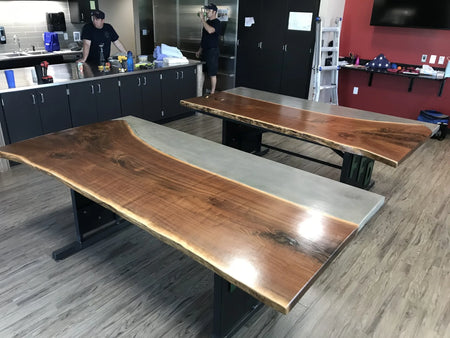
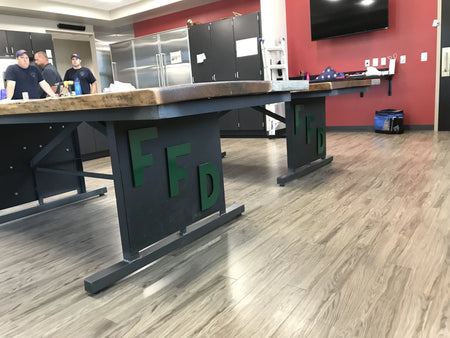
More concrete furniture
The same casting-and-coloring process makes anything you can build a form for.
Concrete & Wood Table: FAQs
How are the concrete and wood joined?
1/2 in. stainless steel lag bolts into the edge of the wood slab, cast into the concrete — the concrete is poured onto the wood rather than fitted to it afterwards, so the order matters.
Why dye rather than stain?
Because it goes onto polished concrete and then gets polished further. Wet polish to 200 grit, dye, then up to 3000 grit — that sequence is what gives color inside a polished surface rather than on top of it.
How long before I can handle it?
A minimum 15-day cure before you touch it. Melamine sheet for the form, wire mesh or fiberglass net inside, and seal all sides afterwards.
Are the colors used here still available?
Stormy Gray Vibrance™ is still stocked. The green accent color is discontinued.
What’s Next
- How to apply dye → Using Concrete Dye Over Imperfections
- The other table build → How to Make a Concrete Fire Table
- Countertops, same skills → DIY Concrete Countertops · Wood-Look Concrete
- The whole craft pillar → DIY Concrete Craft Projects
- Shop → Vibrance™ Dye · Dye Trial System · ProWax Polish™


