How To Apply Deco Gel Acid Stain
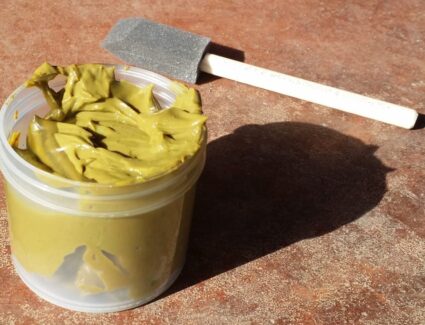
Deco Gel Acid Stain is an acid-based gel of metal salts and acid designed to adhere without drips or runs to vertical surfaces and other projects such as garden décor. Deco Gel Acid Stain has been specifically designed for use on vertical applications, such as retaining walls and columns or garden décor, as well as statuary, cultured rocks, and design work. Apply in conjunction with our liquid acid stain for projects that have both vertical and horizontal surfaces. When covered with the proper sealer and if required, wax, the acid stain produces a bright, variegated surface color unique to this process.
Step 1. Surface Preparation for Deco Gel Acid Stain
Surface preparation is one of the most important steps of the staining process. The concrete must be free of debris, dirt and oils, sealers or waterproofing agent. If your concrete has been treated with a waterproofing agent or cleaned with muriatic acid, the DecoGel Acid Stain will not be able to penetrate the pores of your concrete.
If you do not know the history of your surface, preparing a test patch or sample would be highly advisable. For older or exposed concrete, the surface must be completely intact with no exposed aggregate. Deco Gel will only work on the cement portion of the concrete, not the aggregate, rocks, or sand particles.
Deco Gel is not an overcoat, but is an opaque, penetrating color that permanently changes the appearance of the concrete. Areas where debris, like tile or carpet adhesive, paint, drywall mud, or similar products, remains on the surface will not accept the stain leaving color imperfections on the wall. Use Bean-E-Doo, for removing mastics and adhesives and Soy Gel Professional Paint and Sealer Stripper for epoxy, sealers, varnish, or paint stains. Clean the surface well using Direct Colors Concrete Cleaner and water solution, especially after applying stripping agents. Rinse thoroughly with clear water and allow to dry.
For the complete application instructions and more information on surface preparation products, check out our full guide here.


Step 2. Applying Deco Gel Acid Stain
Material may settle during transportation. Stir well before use. Thin with water as needed for application. Add up to 1 oz. of water per quart of Deco Gel.
Safety while applying Deco Gel is very important. Remember to use gloves and a mask while working with the gel.
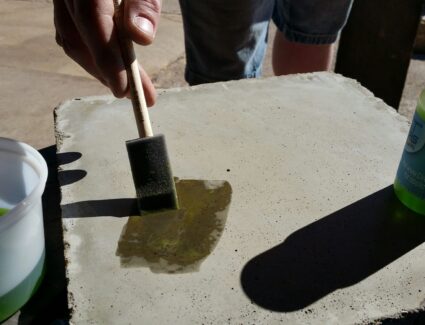
The appearance of the finished product is influenced by the manner in which it is applied. The application of the stain will vary according to size, design, and desired effect. The most common tools used to apply Deco Gel Acid Stain are foam brushes, artist paint brushes for fine work or foam rollers. Avoid nap rollers as they apply the gel too thickly on the surface.
For a more variegated effect, use a plastic dry wall trowel for application. Artist’s brushes can also be used to apply the gel particularly in hard-to-reaches crevices, particularly on concrete statuary. Deco Gel can be thinned slightly with water to provide easier control with a brush.
When applying stain to the surface, you should notice a light “fizzing” reaction with the concrete. Apply one thick, saturating coat to the surface and allow to process for the appropriate length of time.
Check your stain color’s activation time here before beginning the project. Stains can be left on the surface for longer but not less than the activation time. If you are working on a countertop project, use a timer to insure the same activation time for each of the countertop sections.
Each stain needs different times to activate and fully color the concrete, generally from two to eight hours. Stains can be left on the concrete for a longer period time if a darker color is desired. As the Gel dries and processes, an alkali and minerals residue will form on the surface. This is completely normal and is part of the reaction process. If the gel flakes off when dry, reapply the stain to any exposed areas and allow to process.
3. Neutralizing the Surface and Removing the Residue
Once the residue has dried and the stain has been given at least the recommended minimum time to react, the residue should be neutralized and all debris or extra stain removed in the following manner:
1. Prepare a base solution using baking soda at a ratio of 2 tablespoons of baking soda per gallon of water. Slosh the solution on to your surface and clean with a mop, brush or water hose as is appropriate for the project. A shop vacuum can be used to remove the residue.
2. Repeat the process, using clean water. After this step, all but a light residue should have been removed. For stubborn residue or porous surfaces, use a floor soap or organic degreaser with a brush to aid in removal. The clean wet surface will be the approximate color of the final sealed surface.
3. After the surface has completely dried, it should be ready to seal.
Learn more details about Neutralizing Acid Stains here
Notice: DO NOT apply masking or duct-tape to a stained and sealed surface. The tape will adhere to the sealer and seriously mar the floor’s finish.
4. Sealing Your Surface
After the surface has been neutralized and has thoroughly dried, the acid stained project must be sealed with an appropriate concrete sealer. Direct Colors offers both solvent and water-based sealers suitable for any concrete project. Sealers can be applied with either an applicator or a sprayer.
The method used to apply sealer depends on the type of surface and the variety of sealer used. Our solvent-based non-sprayable sealers can be used in and are appropriate for both indoor and outdoor applications; however, we recommend using a water-based sealer for occupied indoor applications and for basements.
If you are sealing a wall, statuary or a similar project, the Solvent-based, Satin Acrylic Sealer is by far the easiest sealer because it can be sprayed on. Use caution in applying solvent-based sealers, particularly during indoor applications. Wear a mask and make certain the area is well ventilated to the outside. Extinguish all open flames in the area.
Generally, the thinner the application, the stronger and more durable the sealer will become. Applying a thick coat will result in an inconsistent finish with tacky areas that may not cure properly. Depending on the sealer selected, leave the solvent-based sealers to dry for at least 4-6 hours between coats.
The Direct Colors solvent-based, satin acrylic sealer has the shortest drying time between coats and the water-based sealers the longest. Water-based sealers should be given at a minimum 24 hours to set-up between coats.
The surface should be completely clear and dry before applying an additional coat. If you live in a humid climate or the weather conditions are damp and overcast, give the surface additional time to dry. Reseal any exterior concrete surfaces or décor every 2-3 years if using an acrylic sealer.
Cold Temperature Warning
Water-based sealers and all Direct Colors floor waxes must be applied to surfaces at temperatures greater than 60°F with an air temperature difference of 5 degrees or less. Central heating, radiant or convection heaters, or similar heating devices should be turned off during application. In-floor heating should be set at 60-65 degrees before application and turned off during the process.


