Stained Concrete Pavers: Before and After Inspiration
By Justin Richardson
Discover how to restore faded pavers and bring life back to dull spaces in our before and after gallery. See firsthand how customers tackled pavers that look dull or have lost their color, transforming them affordably. Get inspired to refresh your outdoor area and make your pavers pop again. This is your go-to guide for revitalizing pavers that have seen better days, all on a budget.
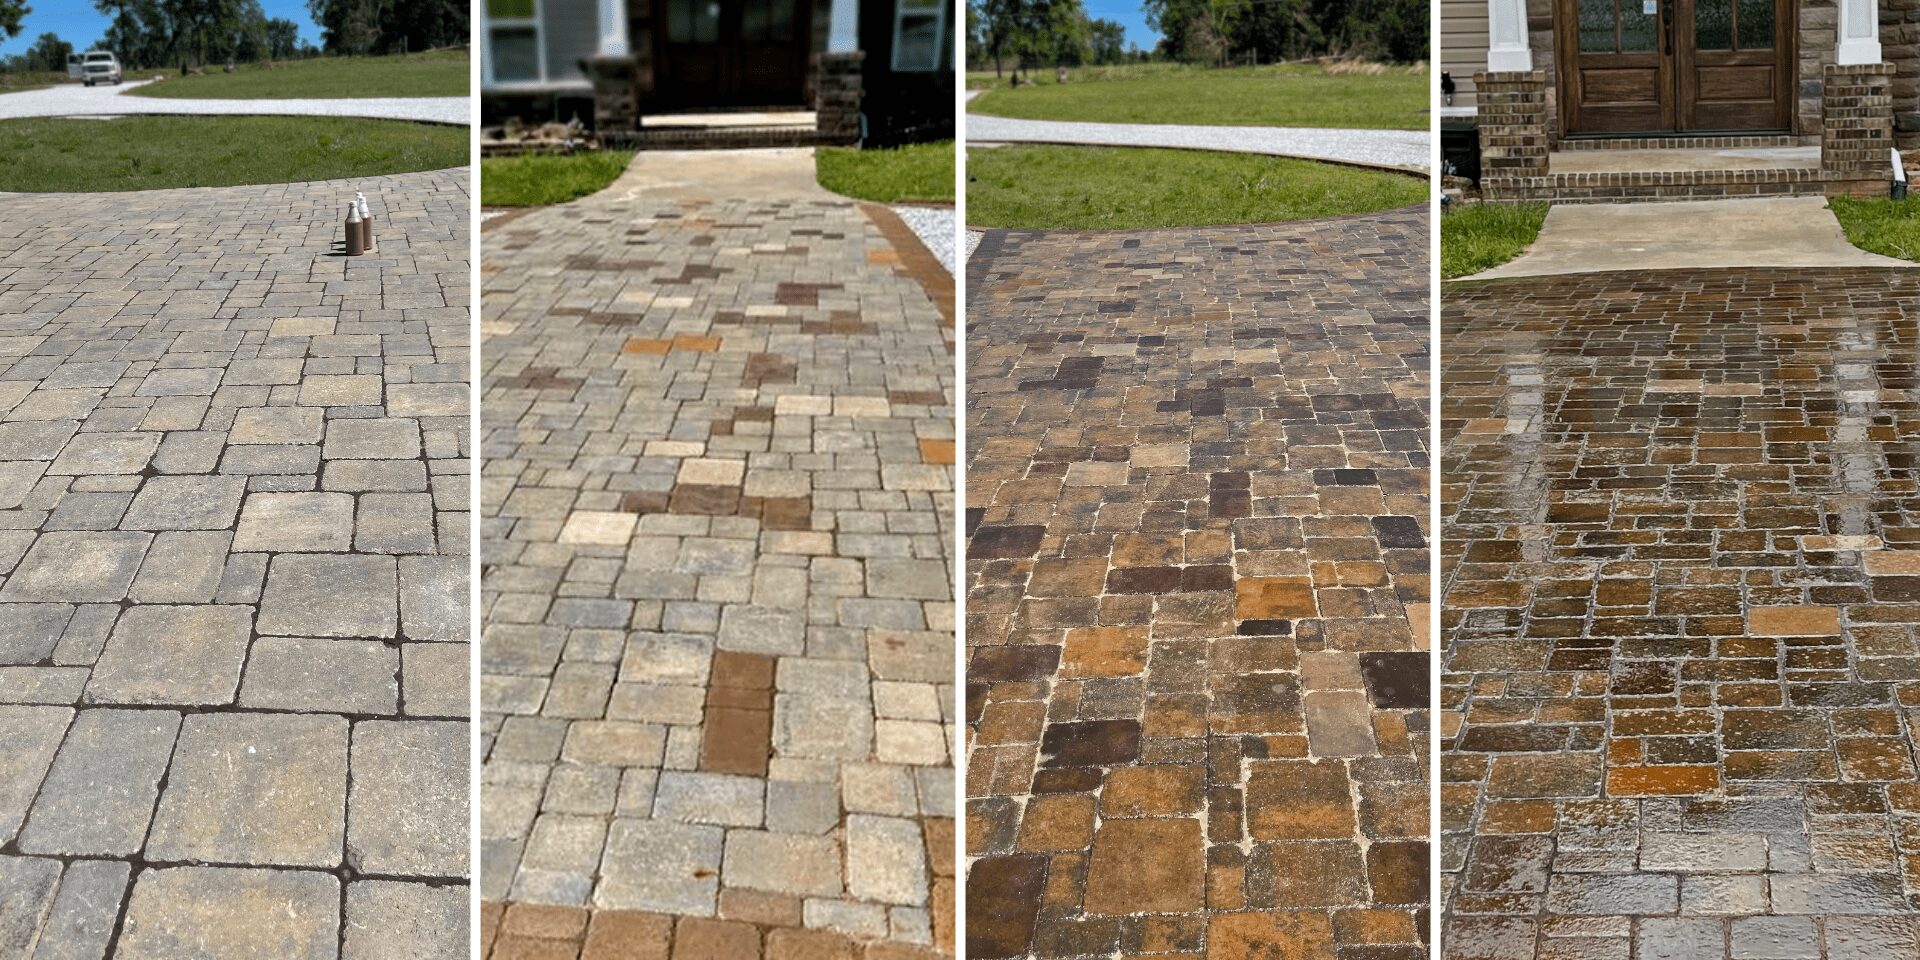
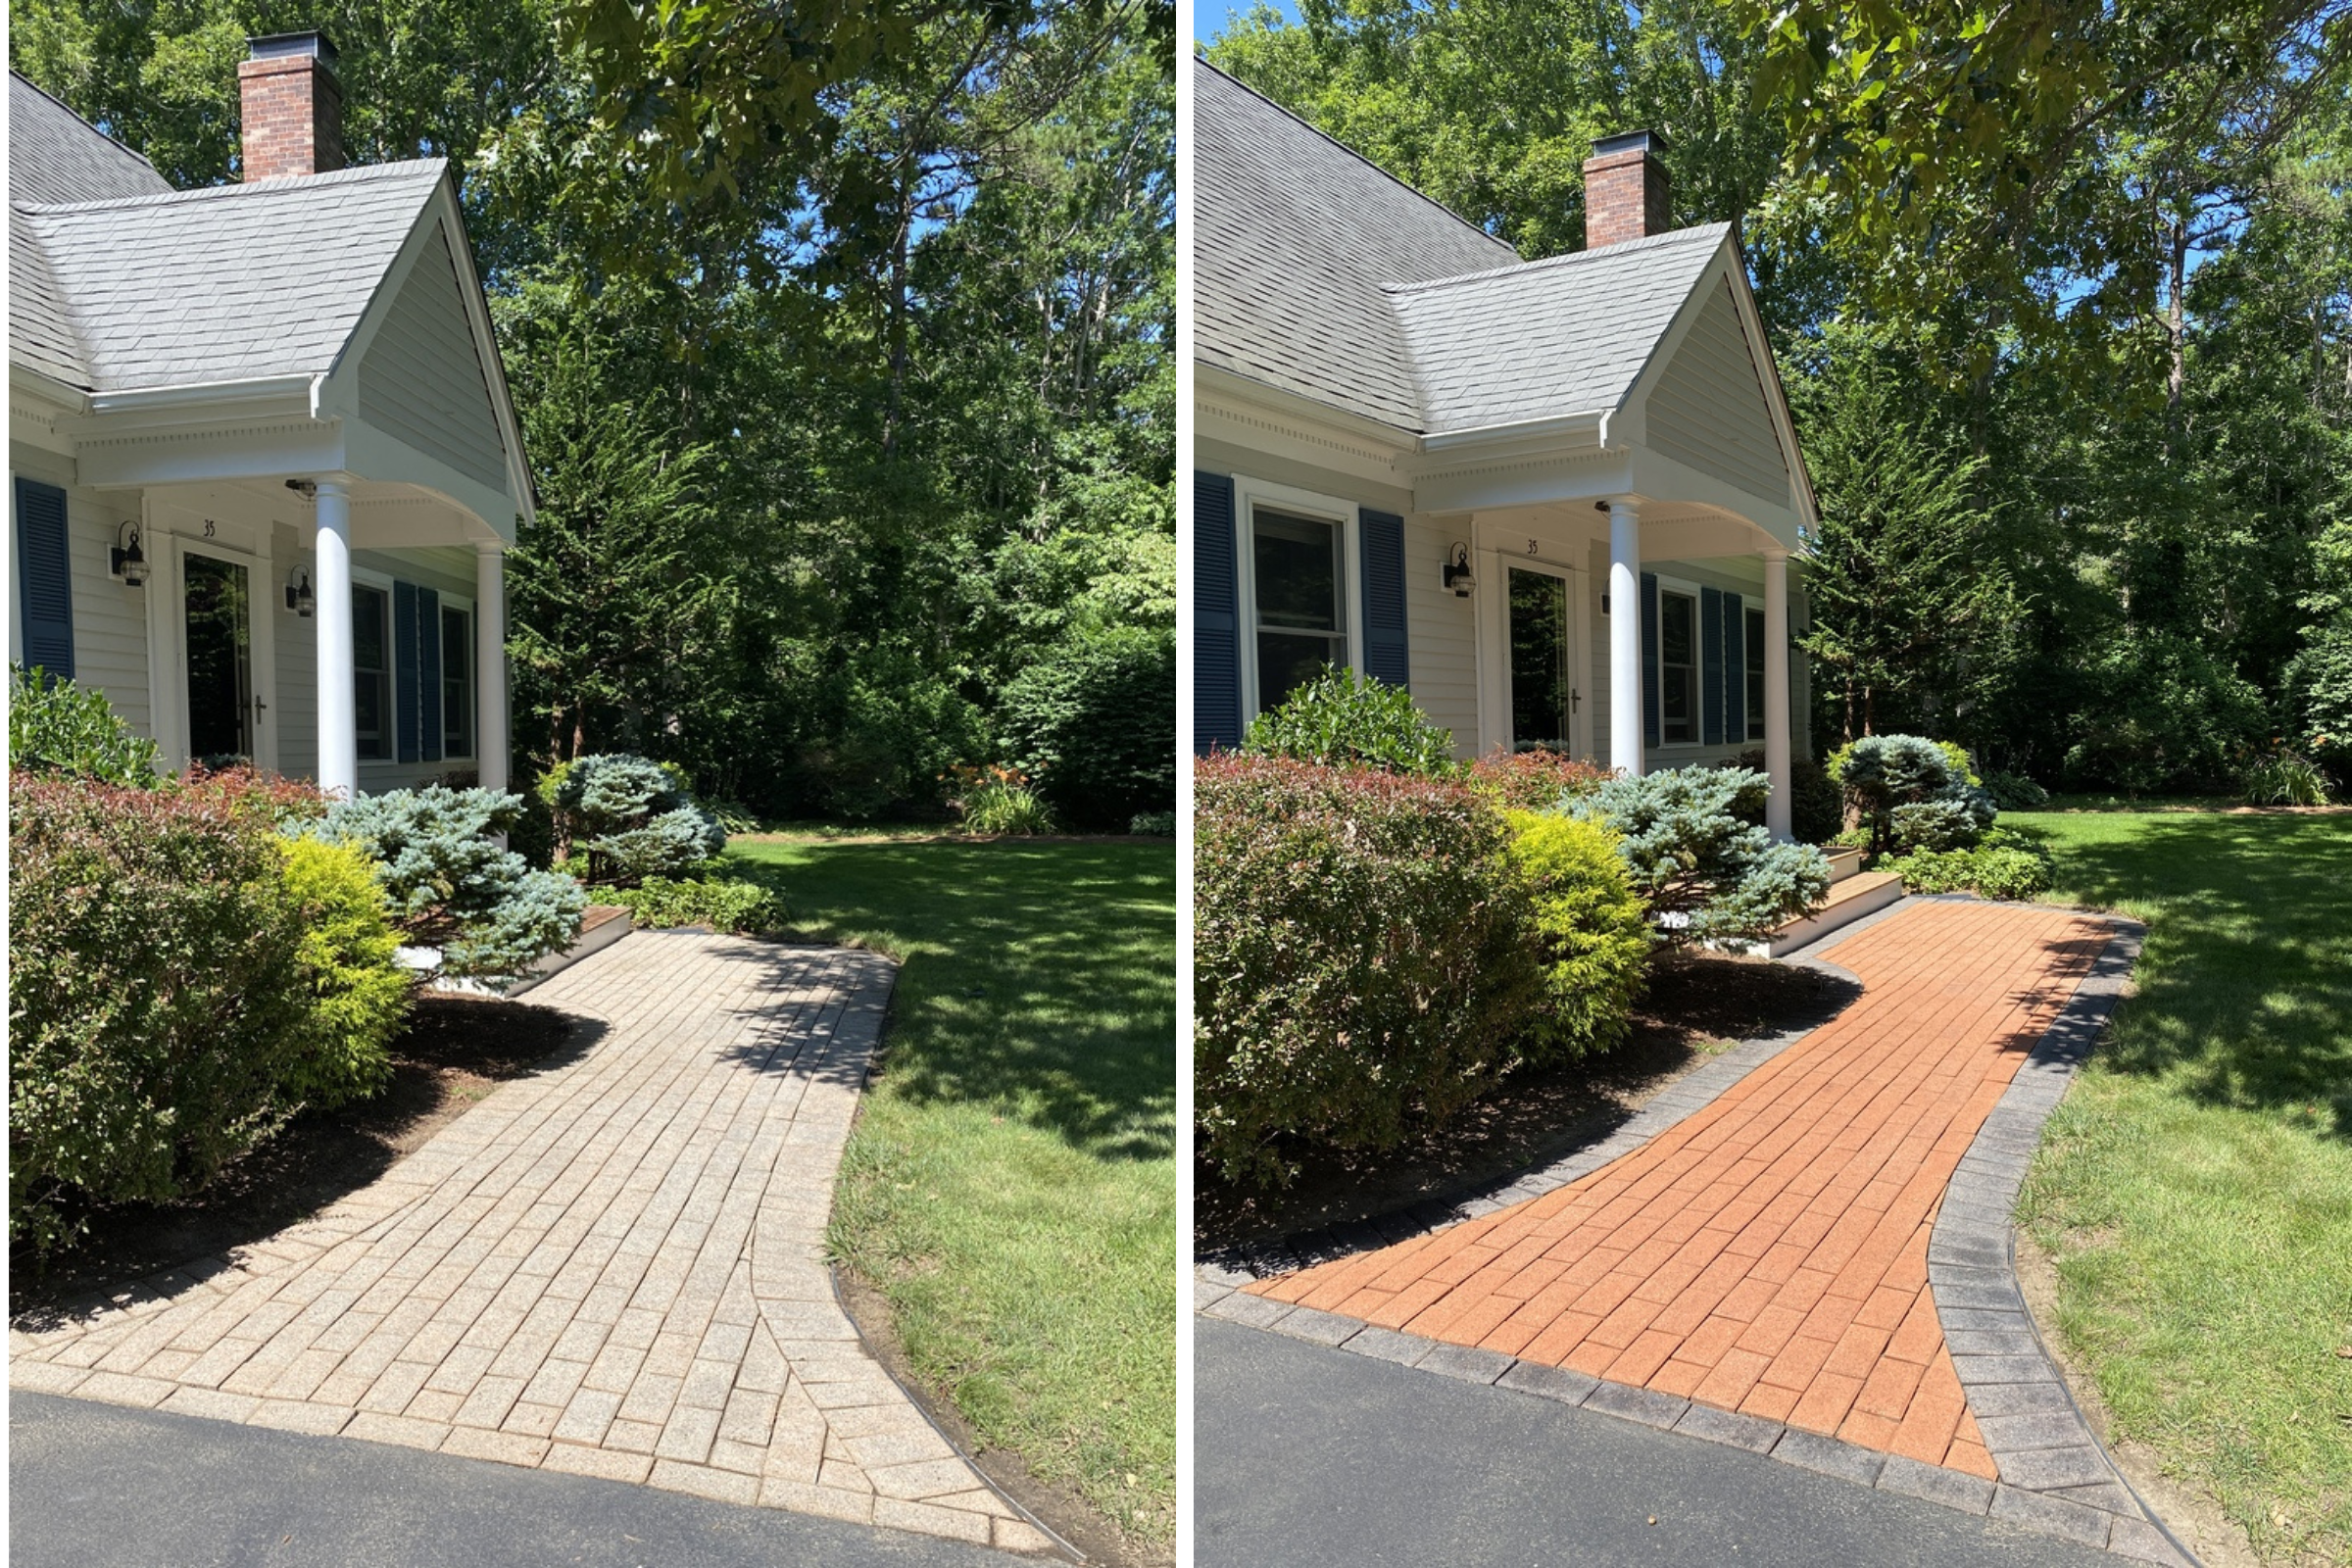
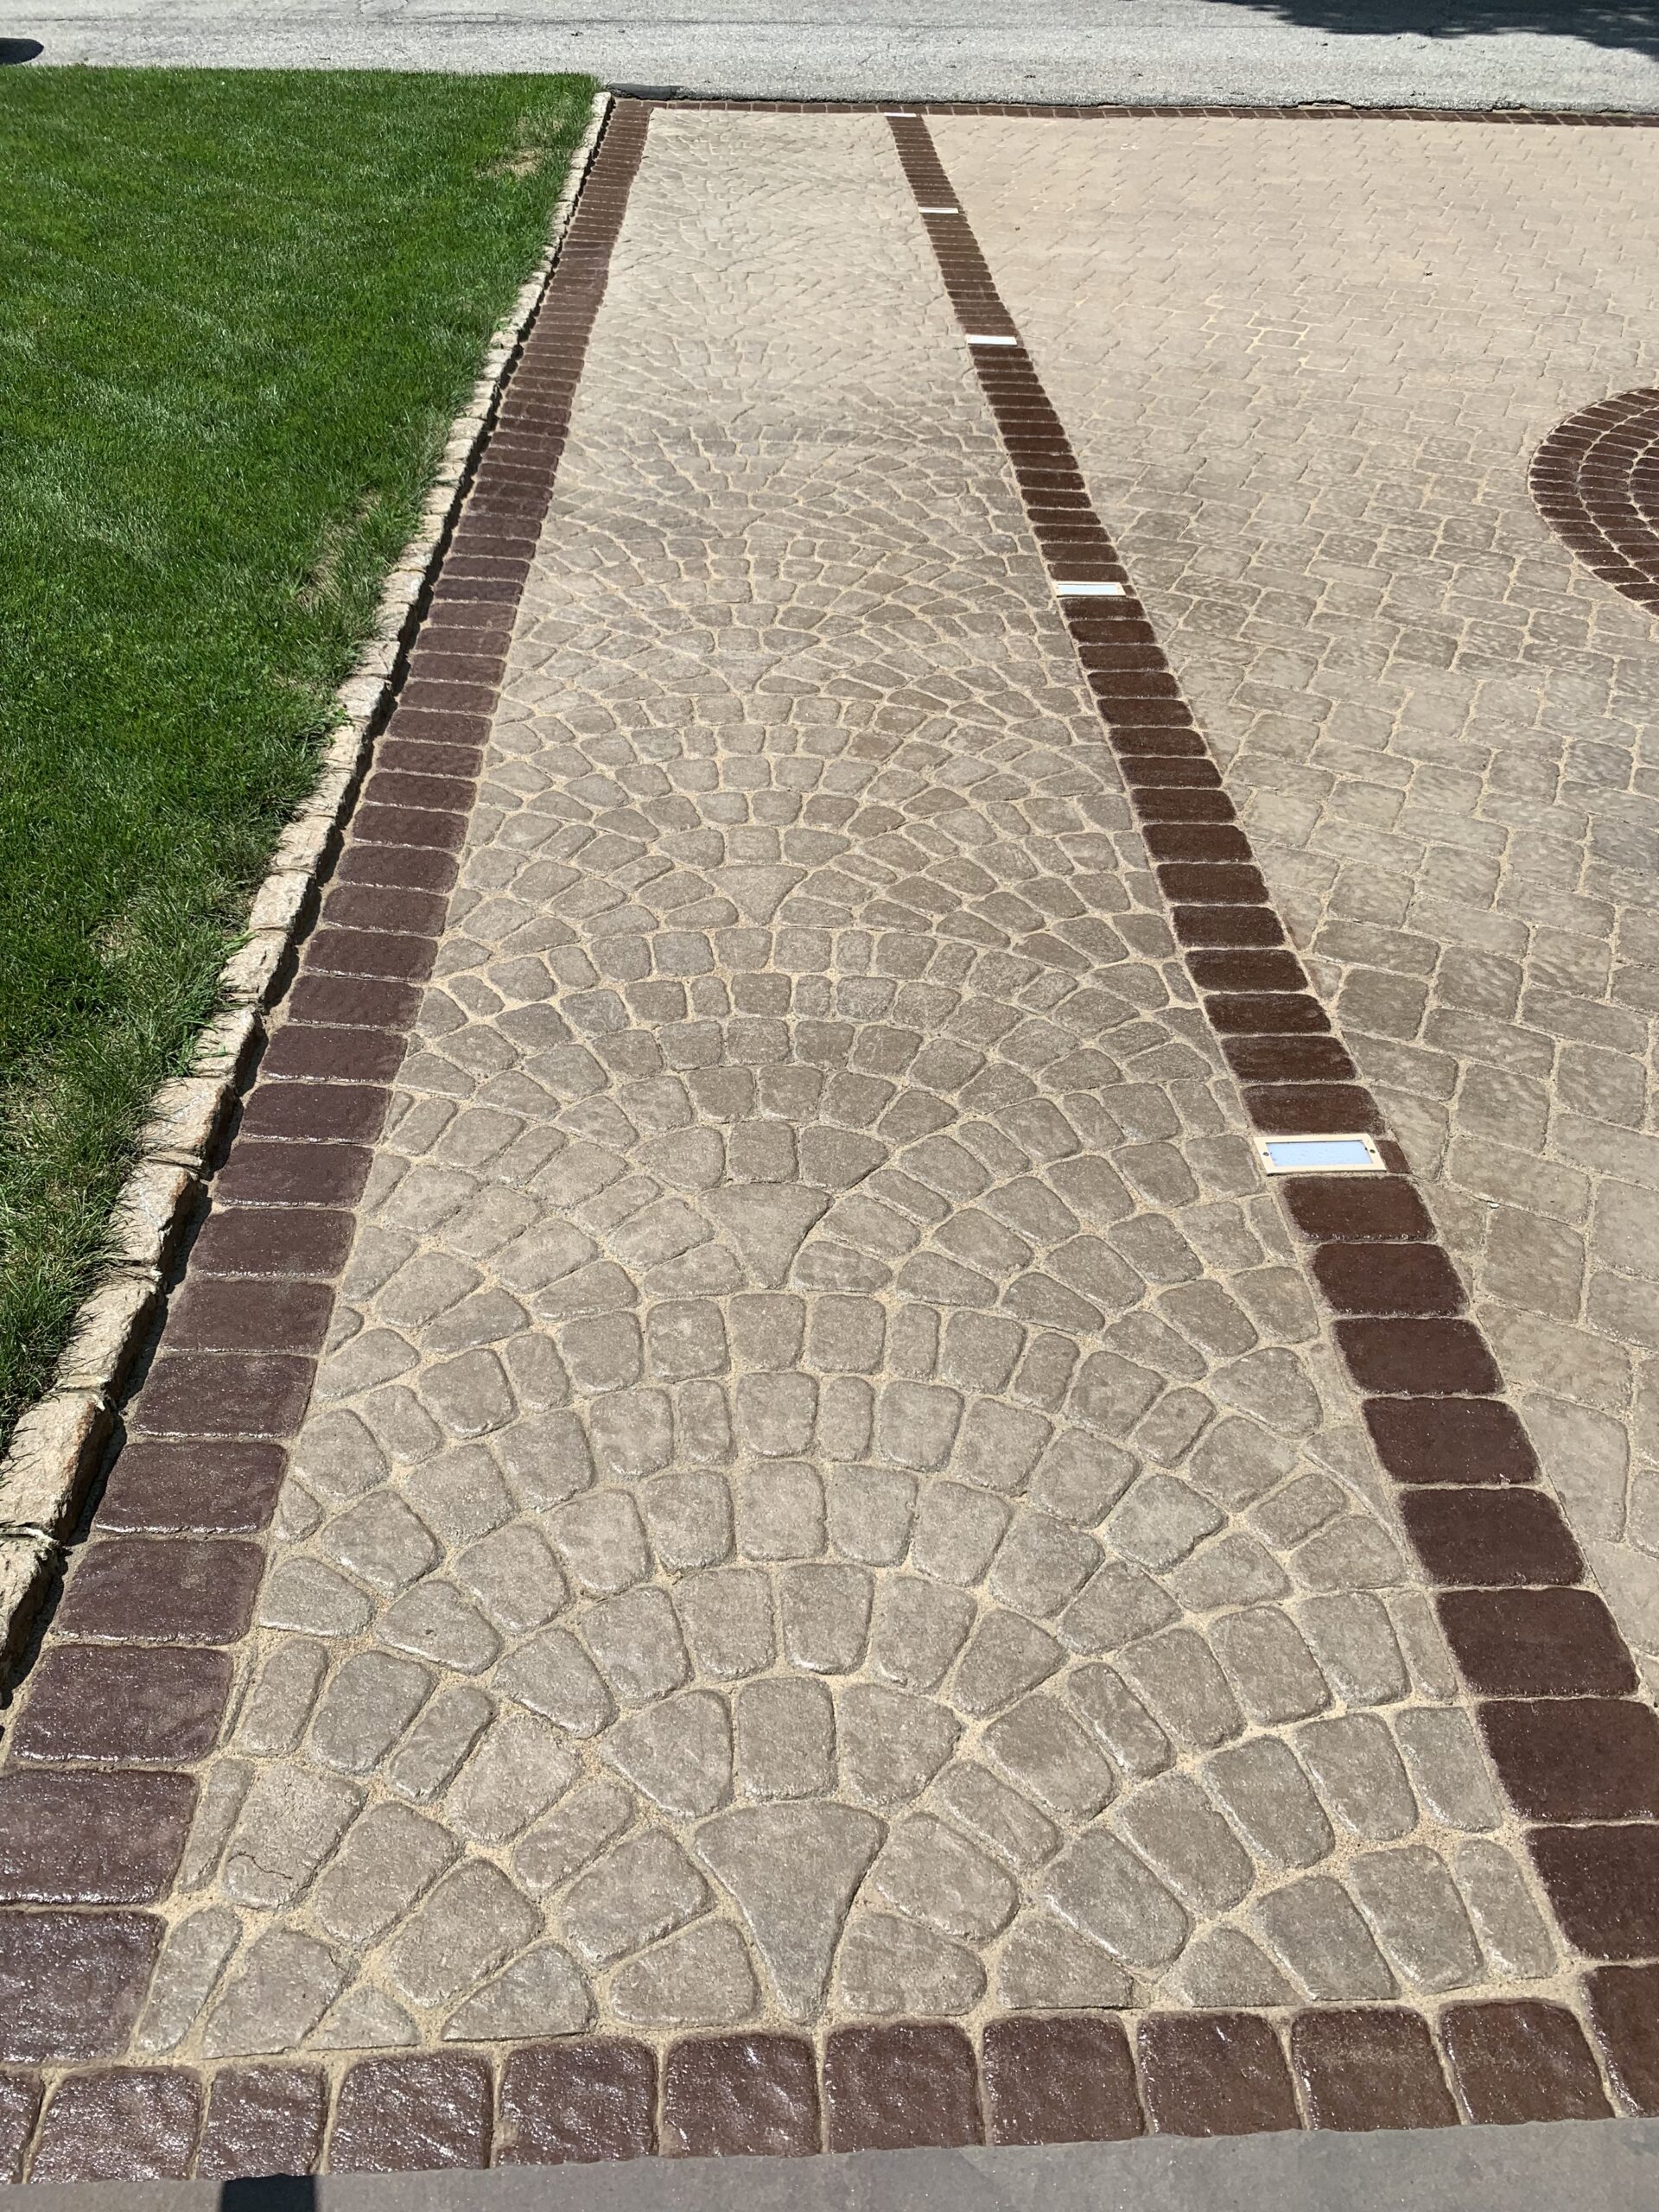
Check out how this homeowner brought a faded front walkway back to its bright, original color for only $125. This makeover shows you don’t need to spend a lot to make your outdoor space look amazing.
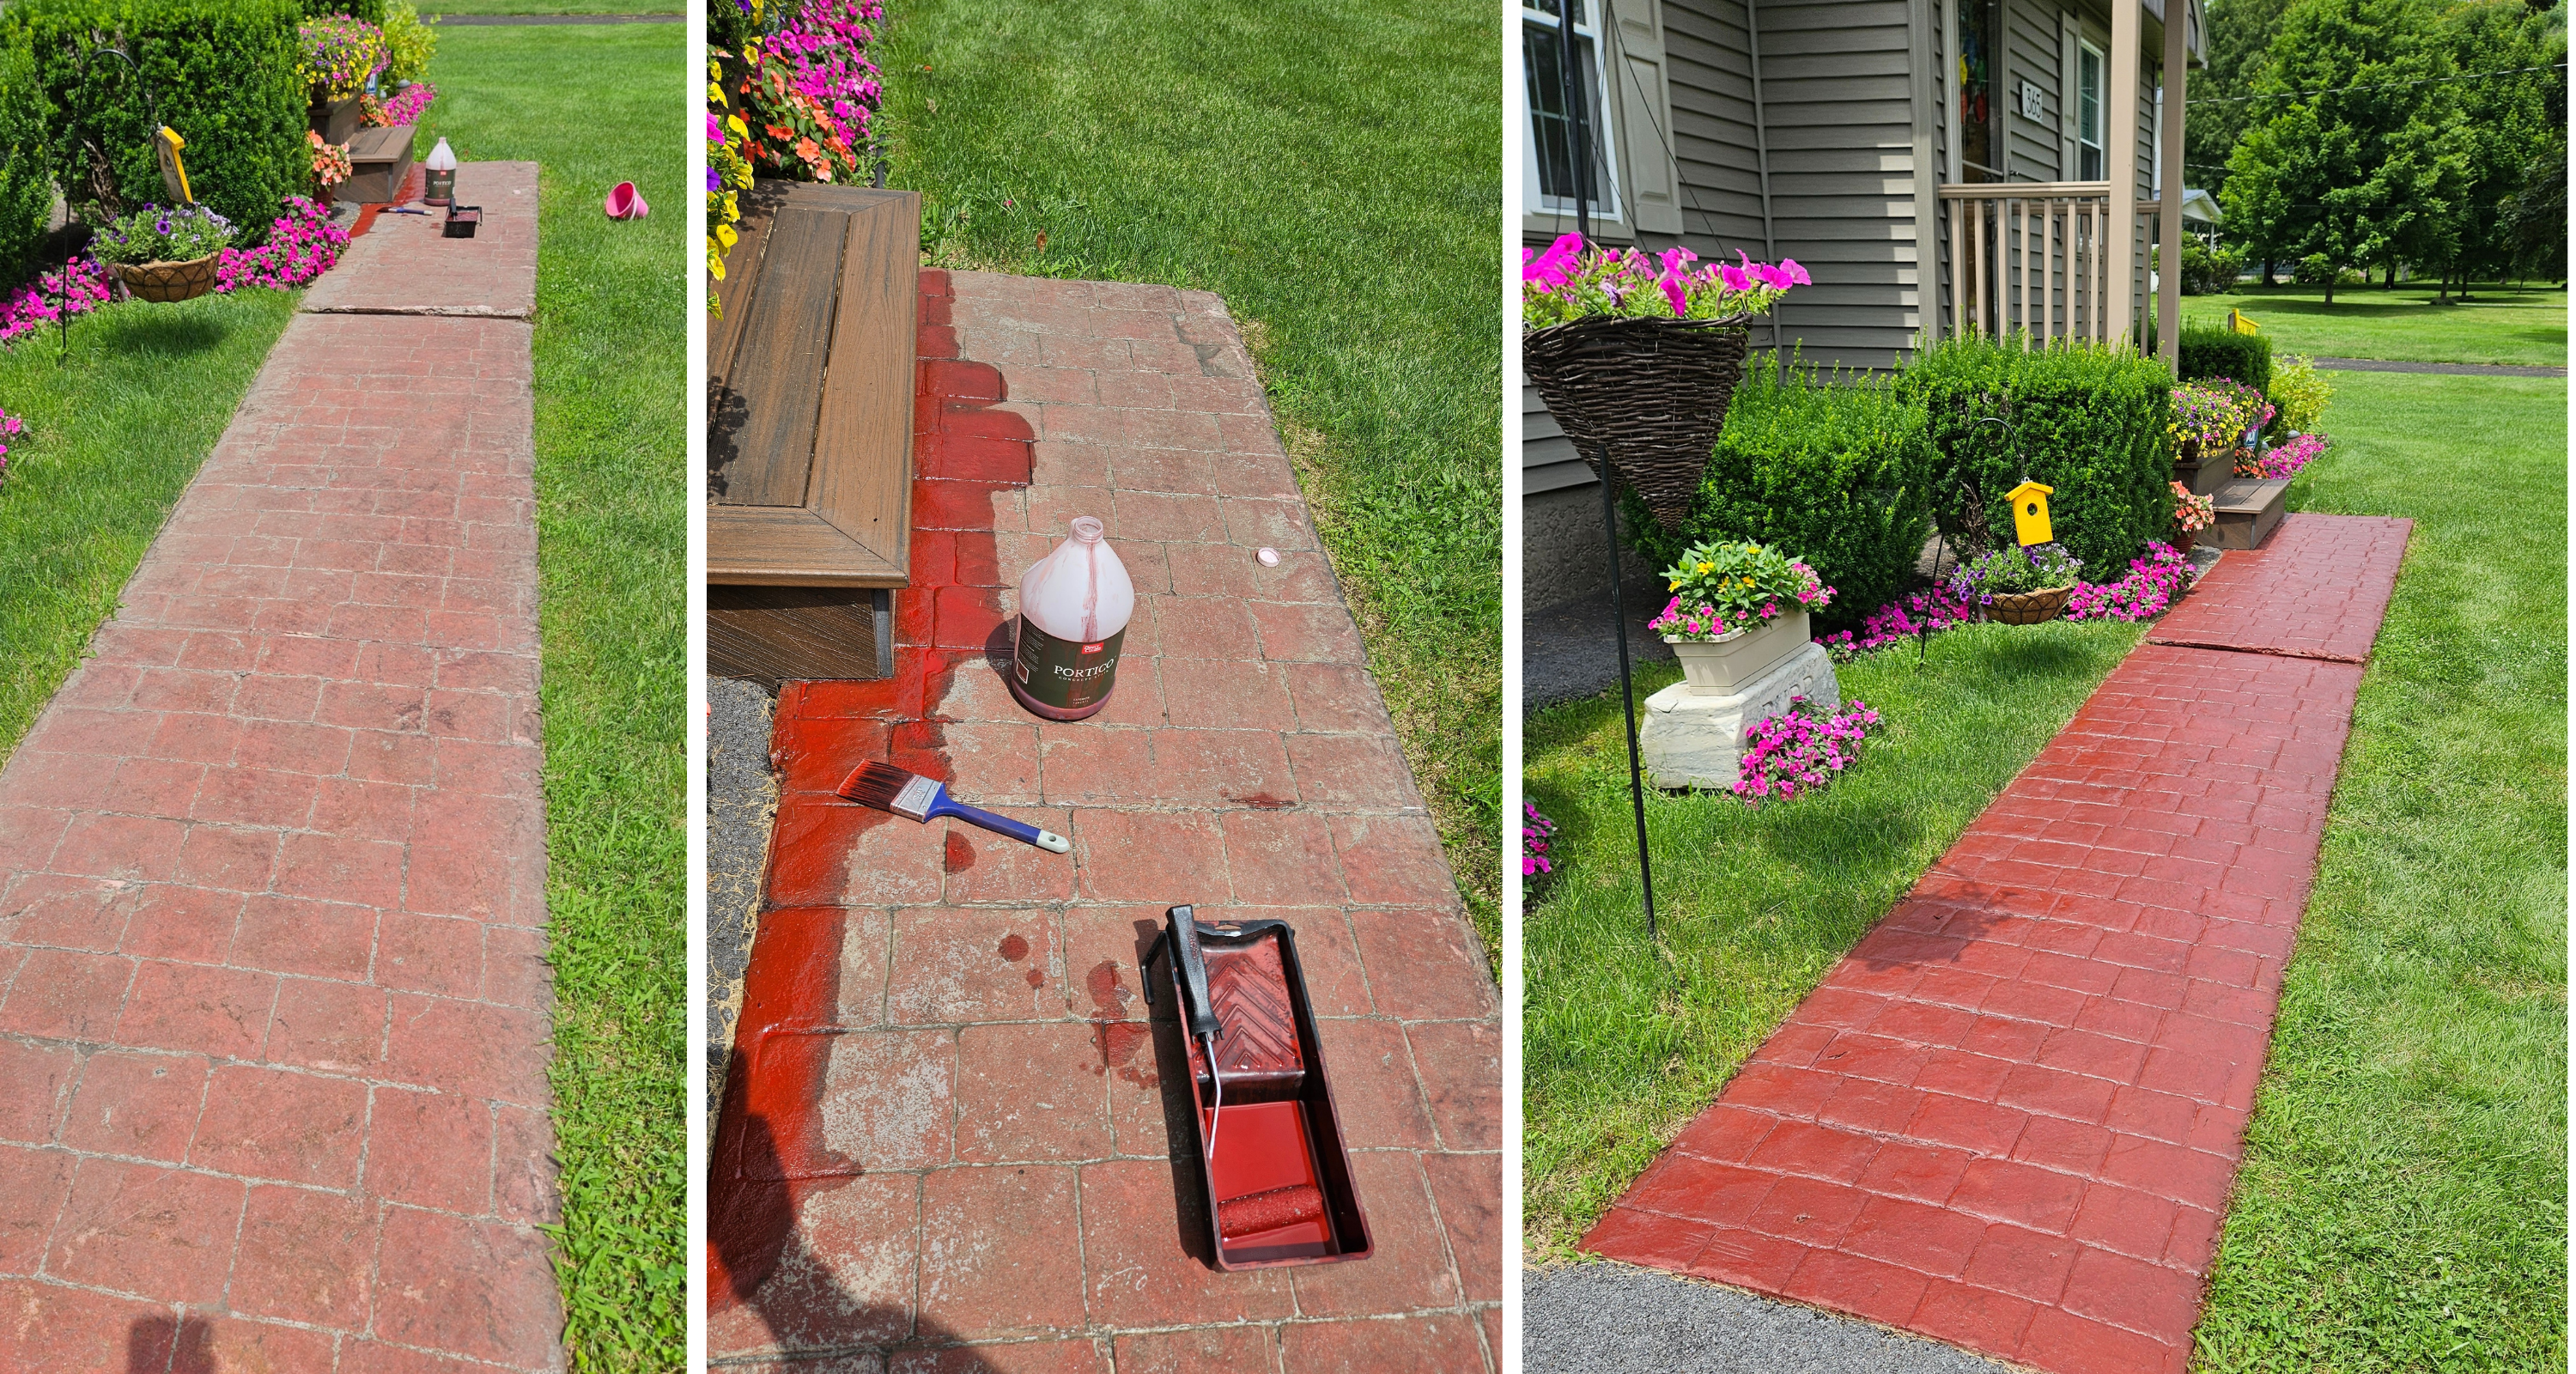
This gallery features customer projects using Portico™ Paver Stain, offering inspiration. Please note, Portico™ is semi-transparent, so the final look depends on your concrete’s original color and condition, leading to possible variations. We advise doing a small test on your surface before full application to meet your expectations.
Brighten Pavers and Add a Budget-Friendly Border
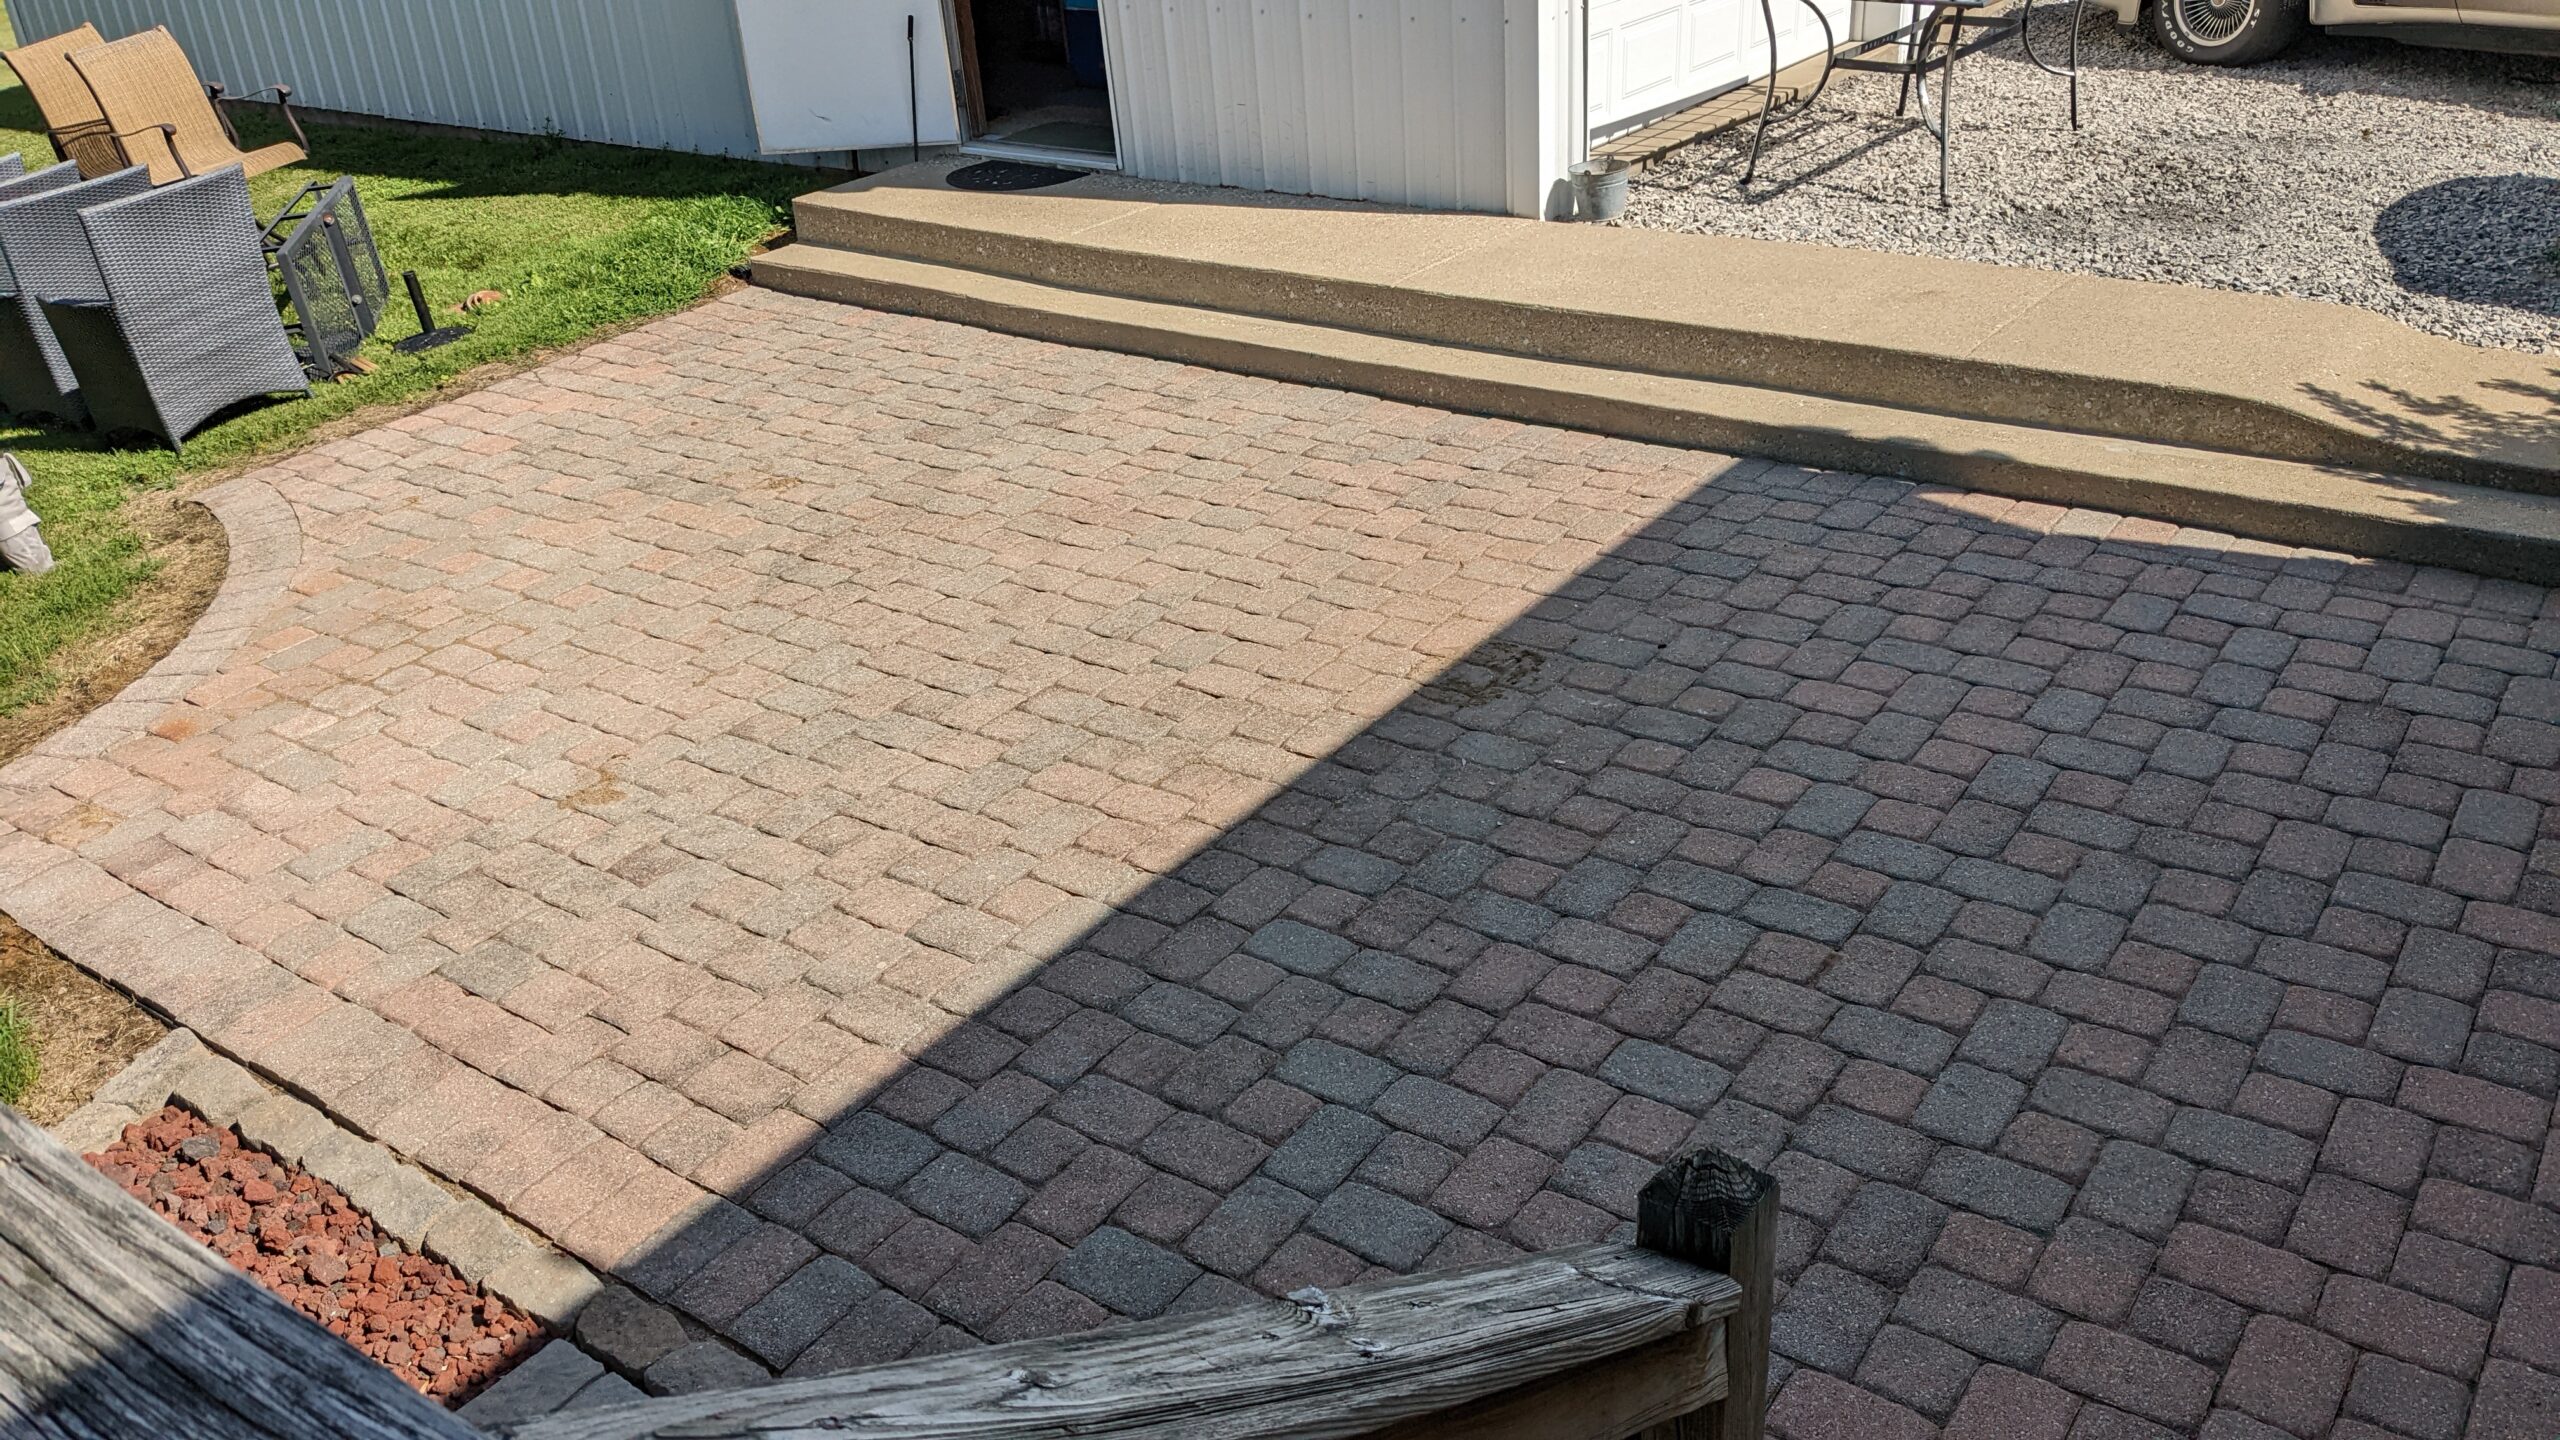
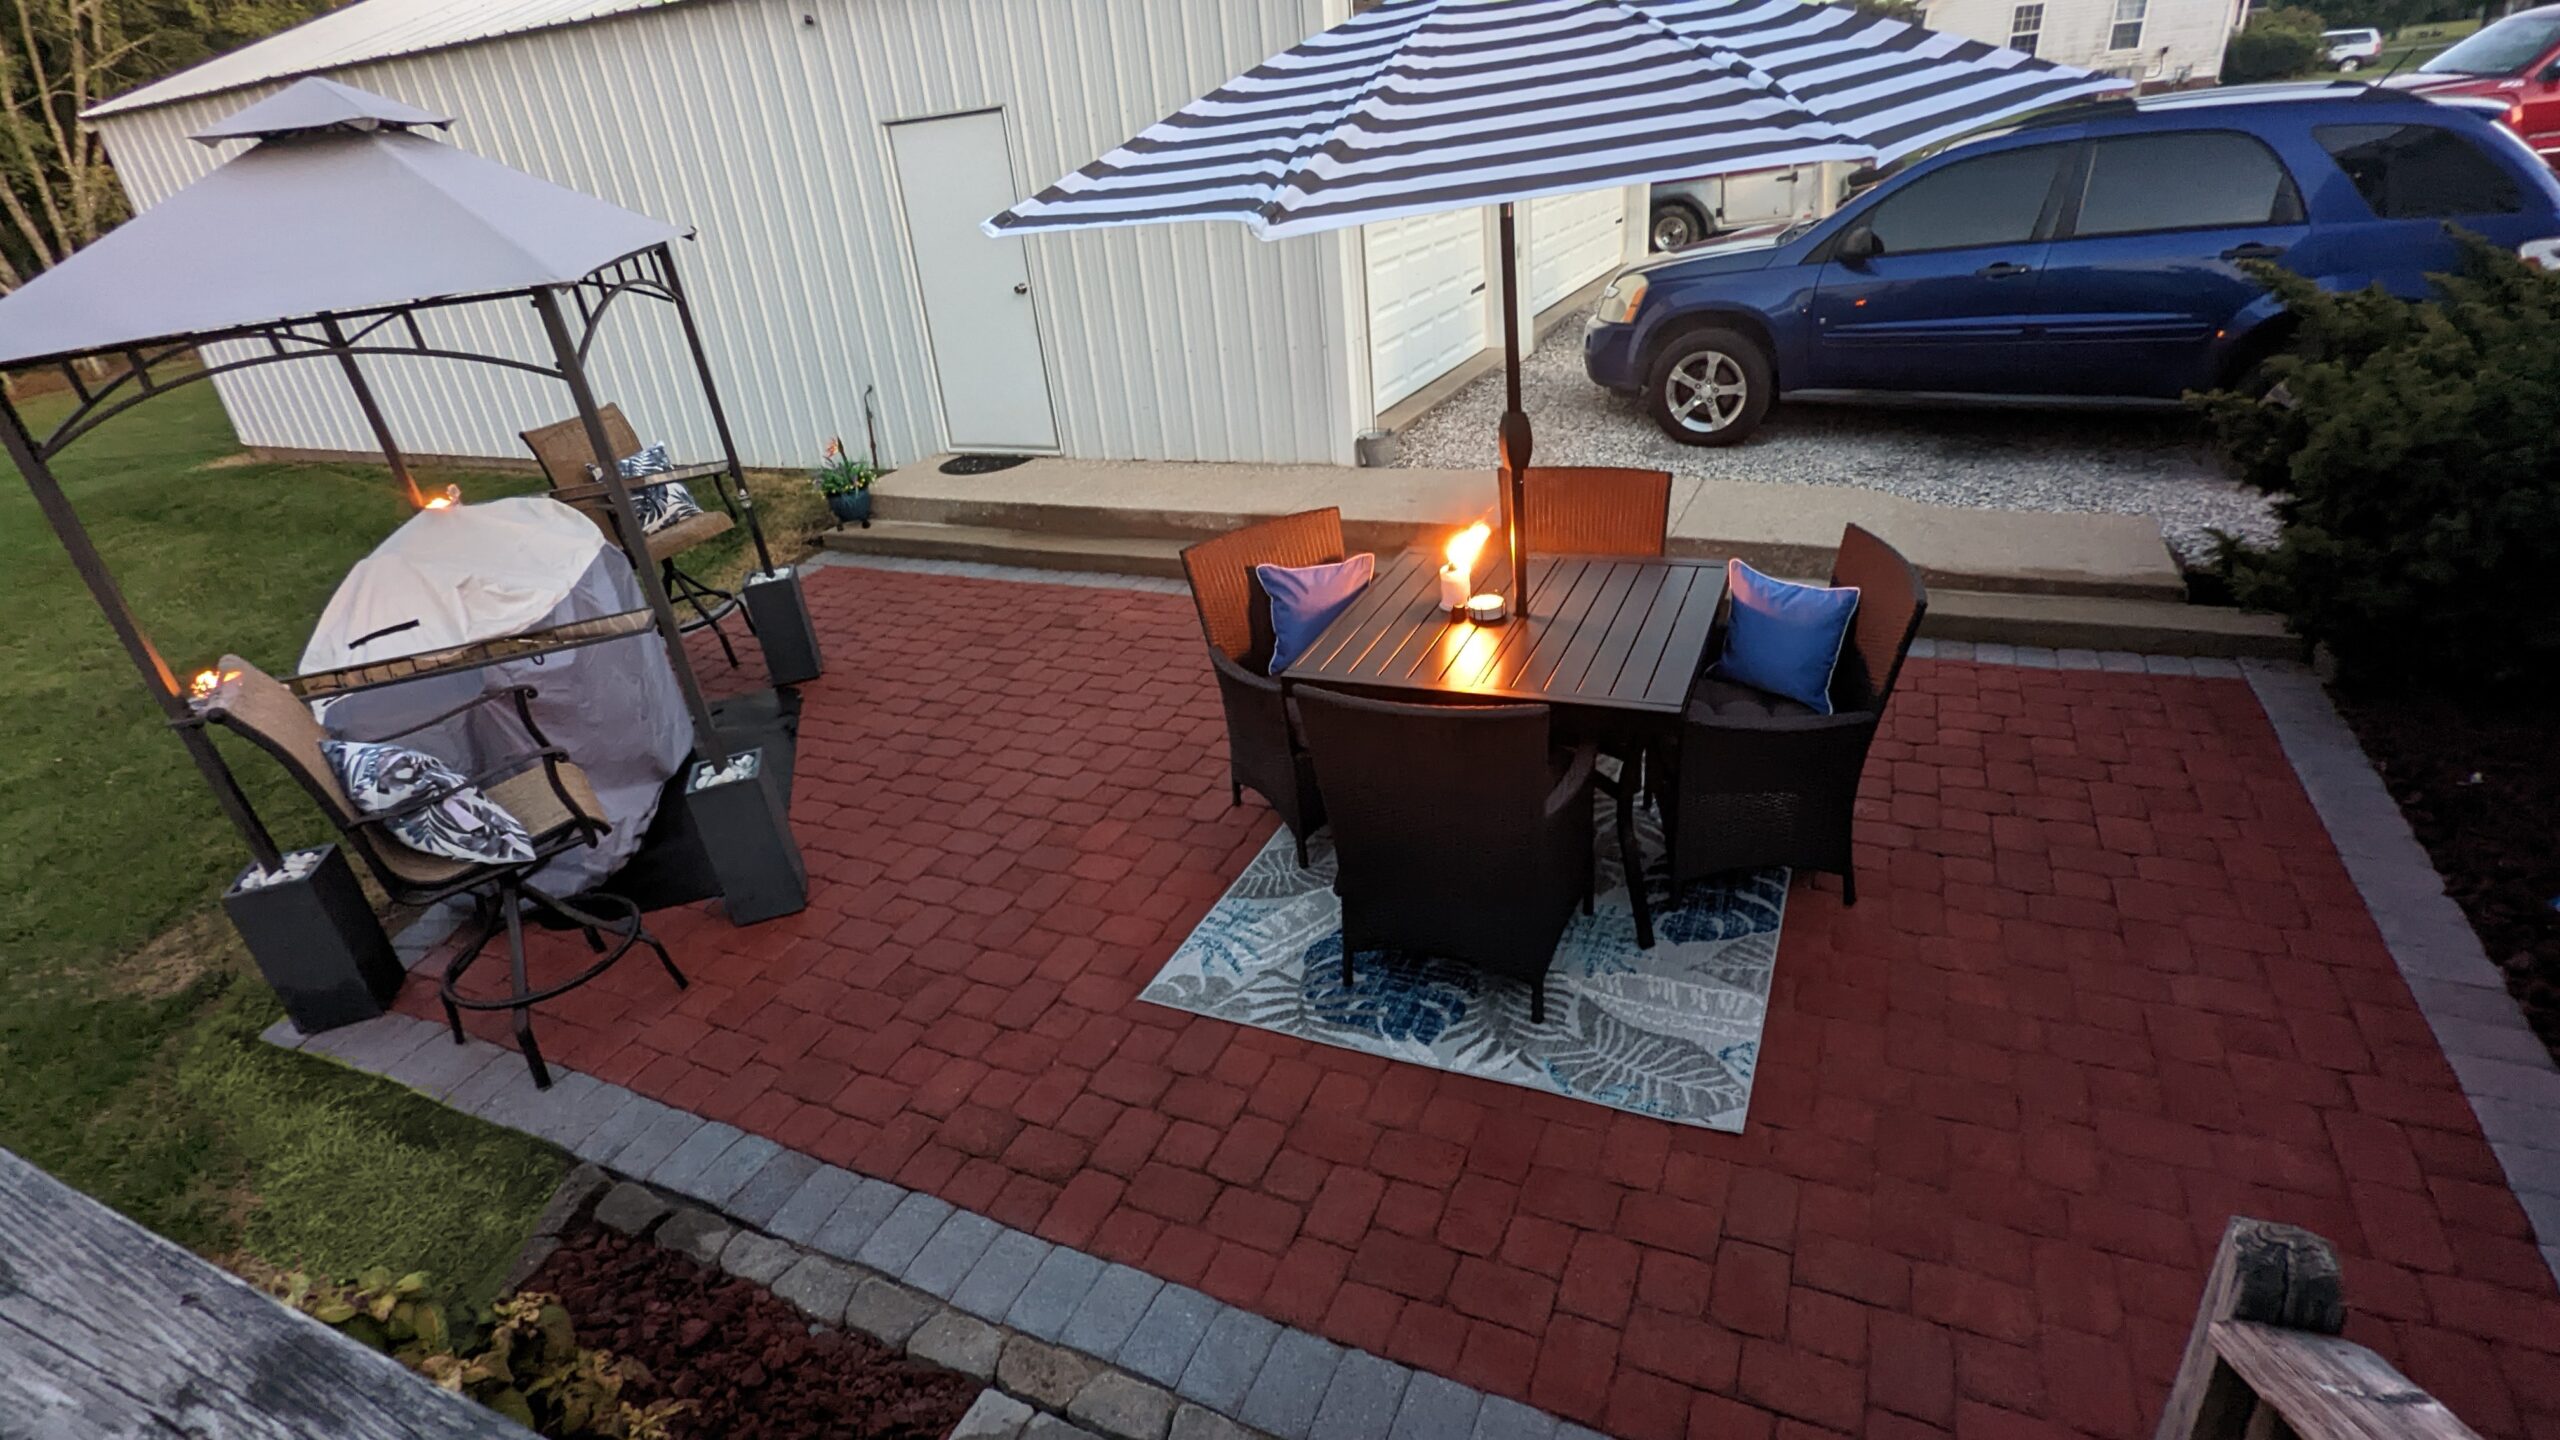
Find out how to get your faded brick pavers looking like new again and give your patio a fancy upgrade with a budget-friendly border. We’ll show you how to turn red brick pavers gray for that expensive look without spending a ton.
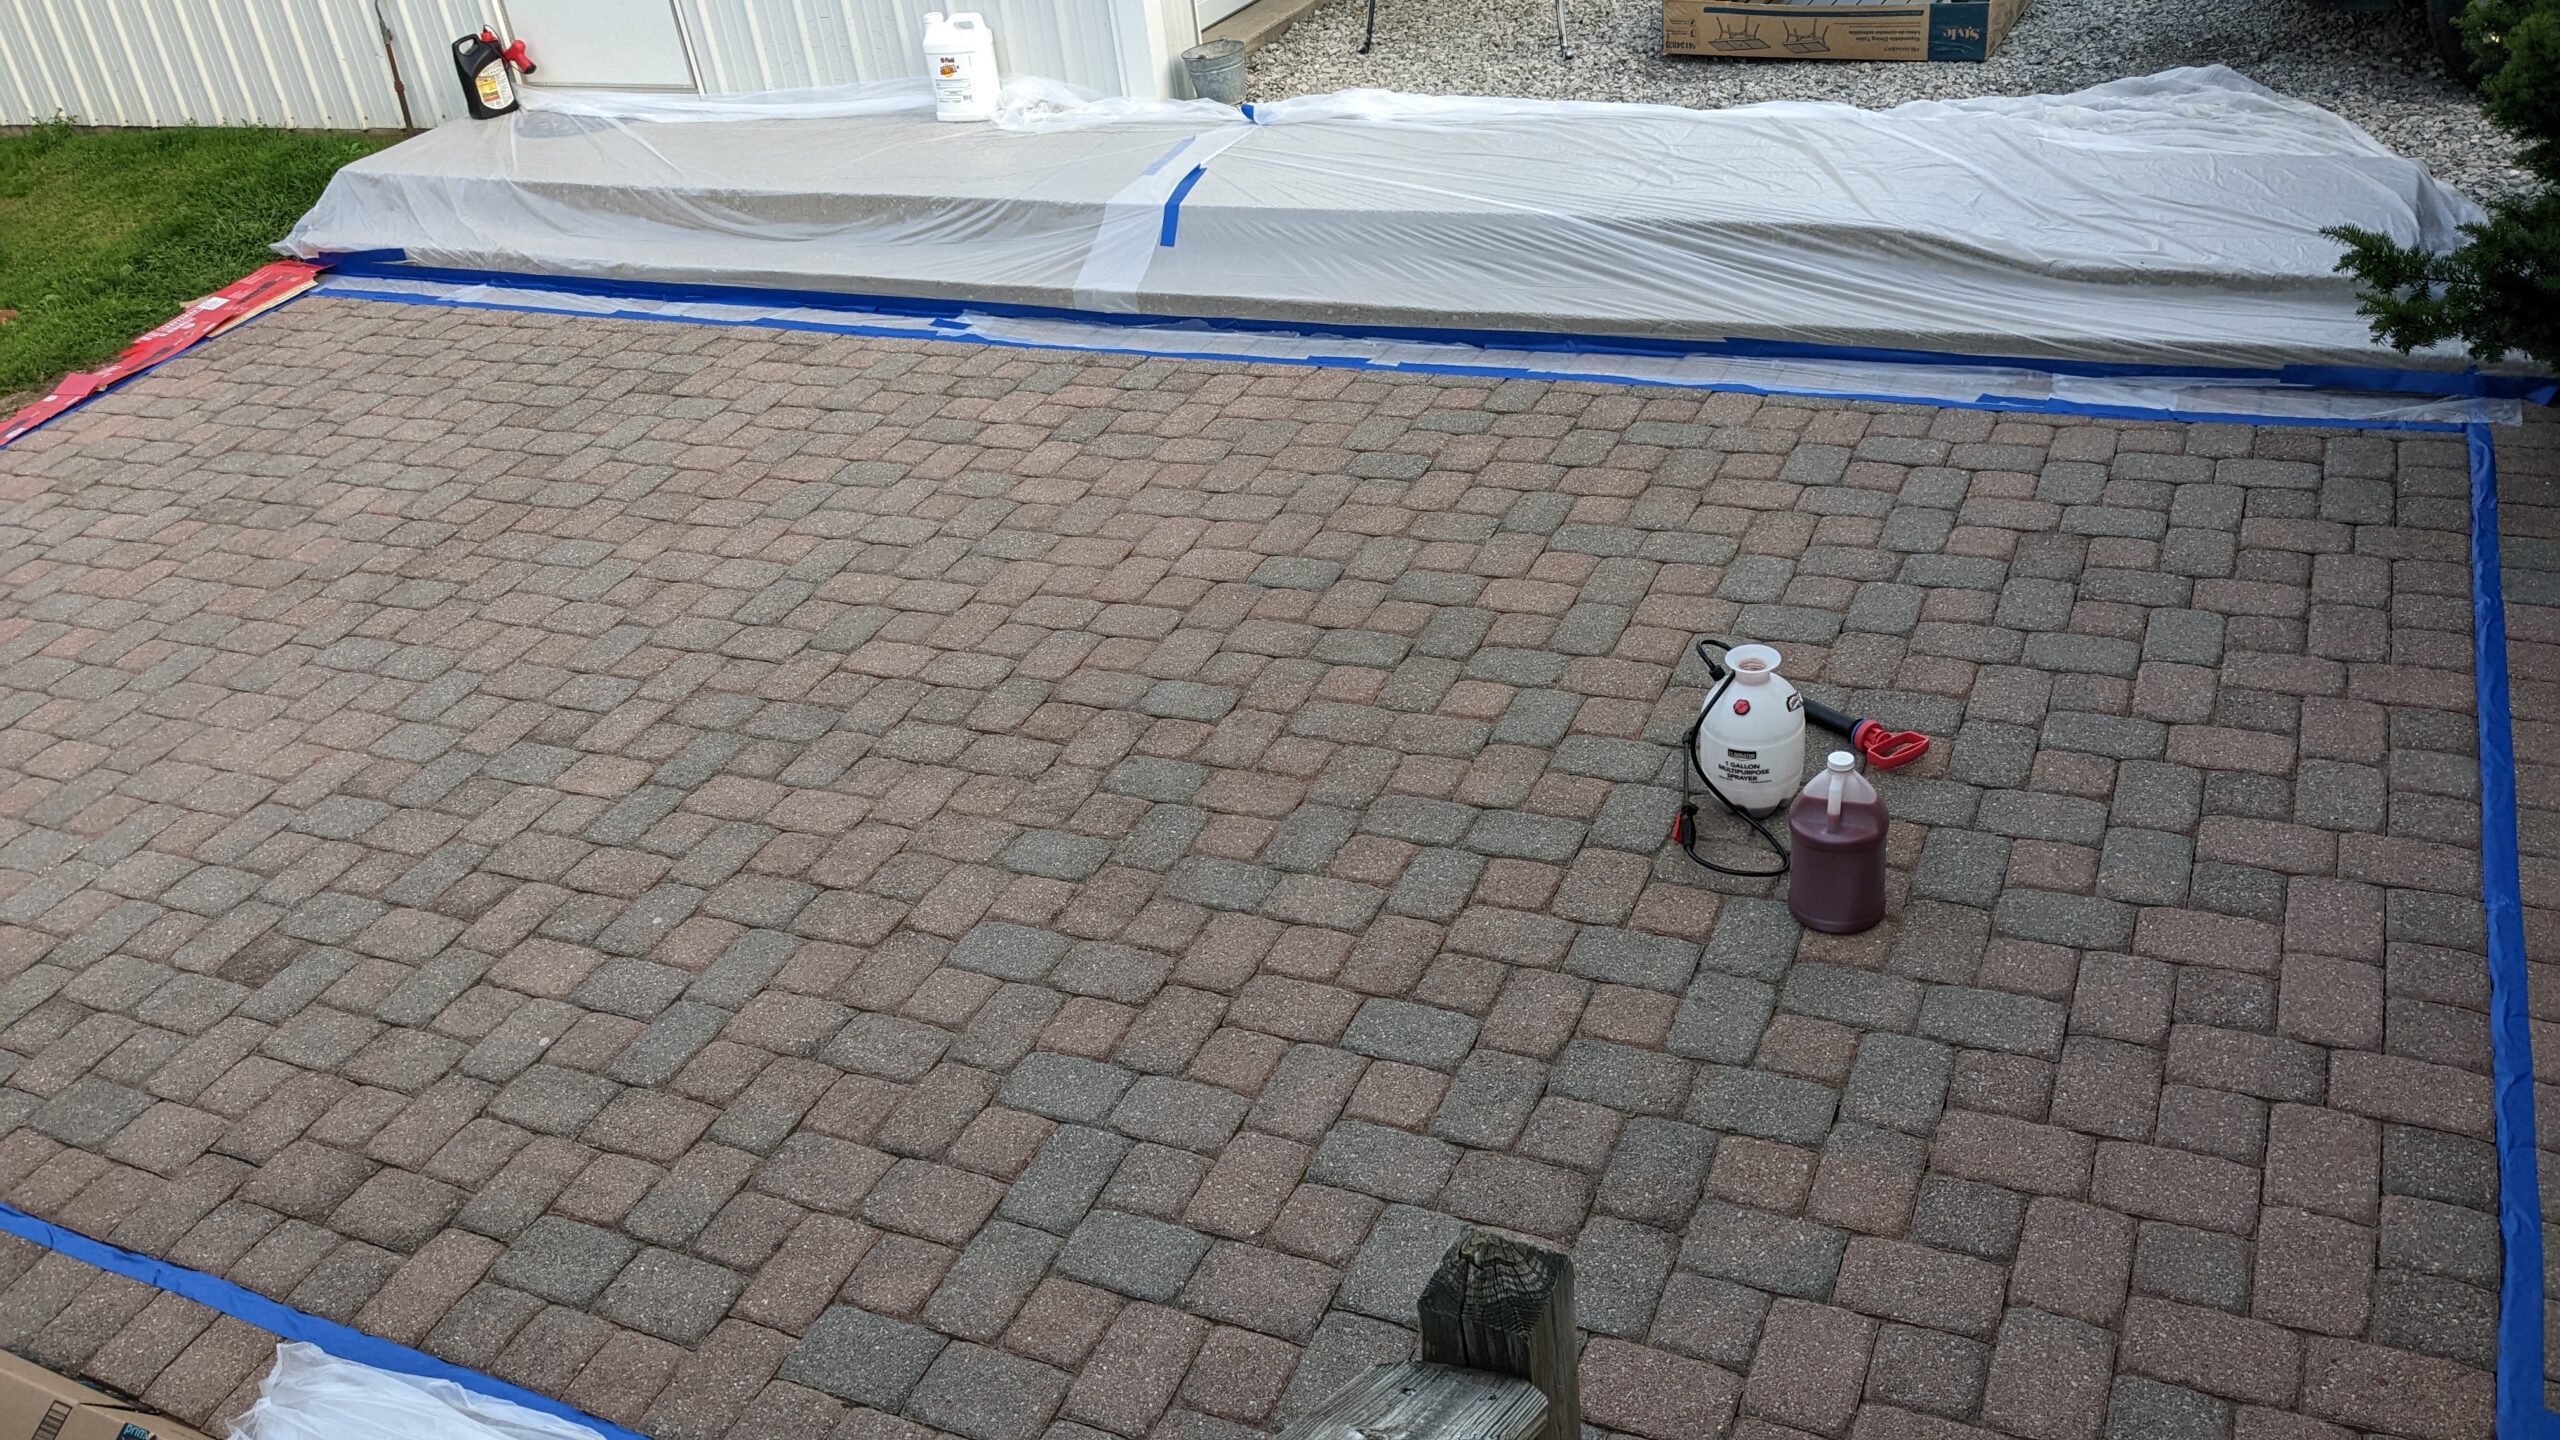
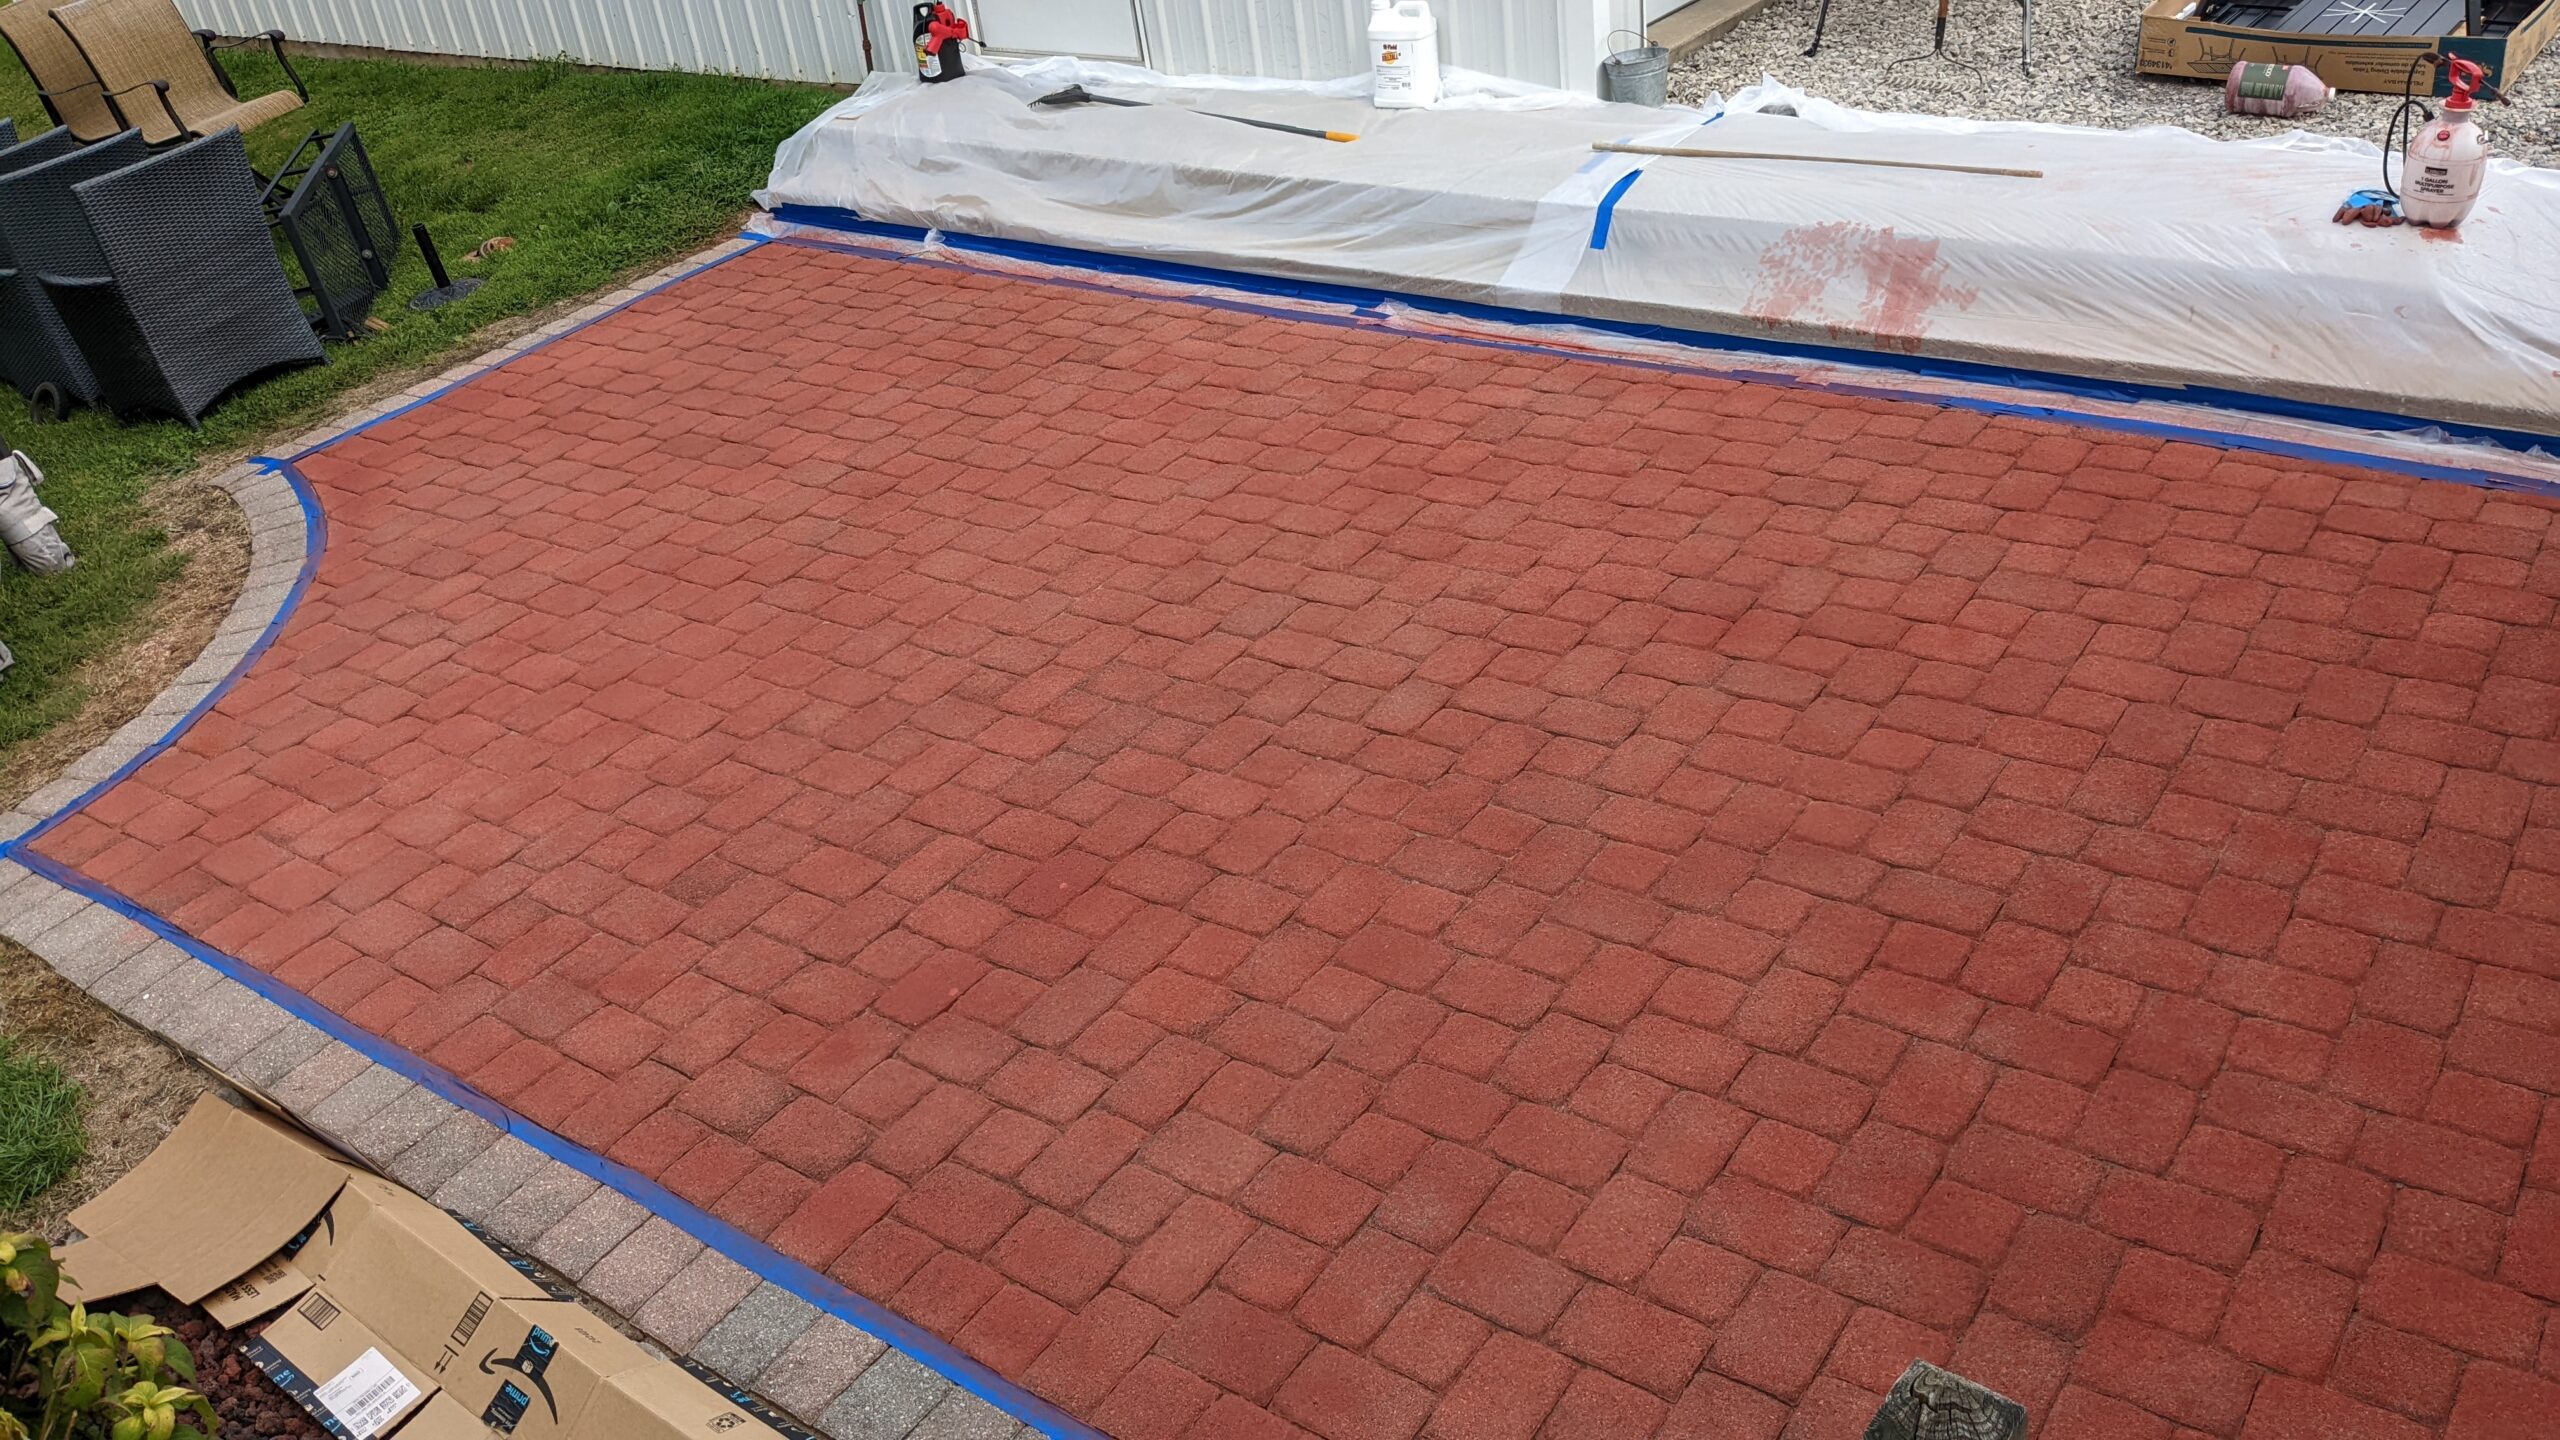
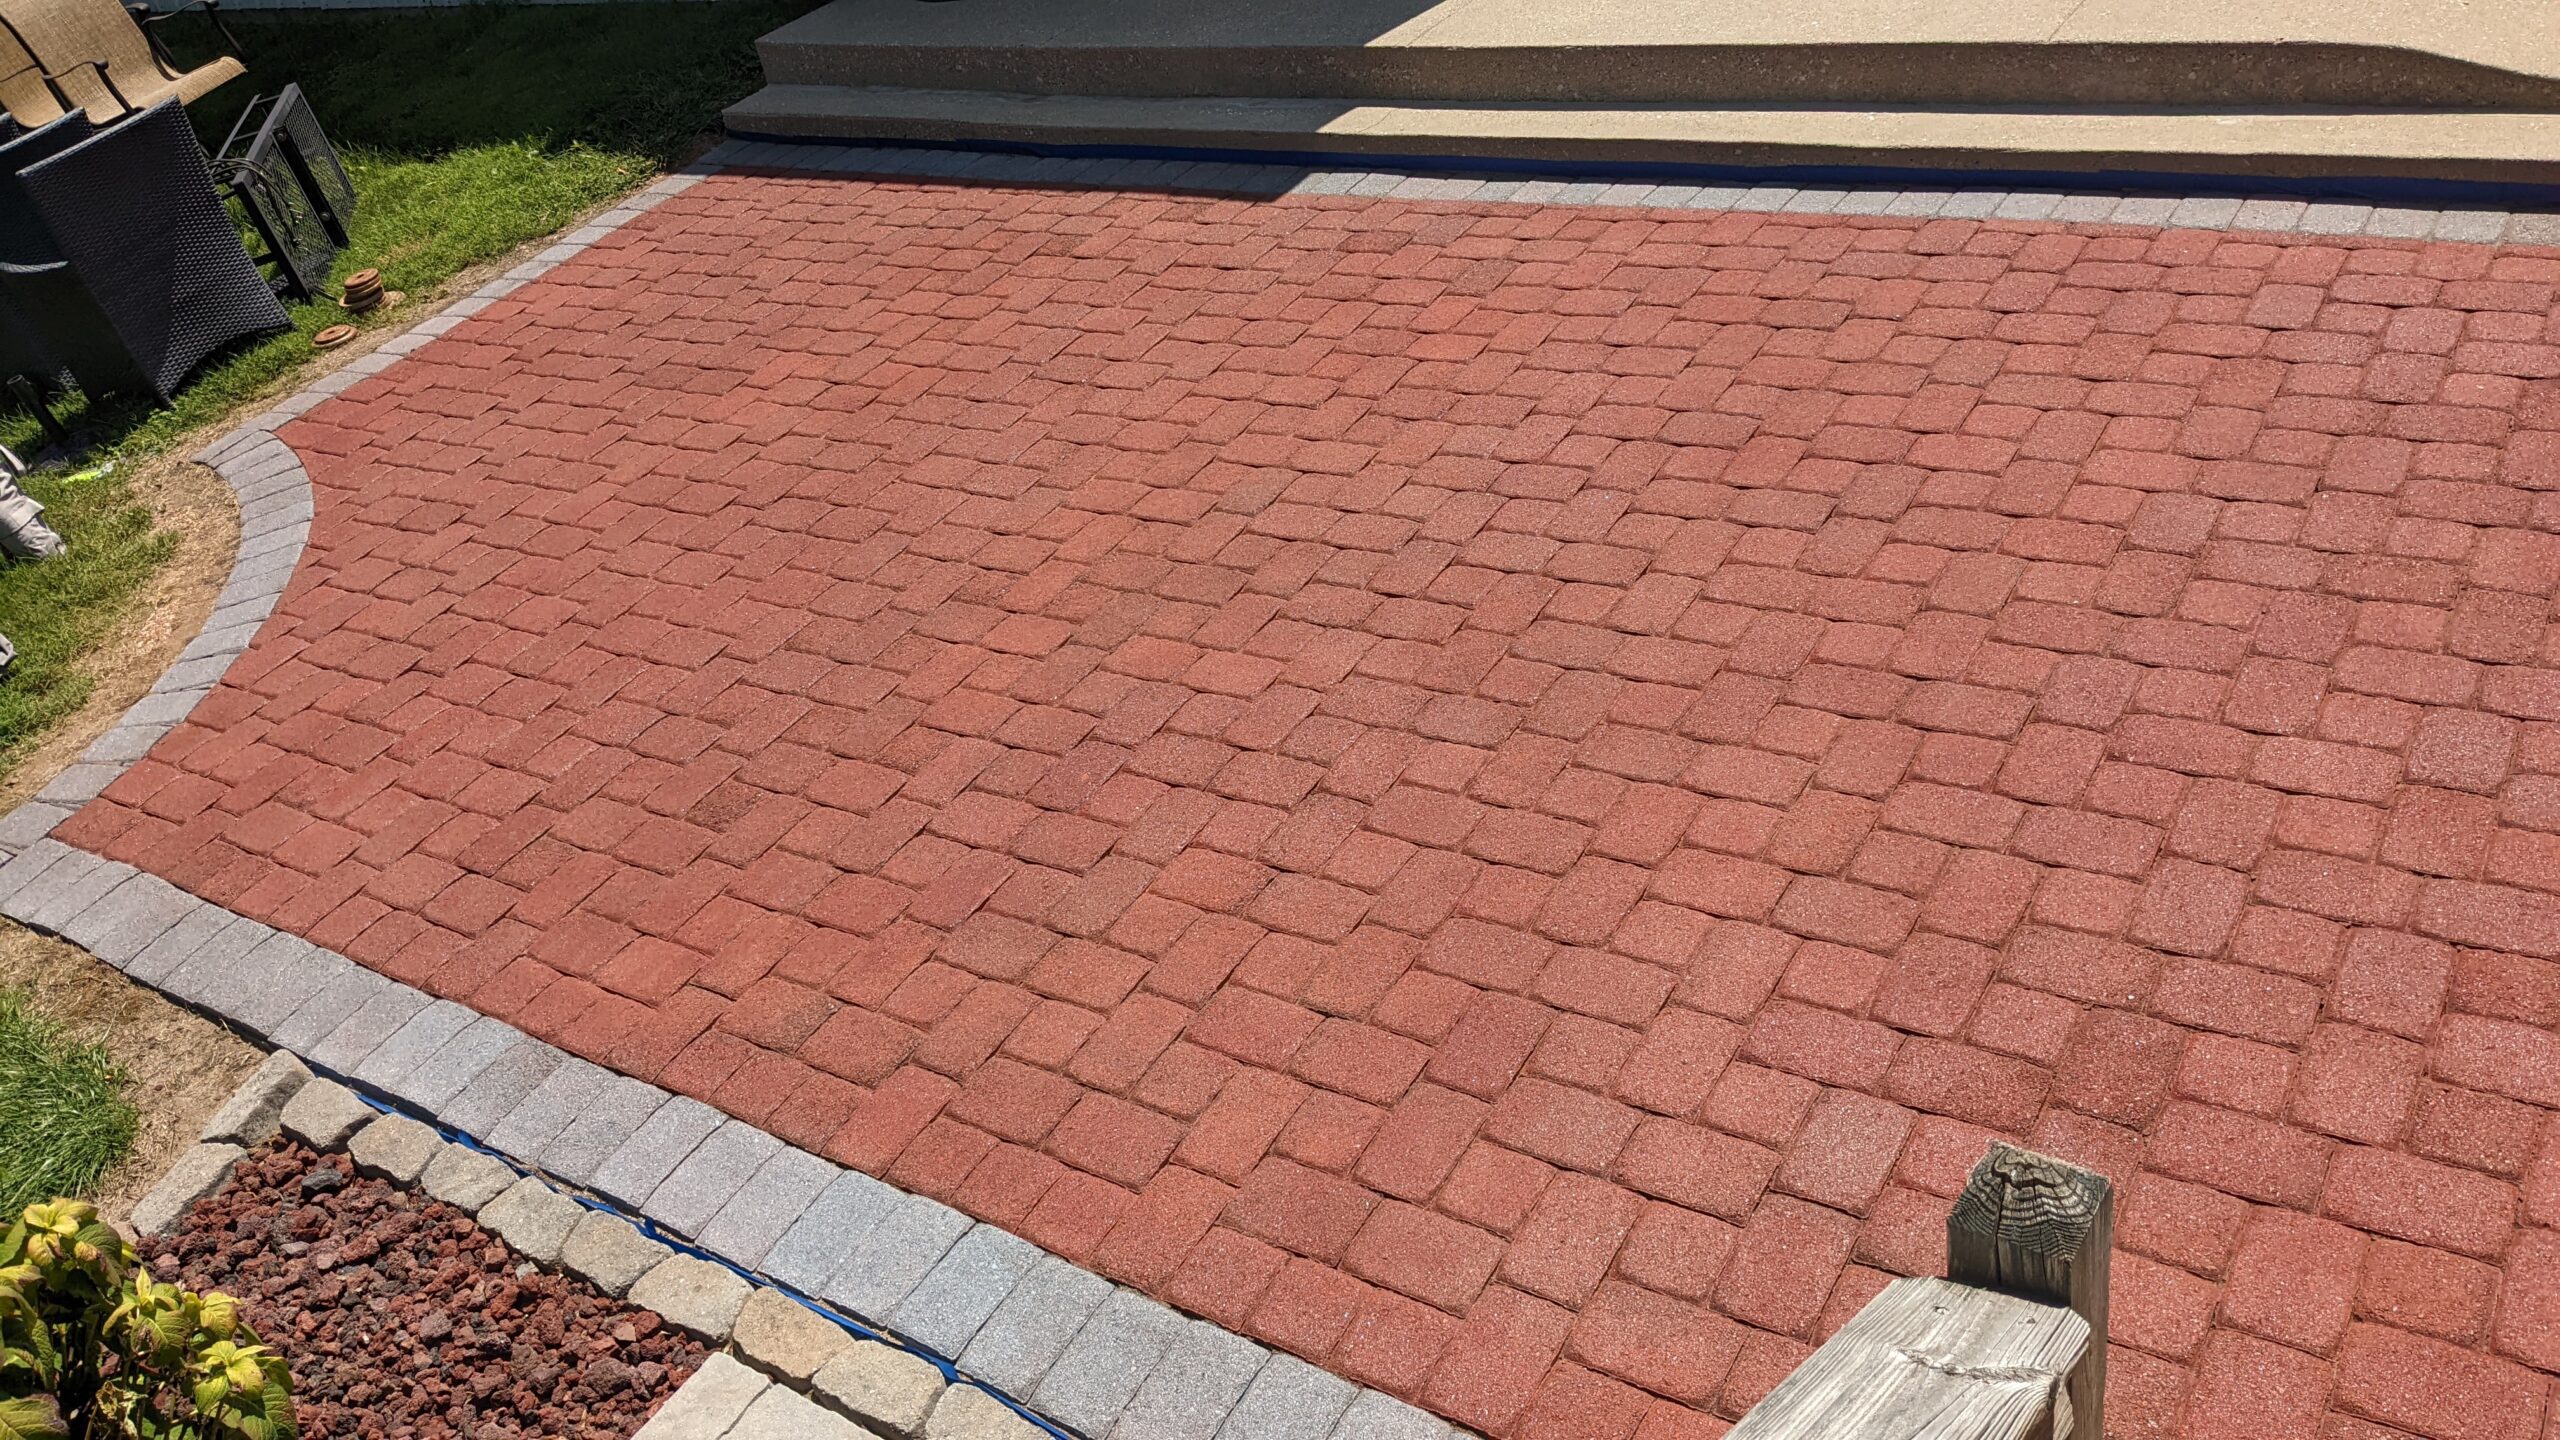
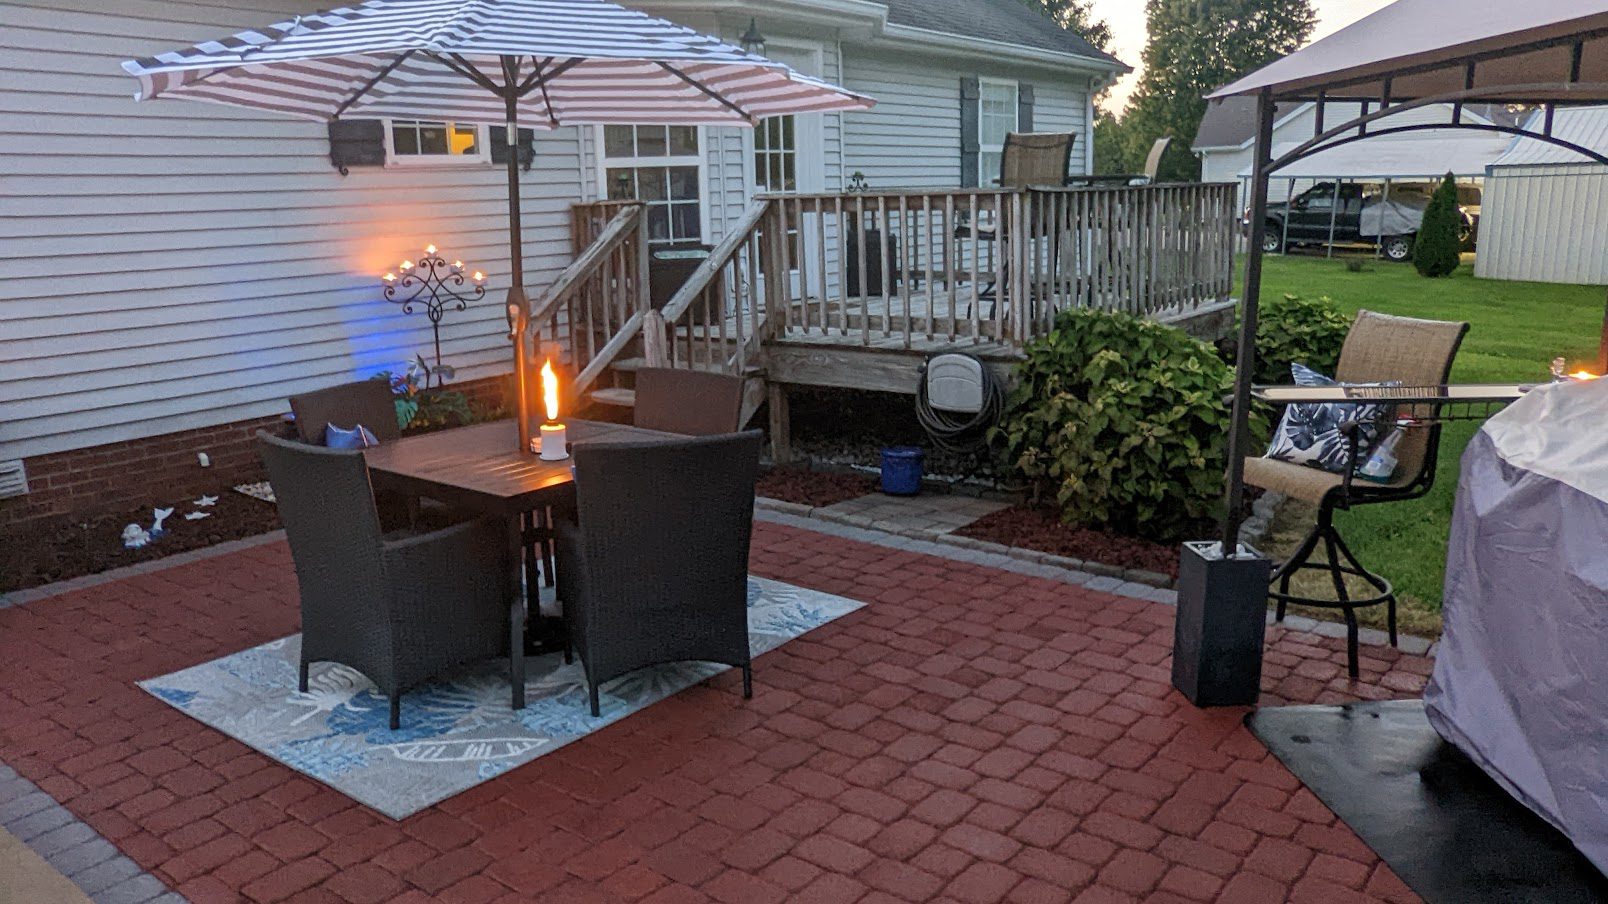
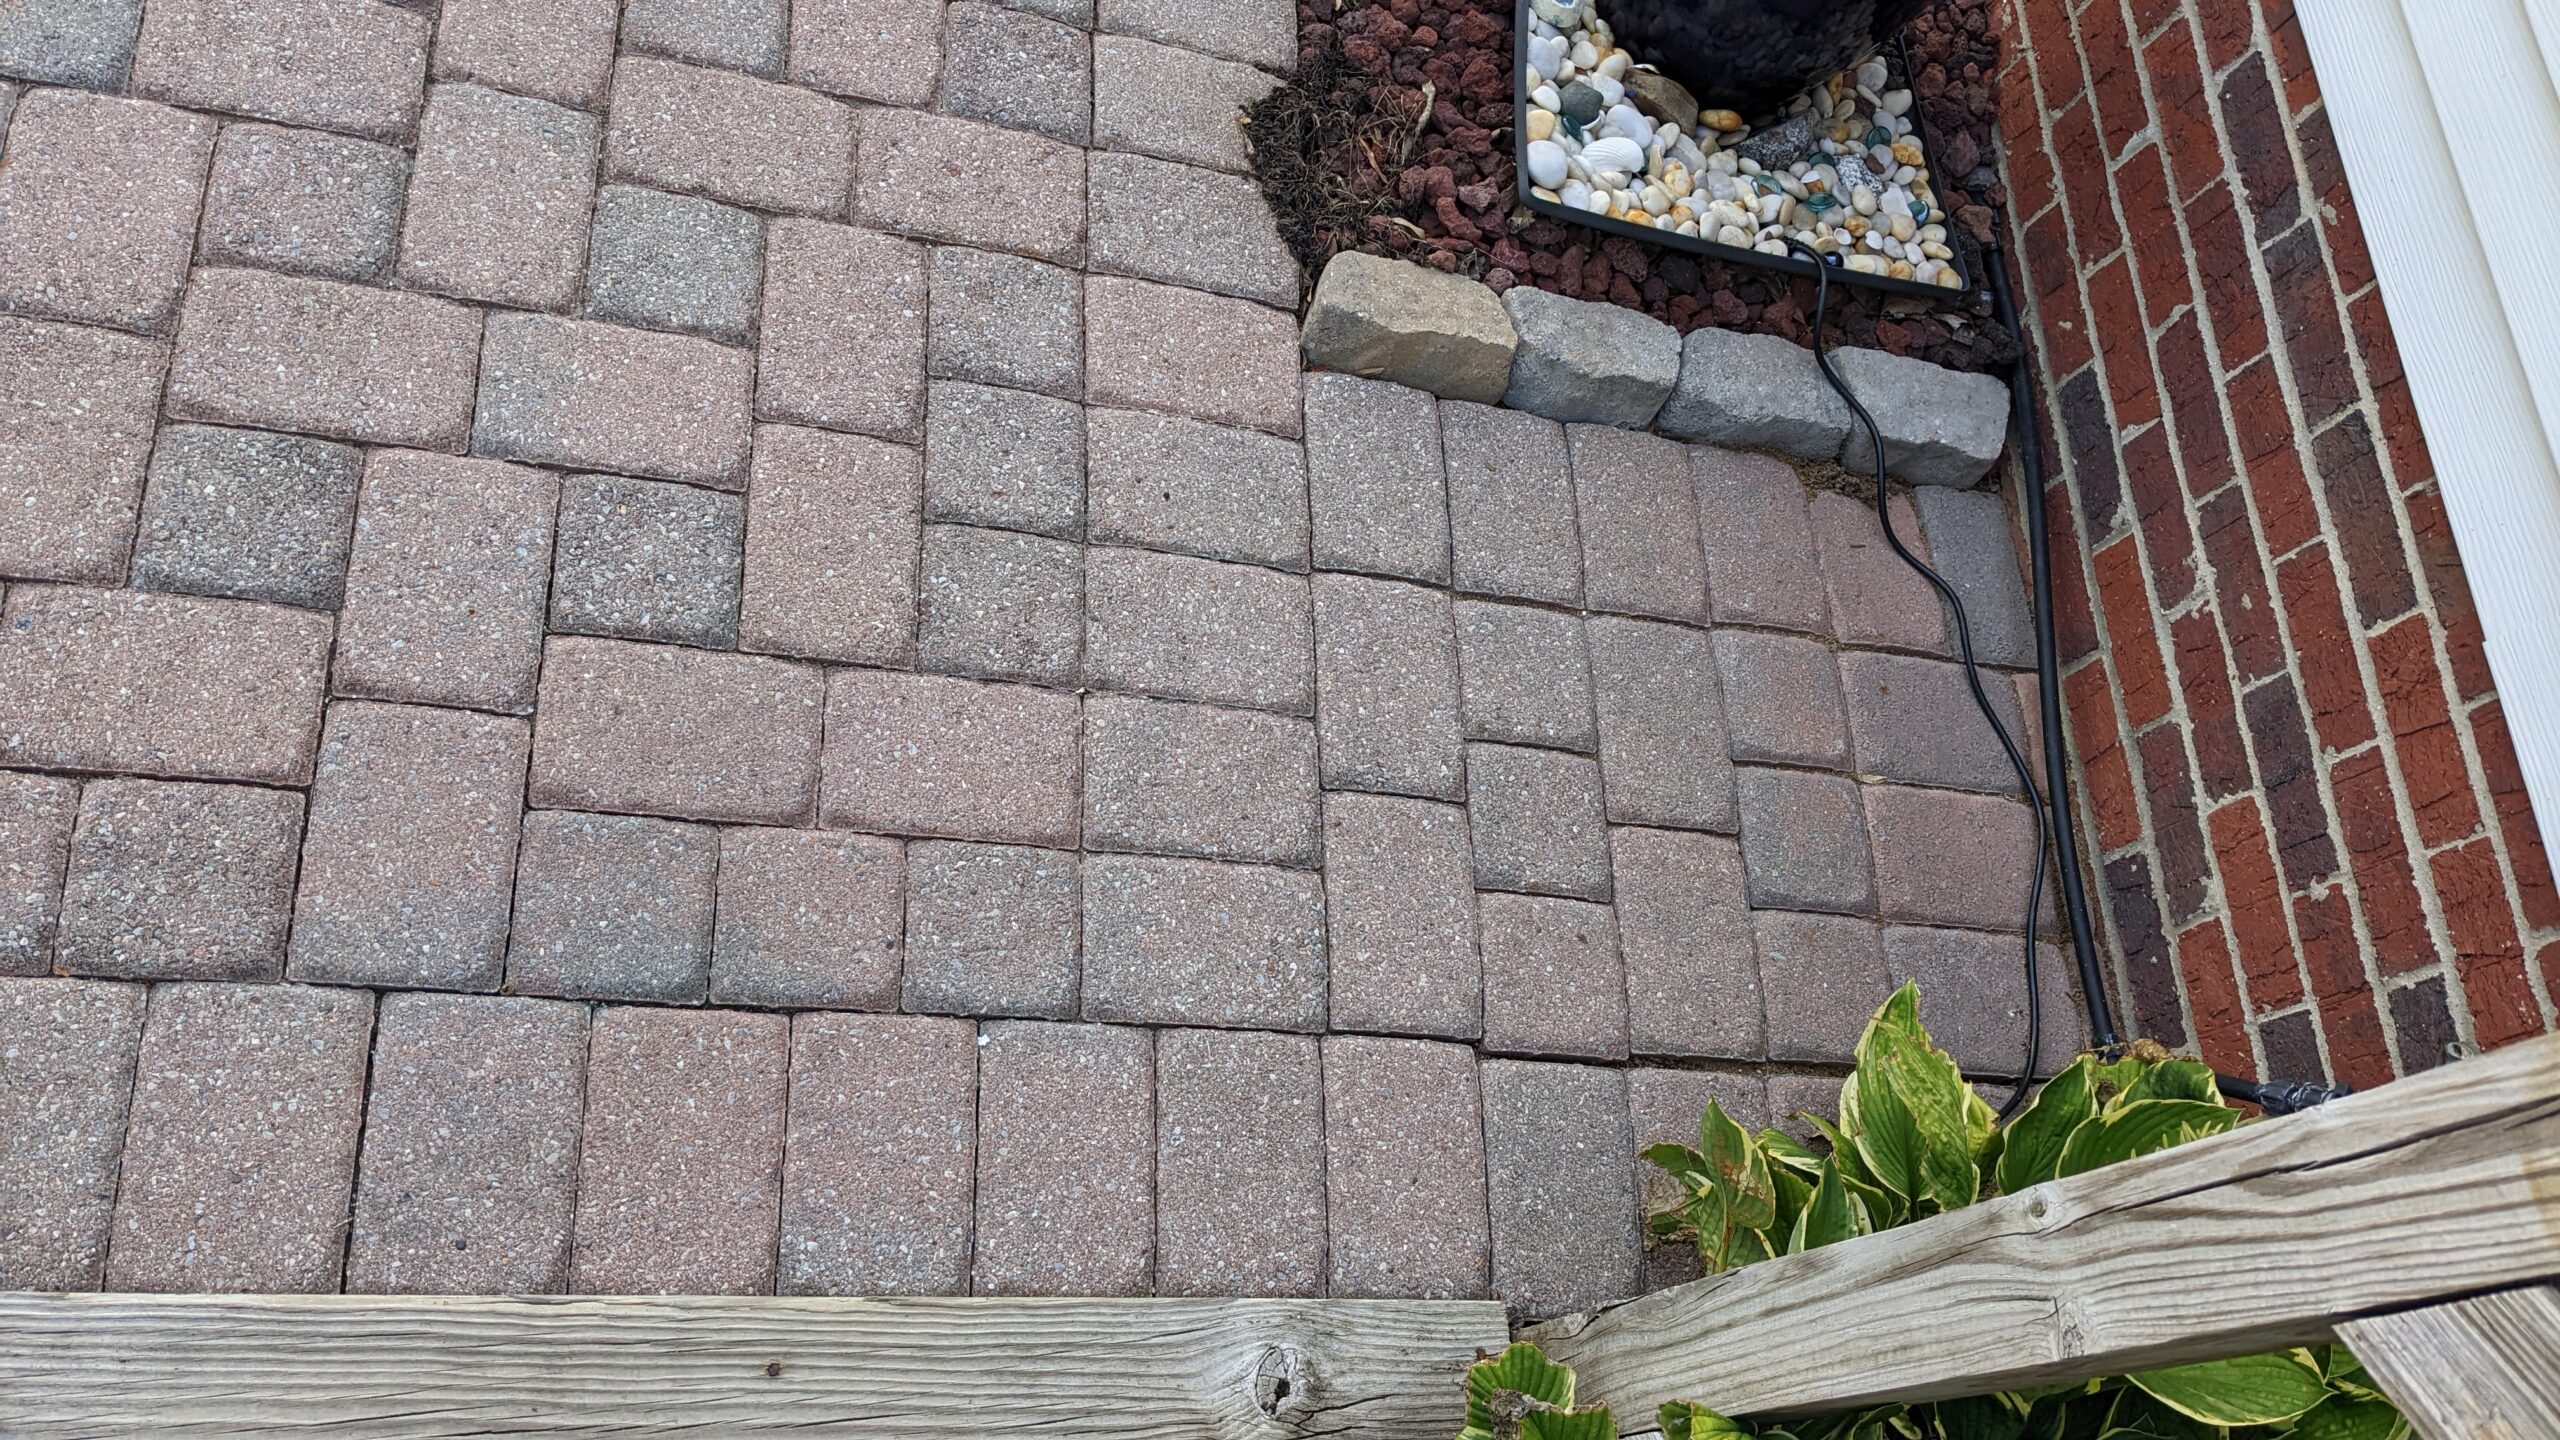
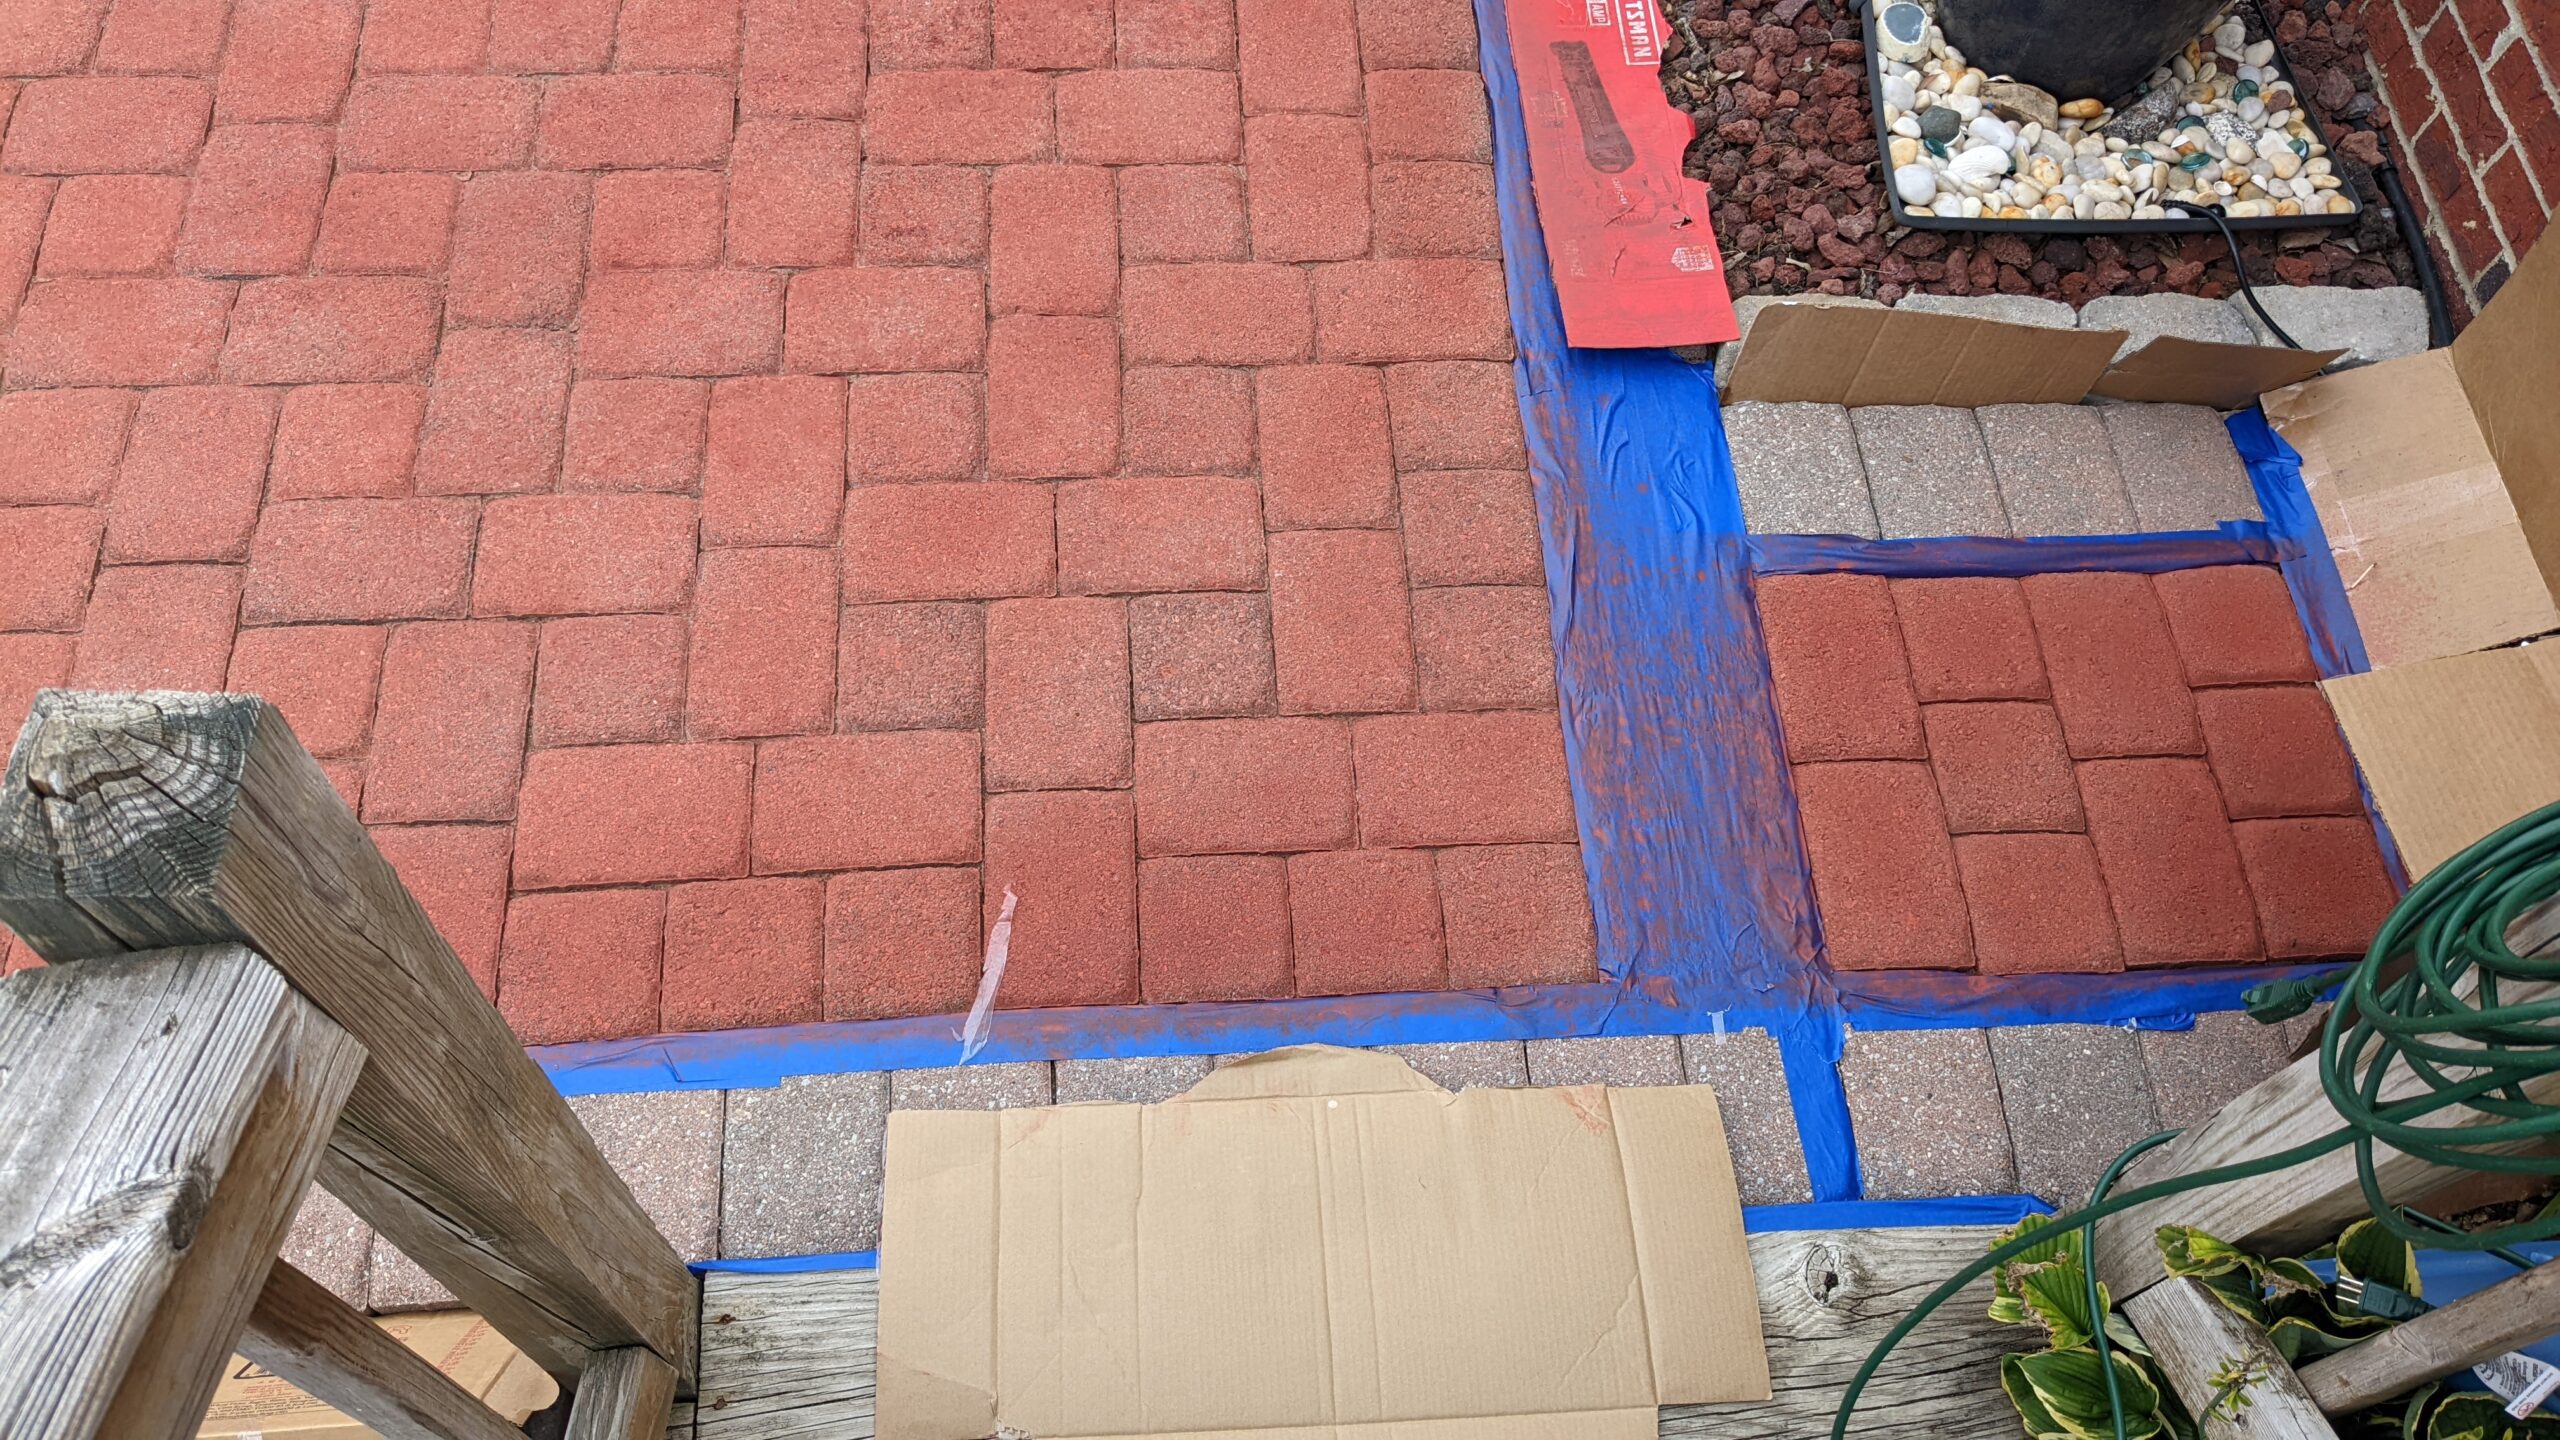
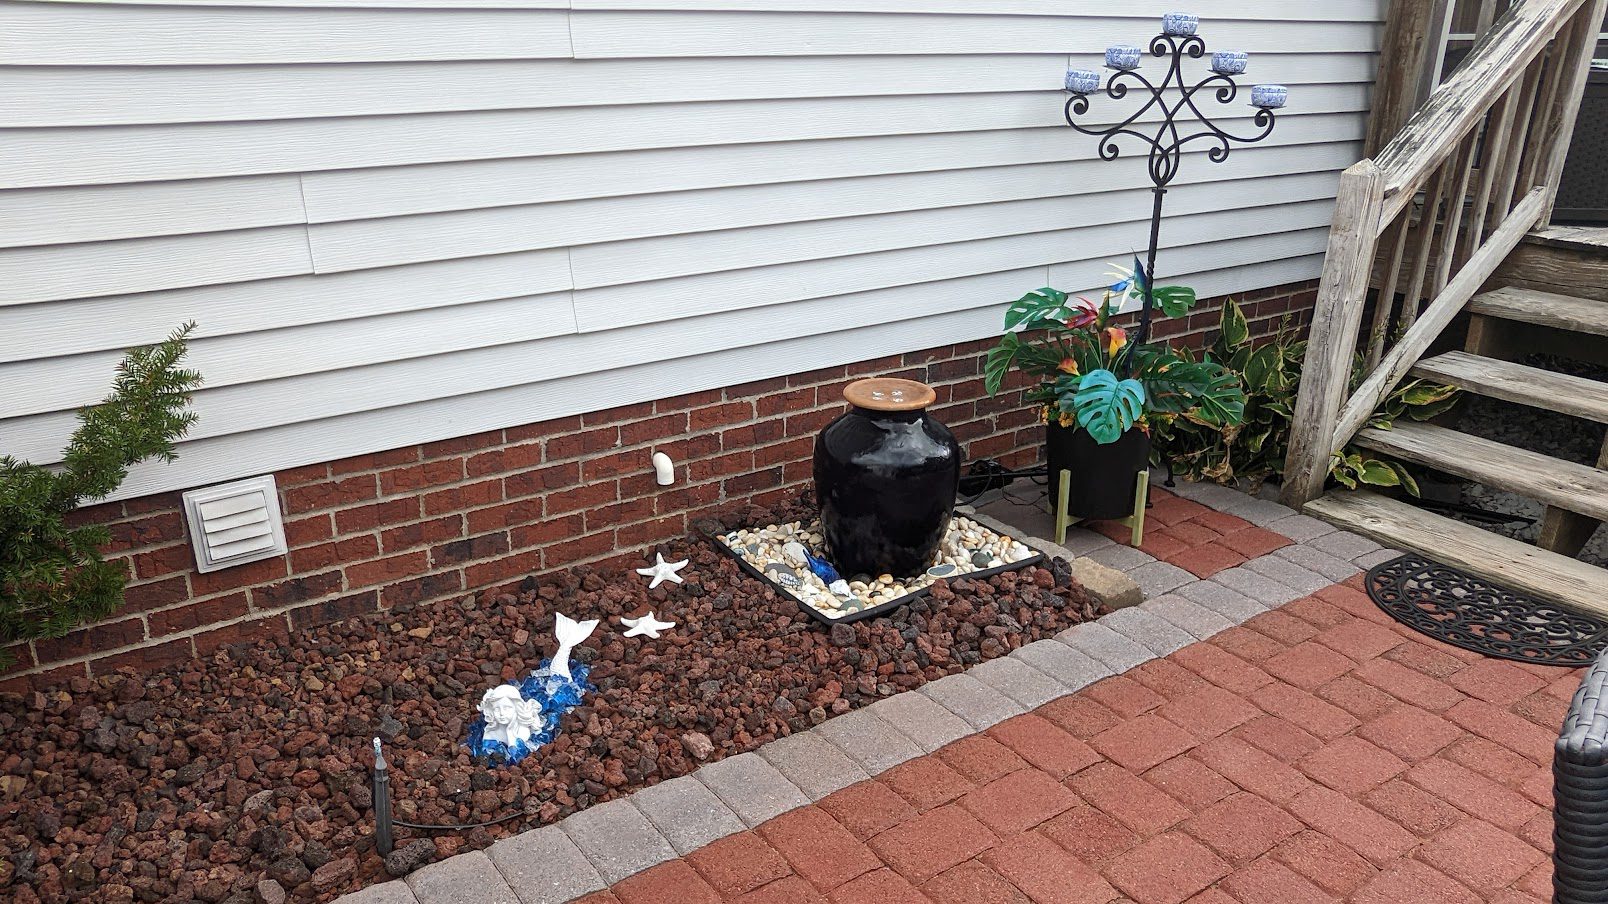
Project Info:
- Project Completed In: 5 day(s)
- Estimate of Square Footage: 315.00 sq. ft.
- Project Description:
Our paver patio is over 15 years old, had never been sealed to our knowledge, and the mixed color stones had faded considerably. Plus, the moss and weeds had started an open rebellion. I wanted to bring new life to the patio, and I wanted it to compliment the landscaping (gray edging stones with red lava rock) that was last summer’s project. Between weeds and weather, I didn’t want the patio to become damaged enough that it would require being pulled up and re-laid. So, I began doing my pre-project research. Since, I typically don’t have the time or the budget to make major mistakes; I make sure to do my homework on everything from products to application. Everything that I could find at my local home improvement stores had awful reviews. Frankly. I was surprised they were still selling most of the products with the horror stories I read. And then, (cue the magic wand sound) I found Direct Colors Portico Stain product line! I LOVE how it has turned out. It looks like we had a new patio installed. Here is a link to an album with all my project photos and notes. Feel free to use and/or share anything. Thanks so much Direct Colors!https://photos.app.goo.gl/r9FC7rFKVj7YyaKh7 - Personal Tips:
The Portico Stain is very thin. So, prep will be the most important part – make sure to tape, cover, or block anything that might catch overspray. When I did the outside border in Eagle Gray, there was no way I could spray it without it getting on to the Crimson Red I had already applied. I cut in all the border stones with a foam brush, and then I did the second coat with a 4″ roller. And don’t forget to consistently shake your stain in the sprayer to keep it mixed well, so it will apply evenly! - Direct Colors Products Used:
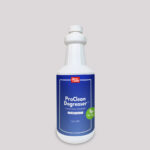
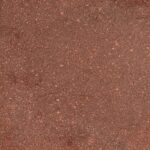
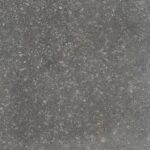
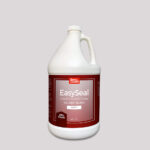
I used the Direct Colors ProClean Degreaser as the last prep before stain application. Then from Direct Colors Portico Line, I applied two coats of Crimson Red paver stain on the majority of the paver patio and applied two coats of Eagle Gray paver stain to the border. I followed up with two coats of the Satin EasySeal. - Other Products Used:
Initial Prep –
1.Pressure Washer and Outdoor Cleaner
2. Spectracide Weed Killer and Triazicide Insect Killer Granules – I push-broomed the granules into the cracks (just like joint sand) and watered them for a couple of weeks to kill any weeds or ant hills at the root.
During the Direct Colors Product Application – Everything that I used grabbed from my local Dollar General Store!
1. Deck Brush for the ProClean Degreaser
2. Plastic Drop Cloths and Painters Tape to protect from overspray
3. Garden Sprayers. Foam Brushes. and 4″ roller for the Portico Stain
4. Lots of Tarps – For the unanticipated pop up rain shower. *Thank you, Matt at Direct Colors, for talking me down from panic mode!
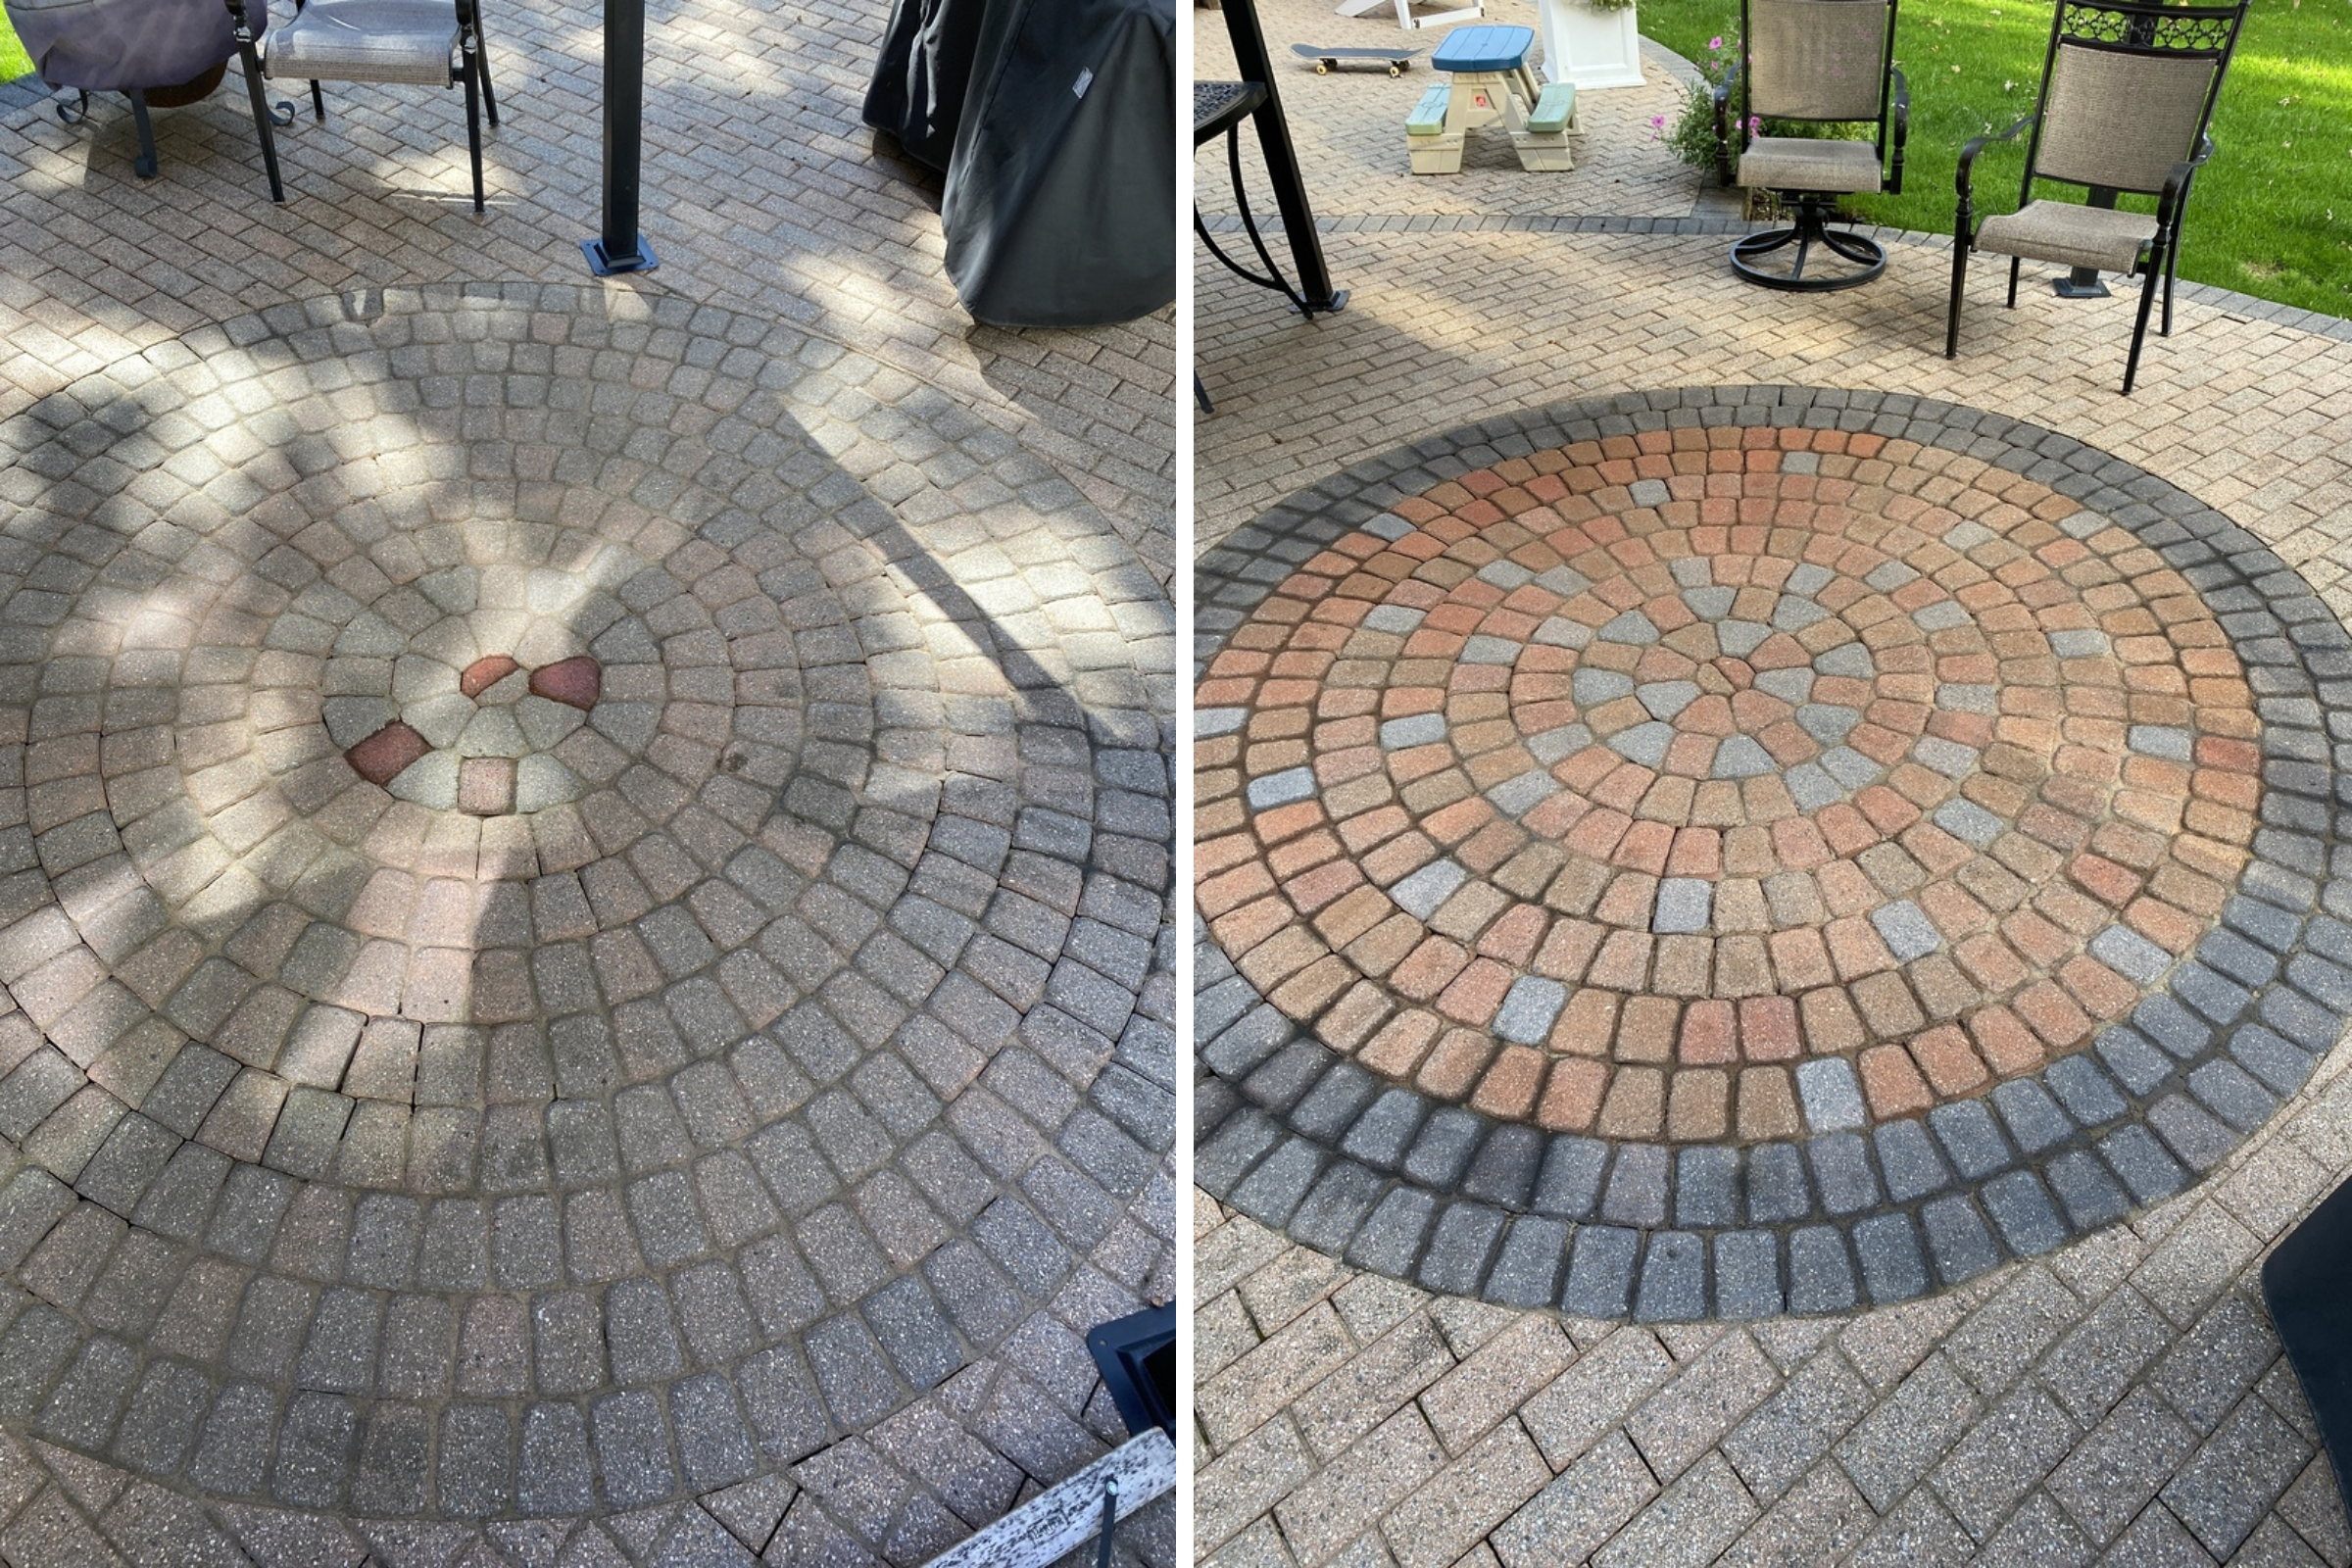
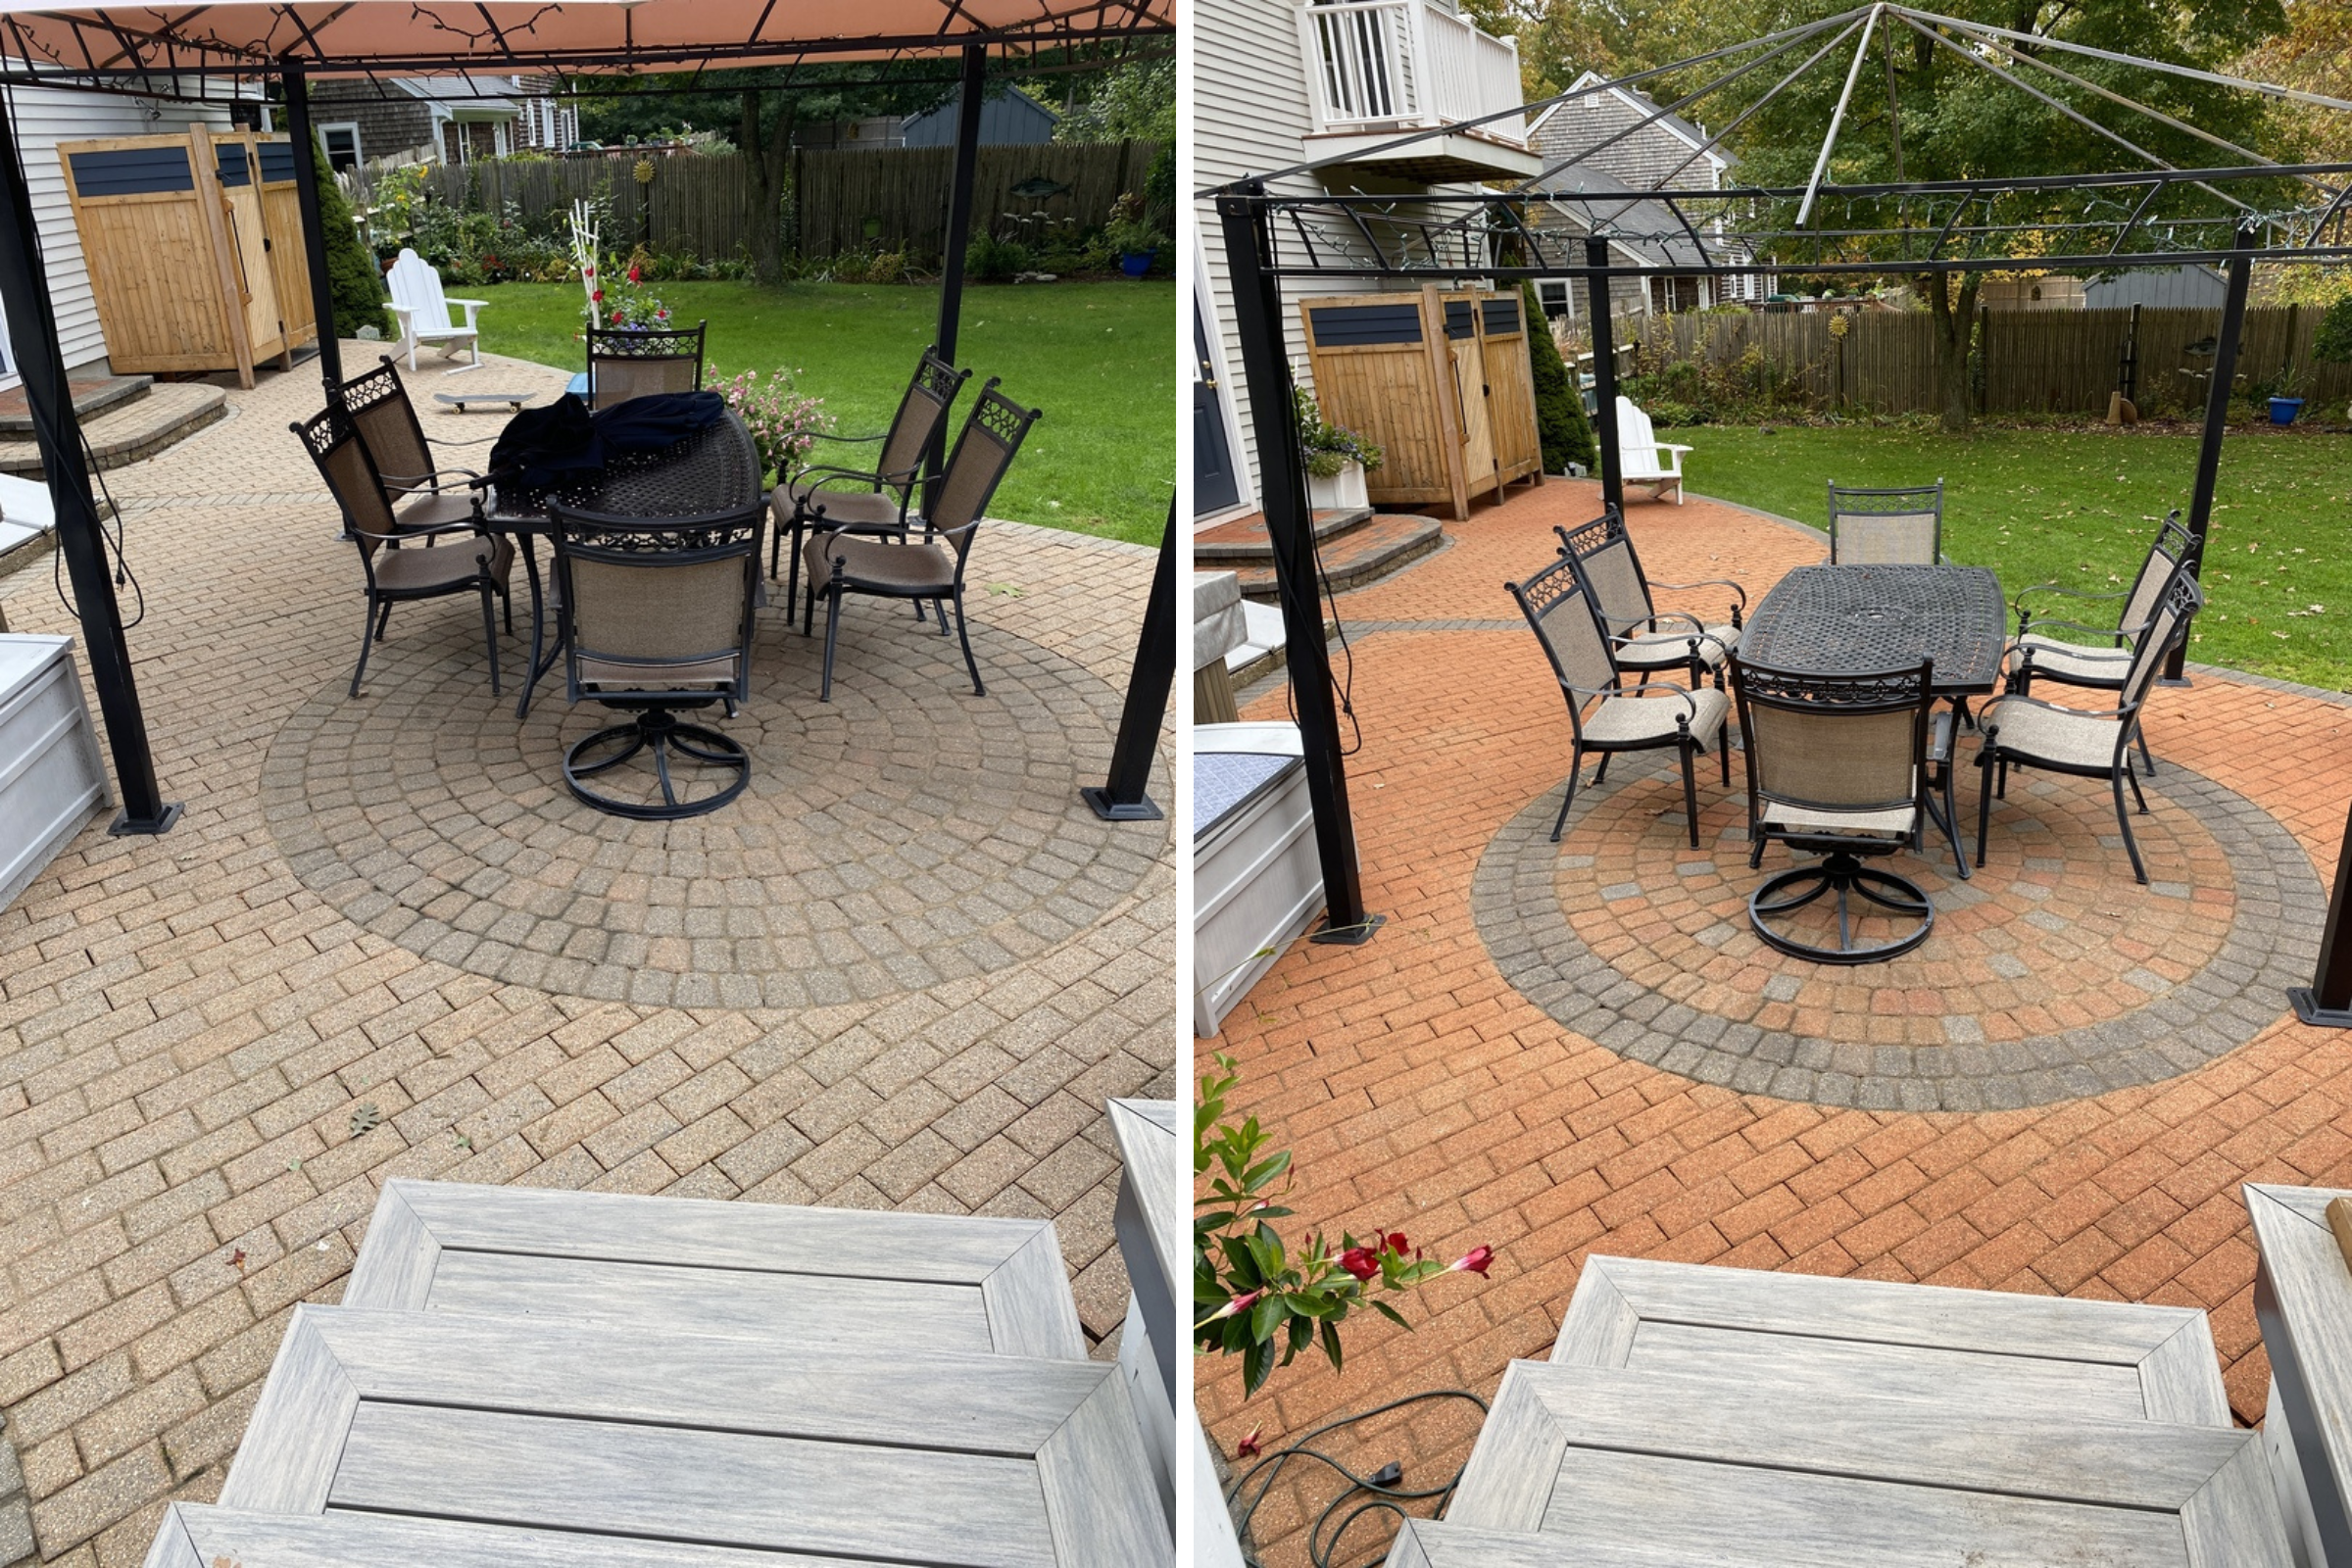
This homeowner transformed their lackluster patio into a striking feature by creatively restoring the central circle paver design. With careful application using foam brushes, each paver was individually colored, bringing warmth and dimension to the design. The interior rings were meticulously hand-stained with shades of terracotta and russet, with subtle touches of silver-gray. A charcoal edge adds a bold contrast, defining the area. The remaining patio pavers were refreshed with a cohesive terracotta stain, elevating the entire space from a discolored and boring area to an inviting statement piece that truly stands out.
Revitalizing a 16-Year-Old Concrete Paver Driveway on a Budget
Discover how one retired homeowner was able to revive their 16-year-old concrete paver driveway on a budget using ColorWave water-based stain. Without any prior experience, the homeowner was able to repair and rejuvenate their driveway to look like new and even impressed their neighbors with the final results. This project is perfect for any homeowner looking to save money and breathe new life into their concrete paver driveway.
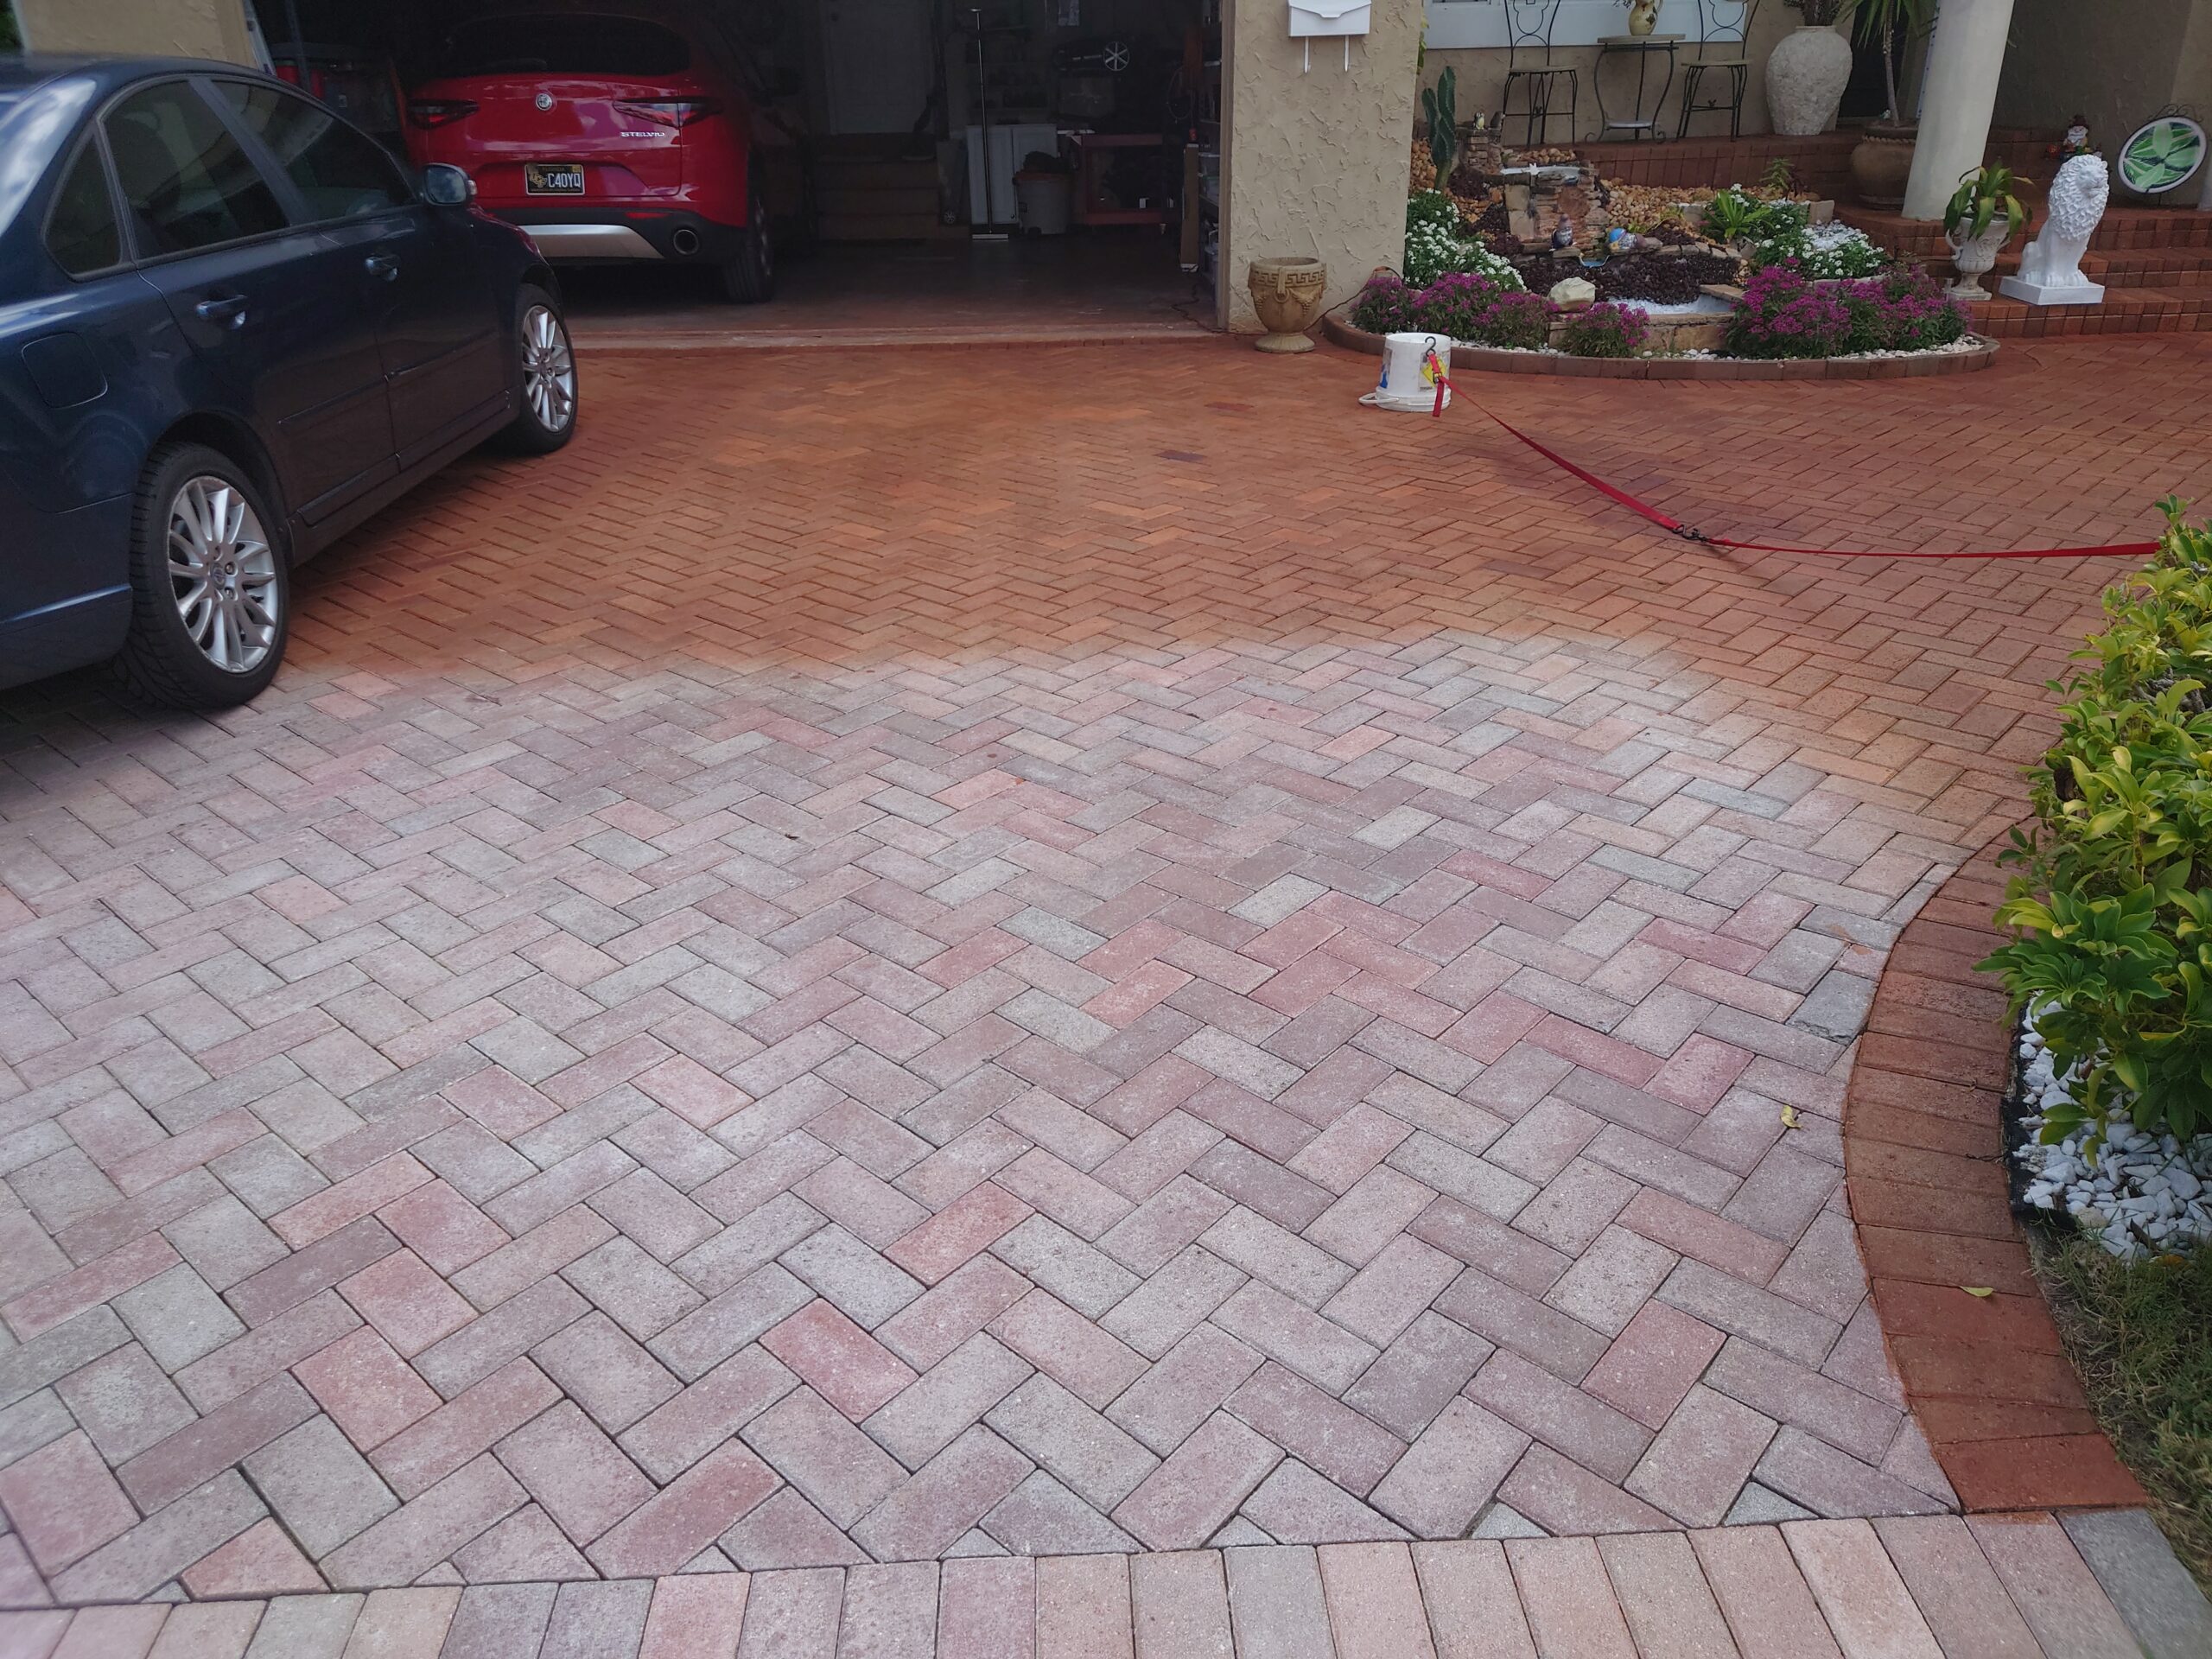
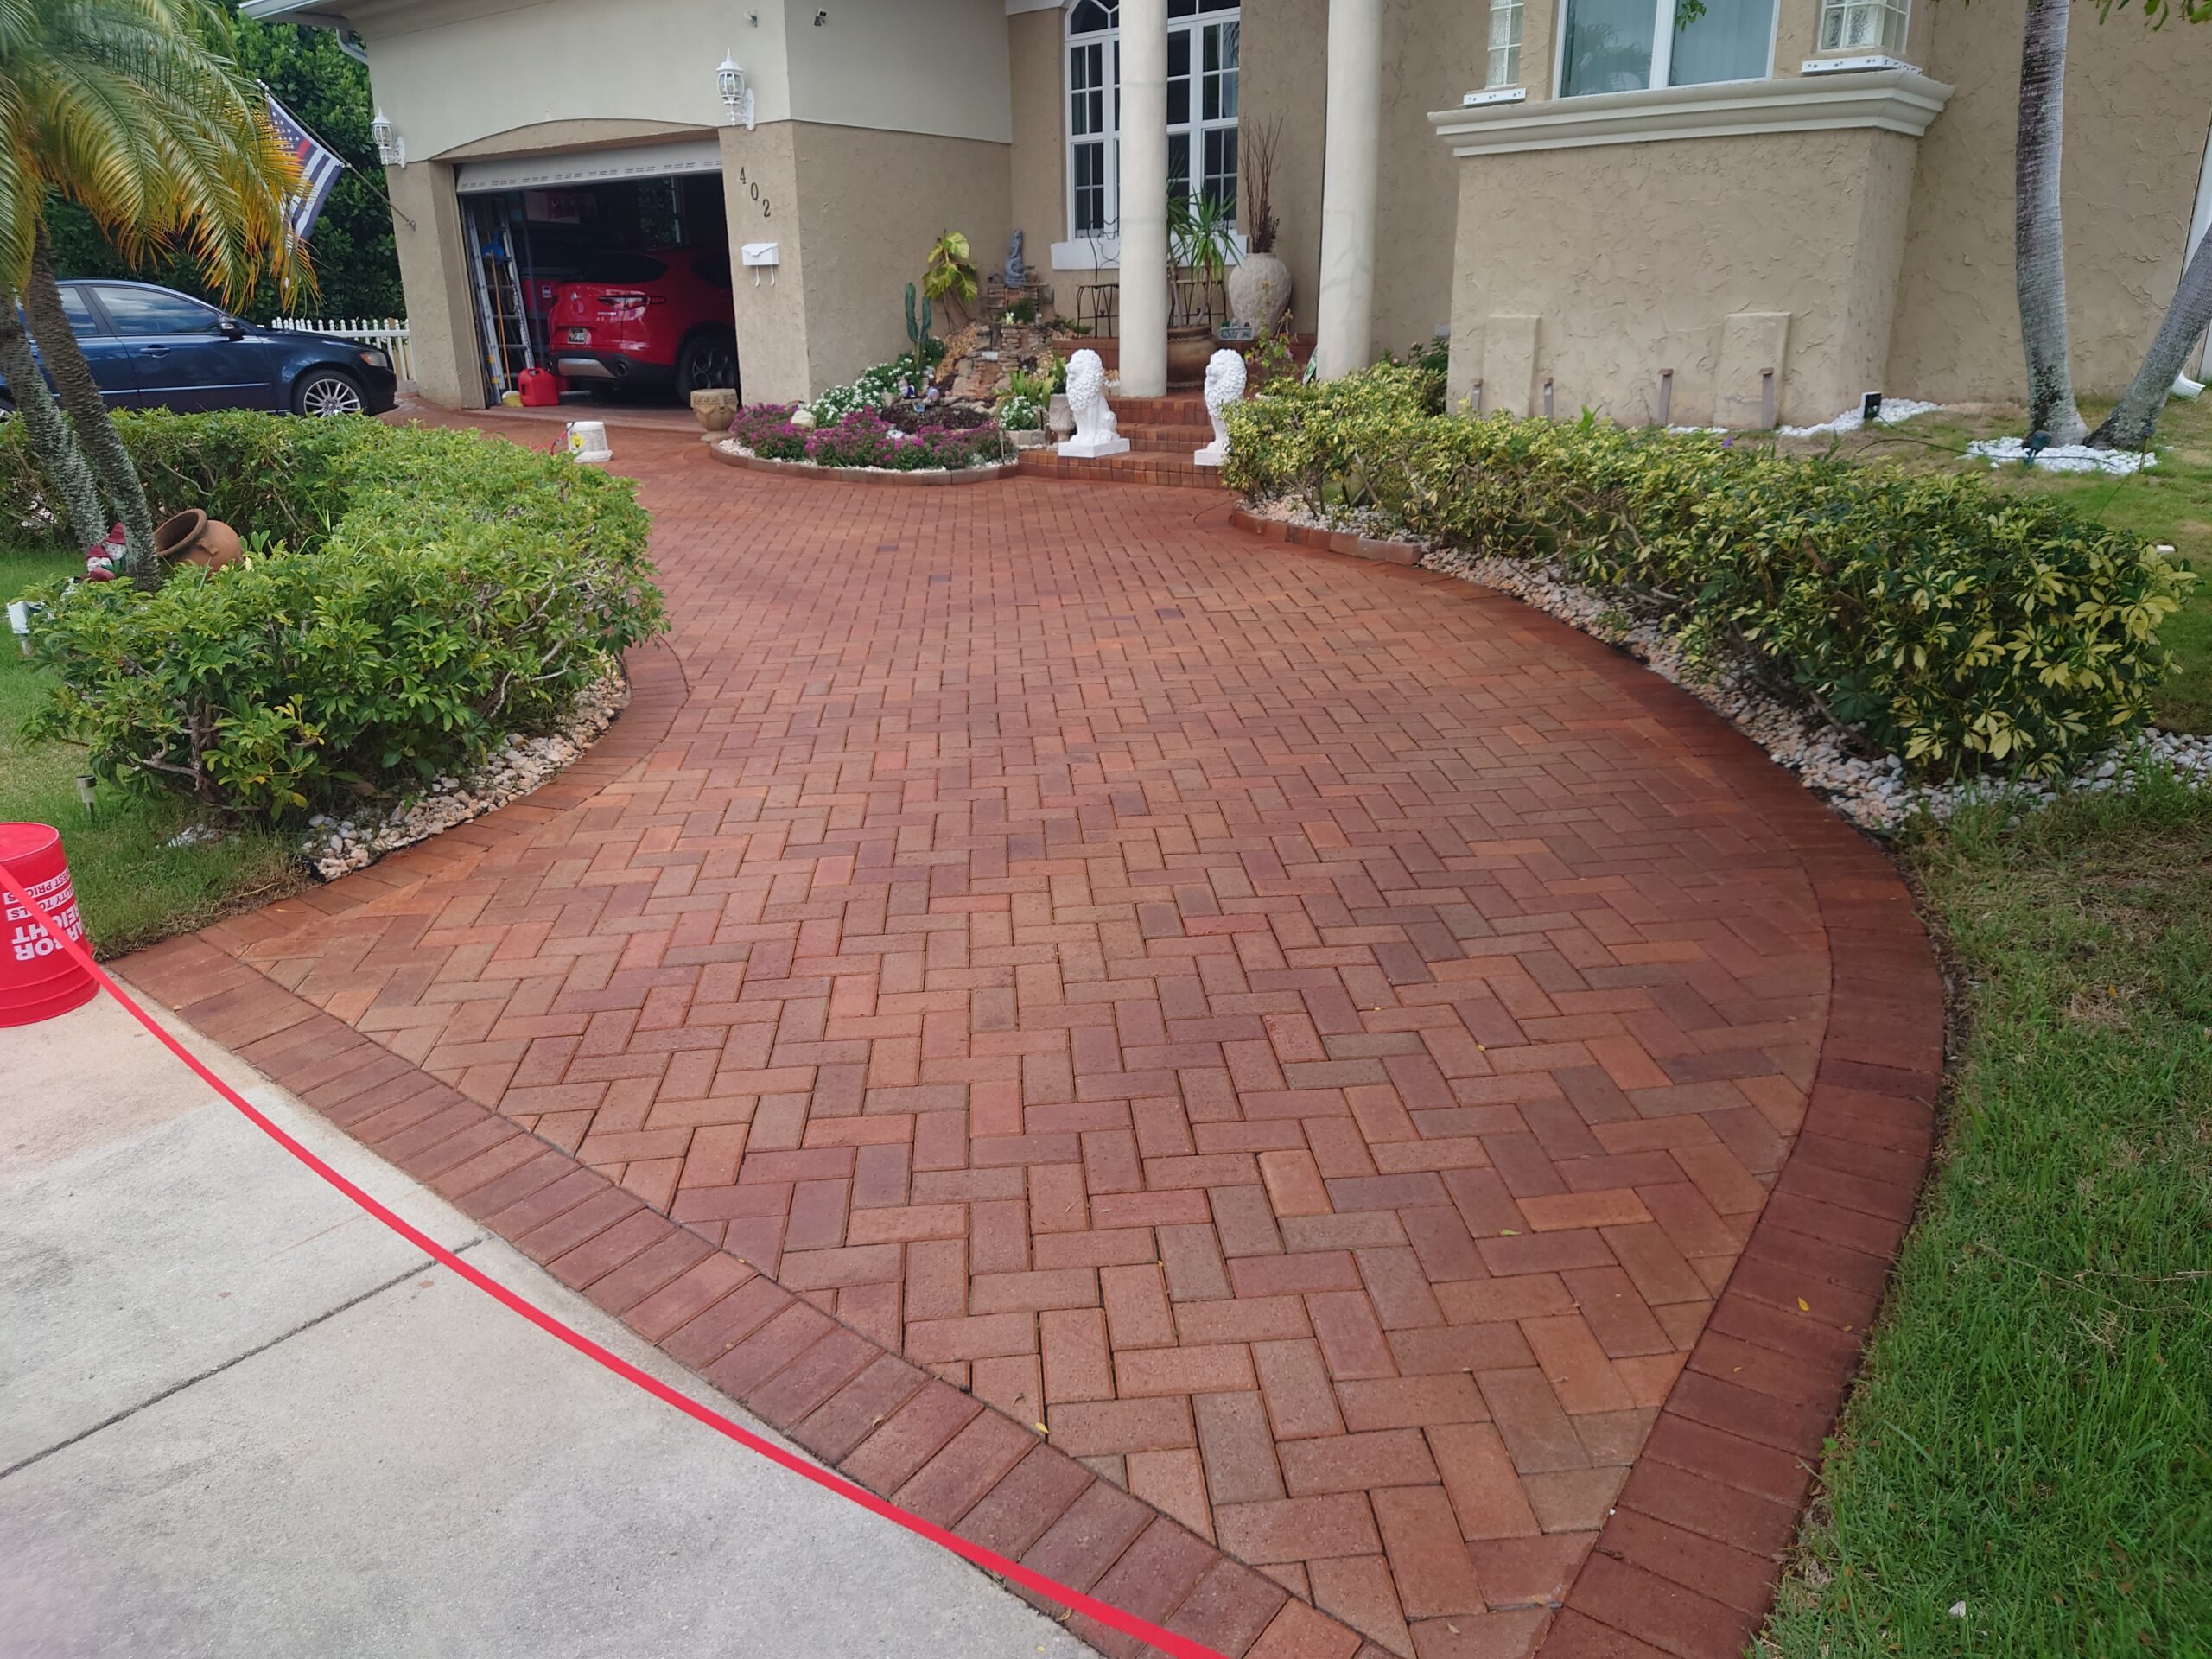
Project Description: Retired and on a budget, I couldn’t justify spending over $10,000 on new pavers for my driveway. After researching products, I decided to give Direct Colors a try. Using their ColorWave concrete stain water base and AcquaSeal high gloss sealer, I was able to repair my 16-year-old pavers to look like new. Even my neighbors were impressed with the results. I highly recommend this product, even for older homeowners who may not have experience.
Personal tip: I used an old Wagner spray gun to make the job easier and faster. Just make sure to follow the instructions.
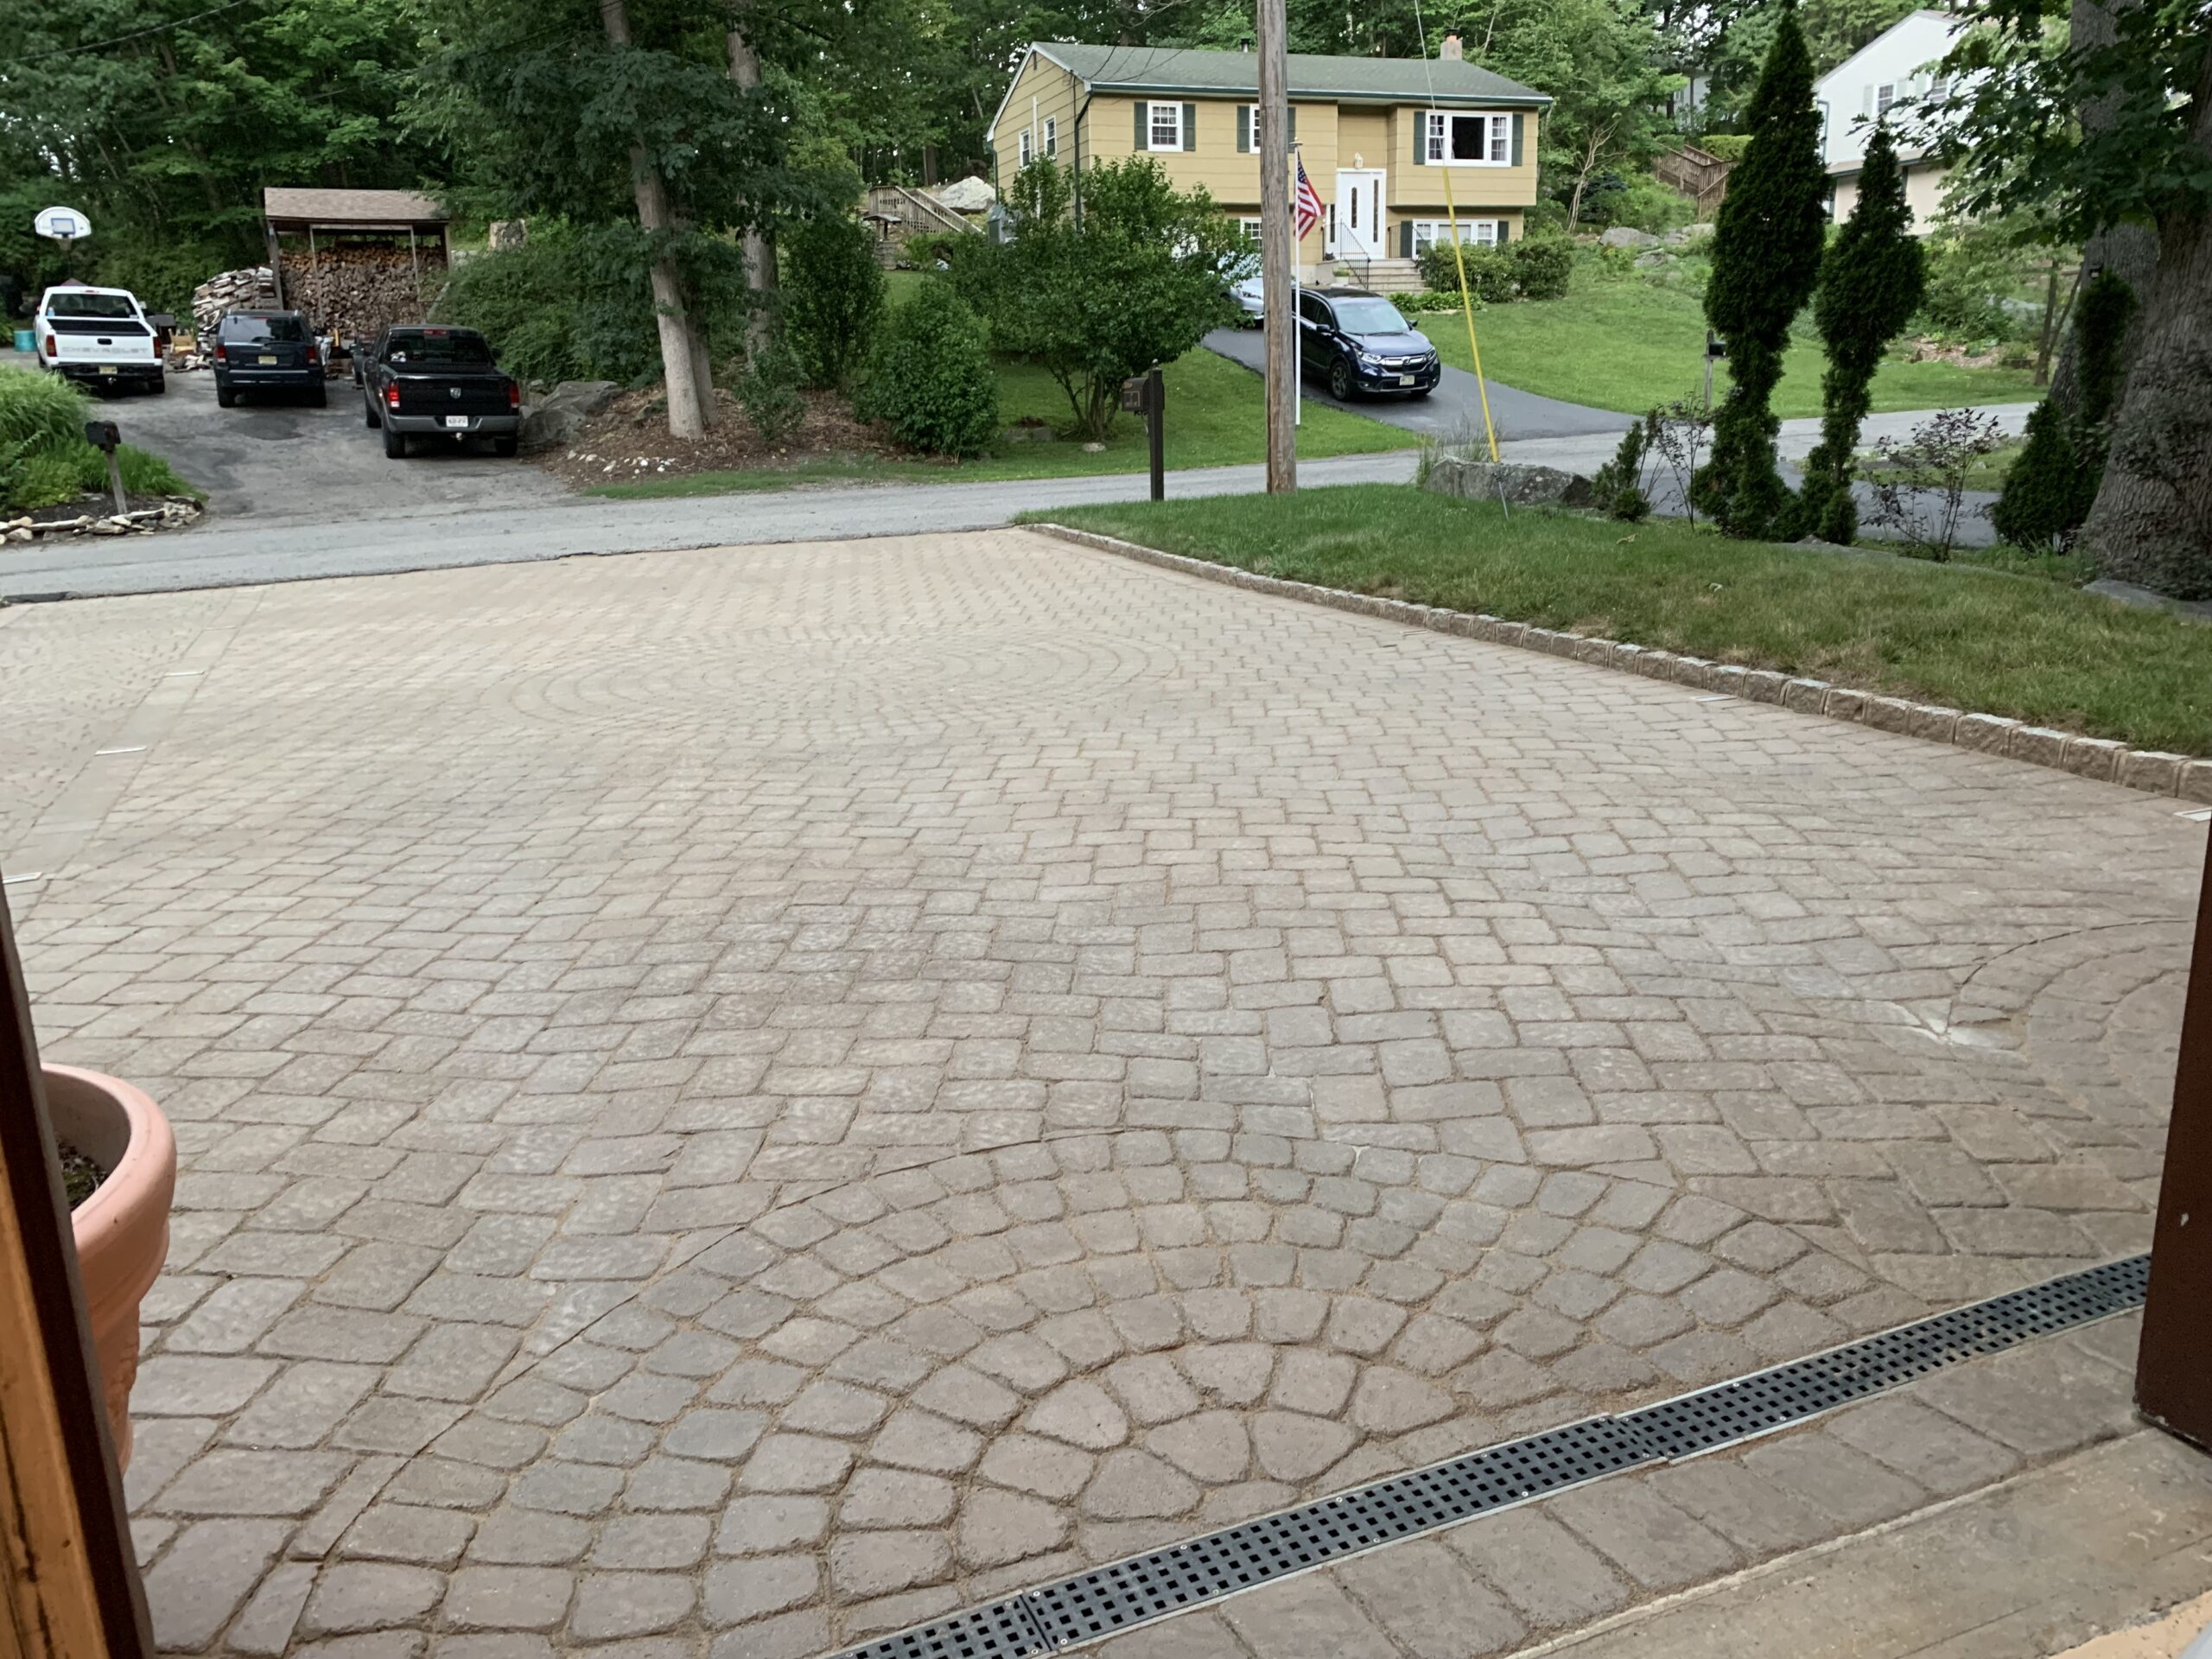
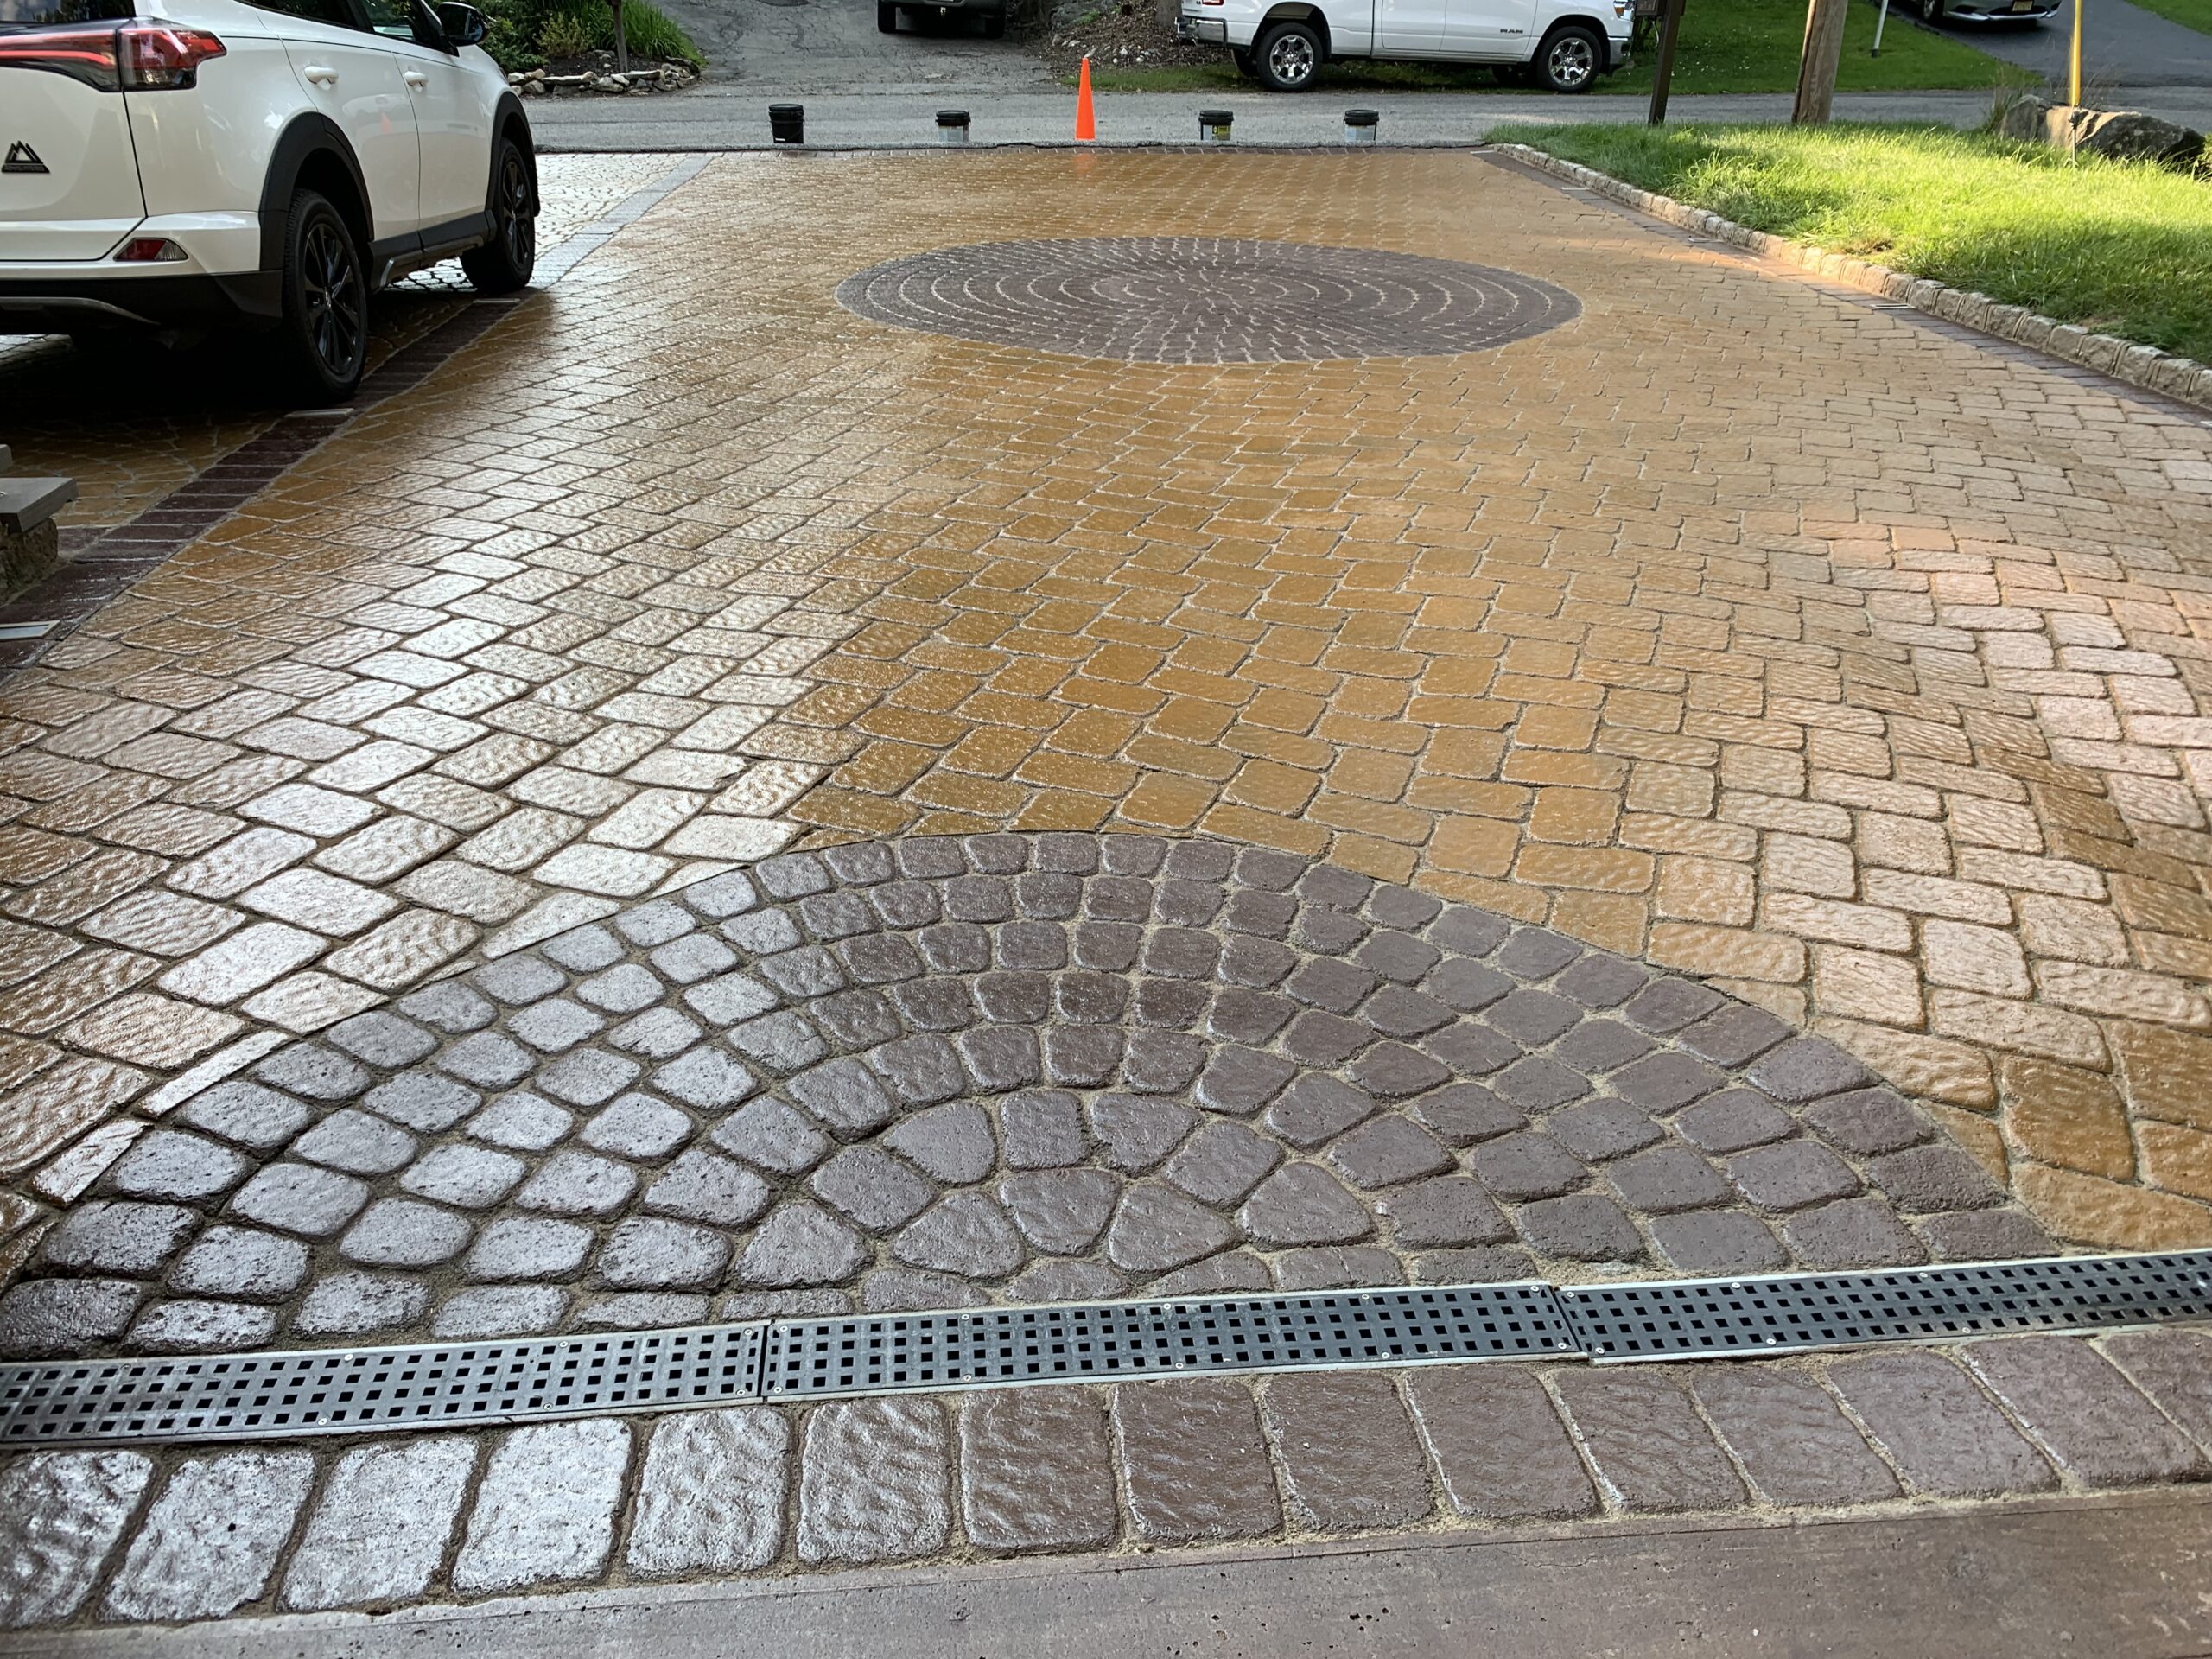
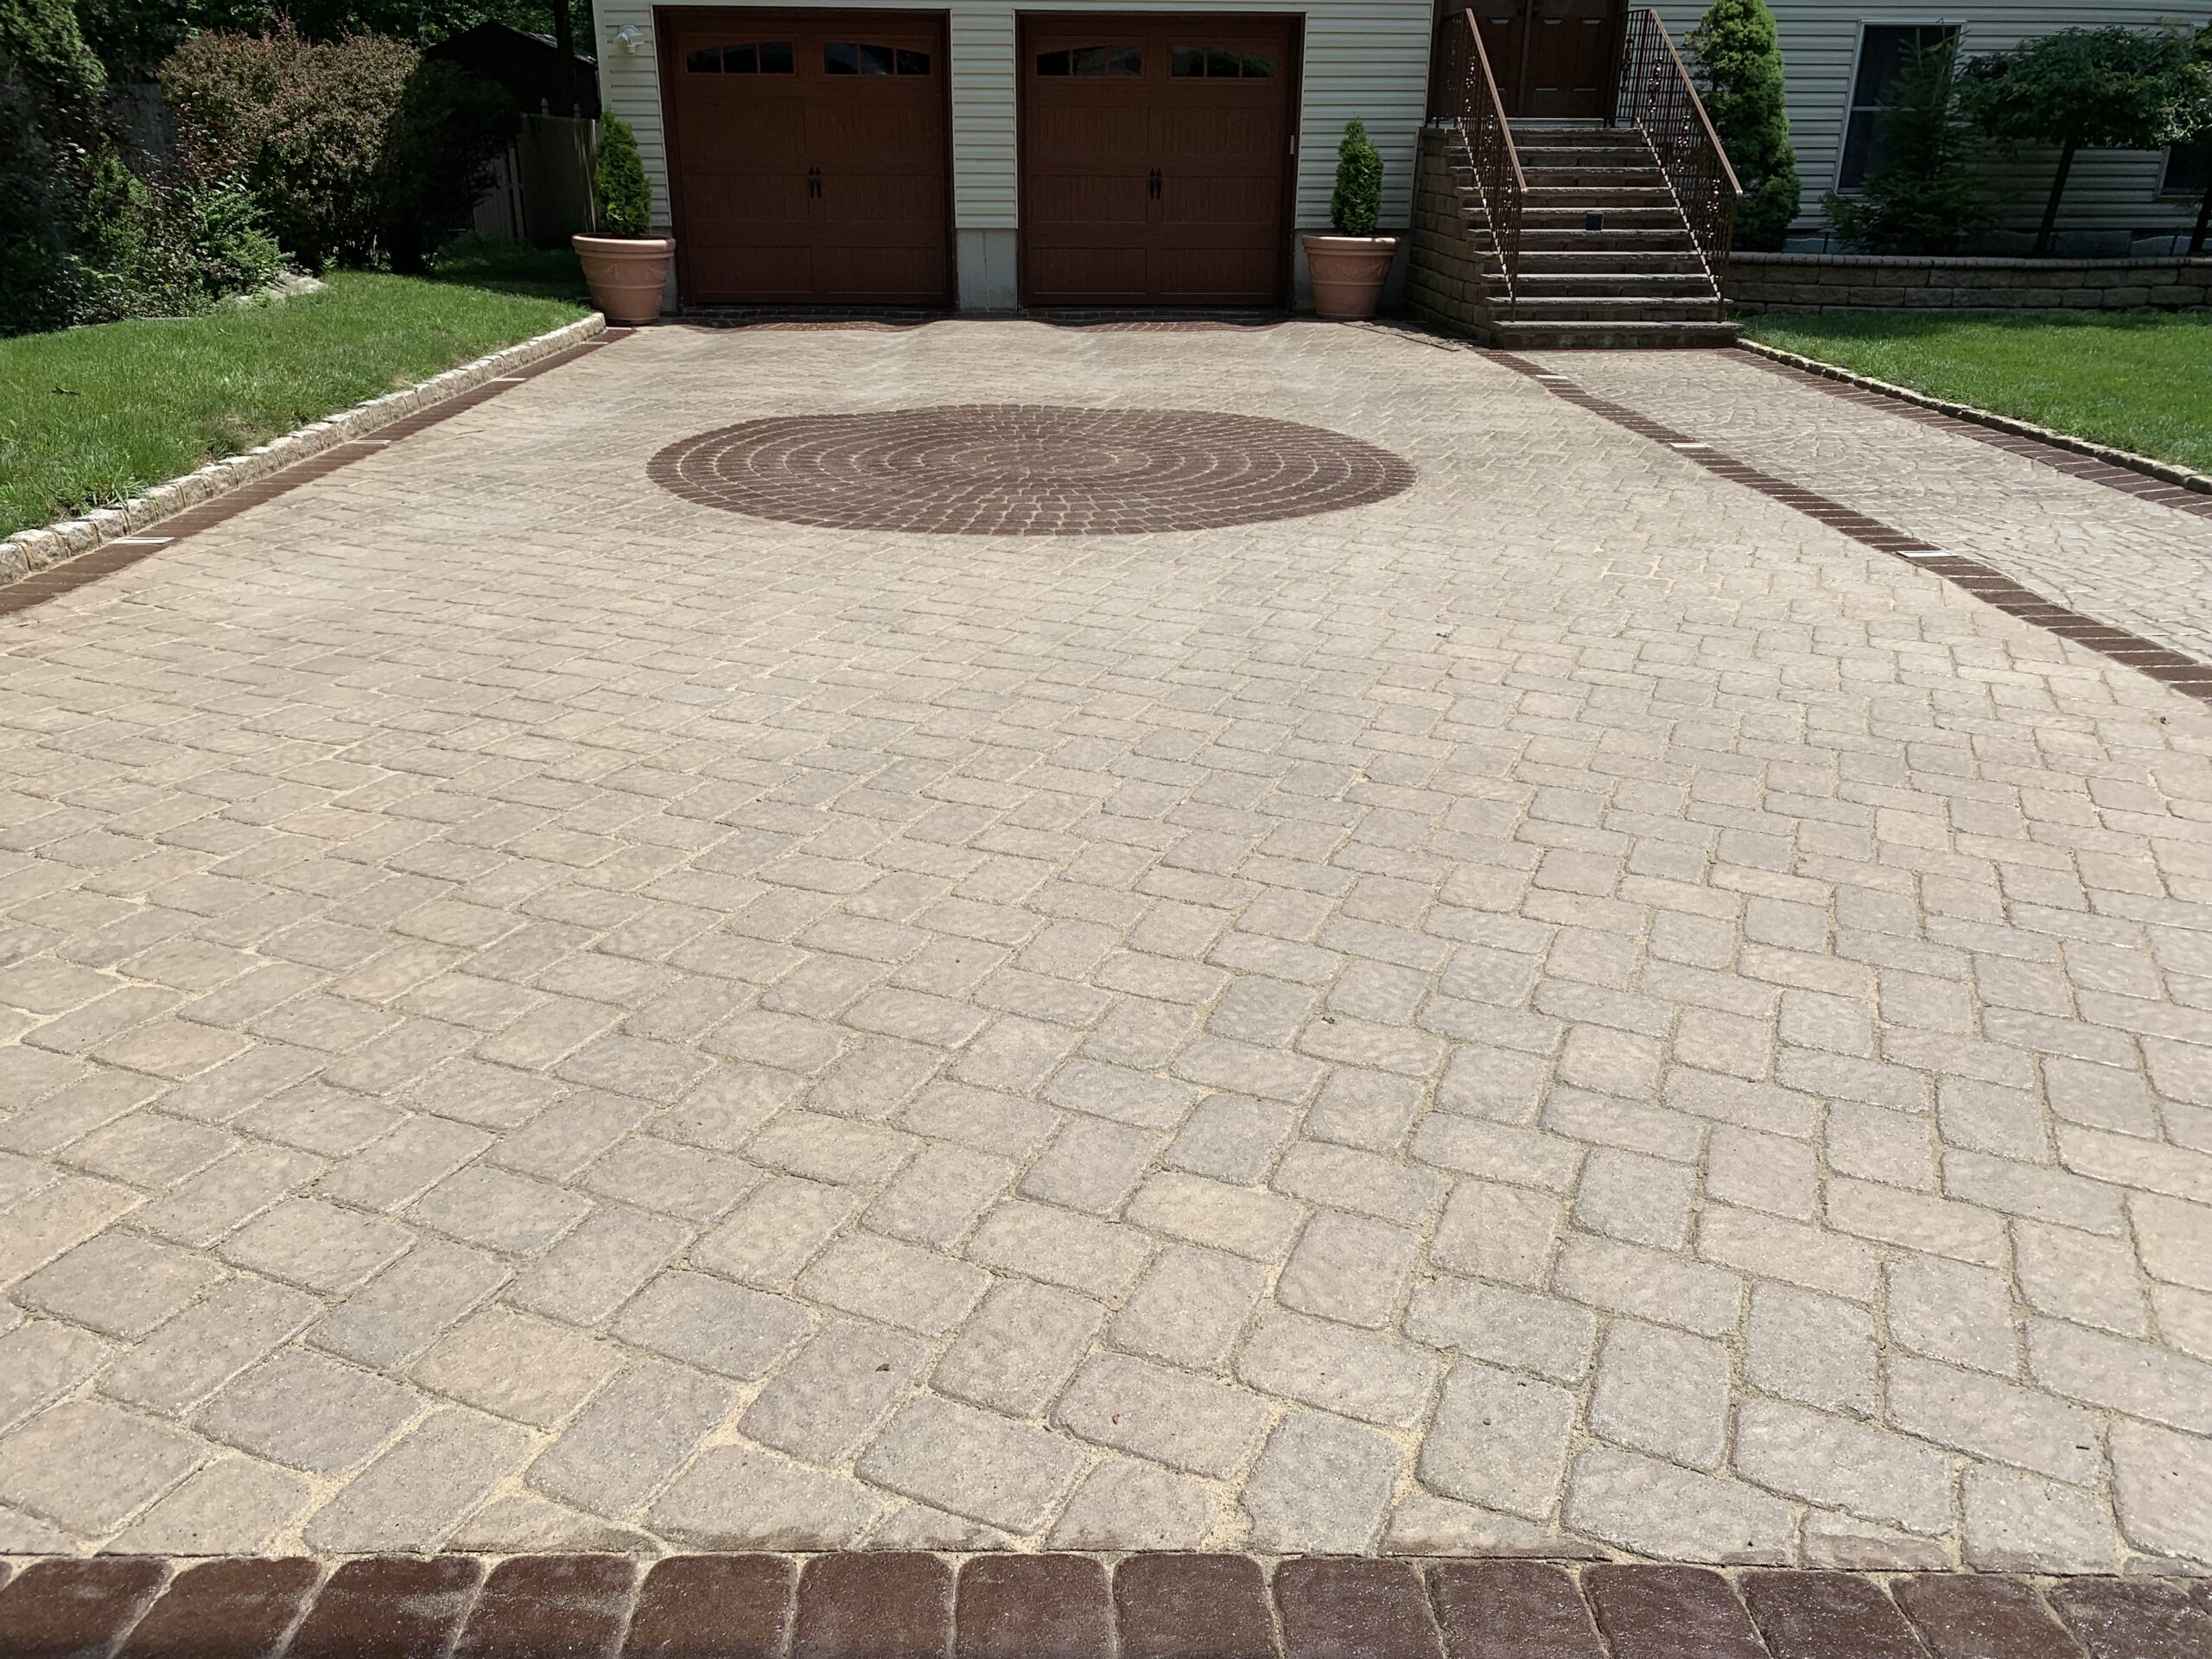
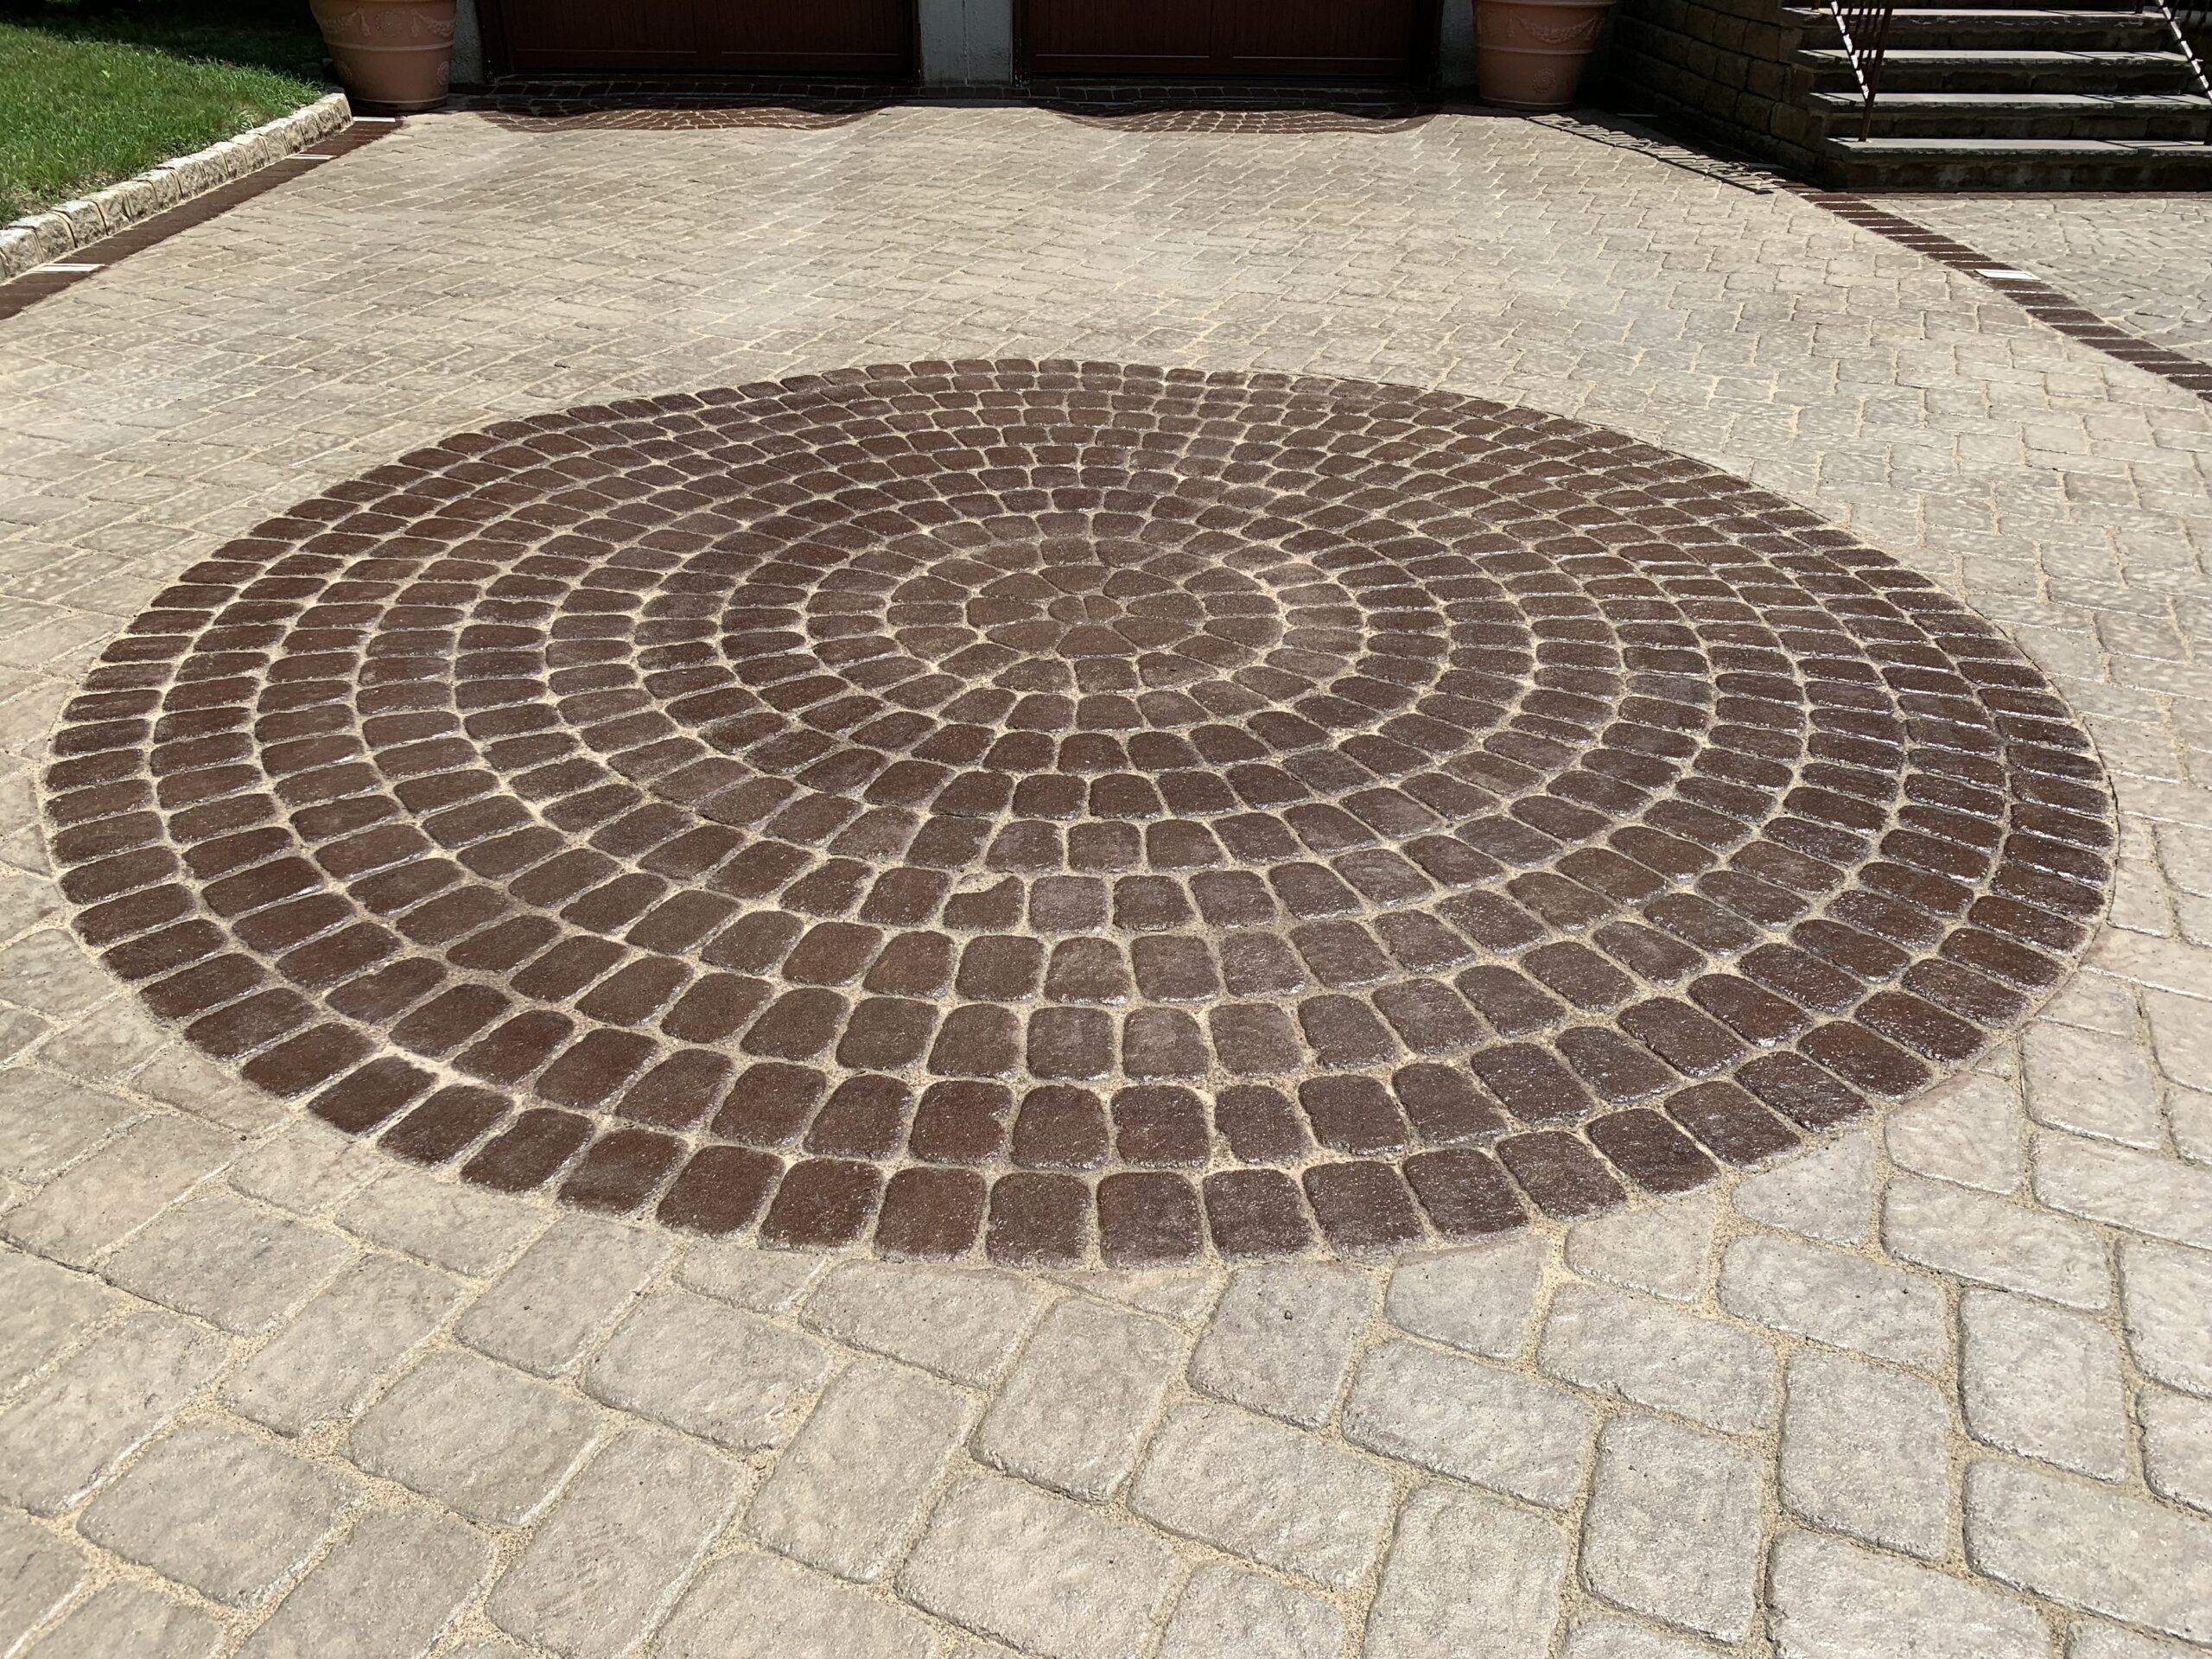
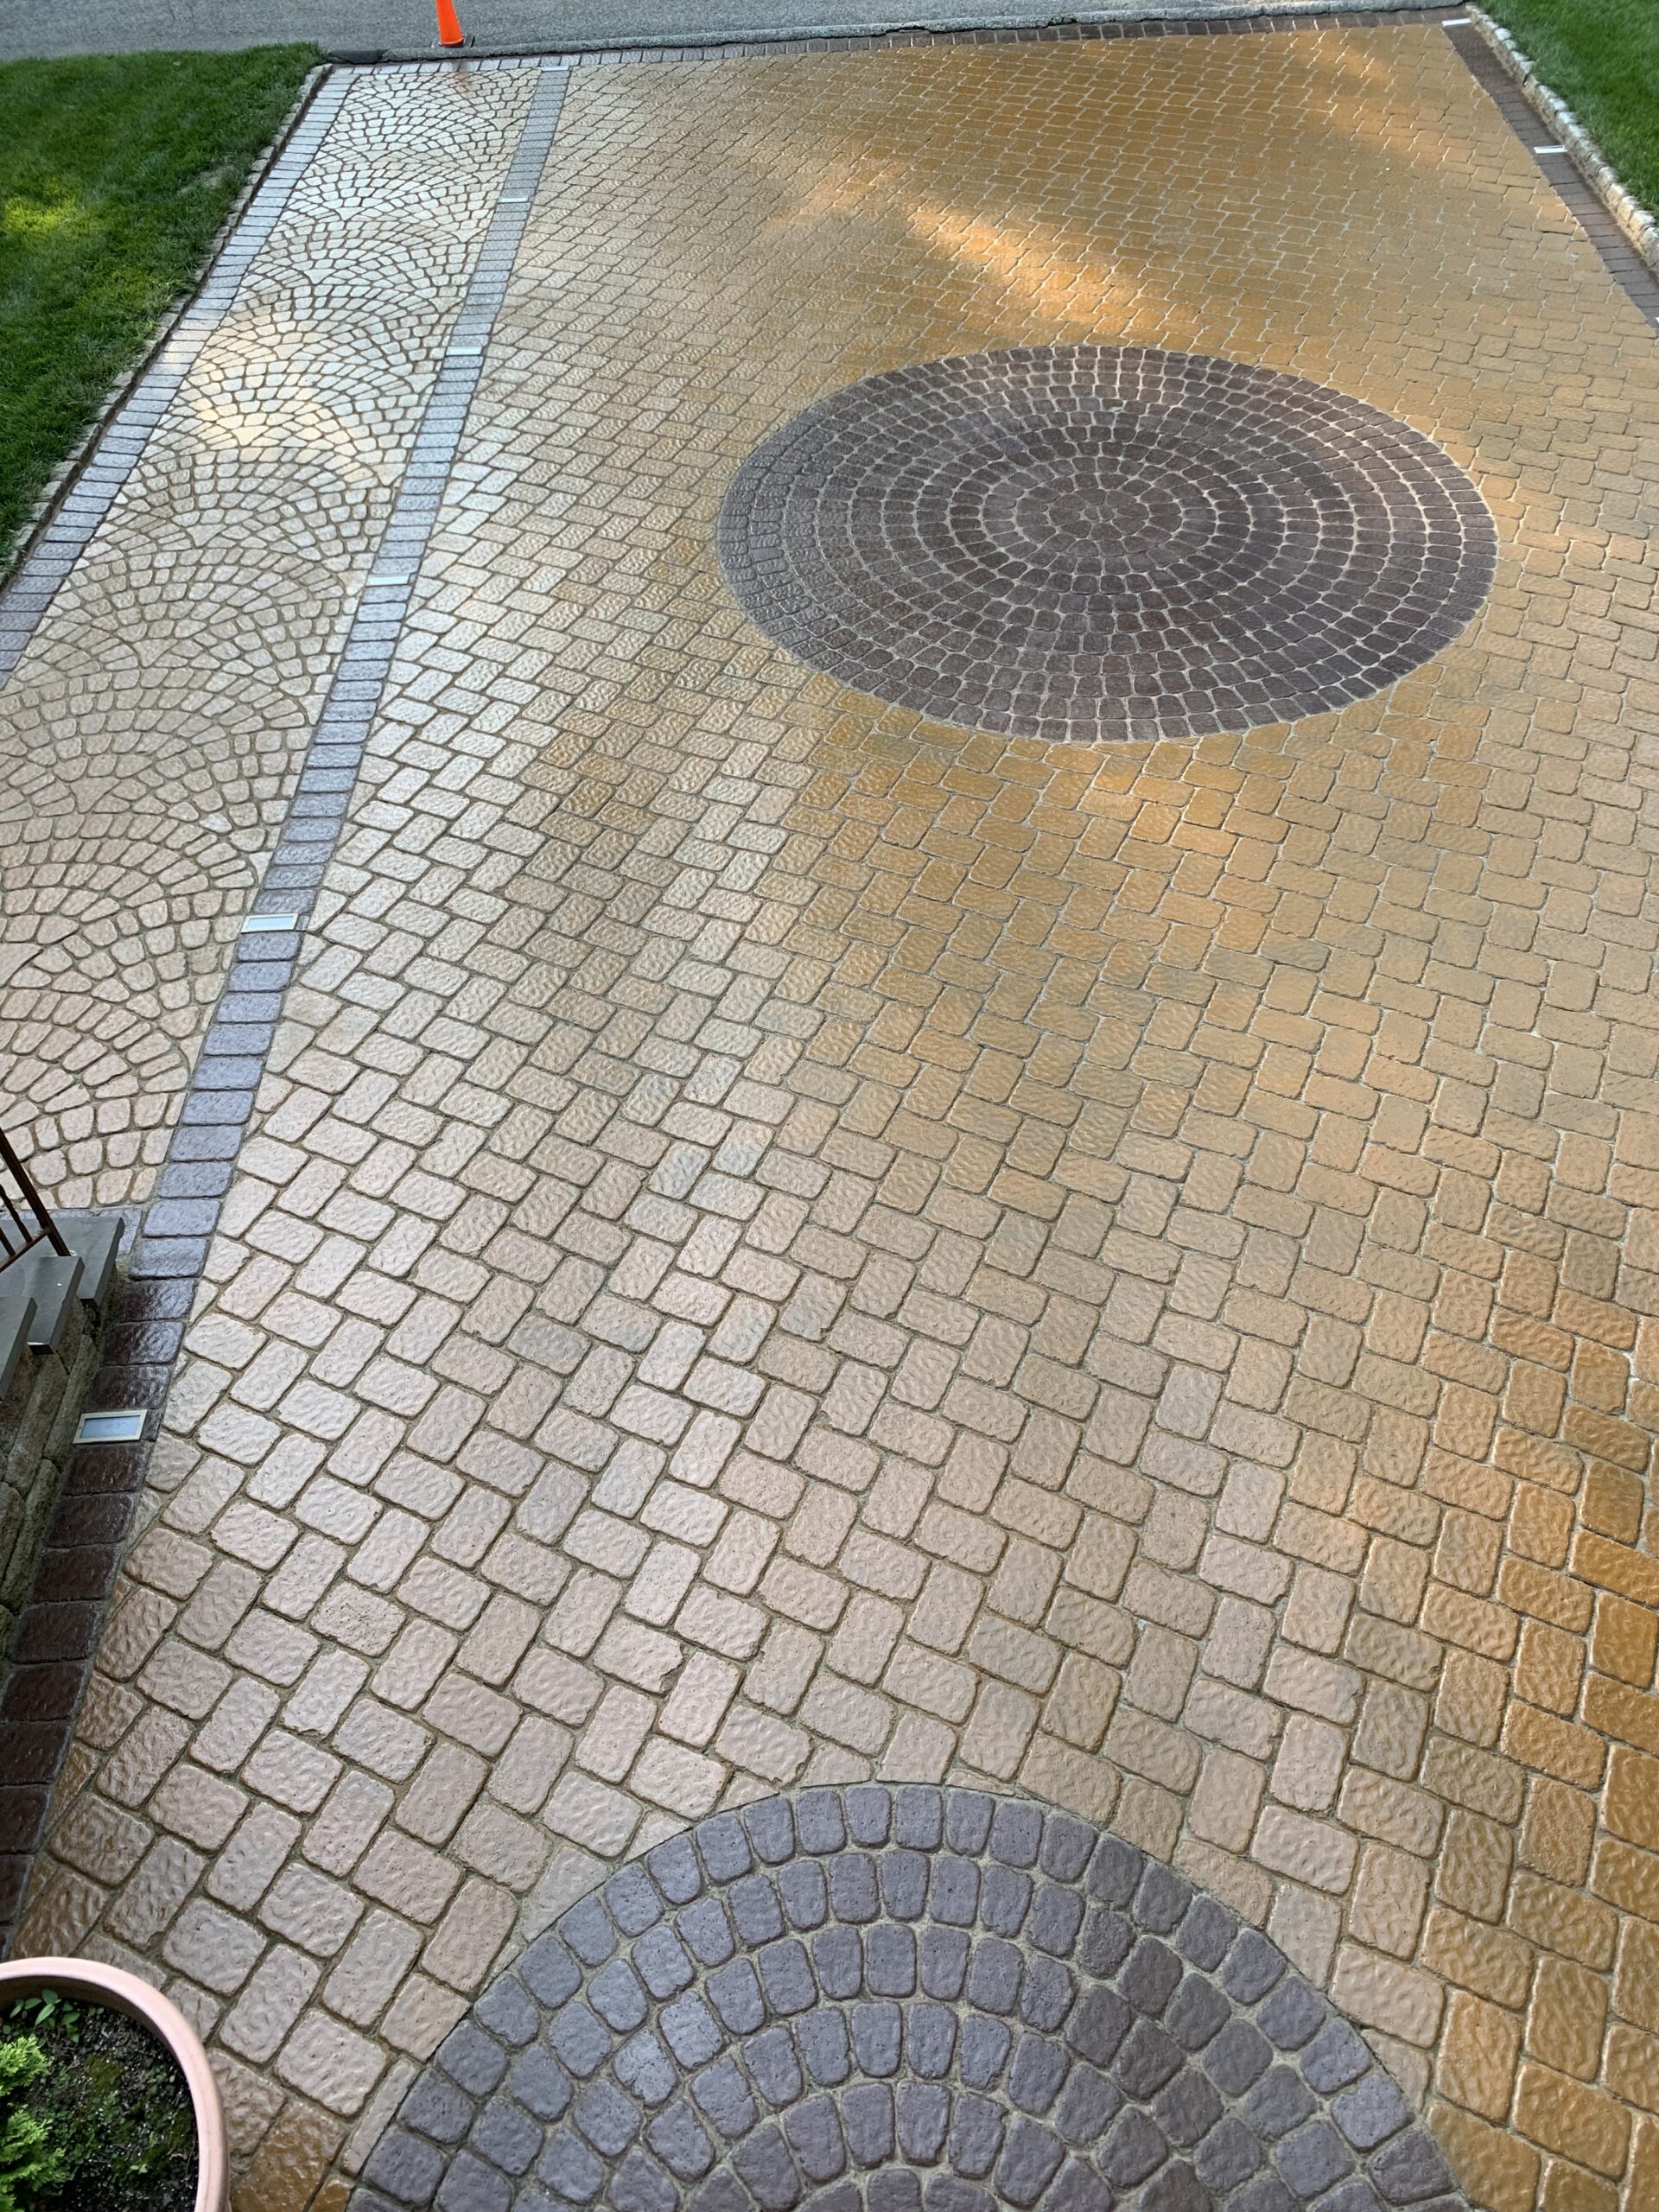
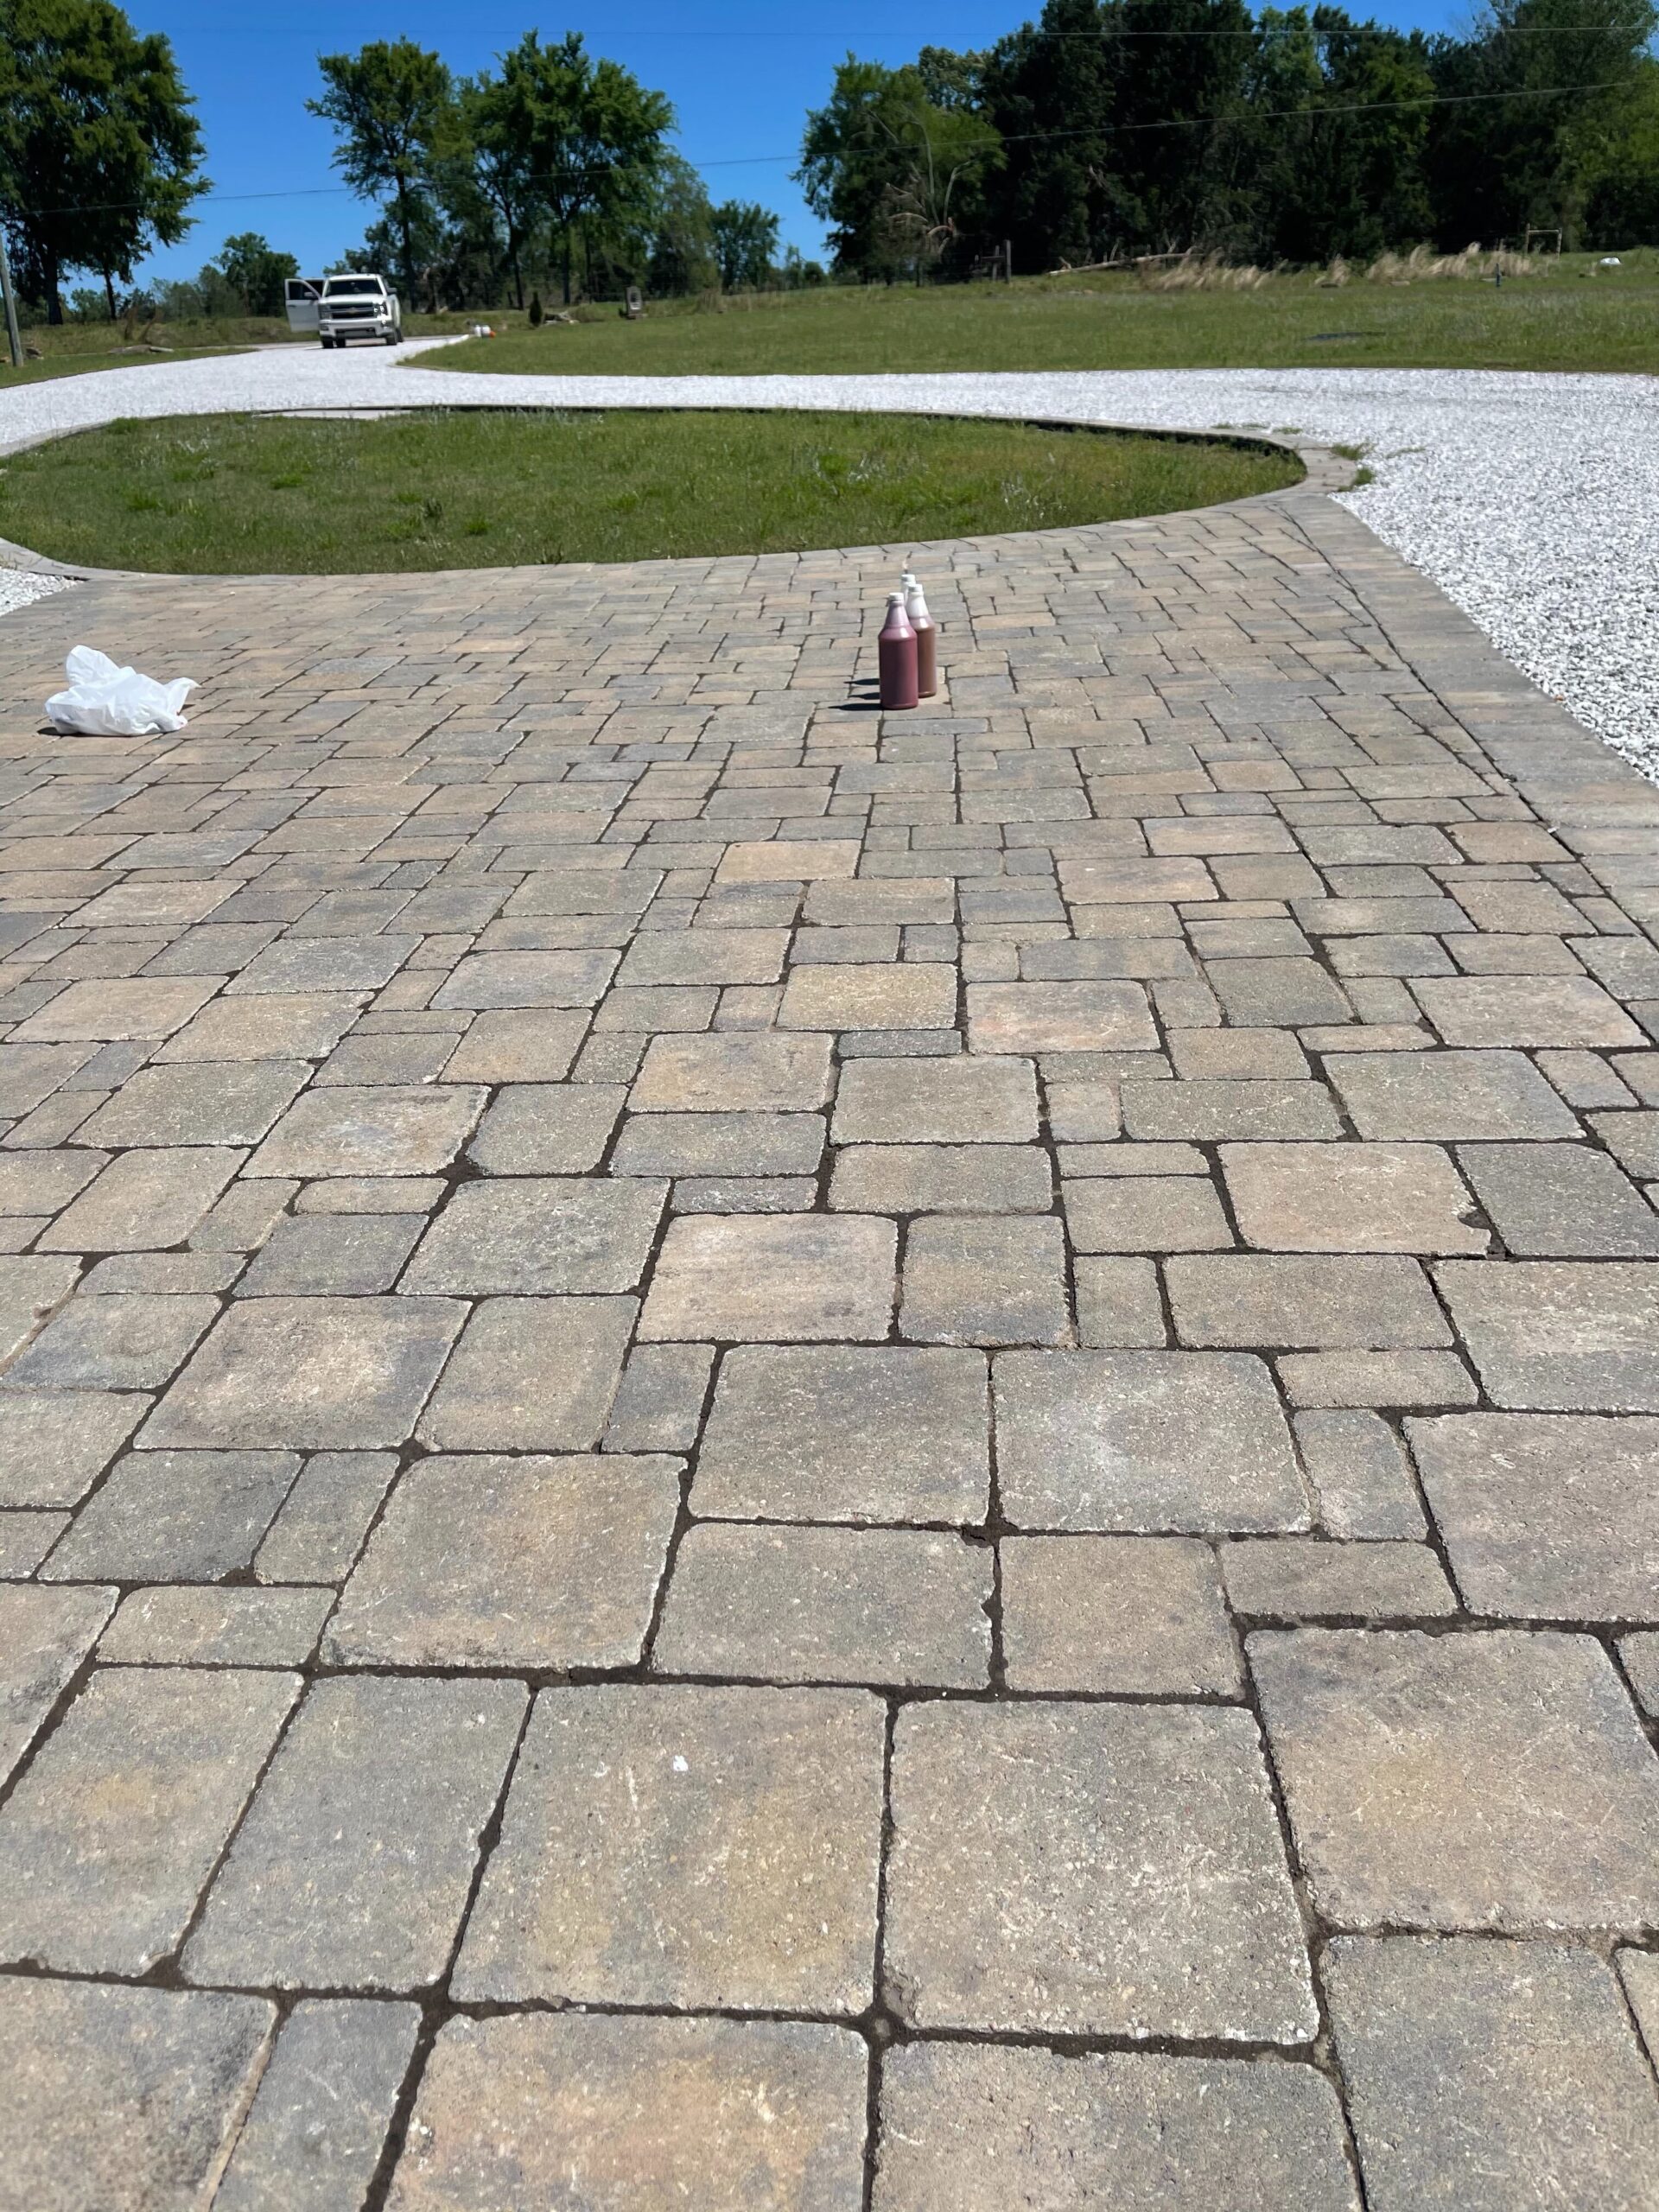
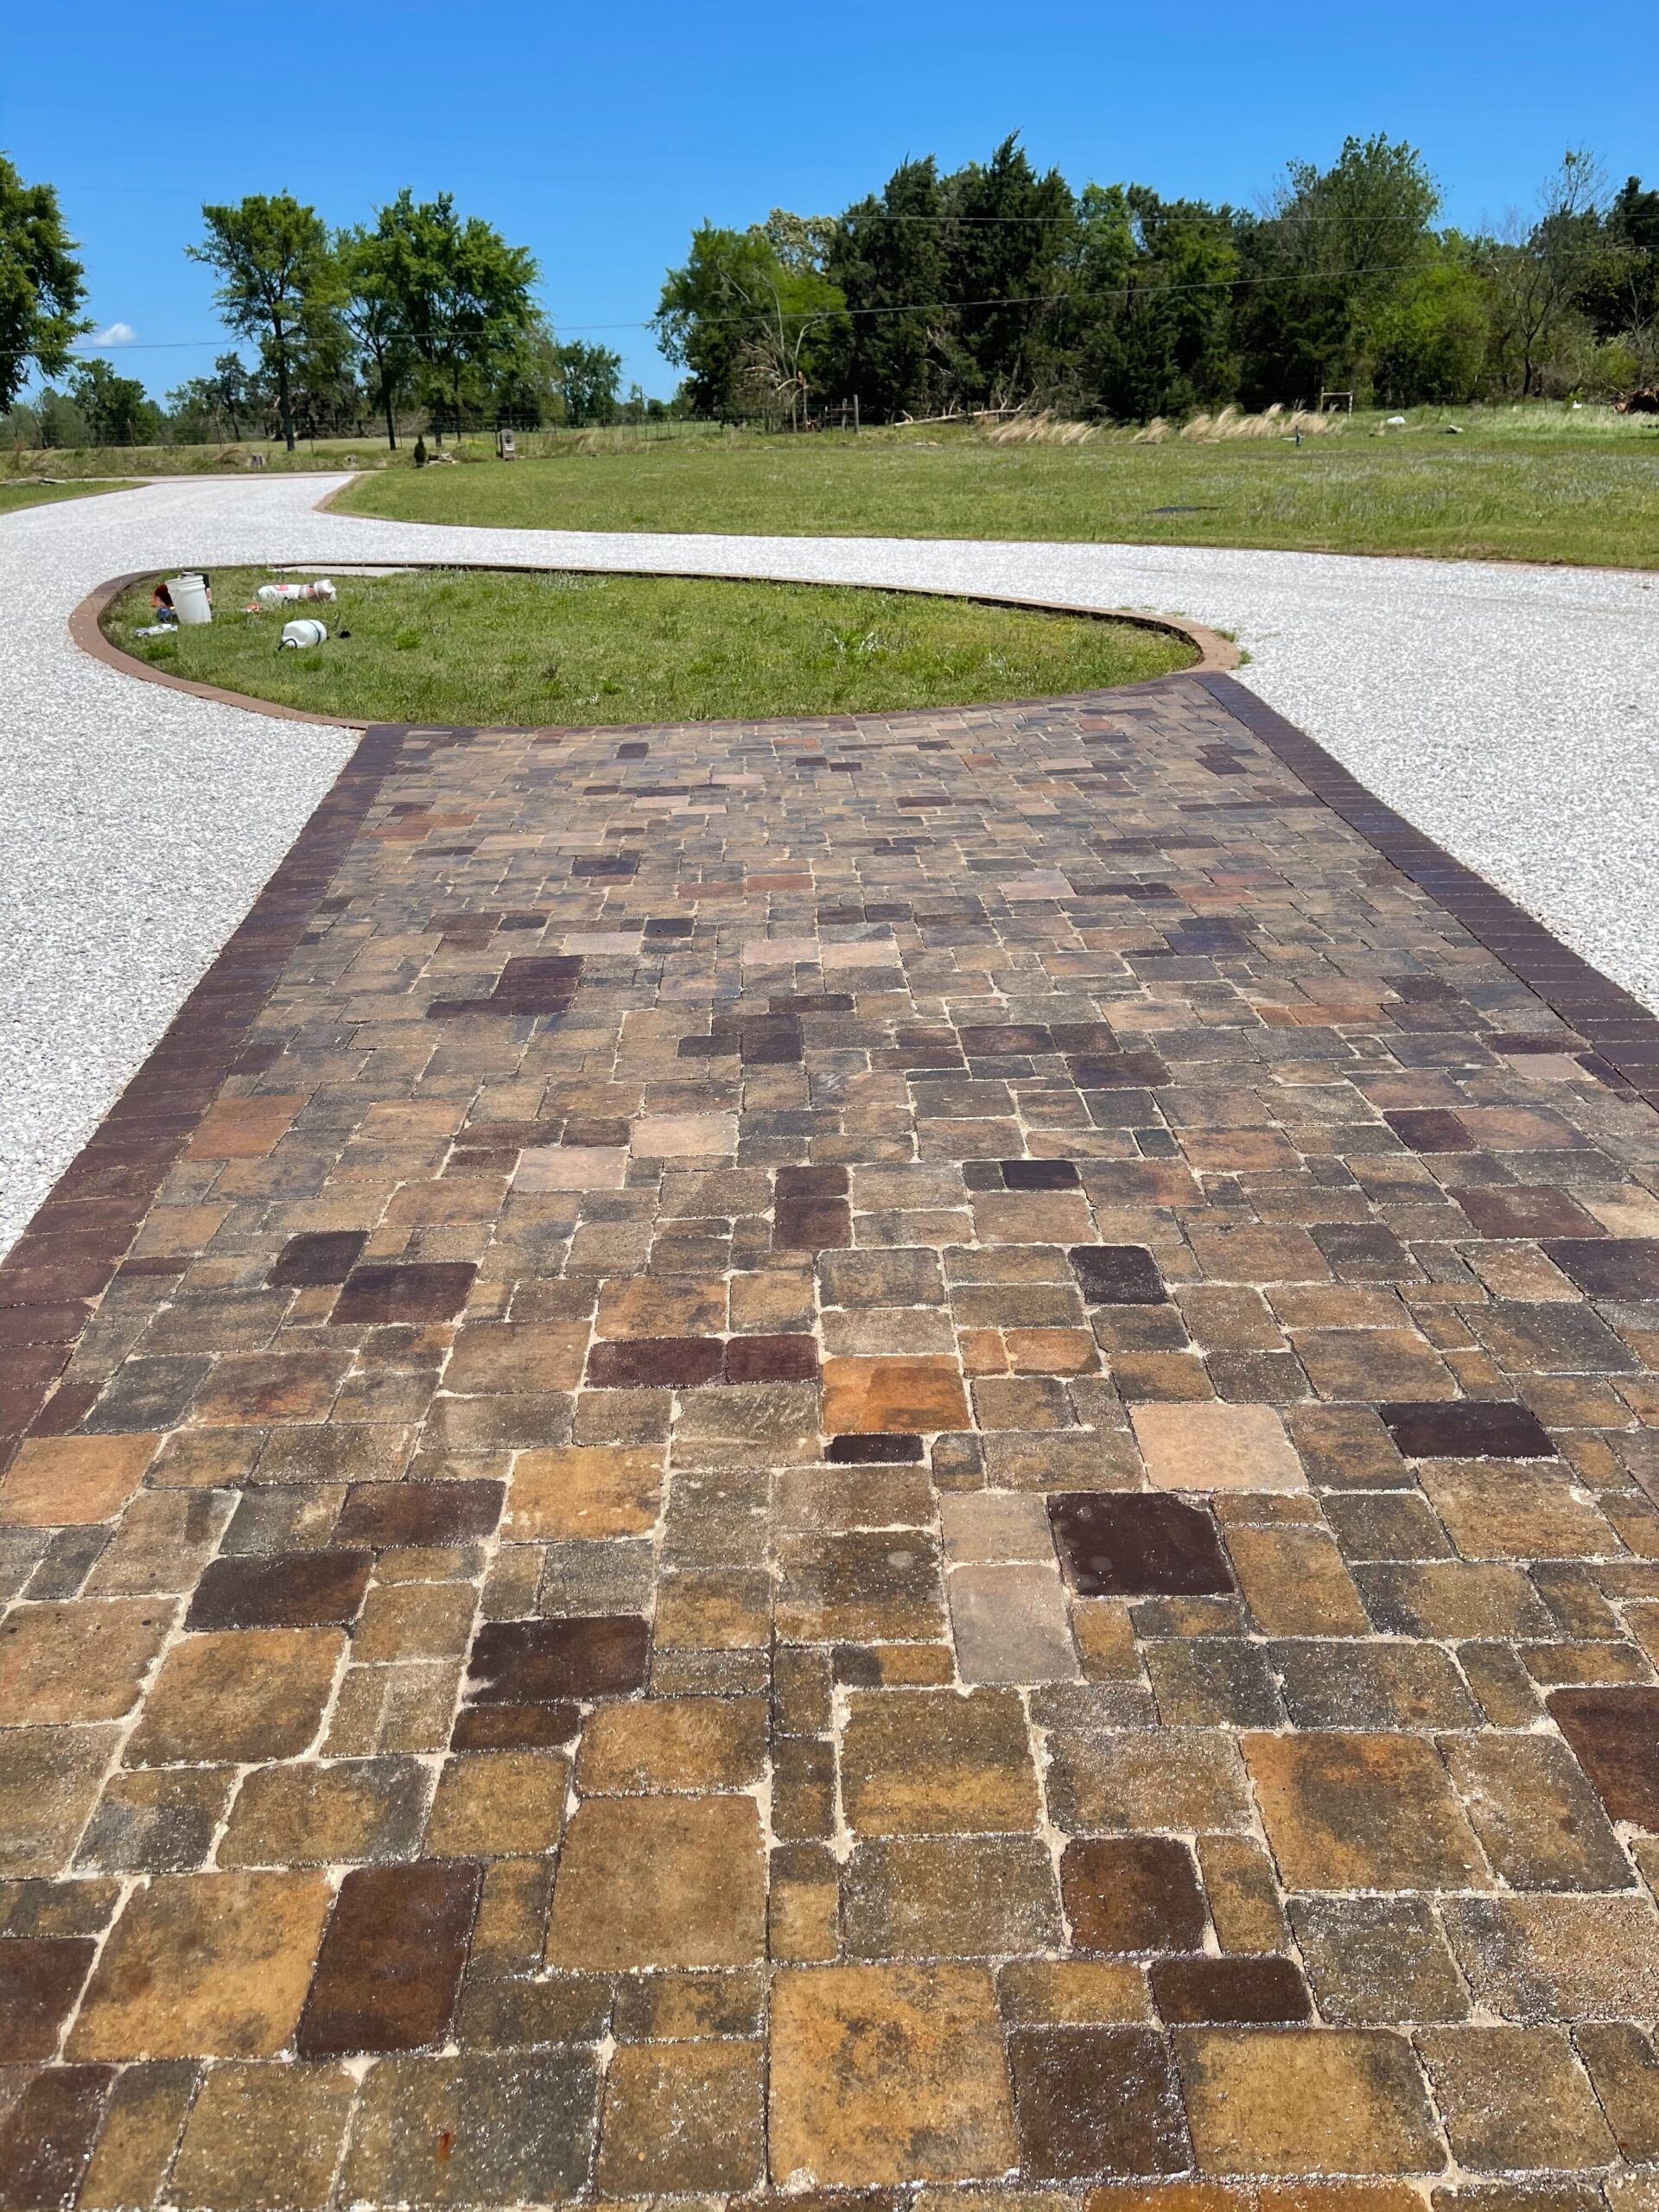
Stunning Paver Circle Accent on Concrete Paver Driveway
Create a visually striking design on your concrete paver driveway by utilizing contrasting stains. Use Aztec Brown Portico Paver Stain on the inner circle of pavers, and the outer border. For the remaining pavers, apply Goldenrod EasyTint. This approach not only adds aesthetic appeal to your driveway but also enhances its durability. With a bit of effort and creativity, you can transform your driveway to look like new.
Efflorescence and Staining Faded Pavers
Get ready to give your old brick patio a fresh new look! This project focuses on removing the unsightly efflorescence and applying a beautiful and bold combination of Portico Milano Red and Pumpkin stains, with sponge brushes. The end result is a beautiful, protected and unique patio that will be the envy of the neighborhood. Let’s get started and give that old patio a new lease on life!
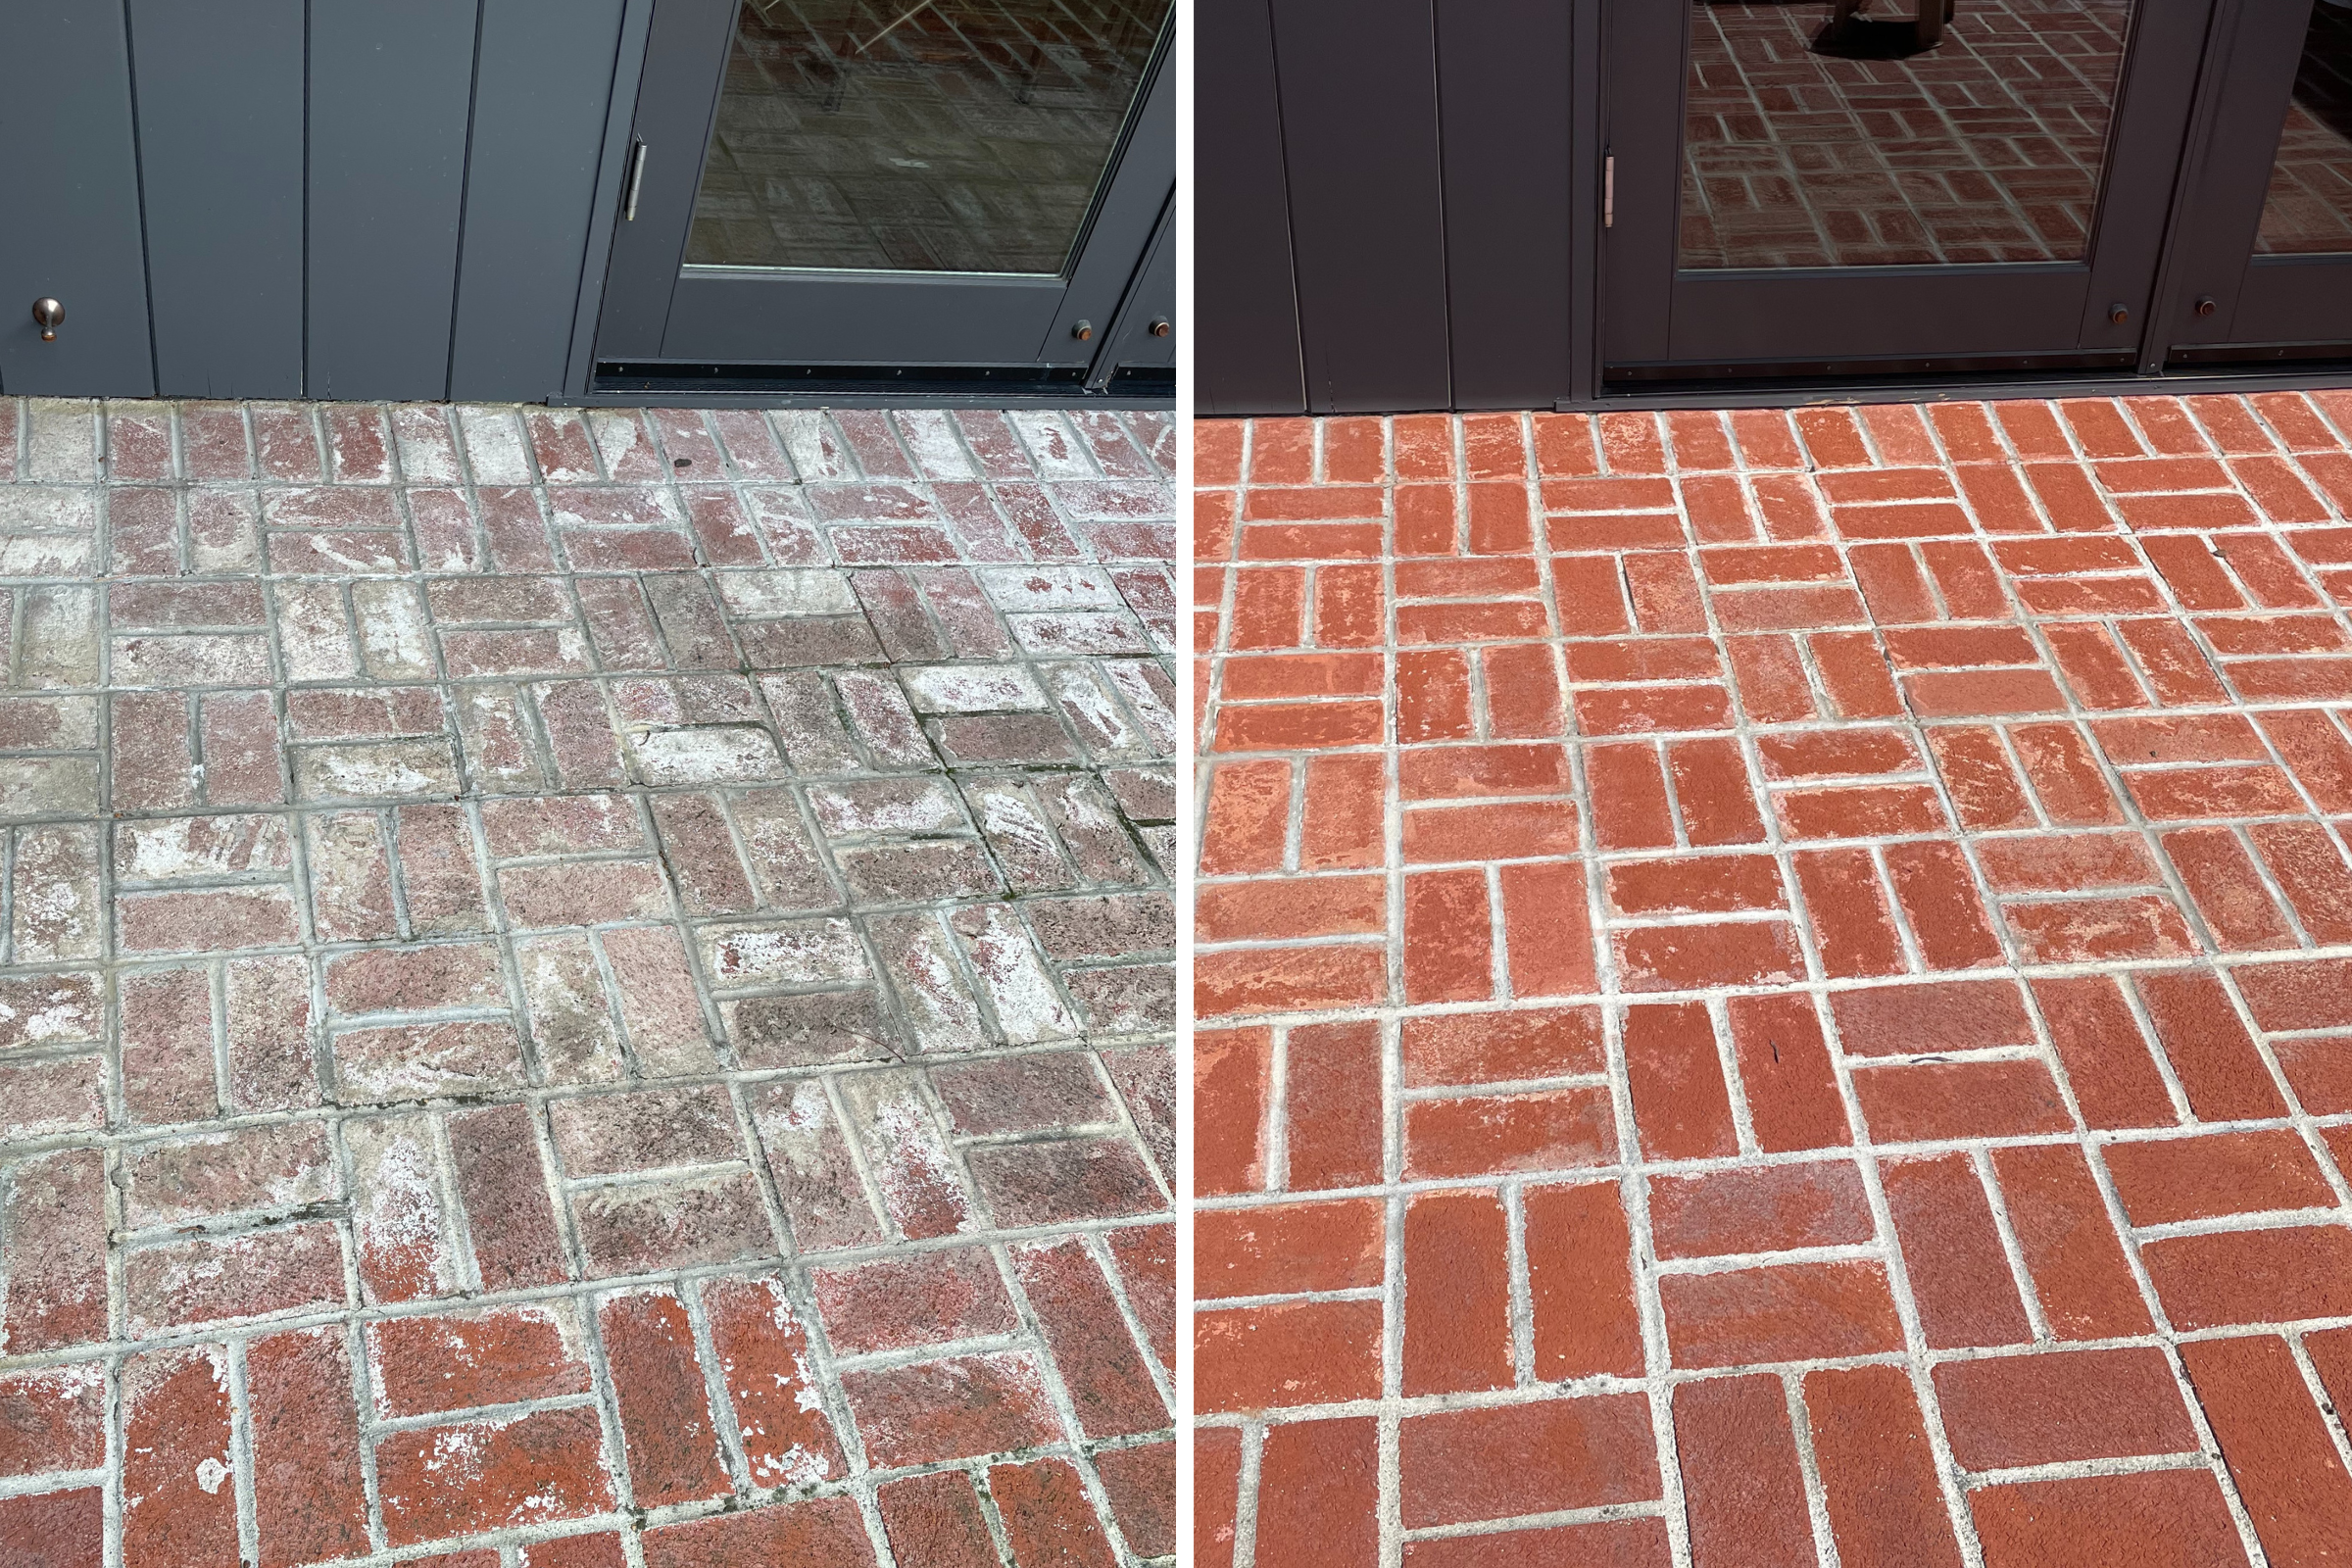
- Project Description: We wanted to give our old brick patio a new look, so we decided to try staining the bricks with a combination of Portico Milano Red and Pumpkin. The patio had a large area covered in efflorescence and cement & grout that we needed to remove before we could start staining. We used high pressure spraying to get rid of the efflorescence and then applied the stain to each brick with sponge brushes. After the stain dried, we applied two coats of satin sealant to protect the new color.
- Personal Tips: The key to this project was patience and strong knees! Staining each brick individually was a labor-intensive process, but the end result was worth it. We also found that using a short-nap roller for the sealant helped to ensure an even finish.
- Direct Colors Products Used:
Portico Milano Red
Portico Pumpkin
Satin EasySeal
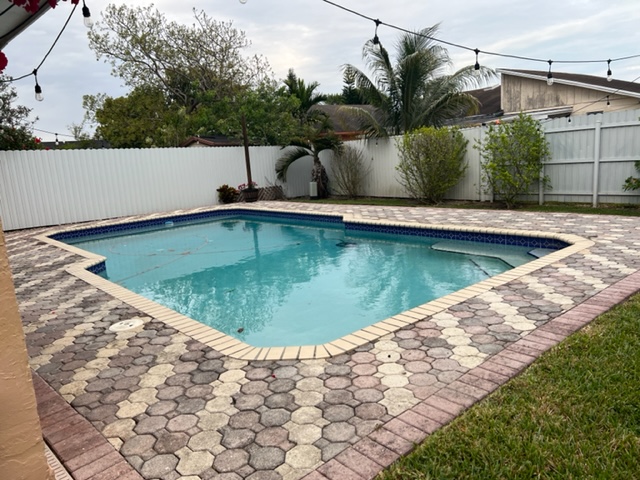
A Creative Paver Pool Deck Design with Chocolate and Milano Red Stains
This project is all about creating a unique and eye-catching look around your pool using the colors of chocolate and Milano red stains. The alternating of colors and intensity of stains creates a visually interesting design that’s sure to be a conversation starter among your friends and neighbors.
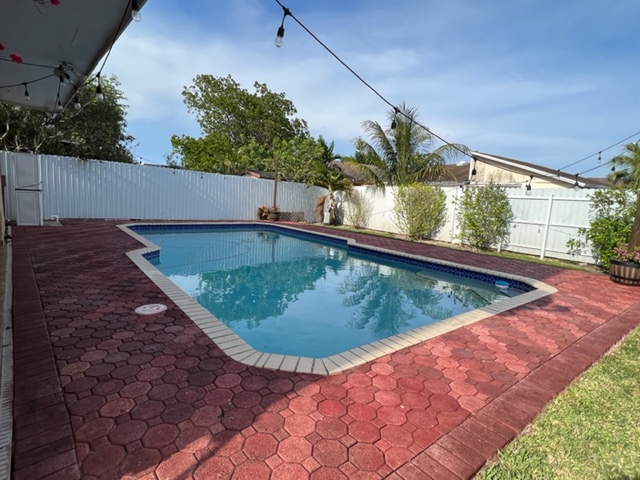
- Project Completed In: 4 day(s)
- Estimate of Square Footage: 450 sq. ft.
- Project Description:
Stain and Seal pavers around swimming pool - Personal Tips:
My main problem was to keep the color uniform around the area. The pigment goes down to the bottom very easy and the beginning of the gallon is always lighter. I had better results using a brush and small bucket than the sprayer. - Direct Colors Products Used:
Portico Stain and Seal (Red Milano and Chocolate, plus satin EasySeal
DIY Brick Paver Patio Rehab: Reviving a Tired Patio with Paver Stains
Get ready to upgrade your dull, outdated brick paver patio to a stunning retreat! This project chronicles the homeowner’s journey of tackling the project themselves, after getting unreasonable quotes from companies, and revamping their patio using Direct Color’s products. It’s a fun, cost-effective way of giving your backyard the makeover it deserves!
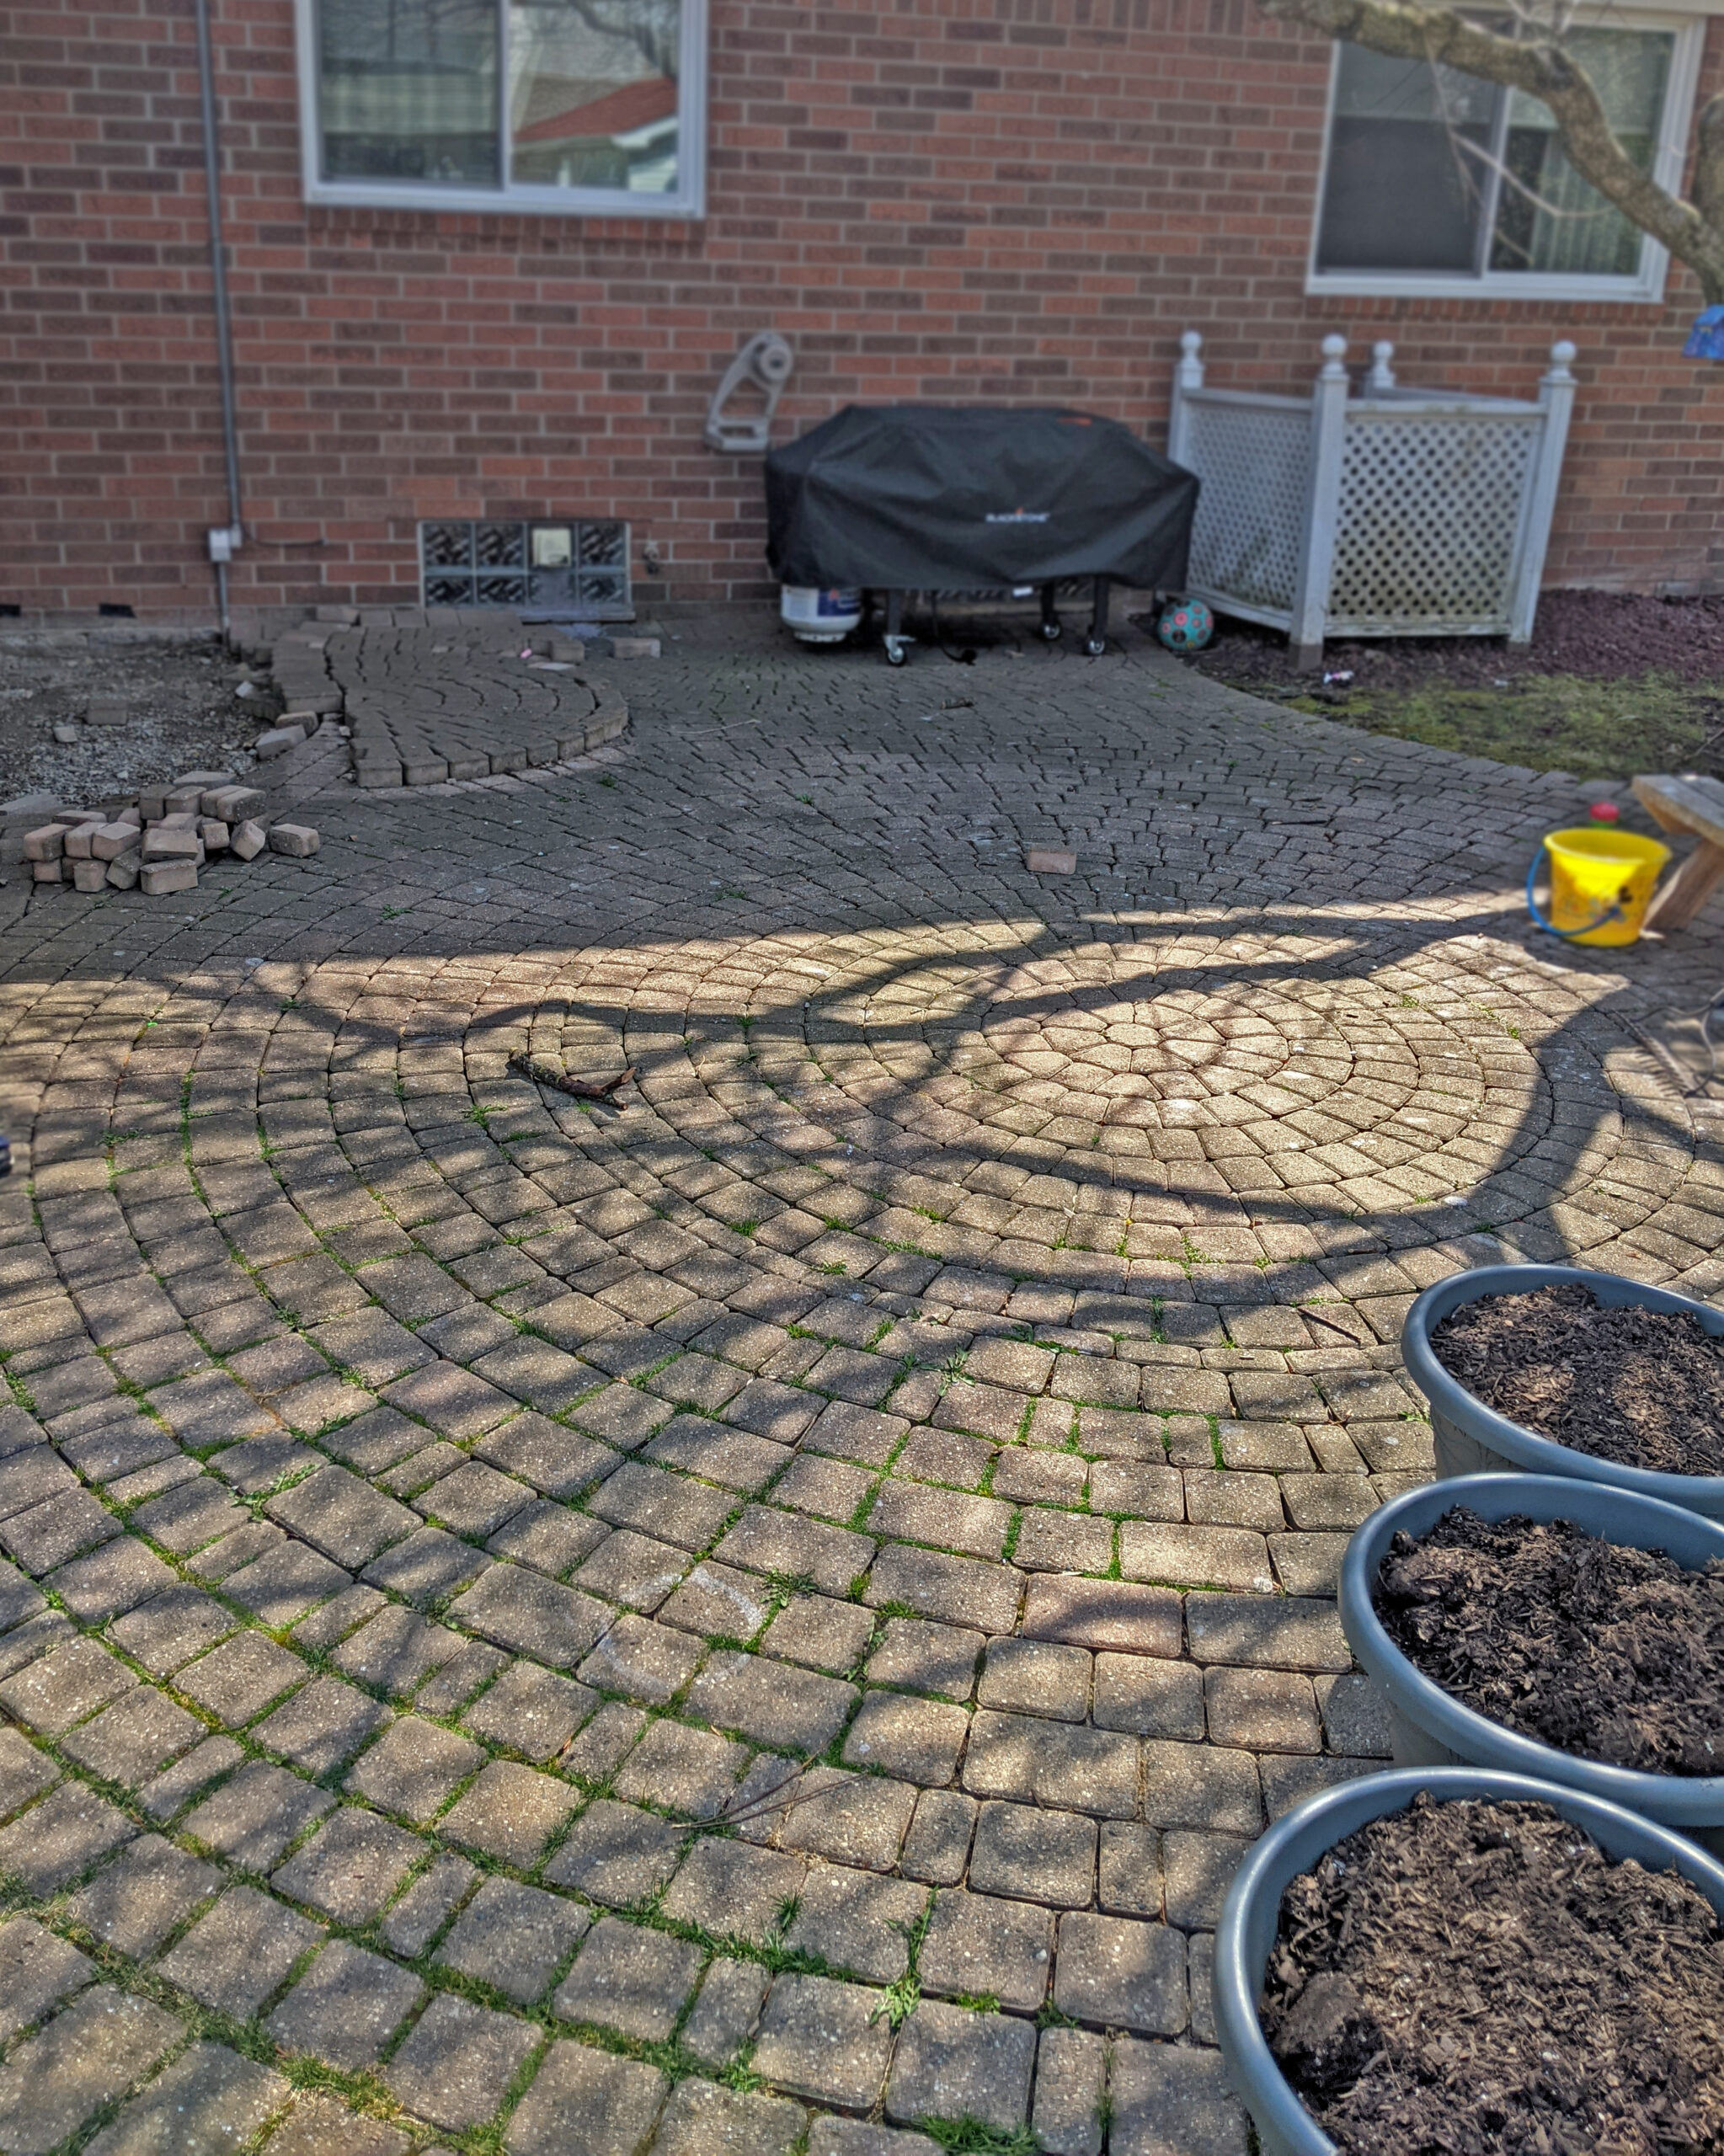
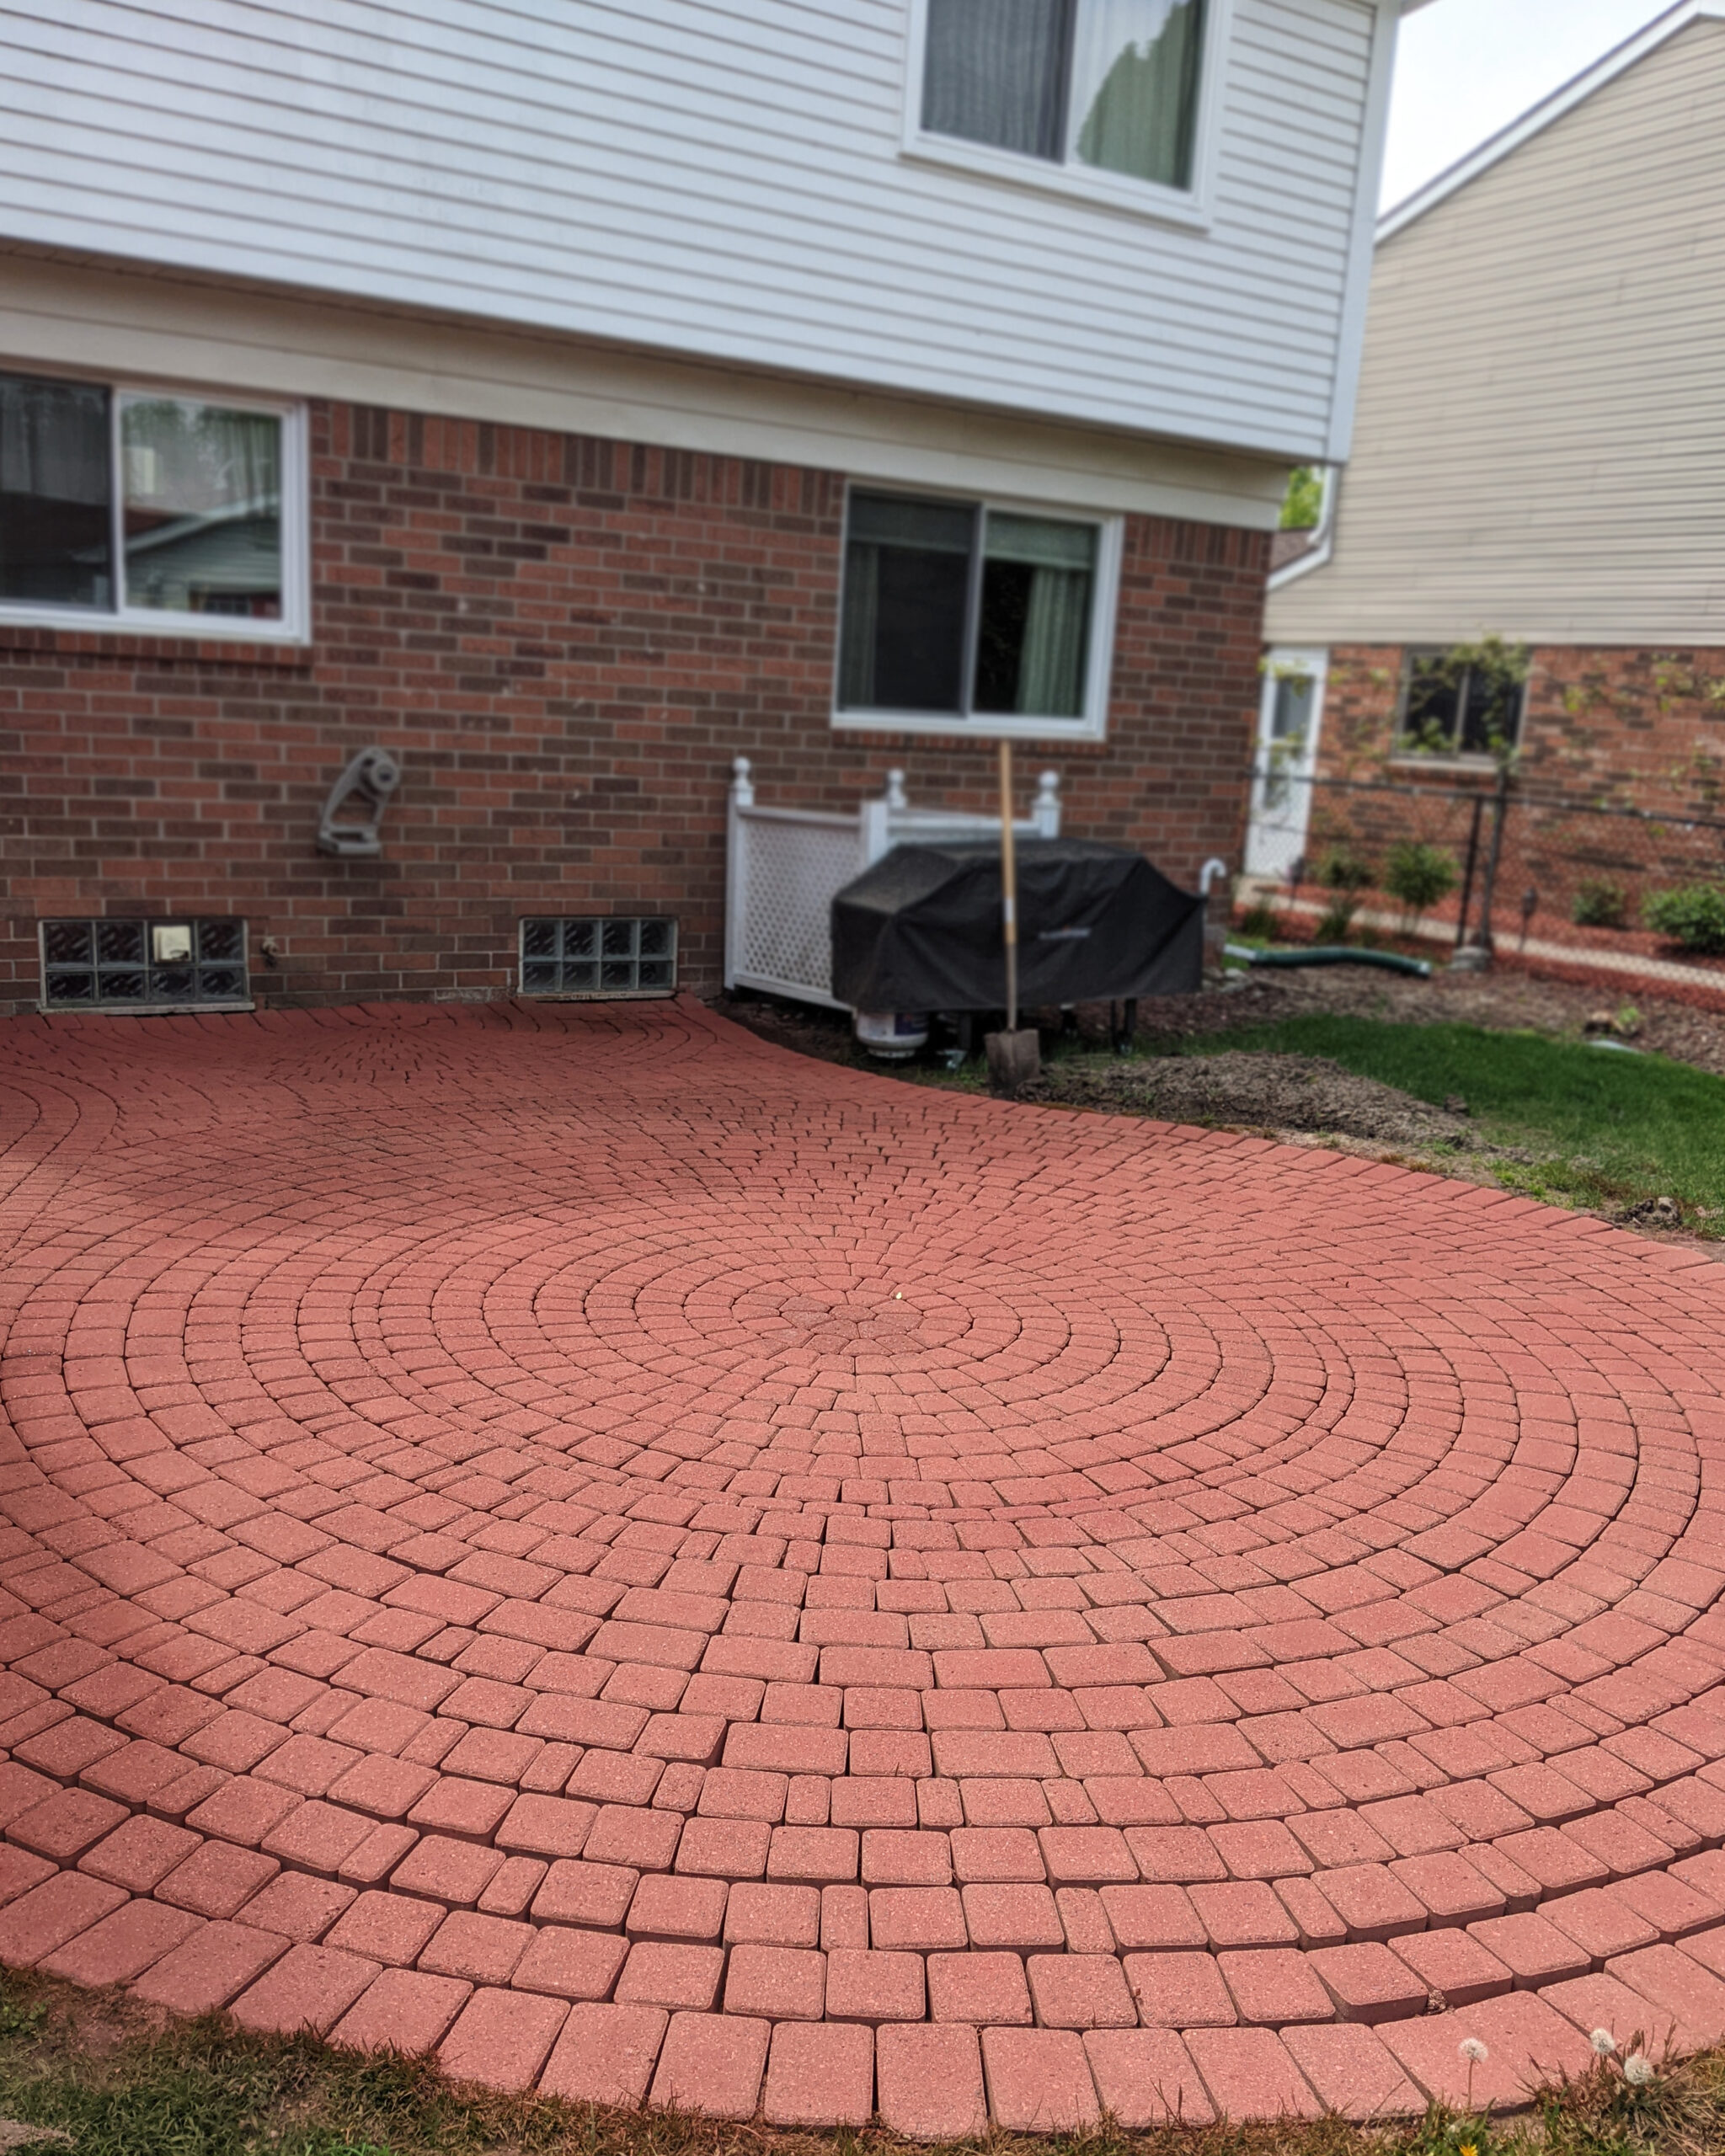
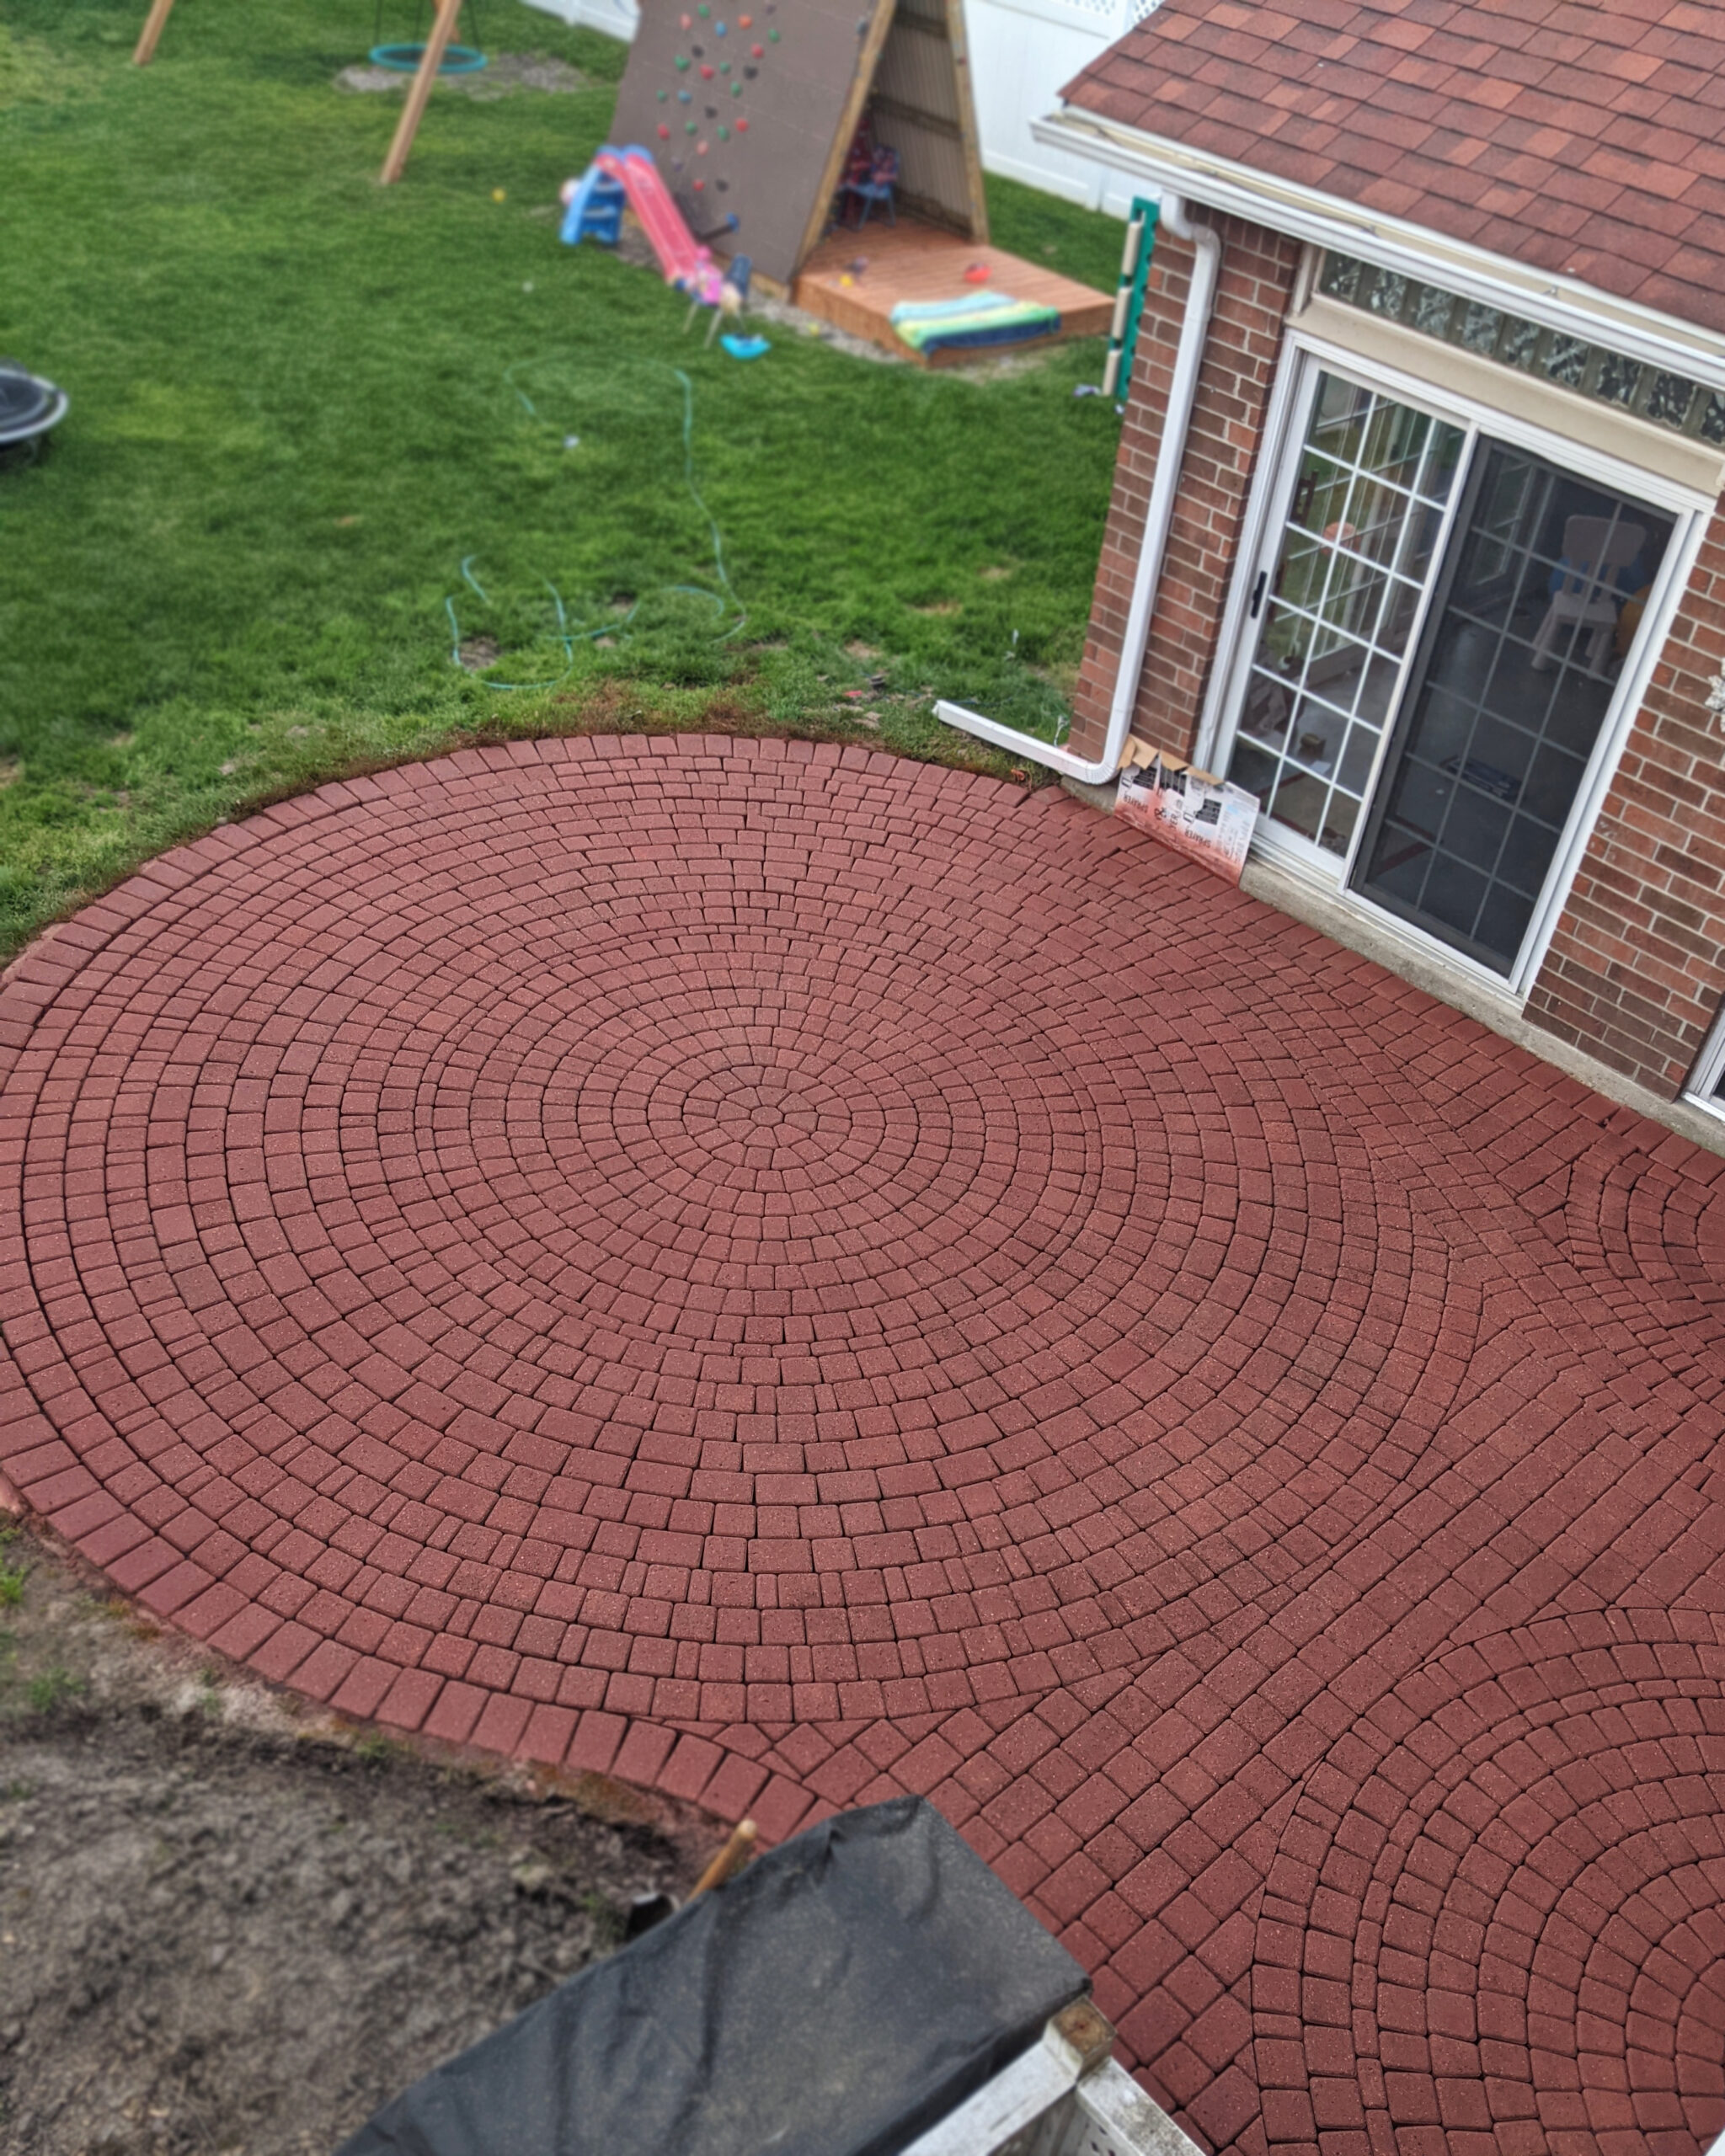
Project Summary:
- Completed in: 20 days
- Square Footage: 200 sq. ft.
- Description: The homeowner decided to renovate their brick paver patio which was in poor condition due to sinking pavers, dirty appearance and weeds growing in-between the pavers. They decided to do the work themselves after receiving several exorbitantly high quotes from companies. They repaired the patio by themselves and after power washing, stained, sealed, and added polymeric sand. The patio now looks like new.
Personal Tips:
- Pavers may become extremely porous after power washing, plan accordingly and consider getting extra sealer.
- Starting the project during a dry season would be ideal as multiple days of rain may delay progress.
- Make sure to have enough dry days to stain and seal the pavers.
- This project shows that it is possible to renovate your patio by yourself, using Direct Color’s products, instead of relying on expensive companies.
Direct Colors Products Used:
- Portico Paver Stain Crimson
- EasySeal Satin Sealer
Other Products Used:
-
- Paver set
- Power washer
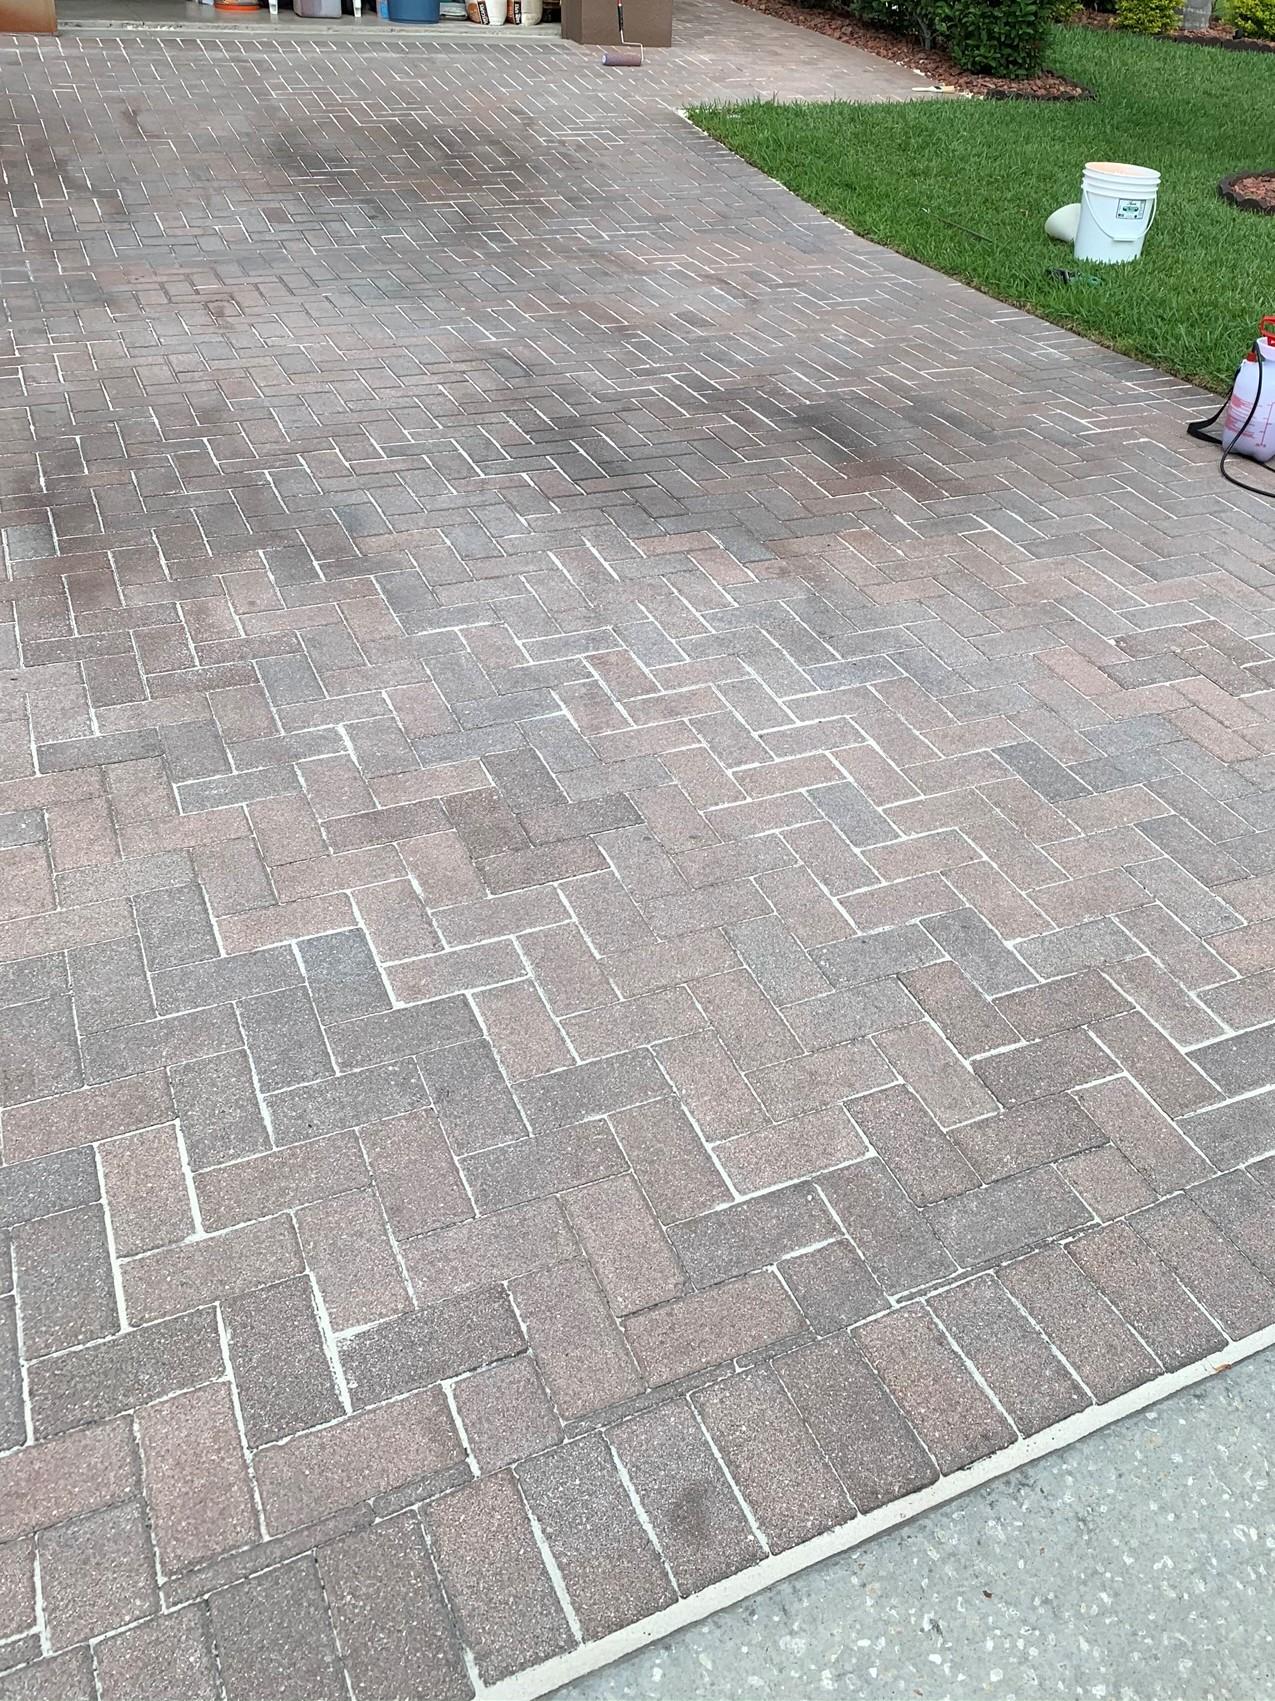
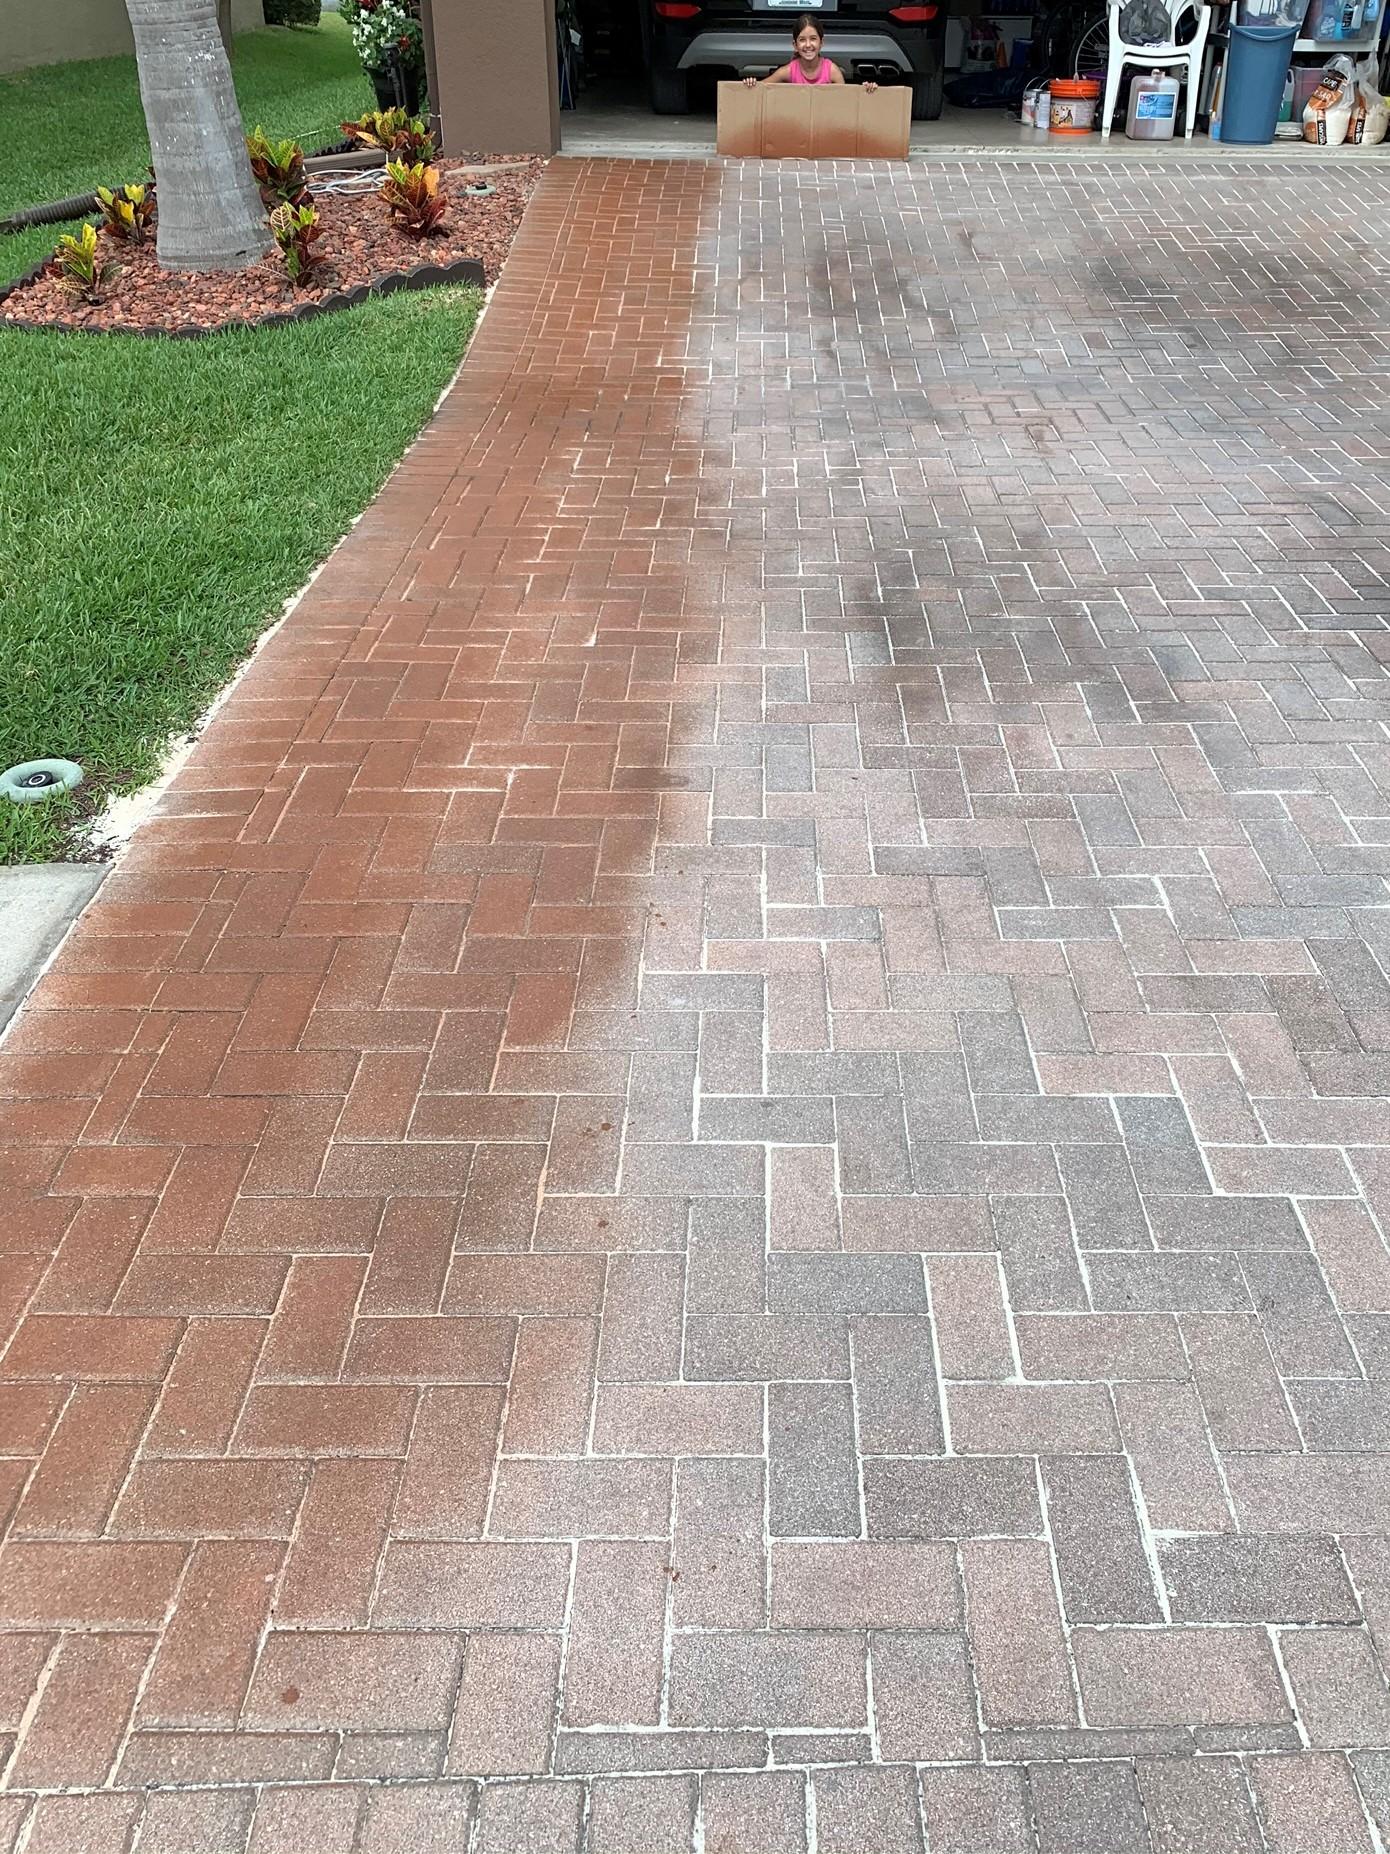
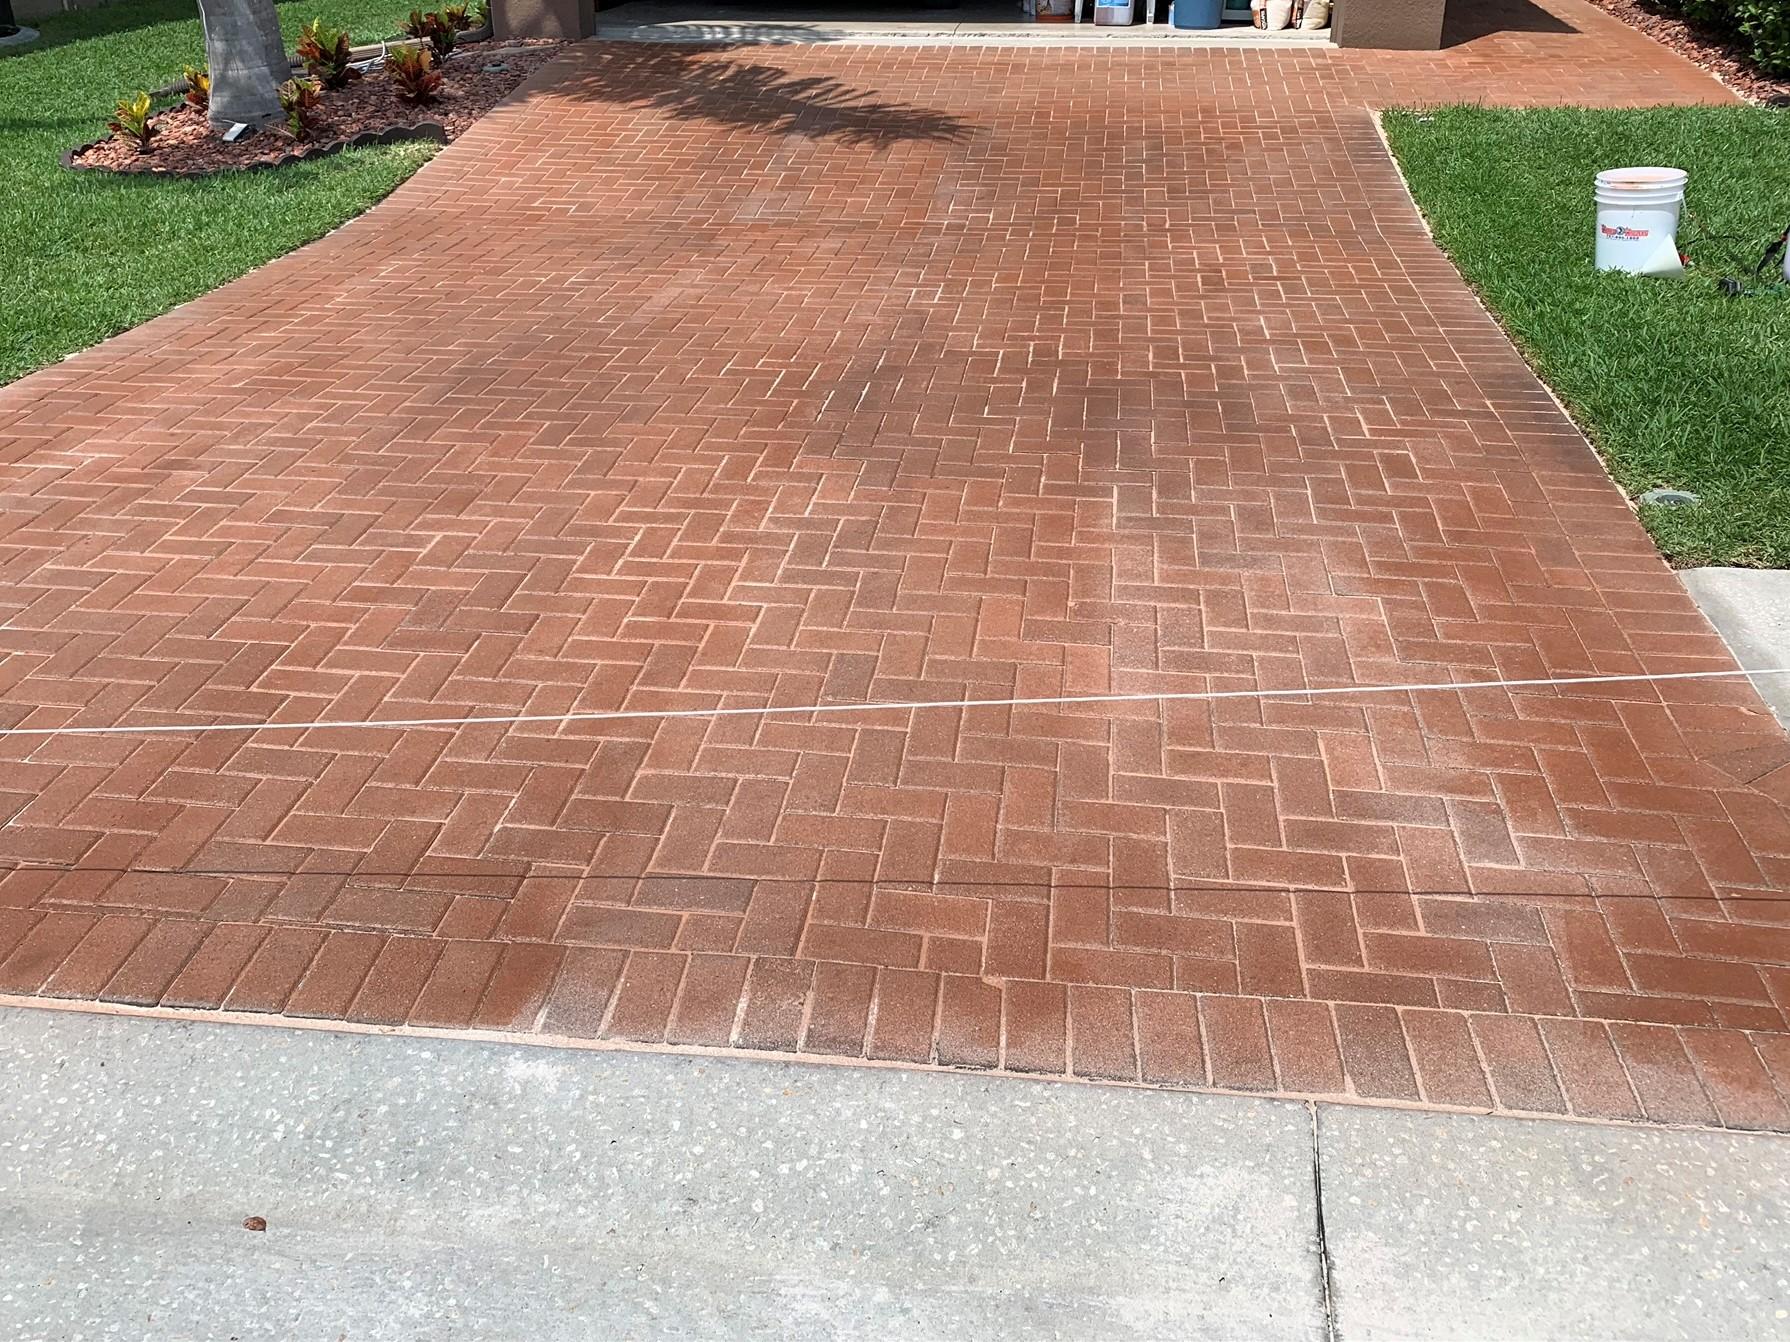
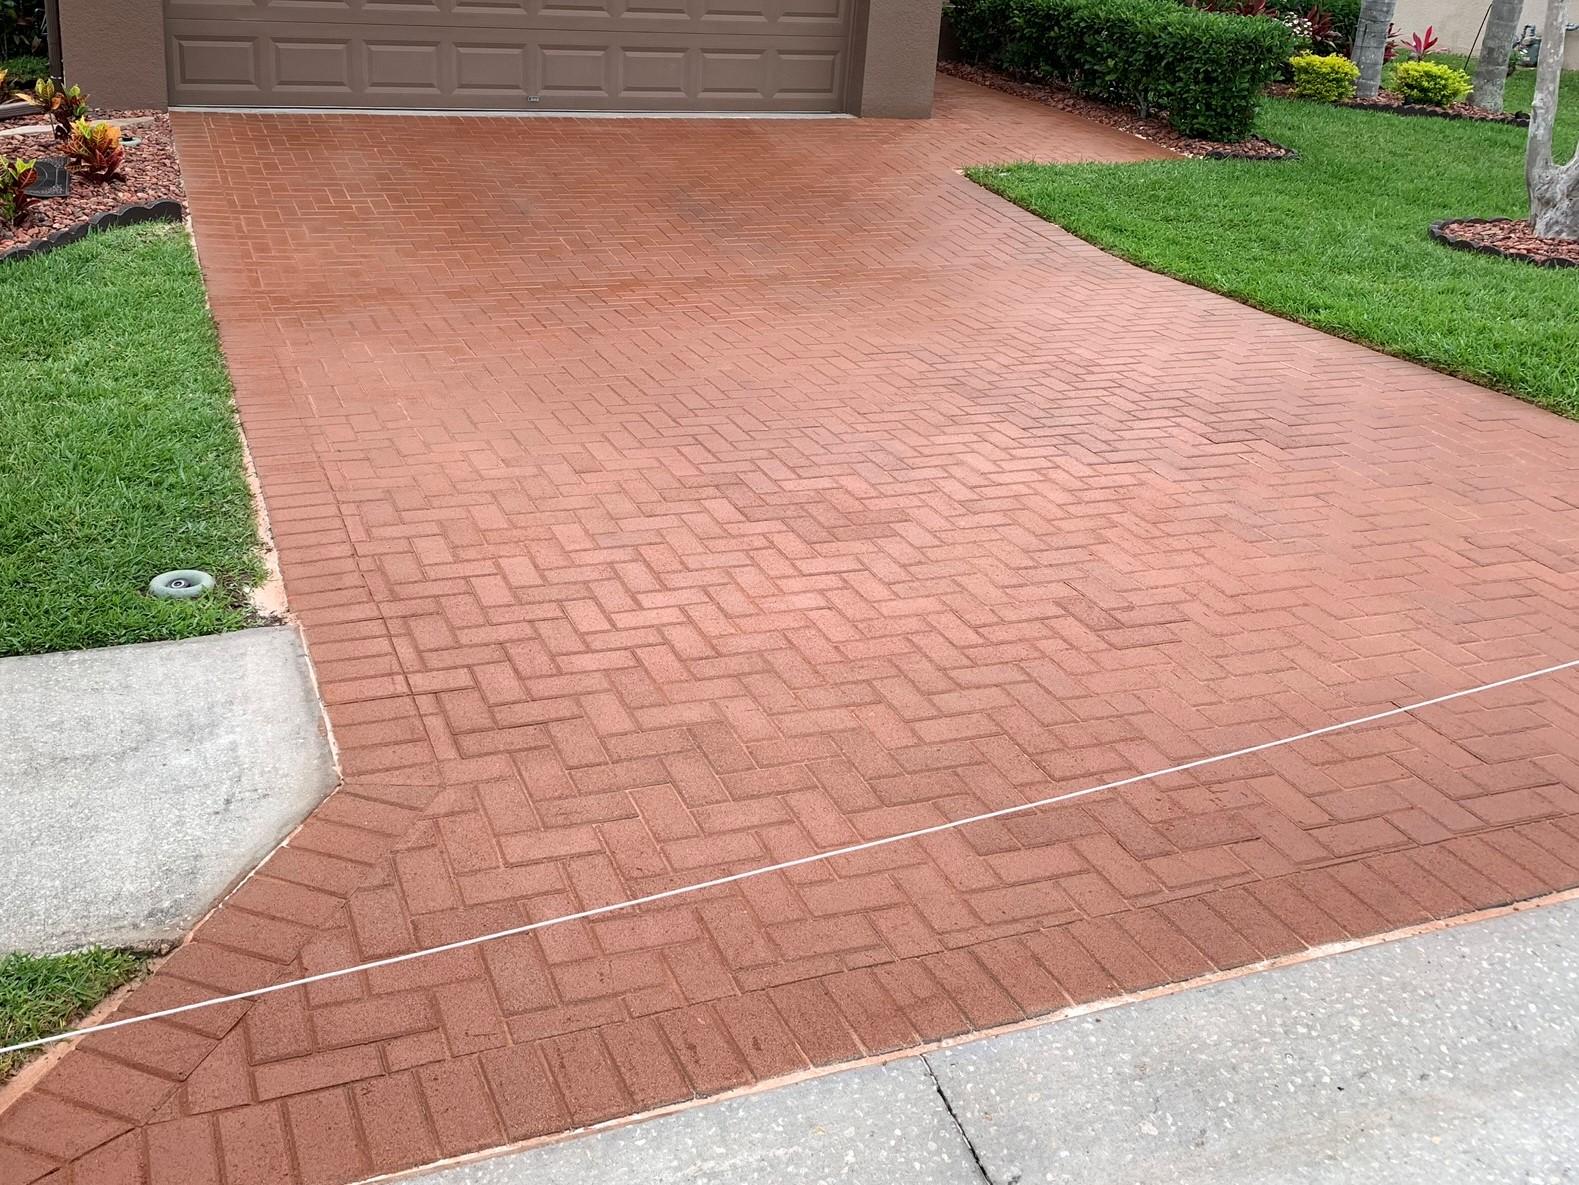
Driveway Paver Discoloration Dilemma
This customer had had enough. Their paver driveway was looking a bit rough. Due to constant sun exposure and stains and spills over the years, it was time for an upgrade! Luckily, our tinted concrete sealer and acrylic sealer did the job. And my, what a fantastic job they did. Looks great!
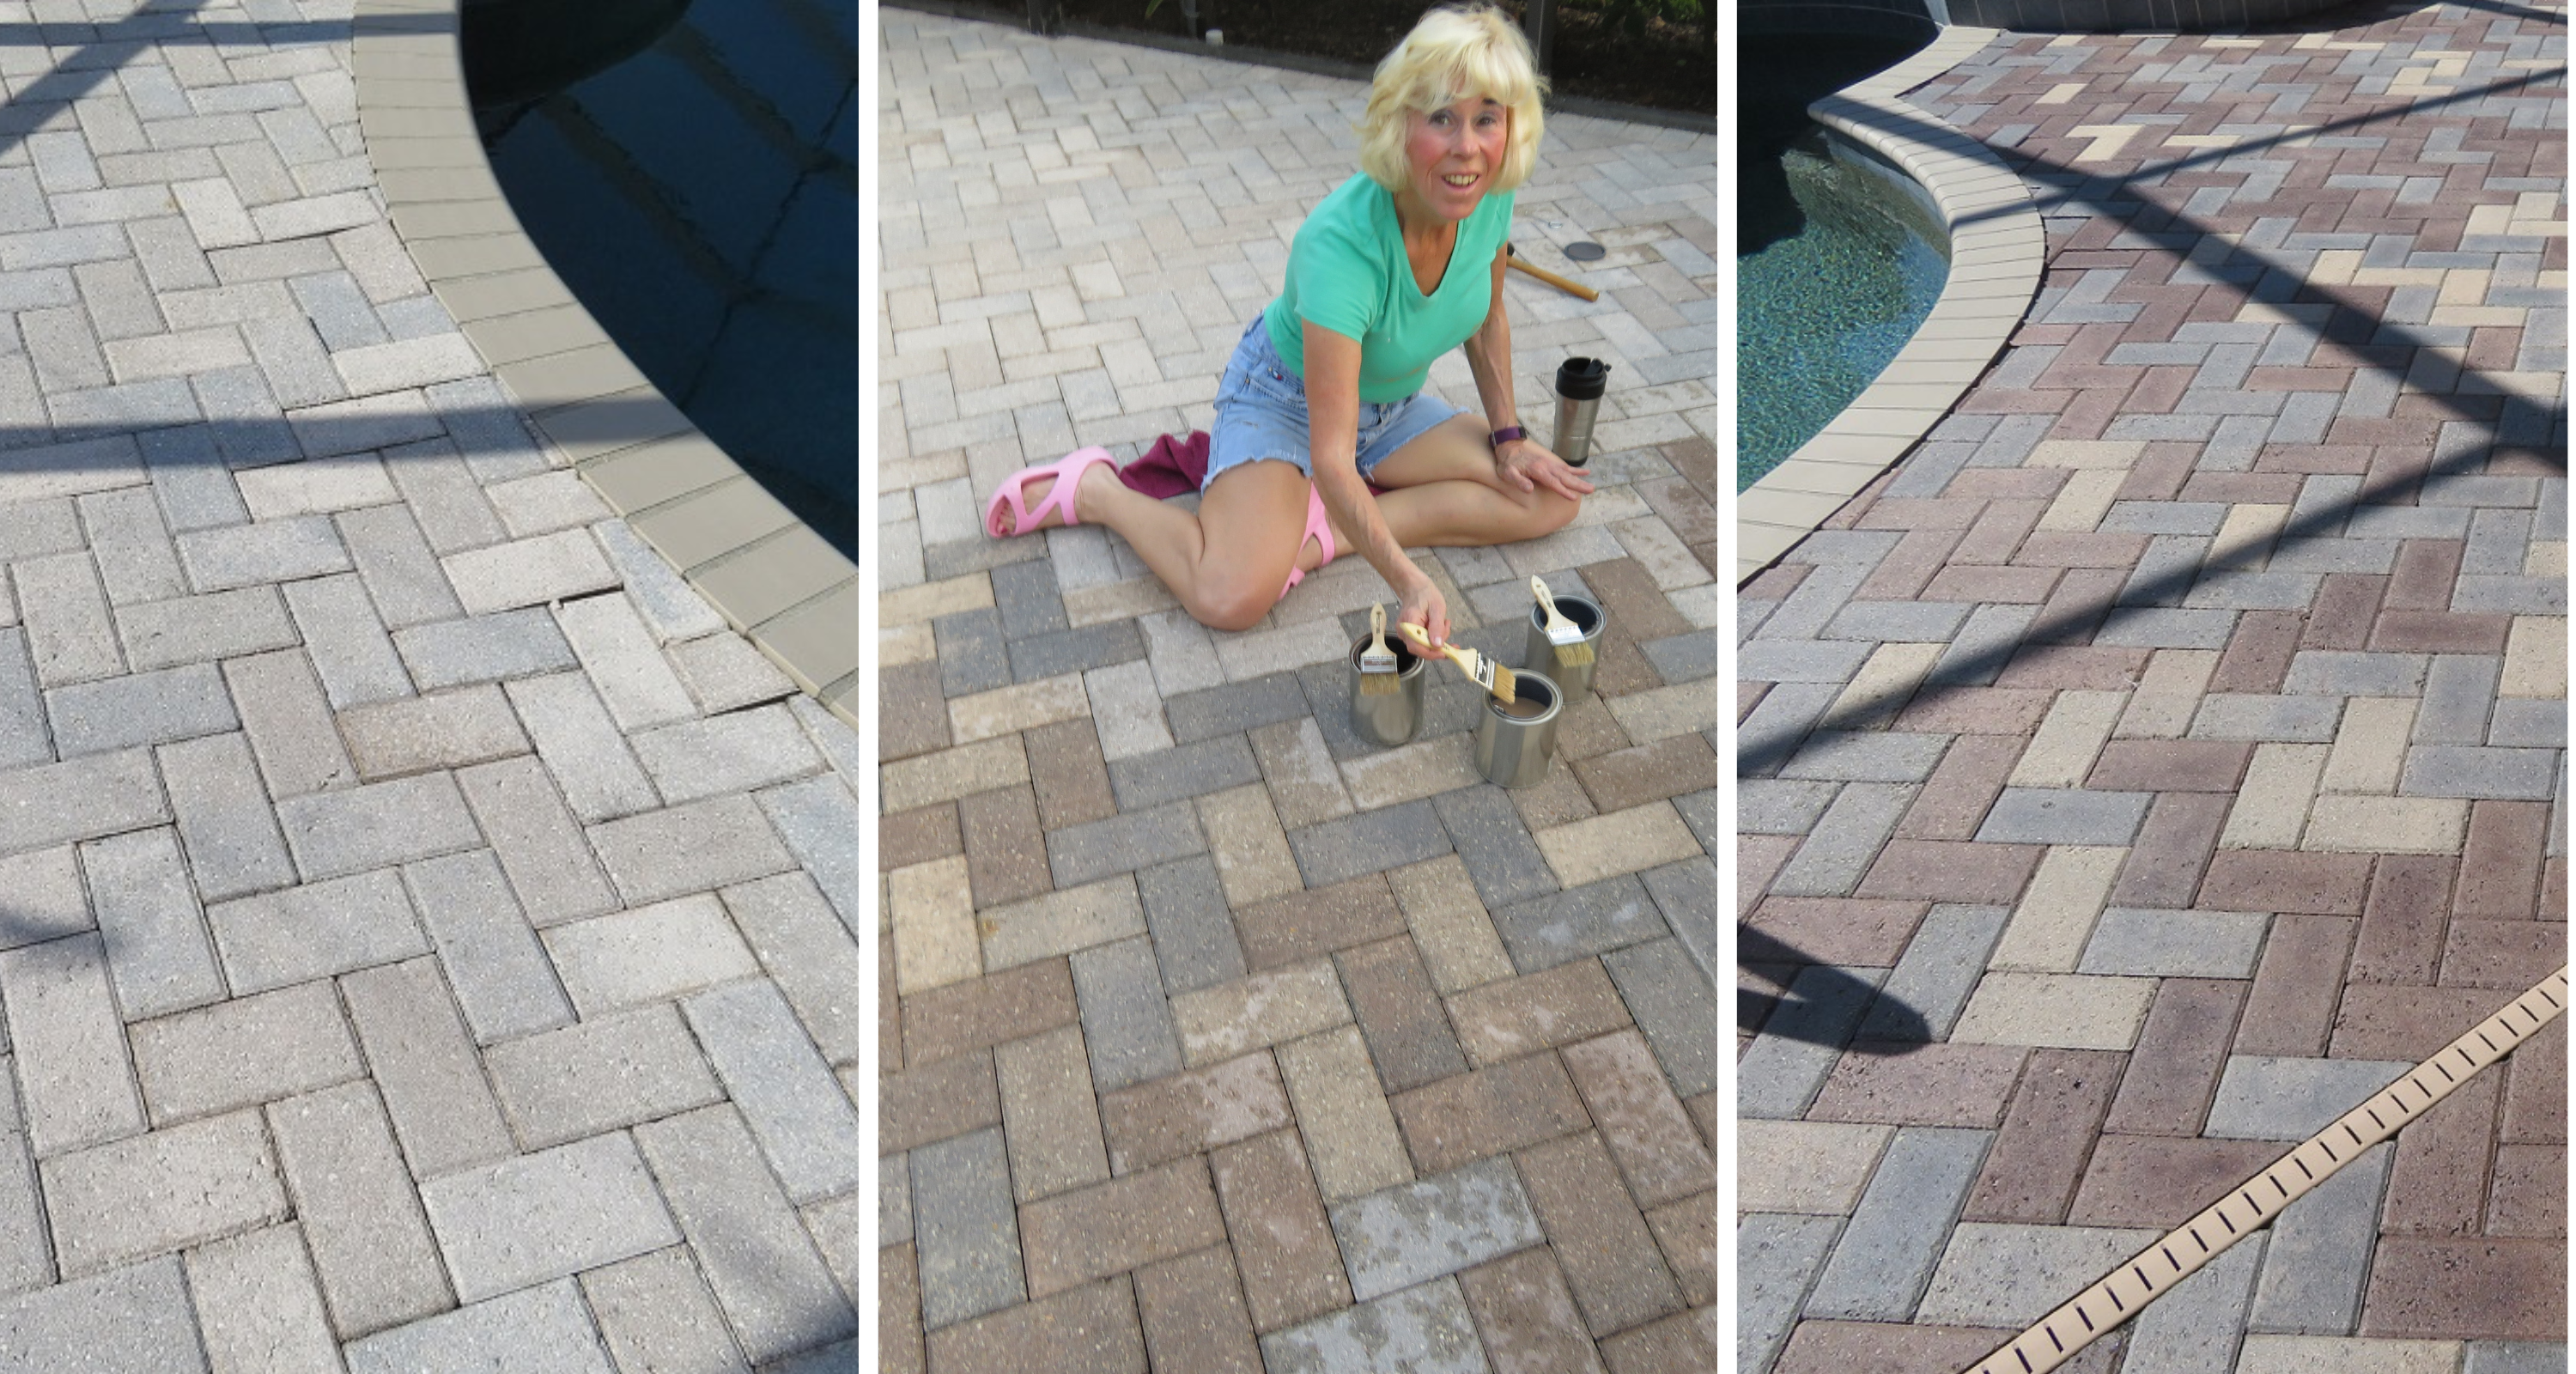
Recolor Badly Faded Pool Pavers with Tinted Sealer
This homeowner recolored their severely faded pool pavers, with hand-staining each paver individually using a foam brush and an array of colors. The end result is a unique design that’s sure to turn heads and make your pool deck the envy of the neighborhood.
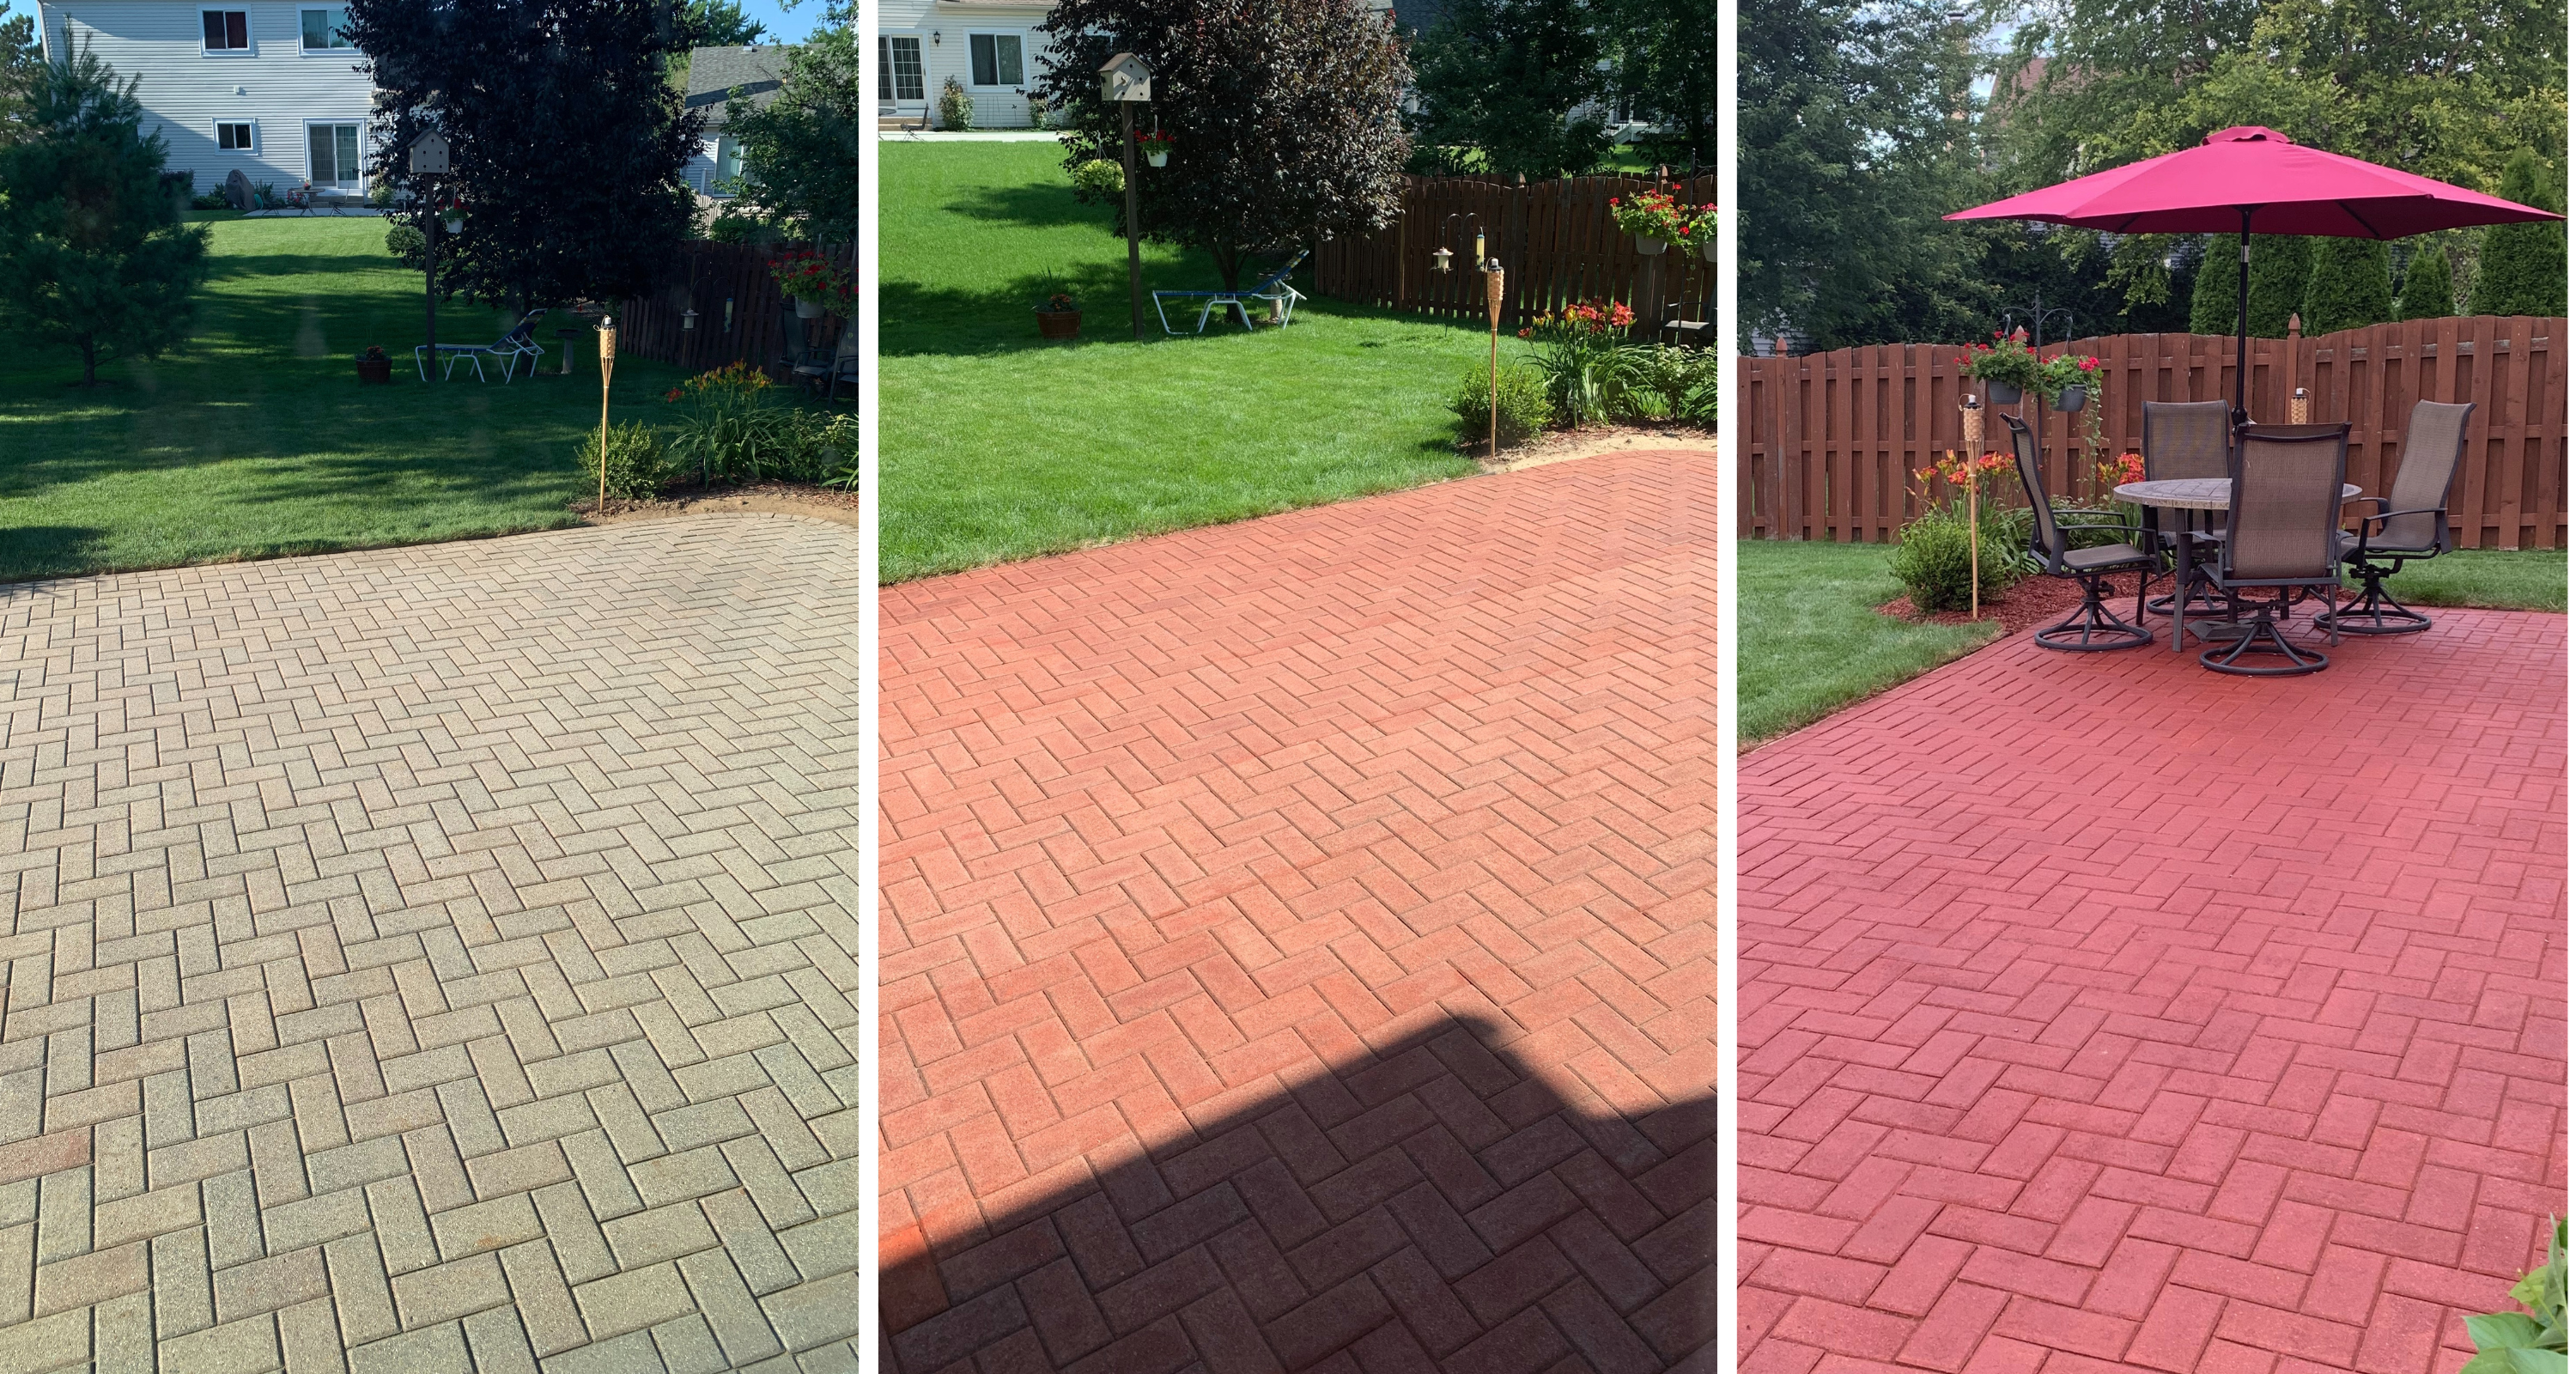
Reviving an Old Brick Patio with Concrete Paver Stain
Get ready to bring new life to your old and faded brick patio! This project is all about using concrete paver stain to refresh the colors and give your patio a fresh new look.
Project Summary:
- Completed in: 2 days
- Square Footage: 384 sq. ft.
- Description: The homeowner’s 30 year old brick patio had faded colors, They decided to stain the patio to refresh the colors and found Direct Colors website helpful. They used the Portico concrete paver stain in crimson color and easy seal satin sealer and are very satisfied with the results.
- Personal Tips:Take advantage of the sample kit that Direct Colors offer to help choose the color stain for your project
- Direct Colors Products Used:
1 Gal. Crimson DIY Portico™ & EasySeal™ Satin Kit
1 Gal. Crimson Portico™ & EasySeal™ Satin Kit
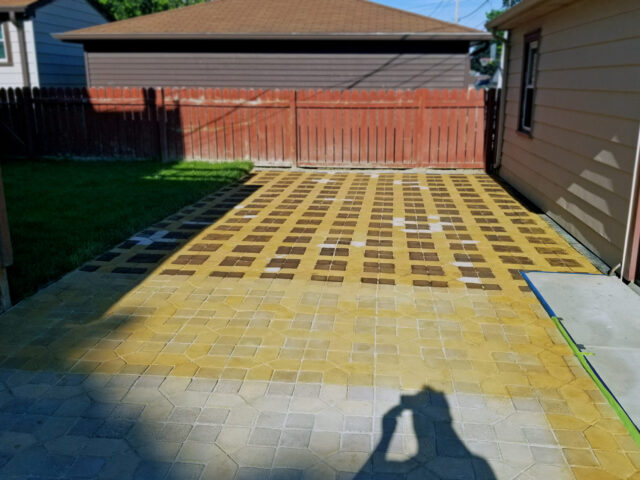
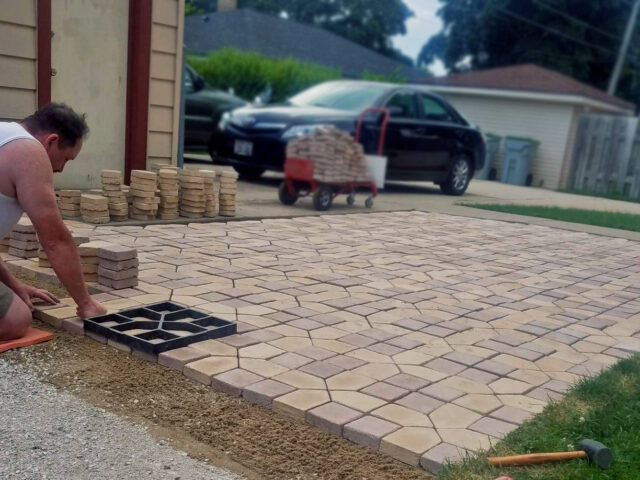
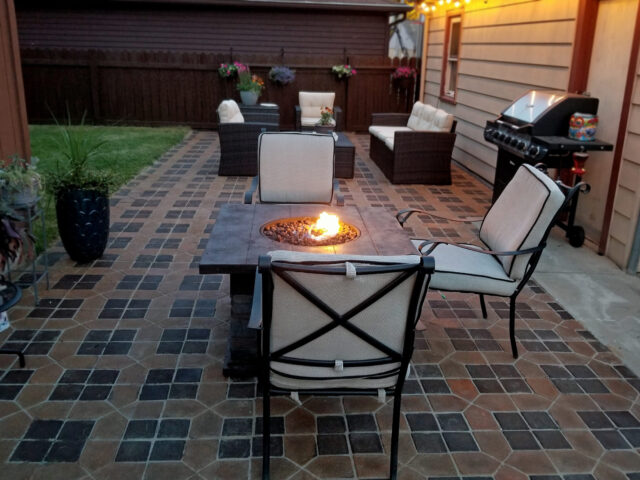
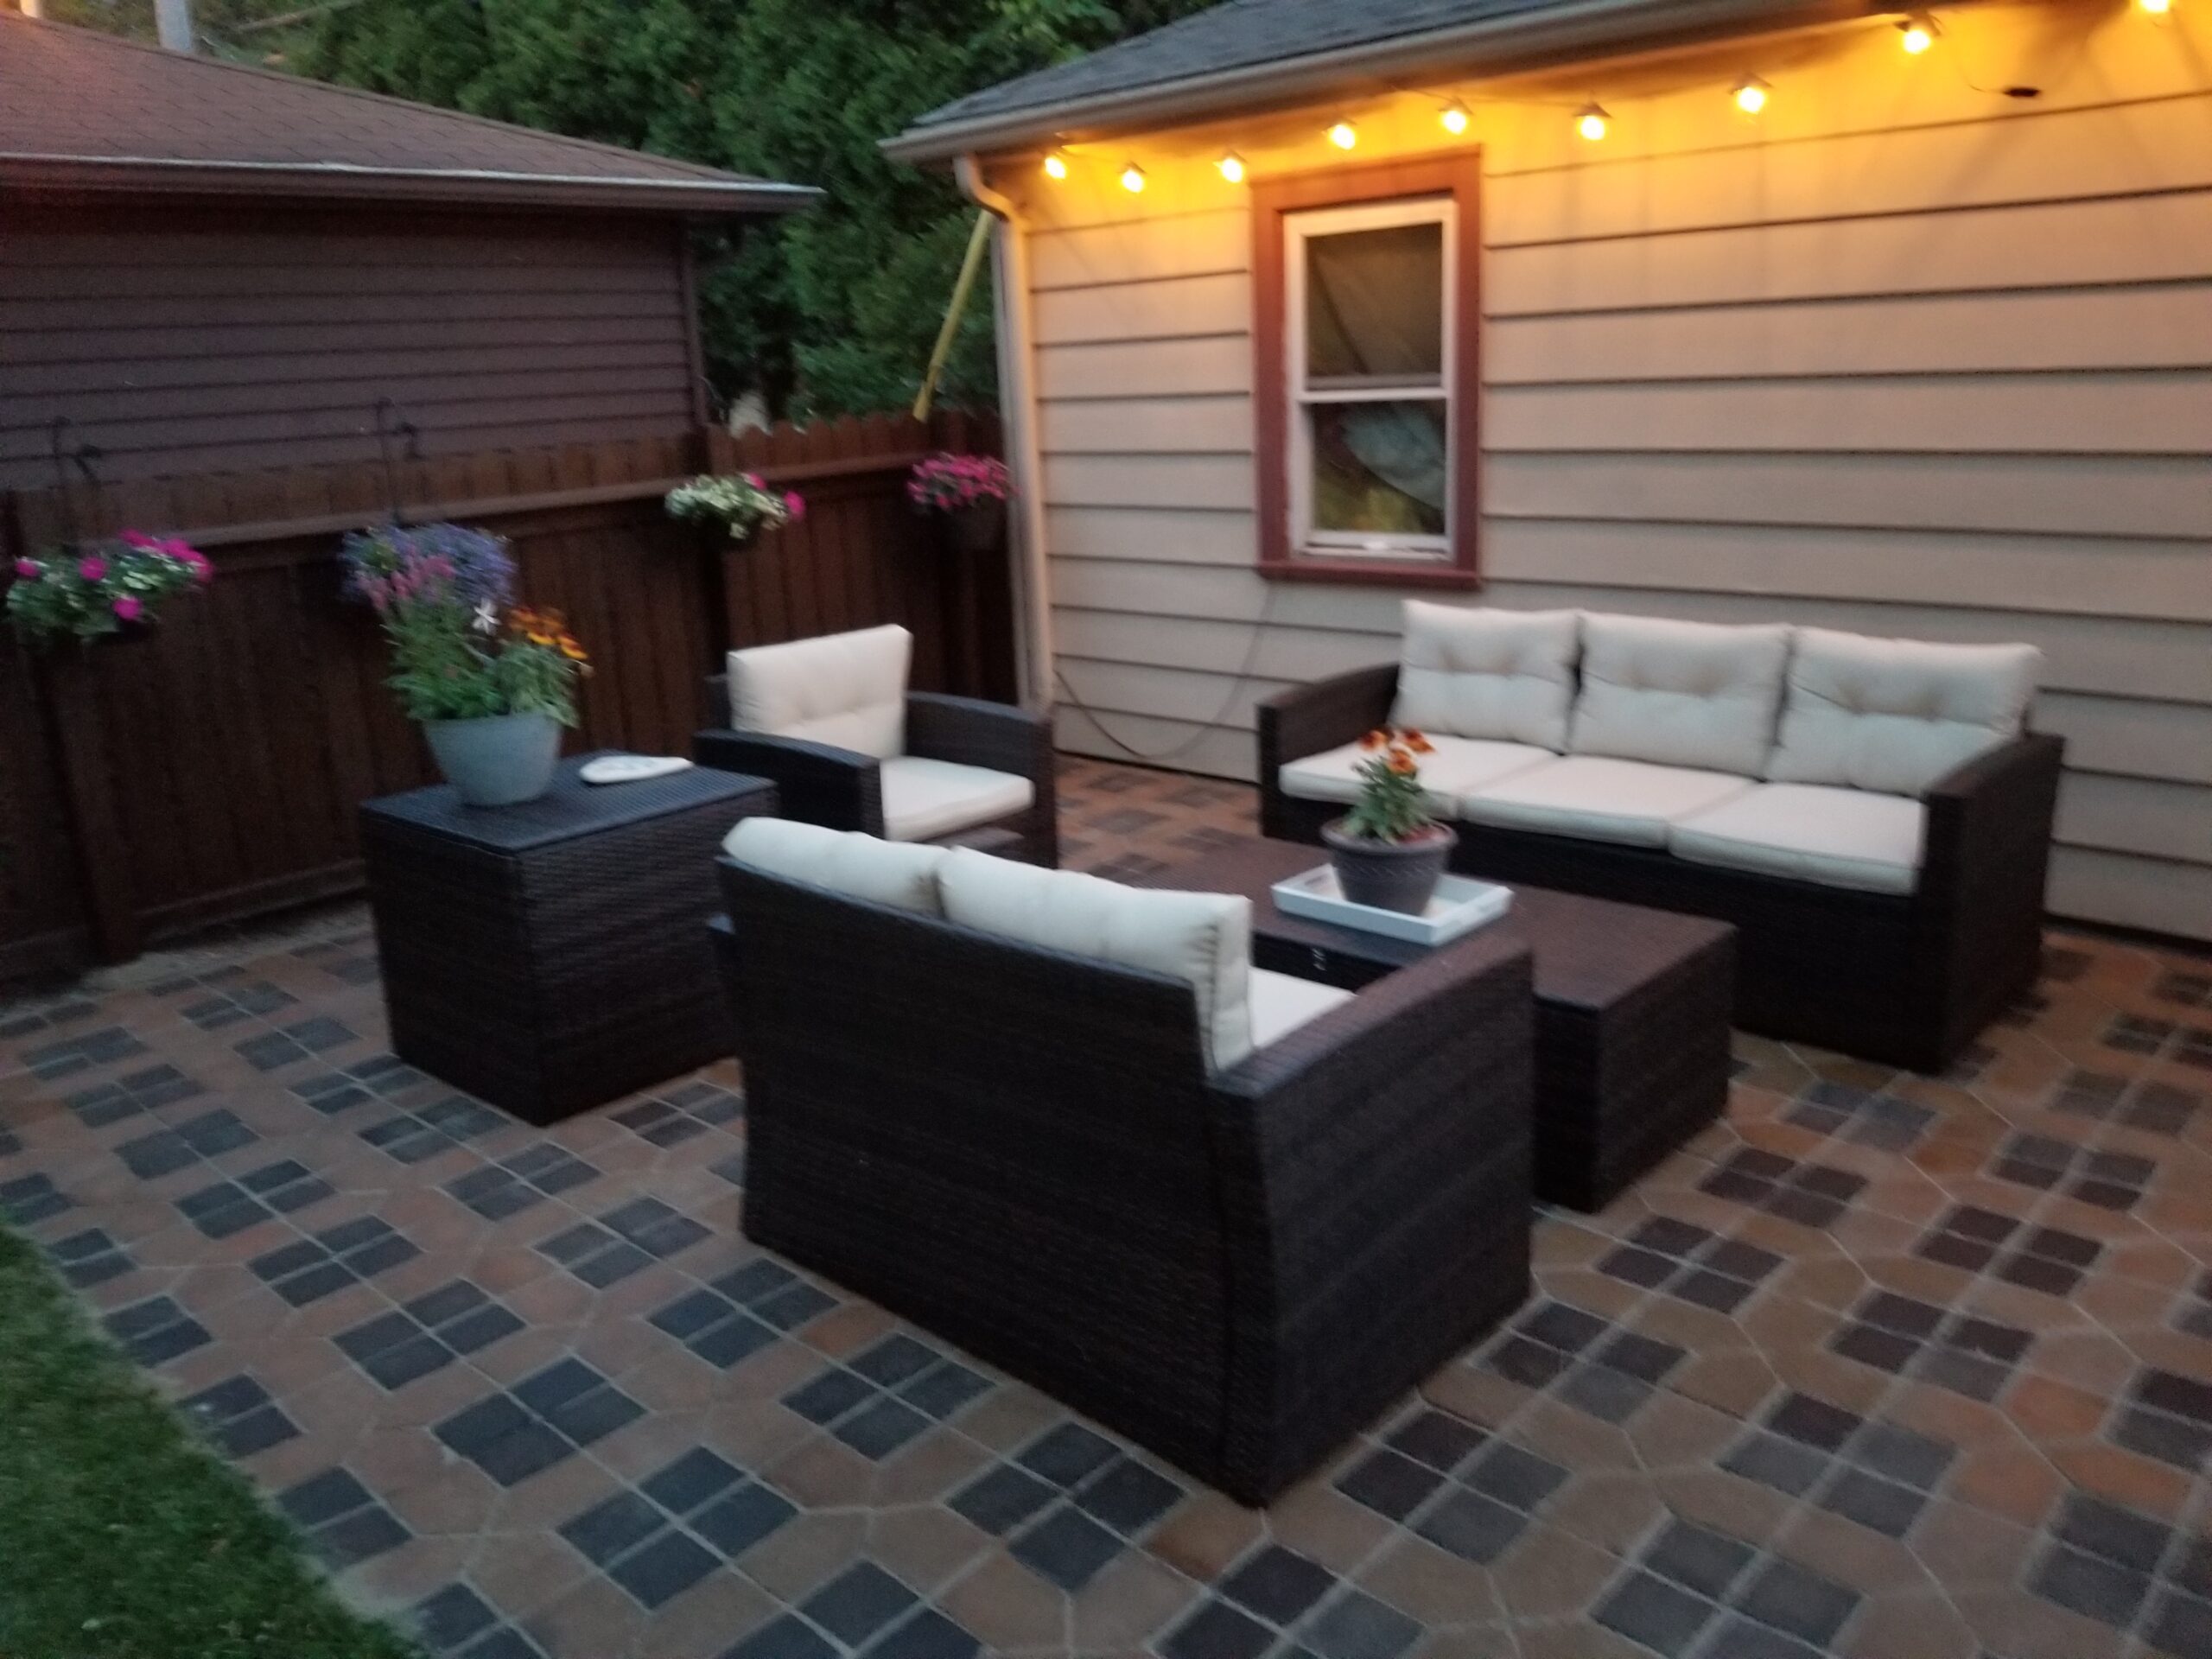
DIY Concrete Pavers Transformation: Achieving a Rich Color with Acid Staining
Are you ready to take your boring and dull concrete pavers to the next level? This project is all about using acid staining to give your DIY pavers a rich and unique look. Whether you created your pavers with a mold or not, this method will give you the opportunity to experiment with color and have fun creating your own one-of-a-kind pavers. So grab your acid stain and let’s add some pop to those pavers!
Project Summary:
Completed in: 7 days
Square Footage: 500 sq. ft.
Description: The homeowner created their own pavers using a mold and colored cement, but wasn’t satisfied with the color consistency or richness of the cement so they decided to acid stain the blocks.
Personal Tips:
- To achieve a more consistent color, it is recommended to spray the entire area with a light color, and then go back and paint brush the dark areas.
Direct Colors Products Used:
-
- Coffee Brown EverStain
- Desert Amber EverStain
- Satin EasySeal Sealer
Updating A Paver Patio With Terra Cotta And Charcoal Concrete Stains
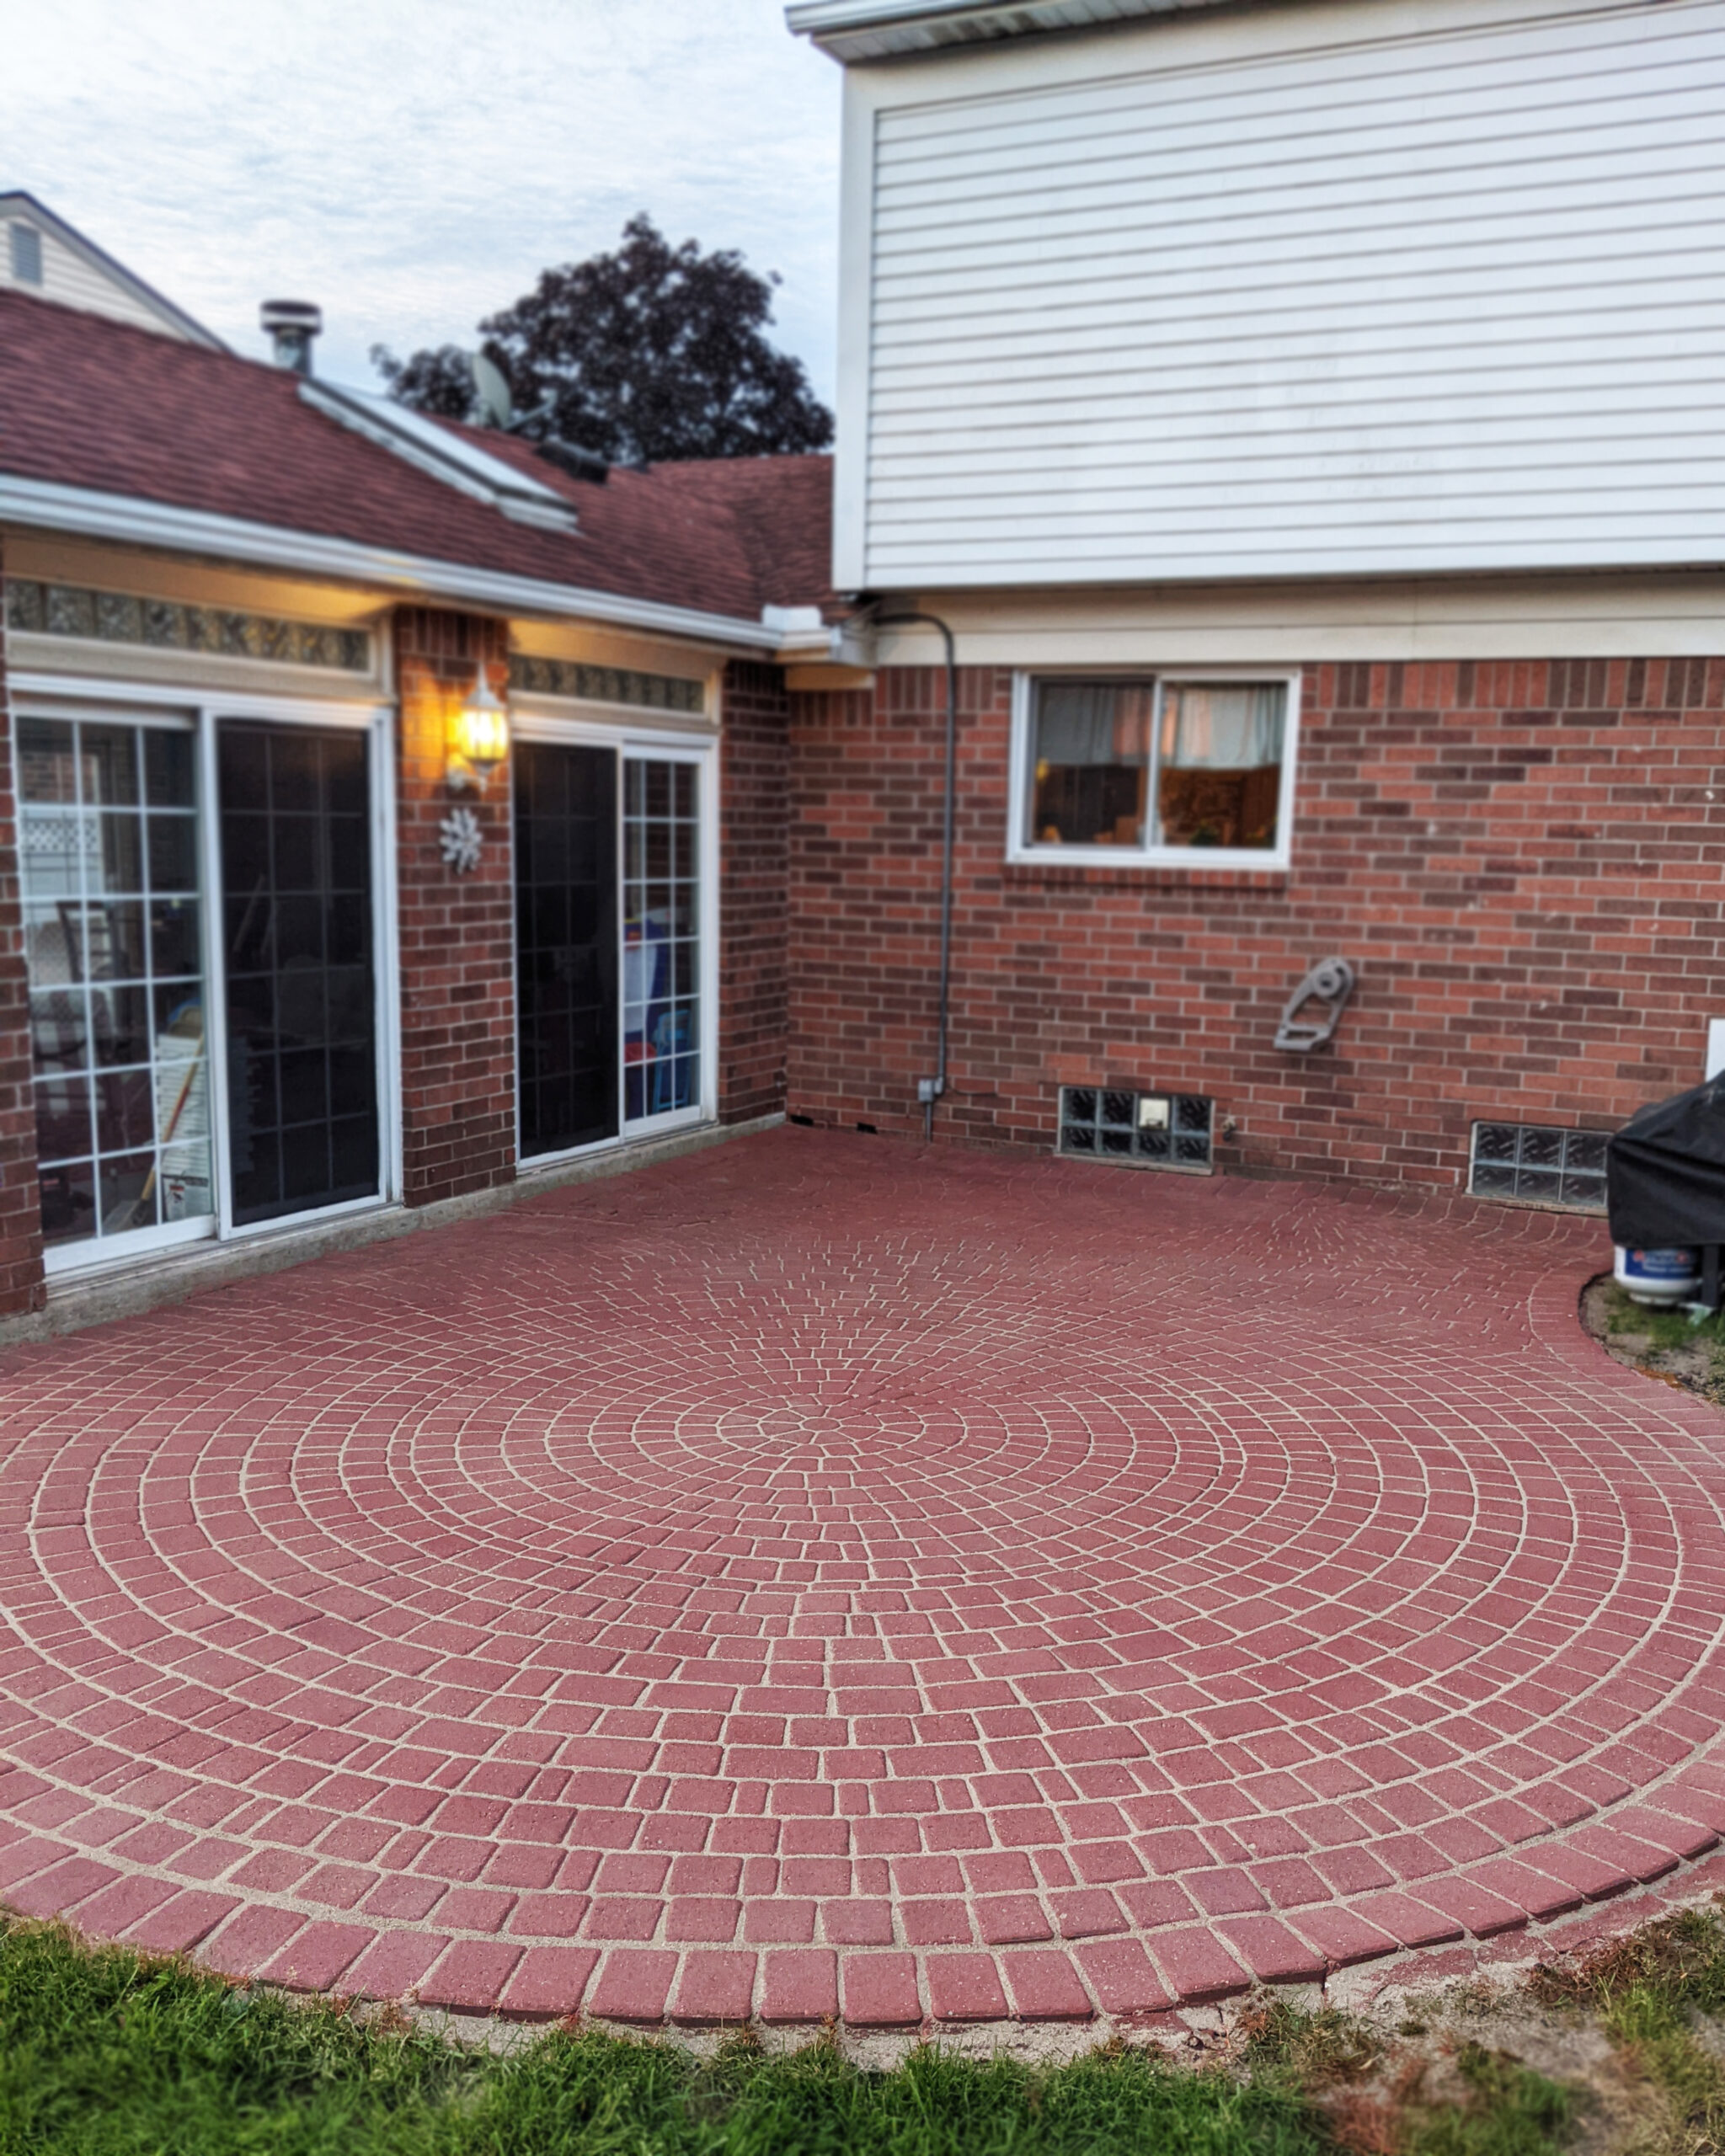
Transform your paver patio from dull and gray to a unique and beautiful space using paver stains. This project shows how a little creativity, pressure washing and staining with Terra Cotta and Charcoal can revamp a patio, using a circular kit and a cobblestone effect. So roll up your sleeves and give your patio a makeover!
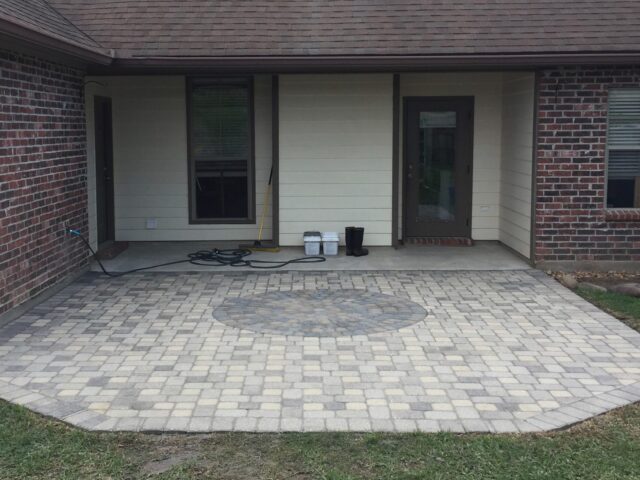
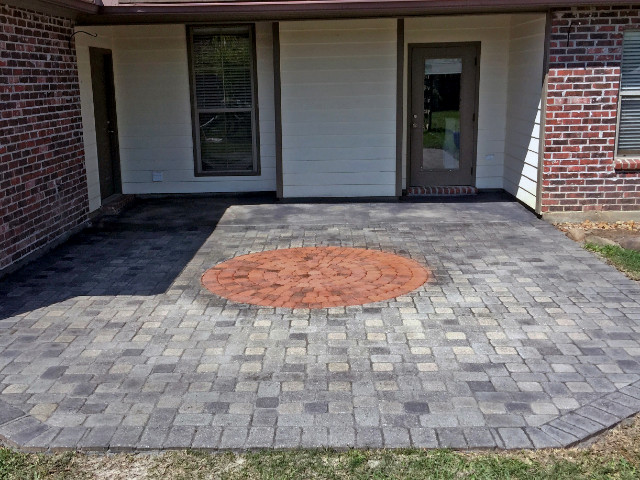
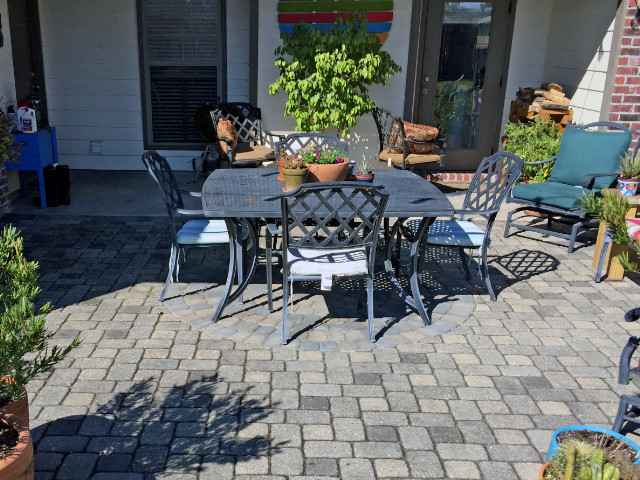
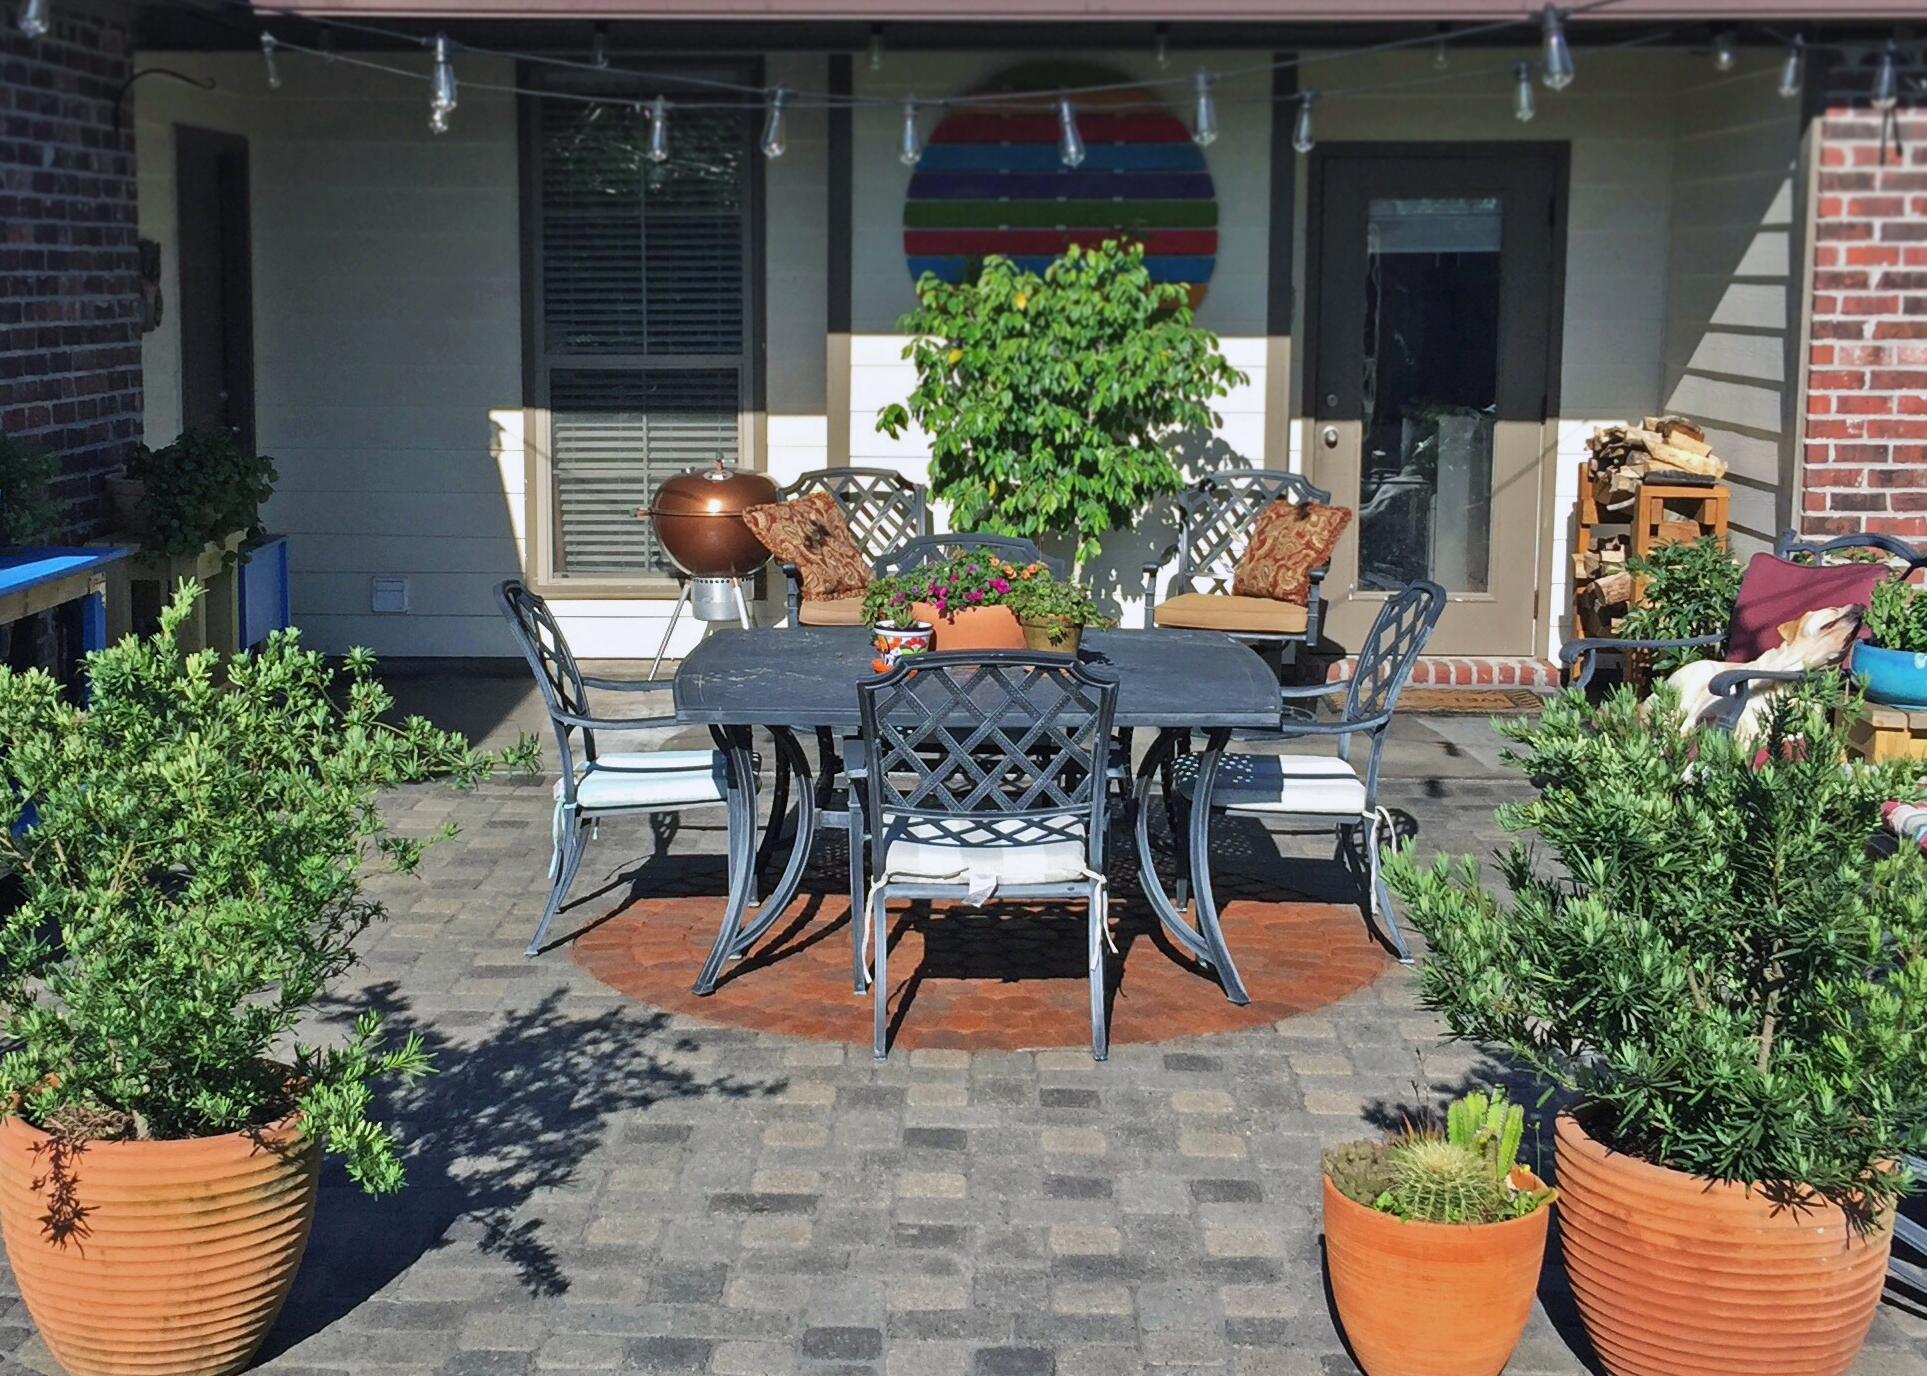
This paver patio project took place over the course of 5 days and covered an estimated 400 sq. ft. The homeowner had previously installed a patio with a brick fire pit in the center, but eventually removed the fire pit and filled the hole with river pebbles. When they couldn’t find a circular outdoor rug they liked, they decided to see if they could find a circular paver kit to fill in the hole. They found a kit, but the pavers came out mostly gray instead of having a reddish tint as expected. The homeowner then discovered Direct Colors and decided to stain the circle with Terra Cotta and the existing gray pavers with Charcoal. They also stained the concrete back porch. After pressure washing the existing pavers and adding polymeric sand, the homeowner sprayed on a coat of Terra Cotta in the circle and followed with Charcoal for the grays. They later added additional coats of Charcoal by brush to the darkest existing gray pavers and the darkest red pavers to give it a cobblestone effect. The project ended up requiring three coats of sealer. Personal tips from the homeowner include planning ahead if you want to maintain an edge between two distinct colors, being careful to avoid overspray and bleeding, and ordering extra bottles of stain and sealer if you have a large or porous surface. They also recommend being aware that very porous surfaces may absorb and spread the stain like alcohol on chalk.
Boring Brick Pavers Are In The Past
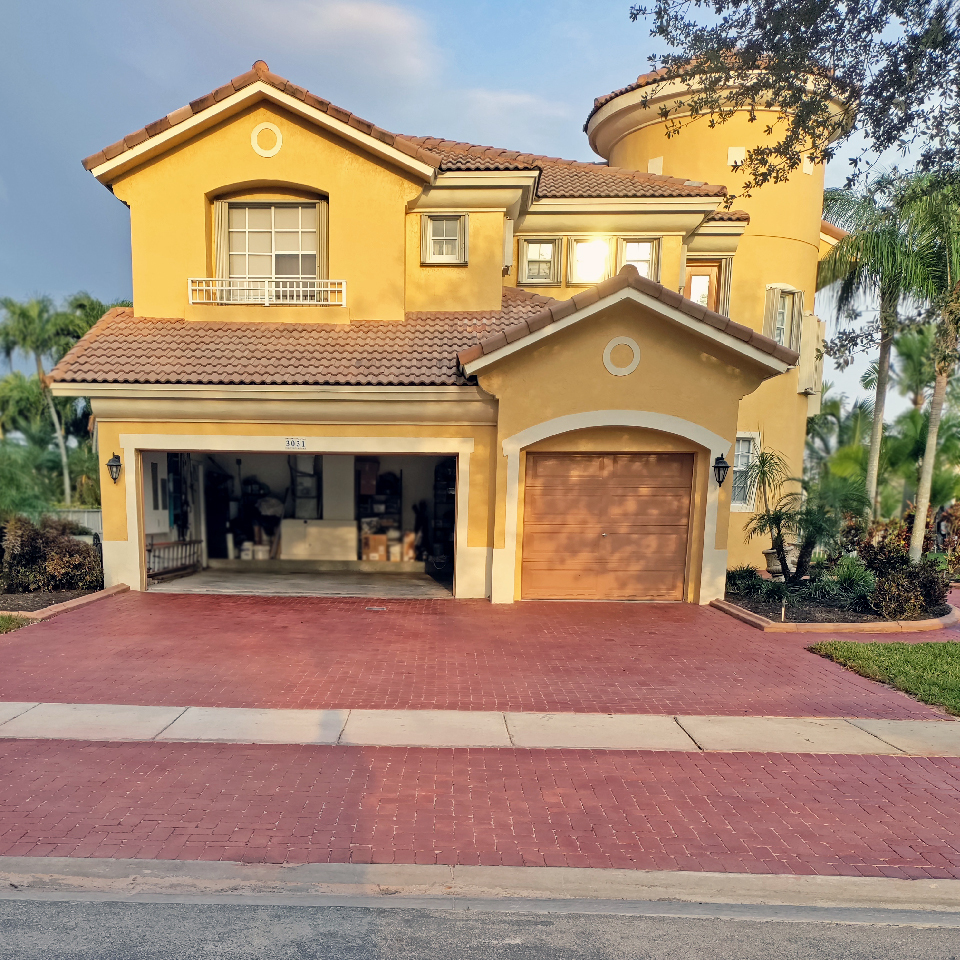
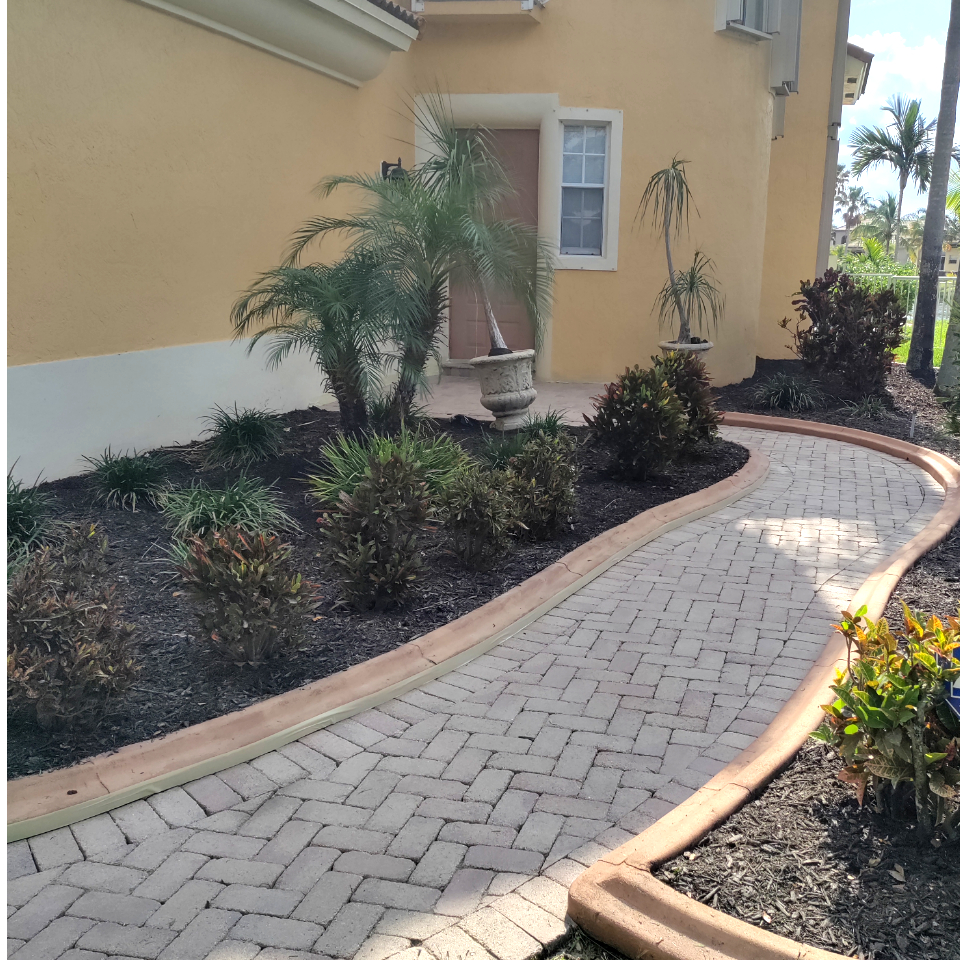
These brick pavers underwent an impressive transformation when our customer decided to stain them. Our acrylic sealer sealed the deal (literally). We think that the red concrete stain really dresses up this once drab driveway!
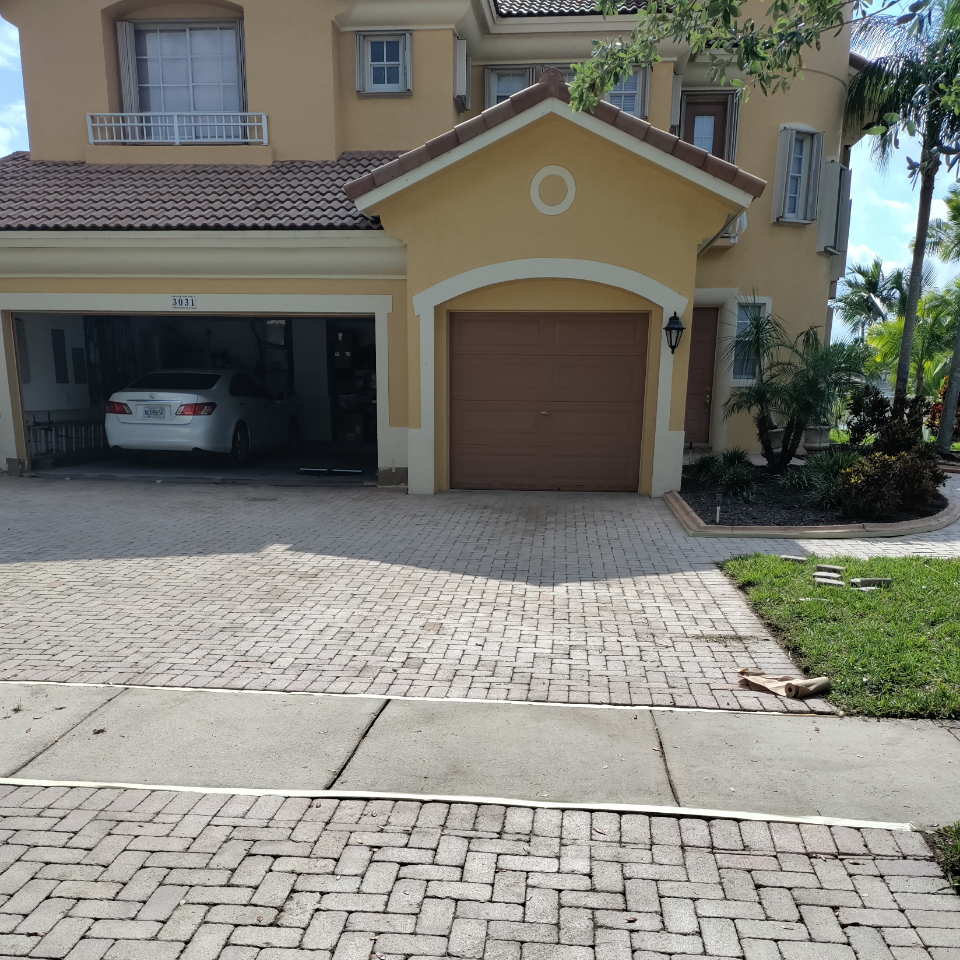

- Project Completed In: 3 day(s)
- Estimate of Square Footage: 1200 sq. ft.
- Project Description:
My pavers were very discolored and I decided to stain them .I checked online and found Direct Colors .There staff was very helpful throughout the entire process. I ordered the sample kit a nd decided on the Crimson color and the Satin sealer. All the products arrived on time and were packed very good. - Personal Tips:
make sure you check the weather report for the days you will be working and having the sealer dry
take your time in pressure washing and preparing the surface test small areas first
make sure you give ample time in the drying process
Use a deck sprayer and use the red tip for best results - Direct Colors Products Used:
Portico paver stain crimson
Solvent based acrylic satin sealer
Other Products Used:
Used techniseal poly sand
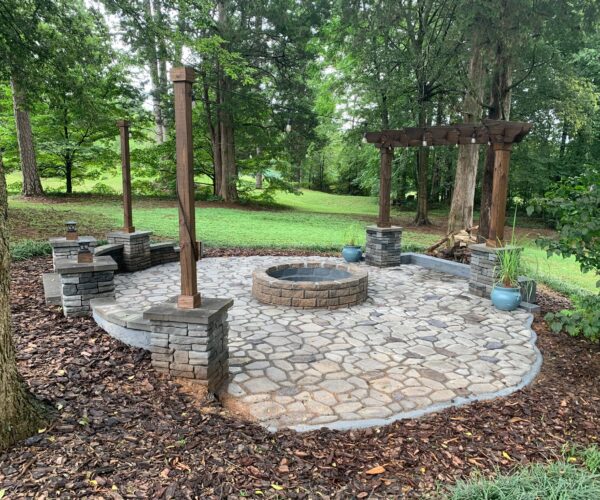
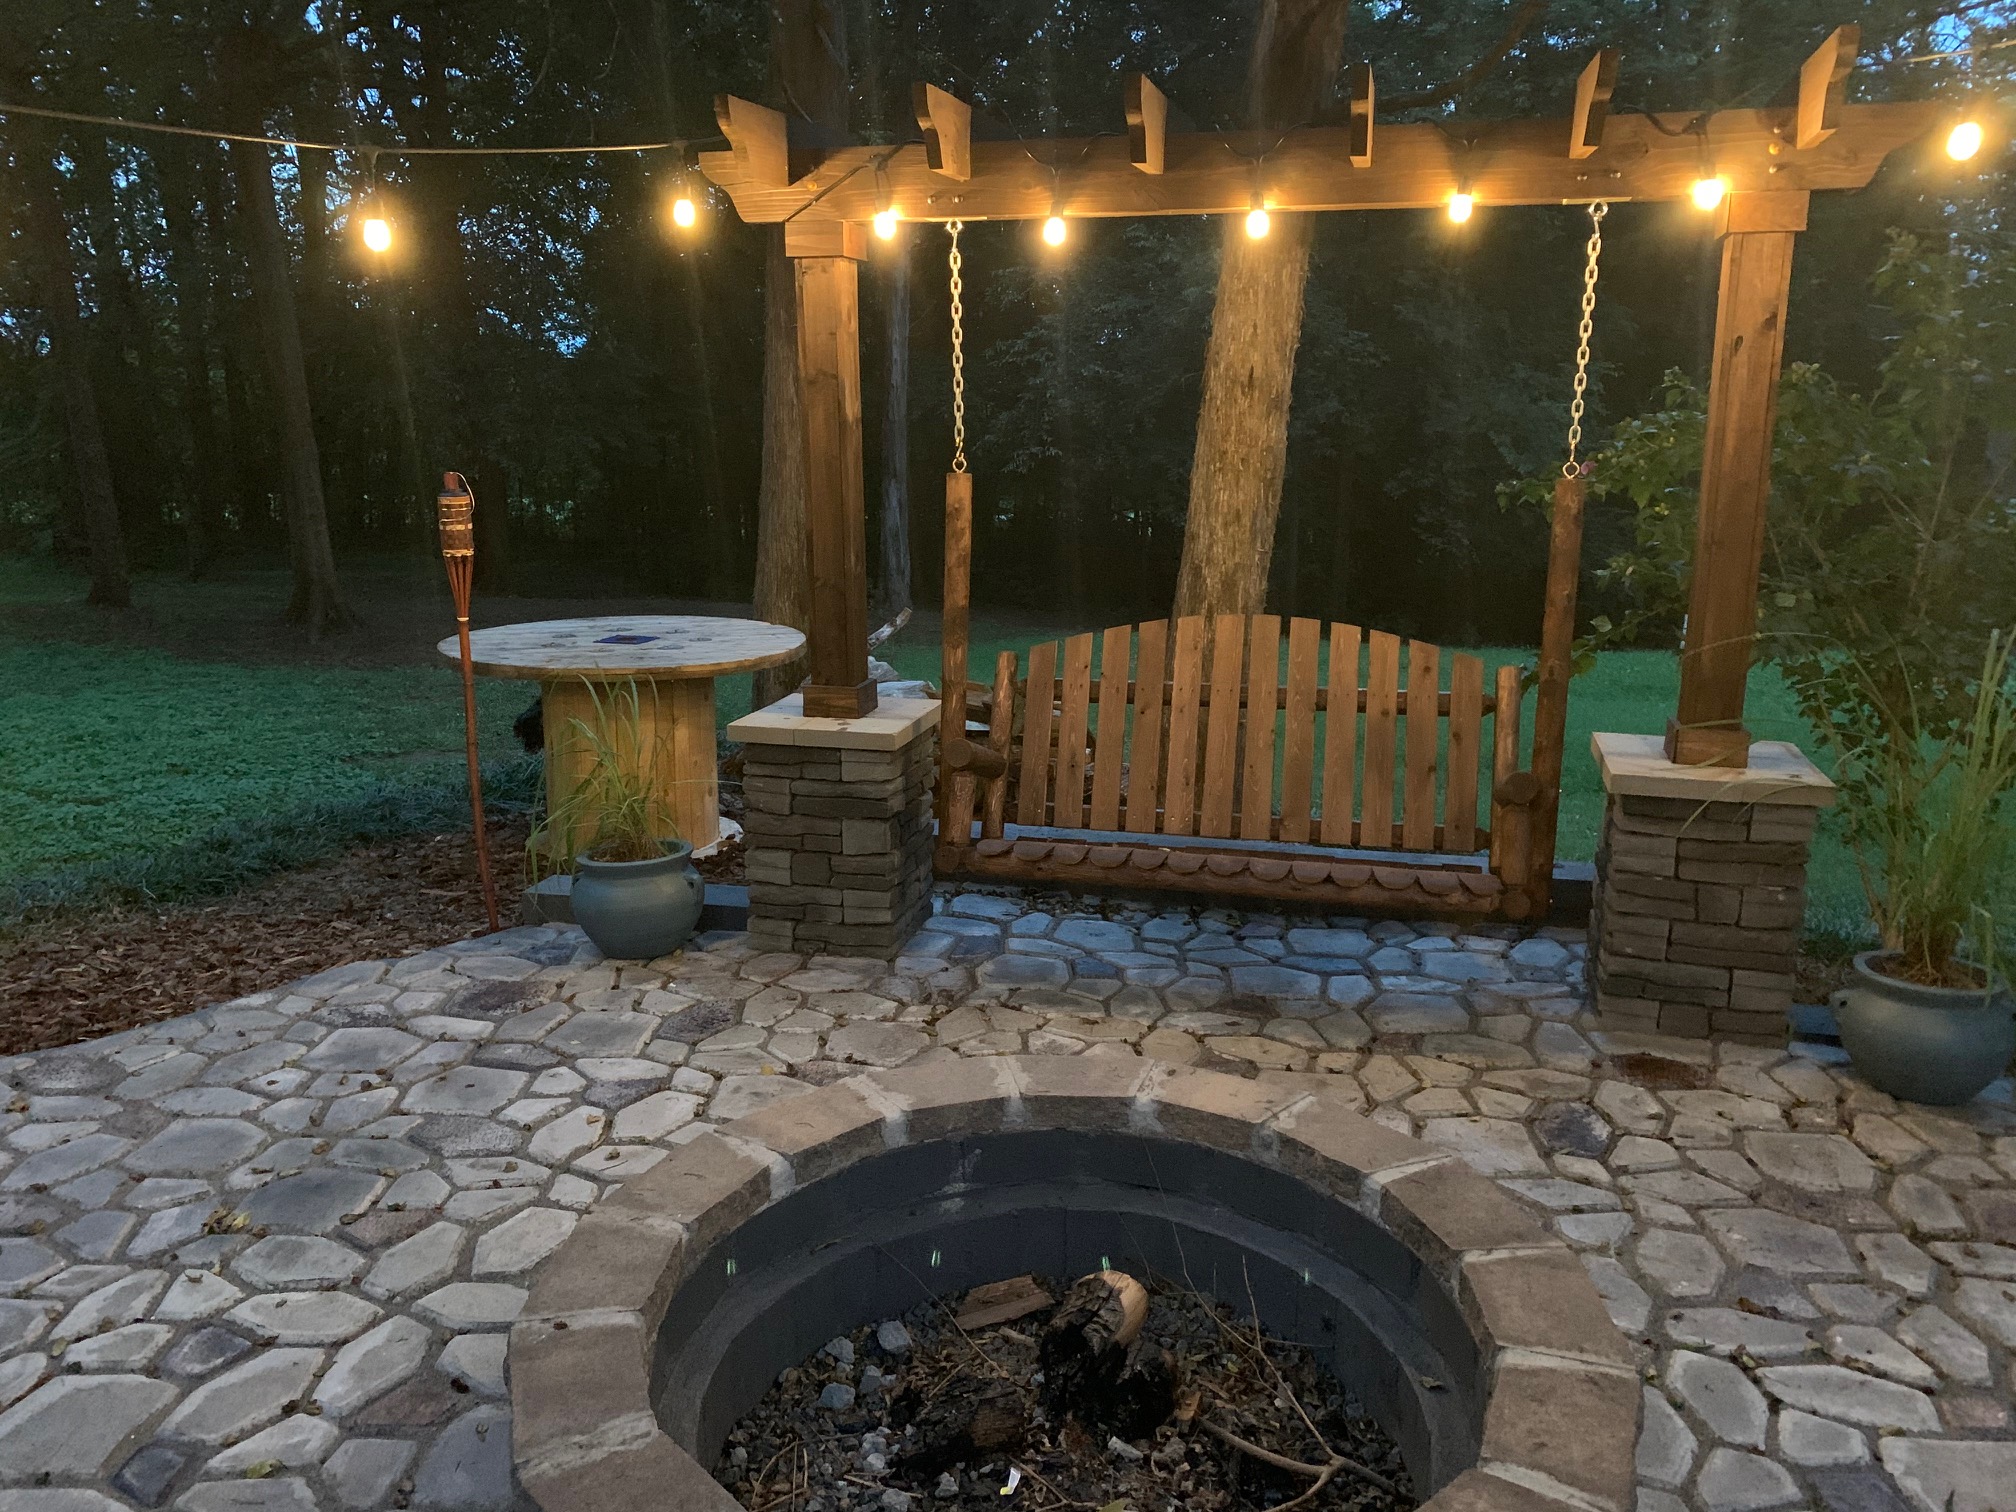
Creating a Stained Concrete Fire Pit Patio with WalkMaker Pavers
Looking to add some warmth to your patio? This project is all about using light charcoal Portico paver stain and WalkMaker pavers to create a stunning fire pit area in your backyard. The use of stain will enhance the color and texture of the pavers, creating a visually interesting focal point for your outdoor space. So gather your friends and family around for a cozy night by the fire on your new and beautiful patio!
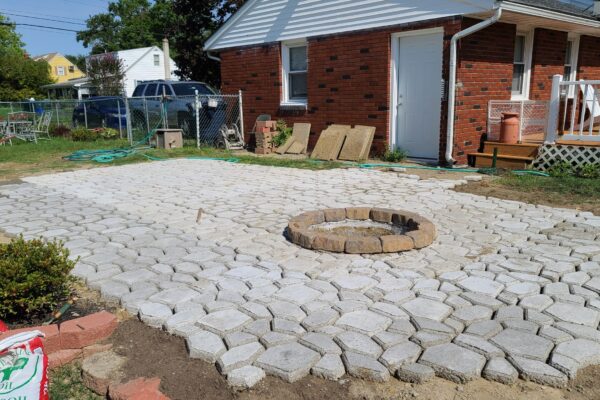
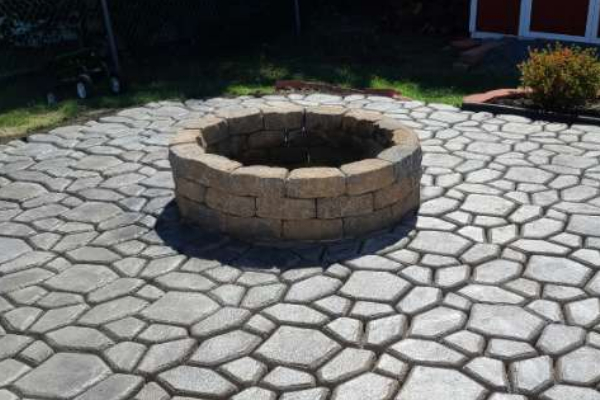
Stained Quikrete WalkMaker Patio With Fire Pit
With minimal materials and effort, you can create an inviting and functional addition to your backyard or patio with a wood-burning fire pit. These fire pits are perfect for outdoor gatherings with friends and family, allowing you to roast marshmallows, tell stories and stay warm on chilly nights. Not only functional, but these concrete fire pits also add a charming and unique touch to your outdoor space, becoming a great landscaping feature all year round.
Pros and Cons of Concrete vs Paver Patios: A Comparison
There are several pros and cons to consider when choosing between a concrete patio and a paver patio.
Pros of a concrete patio:
- Durable and long-lasting
- Low maintenance
- Can be poured in any shape or size
- Can be colored or stamped to resemble stone or other materials
- Inexpensive compared to other materials
Cons of a concrete patio:
- Can crack over time, especially if the ground underneath shifts
- Can be difficult to repair
- Can become slippery when wet
- Limited design options
Pros of a paver patio:
- Durable and long-lasting
- Low maintenance
- Comes in a variety of colors, sizes and shapes
- Flexible, pavers can shift with the ground and reduce the risk of cracking
- Can create a variety of patterns and designs
Cons of a paver patio:
- May be more expensive than a concrete patio
- Pavers can settle or shift if not installed properly
- May be more difficult to install than a concrete slab
Overall, both concrete and paver patios can be a great choice for a backyard patio, depending on the specific needs and preferences of the homeowner.


