Light Charcoal Concrete Projects: Before, During & After Transformations
Explore stunning transformations with Direct Colors’ Light Charcoal concrete colorants. Dive into customer projects, witness the before & after magic, and see in-progress snapshots. Your next inspiration awaits!
by Justin Richardson
Each photo in this gallery showcases real customer projects to inspire you. Keep in mind that our semi-transparent colorants mean the initial color and condition of your concrete will influence your final look, possibly leading to varied results. For best outcomes, please do a test patch on your specific surface before full application.
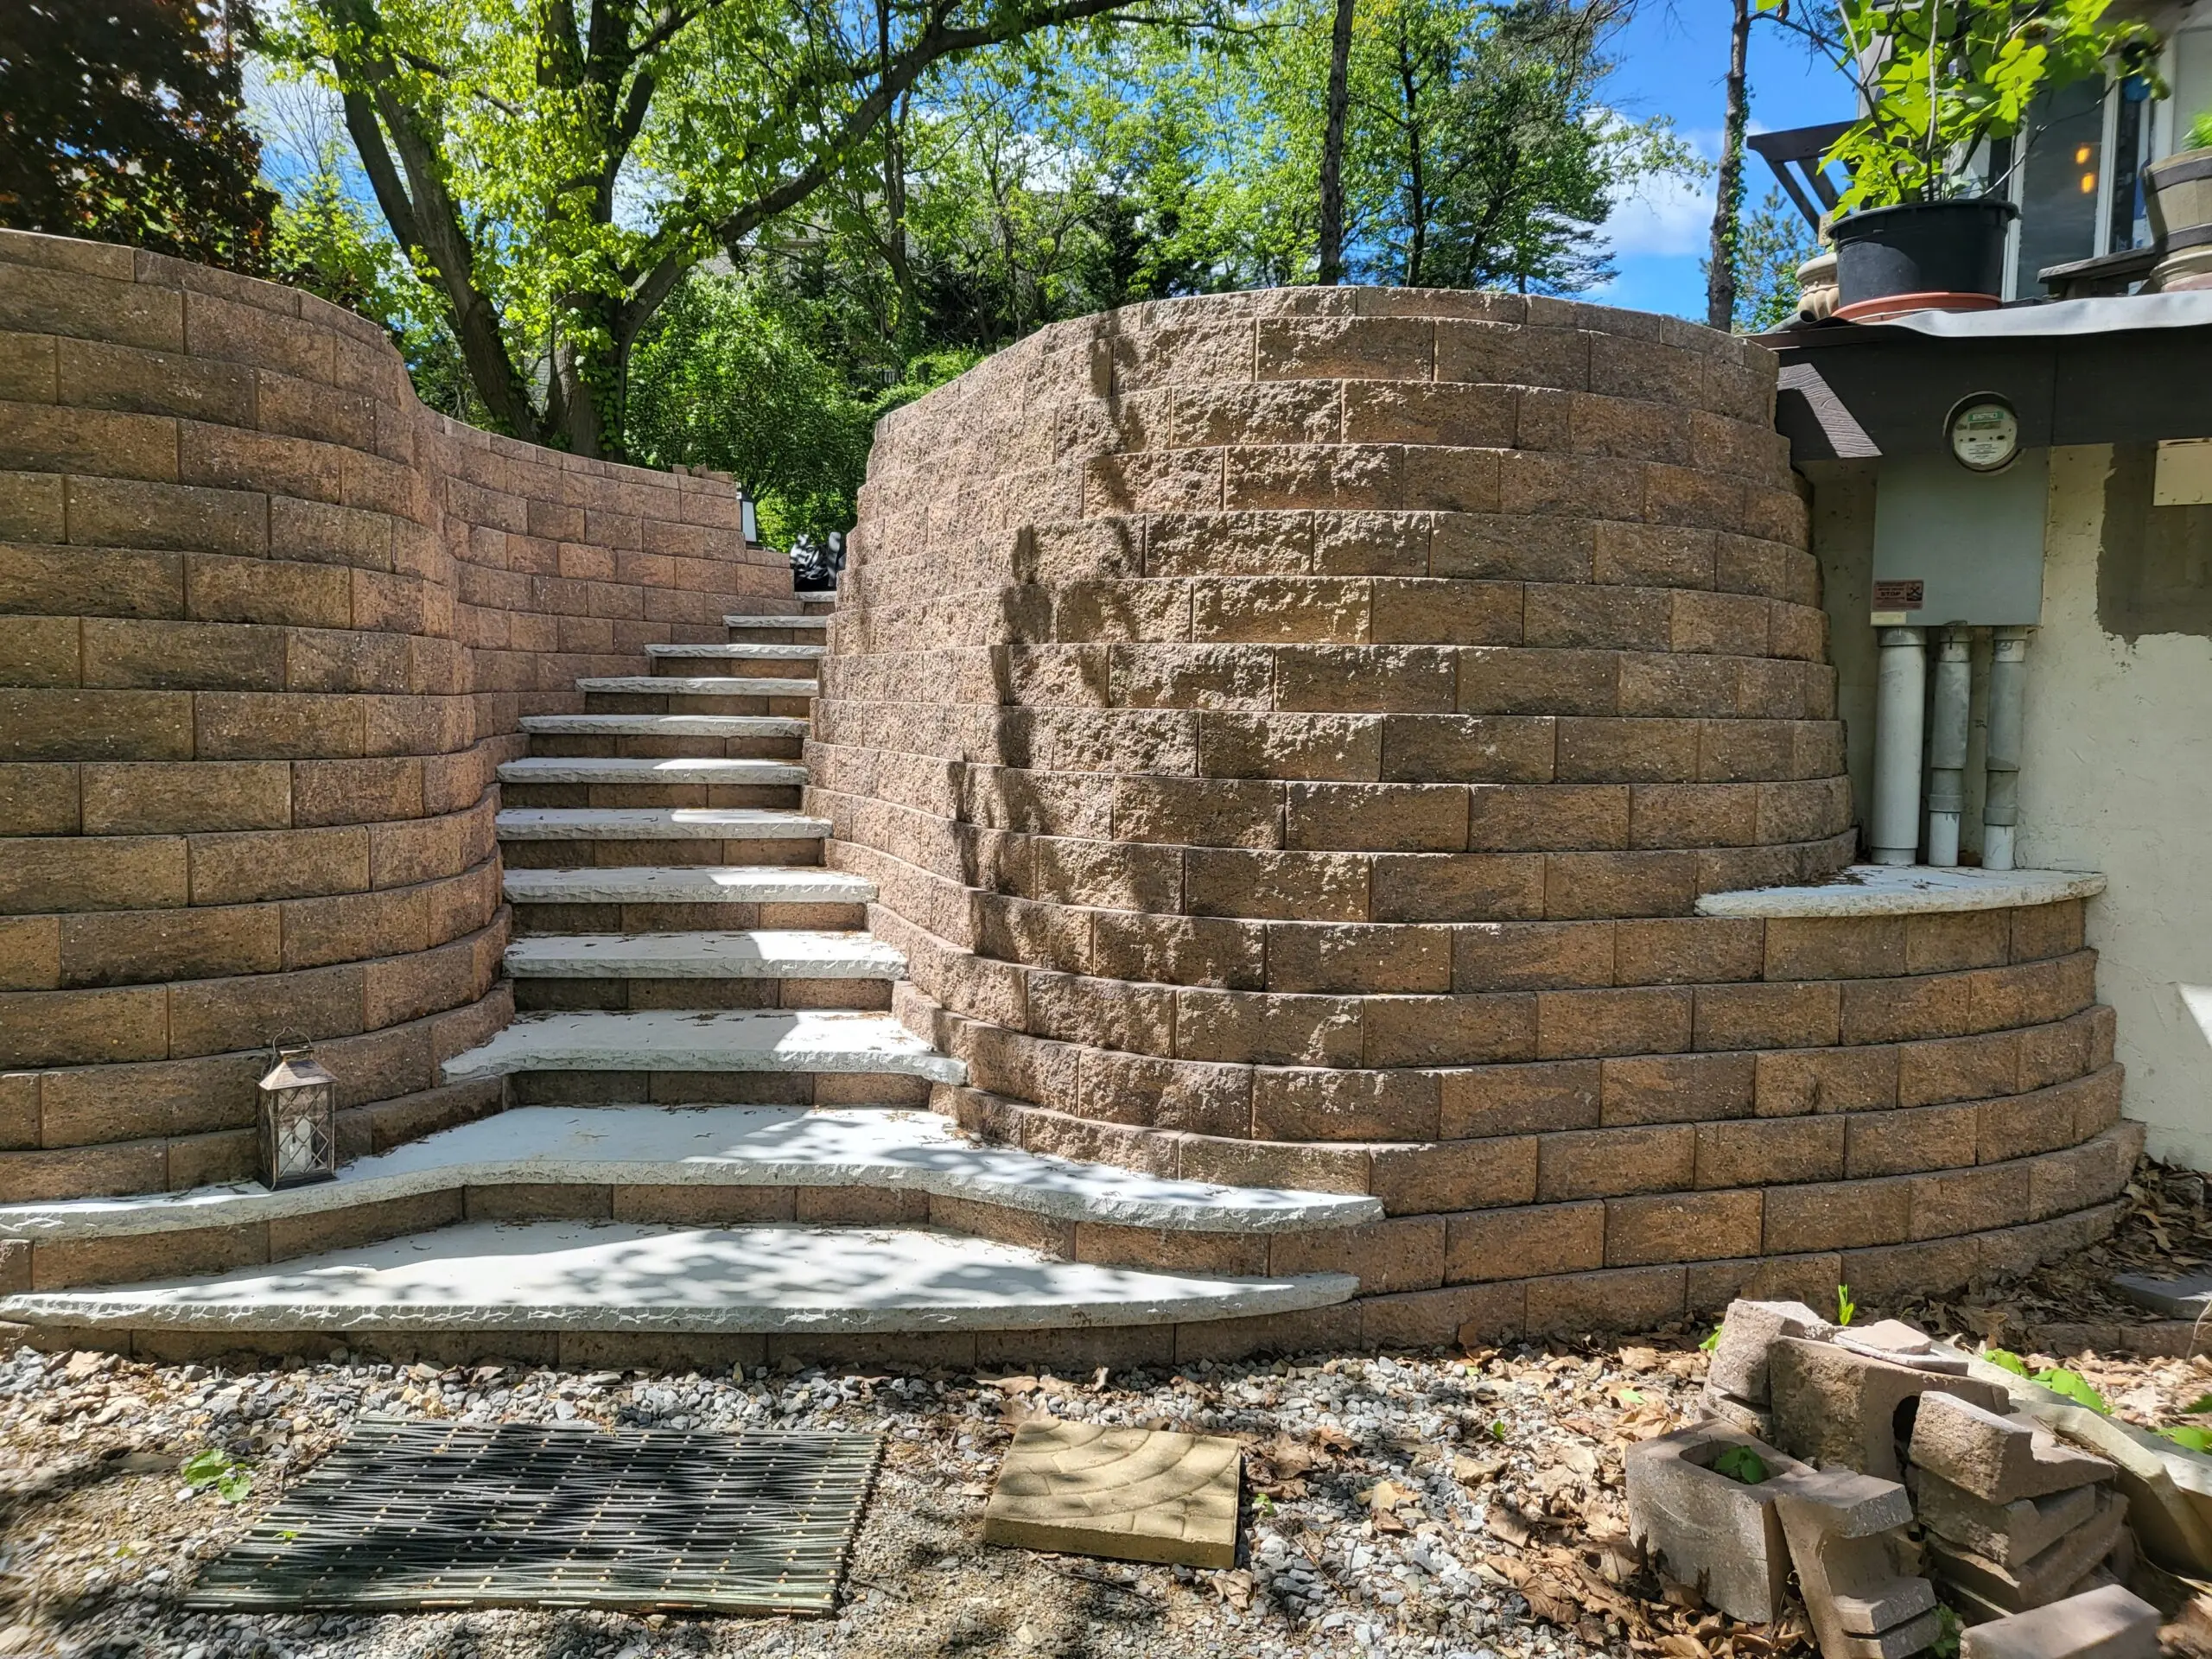
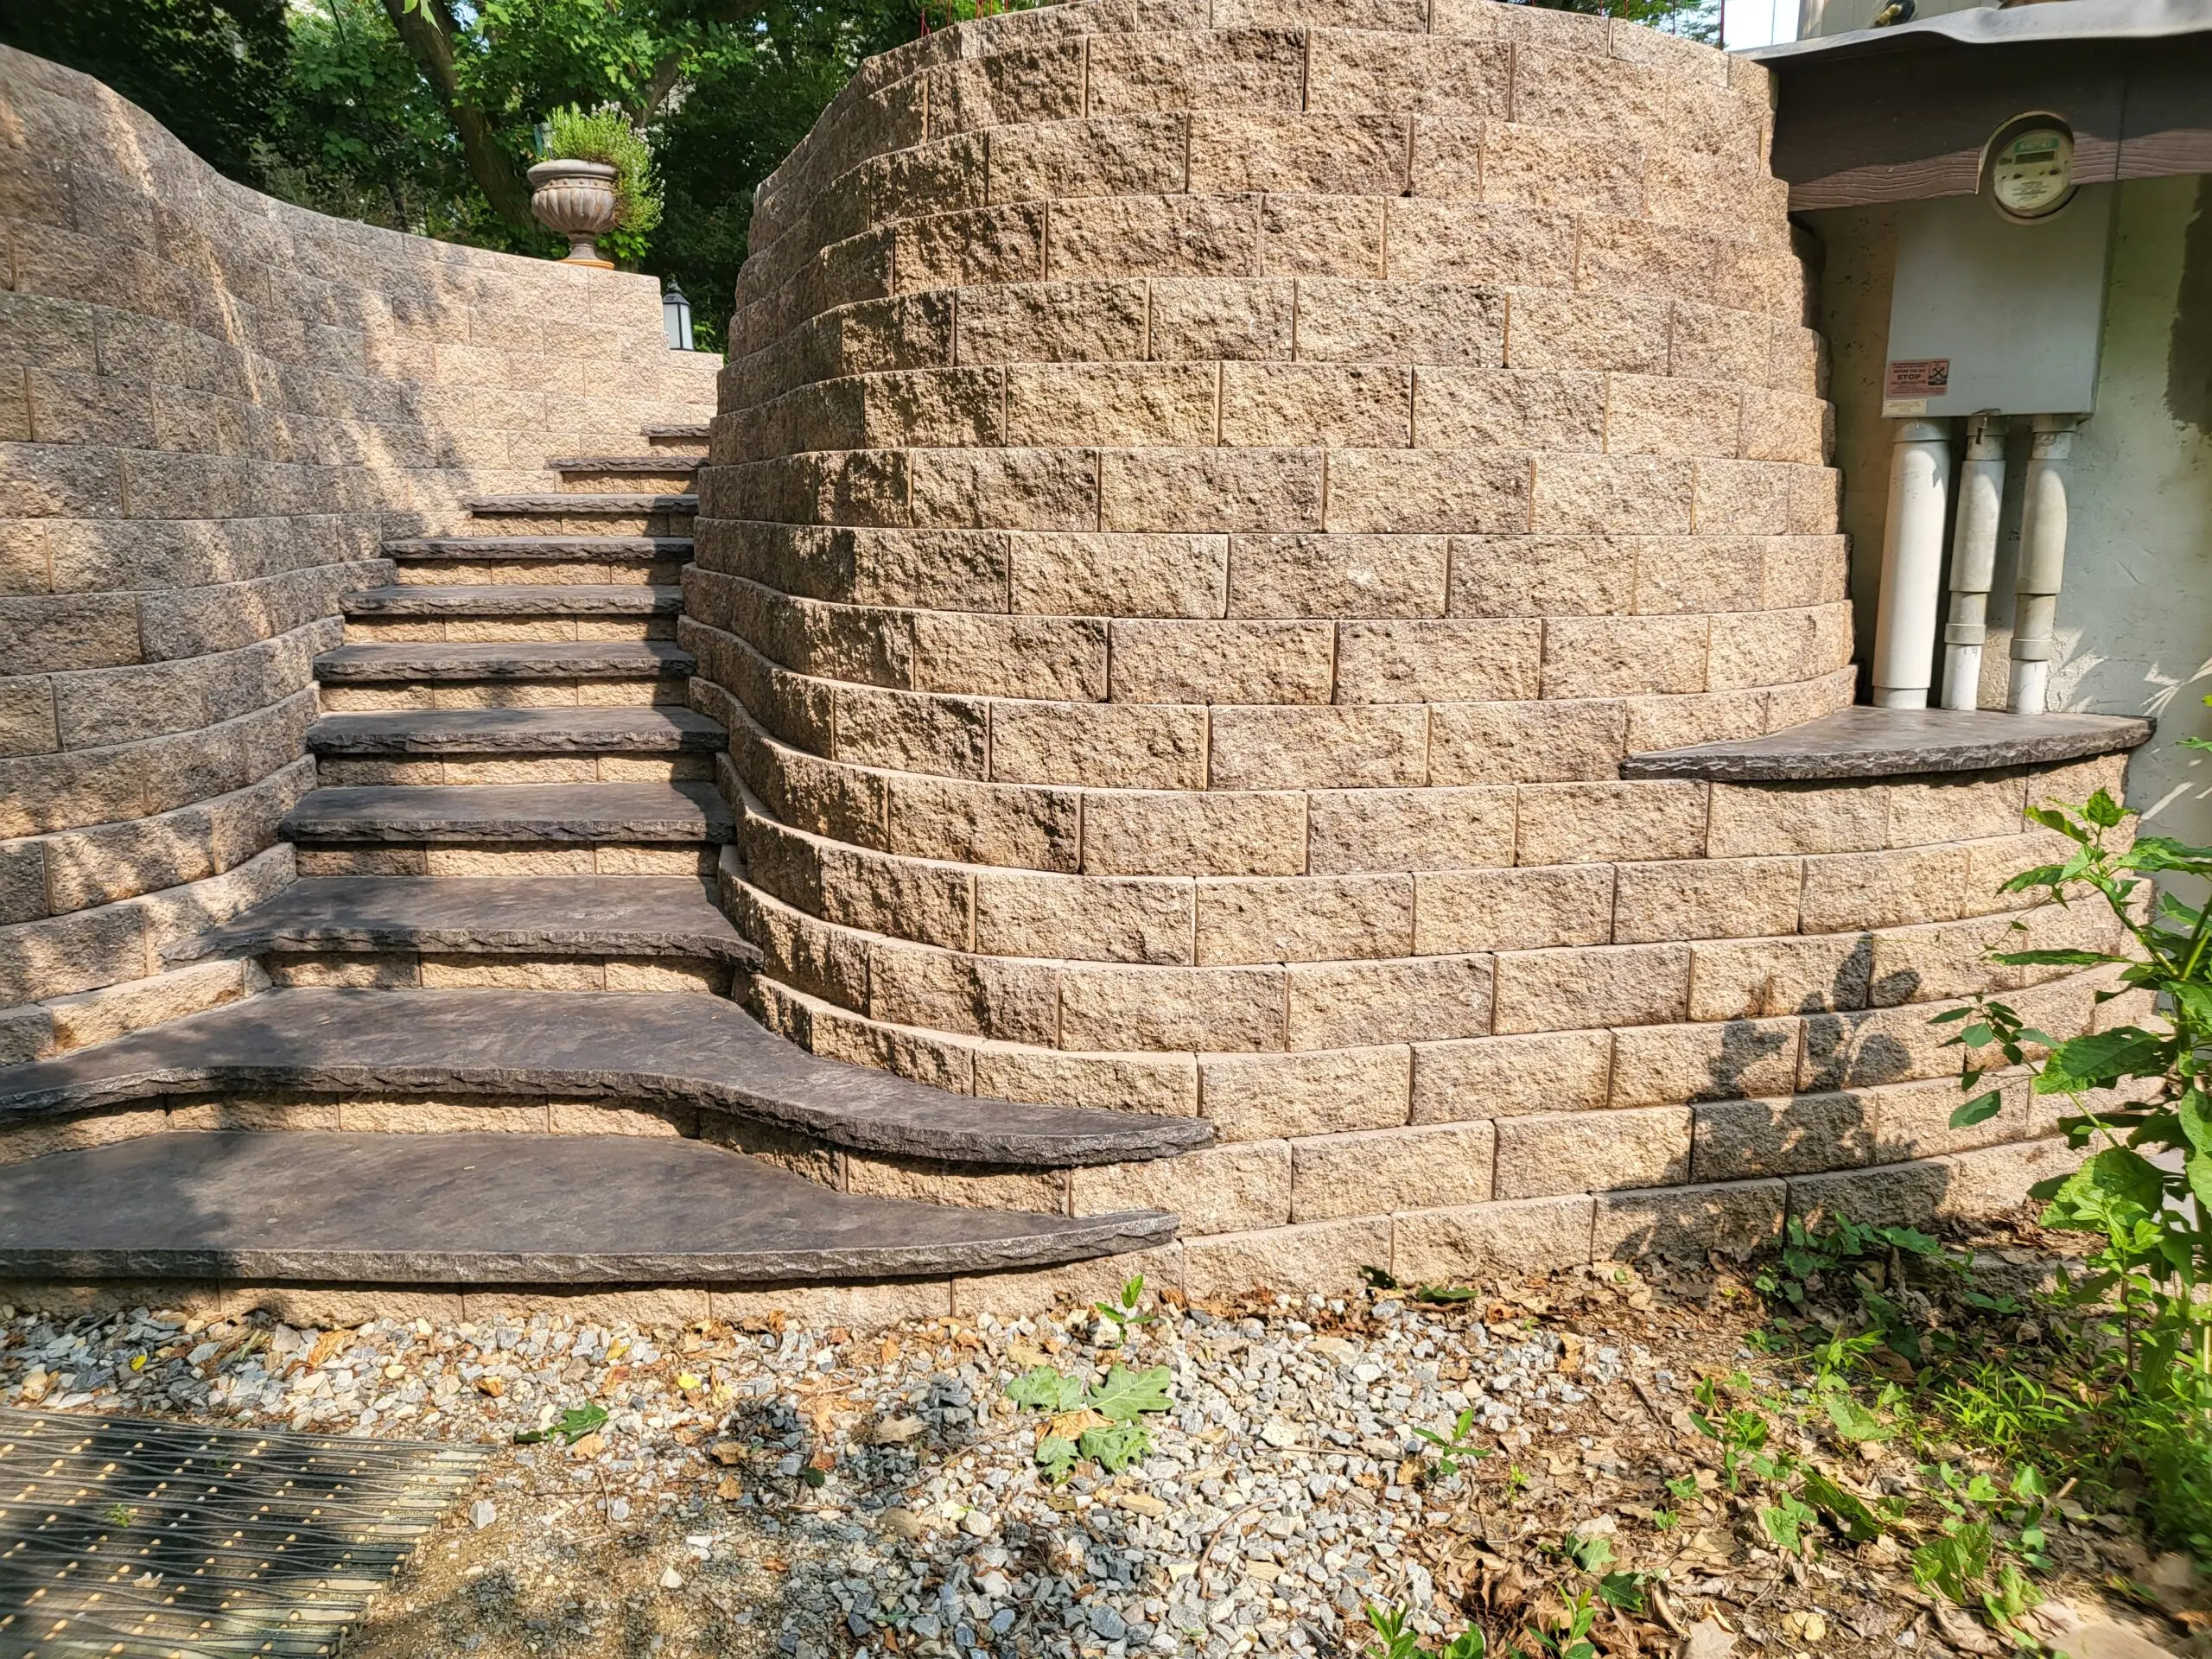
Harlequin Patio Makeover with Light Charcoal & Mossy Stepping Stones
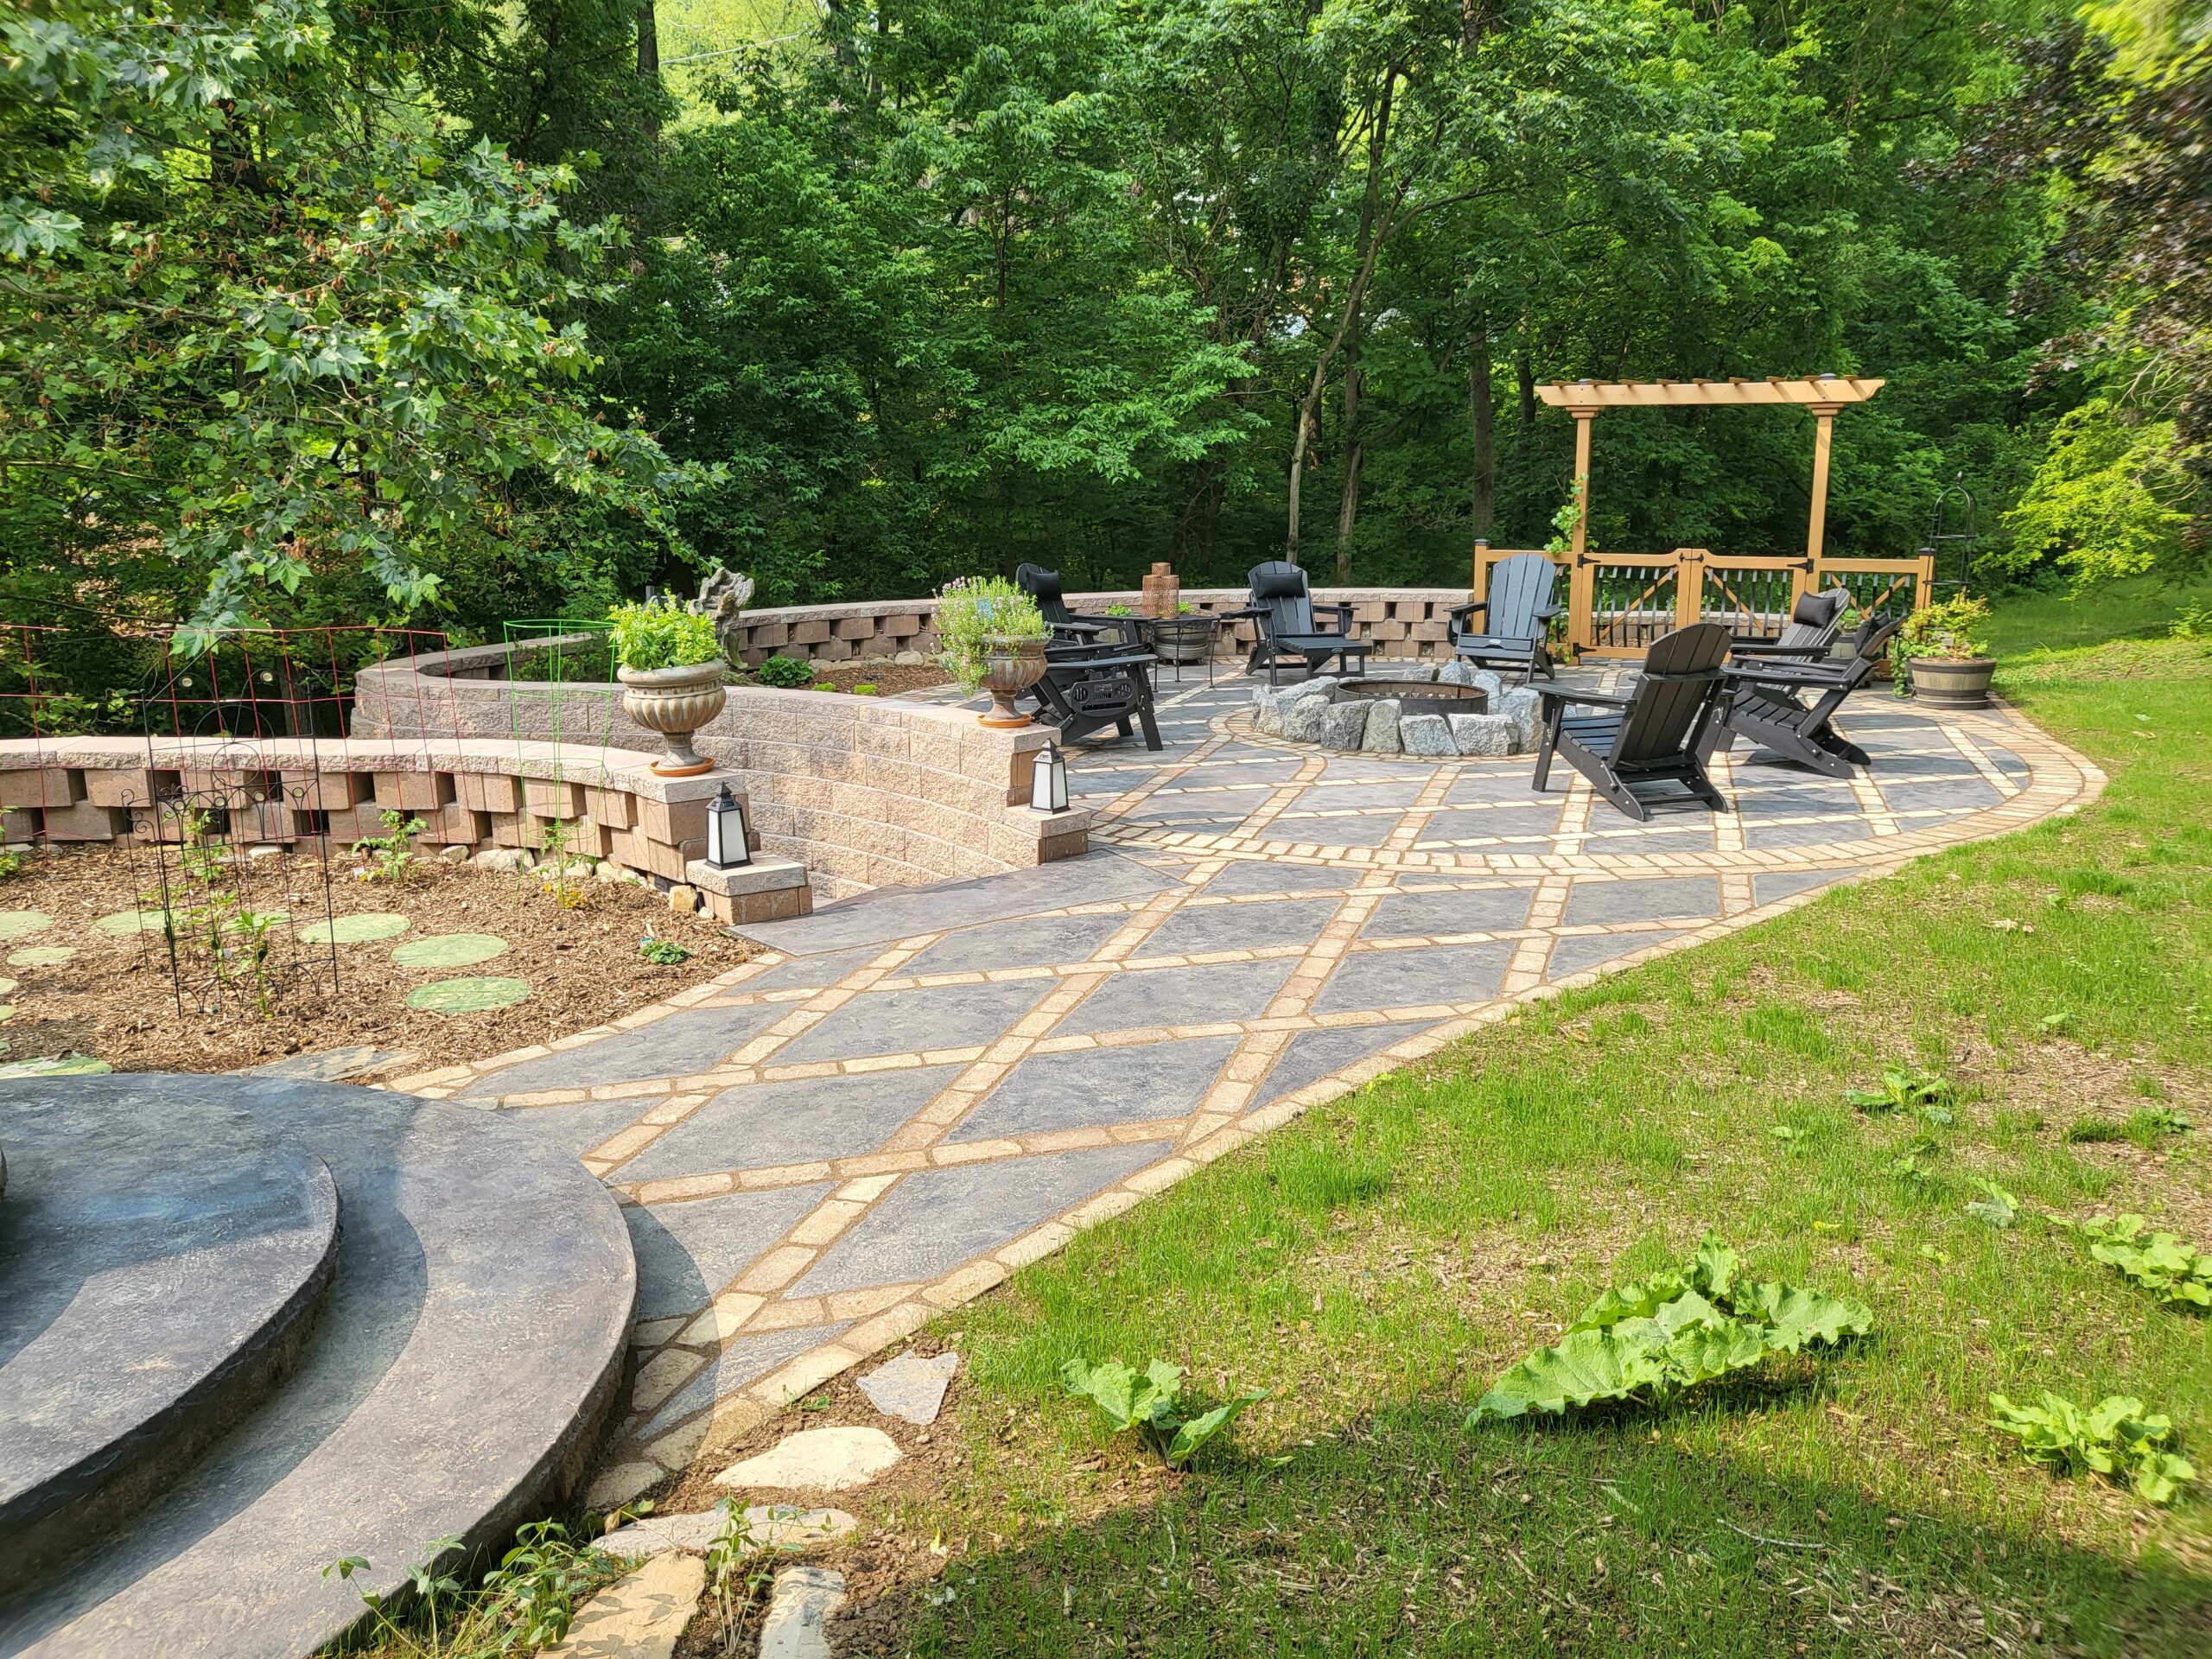
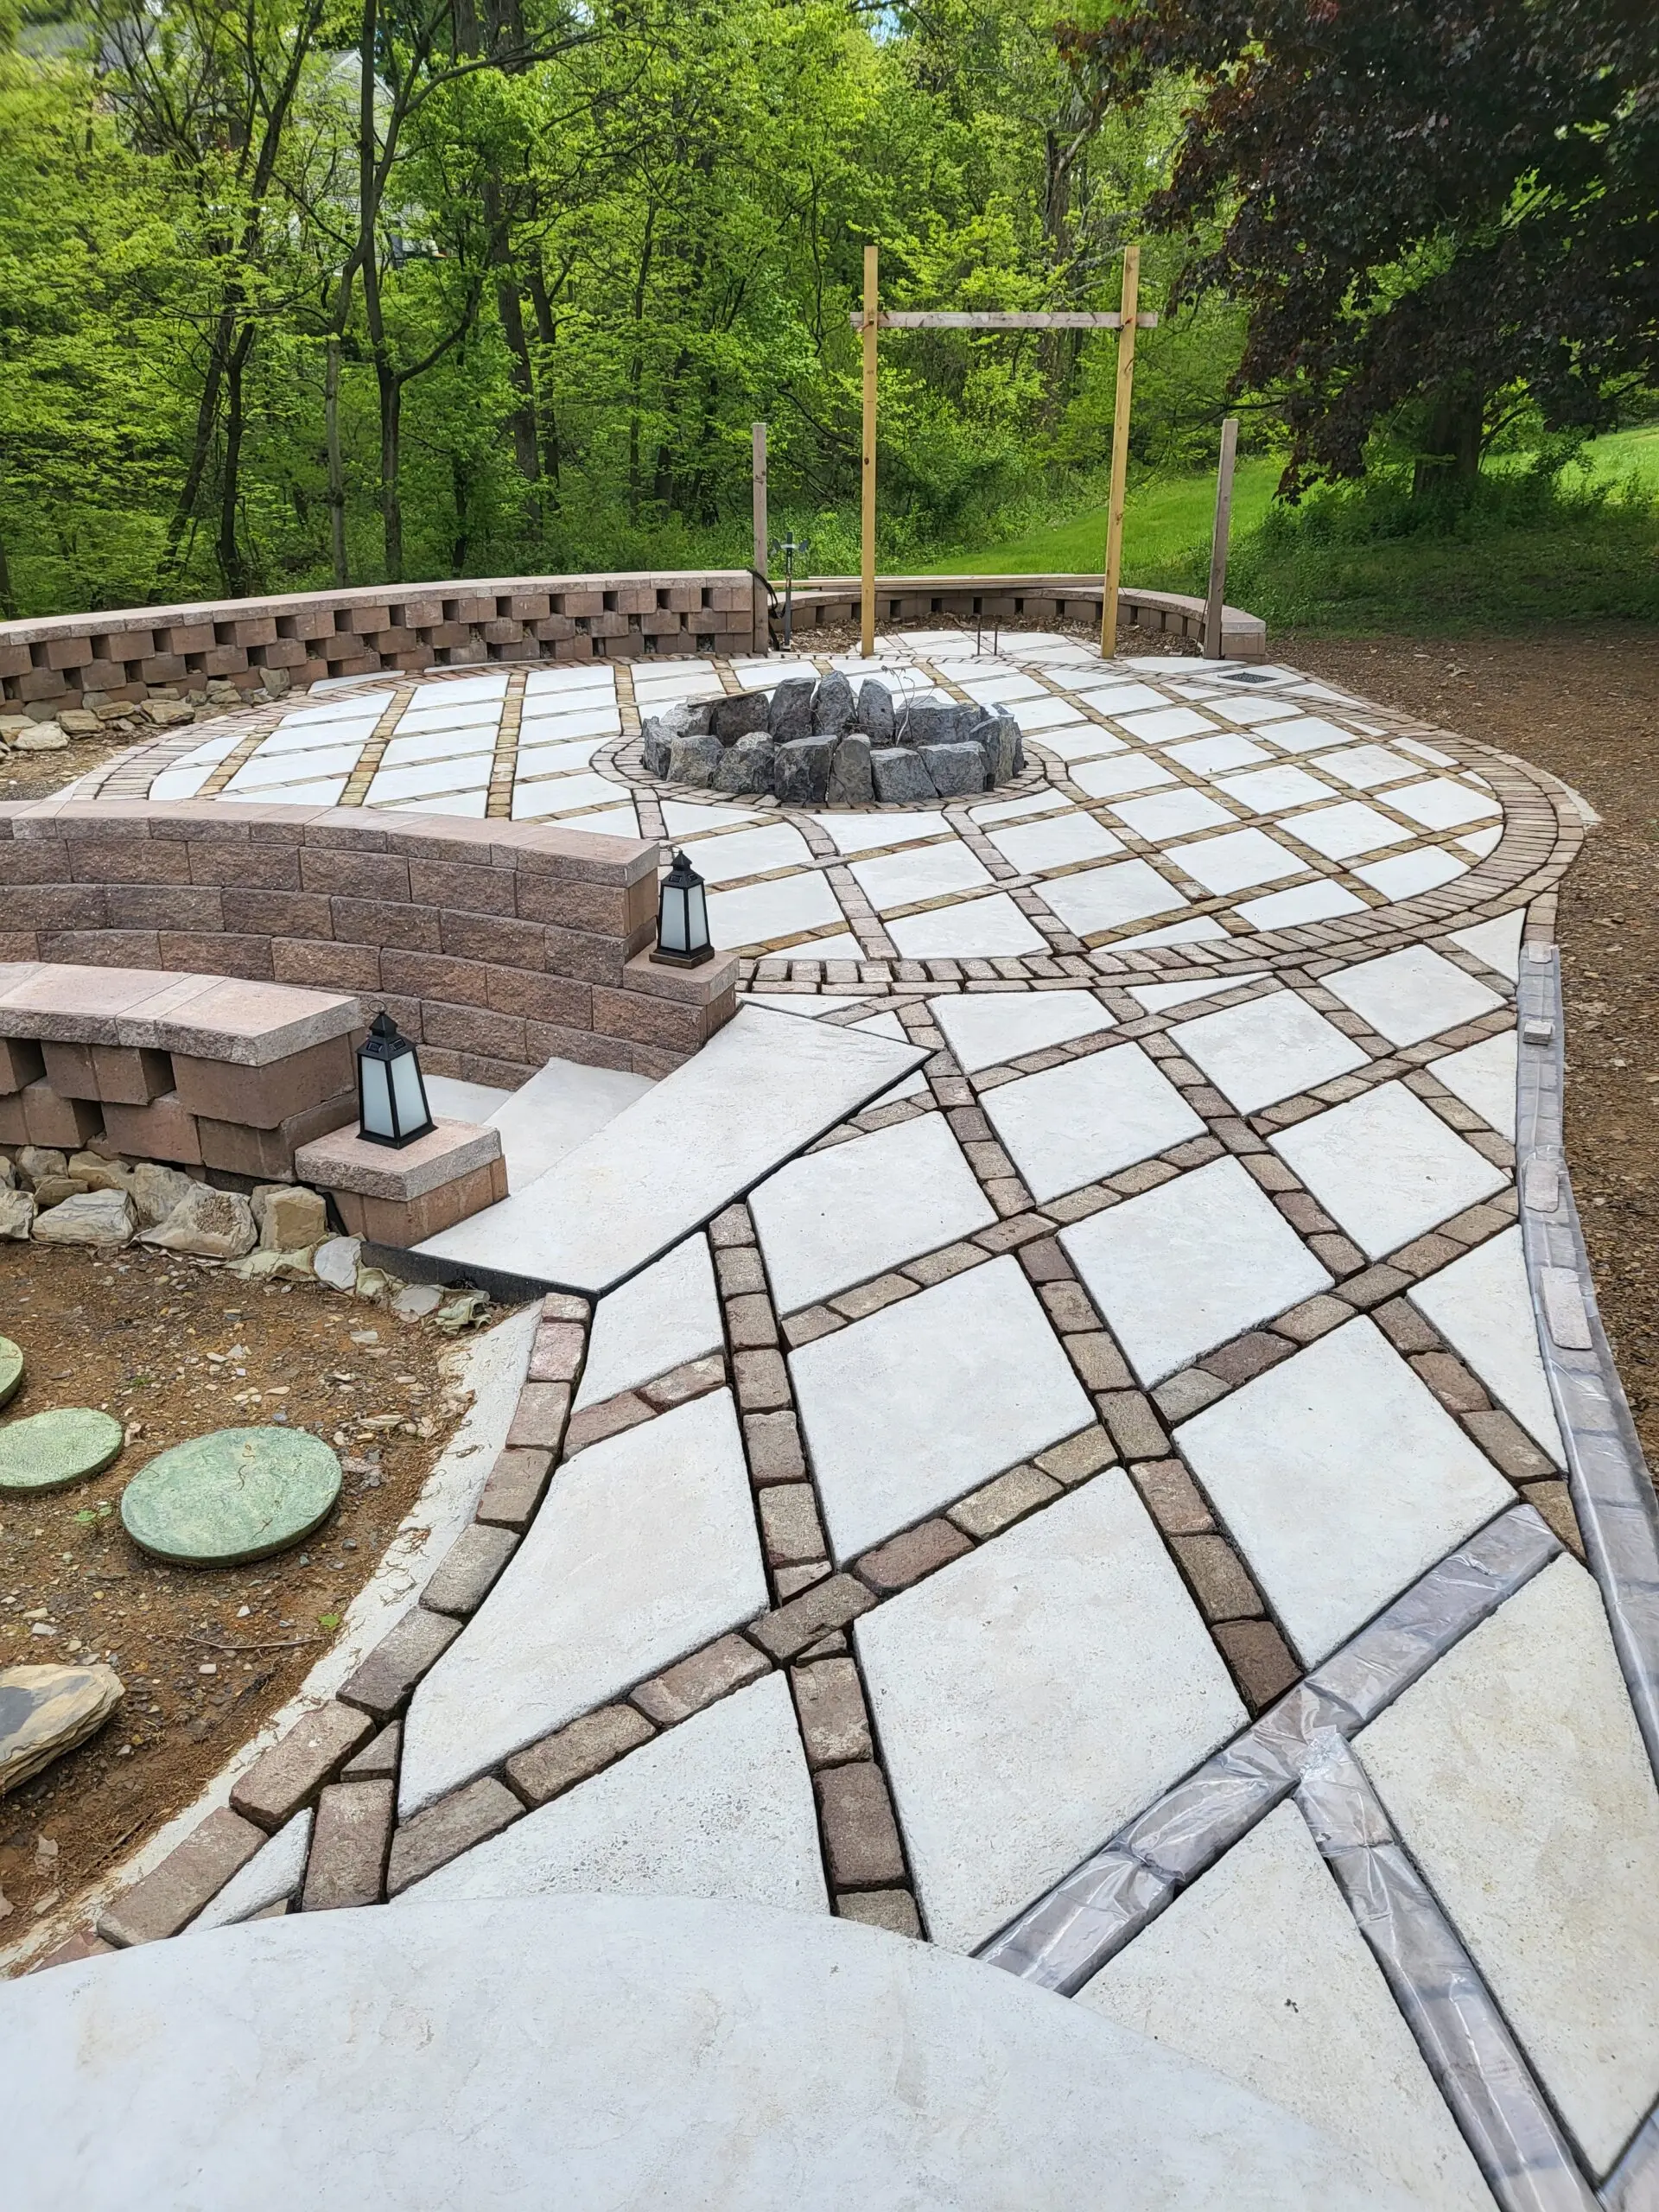
Using Direct Colors’ Light Charcoal stain and reclaimed bricks, witness how a harlequin diamond pattern and squirrel footprints combine to create an outdoor masterpiece. Alongside the main patio, discover mossy-like stepping stones set in the garden, offering both utility and charm.

Project Info:
- Project Completed In: 20 day(s)
- Estimate of Square Footage: 750 sq. ft.
- Project Description:
We had to build a retaining wall (about 7.5 feet) to level the ground and build a patio as an extension of the yard. We used reclaimed brick off the original house and laid out a harlequin diamond pattern. Then we used 3/8″ plywood strips to form diamond concrete pavers within the brick pattern, allowing for joint sand compound between the bricks and concrete pavers. After waiting a season (winter), we masked off the bricks and retaining wall to stain the pavers and steps with Antiquing light charcoal stain. We used the light charcoal because we wanted to match the firepit stones and give the illusion of slate slabs. When we were laying the concrete diamonds and we had leftover concrete, we poured them into large container saucer dishes to be used as steppingstones within the garden area. The steppingstones were stained with ColorWave ivy stain to look like moss covered mounds. *Side note: when laying the concrete on the contoured steps in the fall, there was a lot of squirrel activity and impossible to keep them off the steps as they dried. We ended up embracing their little footprints as signatures embedded in the project. - Personal Tips:
Watch to make sure your EasySeal is not creating any bubbles. If bubbles occur, allow yourself room to go back and access your area to gently pop them. If you don’t catch them, you can sand them out, but you must be careful not to remove the stain in the process. It is easier to address them when it is wet. - Direct Colors Products Used:
Antiquing™ Stain Trial Kit (Driftwood, Yukon Gold & Light Charcoal)
1 Gal. Light Charcoal DIY Antiquing™ & EasySeal™ Satin Kit (on steps and diamond harlequin pavers)
2 x 1 Gal. Light Charcoal Antiquing™ & EasySeal™ Satin Kit (on steps, diamond and brick pavers)
1 Qt. Ivy ColorWave® Stain (for steppingstones in garden) - Other Products Used:
EP Henry harvest blend retaining wall block, reclaimed bricks, quickrete concrete mix, and beige Gator Nitro joint sand.
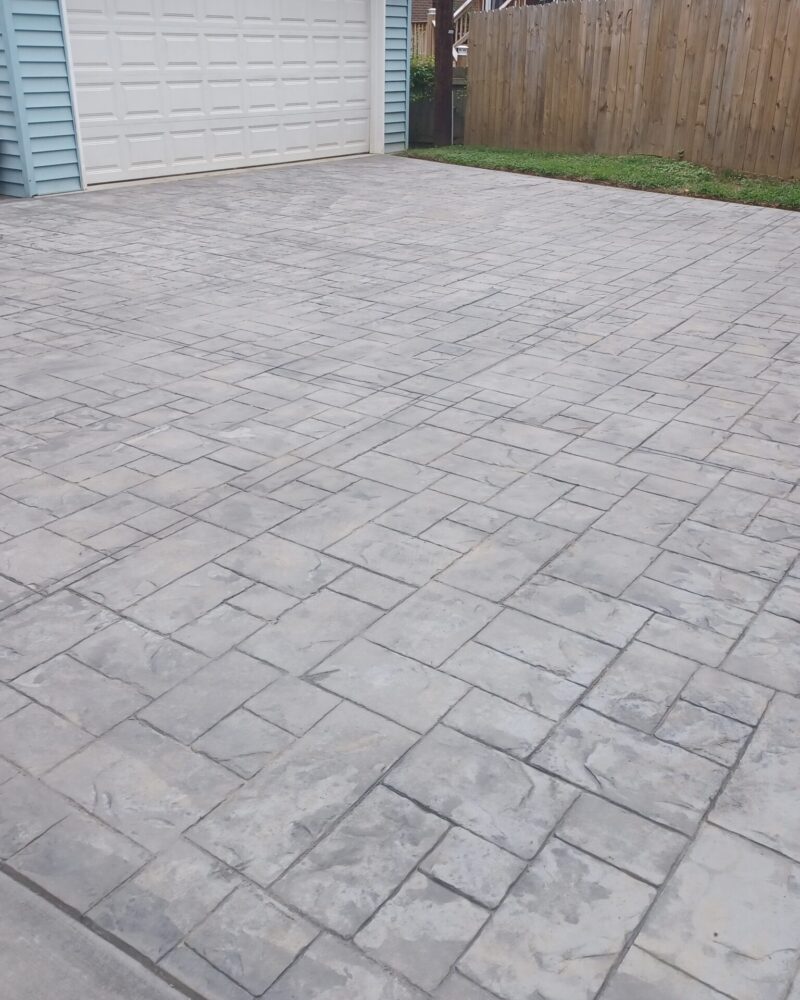
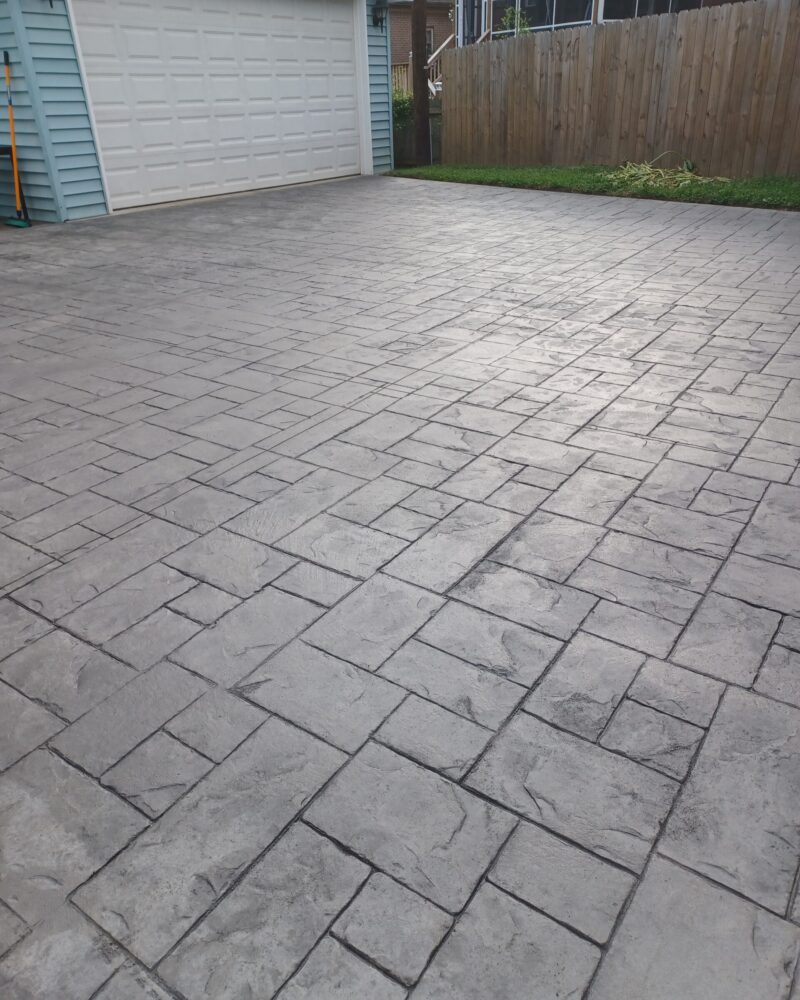
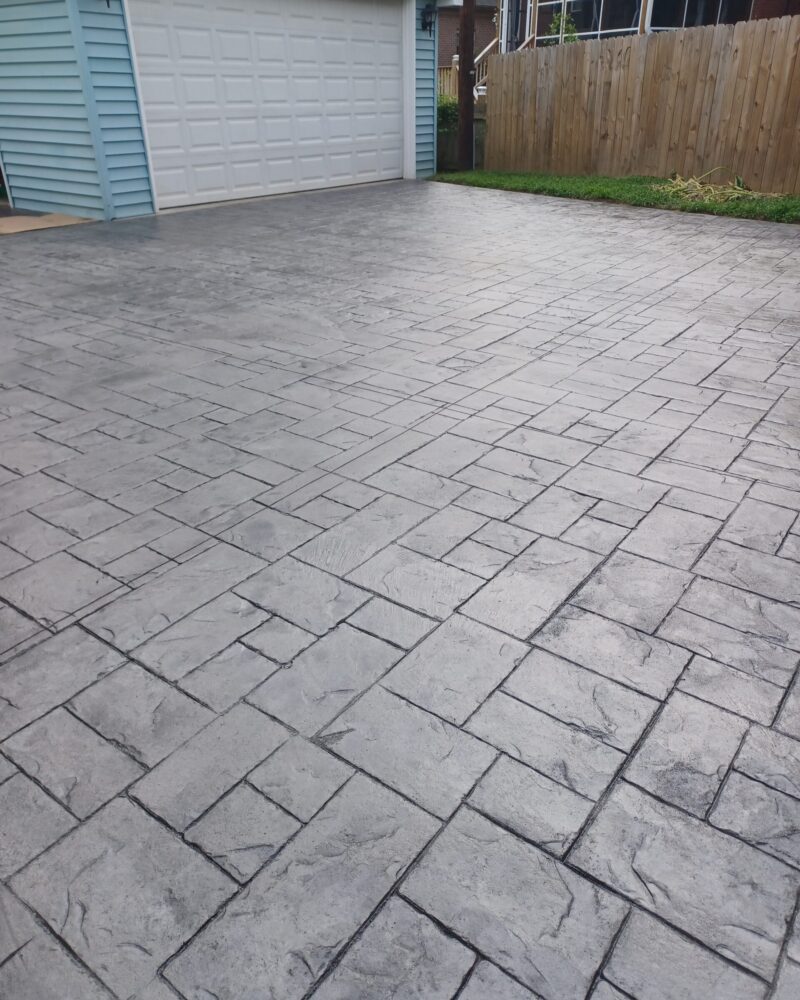
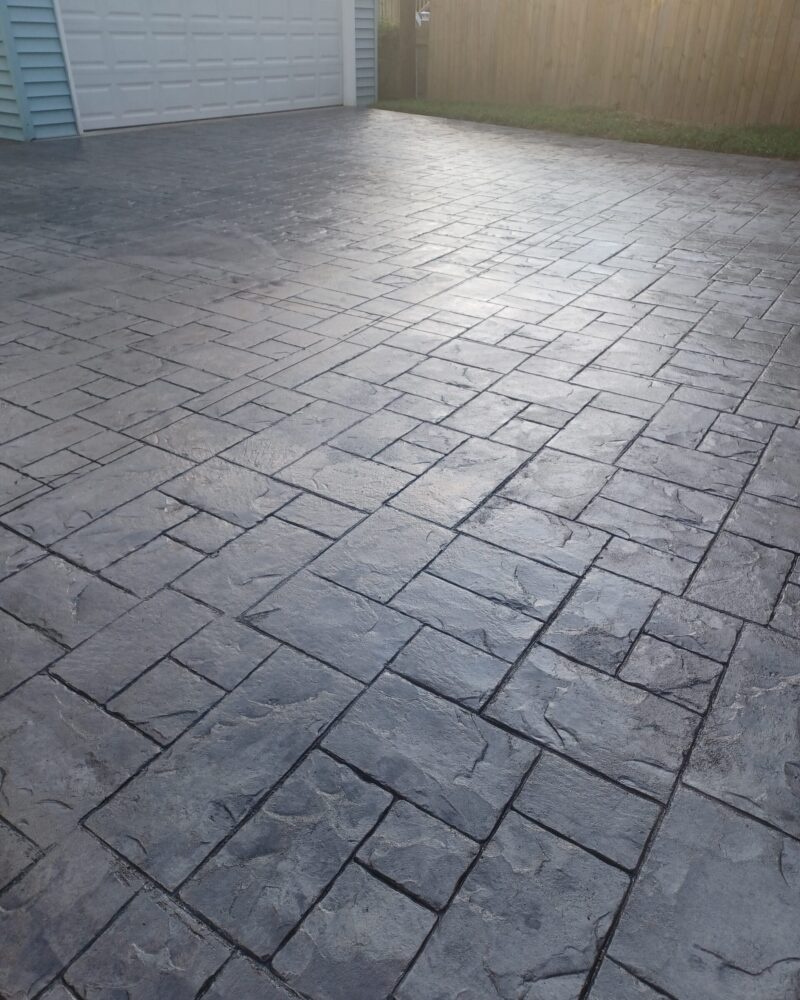
Fixing the Splotchy: Ashlar Slate Update
Addressing the issue of poor color contrast and an inconsistent clearcoat on a year-old ashlar slate stamped concrete, this project made use of Light Charcoal Antiquing™ and the EasySeal™ Satin Kit for a more cohesive finish.
Project Info:
- Project Completed In: 3 day(s)
- Estimate of Square Footage: 900 sq. ft.
- Project Description:
I had one year old ashlar slate stamped concrete that had poor color contrast and very splotchy clearcoat. I thoroughly washed the surface with a pressure washer and then applied Direct Color’s two stage treatment: Light Charcoal Antiquing & EasySeal Satin Kit.
- Personal Tips: For the clearcoat, use a sprayer and then back roll just like the directions recommend.
- Direct Colors Products Used:
2 x 5 Gal. Light Charcoal Antiquing™ & EasySeal™ Satin Kit
DIY Patio Transformation: From Dull to Dazzling with Direct Colors
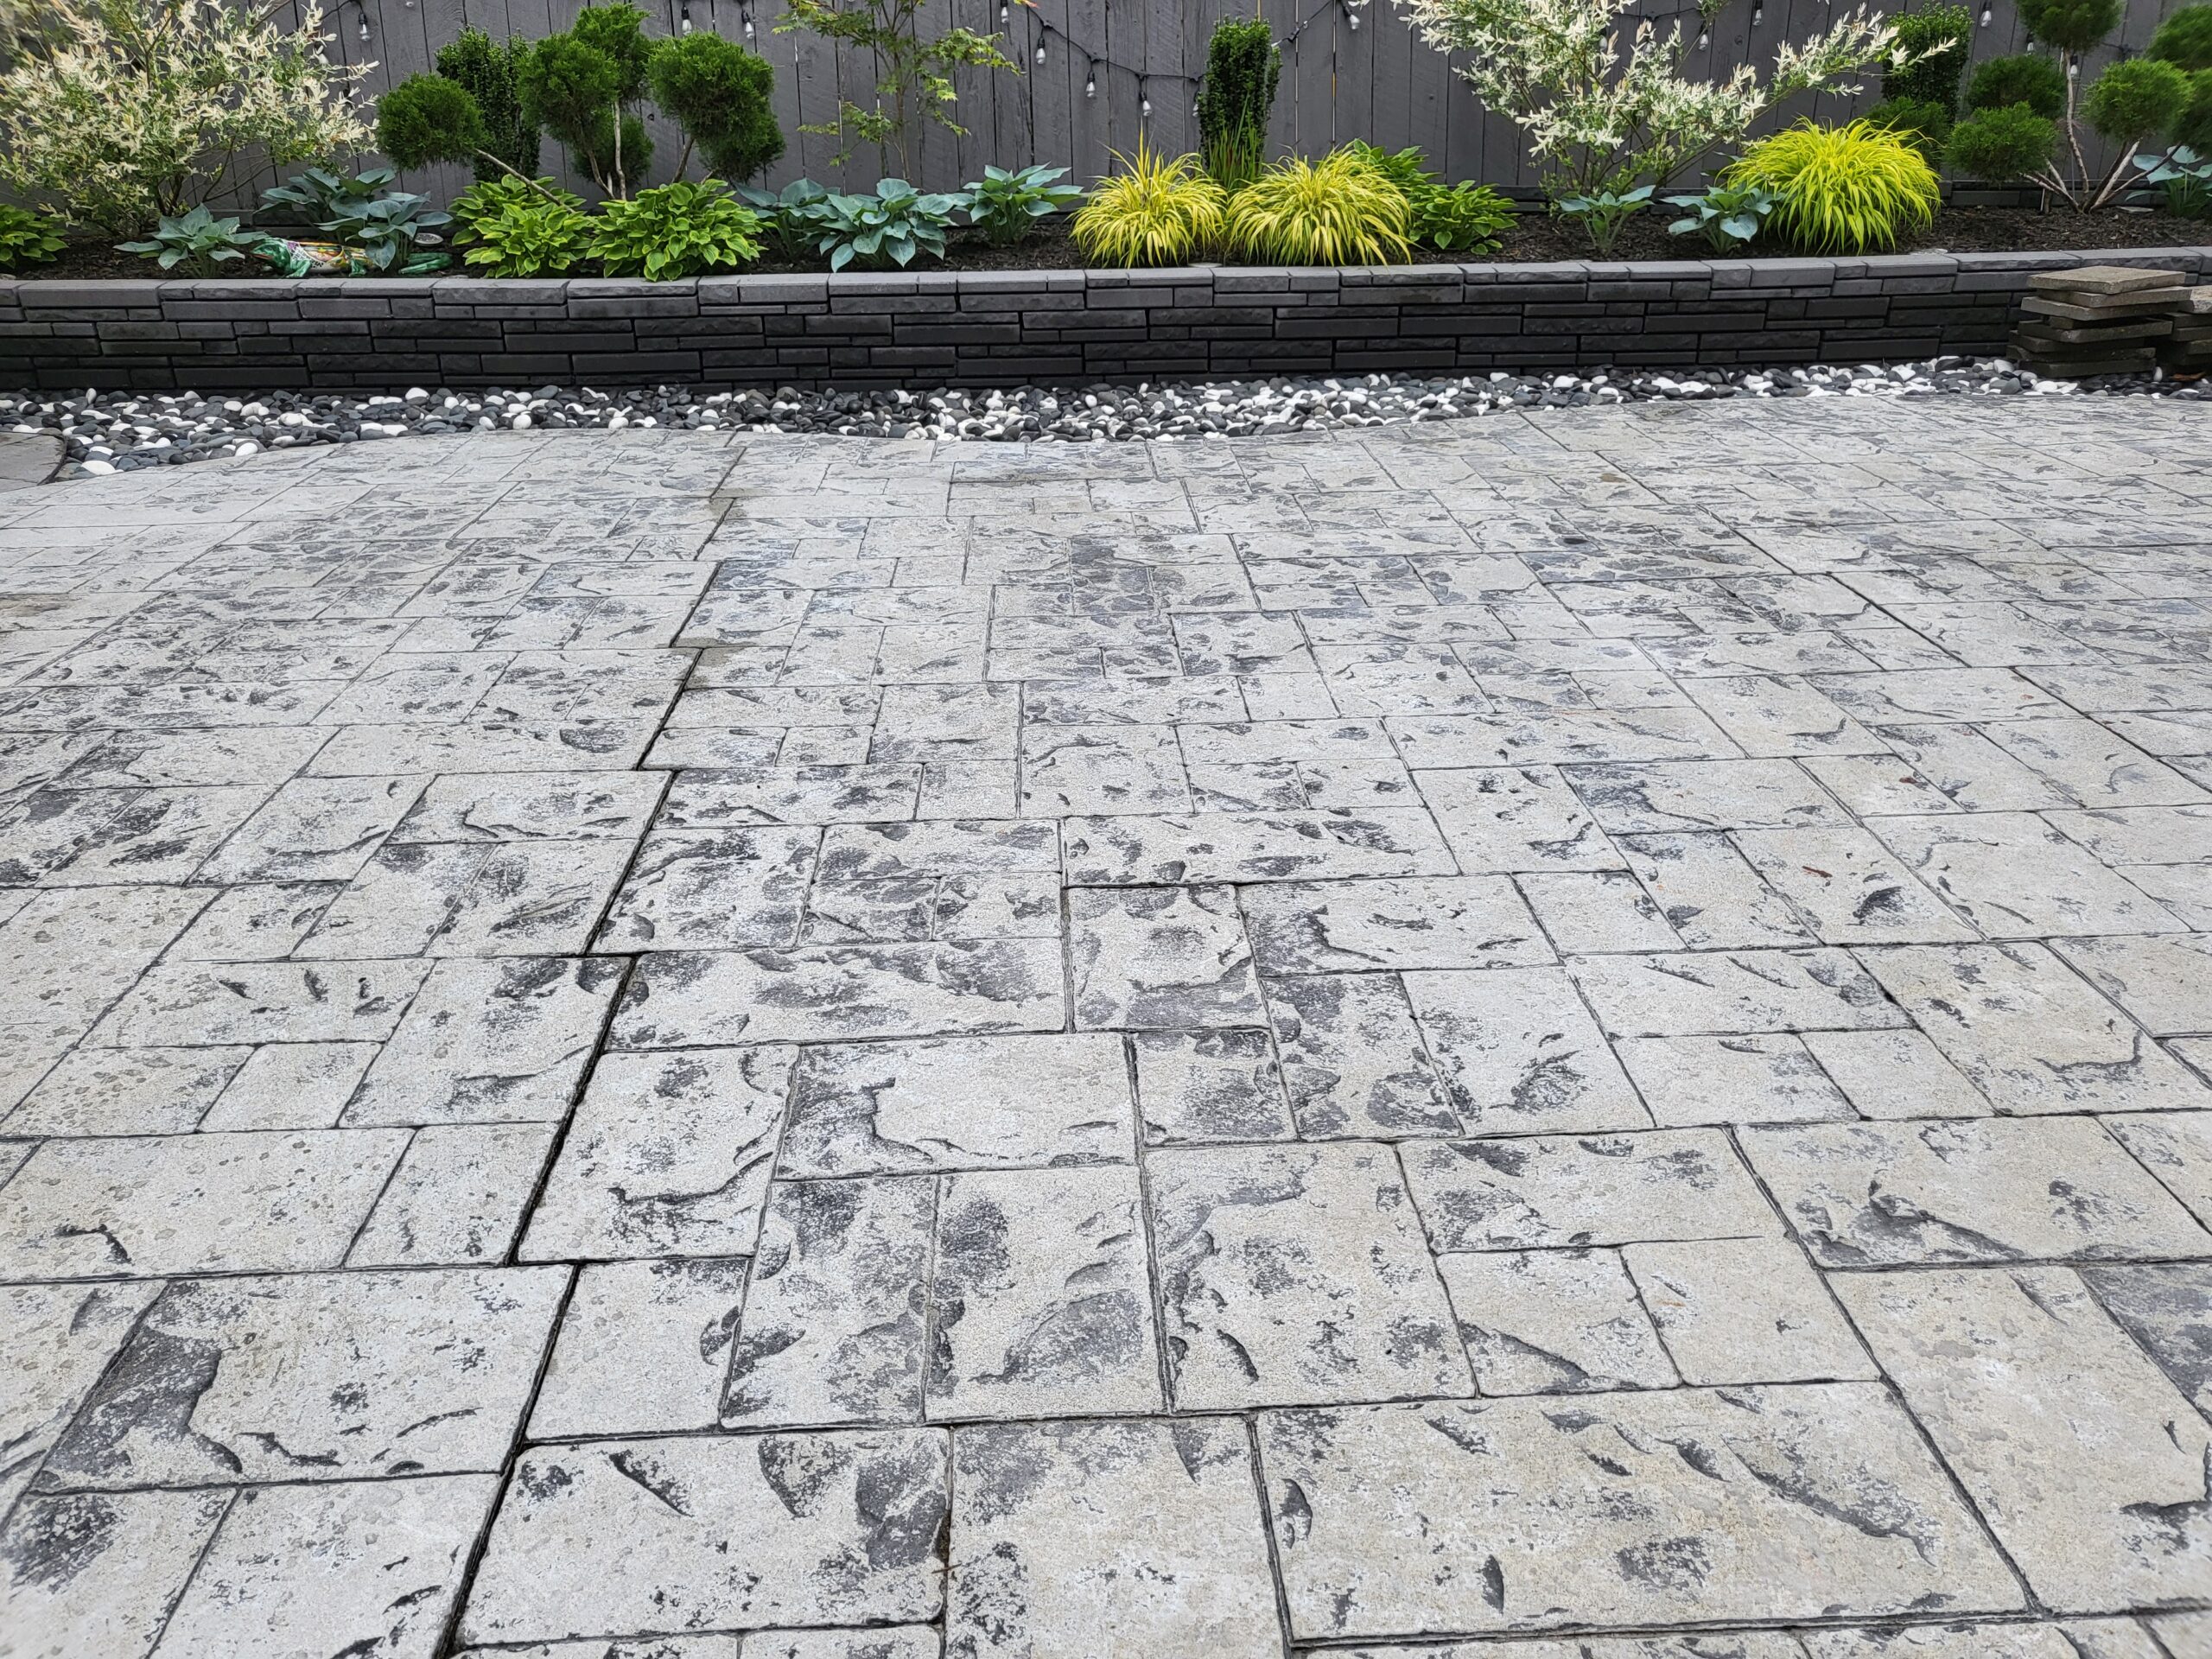
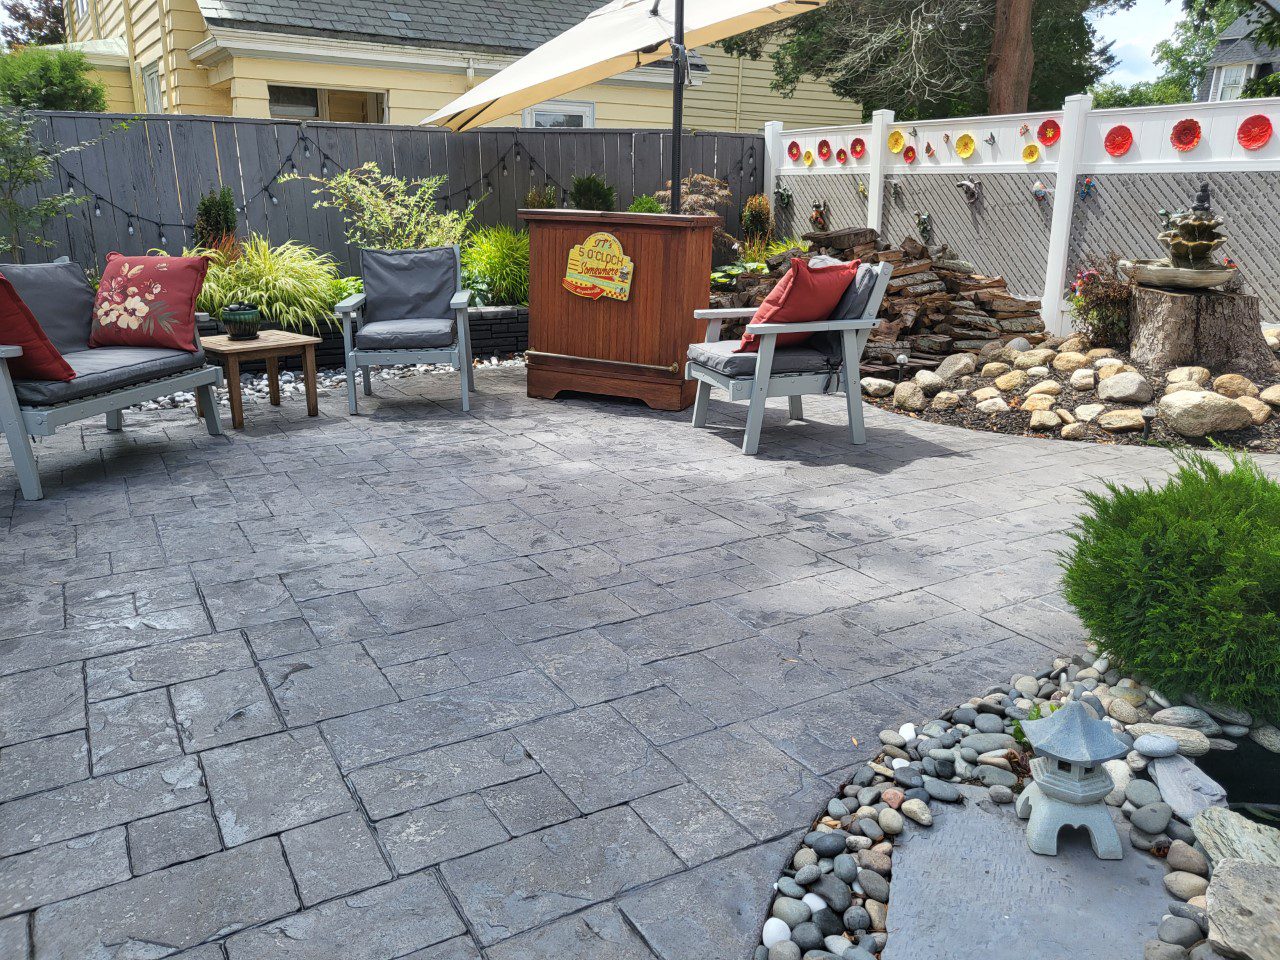
Faced with steep professional quotes, one couple in their mid-50s decided to take patio renovation into their own hands. With no prior experience but armed with Direct Colors’ comprehensive resources, they embarked on a DIY journey.
Project Info:
- Project Completed In: 3 day(s)
- Estimate of Square Footage: 200 sq. ft.
- Project Description:
Outdoor patio needed a major make over. We contacted a few professional companies in our area quotes came in around 3,000!!! that made us think perhaps we can do it ourselves! it can’t look any worse than it does now.
After researching online for about a month hubby and I opted to purchase from Direct Colors because of the simple easy to understand instructions, along with the ” how to videos ” available on the website.
I must admit we both were feeling a bit apprehensive at first to take on such a massive project. We are both in our mid 50″s with zero previous experience.
After contacting the wonderful customer support service team at Direct Colors we took the plunge and ordered. The customer service team is professional, knowledgeable and was patient with our questions explaining in layman’s terms our questions.
It’ was comforting to know professional assistance was just a phone call away 3 days later our patio was finished, looks amazingly well done saved literally thousands of dollars and had the feeling of accomplishment.
Thank you Direct Colors!
- Personal Tips:
- Pre- preparation is 90% the key to success. A clean, grease free surface is a must!
- Check weather forecast partly cloudy/ no rain in the forecast for 3 days, green flag to begin
- Make sure you have all equipment ( brushes, tarps, rollers, trays, etc.) required gathered in one handy space
- Create a checklist of materials needed prior to starting.
- Read then re-read the directions/ instructions
- Jot down any questions you may have, then contact Direct Colors customer support … the team is fabulous!
- Direct Colors Products Used:
1 Gal. Light Charcoal DIY Antiquing™ & EasySeal™ Satin Kit
1 Gal. Gray Antiquing™ Stain
From Faded to Fab: Patio Deck Glow-Up
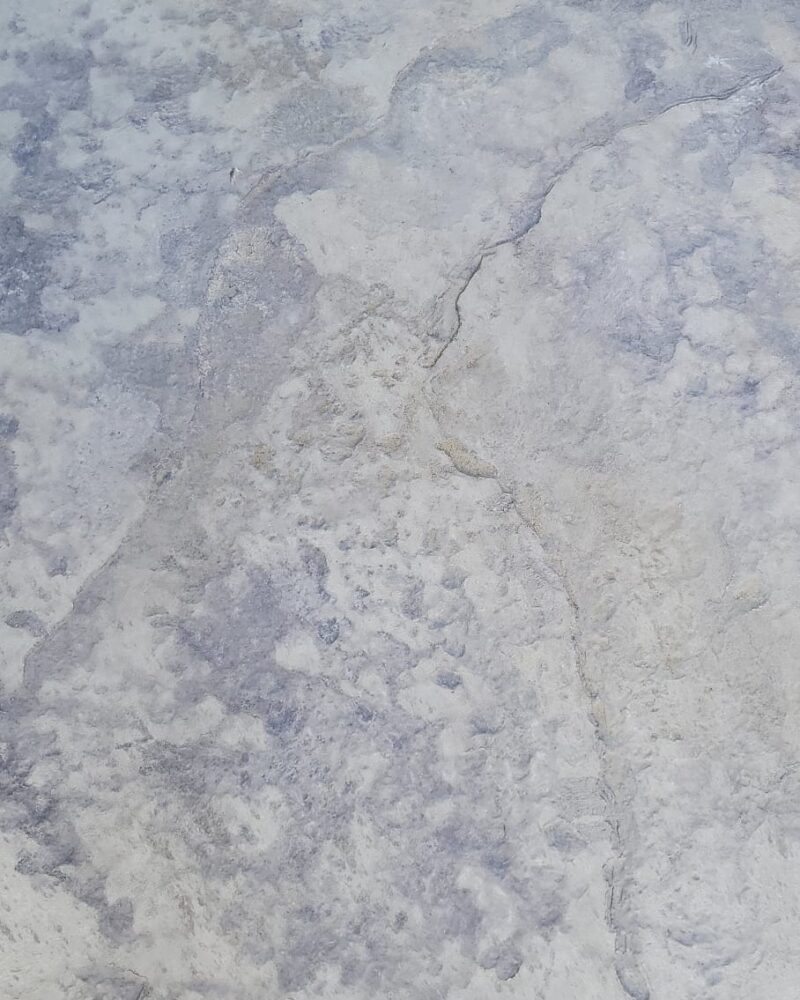
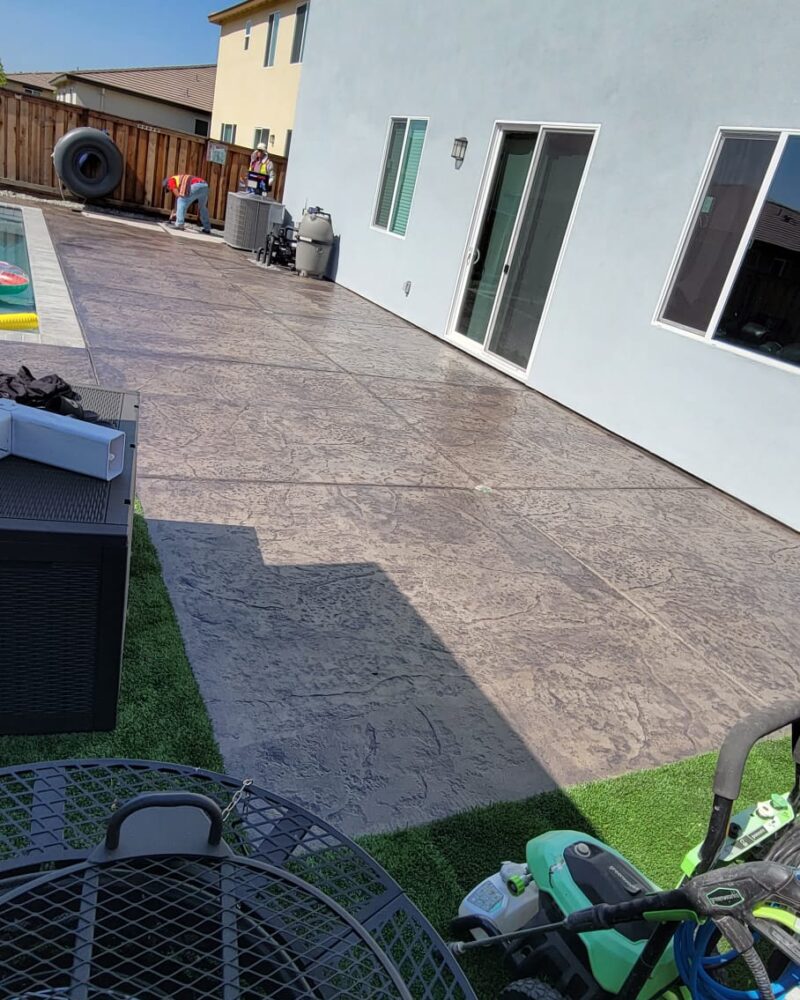
Undertaken by our esteemed customer and DCPro contractor, Toledo Construction Corporation in Oakley, California, this project transformed a worn-out stamped concrete patio deck. With the right products and expertise, a touch of gloss colored sealer revived its beauty. The deck now gleams, showcasing the sheen of EasySeal™ Gloss and the richness of Light Charcoal EasyTint™, reminding us of the importance of a clean foundation for optimal results.
Project Info:
- Project Completed In: 3 day(s)
- Estimate of Square Footage: 200 sq. ft.
- Project Description:
Outdoor patio needed a major make over. We contacted a few professional companies in our area quotes came in around 3,000!!! that made us think perhaps we can do it ourselves! it can’t look any worse than it does now.
After researching online for about a month hubby and I opted to purchase from Direct Colors because of the simple easy to understand instructions, along with the ” how to videos ” available on the website.
I must admit we both were feeling a bit apprehensive at first to take on such a massive project. We are both in our mid 50″s with zero previous experience.
After contacting the wonderful customer support service team at Direct Colors we took the plunge and ordered. The customer service team is professional, knowledgeable and was patient with our questions explaining in layman’s terms our questions.
It’ was comforting to know professional assistance was just a phone call away 3 days later our patio was finished, looks amazingly well done saved literally thousands of dollars and had the feeling of accomplishment.
Thank you Direct Colors!
- Personal Tips:
- Pre- preparation is 90% the key to success. A clean, grease free surface is a must!
- Check weather forecast partly cloudy/ no rain in the forecast for 3 days, green flag to begin
- Make sure you have all equipment ( brushes, tarps, rollers, trays, etc.) required gathered in one handy space
- Create a checklist of materials needed prior to starting.
- Read then re-read the directions/ instructions
- Jot down any questions you may have, then contact Direct Colors customer support … the team is fabulous!
- Direct Colors Products Used:
1 Gal. Light Charcoal DIY Antiquing™ & EasySeal™ Satin Kit
1 Gal. Gray Antiquing™ Stain
Explore more creative uses and stunning transformations by visiting our EasyTint™ Project Gallery.
Charcoal Refresh: Circular Patio Makeover
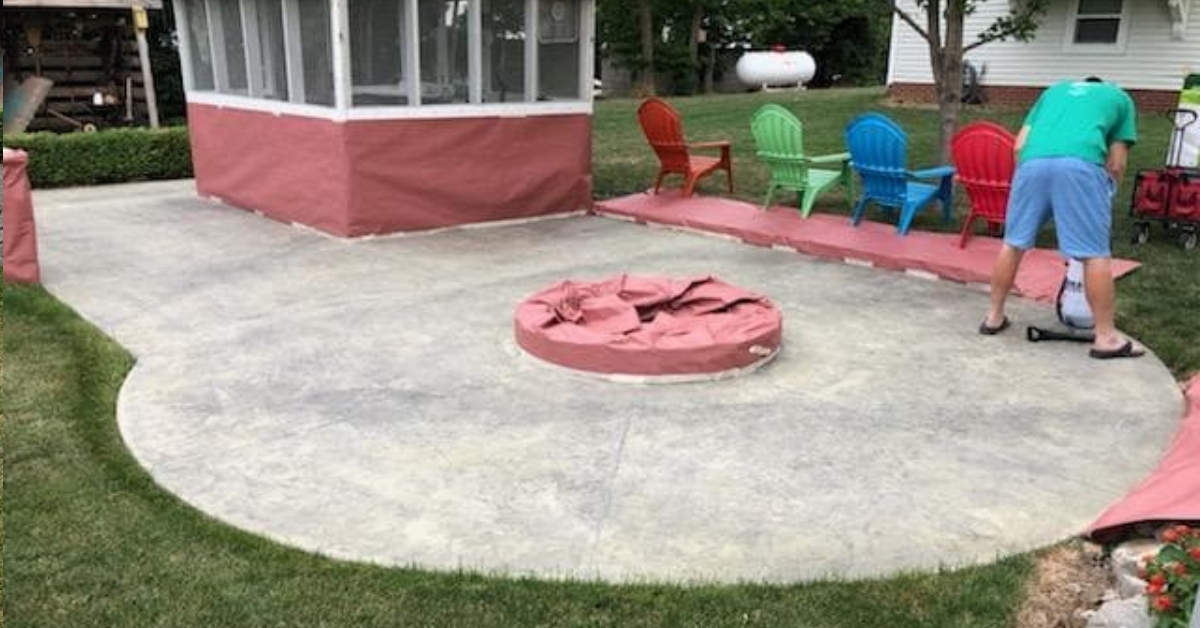
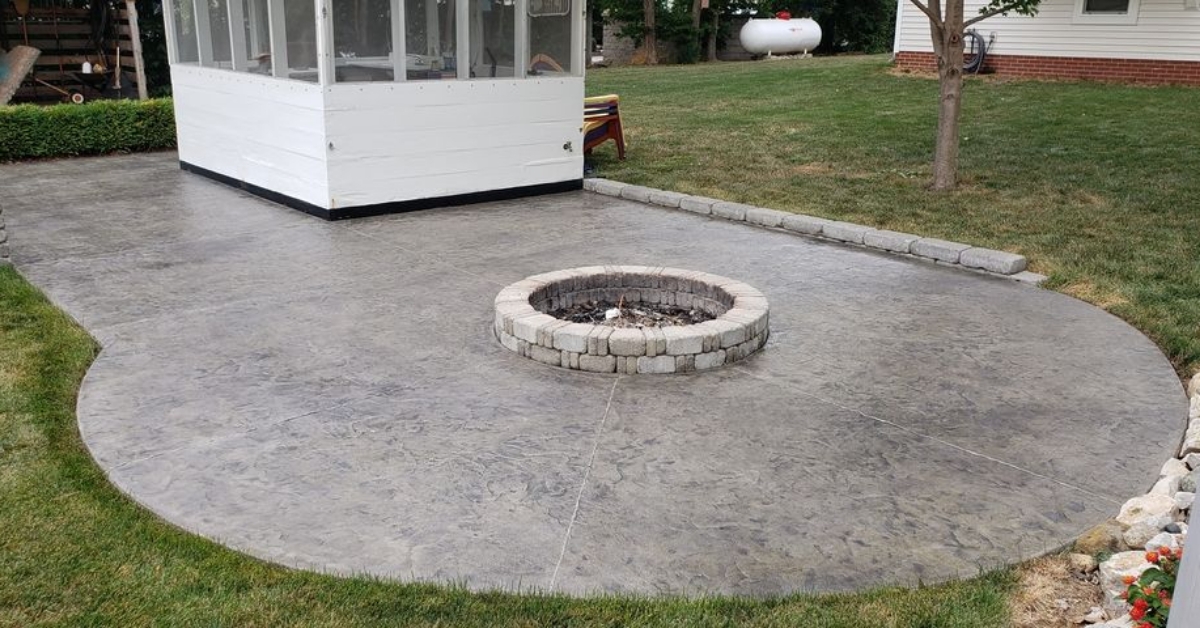
See the transformation of a straightforward circular stamped patio as it gains a fresh, updated look with Antiquing™ Light Charcoal stain and the protective sheen of EasySeal™ satin.
Concrete Stain Color Duo
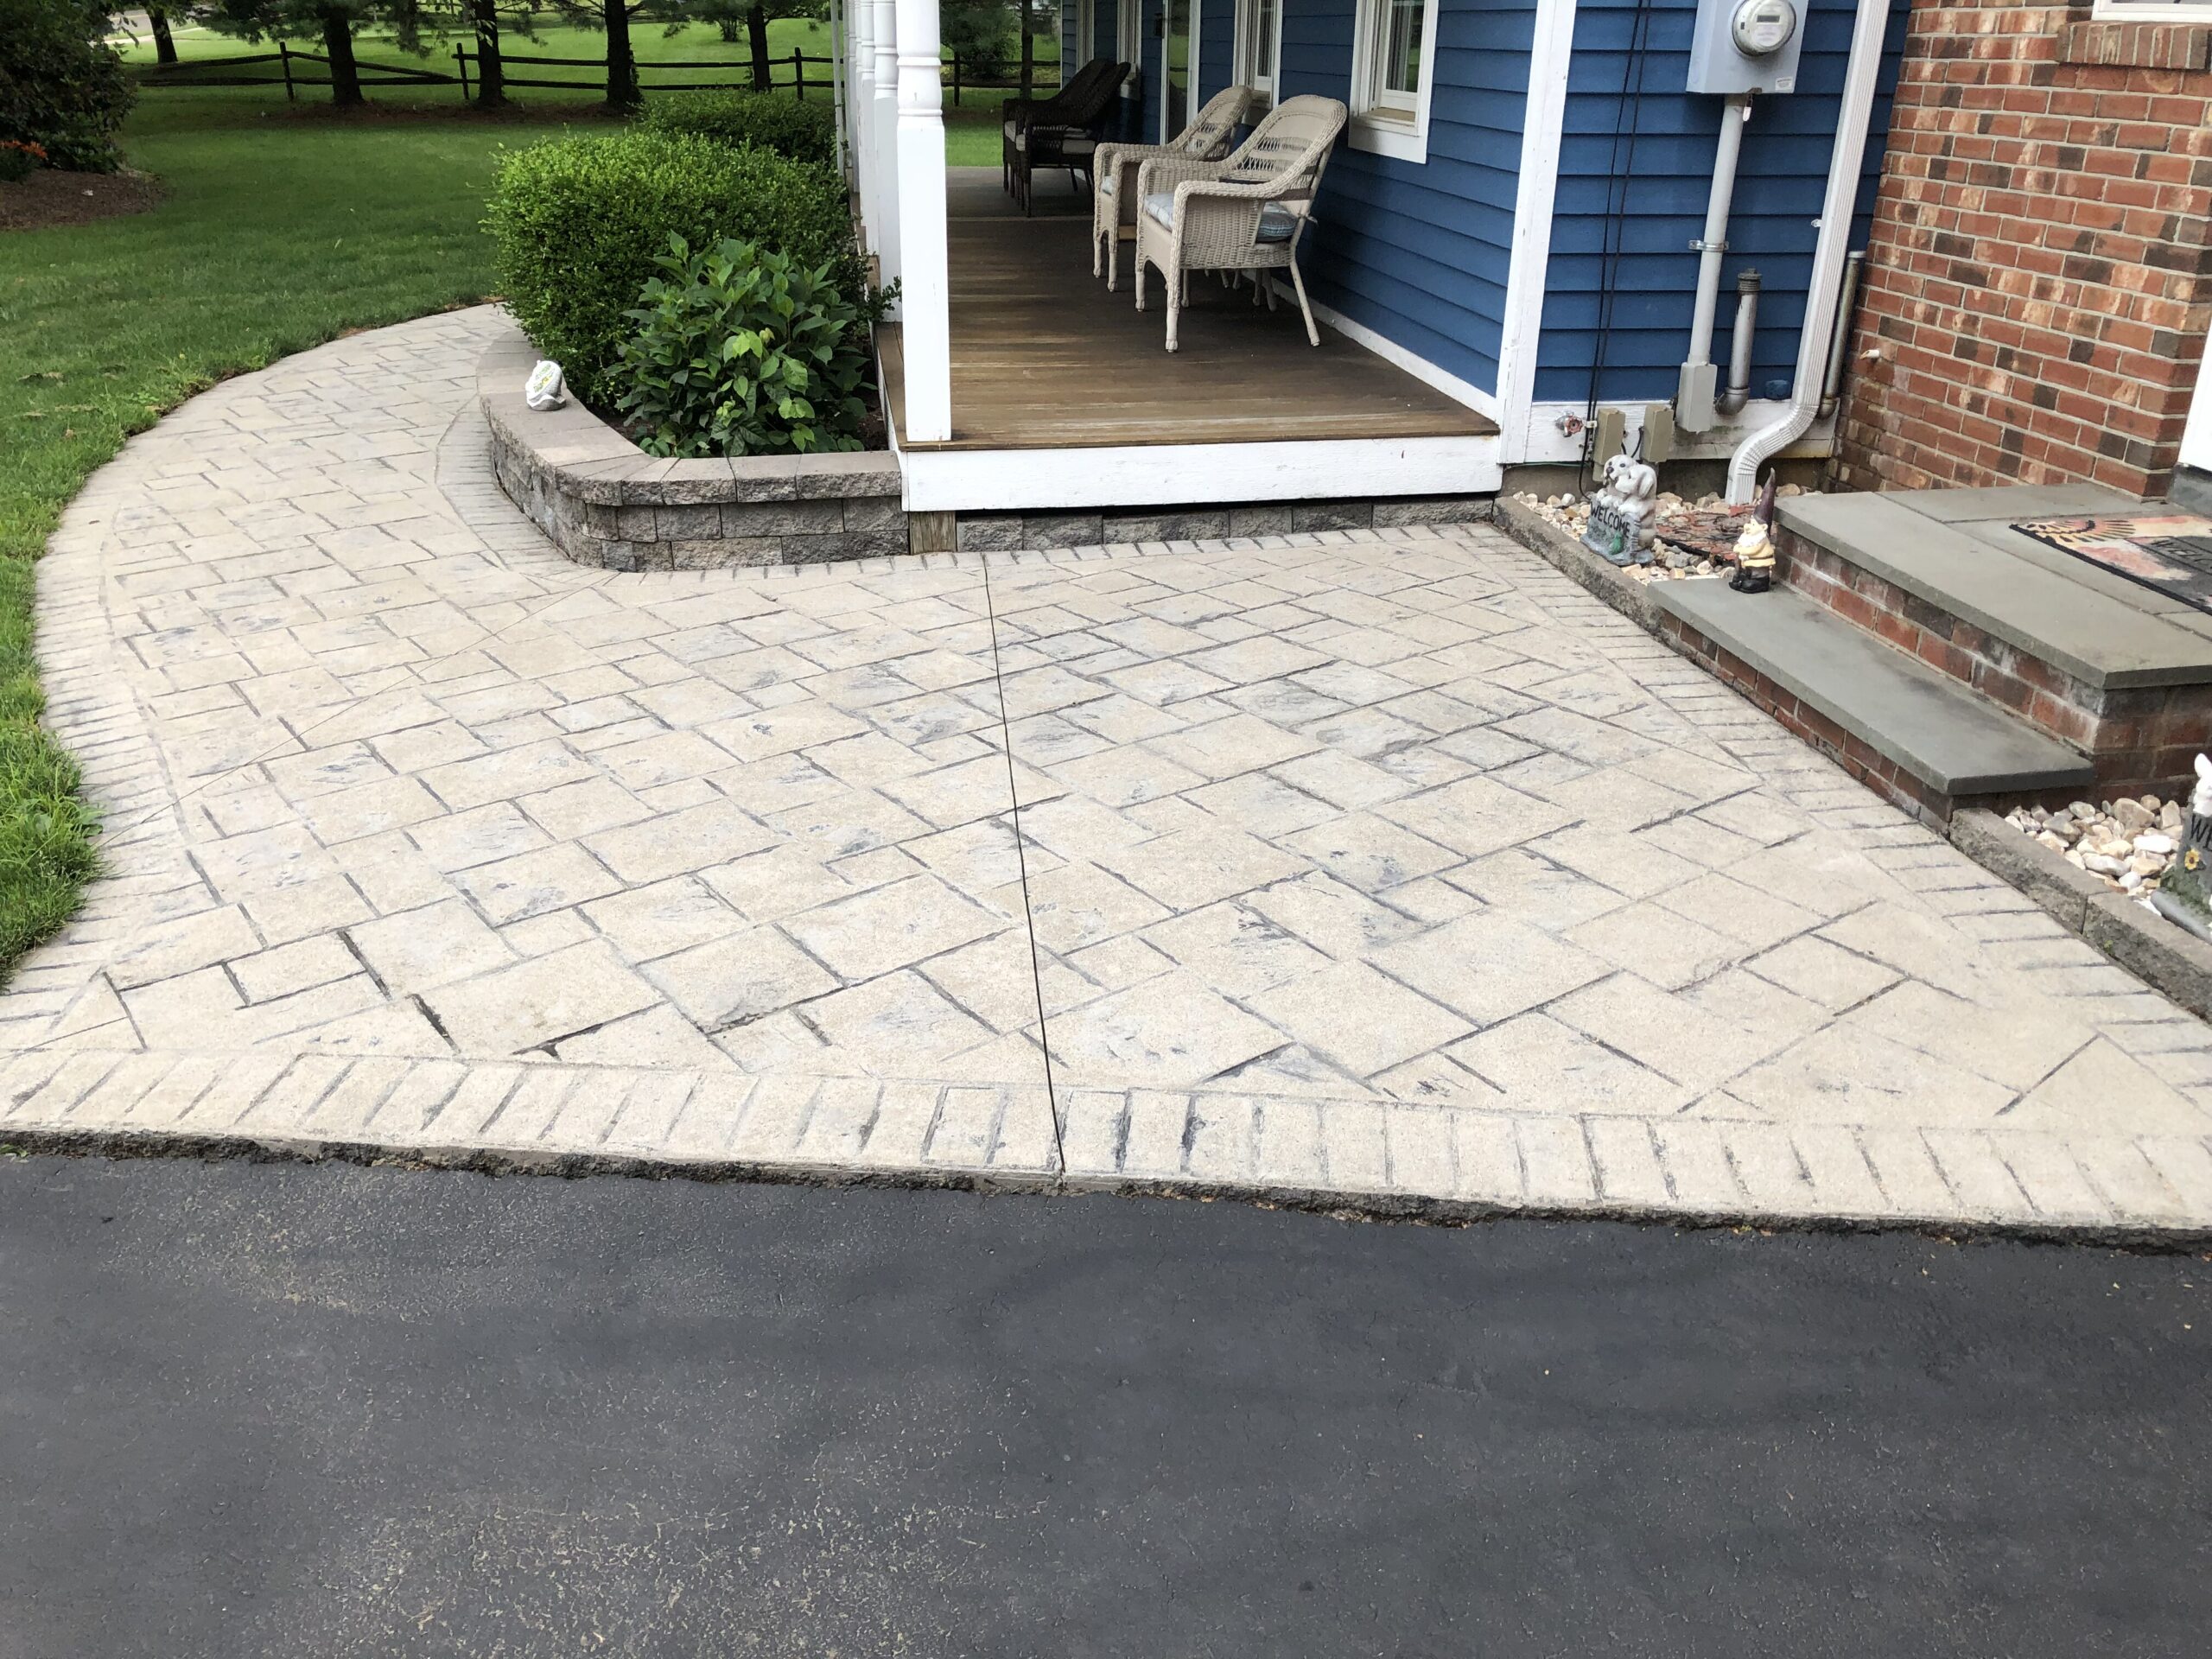
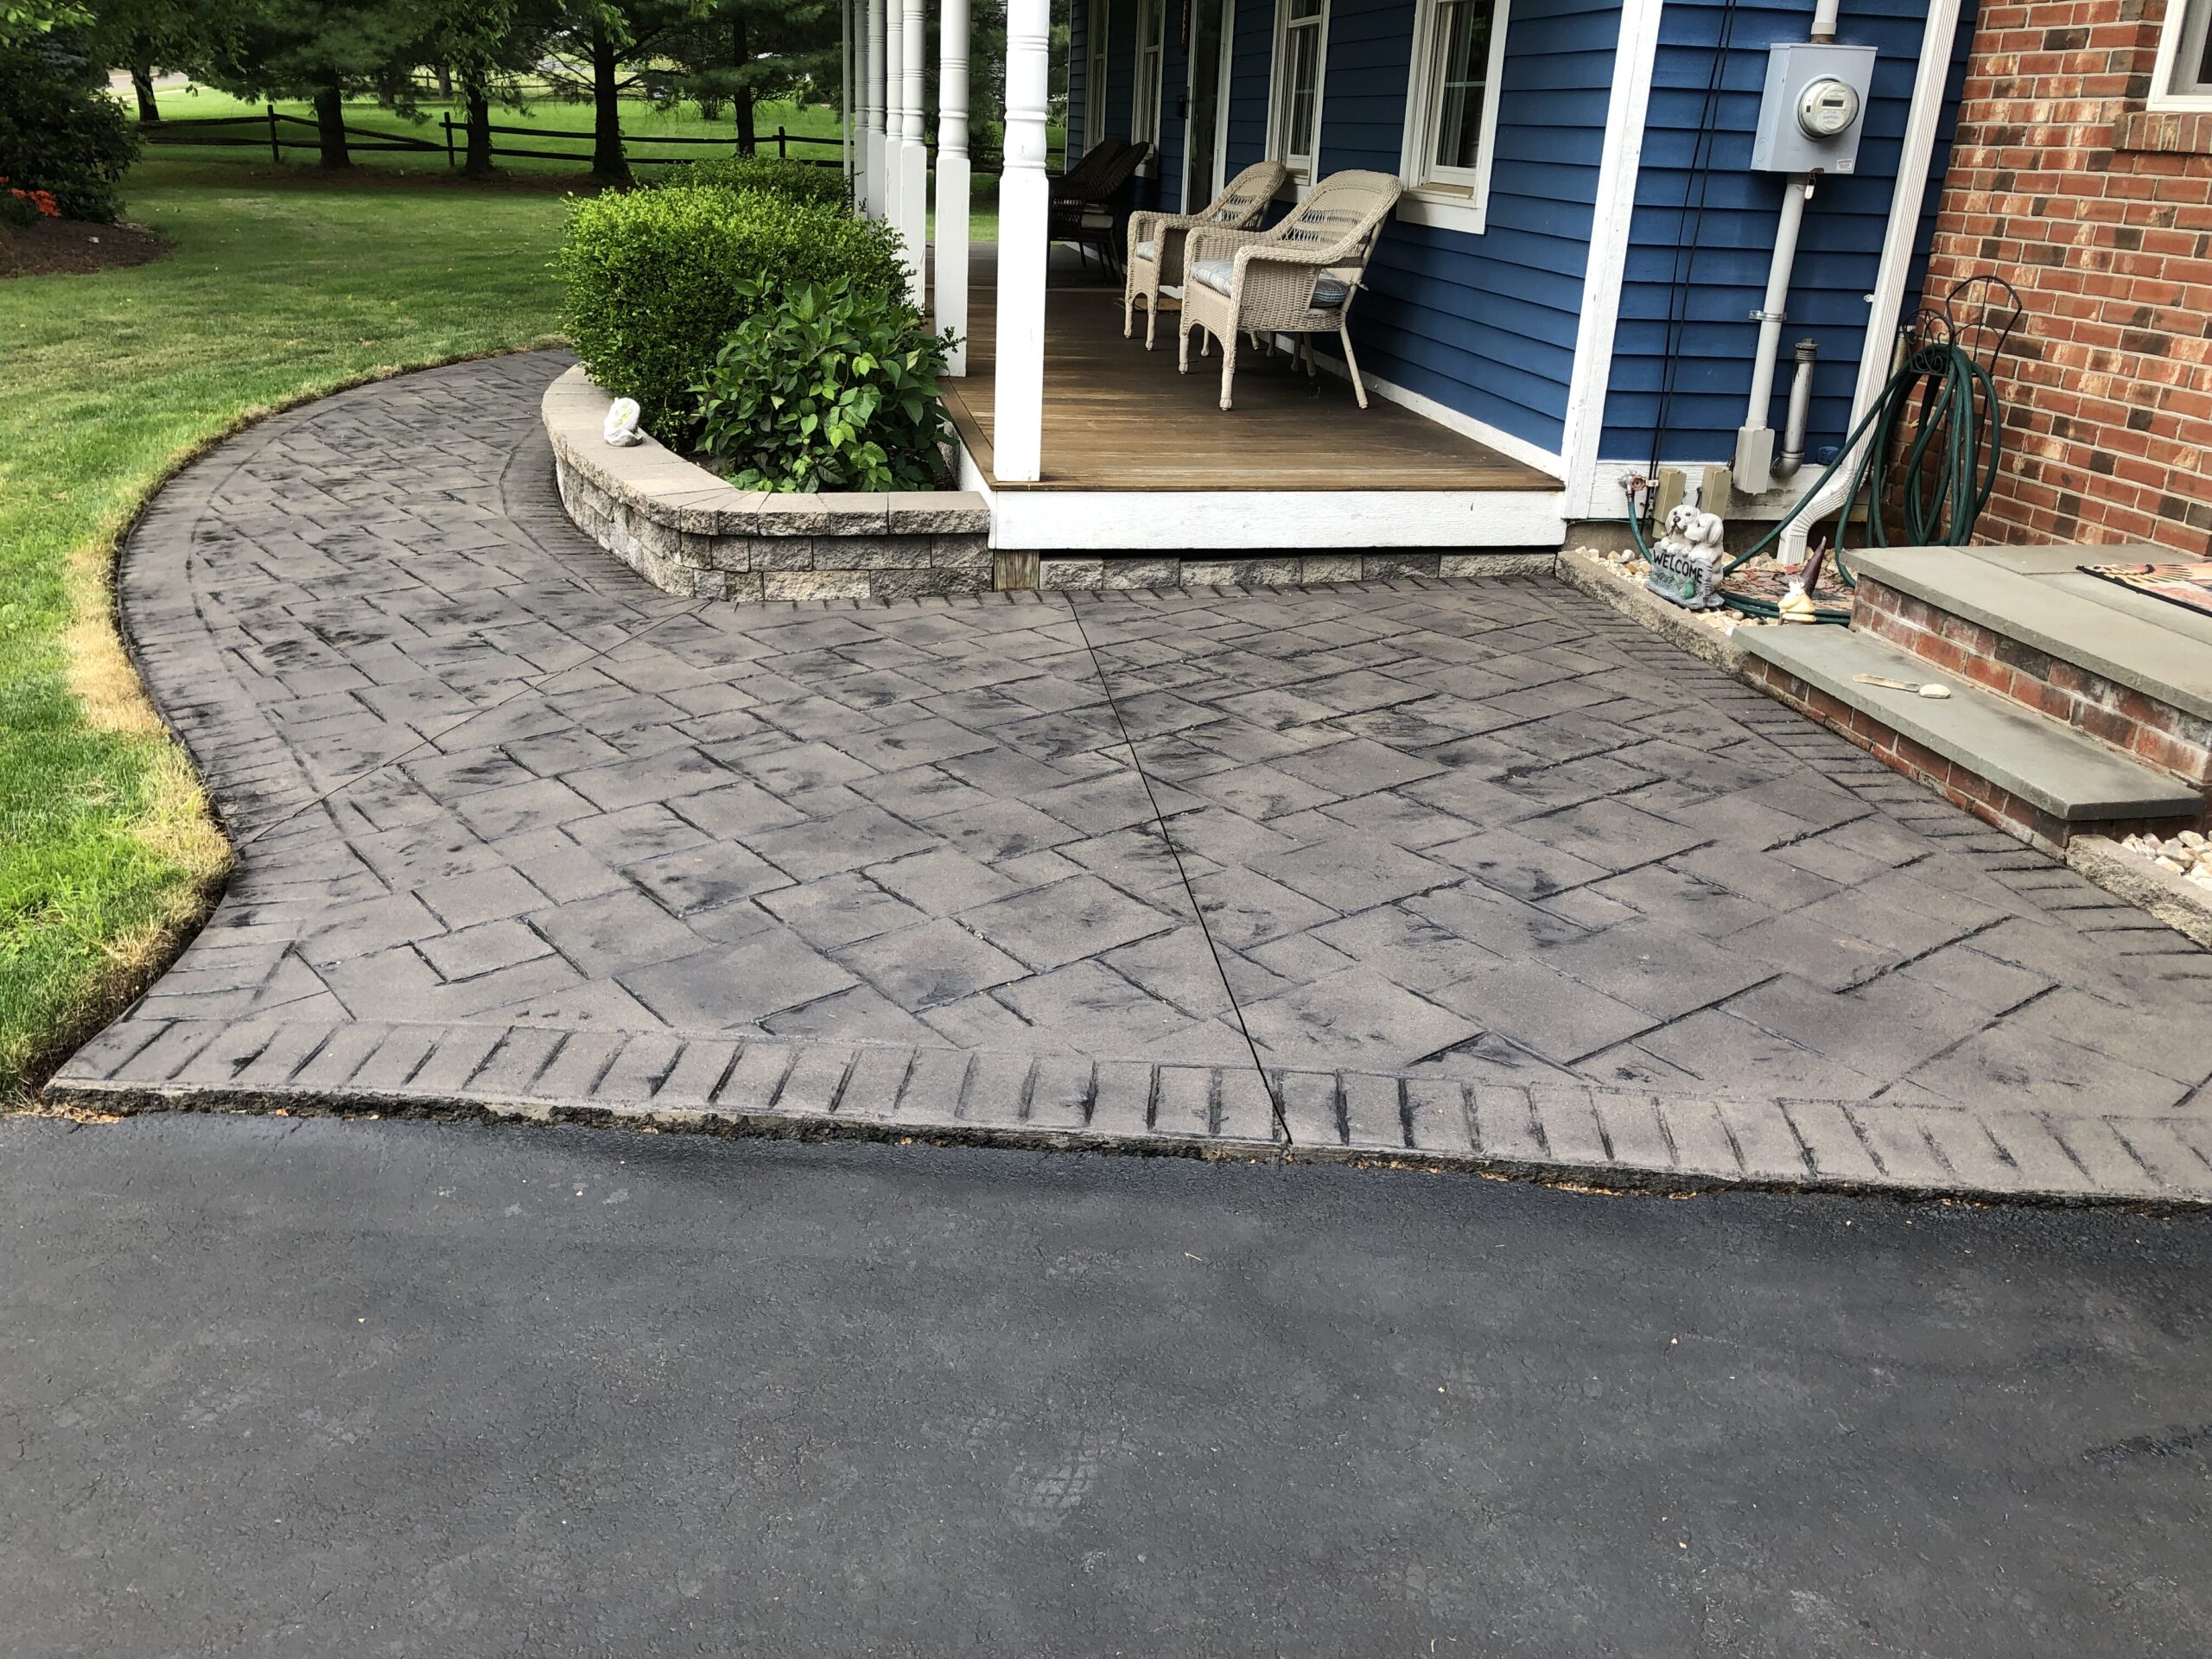
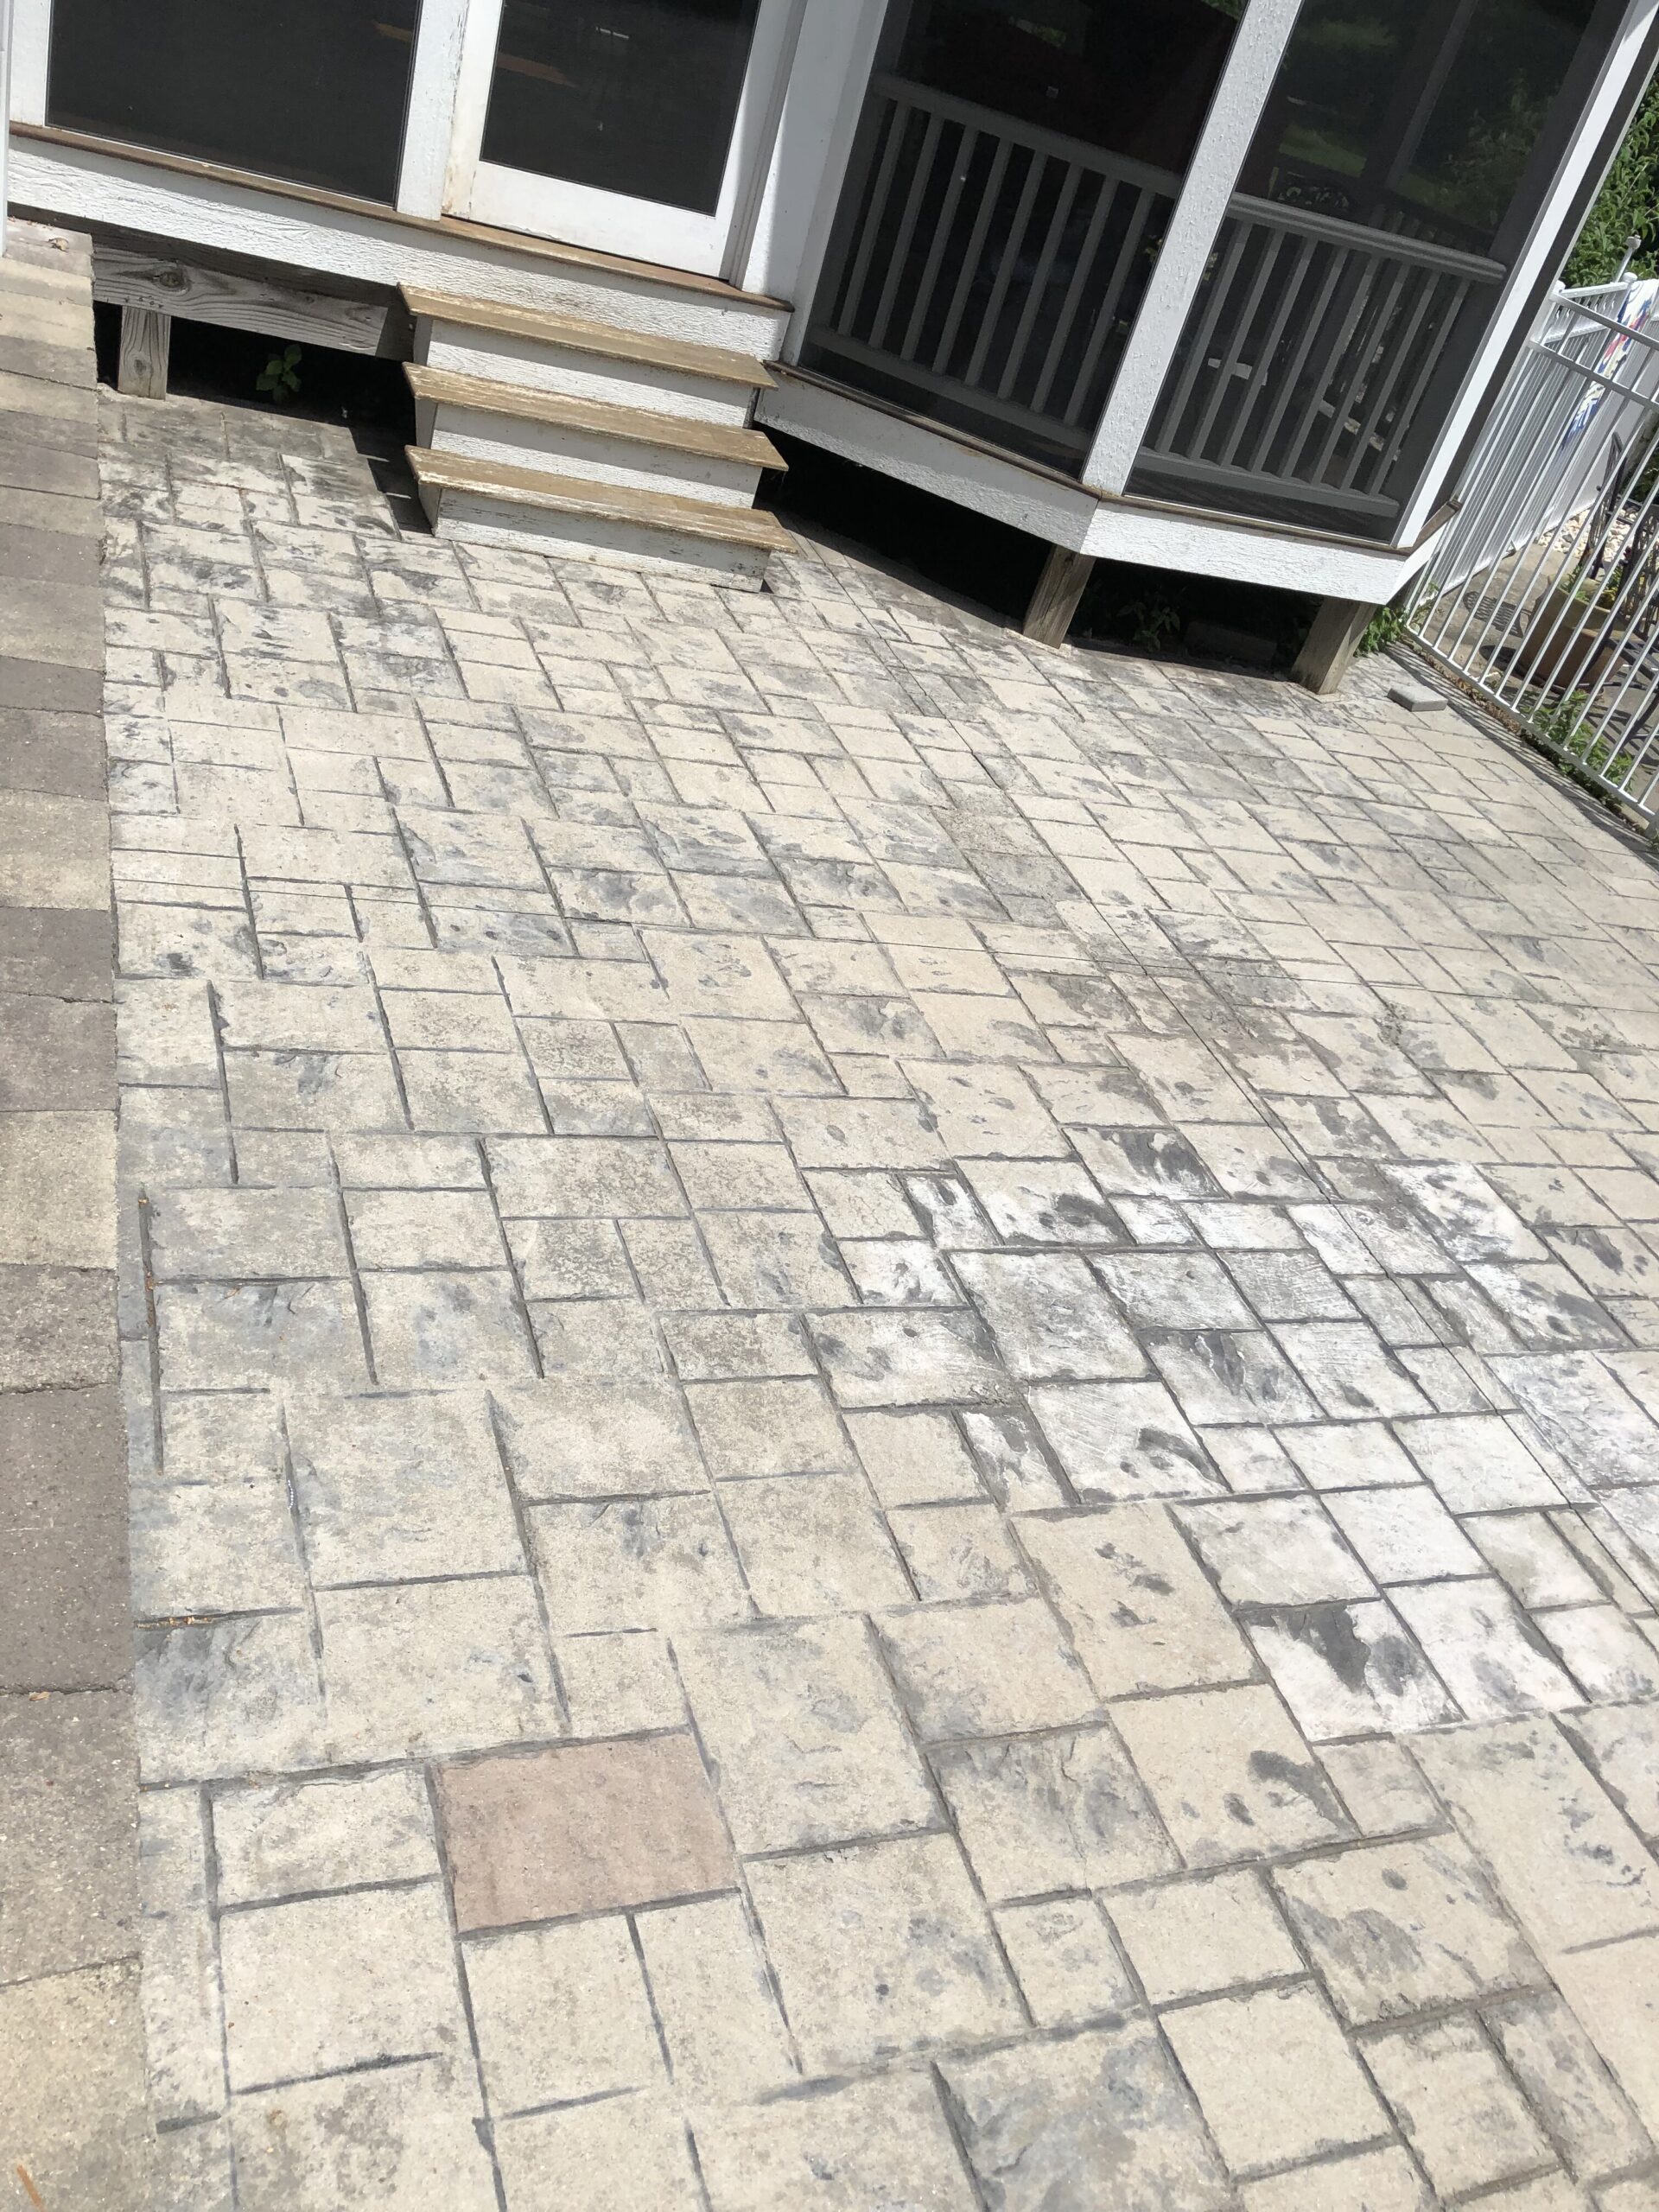
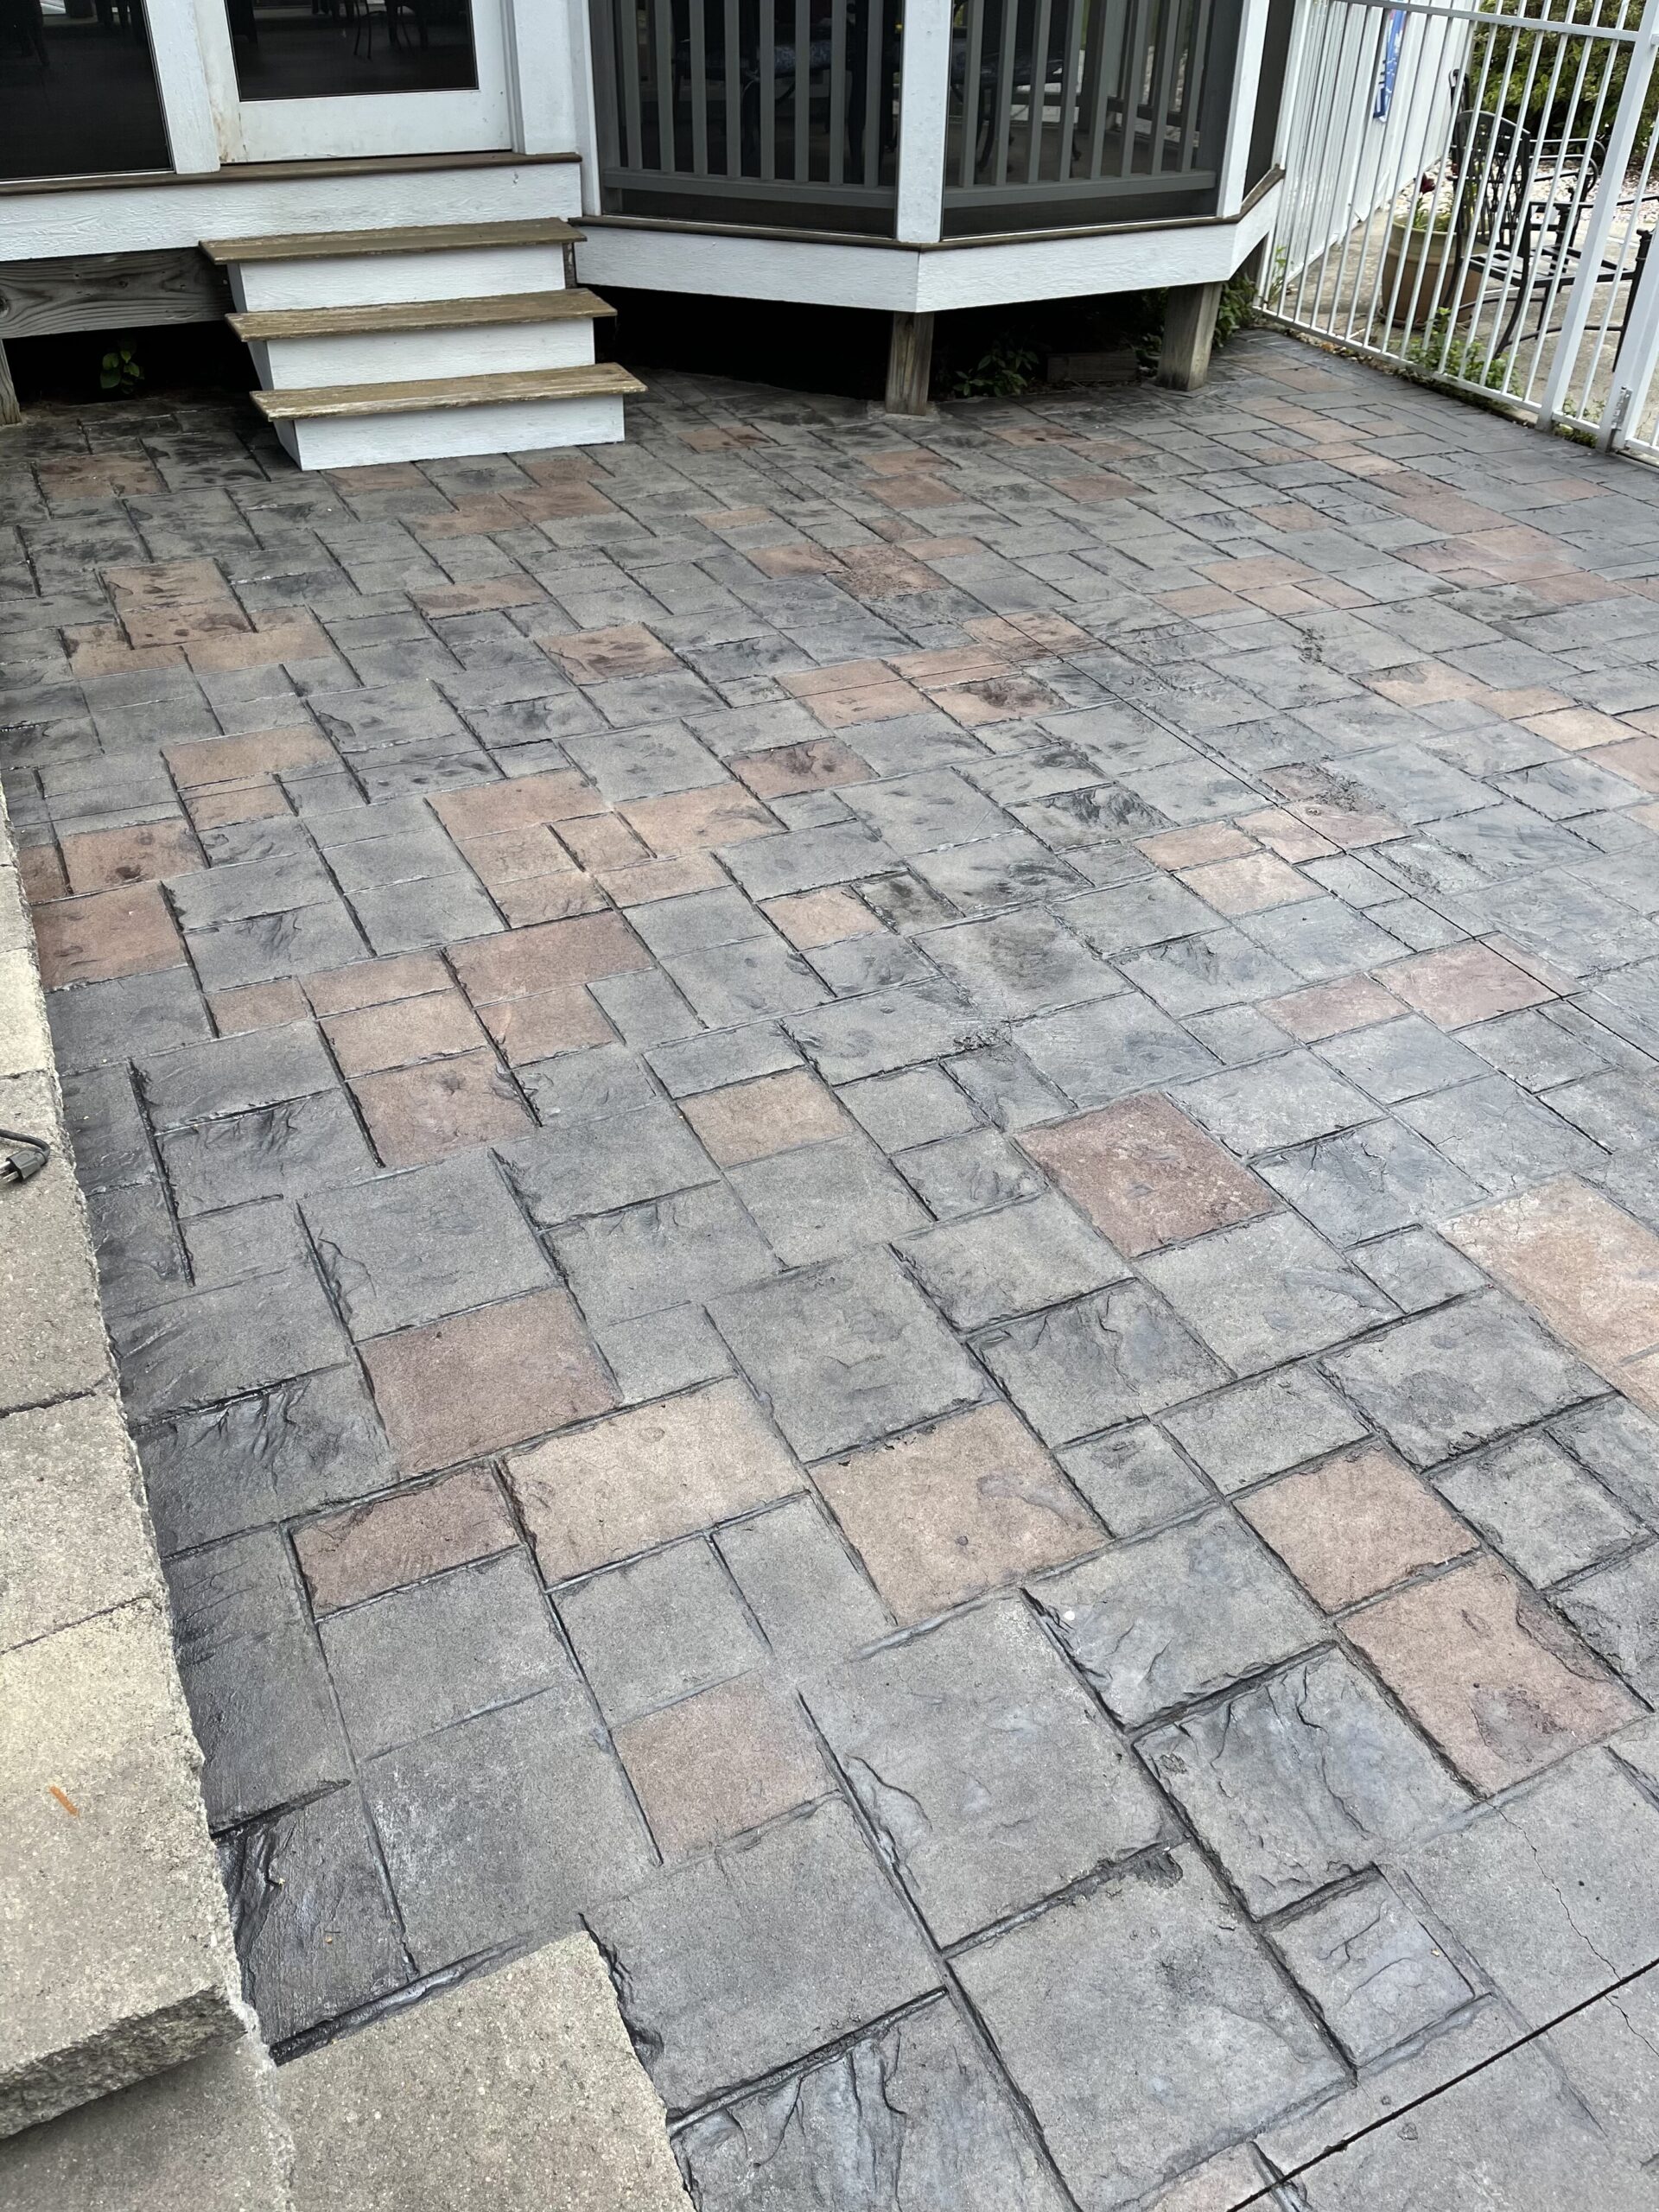
The only thing better than one concrete stain color is two colors of stain! After this faded stamped concrete patio lost all of its original color, this DC customer was looking to bring the color back. Light charcoal concrete stain spruced up the base, while gorgeous auburn livened up the design.
- Project Completed In: 4 day(s)
- Estimate of Square Footage: 770 sq. ft.
- Project Description:
We had a front walkway and back yard patio poured about 12 years ago. Both had worn badly and lost all color.
The front walkway we wanted darker, so we decided on charcoal for the color. The walkway is approx. 260 sq. ft.
We power washed, applied one coat of light charcoal antiquing stain, then went over it with dark charcoal for the second coat, followed by two coats of the acrylic satin sealer.
Total labor time was about 8 hours.
For the back patio, it was just as worn as our walkway, but we had put in a small paver walkway this year leading to it and the pavers had a mix of grey and auburn, so we decided to match the pattern.
The patio is about 510 sq. ft. We first power washed, then took a foam brush and stained random sets of blocks with the auburn antiquing stain. When that was complete I sprayed the entire patio in light charcoal, trying to not overspray the auburn blocks. The Auburn only needed 1 coat because we didn’t want it too dark.
The light charcoal we did 2 coats and finished off with two coats of the satin acrylic sealer.
Total labor for the patio was approx. 10 hours. - Personal Tips:
When using a sprayer for the sealer, it’s good to go over with a foam roller, if you are covering stamped concrete.
The sealer will pool in the seams and if there is too much can bubble. Also find a good way to clean out the sprayer, because after the 2nd coat, our sprayers wouldn’t work. - Direct Colors Products Used:
1 Gal. Charcoal DIY Antiquing™ & EasySeal™ Satin Kit
1 Gal. Light Charcoal DIY Antiquing™ & EasySeal™ Satin Kit
1 Gal. Auburn DIY Antiquing™ & EasySeal™ Satin Kit - Other Products Used:
Two pump sprayers
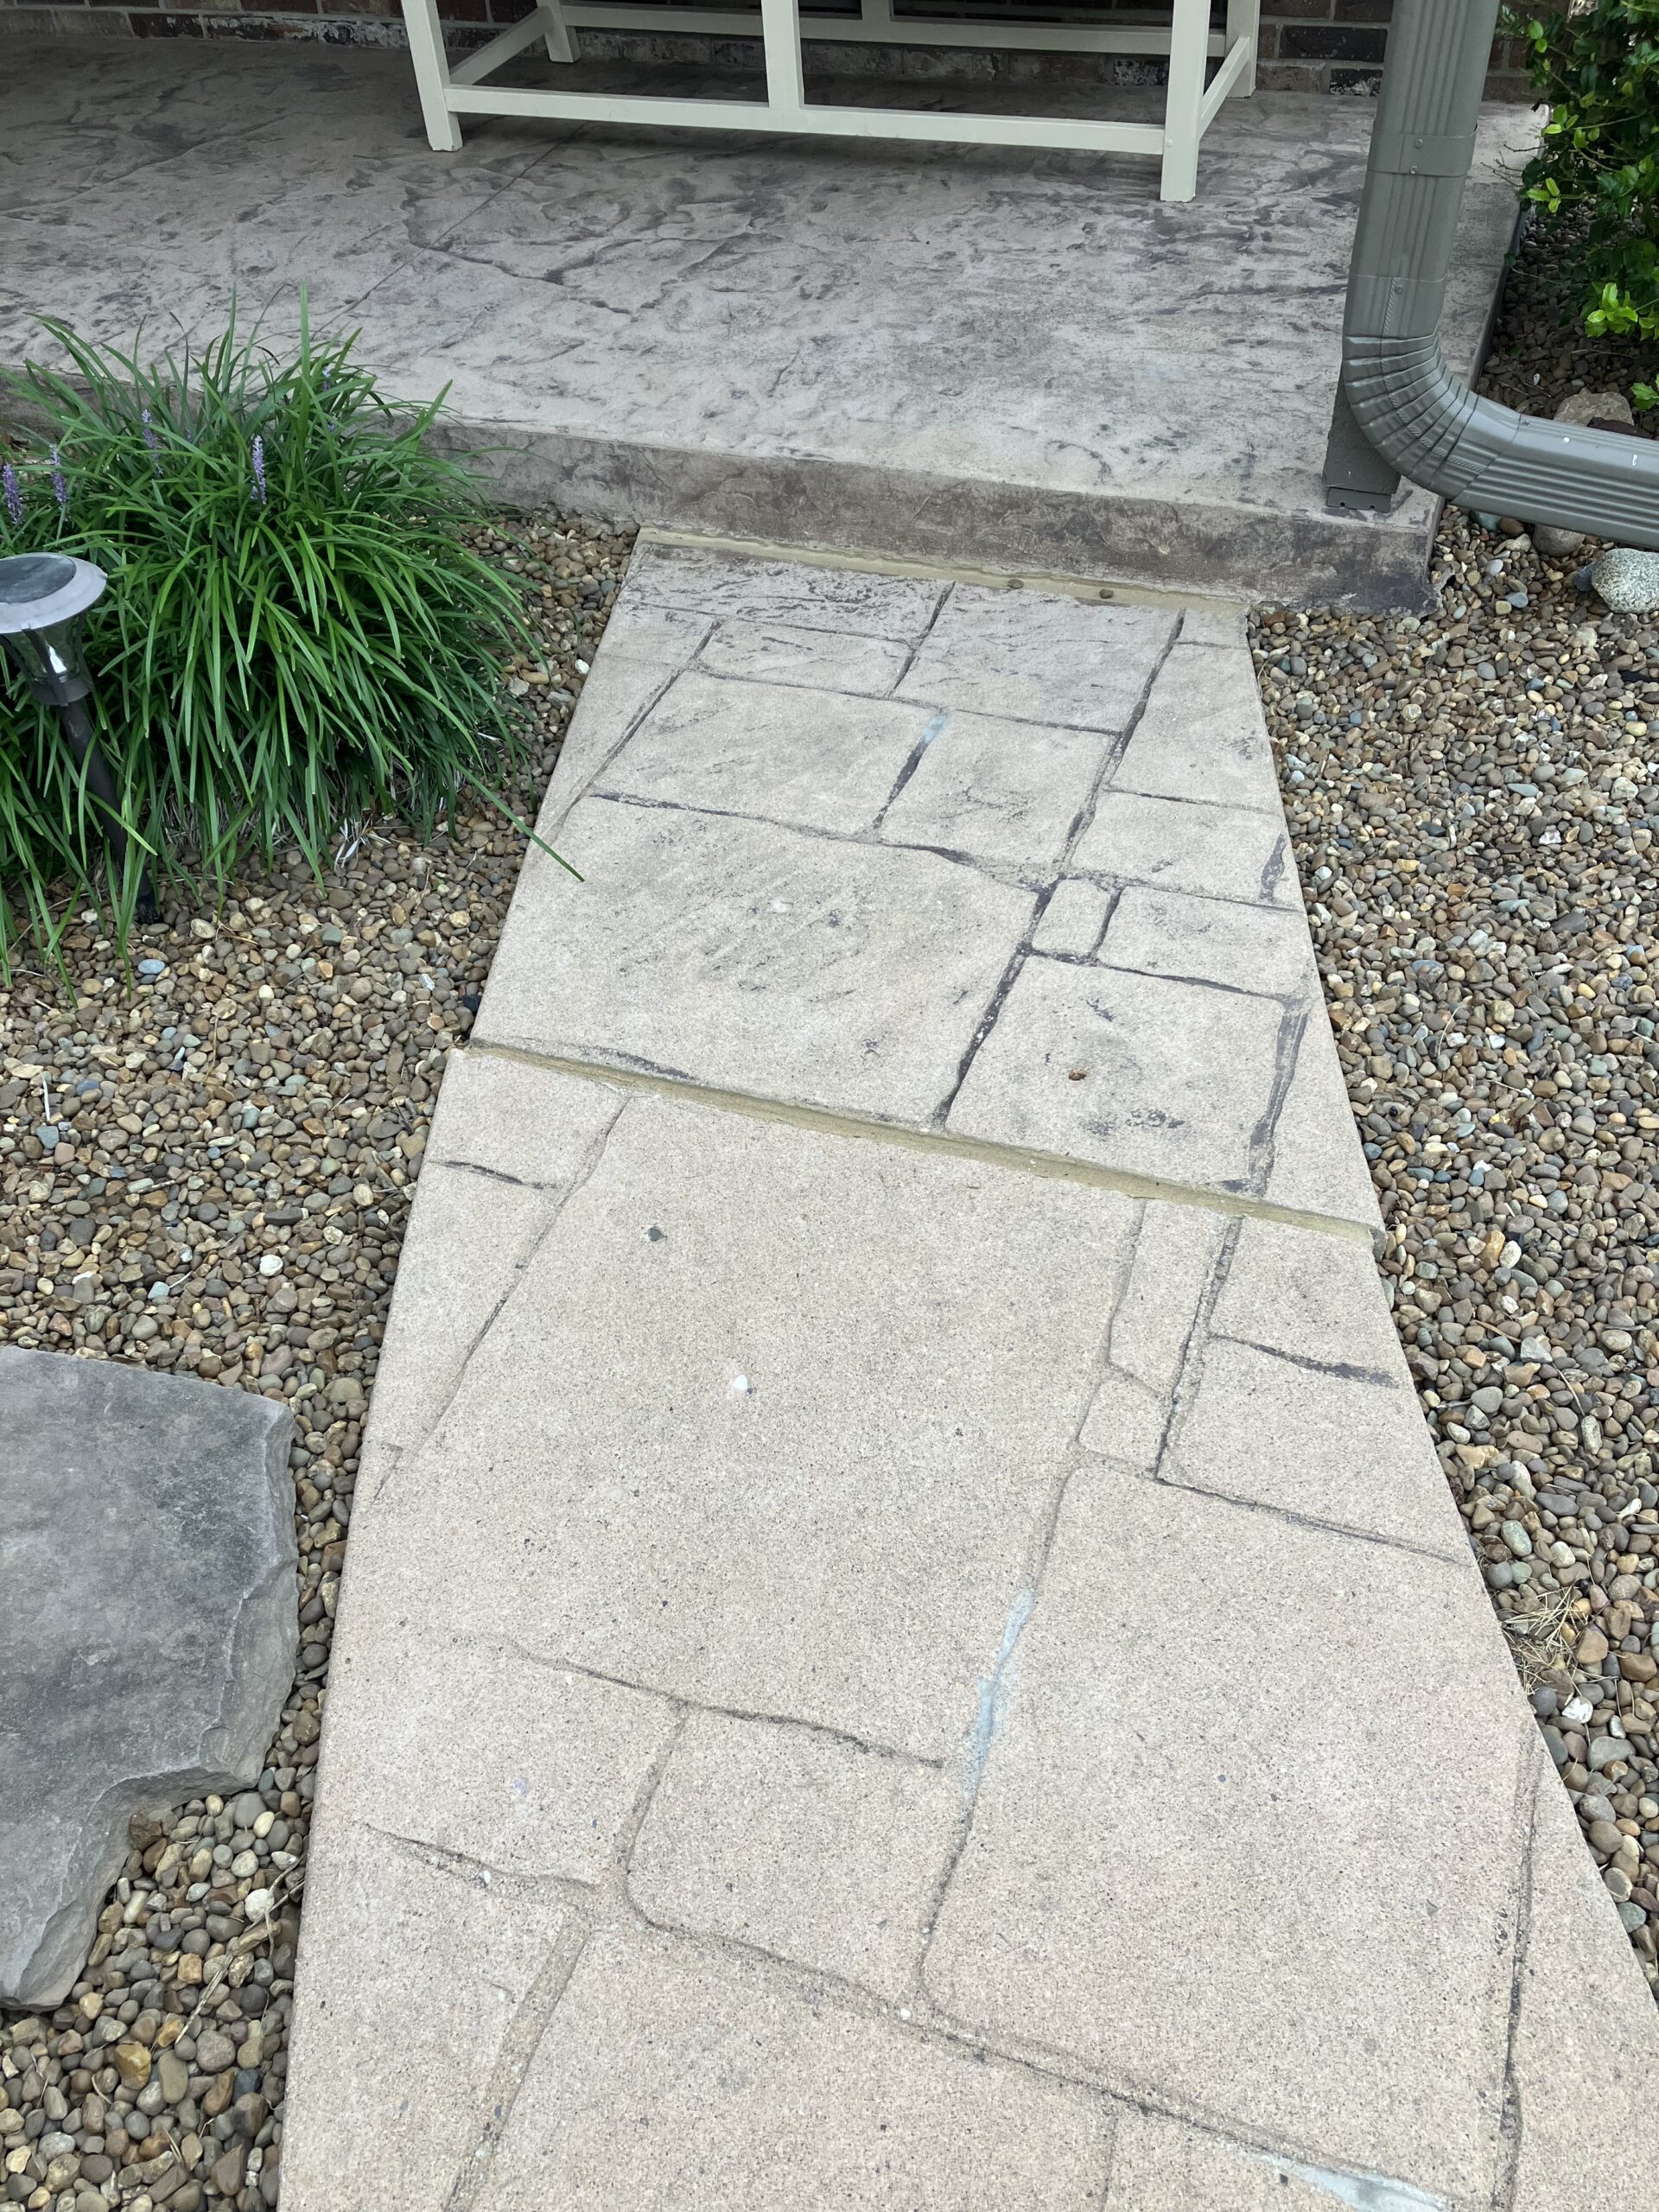
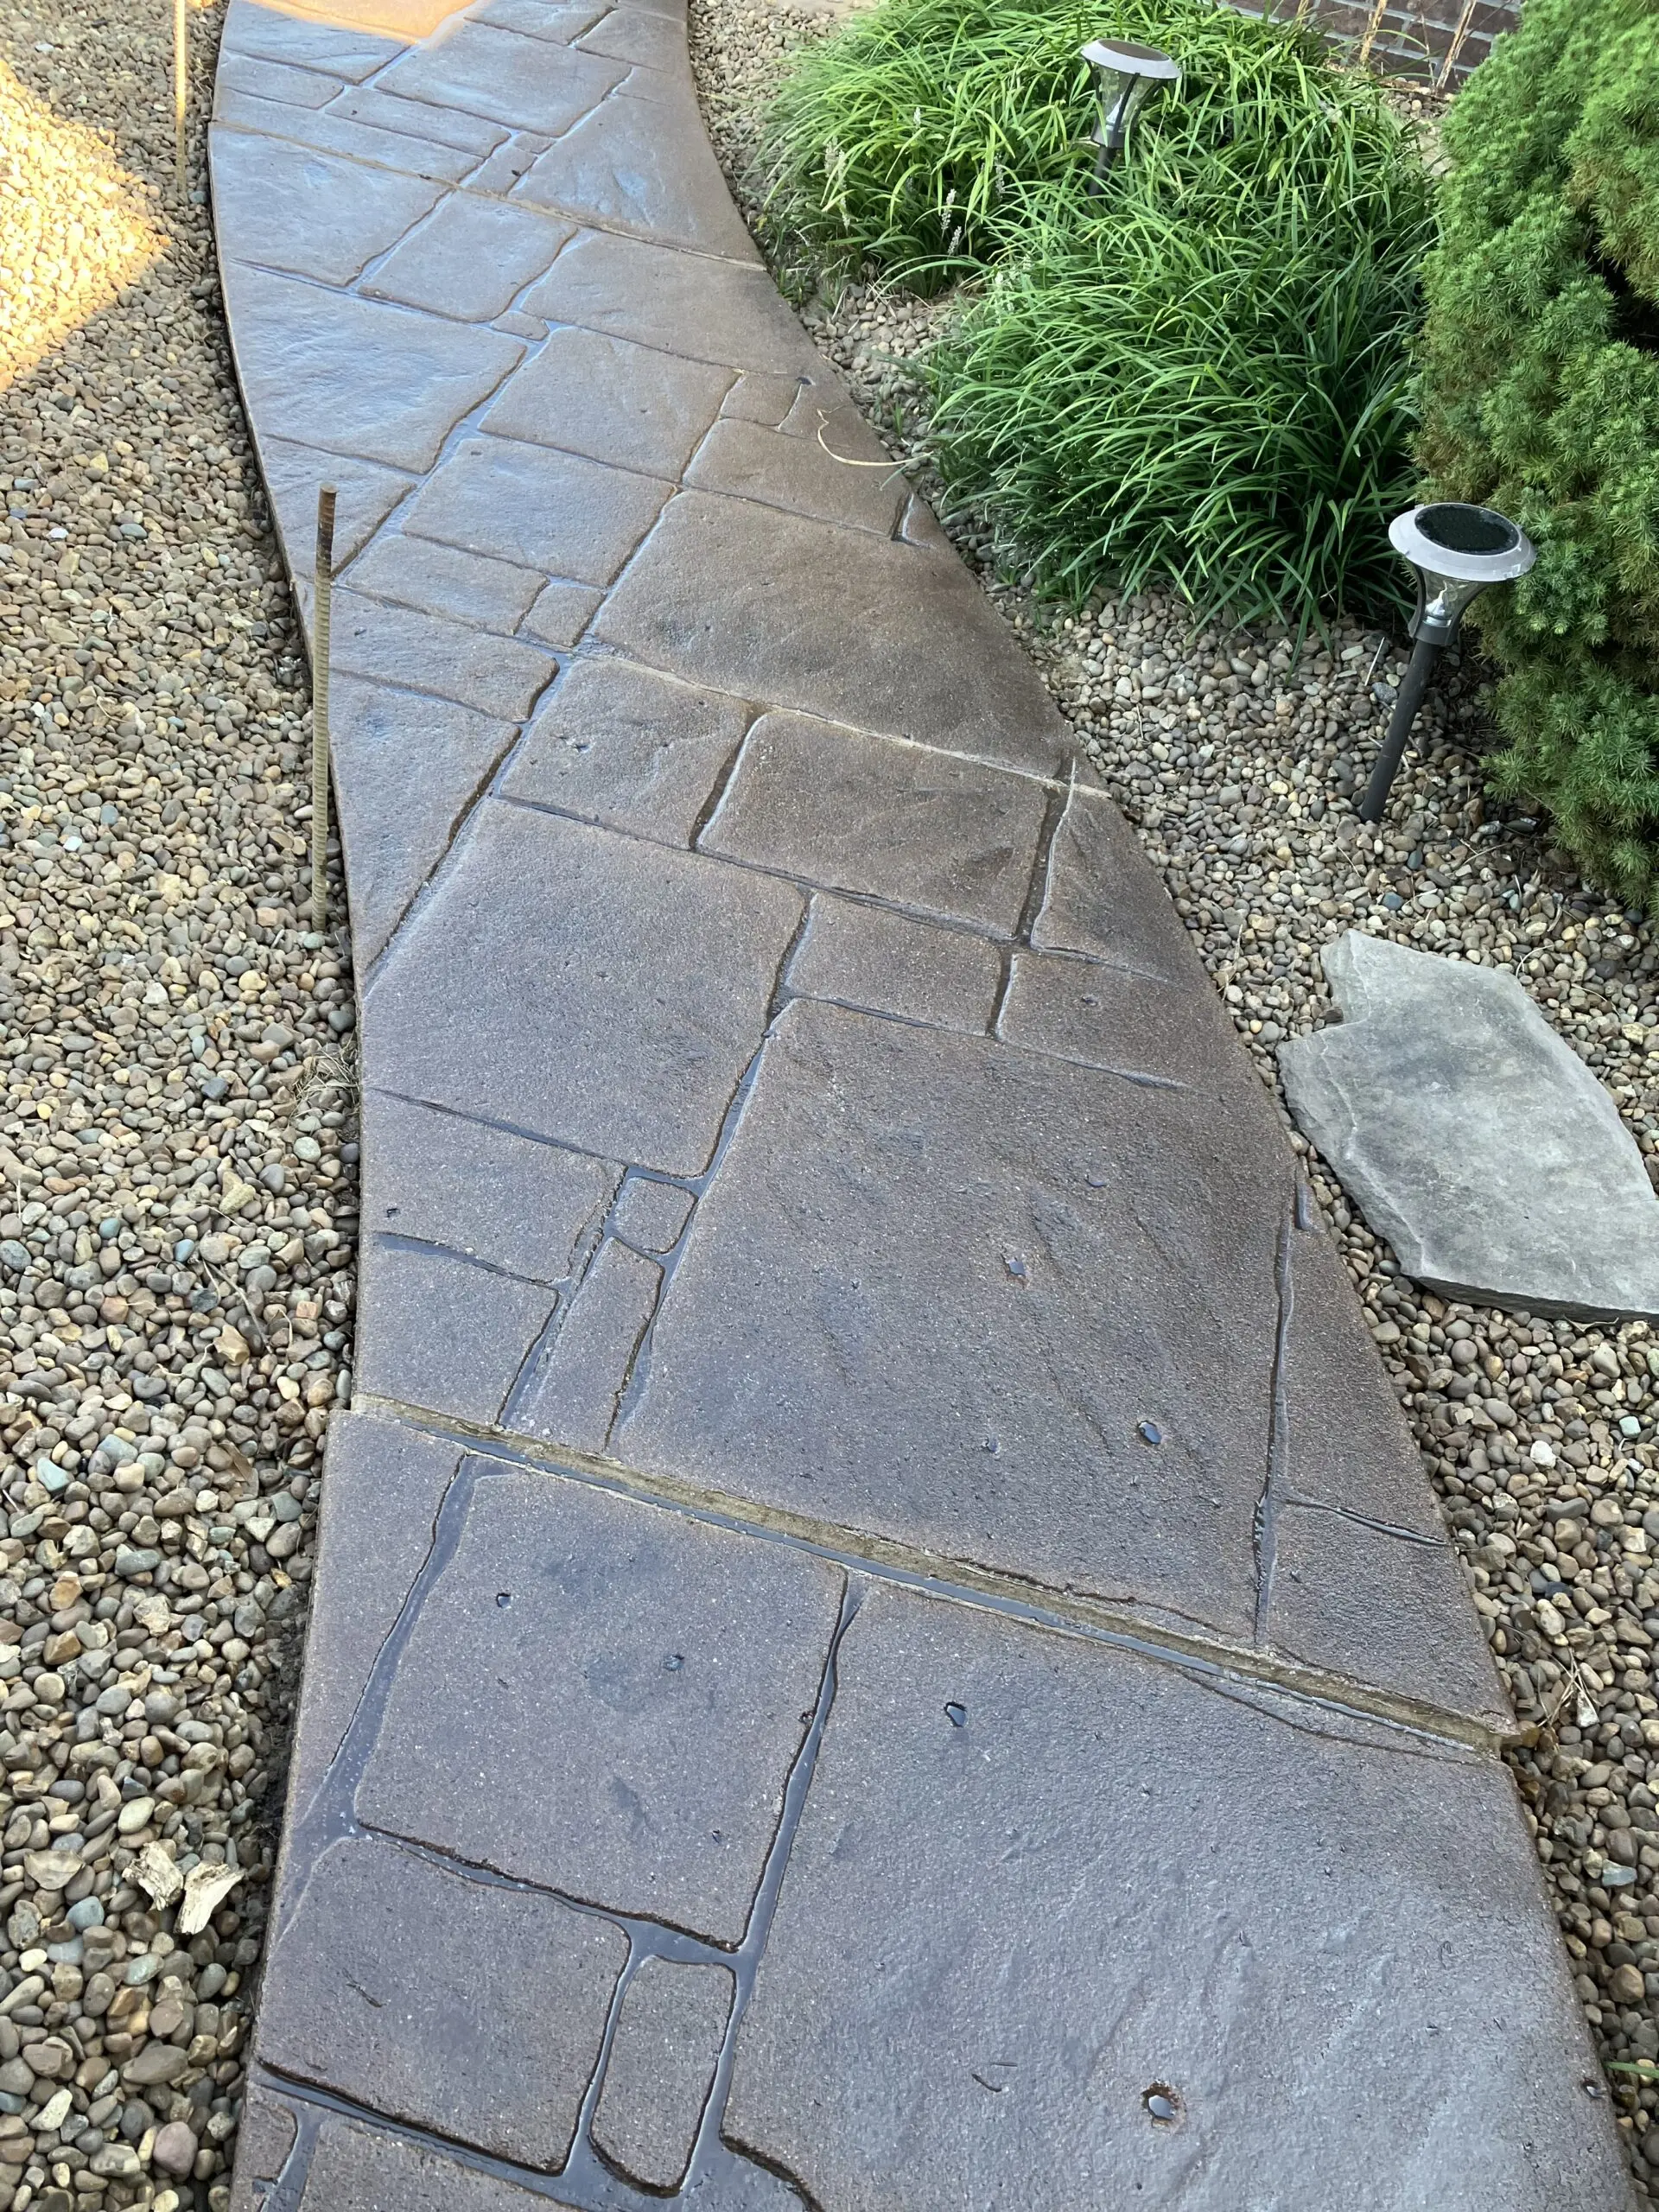
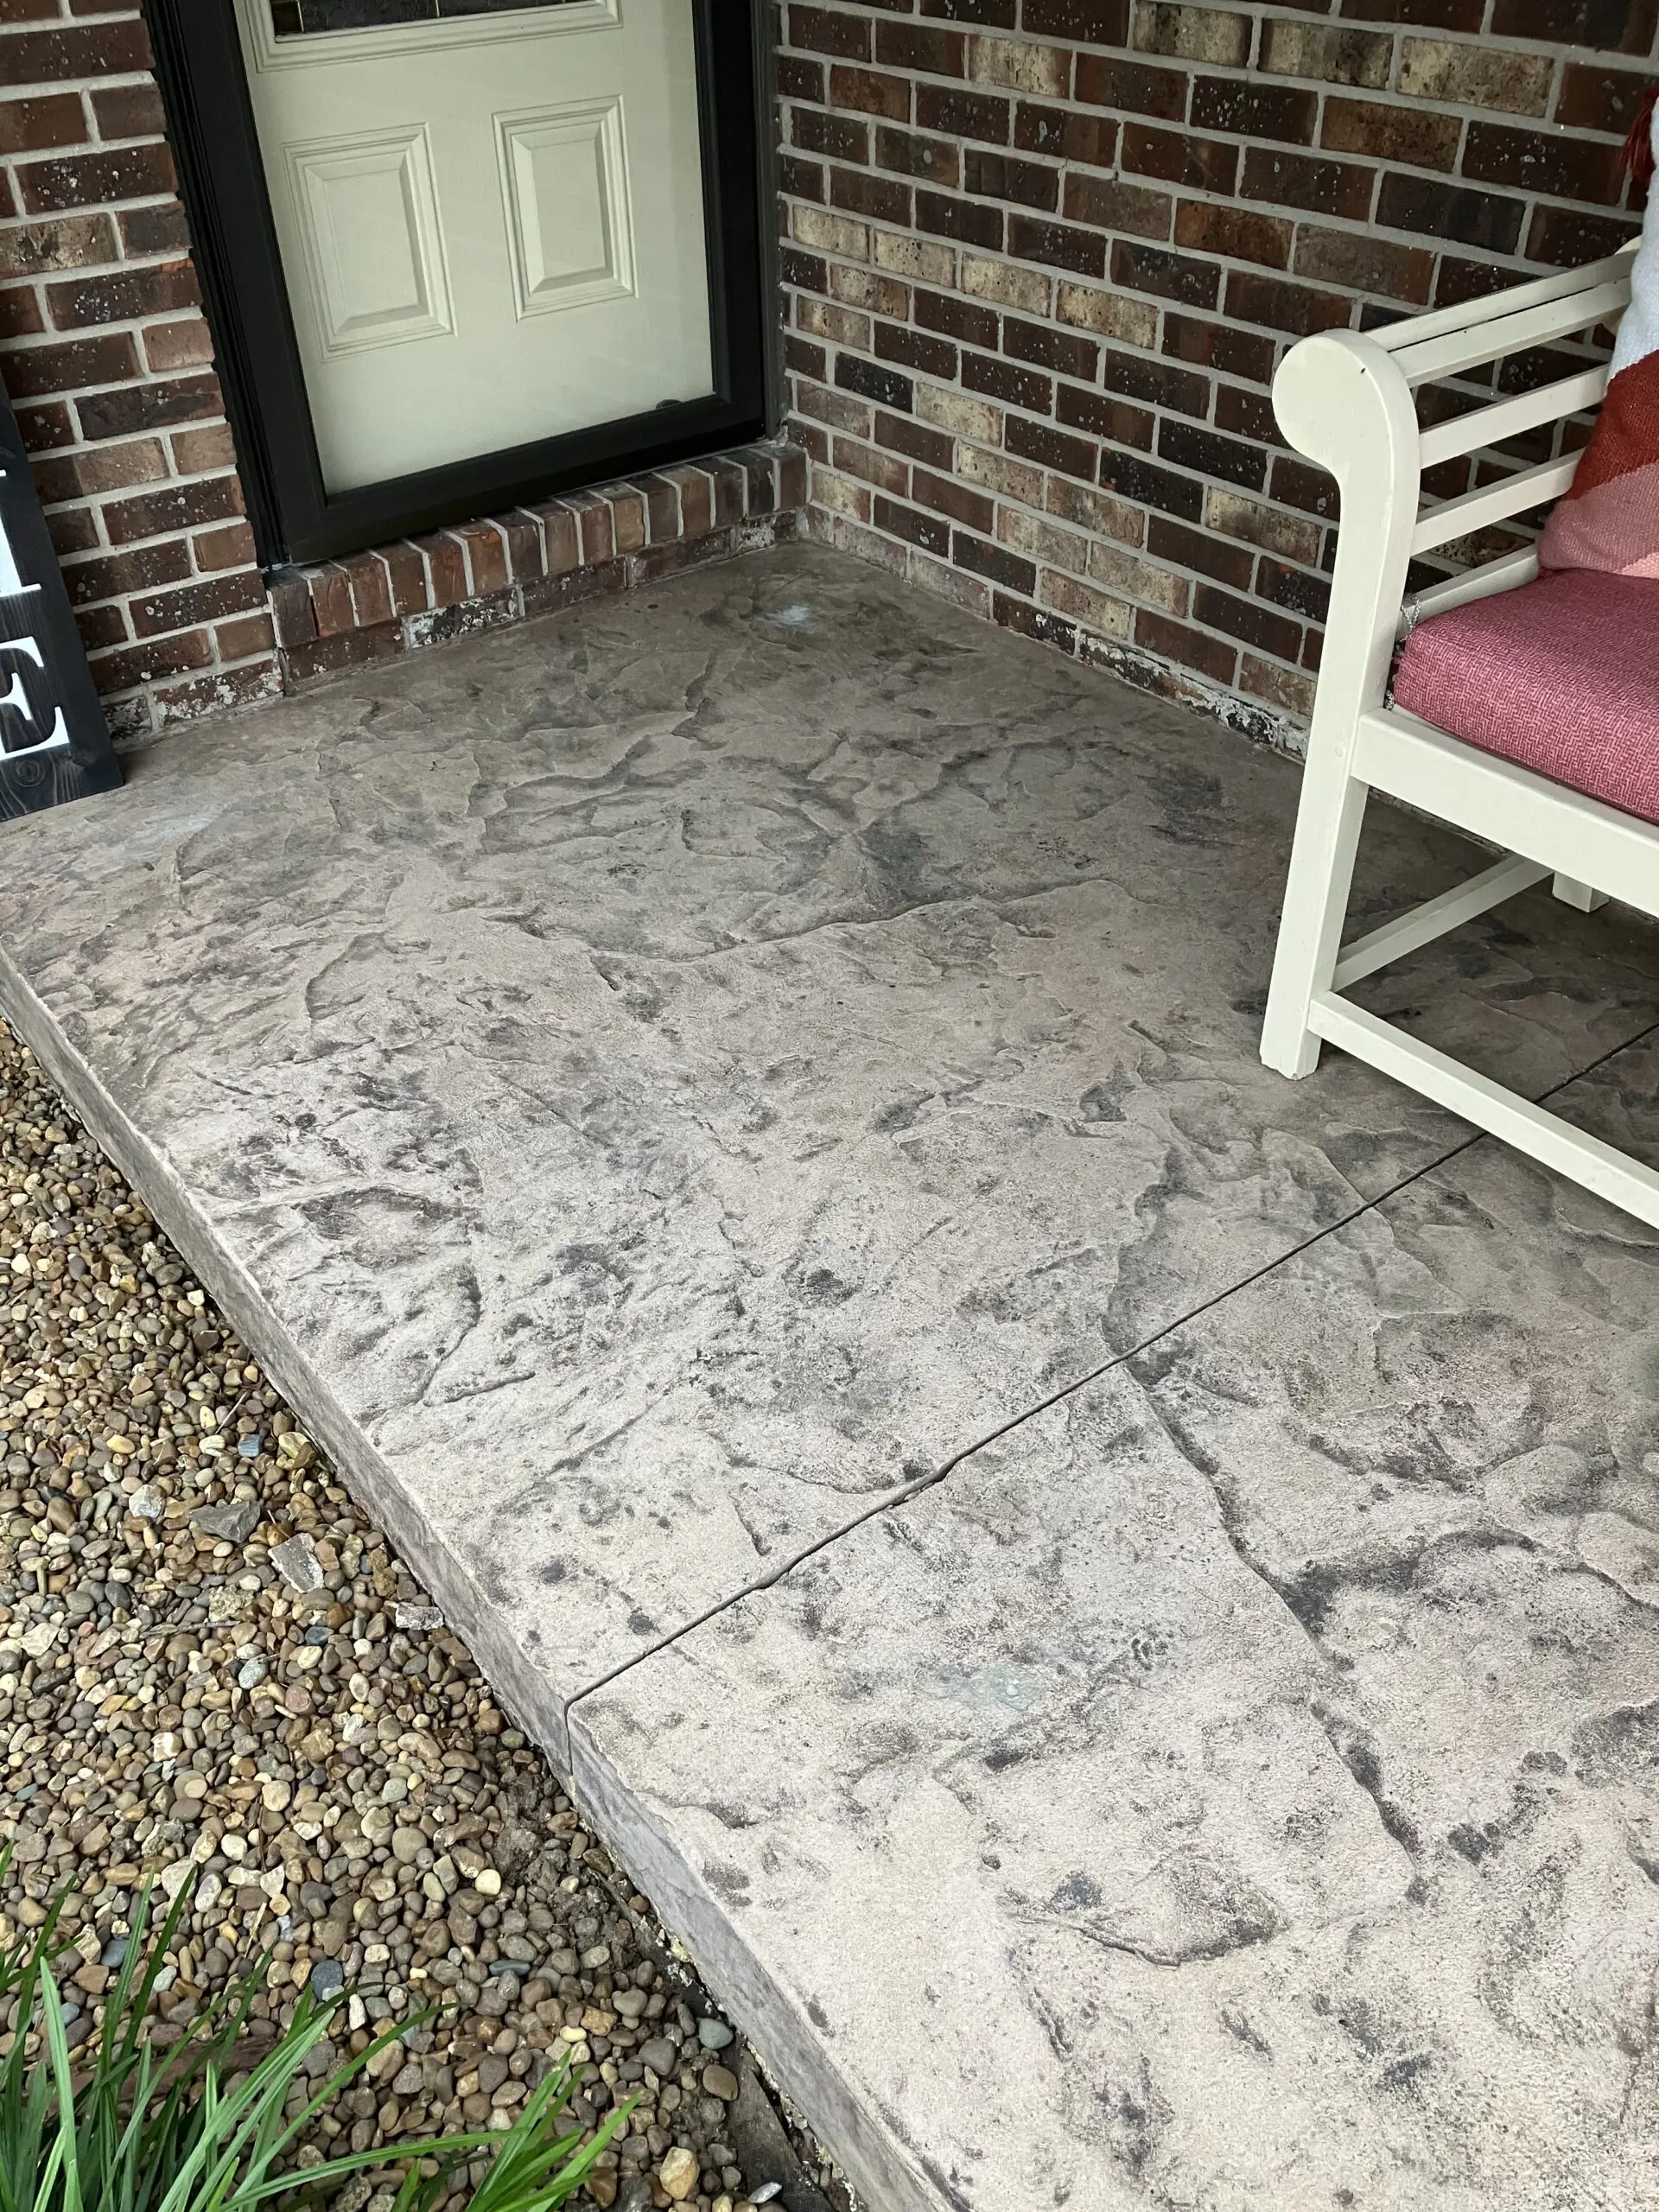
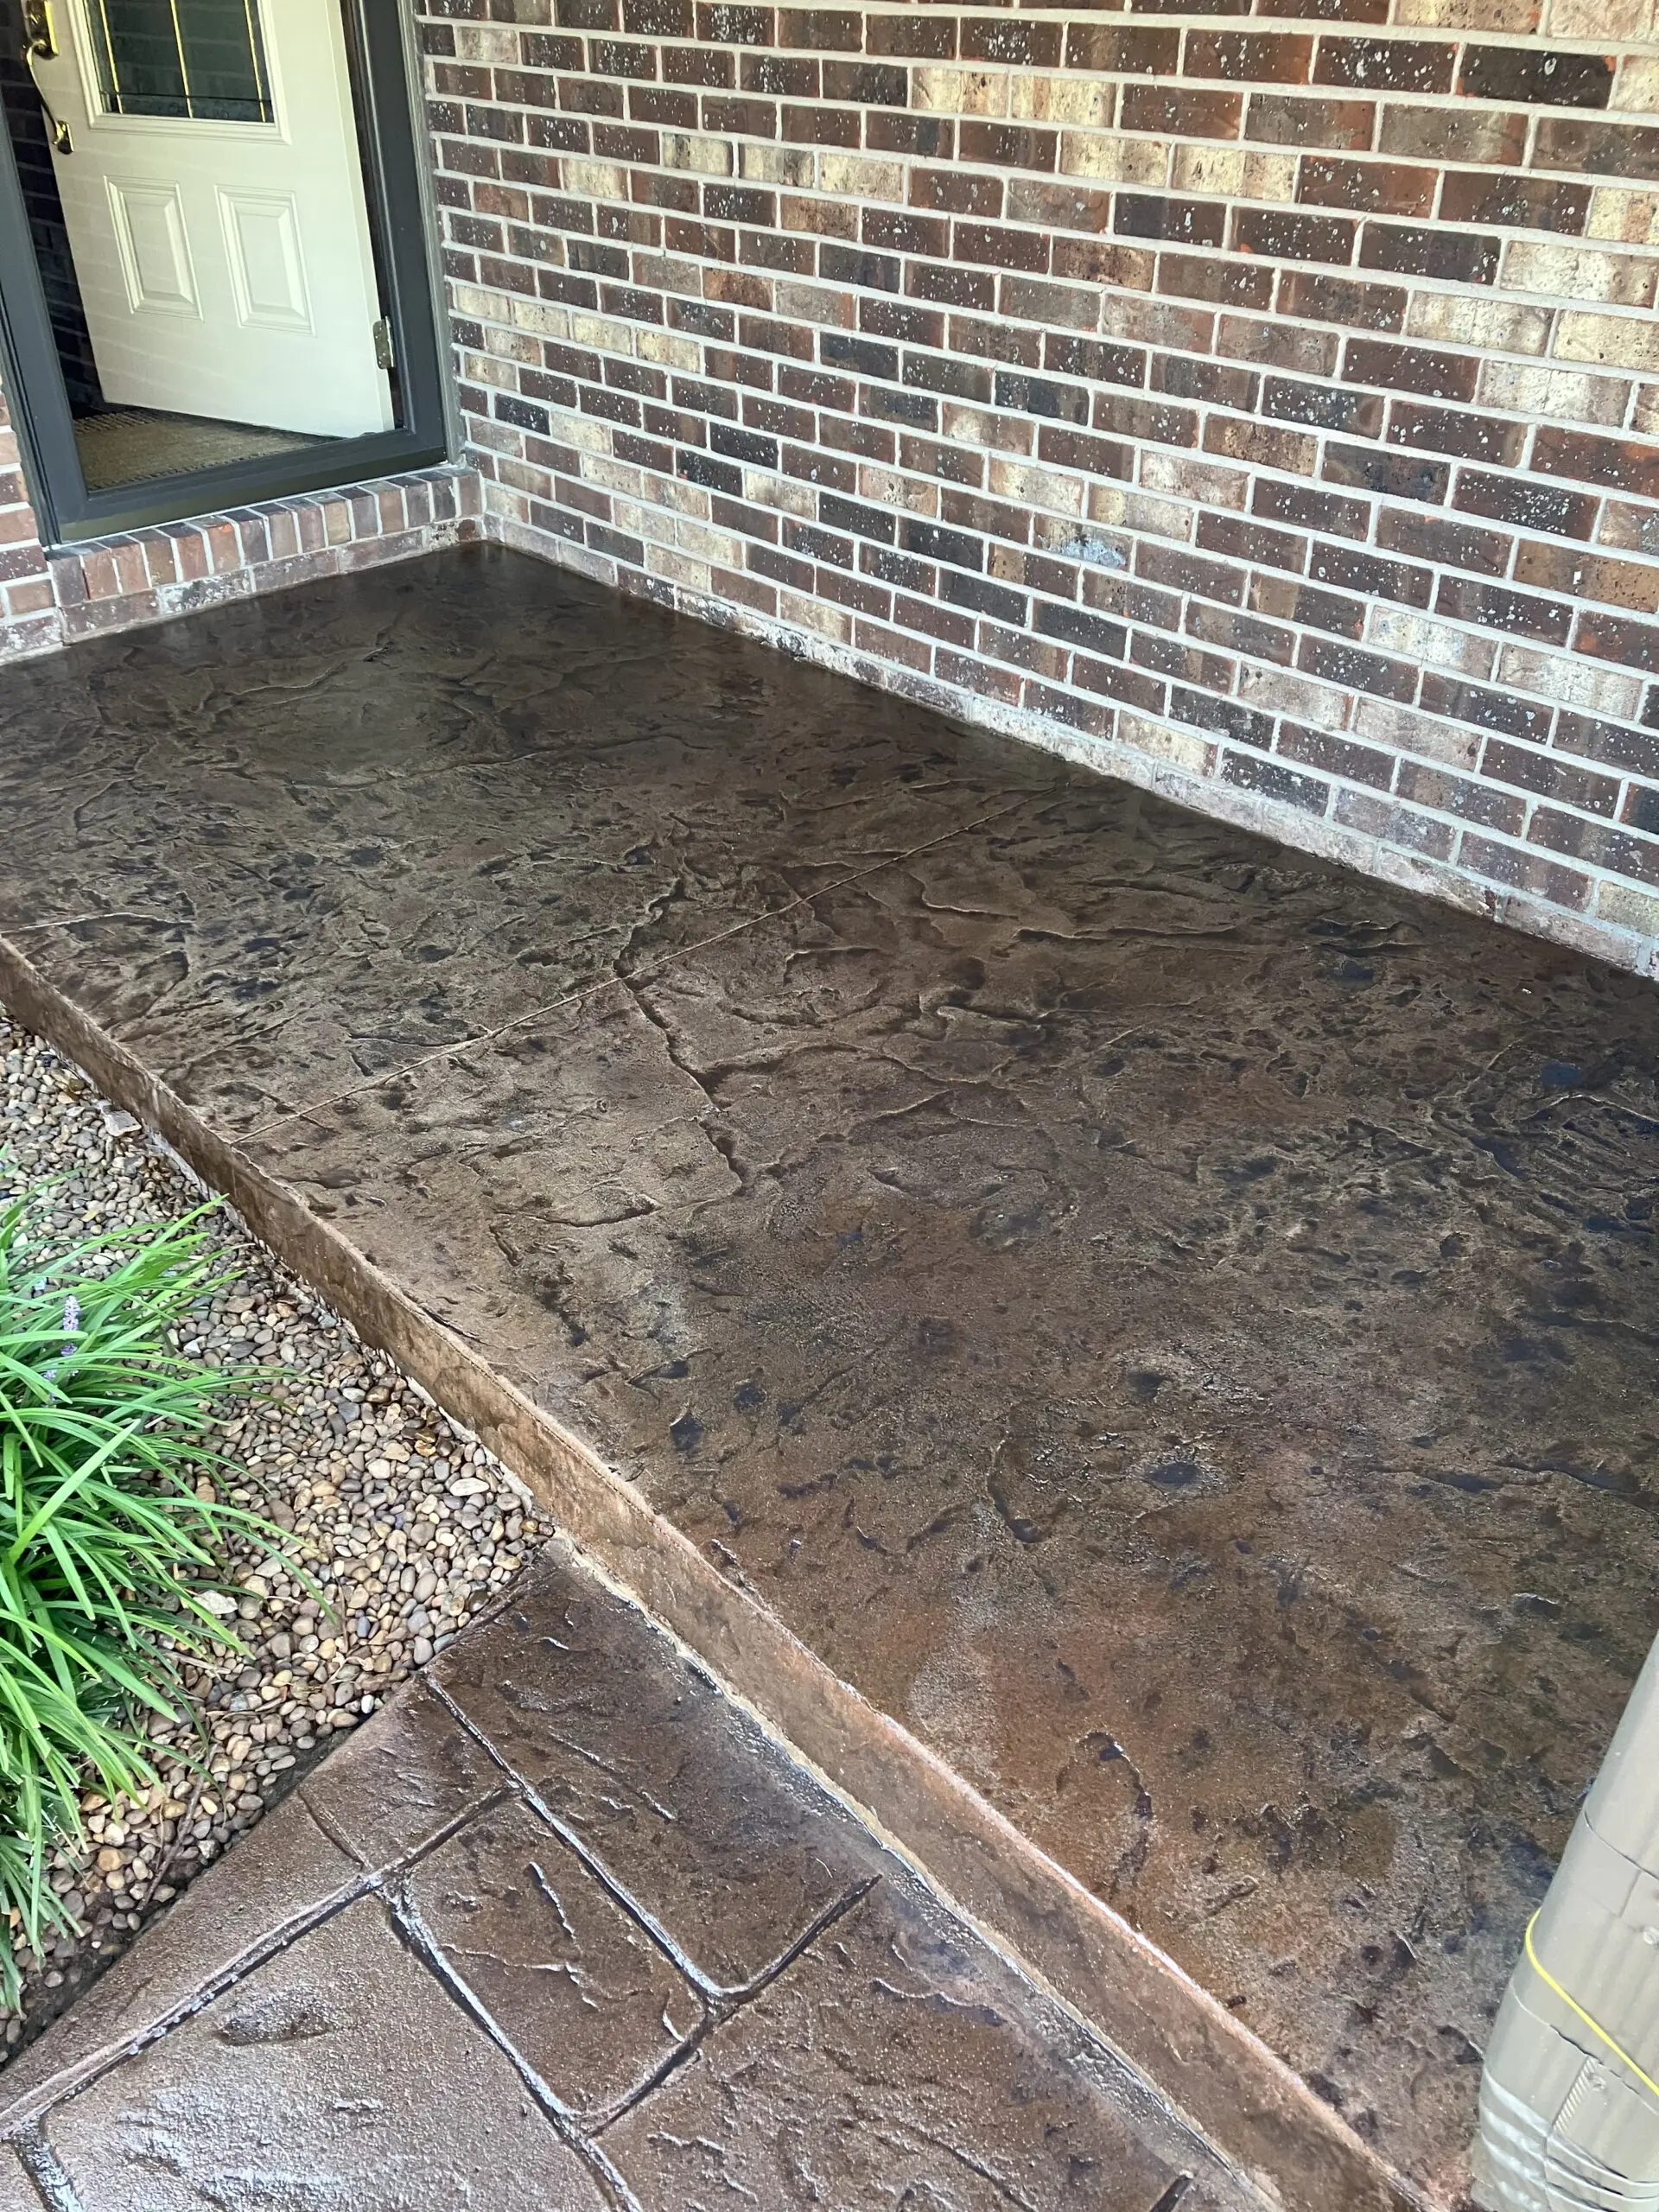
Stamped Sidewalk & Porch Refresh: Charcoal & Russet Blend
See how a stamped concrete sidewalk and porch slab are revitalized using a combination of Light Charcoal and Russet Antiquing™ stains. With the help of Direct Colors’ trial kit and informative videos, the surfaces got a fresh, updated look.
Project Info:
- Project Completed In: 3 day(s)
- Estimate of Square Footage: 200 sq. ft.
- Project Description:
The project was to restore stamped concrete sidewalk and a porch slab. - Personal Tips:
Watch the videos on application, very helpful. - Direct Color Products Used
Antiquing™ Stain Trial Kit (Russet, Wheat & Light Charcoal)
1 Gal. Light Charcoal DIY Antiquing™ & EasySeal™ Satin Kit
1 Gal. Russet Antiquing™ Stain
Orange No More: Iron Stone Walkway Transformation
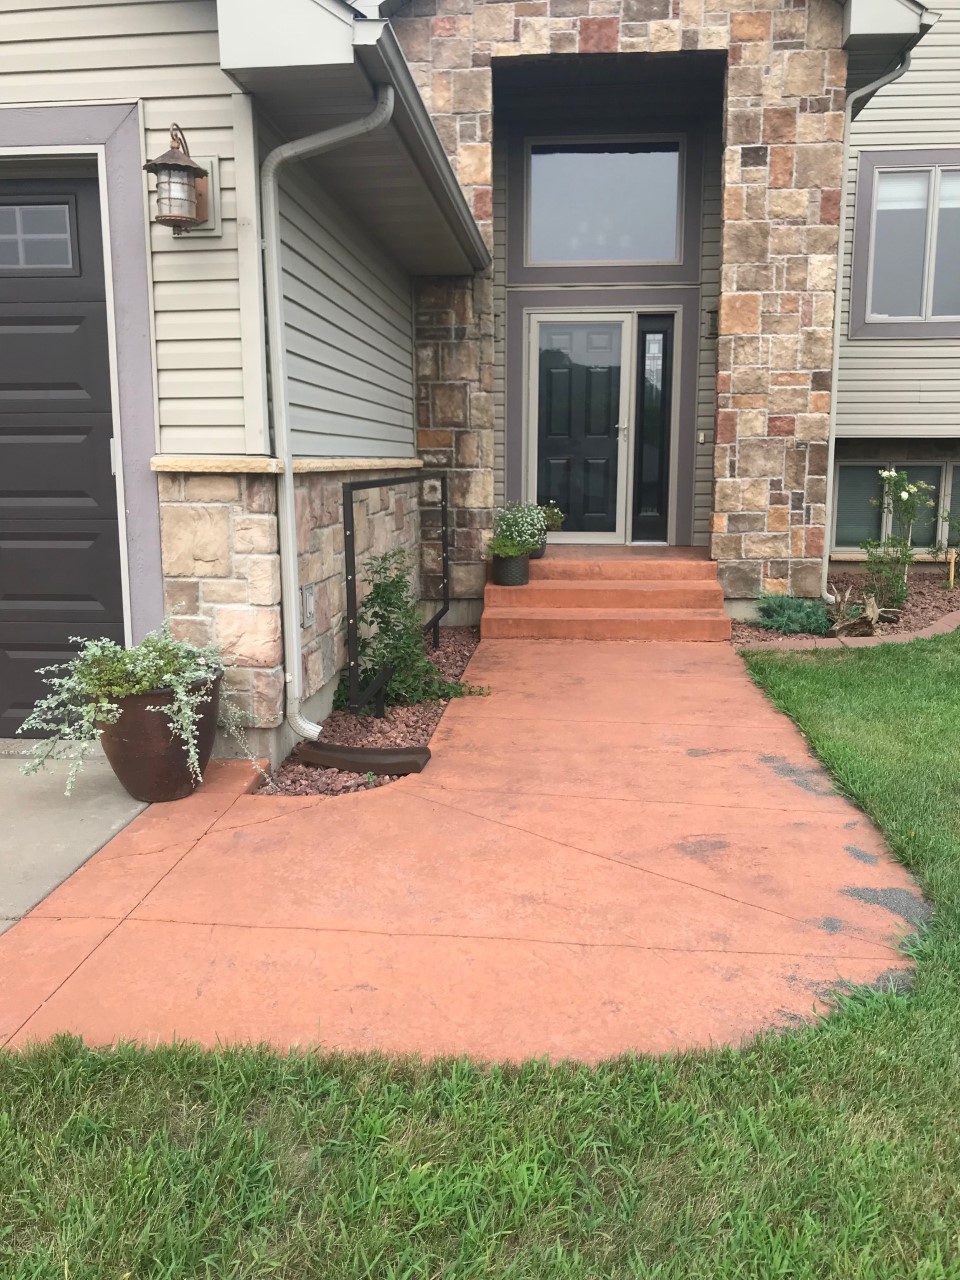
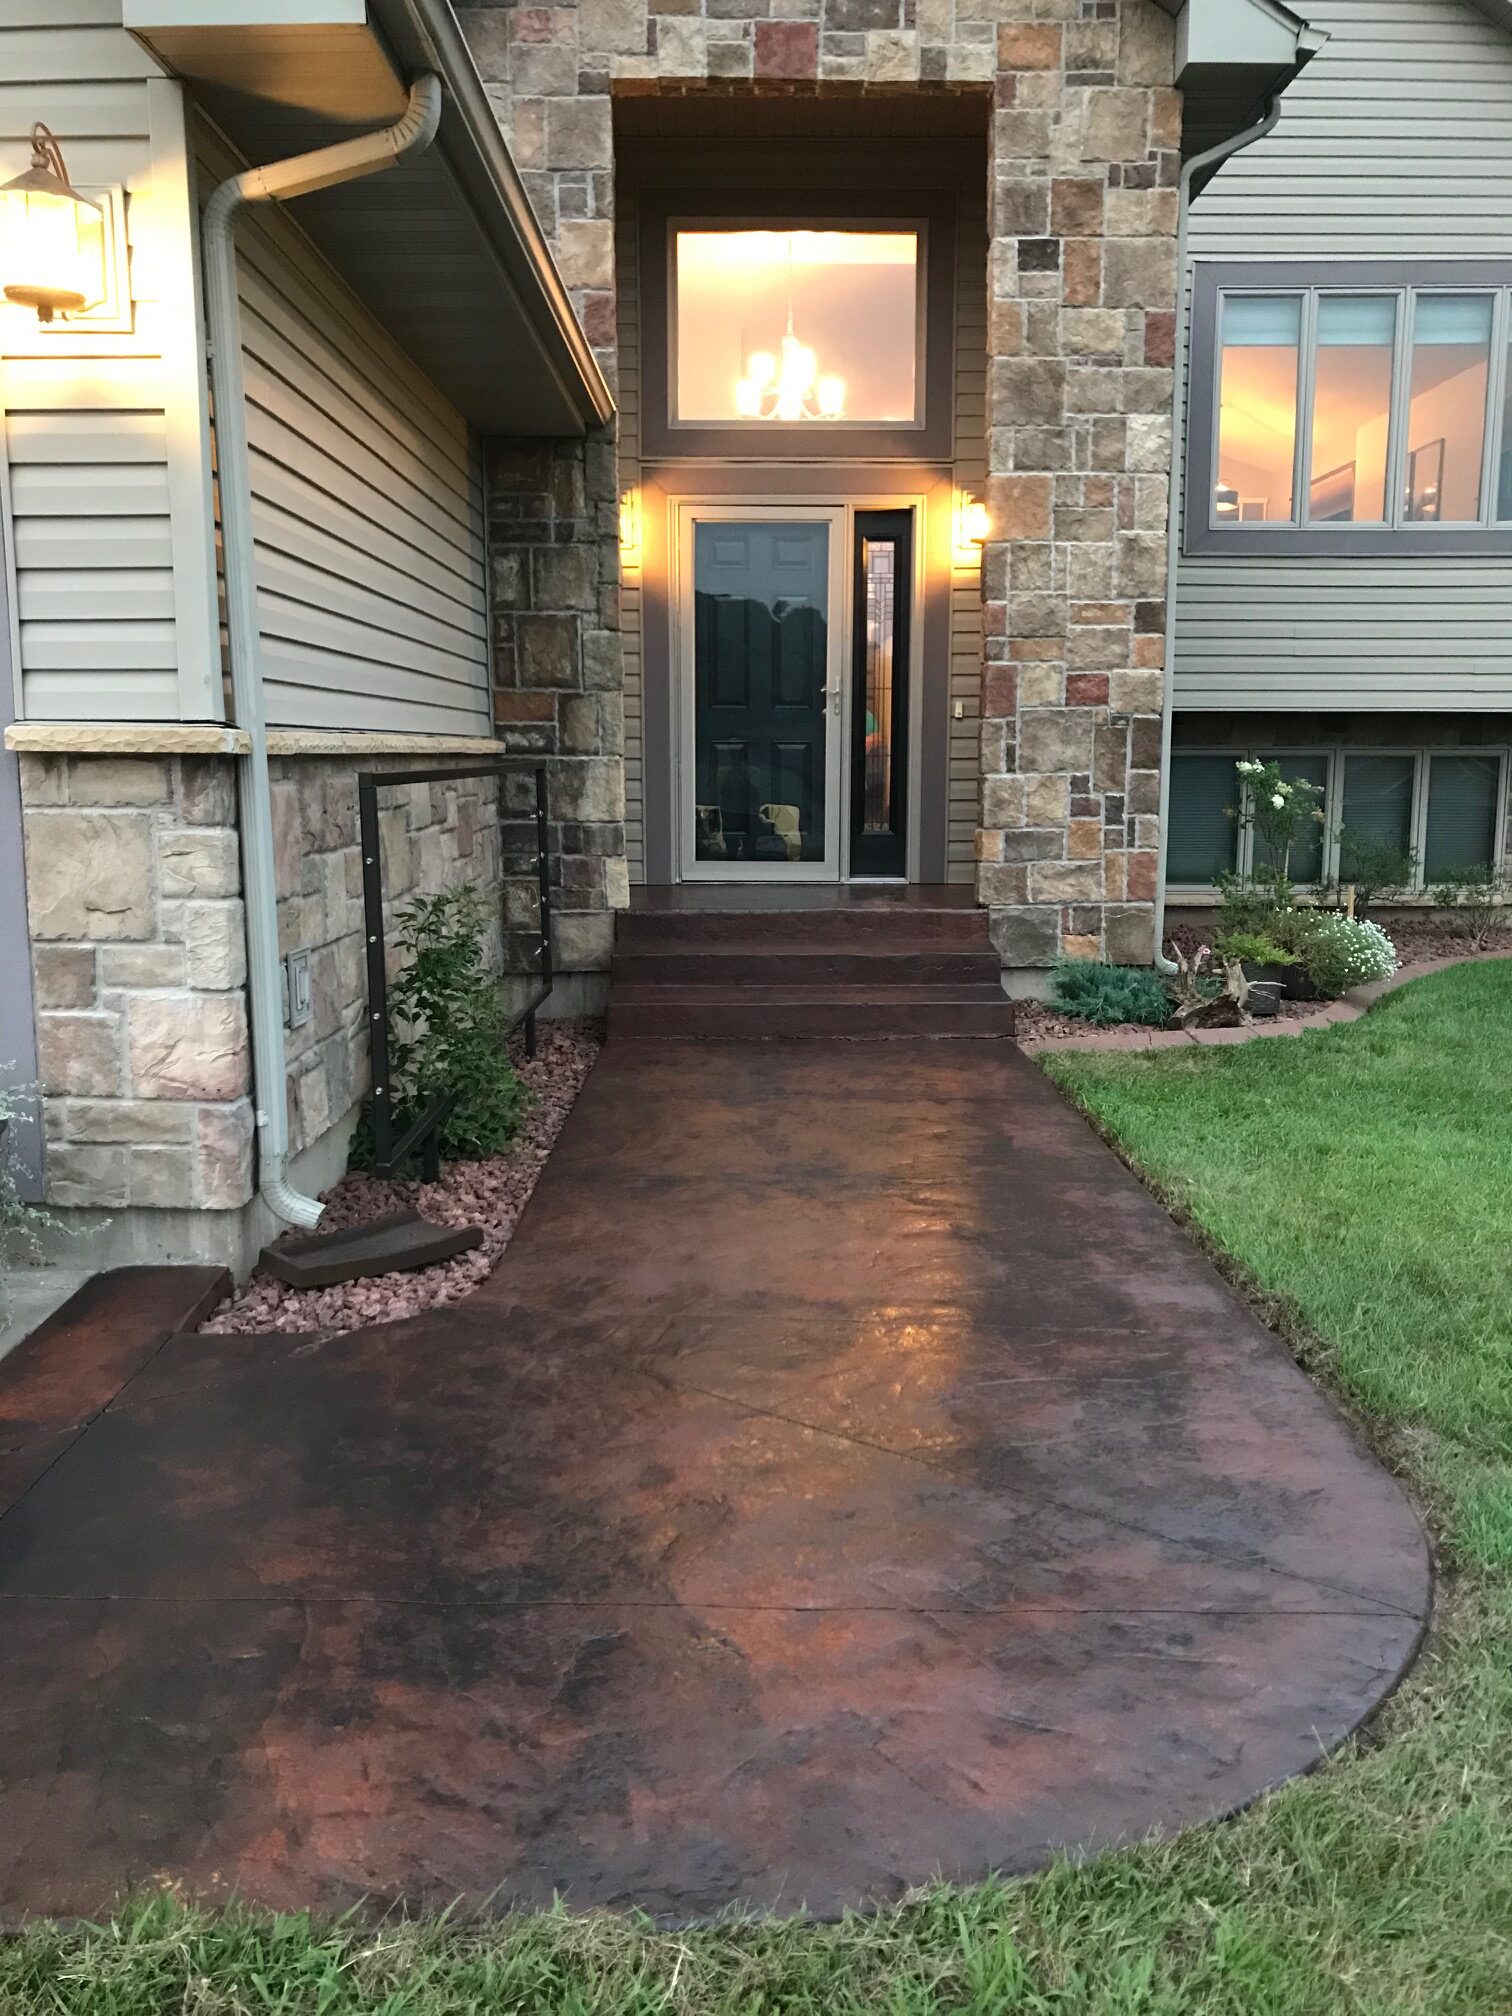
An undesired pinkish-orange hue once dominated this home’s stamped concrete walkway. Armed with Direct Colors’ Light Charcoal Satin EasyTint™ and EasySeal™ Sealer, the walkway was rejuvenated with a rich iron stone finish, exceeding all expectations. Curious about the transformation process? Dive deeper into our blog: “How To Change The Color Of Already Stained Concrete With Concrete Stains” for a detailed look.
Project Info:
-
- Project Completed In: 2 day(s)
- Estimate of Square Footage: 268 sq. ft.
- Project Description:
This project was a color correct for our outside stamped concrete walkway and edging for our driveway. Photos that I included do not do the ugly orange color justice. The photos make it look like a bright terra cotta, but in actuality it was pinkish orange. We inherited this very bright chalky pinkish orange walkway when we purchased the house seven years ago. We’ve lived with the color all of this time, hating it but also being hesitant to dive into attempting to fix it. Finally bit the bullet and decided this was the year to try to improve the color. I ordered 7 color samples, from two companies. Direct Colors won out with their Light Charcoal Satin EasyTint. I loved the richness of the color, and the sample gave me the exact results I was hoping for – it turned the chalky orange to a rich rusty iron color. I ordered more than the recommended amount of tinted sealer and acrylic sealer, as I knew how thirsty my concrete would be. I received my order quickly, and transformed the concrete the following weekend.I cannot recommend these products enough. I was impressed with the ease of application, and even more impressed with the fantastic transformation. The end result was what I had hoped for and so much more. Our walkway now has the rich color of iron stone. It is stunning. Gorgeous. I could go on and on. My husband said the same thing, that the results far surpassed expectations. - Personal Tips:
The evening before project day, I edged the sod all around the project, then pressure sprayed the concrete. I was fortunate that the weather cooperated perfectly for me – it was overcast with a high of 72 degrees the first day. On day one I applied two coats of the tinted sealer, using a 1/2″ nap roller. Direct Colors recommends a 3/8″ nap roller at the most, but I bent the rule and went with 1/2″ because my stamped concrete has some pretty deep wells (I was very careful not to get so much product in the deep areas so that there was no puddling). I made sure to keep the co at even, and covered each section completely. I was concerned that with the fast dry time, I might see roller lines. But no, not at all. Despite the fast dry time (tacky within a few minutes), there were absolutely no roller lines. The sealer was fantastic to work with – it is thin, so it will run into cracks and over edges. I used this to my advantage when working the edges, and squeezed sealer over the edges with the roller. I only had to hand paint (using a 2″ paintbrush) a few sections which were deeper than others. But for the most part, I could get away with just using the roller for edges and the bulk of the project. I ordered the 5 gallon bucket for the tinted sealer. I mixed it by shaking and rolling it around on the ground prior to opening it. After I used some of it, I then could shake it easier before each pour. Also, I did not wear any special shoes. The tinted sealer dried completely between coats. It wasn’t completely cured, but it was very tough and I could easily walk on it leaving absolutely no footprints. On day two, again the weather cooperated nicely – it was partly cloudy/partly sunny, and again around 72 degrees. I applied two coats of Solvent Based Acrylic Satin Concrete Sealer. The acrylic sealer also dries very fast, possibly faster than the tinted sealer. But it was easy to apply using the roller and paintbrush. Again I used a 1/2″ nap roller and was careful to watch for puddling. And again I was able to walk on the product between coats, leaving no footprints. For cleanup for both tinted sealer and acrylic sealer, I used Xylene. For 268 square feet, I used approximately 3 gallons of tinted sealer and 2 gallons of acrylic sealer. My concrete was very thirsty, so used more than the recommended amount. I thought the concrete looked nice with only the tinted sealer from the day before, but adding the acrylic sealer not only gave it added protection, but added another layer of richness that took the look to the next level.
- Direct Colors Products Used:
EasyTint™ Trial Kit (Light Charcoal, Aztec Brown & Black)
5 Gal. Light Charcoal EasyTint™ Satin
3 x 1 Gal. EasySeal™ Satin - Direct Colors Products Used:
Lawn edger and power sprayer for prep work
Paint roller with extension pole
Paintbrush
Paint tray
Xylene for cleanup


