
How to Properly Prepare Concrete For Staining
By Justin Richardson
Concrete surface preparation is the most crucial step to a successful concrete staining project outcome. In this comprehensive guide, Justin Richardson shares his expertise on how to assess and prepare your concrete for staining, ensuring the best possible outcome.
Testing Concrete Porosity
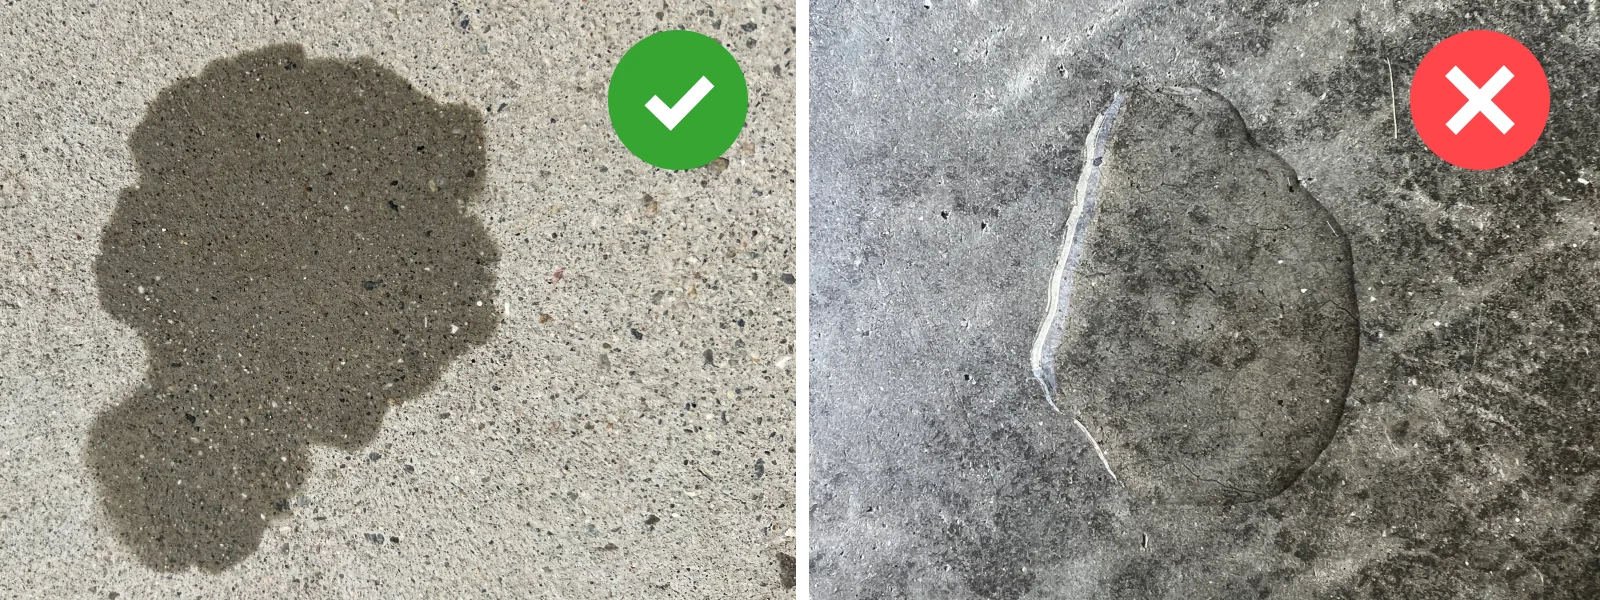
Before starting your concrete staining project, understanding the porosity of your concrete surface is essential. Spray water on the concrete and observe how quickly it soaks in. The way the water interacts with the concrete provides valuable insights into its porosity, which directly affects the staining process.
- If the water “beads up” and doesn’t readily absorb, the concrete is too smooth or sealed, which prevents the stain from adhering properly. Such concrete will need to be sanded or chemically profiled using CitrusEtch™ concrete etcher before staining.
- A “Rainbow Sheen” signals an oil spill. To resolve this, clean the area with a concentrated mix of ProClean Degreaser™ and warm water. For heavy spills, more thorough cleaning methods may be needed to ensure complete oil removal and proper concrete preparation for staining.
- If the water absorbs readily, this indicates that the concrete has adequate porosity for staining but still requires cleaning with a diluted solution of concrete cleaner and water.

Cleaning The Concrete Surface
When preparing your concrete surface for staining, especially acid staining, selecting the right cleaning method and materials is critical to achieve the desired outcome.
General Cleaning
- Apply Cleaner and Degreaser: It’s important to use an organic degreaser that’s diluted with water. Avoid using harsh chemicals such as Trisodium Phosphate (TSP) or muriatic acid for cleaning. These substances can remove the lime from the concrete, which is essential for the chemical reaction with acid-based stains. By removing lime, the concrete’s ability to react with the acid stain is significantly diminished, leading to less effective or uneven staining results.
- Scrub Surface: Gently scrub the surface with a soft nylon bristle brush or use a power washer on a low setting. This helps in removing dirt, grease, and any superficial stains without damaging the concrete’s texture or affecting its porosity.
- Rinse and Dry: Thoroughly rinse the cleaned area with water to remove all traces of the degreaser and any loosened debris. Following rinsing, remove excess water using a shop vacuum, mop, or squeegee. Ensuring the surface is completely dry before proceeding with staining is essential for optimal stain absorption and reaction.
By following these steps and choosing your cleaning agents wisely, you prepare the concrete surface in a manner that preserves its natural characteristics, crucial for a successful acid staining process.
Preparing Machine Troweled Concrete Floors
Machine troweled concrete floors are known for their smooth and dense surface finish, which can be challenging for stains to penetrate and adhere to effectively. To prepare these surfaces for staining, a critical step is to etch the concrete to create a more porous texture that can absorb the stain properly.
1. Understanding Etching: Etching chemically roughens the smooth surface of the concrete, making it more receptive to stains. This step is crucial for machine troweled surfaces, which are otherwise too dense for stains to penetrate effectively.
2. Choosing the Right Etching Product: For environmental safety and efficacy, we recommend CitrusEtch™. This biodegradable etching solution is less harsh than traditional acids but effectively prepares the concrete surface.
3. Prioritizing Safety: Always wear protective gear, including gloves, goggles, and a respirator if necessary, when handling etching solutions. Proper ventilation is also crucial to ensure safety during application.
4. Application Process: Dilute and apply CitrusEtch™ following the manufacturer’s instructions. Spread the solution evenly across the surface, ensuring complete coverage to avoid uneven etching.
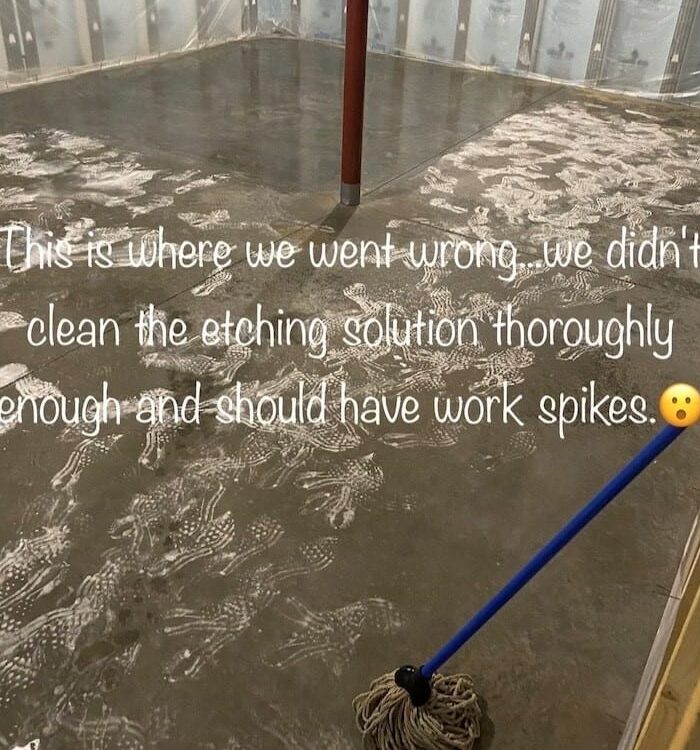
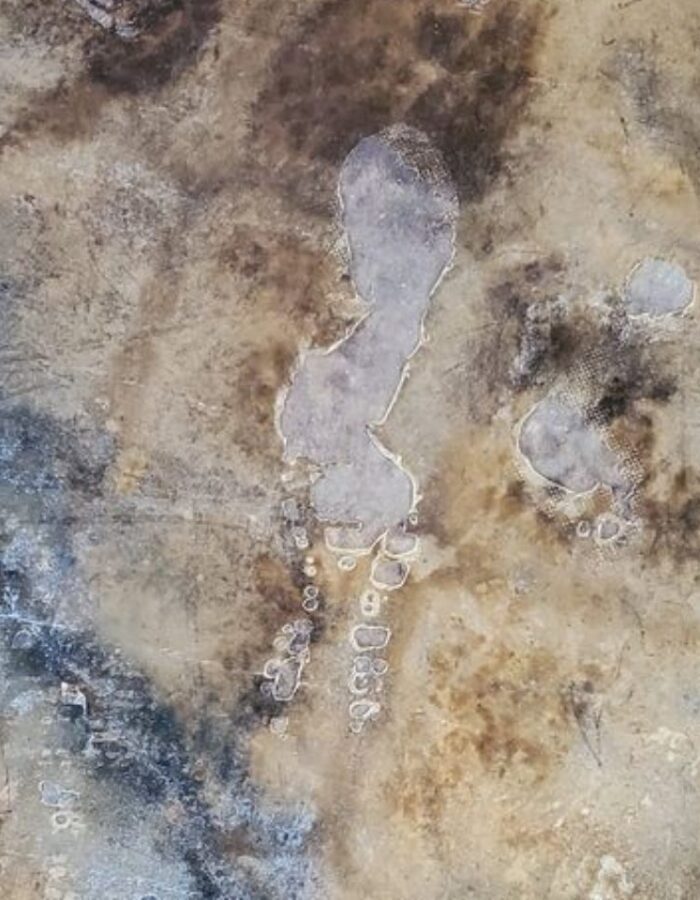
5. Importance of Spiked Shoes: It is very important to wear spiked shoes while applying the etching solution. This prevents the creation of footprints that can etch into the concrete, which would be difficult to remove without mechanical grinding. Spiked shoes allow you to walk on the treated surface without leaving marks, ensuring a uniformly etched area ready for staining.
6. Monitoring and Neutralizing: Observe the etching process and look for the characteristic fizzing action, indicating the chemical reaction is taking place. After allowing the recommended reaction time to pass, it’s time to neutralize the acid. While a baking soda solution is effective for this purpose, it’s important to note that it can be cumbersome to clean up. The reaction between the baking soda and the etching solution can create a significant amount of residue. This residue needs to be thoroughly vacuumed or completely removed to ensure it does not hinder the staining process. In some cases, a commercial neutralizer may be preferred for its ease of use and minimal cleanup requirements. Regardless of the chosen method, ensure the area is then rinsed thoroughly with water to remove any neutralizing agent and residue completely.
7. Drying the Surface: Allow the concrete to dry completely, which can take 24 to 48 hours. The surface must be fully dry before proceeding to staining.
8. Final Inspection: Check the texture of the concrete post-etching. If necessary, repeat the etching process in areas that remain too smooth, taking care not to over-etch.

Removing Sealer From Concrete
Identifying Sealer Type
Before proceeding with staining or other treatments, it’s crucial to determine the type of sealer present on your concrete surface. The type of sealer affects how it should be removed to prepare the concrete for staining.
Test with Xylene:
- Carefully pour a small amount of Xylene onto the concrete surface in a less visible area to test.
- Wait for approximately 30 seconds, allowing the Xylene to interact with the sealer.
- Gently touch the area where Xylene was applied. If the surface becomes tacky, this suggests that a solvent-based sealer has been used. Solvent-based sealers tend to react with Xylene by softening, indicating their presence through this tackiness. Conversely, if there is no change in the texture of the surface (no tackiness), it likely indicates that a water-based sealer was applied. Water-based sealers do not react in the same way with Xylene and will not exhibit a tacky feel upon application.
Sealer Removal Methods
For Solvent-Based Sealer:
- Preparation: Begin by laying a cotton sheet or towel over the area treated with Xylene.
- Application: Generously soak the cotton sheet with Xylene, ensuring it’s fully saturated. This helps to keep the Xylene in contact with the sealer for an extended period.
- Waiting Period: Leave the soaked sheet on the surface overnight. This duration allows the Xylene to penetrate and soften the solvent-based sealer thoroughly.
- Removal: The next day, remove the cotton sheet. You may notice that the sealer has lifted or become more pliable, making it easier to remove. In some cases, it might be necessary to repeat this process to remove all layers of the sealer effectively.
For Water-Based Sealer:
- Sealer Stripper Application: Apply a commercial sealer stripper designed for water-based sealers. Follow the manufacturer’s instructions for application and waiting times to ensure the product works effectively.
- Scrubbing: After the sealer stripper has had time to act, use a stiff brush or scrubber to agitate the surface. This helps in loosening the sealer from the concrete.
- Degreasing: Apply a concrete degreaser to remove any remaining sealer residue and to clean the surface thoroughly. Mix the degreaser with water as directed and scrub the area well.
- Rinsing: Finally, rinse the area with clean water to remove any remaining stripper, degreaser, and loosened sealer. Ensure the surface is completely clean before moving on to any further surface preparation or staining.
Removing Paint From Concrete
Removing paint from concrete can be challenging due to the porous nature of concrete. Once paint penetrates the surface, it’s difficult to remove completely, and remnants can interfere with new finishes. For those planning to apply acid stains, it’s essential to understand that any residue left from paint can prevent the stain from reacting evenly with the concrete. Here’s a more comprehensive approach to tackling paint removal and preparing your concrete surface for staining or other treatments:
Comprehensive Steps for Removing Paint From Concrete
- Initial Cleaning: Begin by using a shop vacuum or broom to clear away any loose debris and dirt from the surface, ensuring it’s clean before applying any chemicals.
- Apply Paint Stripper:
- Choosing the Right Stripper: Select an environmentally friendly paint stripper, such as Soy Gel Stripper, which combines effectiveness with reduced environmental impact.
- Application: Evenly coat the painted surface with the stripper, aiming for a layer about 1/16 to 1/8 inch thick. Make sure to cover all areas thoroughly.
- Let the Stripper Work: Give the stripper sufficient time to penetrate and soften the paint. This usually takes between 30 to 60 minutes, but you may need to adjust this time based on the paint and stripper types.
- Remove Softened Paint: After the paint has softened, gently scrape it off the concrete. For larger areas or more stubborn paint, an industrial wet vacuum can efficiently remove the paint.
- Final Cleaning:
- Degreasing: Once the paint is removed, there might still be residue on the concrete. Use a degreaser mixed with water to scrub the area and clean off any remaining paint stripper or residue.
- Rinsing: Thoroughly rinse the area with water to eliminate any remaining cleaning agents and paint particles, preparing the surface for any further treatment.
Important Considerations
- Porosity and Residue: Concrete is inherently porous, which means that even after stripping paint, microscopic residues can remain in the pores. This residue can significantly affect the outcome when applying acid stains, as they rely on reacting with the concrete’s lime content for coloration. Such uneven reactions can result in a blotchy or inconsistent finish.
- Alternative Finishing Options: If paint removal reveals significant residue or if the concrete’s porosity is compromised, consider using a coating-type stain, such as an acetone dye, instead of acid stains. Coating stains do not require the same chemical reaction with the concrete and can provide a more uniform finish over surfaces that have been painted previously. For detailed guidance, explore our tutorial on how to apply concrete dye for effective results under these circumstances.
- Surface Preparation: In cases where paint stains are pervasive or the residue is too stubborn, mechanically grinding the concrete might be necessary. Grinding opens up the surface, removing the top layer and any embedded paint, creating a fresh and porous layer ideal for staining. Remember, grinding should be followed by thorough cleaning to ensure the best possible surface for staining or sealing.
Using a Concrete Grinder and Coating Stains
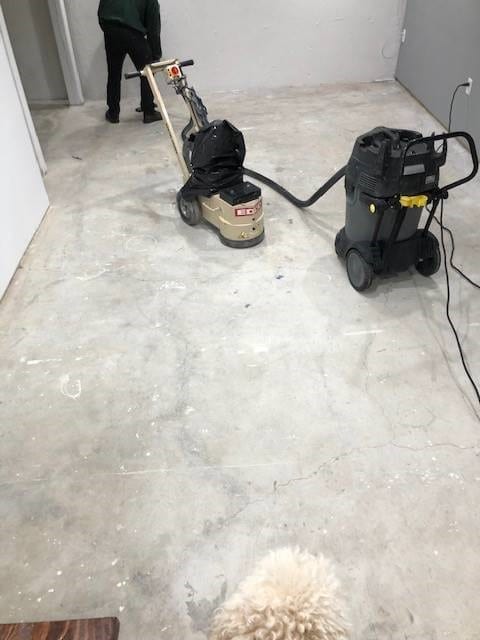
For best results on previously painted surfaces, using a concrete grinder to remove the top layer of concrete, along with the paint, is often the most effective method. This approach ensures the removal of paint and creates a fresh, porous surface. After grinding, a coating-type stain like an acetone dye can be applied. These stains are designed to coat the surface rather than penetrate, making them suitable for surfaces where acid stains might not achieve an even finish due to residual paint.
Removing Carpet Glue From Concrete: Strategies for Tough Adhesives
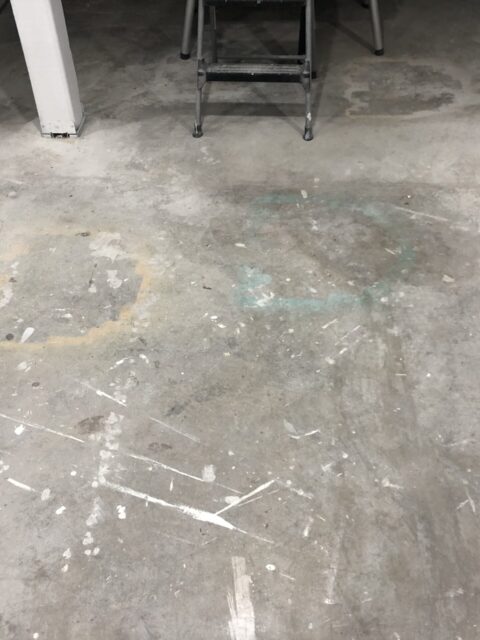
Dealing with carpet glue on concrete surfaces can be challenging, especially when the adhesive is aged and stubborn. The right approach can make a significant difference in preparing your concrete floor for staining or other finishes. Here are comprehensive steps to tackle carpet glue, with a special note on handling very old adhesives:
- Initial Assessment: Begin by assessing the extent and age of the carpet glue. Fresh adhesives might be easier to remove compared to older, more stubborn glues that have hardened over time.
- Simple Scraping: For newer glues, start with a manual scrape using a floor scraper or putty knife. This might be sufficient for lighter adhesives but expect a tougher challenge with older glues.
- Chemical Removers: Apply a chemical adhesive remover designed for carpet glue. Ensure it’s compatible with concrete surfaces and follow the manufacturer’s instructions closely. These products can help dissolve the glue, making it easier to scrape off.
- Heat Application: A heat gun can soften stubborn glue, making it easier to remove. However, be cautious as excessive heat can damage the concrete surface. Use this method sparingly and carefully.
- Power Washing: For outdoor areas or well-ventilated spaces, power washing might help loosen and remove the glue, especially after applying a chemical remover.
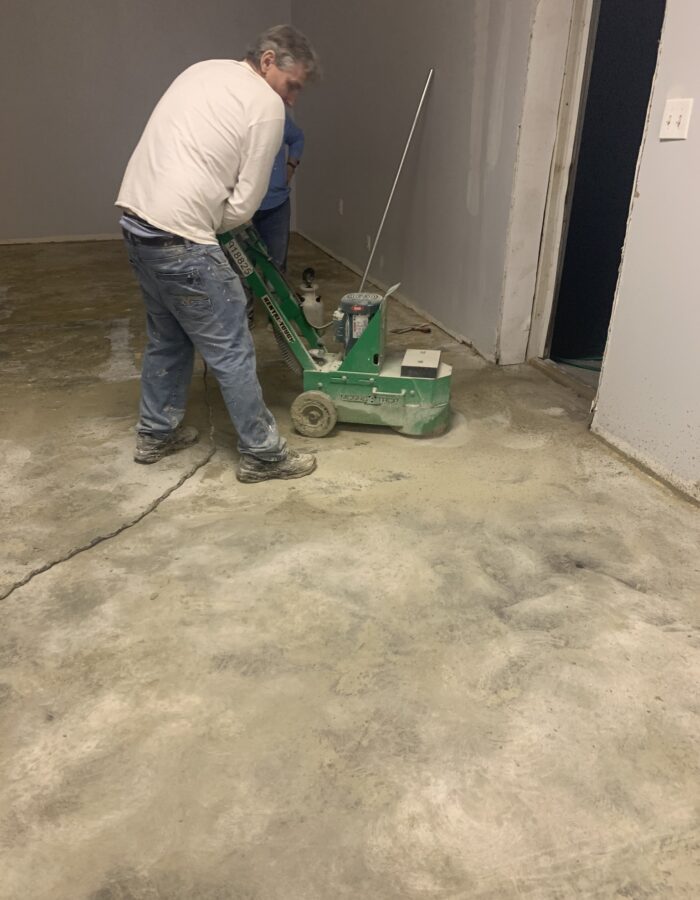
- Concrete Grinding: When dealing with very old, stubborn carpet glue, sometimes the most efficient solution is to bypass the above methods and go straight to machine grinding. A concrete grinder can remove the toughest adhesives and prepare the surface for staining or sealing. While this method is effective, it requires special equipment and can be more labor-intensive. It’s often the best course of action for ensuring a clean, prepared surface, especially when other methods fail to remove the mastic completely.
- Final Cleaning: After removing the glue, thoroughly clean the surface with a concrete cleaner and water to remove any residual adhesive or preparation products. This ensures a clean, porous surface ideal for staining or applying other finishes.
- Professional Assessment: If you’re unsure about the best approach or if the glue proves too challenging, consulting with a professional can save time and ensure the best outcome. They can recommend the most effective strategies based on the specific condition of your concrete and the type of glue present.
By understanding the nature of the adhesive and evaluating the most effective removal method, you can ensure your concrete surface is properly prepared for any renovation or staining project. For very old or tough carpet glue, consider going directly to mechanical grinding to avoid prolonged struggles with less effective methods.
Removing Oil Stains From Concrete: A Comprehensive Guide
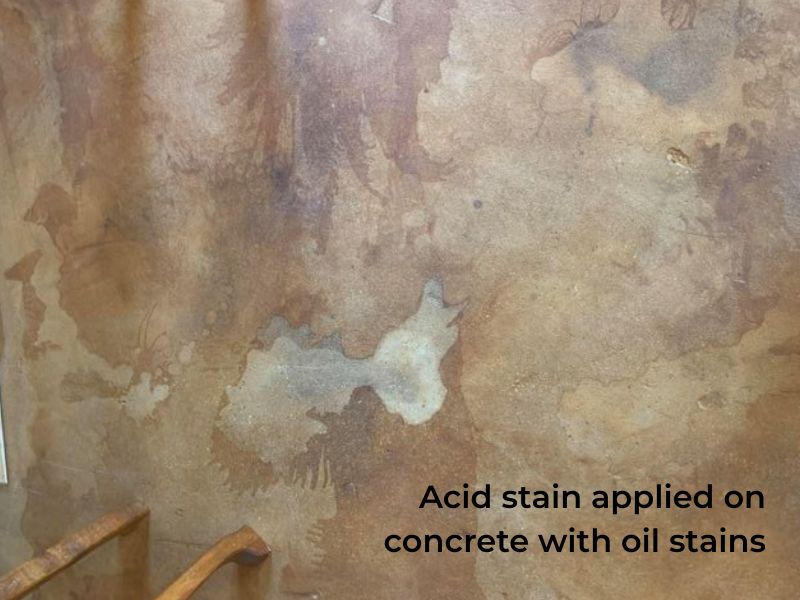
- Identifying Oil Stains: Begin by inspecting your concrete surface for any signs of oil stains. A simple method to identify these stains is to spray a small amount of water on the surface. Look for water beading or a distinctive rainbow sheen, which are telltale signs of oil presence.
- Initial Cleaning Step: Once you’ve identified the stained areas, it’s time for the initial cleaning. Mix a Concrete Cleaner & Degreaser solution according to the manufacturer’s instructions. Apply this solution generously over the stained areas and scrub using a stiff brush. This helps to break down and lift the oil from the concrete.
- Applying Absorbent Material: After scrubbing, if the stain persists, use an oil-absorbent material like Oil Dri™. Sprinkle the absorbent generously over the stain, and for enhanced effectiveness, apply a solvent such as Xylene over the absorbent material. The combination helps to draw out the oil from the concrete’s pores.
- Repeat Removal Process: Some stubborn oil stains may not be completely removed in the first attempt. If the stain persists, repeat the cleaning process. Apply the degreaser, scrub, and use the absorbent material as needed. In cases where the oil has deeply penetrated the concrete or the stain is old, mechanical abrasion methods such as sanding or grinding may be necessary for complete removal.
- Final Cleaning and Rinse: After successfully lifting the stain, perform a final cleaning of the area with the degreaser solution to ensure all residues are removed. Rinse the area thoroughly with water and allow it to dry completely before applying any stains or sealants.
- Preventive Measures: Consider applying a concrete sealer after cleaning to protect against future stains. Sealers can make future spills easier to clean and help maintain the concrete’s appearance.
About Justin Richardson:
Justin Richardson is a renowned expert in concrete staining, with over two decades of experience in the field. His innovative techniques and dedication to sharing his knowledge have made him a sought-after authority for both DIY enthusiasts and professional contractors looking to achieve perfect concrete finishes.


