Stained Concrete Patio Ideas: Before and Afters, Tips, and Customer Stories
Welcome to our gallery of customer stained concrete patio projects! If you’re looking for concrete patio ideas, you’re in the right place. Stained concrete is a popular choice for patios because it is durable, low maintenance, and can be customized to fit any style. In this collection, you’ll find a range of before and after photos showcasing the transformation of outdoor spaces with stained concrete. You’ll also find tips and stories from customers on how they tackled their patio concrete projects. We hope these examples will inspire you as you plan your own outdoor living transformation and help you get the best concrete patio idea for your home.
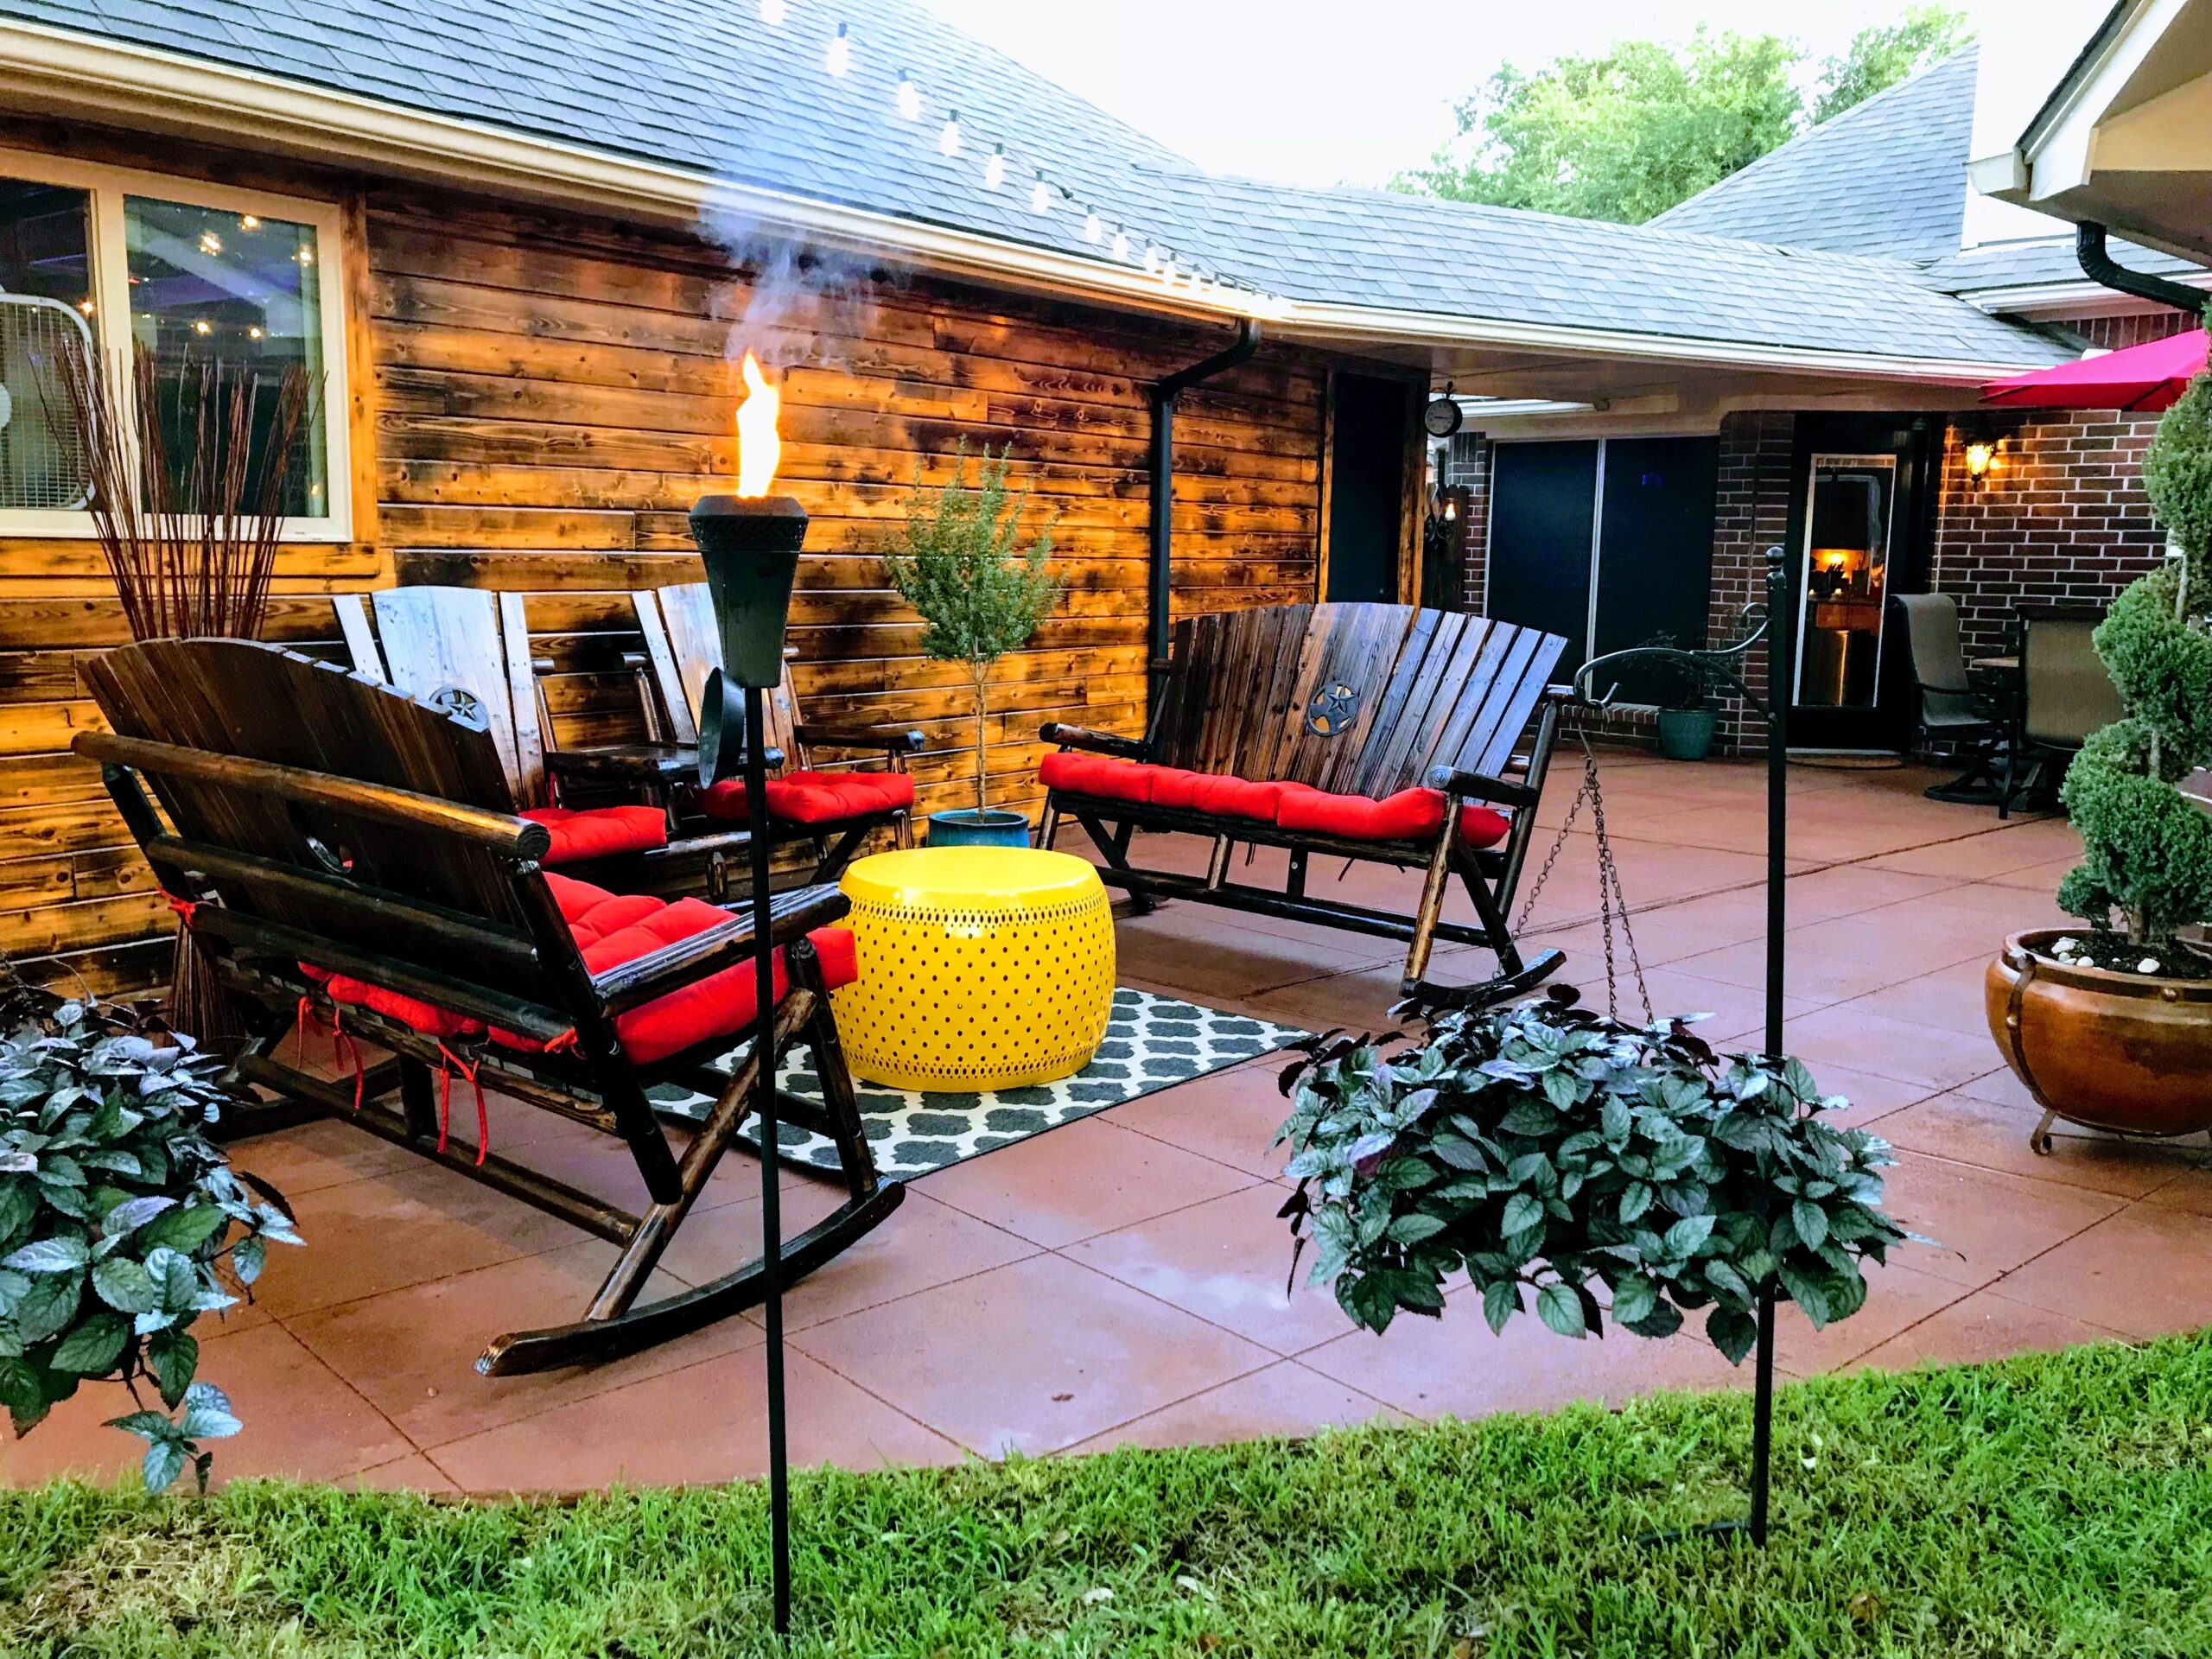
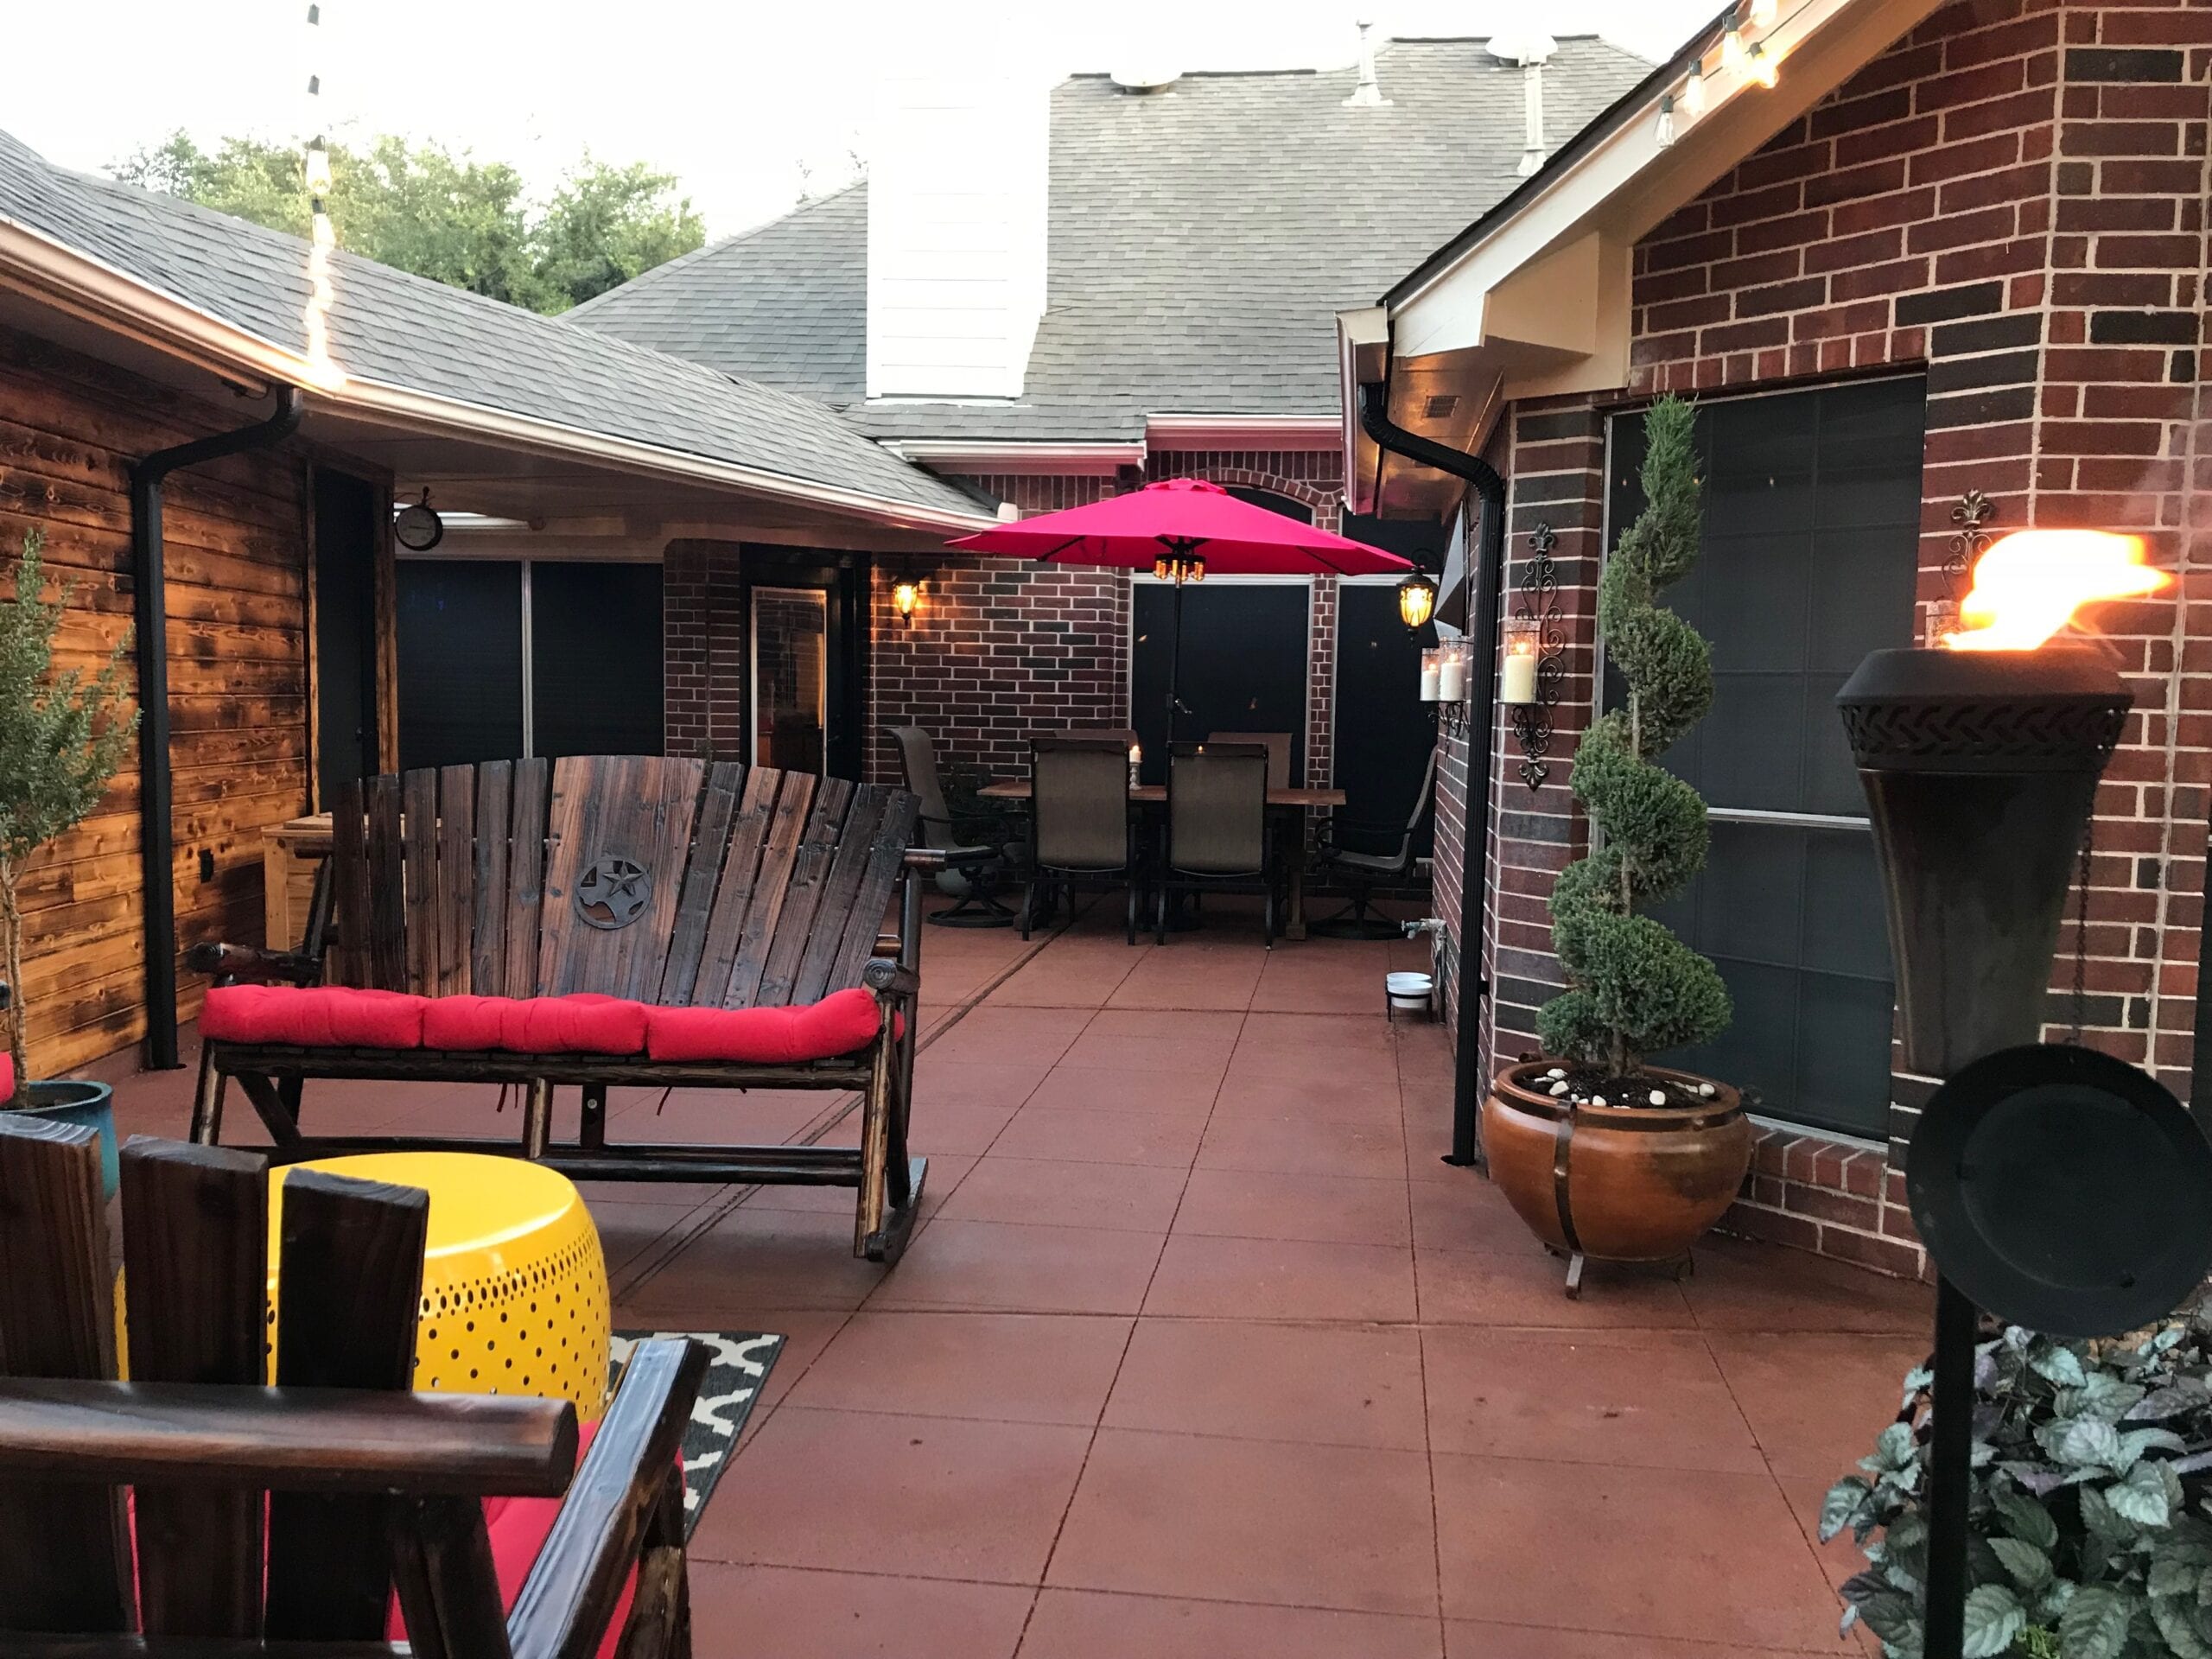
Transforming Backyard Retreat: A Scored Concrete Patio
A stunning transformation of this scored concrete patio from its humble beginnings to a color-soaked oasis, using a harmonious blend of Milano Red, Driftwood, and Pumpkin Antiquing stains. The addition of eye-catching red chairs and a contrasting yellow table completes the lively “Vibrant Fiesta” theme.
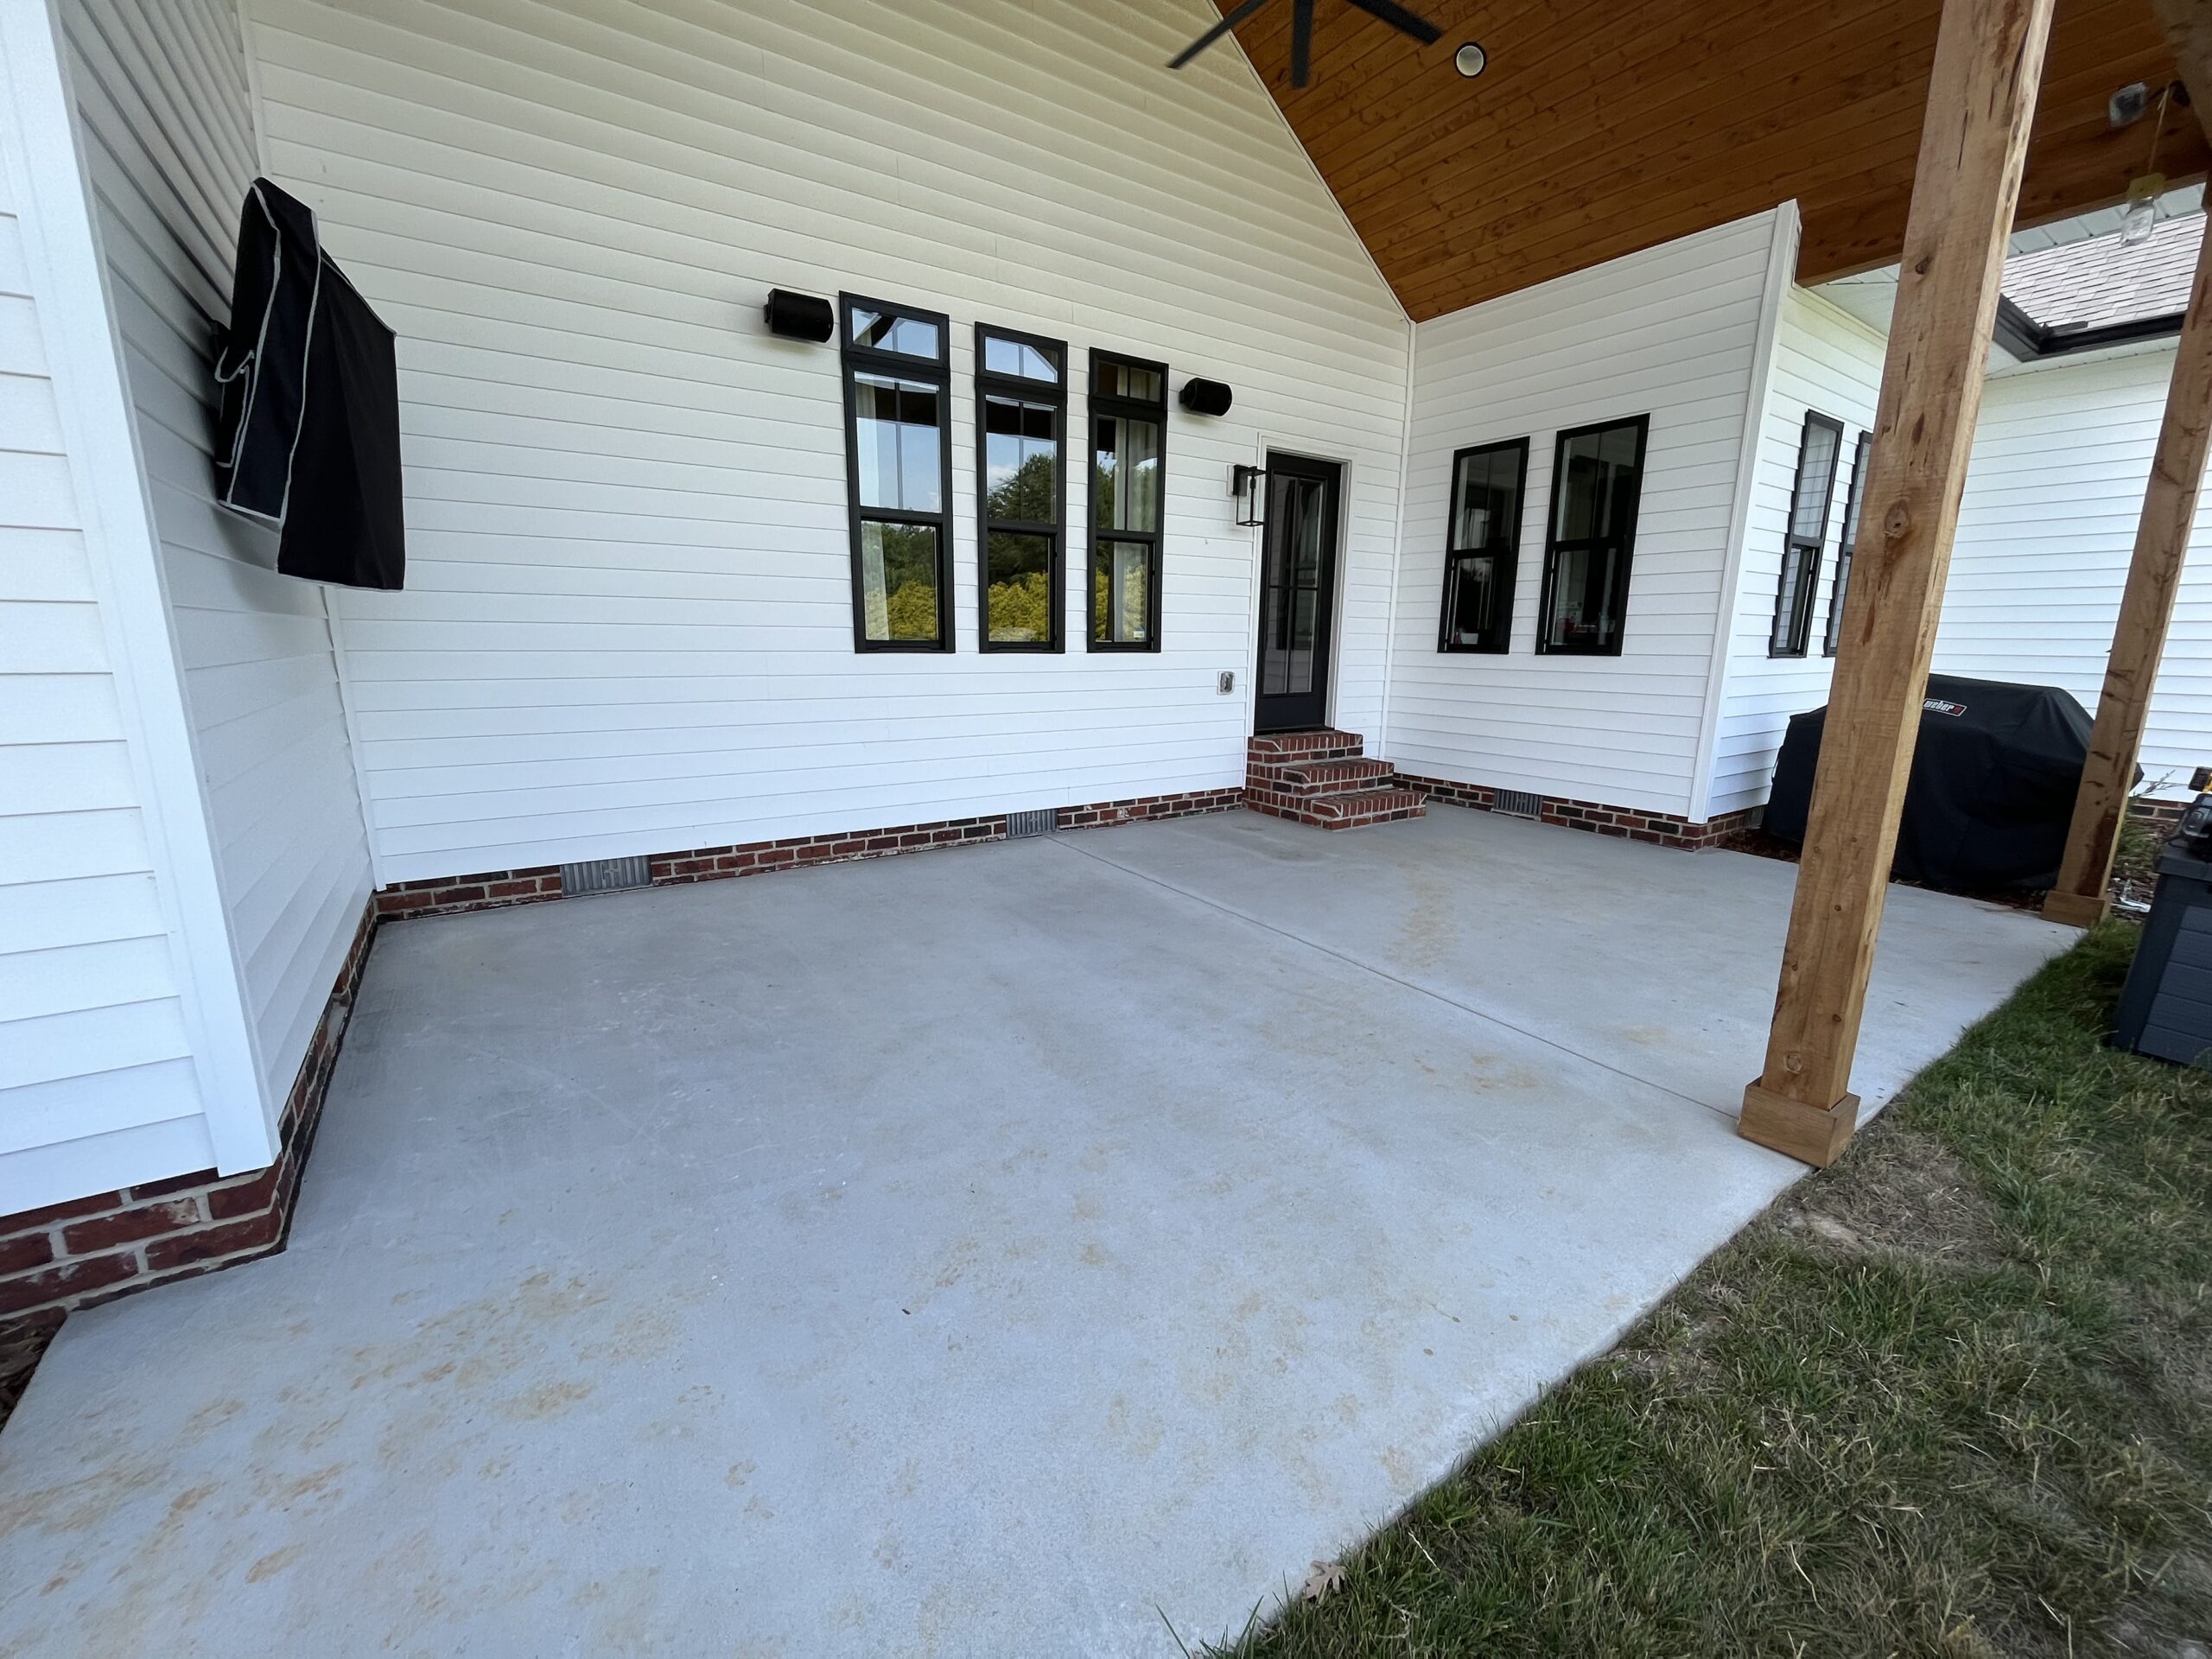
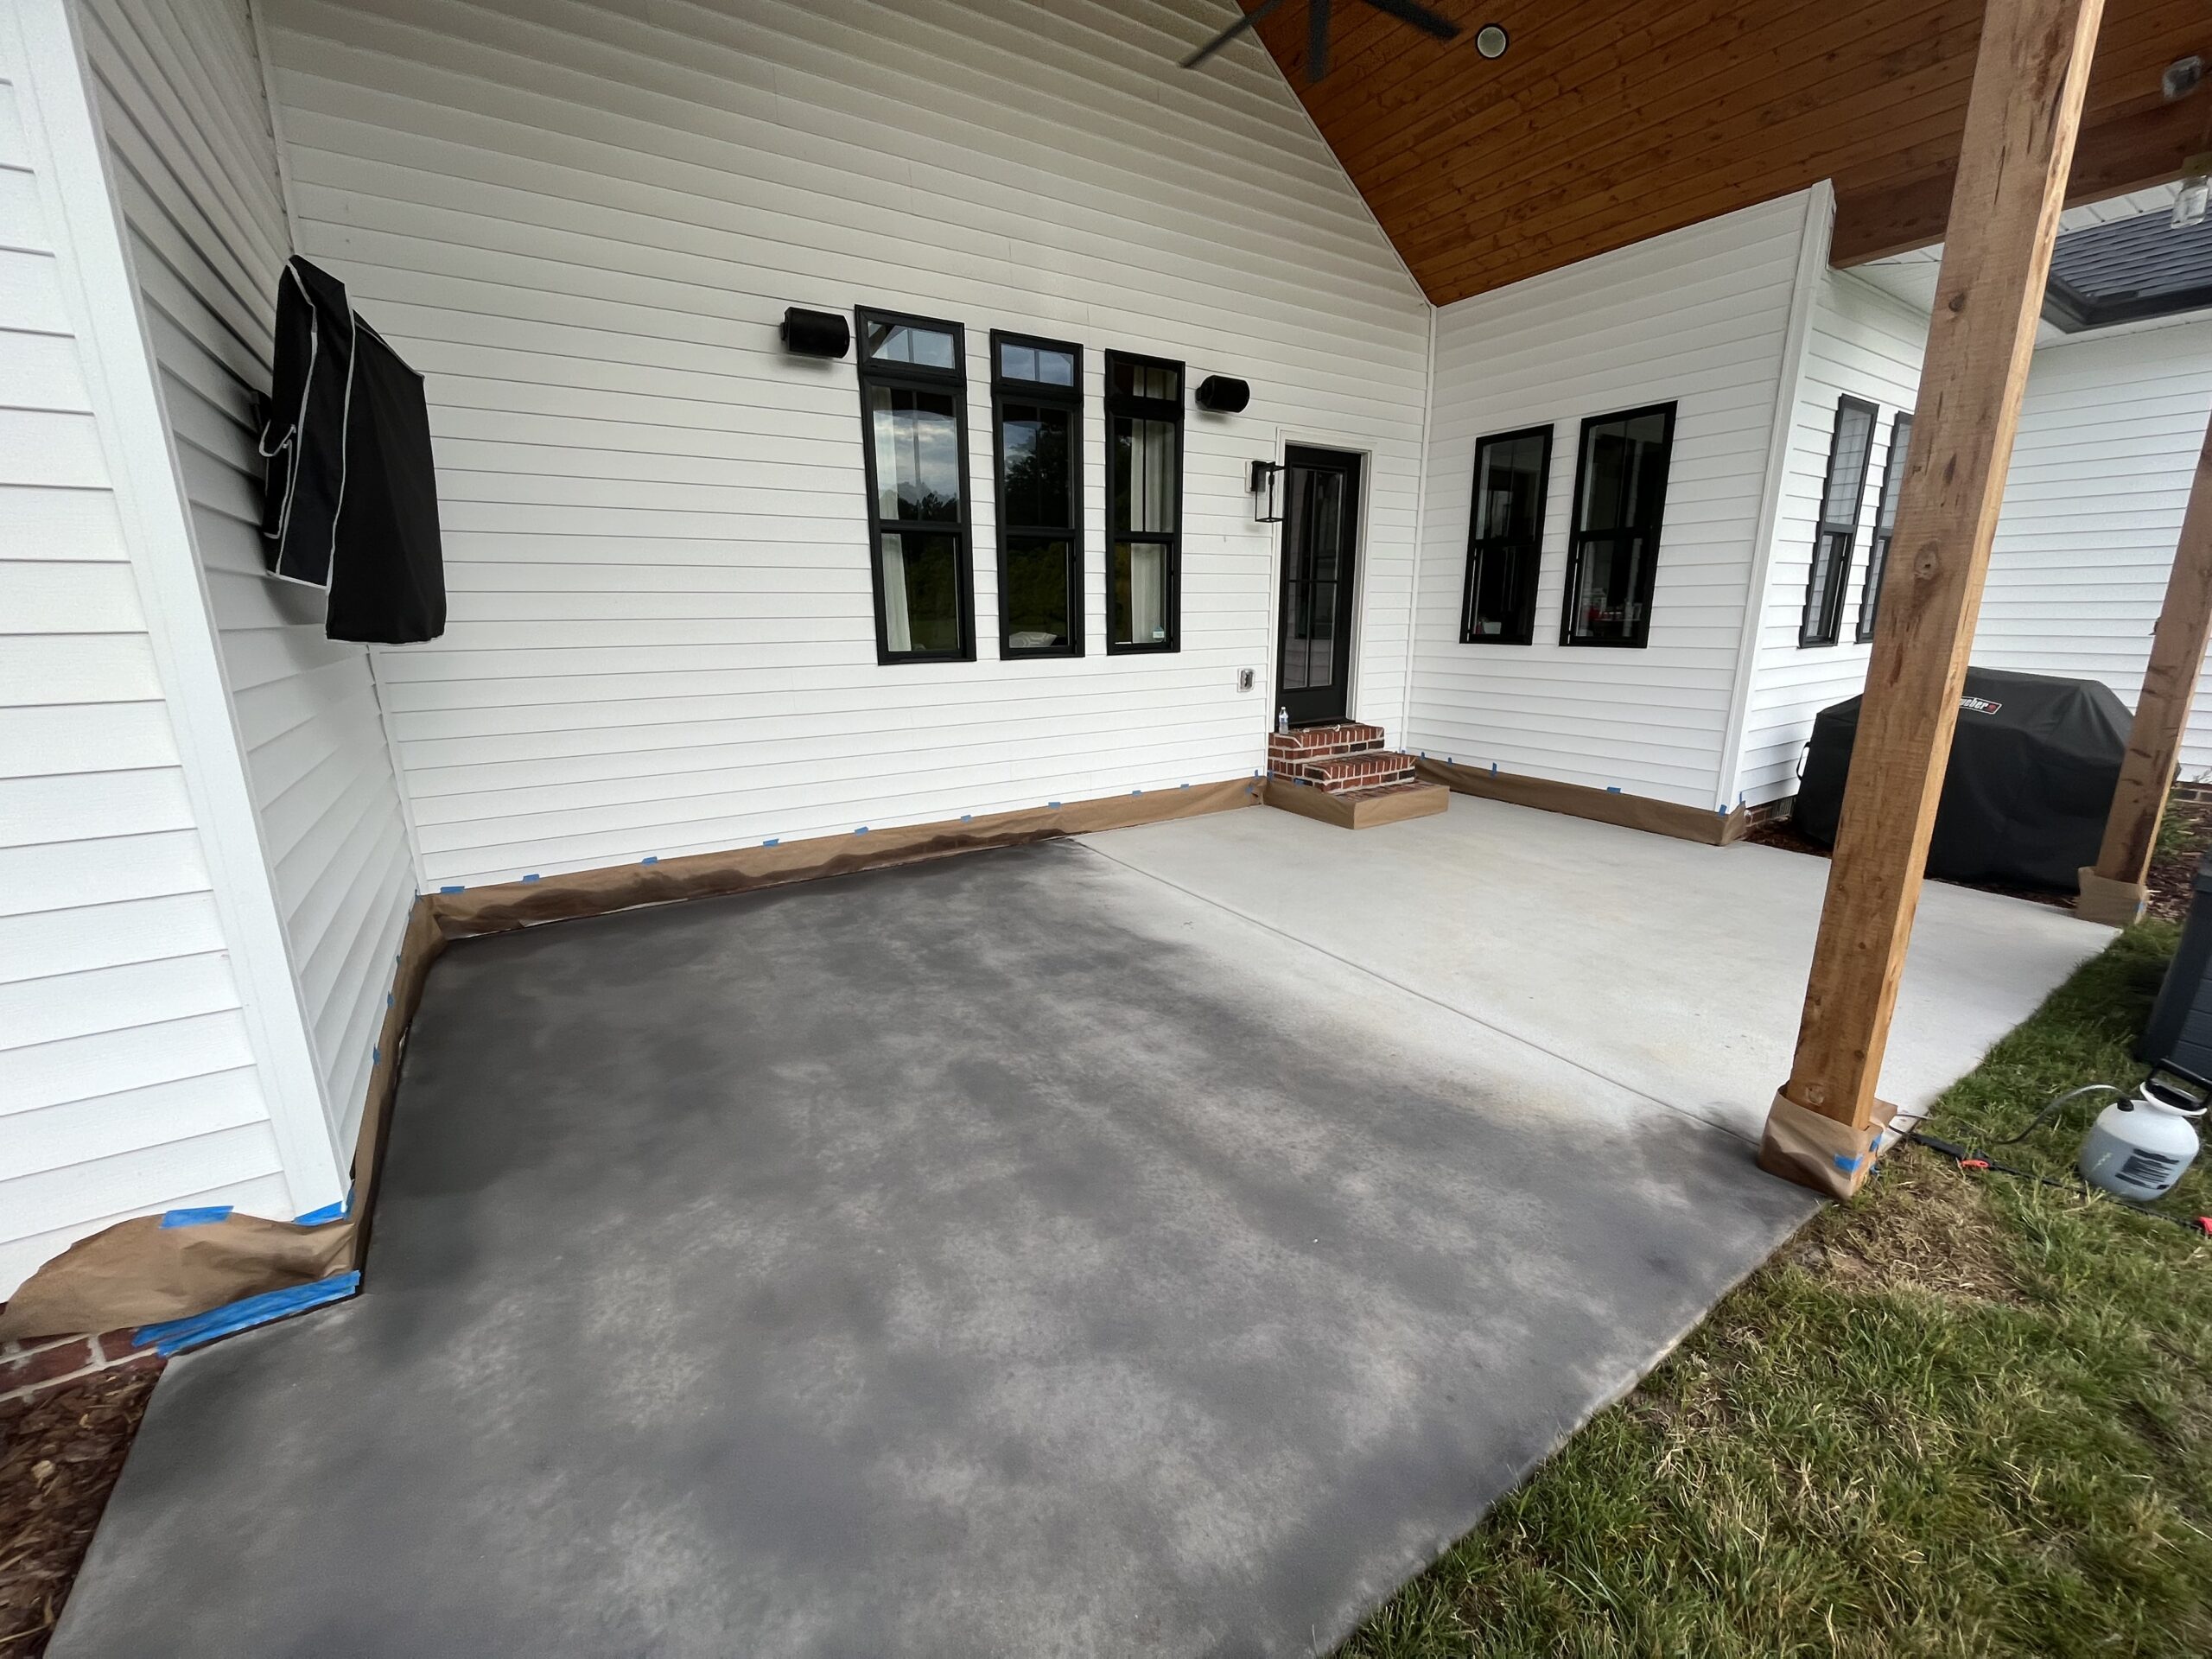
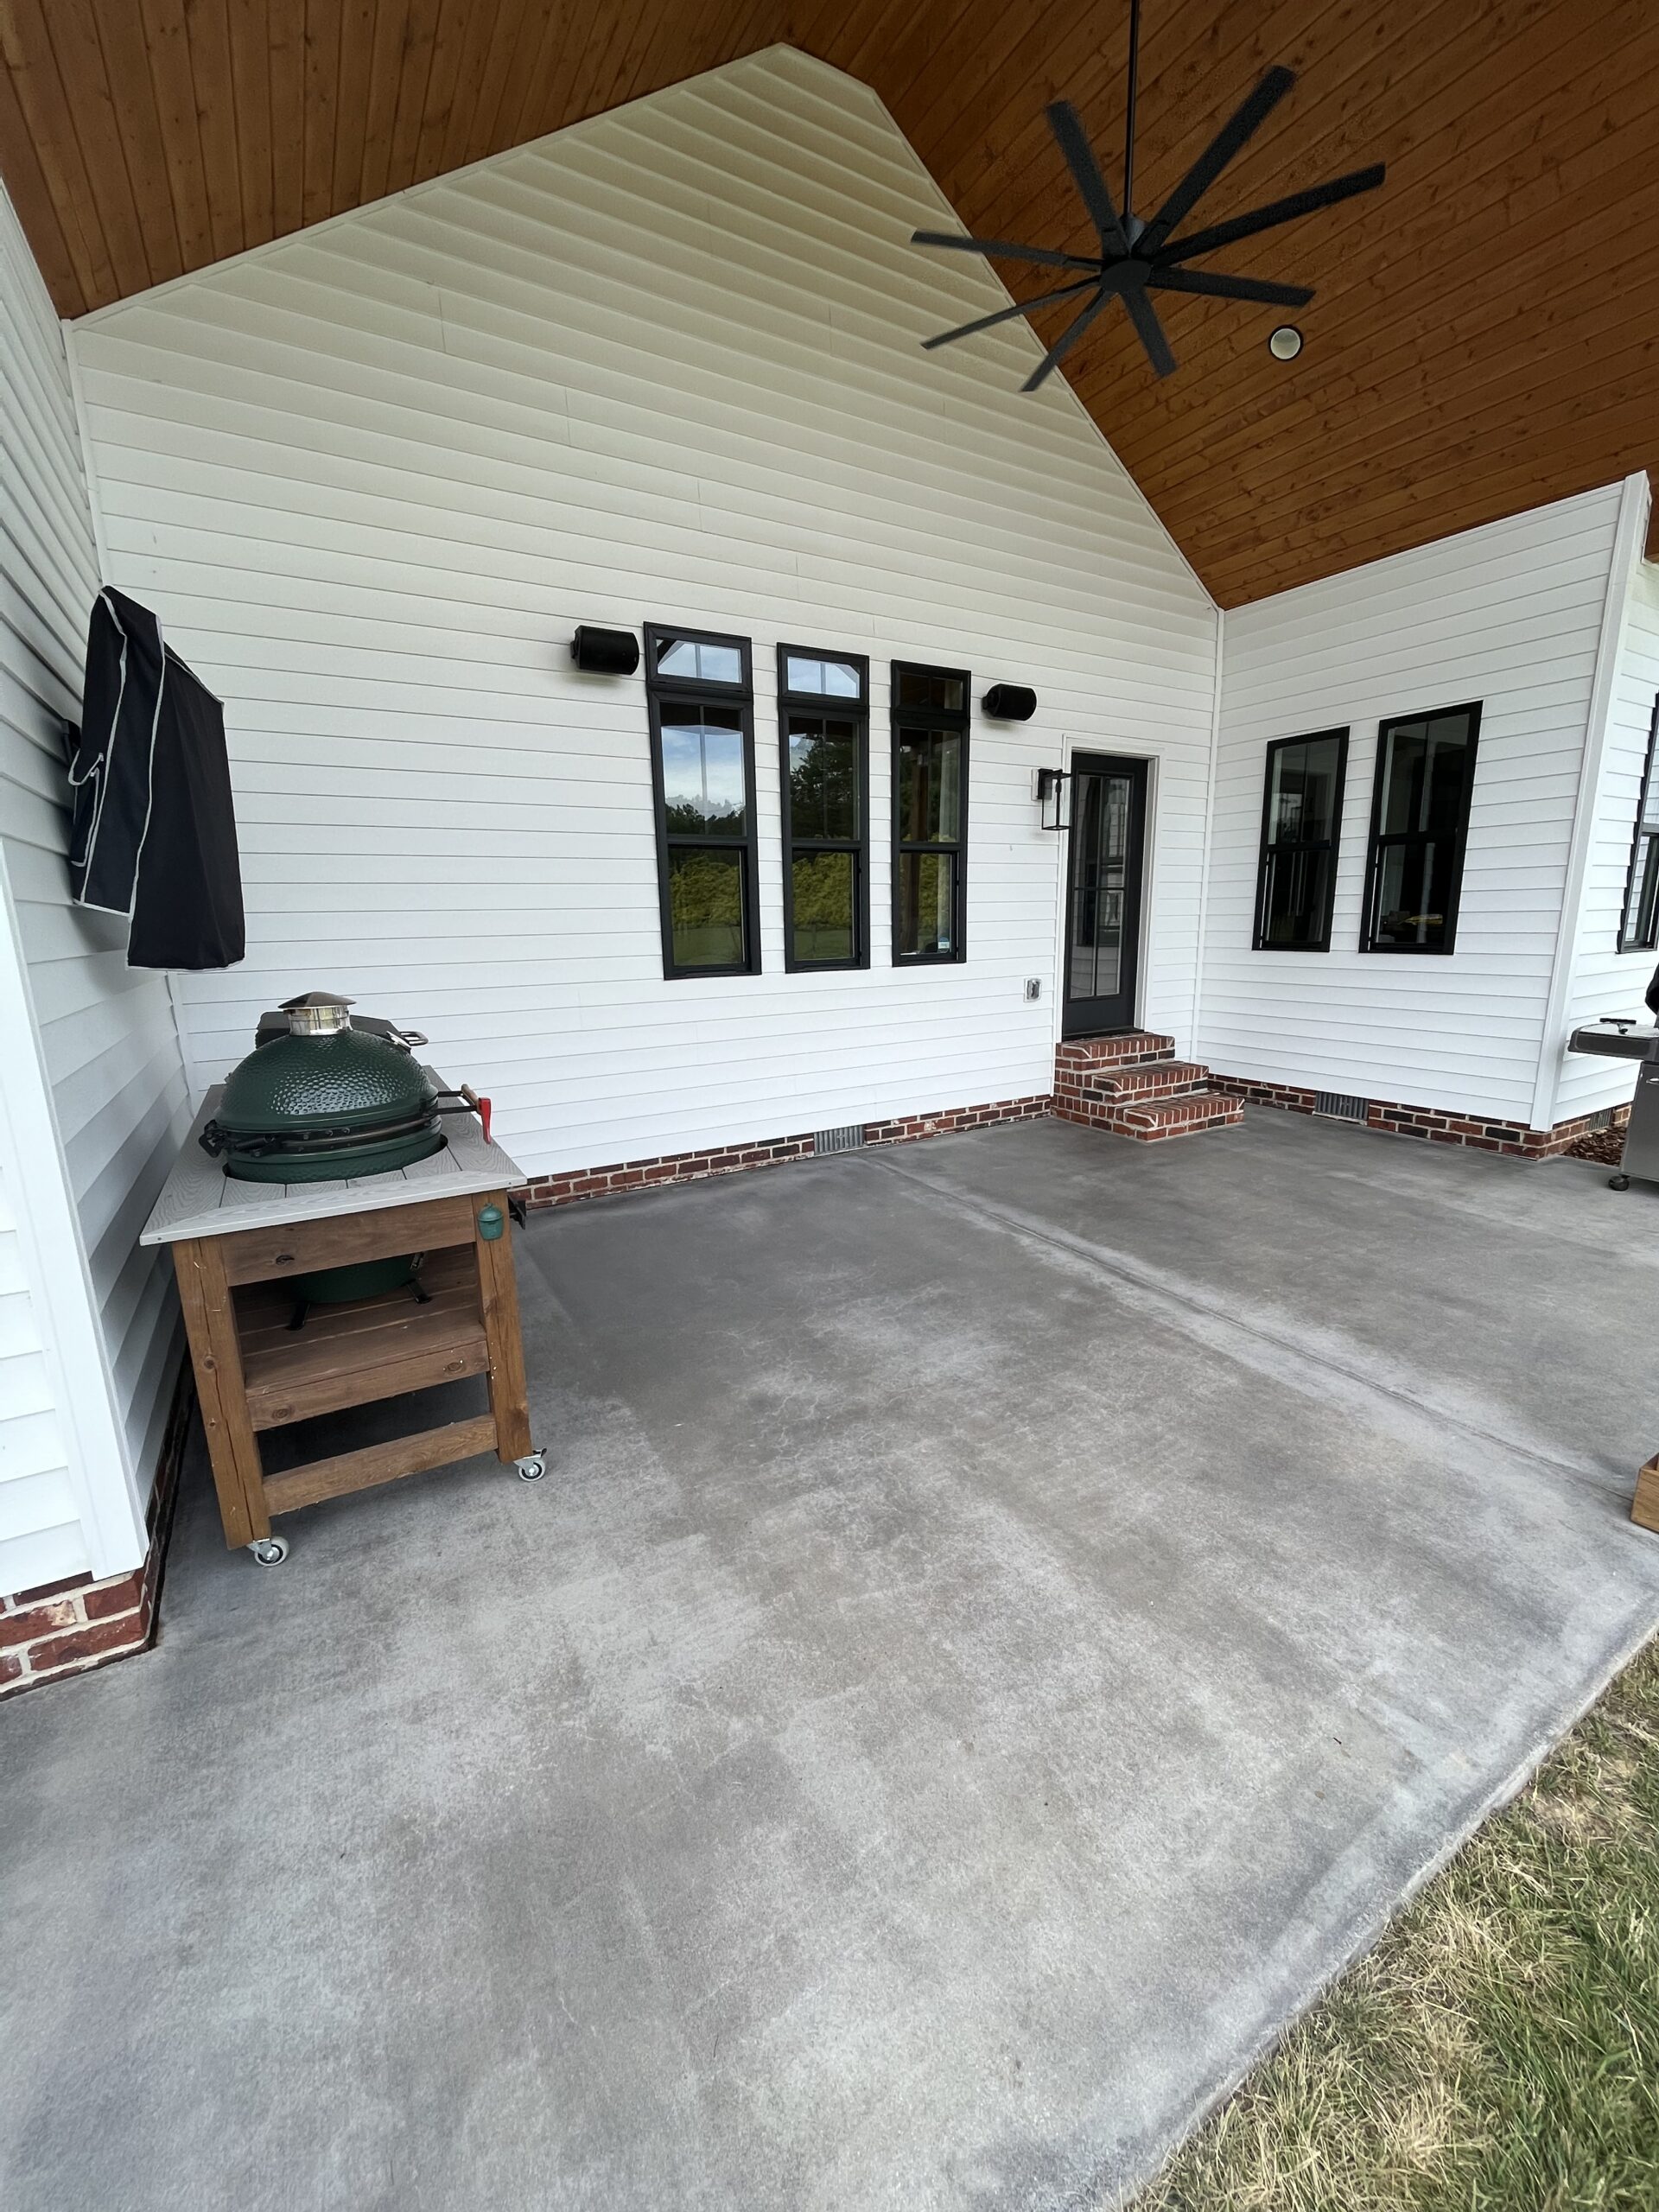
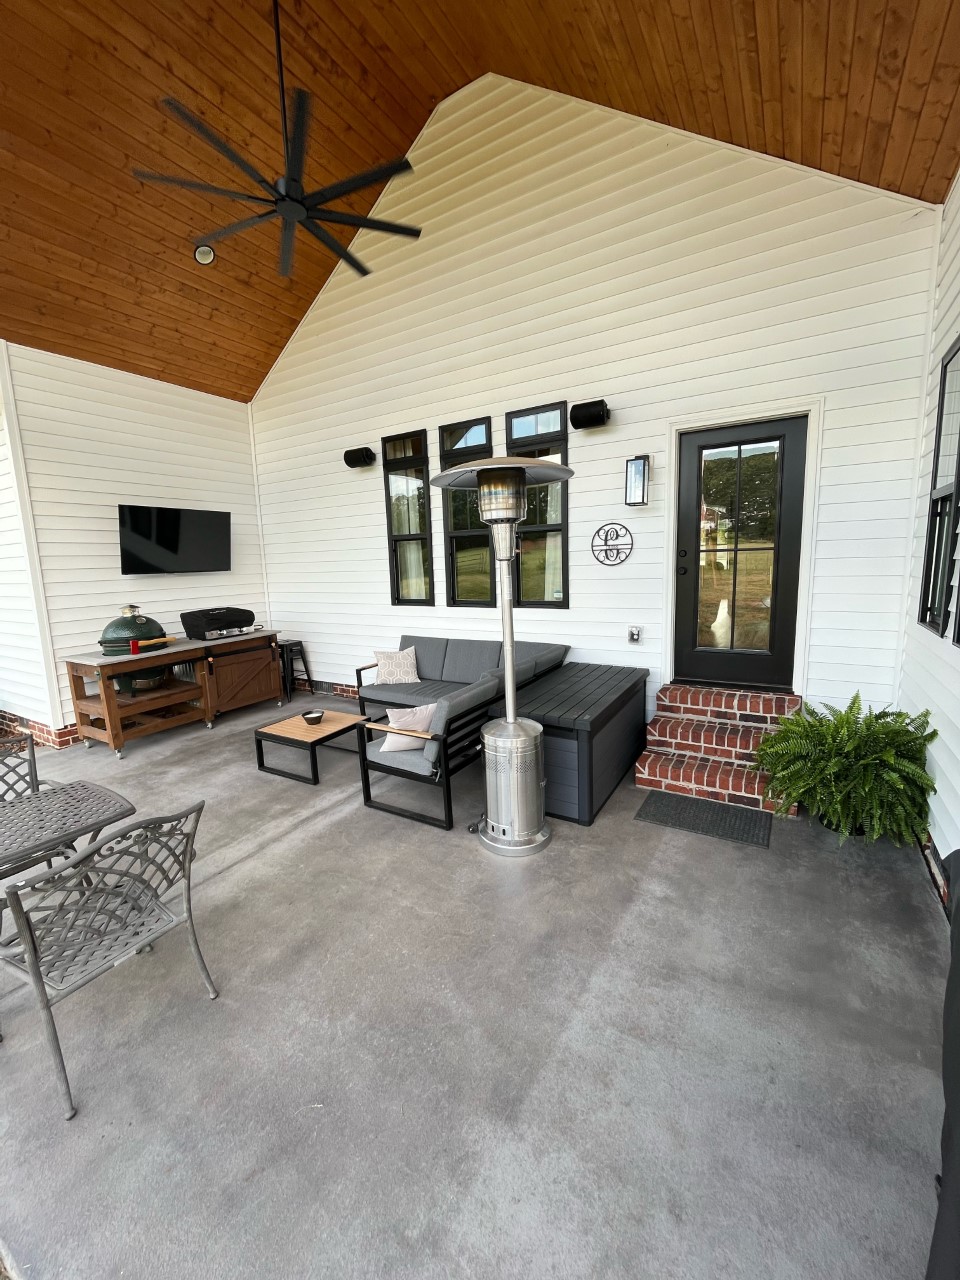
Farmhouse Chic: Sleek Silver Meets Rustic Charm
Embrace the fusion of modern and rustic with our “Farmhouse Chic” project. This broom finish concrete covered patio flaunts the elegance and durability of Silver Gray Antiquing™ stain applied with a pump sprayer and sealed with two coats of satin EasySeal™. The result? A sleek, sophisticated space that elevates the farmhouse aesthetic to new heights.
Elegant Black Concrete Patio Idea: A Modern Outdoor Living Space Upgrade
Enhance the aesthetic appeal of your backyard with a stylish poured concrete patio. This versatile and sturdy concrete slab patio option is perfect for outdoor entertaining, and the use of black outdoor stain gives it a sleek, contemporary look.
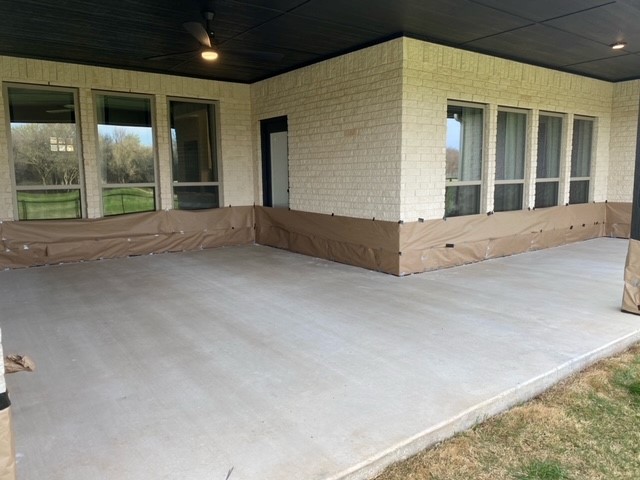
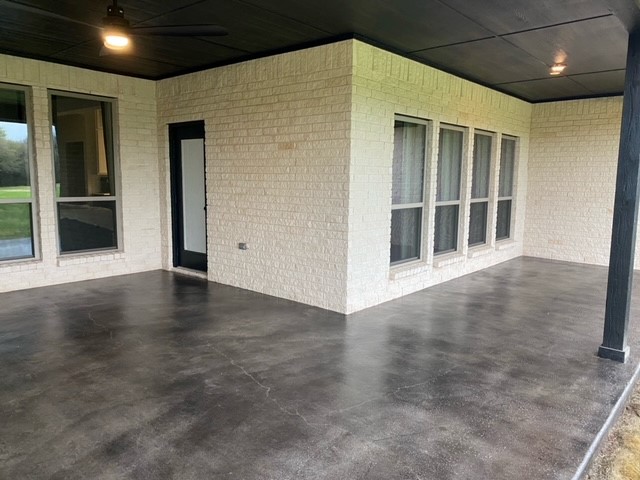
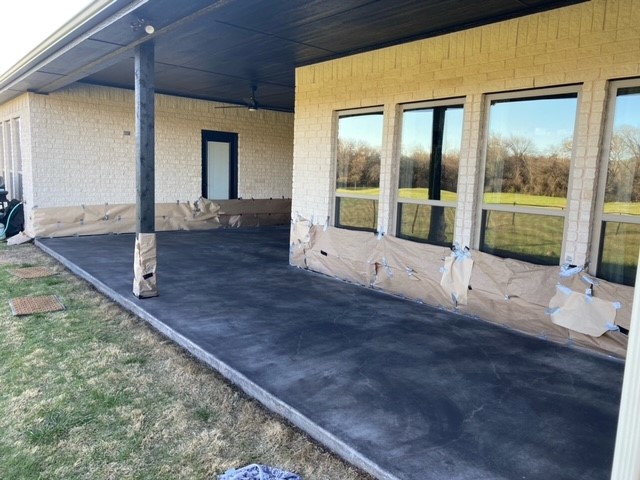
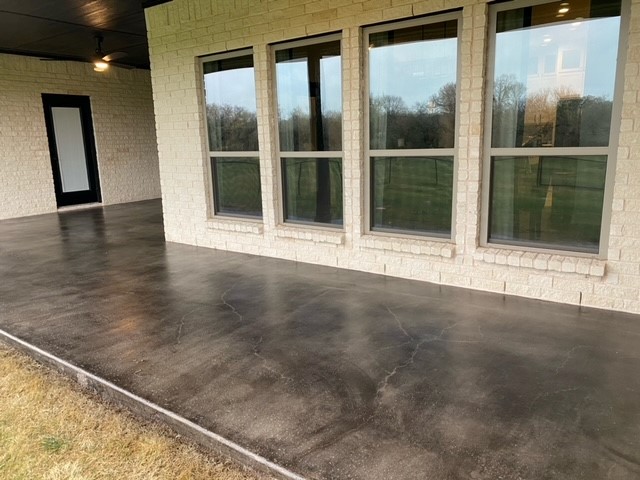
A Black Antiqued And Gold Accent Broom Finish Concrete Patio Transformation
Transform your patio into a masterpiece with this easy DIY concrete transformation project. With the help of Direct Colors’ Black Antiquing Stain & Seal kit and some Walmart gold acrylic craft paint, we created a sophisticated and eye-catching patio surface. See the before and after photos and learn how you can replicate this look in your own outdoor living space with our user-friendly products and tutorials.
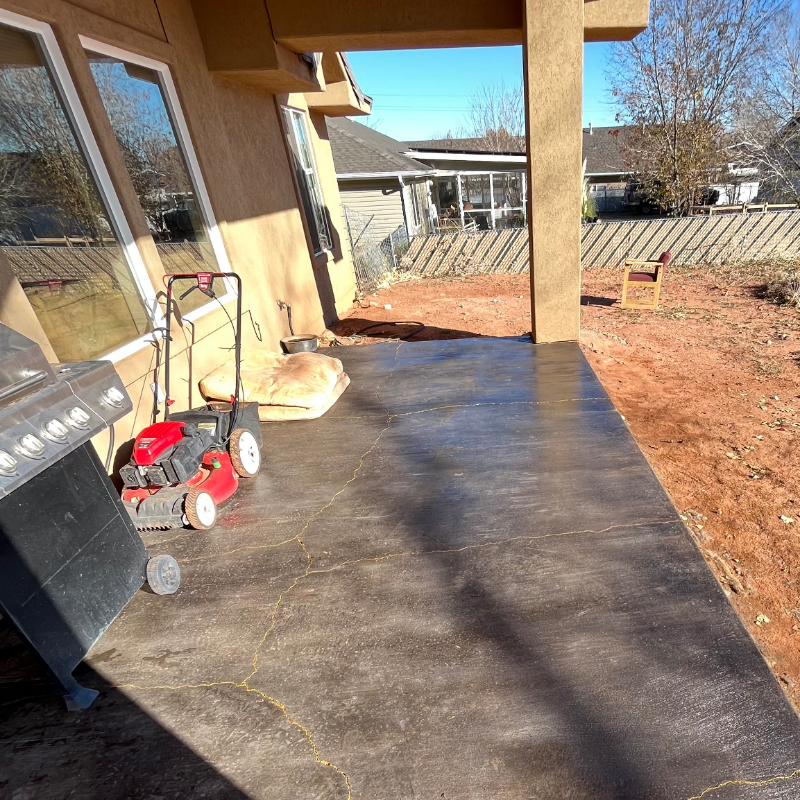
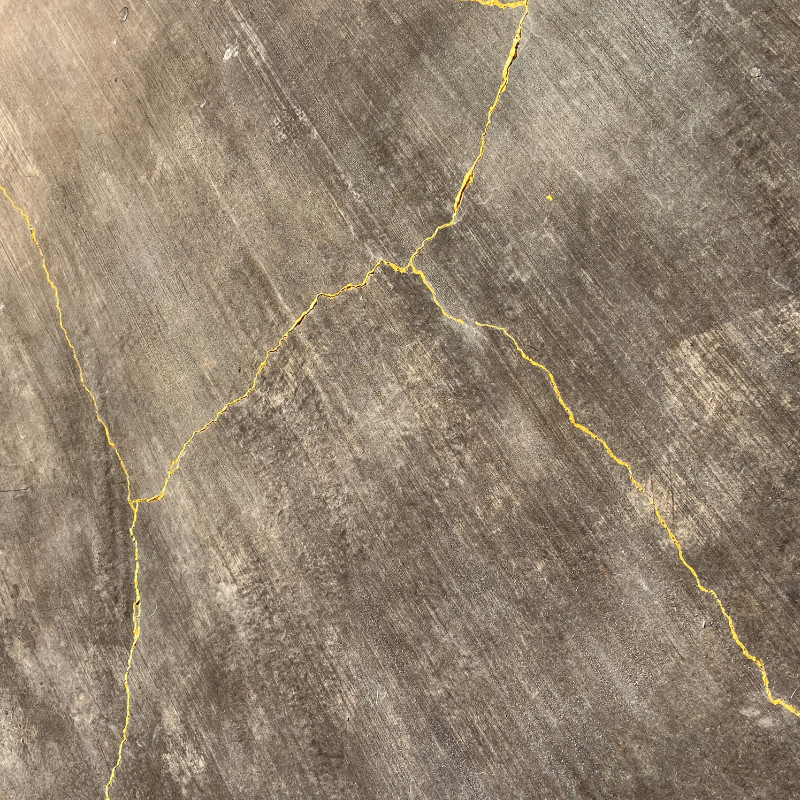
Duration: 4 Days
Square Footage: 200 sq. ft.
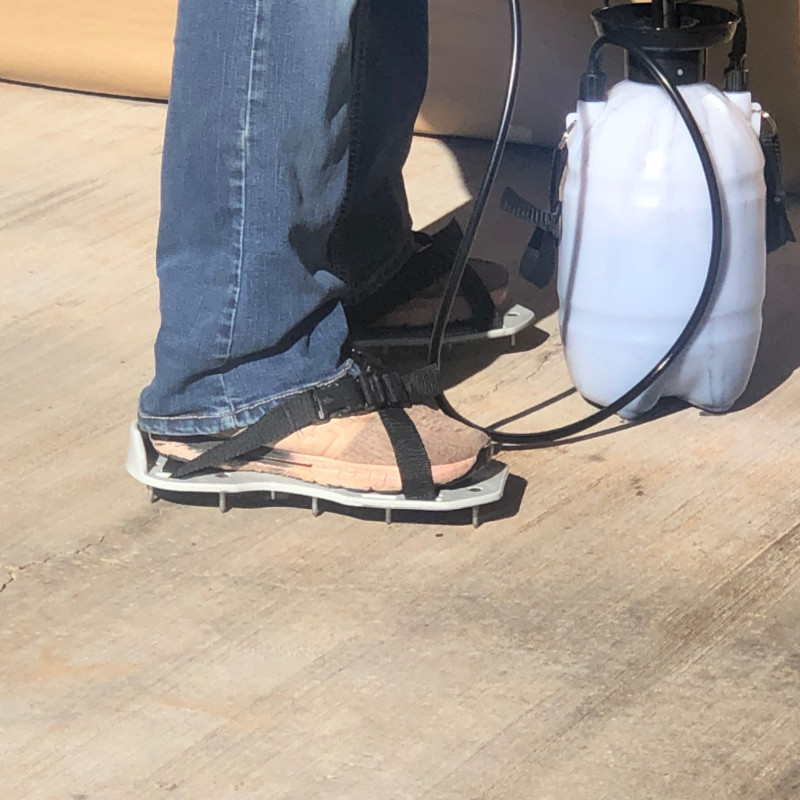
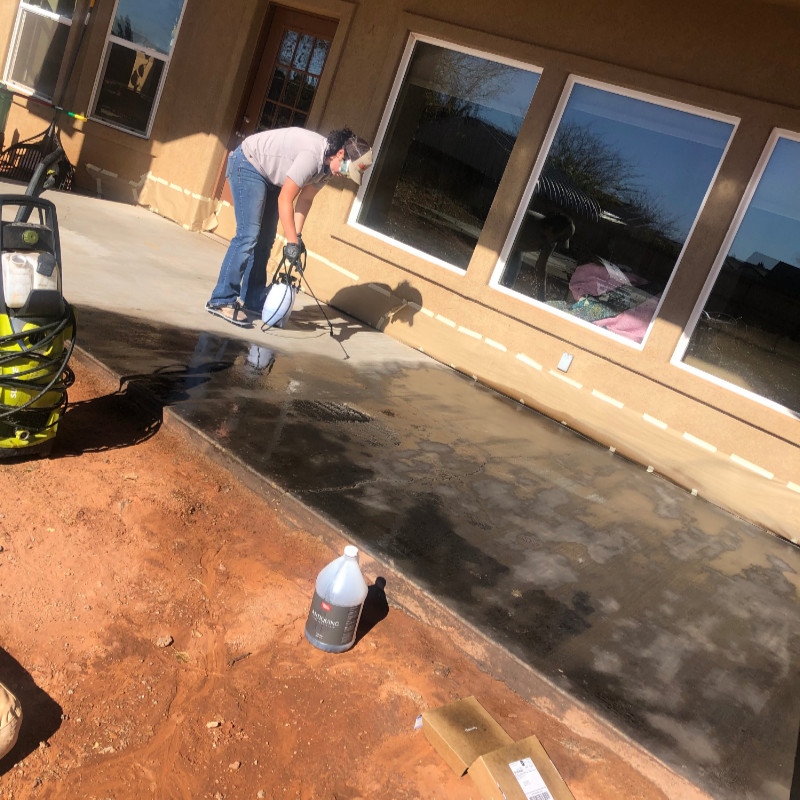
Description: This project showcases the simplicity and effectiveness of using Direct Colors’ Black Antiquing Stain & Seal kit for a DIY concrete transformation. The homeowner was drawn to the product after searching online and finding Direct Colors’ easy-to-use video tutorials. The antique black stain was applied in two coats and the cracks were painted with Walmart gold acrylic craft paint. The sealer was then sprayed on the first coat and rolled on the second coat for the desired finish. Despite the unevenness of the concrete surface, the homeowner is happy with the final outcome and loves the ease of use of the product.
Personal Tips:
- The smell of the sealer can be strong, so be prepared for that.
- If the surface is porous, you’ll likely use more stain.
- Be sure to watch the videos for best results.
- Using a weight on your roller when applying sealer is not necessary, and it’s an easy process overall.
- Don’t be afraid of making mistakes, as the product is forgiving and easy to work with.
Direct Colors Products Used:
- Black Antiquing Stain & Seal Kit
Other Products Used:
- Walmart gold acrylic craft paint
Porch Perfection: Driftwood Delight in 3 Days
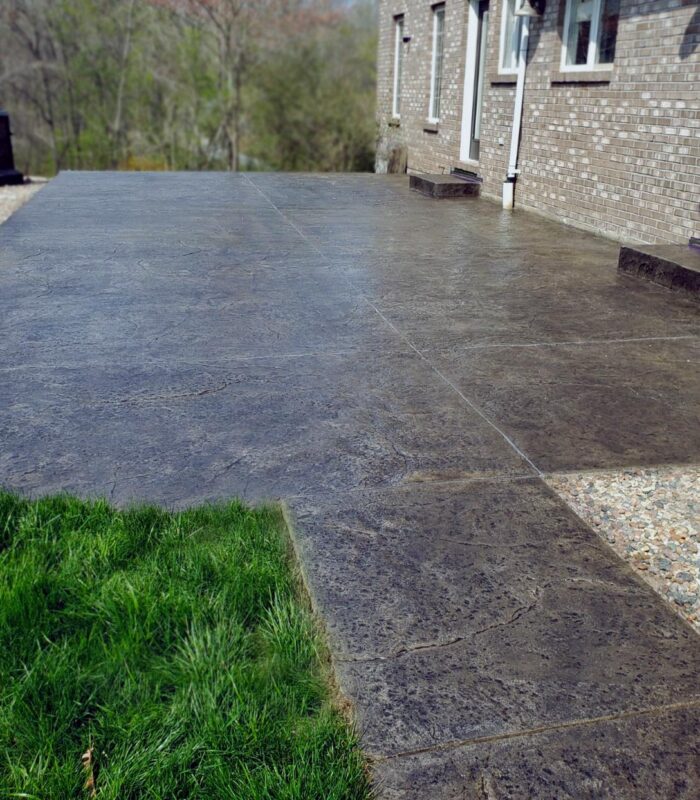
Discover the charm of rapid transformation with our “Porch Perfection” project. In just 3 days, this 200 sq. ft. stamped concrete front porch and patio went from faded and worn out to a vibrant living space, thanks to a fresh coat of Driftwood Antiquing Stain. A smooth finish was ensured by thoroughly cleaning the area and removing any old clear coat before staining, and a High Gloss EasySeal Sealer was used for ultimate protection.
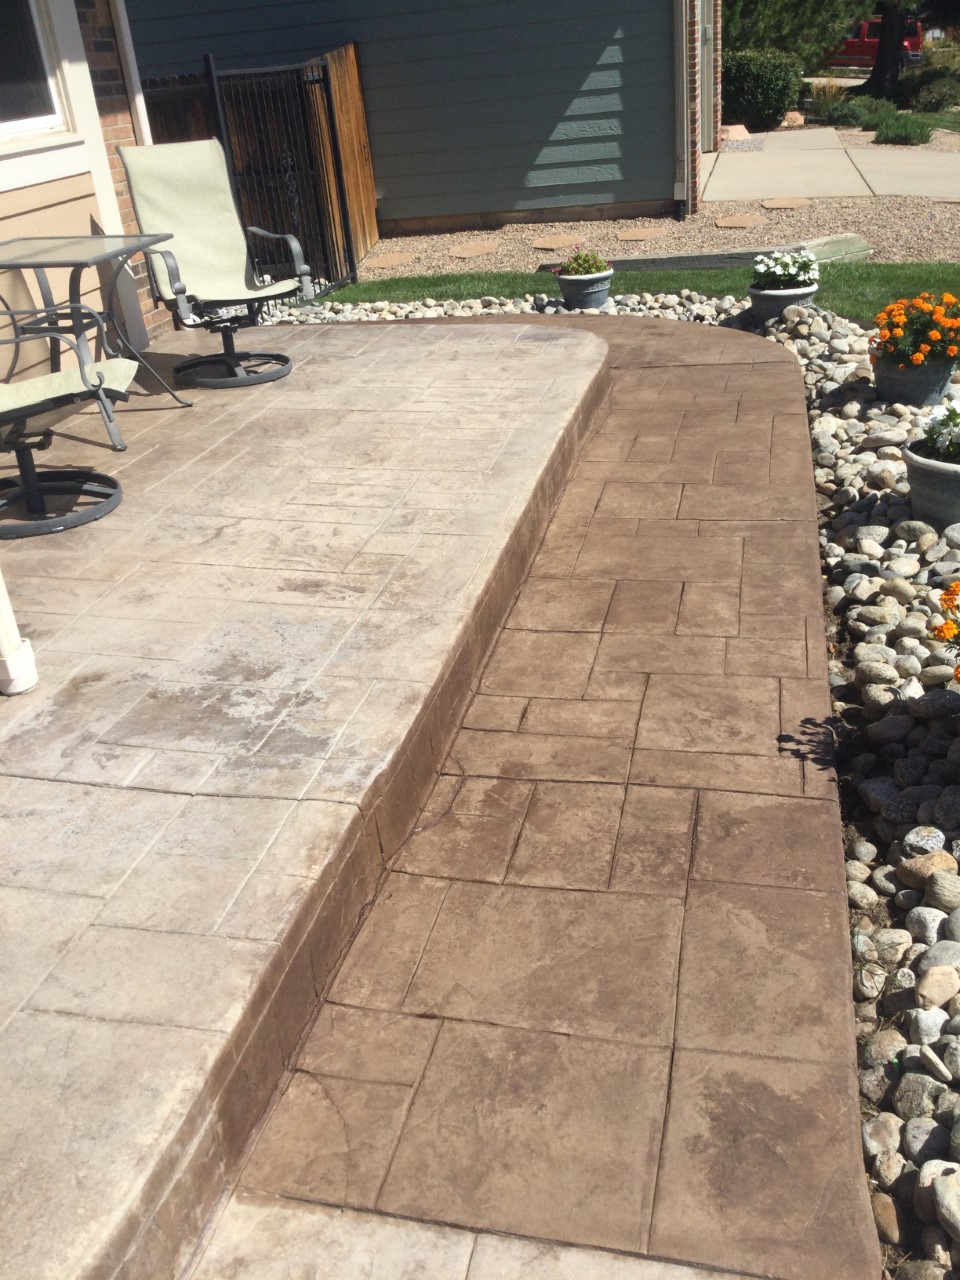
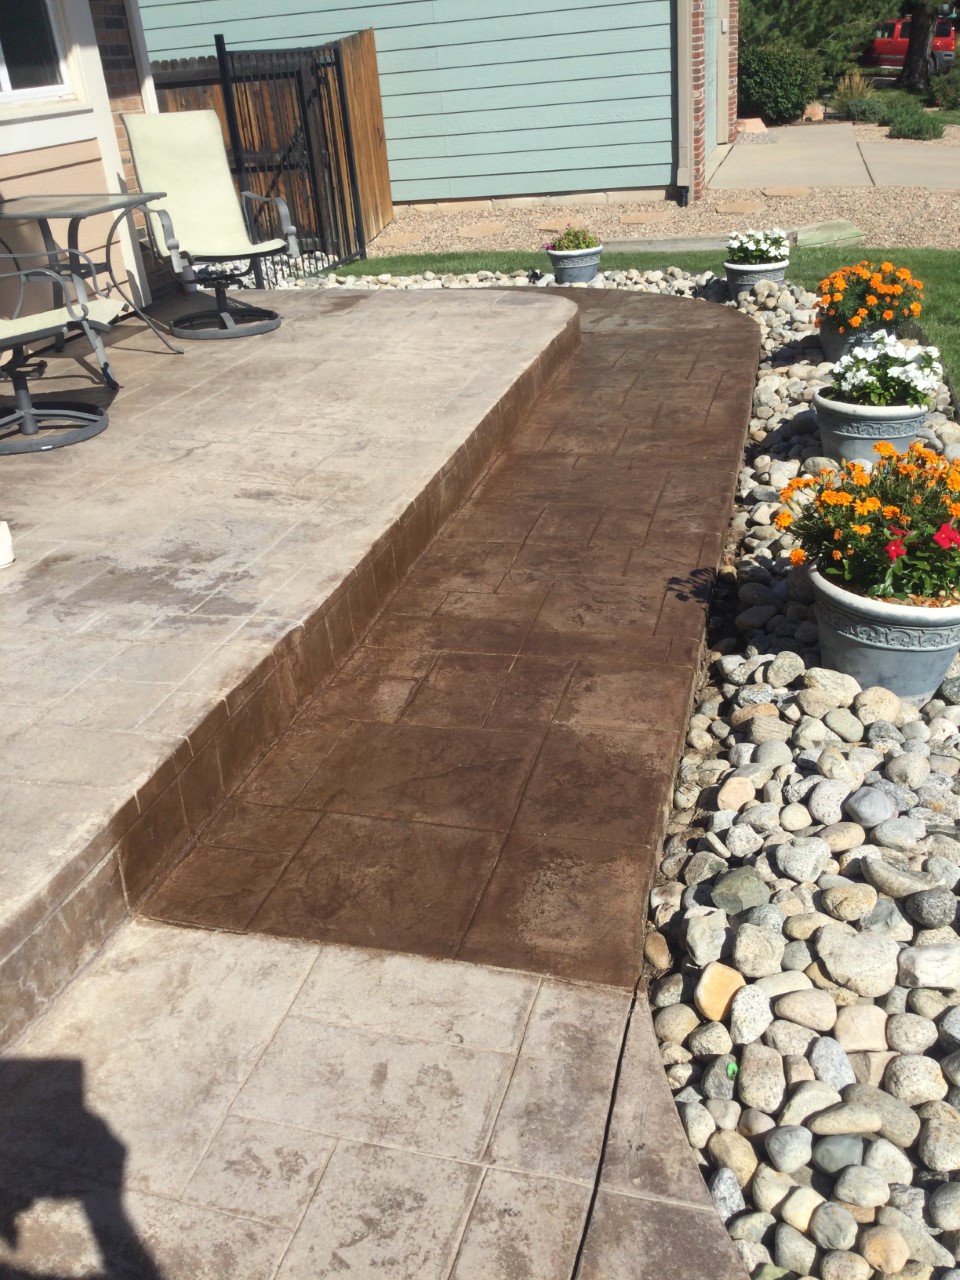
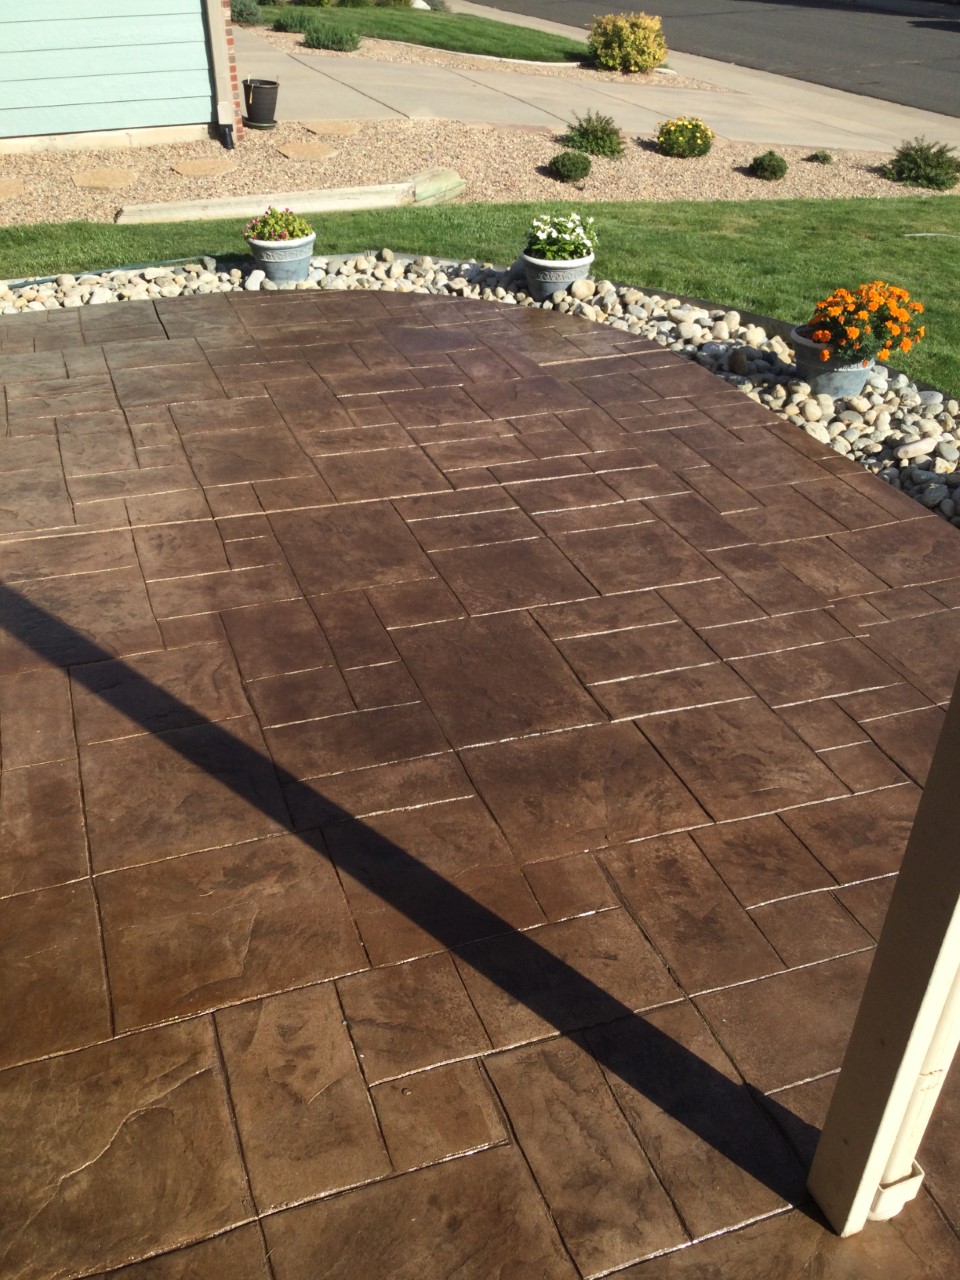
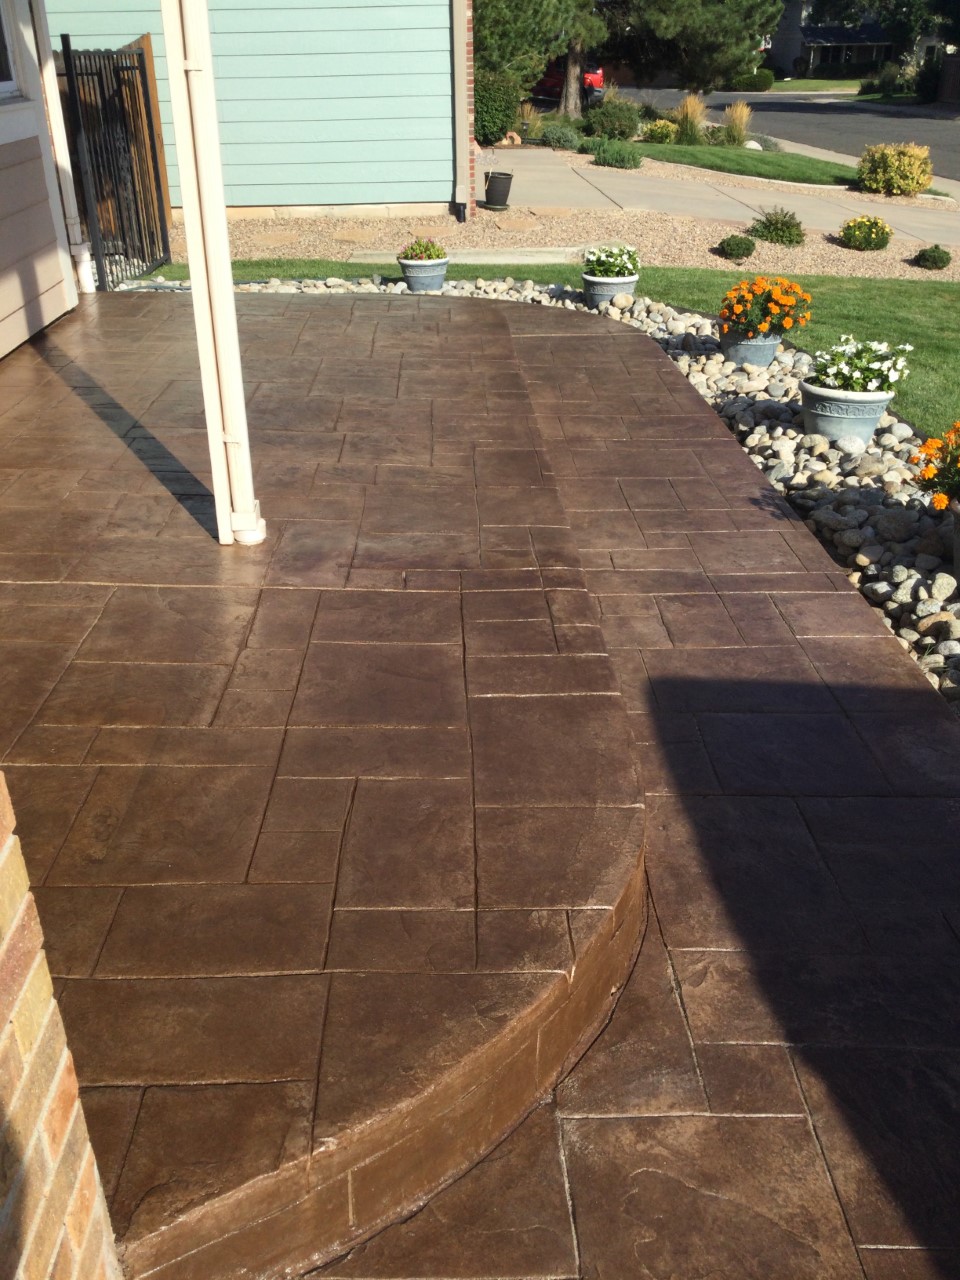
Transform your front porch and patio with this beautiful stained concrete project. Completed in just 3 days, this project covered 200 sq. ft. of stamped concrete. As seen in the before and after photos, the left side was previously faded and worn out but was brought back to life with a fresh coat of Driftwood Antiquing Stain. To achieve a smooth finish, be sure to thoroughly clean the area and remove any old clear coat before staining. To protect the new finish, we sealed it with High Gloss EasySeal Sealer.
Personal tip: make sure to clean the area that will be stained and remove as much of the old clear coat (if any) that is on it to have a smooth finish! this project will give you an amazing look and an amazing result in your patio.
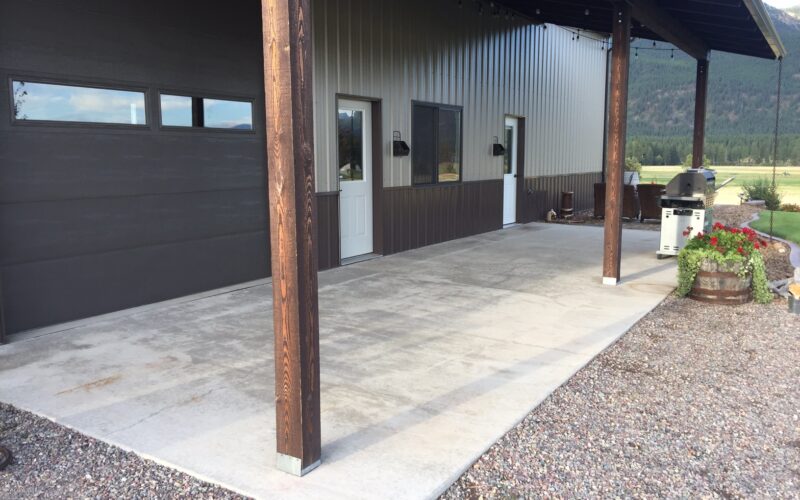
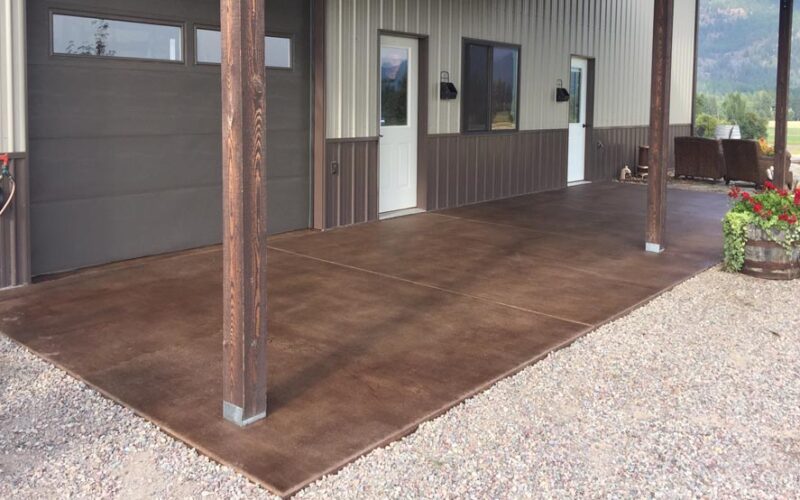
From Boring To Brown Beauty: A Broom Finish Concrete Patio Transformation
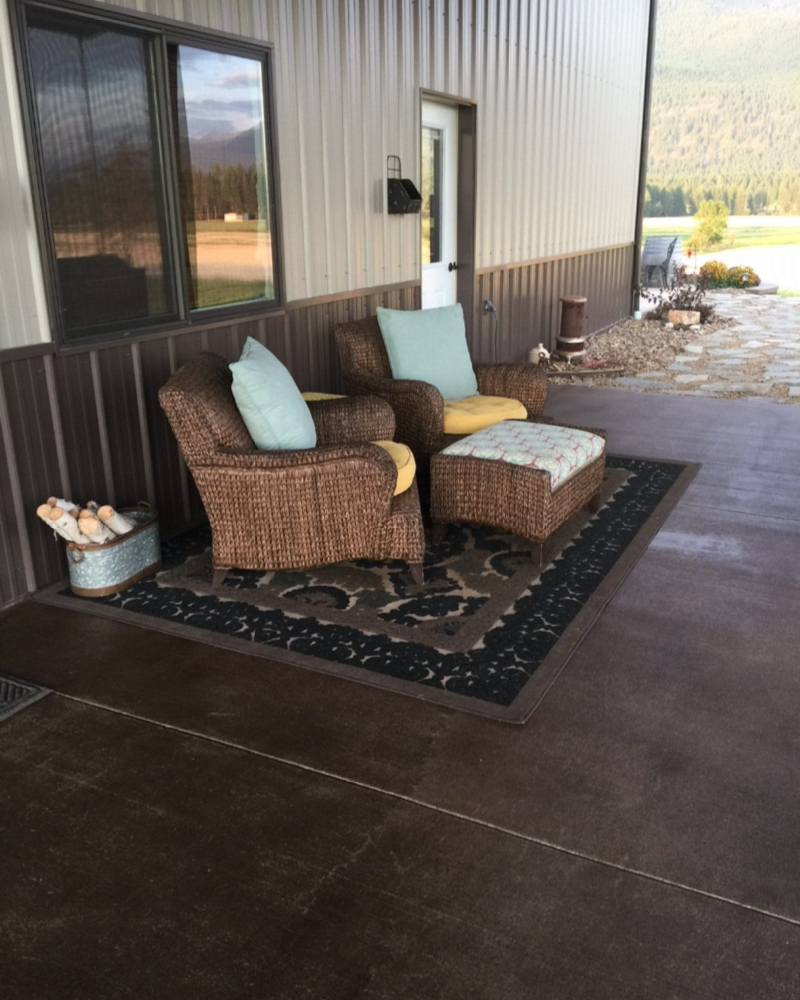
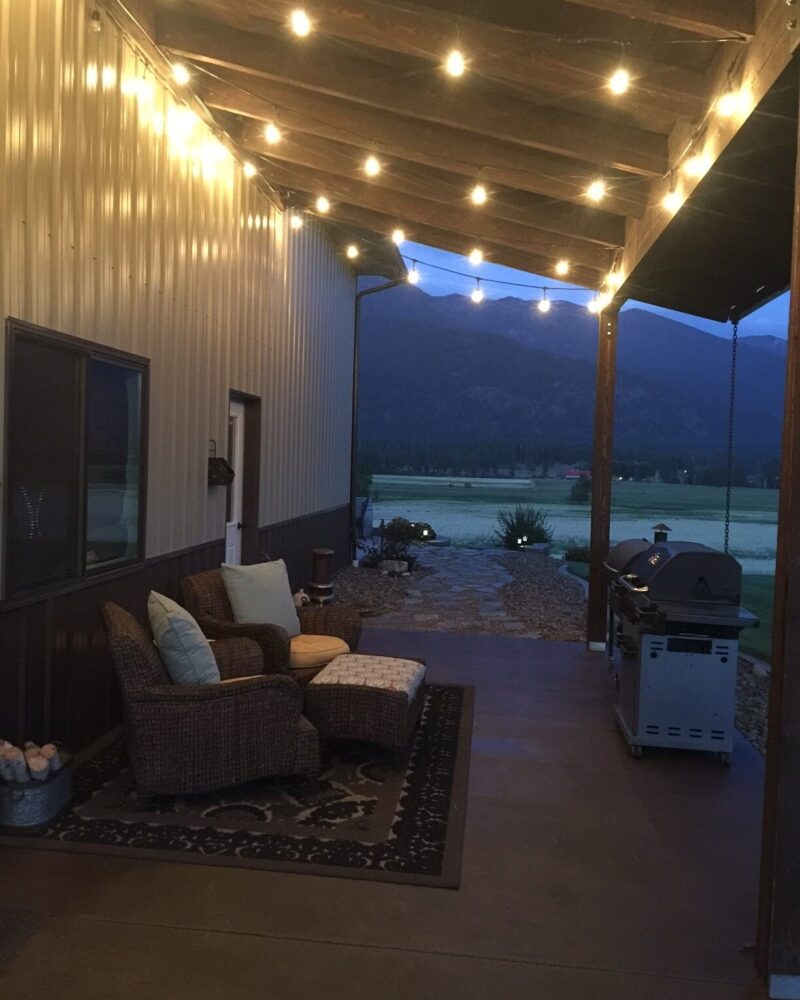
Transform your pole barn patio with the warmth and elegance of brown stained concrete. Discover how we achieved this stunning transformation using a broom finish technique and Driftwood color Antiquing stain. See the before and after photos and get inspired to upgrade your own outdoor living room space with this beautiful and durable option.
Mountain Majesty: From Freeze Damage to Fabulous
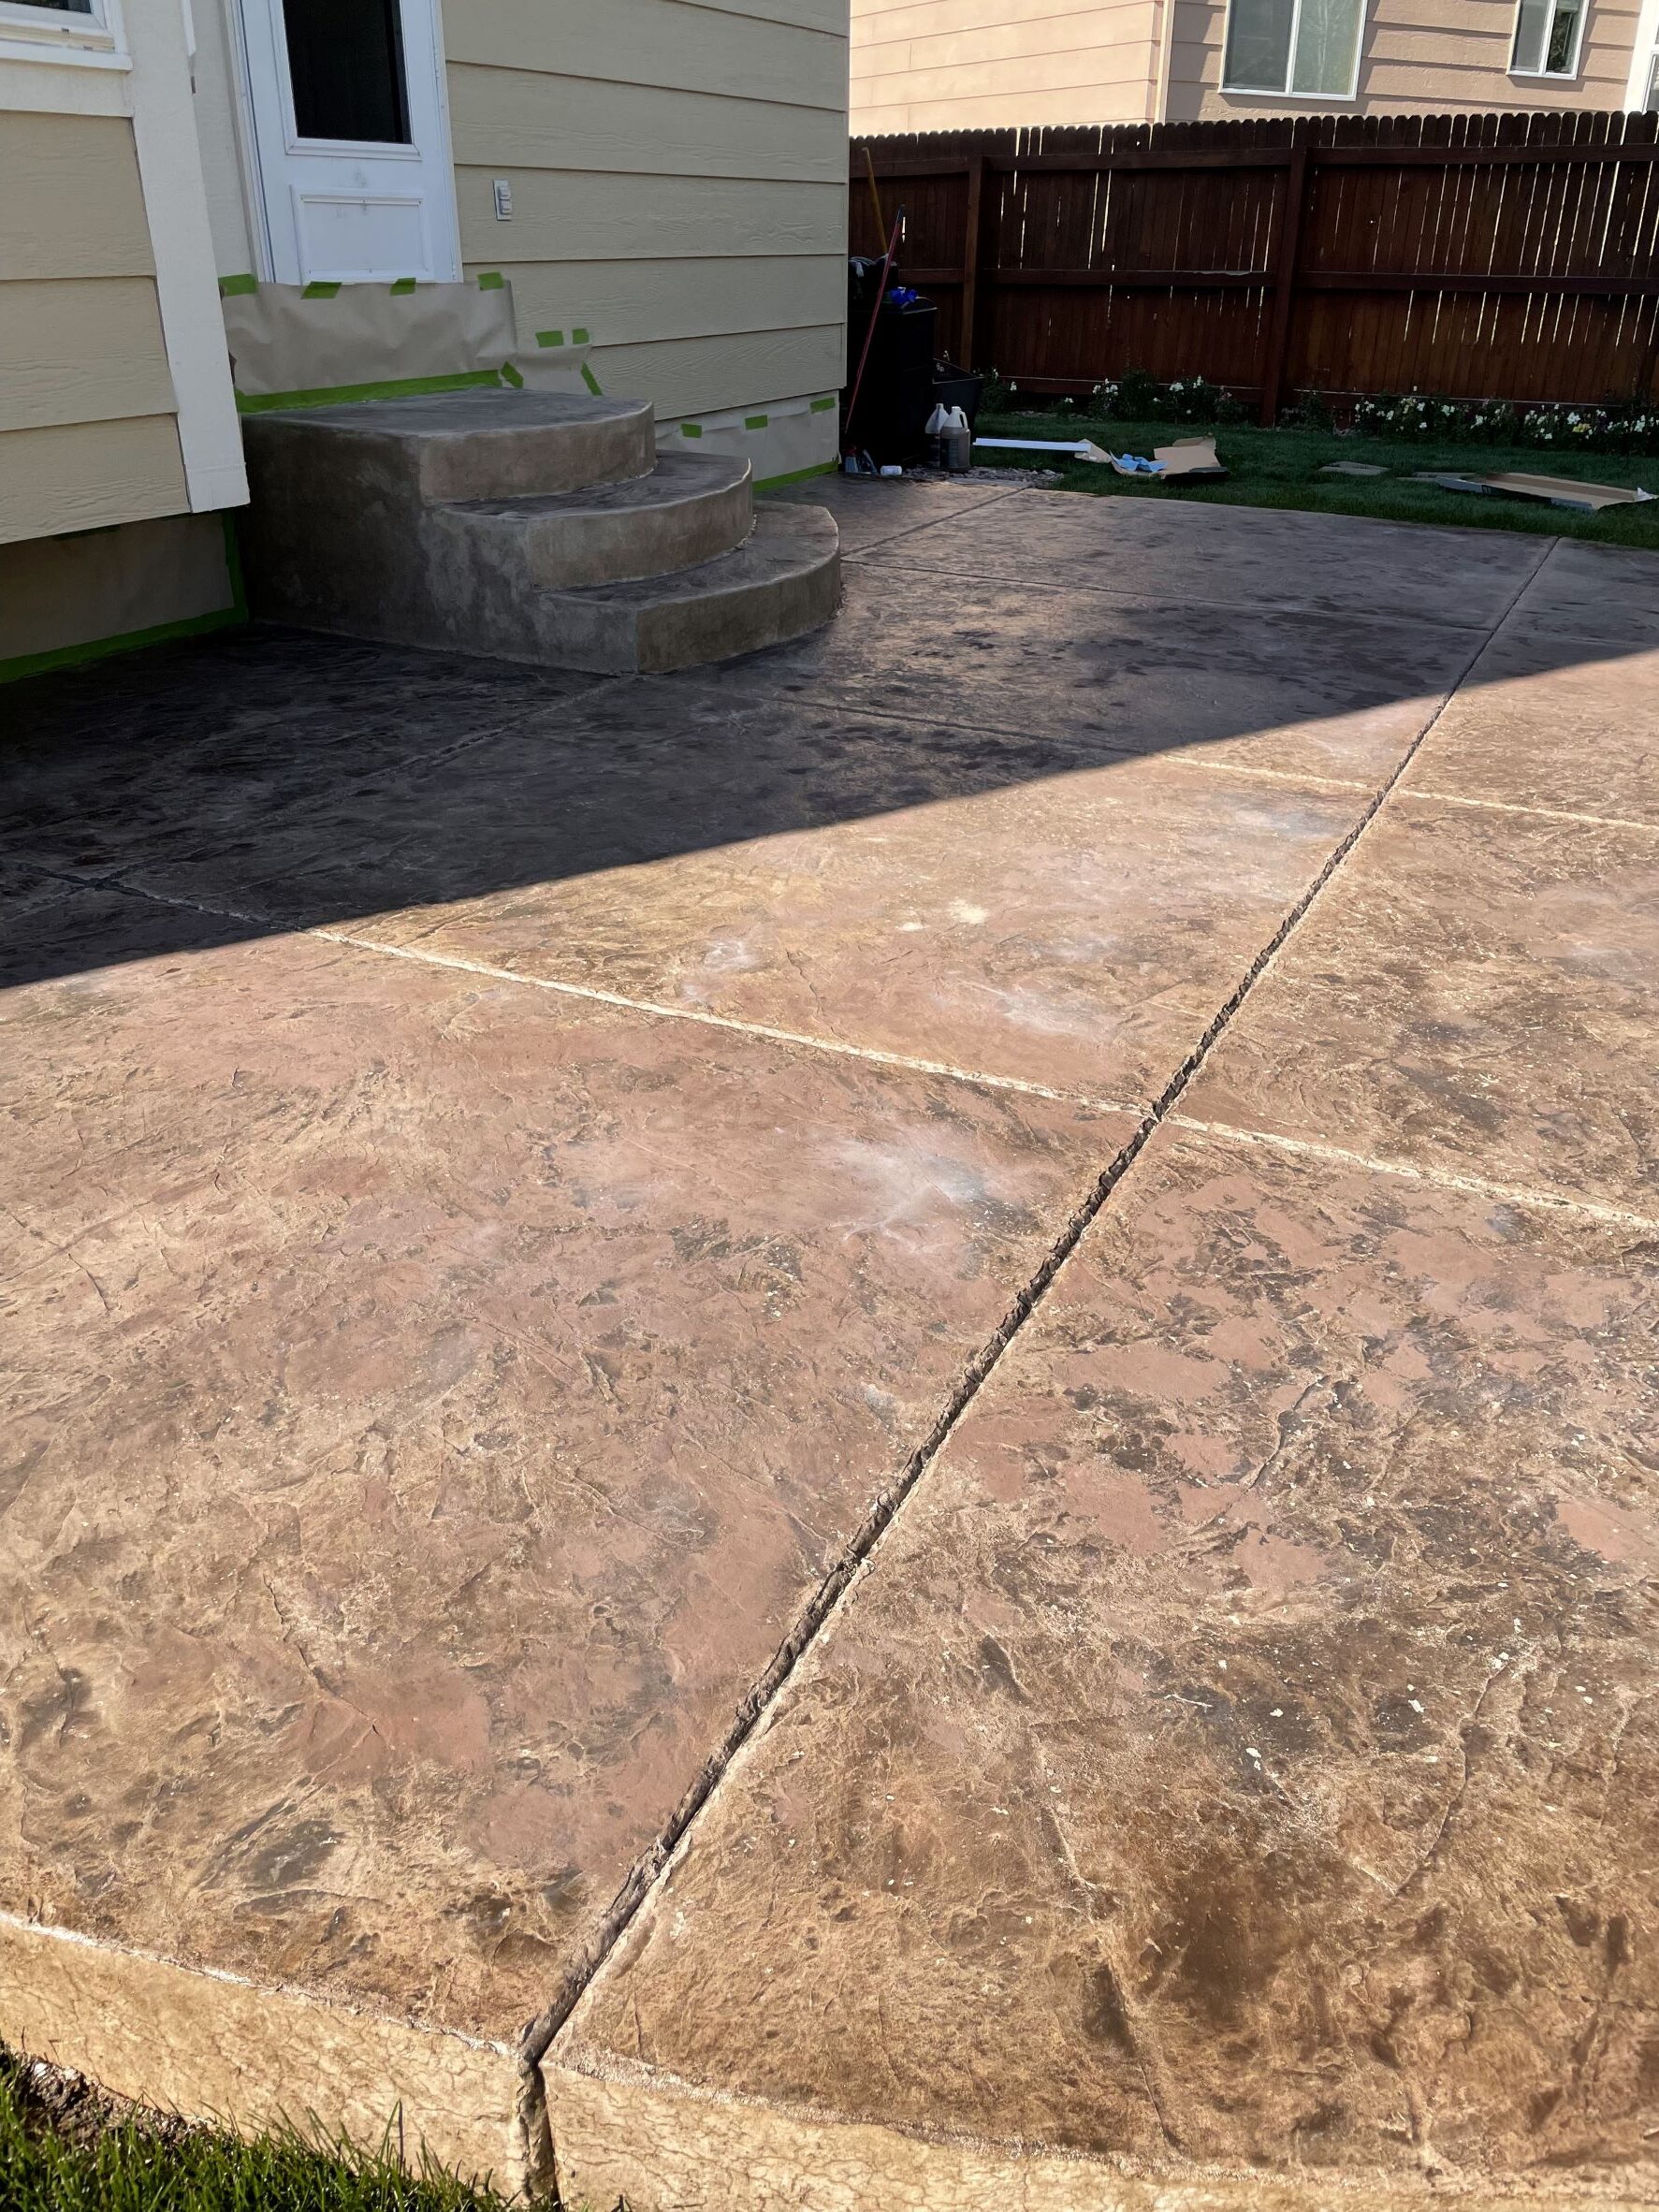
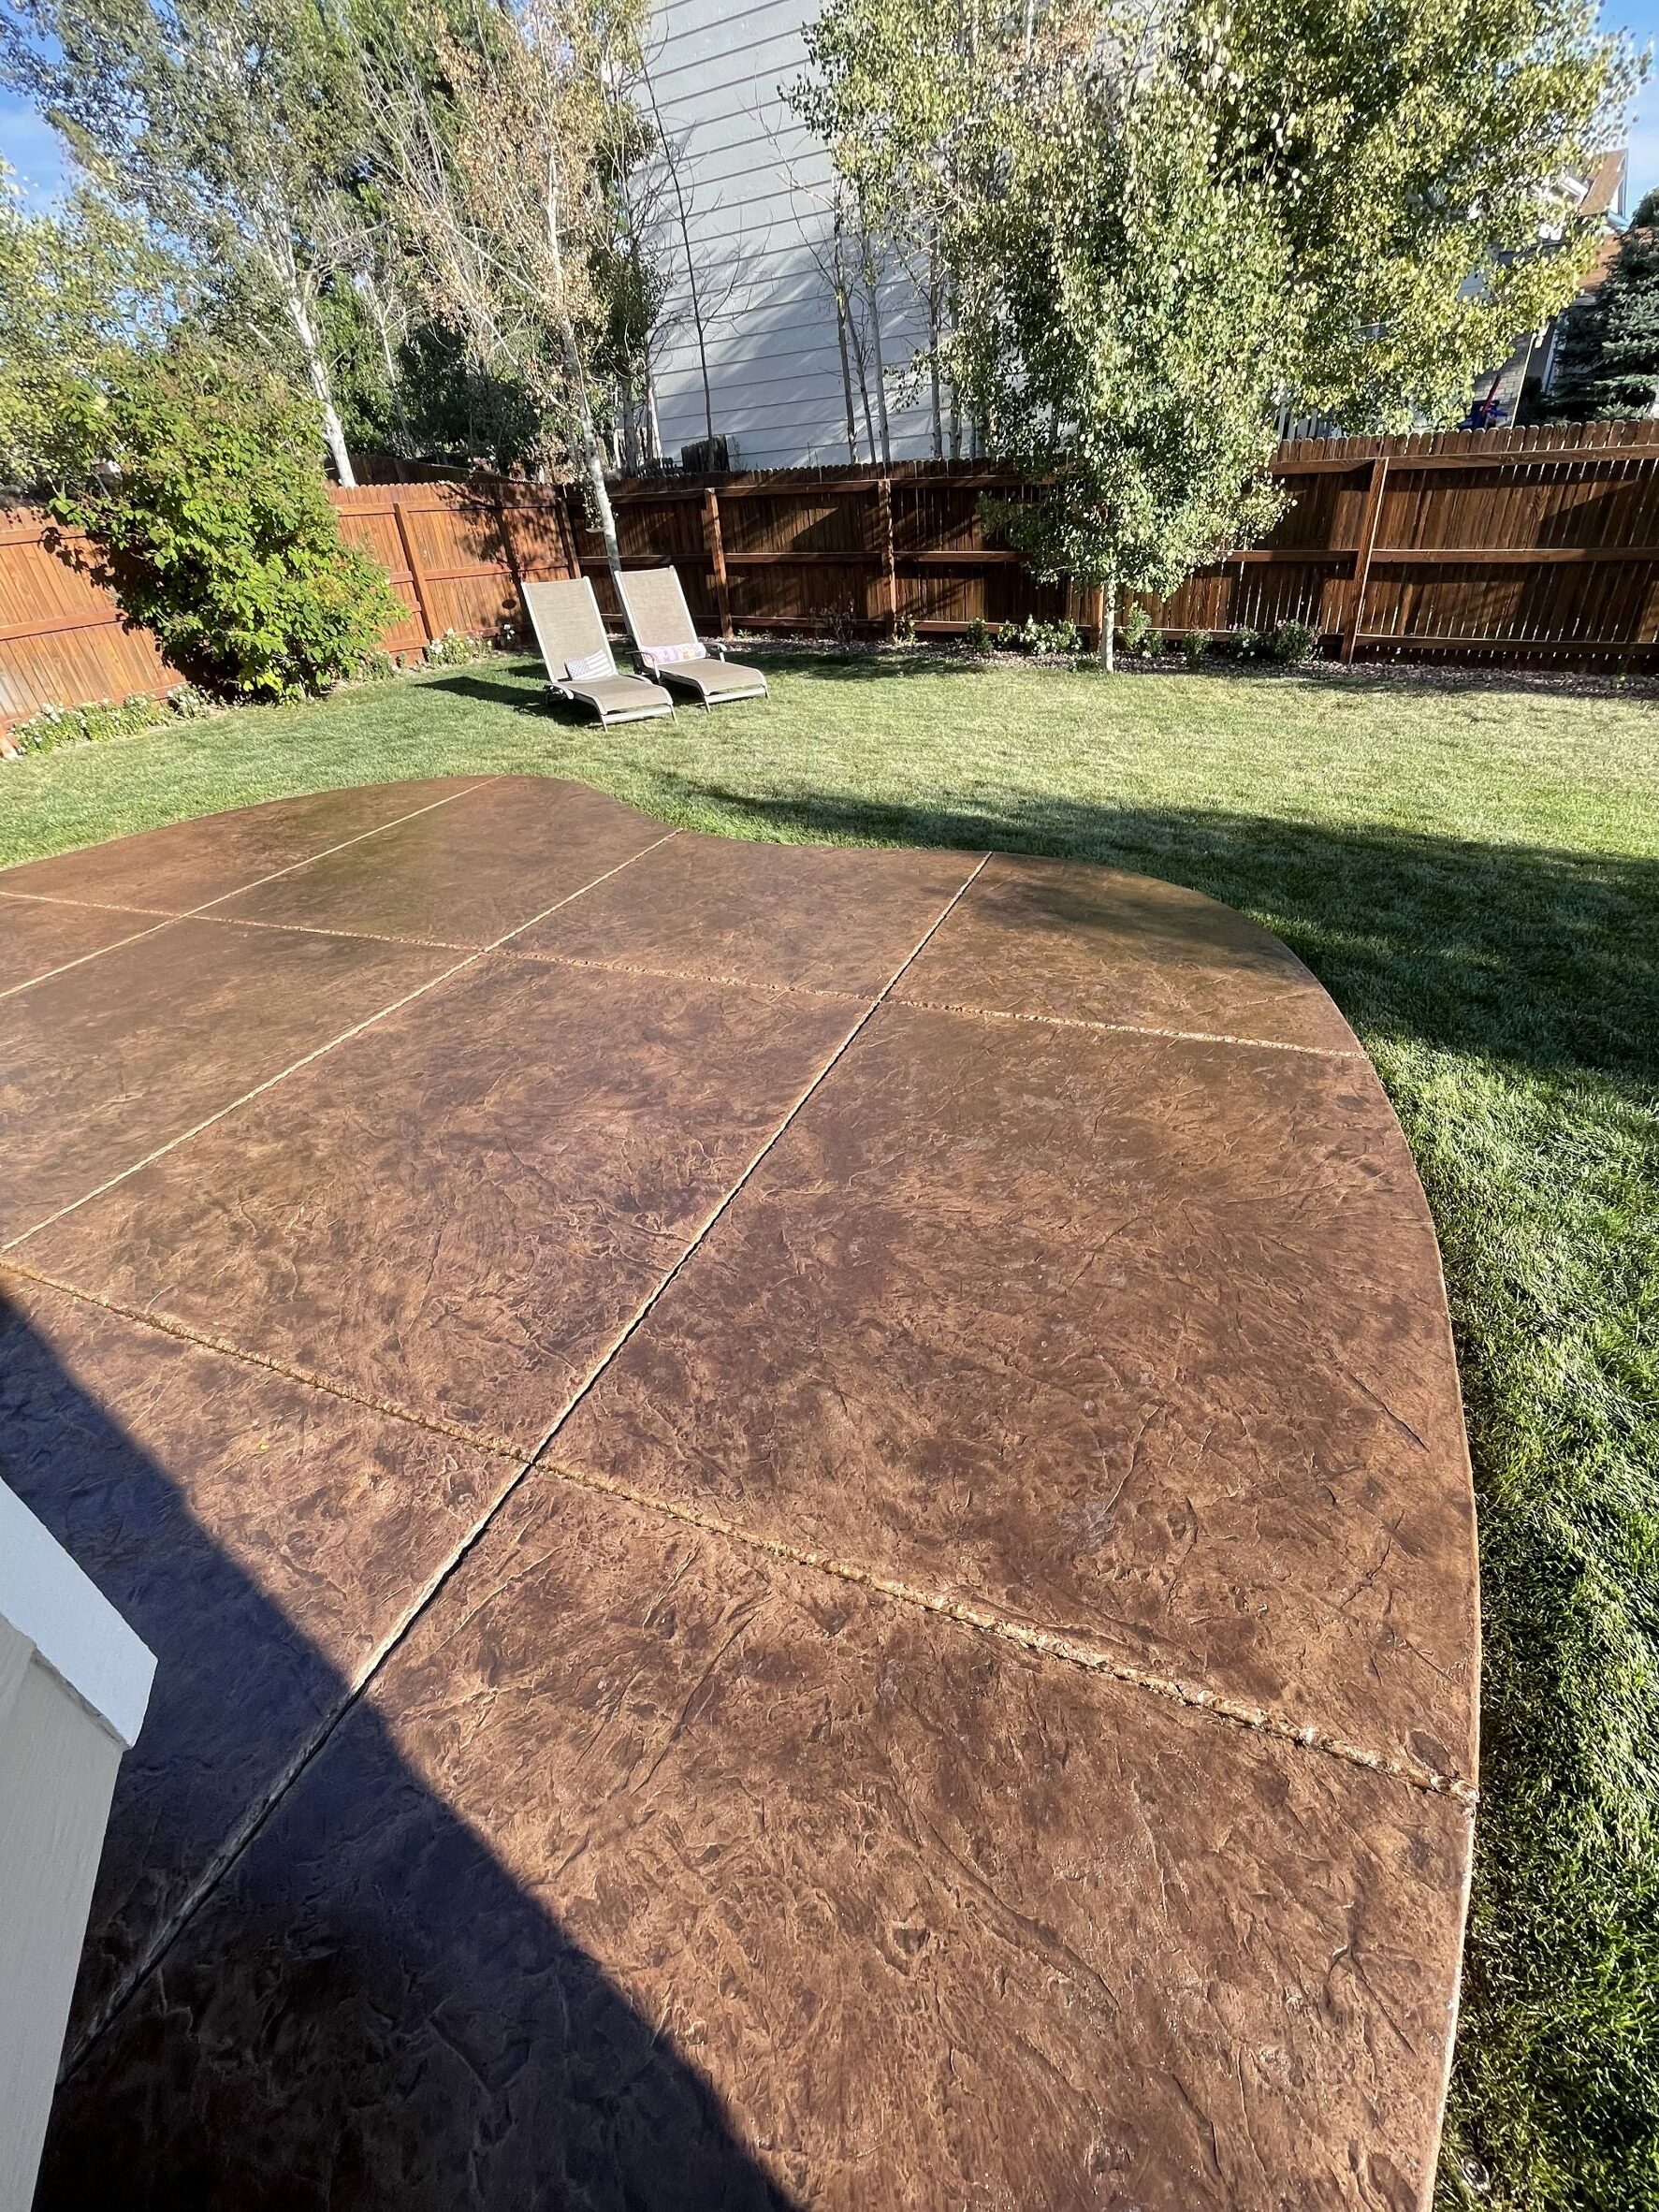
Journey with us through the transformation of a weather-beaten patio in our “Mountain Majesty” project. Starting with a surface pitted and faded by the harsh Colorado elements, this patio was revived using Direct Colors concrete patching compound, concrete pigment, and a coat of antiquing stain applied by a pump sprayer. Topped with two coats of acrylic sealer, the color popped, giving the patio a brand-new look. Dive into the before and after photos and gain valuable insights from the homeowner’s personal tips on achieving this stunning makeover.
If you have a faded or dull stamped concrete patio, it’s time to give it a fresh new look with stained concrete. Staining your concrete patio is a cost-effective way to add color and design to your outdoor spaces.
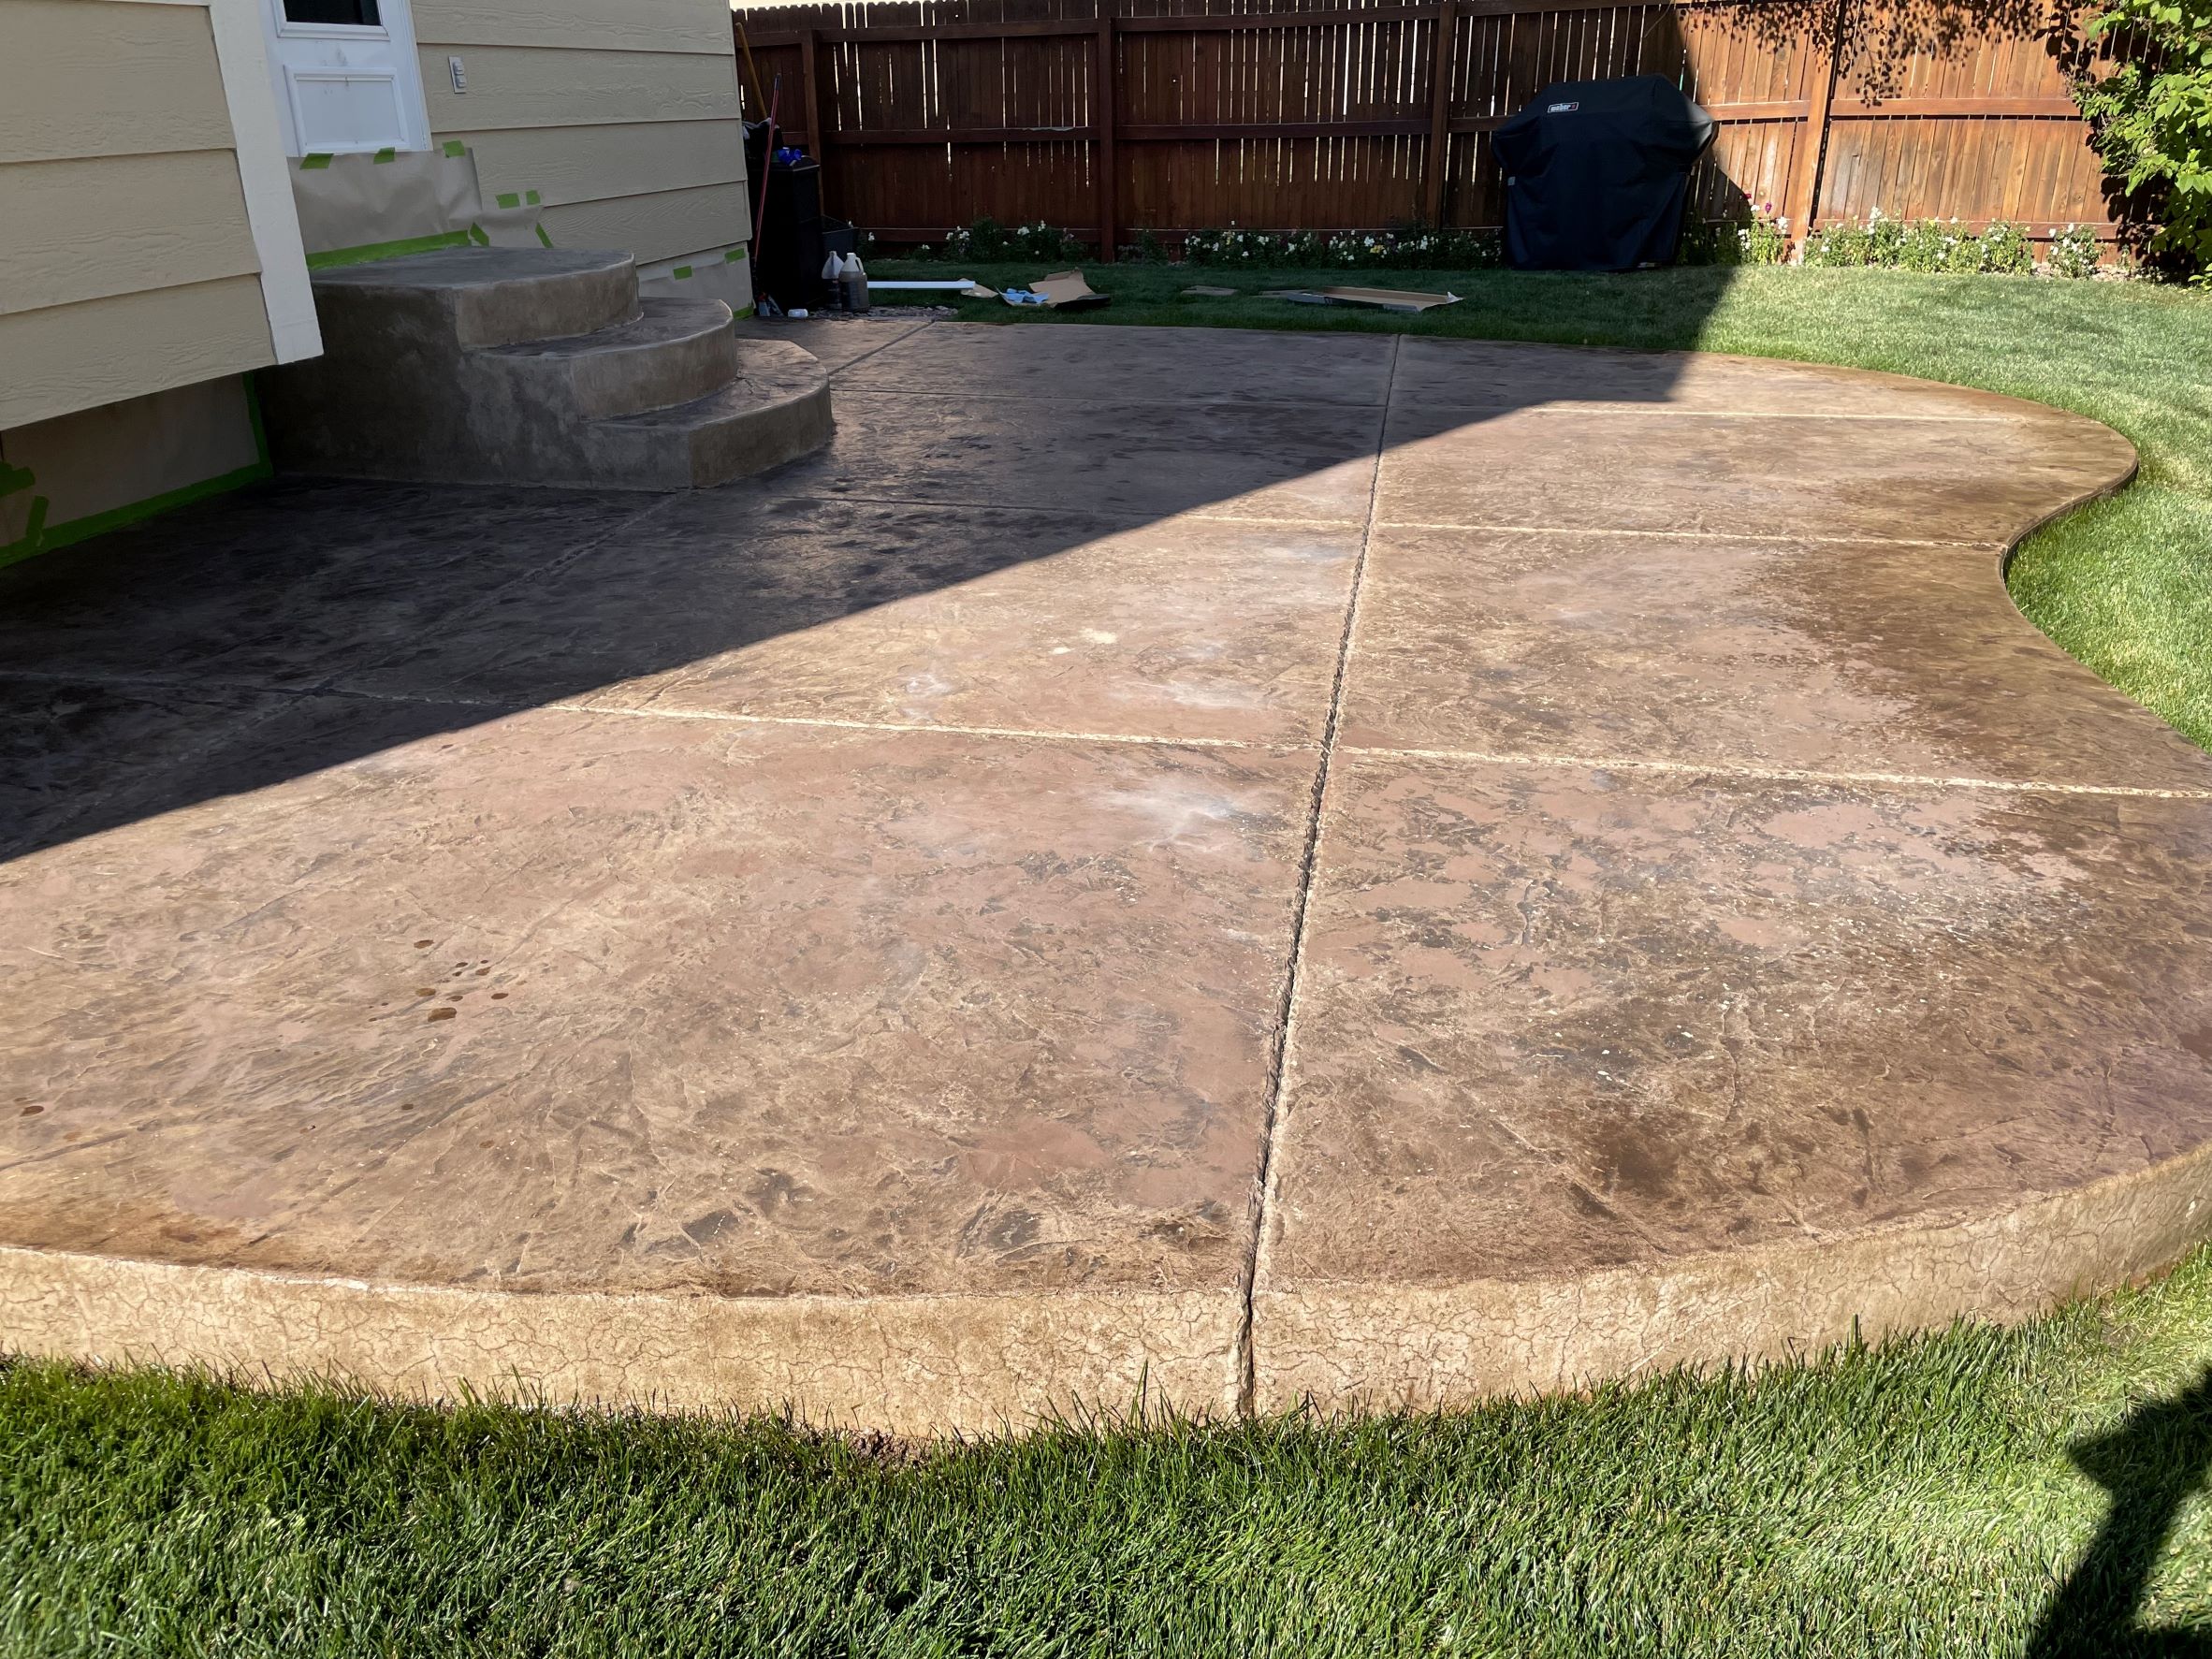
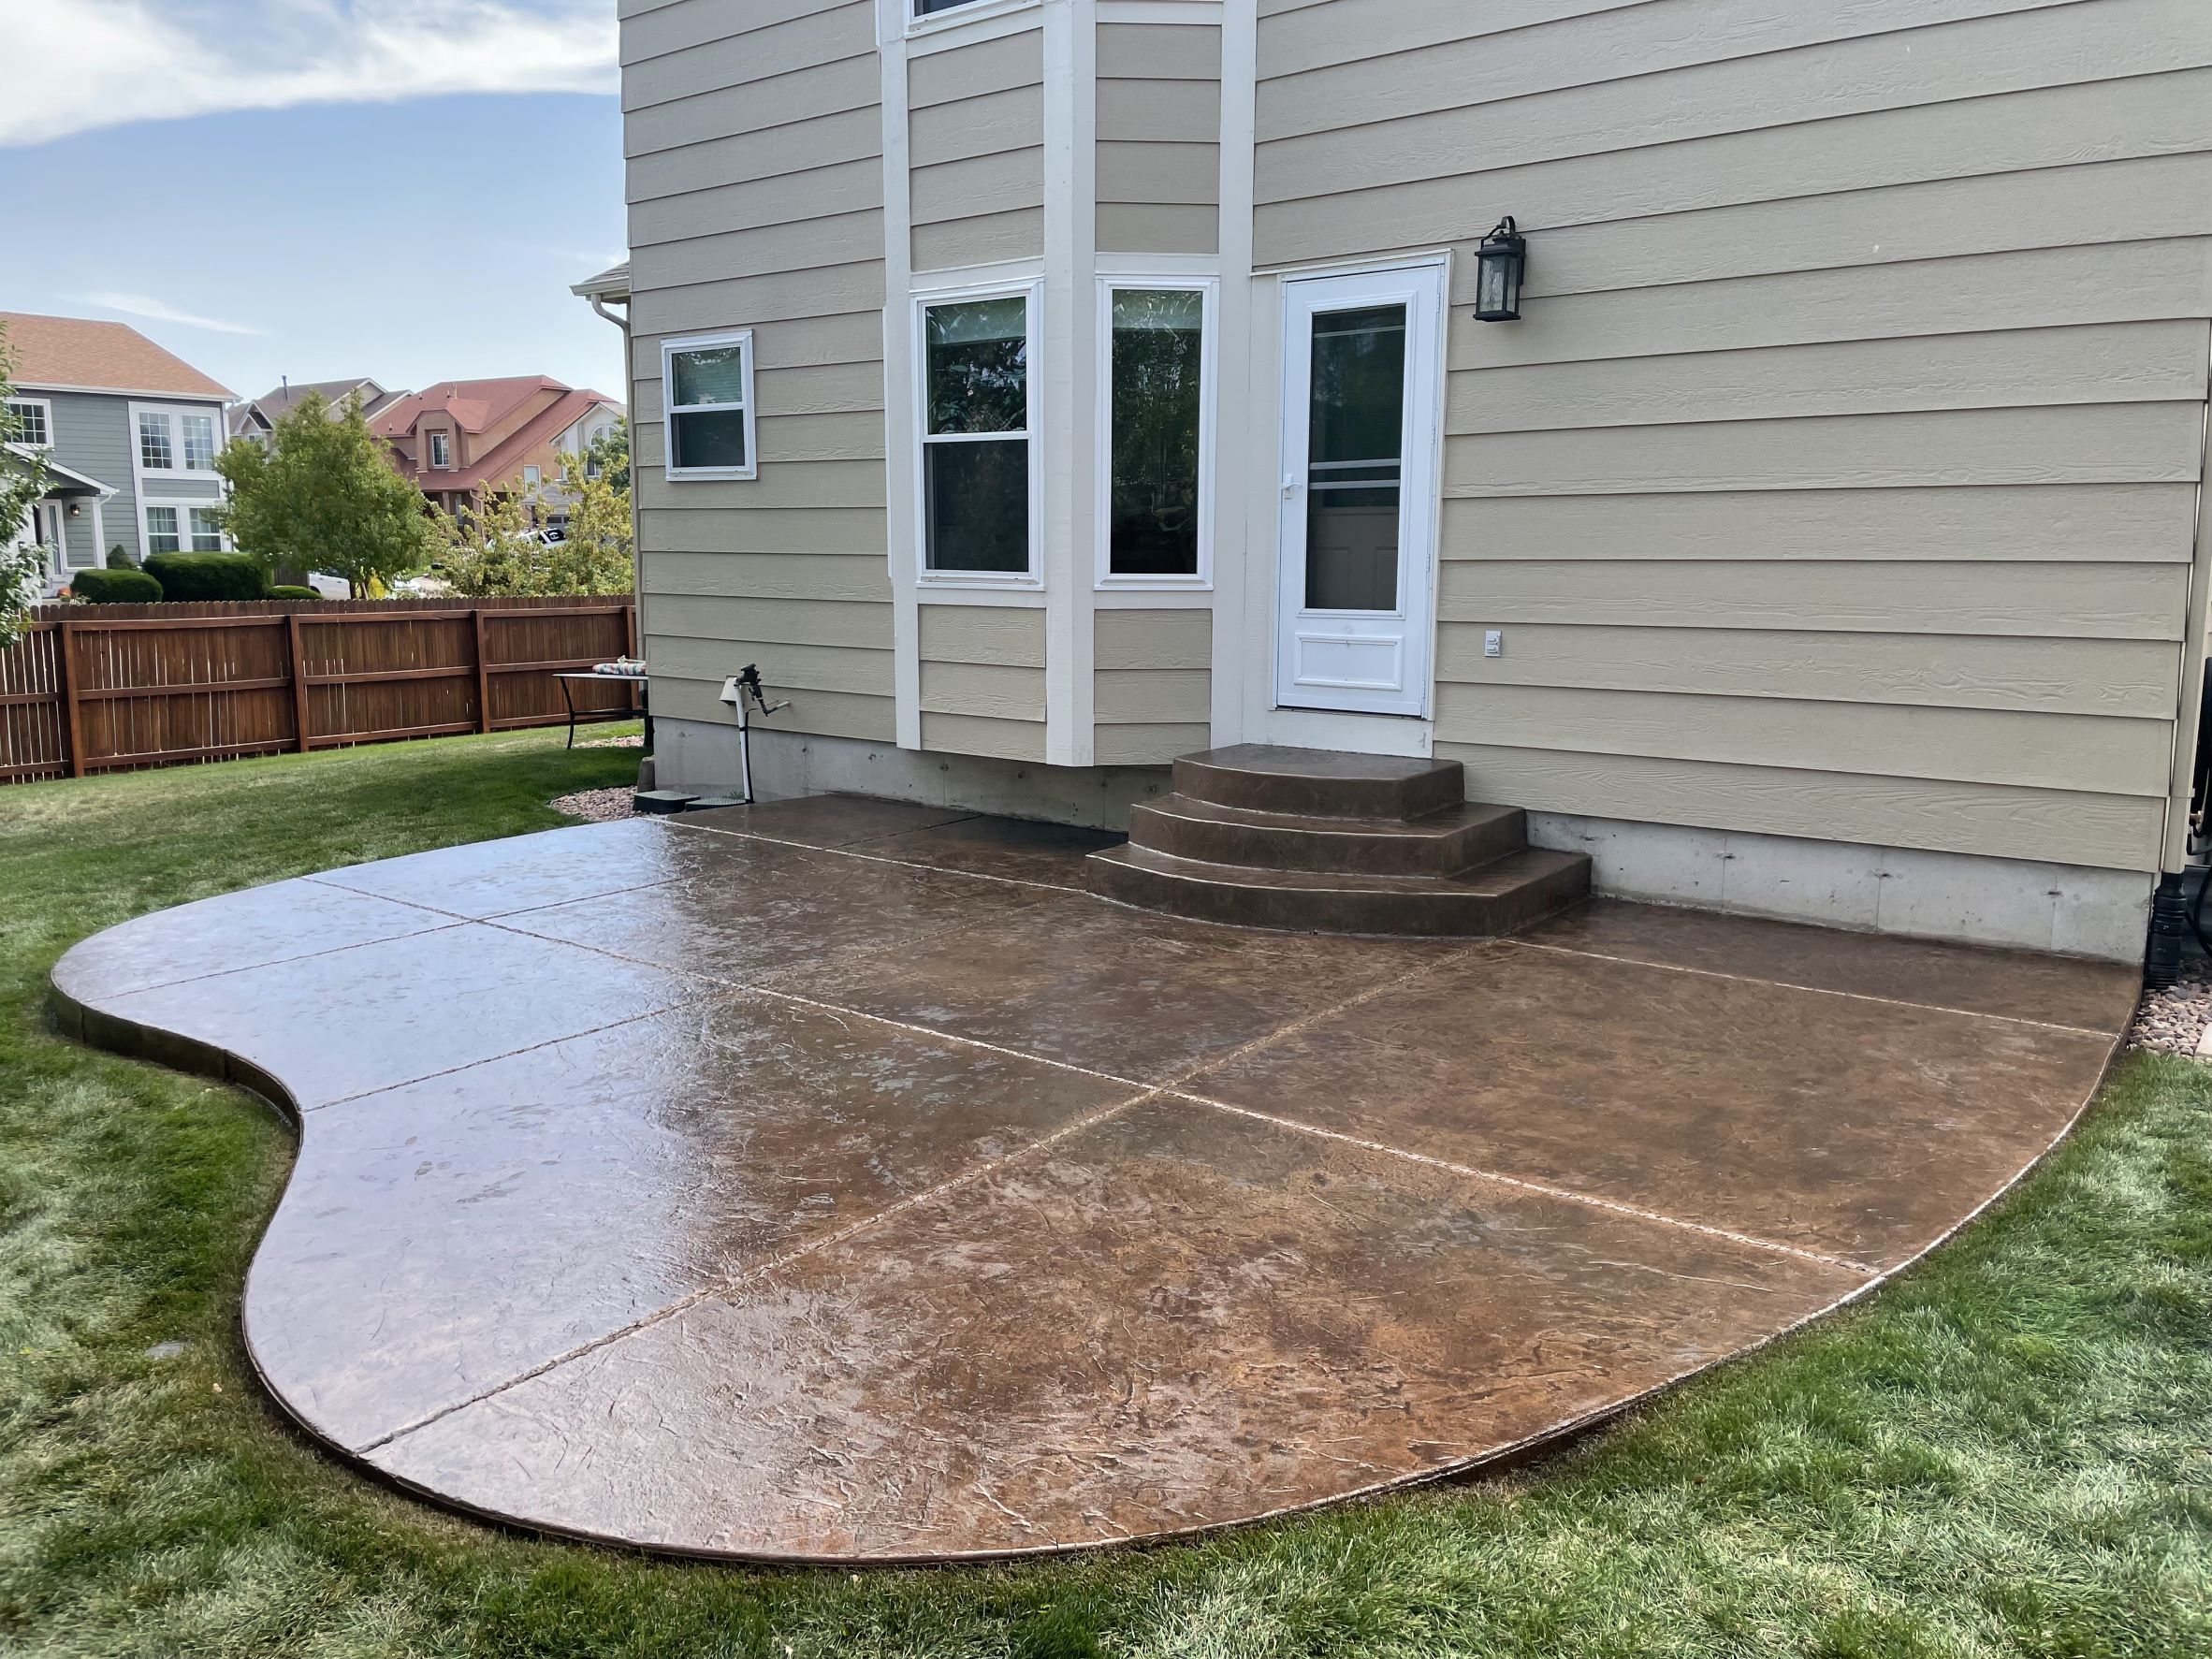
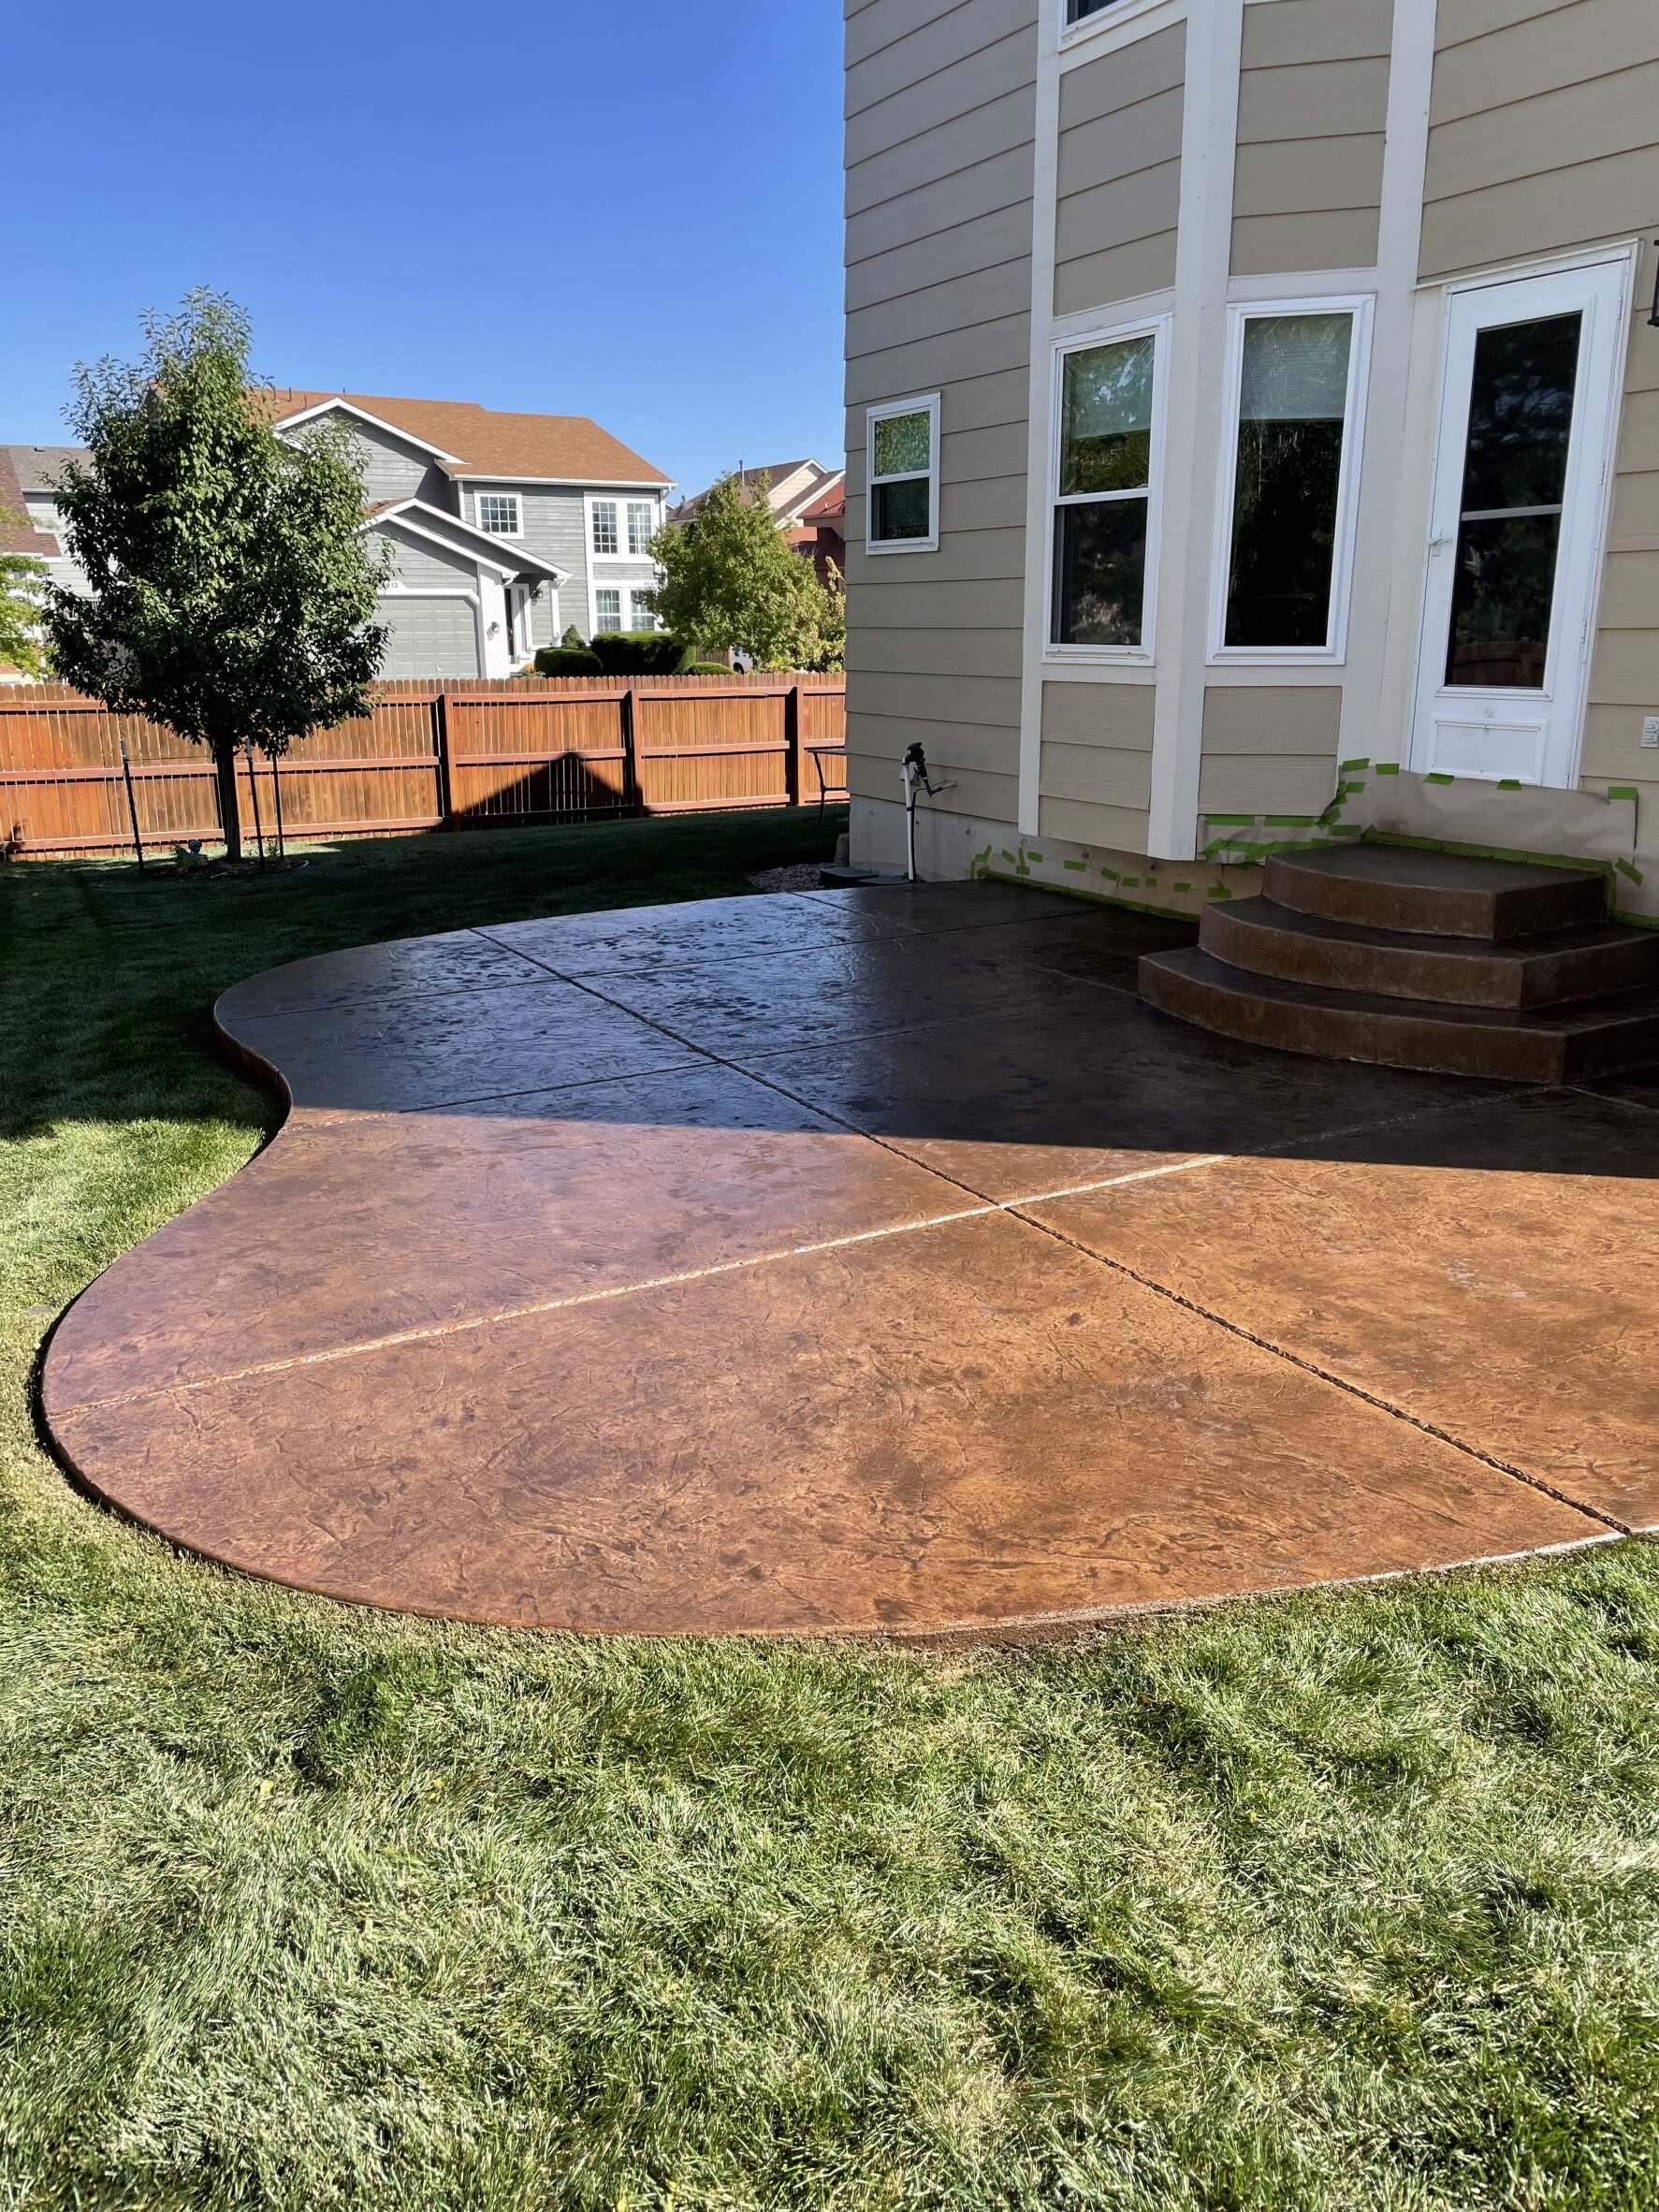
- Project Completed In: 2 day(s)
- Estimate of Square Footage: 400 sq. ft.
- Project Description:
Started off with Colorado weather damaged concrete, typical freeze and expand pitting, and warn faded coloring and sealant due to the strong sun we have. Used the Direct Colors concrete patching compound and some concrete pigment to patch all the pitted areas. Used a pump sprayer to apply the antiquing stain, which went on easily and consistently. Applied the two coats of acrylic sealer and the color popped! My patio looks brand new. We are extremely happy with the outcome, easy application, and great look. - Personal Tips:
When filling concrete pits with the patching compound, sand down the compound slightly before it’s solid, otherwise it’s almost impossible to sand down..
When applying the acrylic sealer, let the weight of the saturated roller do the work. I personally found that rolling the roller back from the far end, let the sealer apply nicely.. Roll the roller nice and slow to prevent the acrylic sealer from bubbling as it dries. - Direct Colors Products Used:
Antiquing Stain & Seal Kit ( Driftwood stain, Solvent Base Acrylic Sealer – Gloss)
Concrete Patching Compound
Concrete Pigment (Cocoa Brown)Other Products Used:
Pressure washer to clean it off
Revitalizing Sunfaded and Blotchy Concrete Patio Design
If you’re looking to refresh your sunfaded and blotchy concrete, look no further. This 2-day project demonstrates how a dated and worn-out surface can be transformed into a refreshed and revitalized outdoor space.
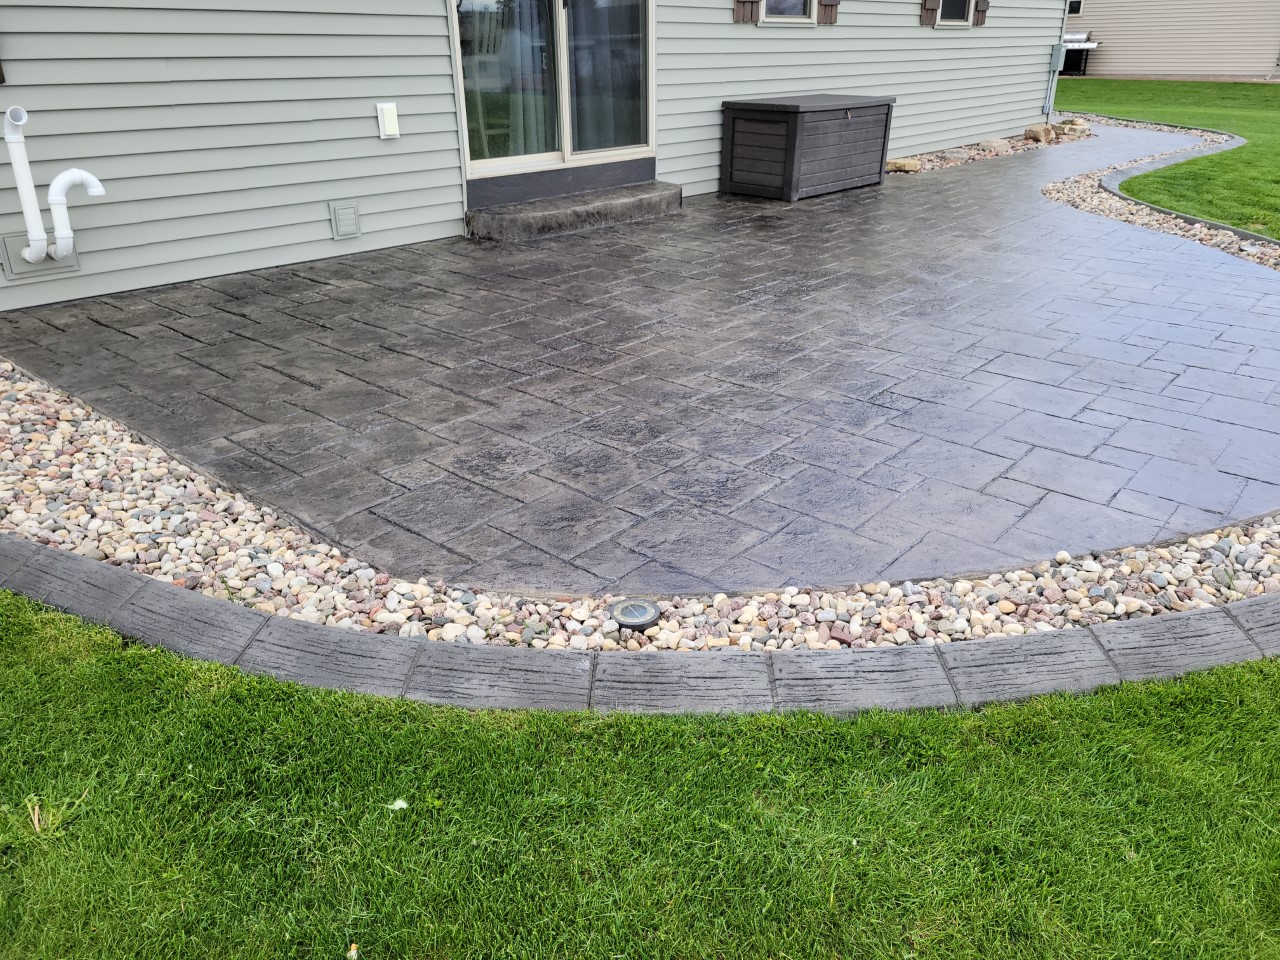
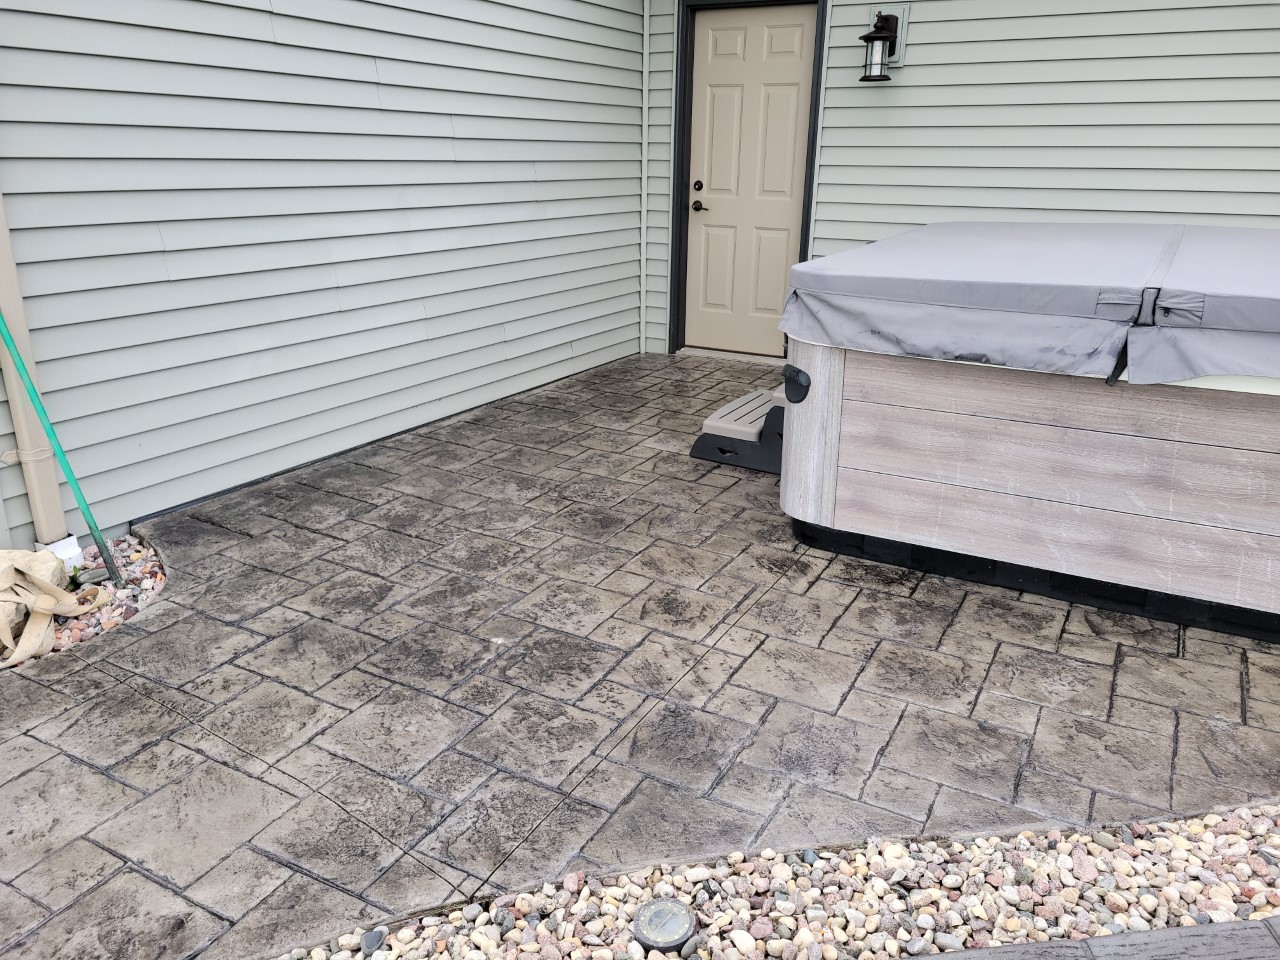
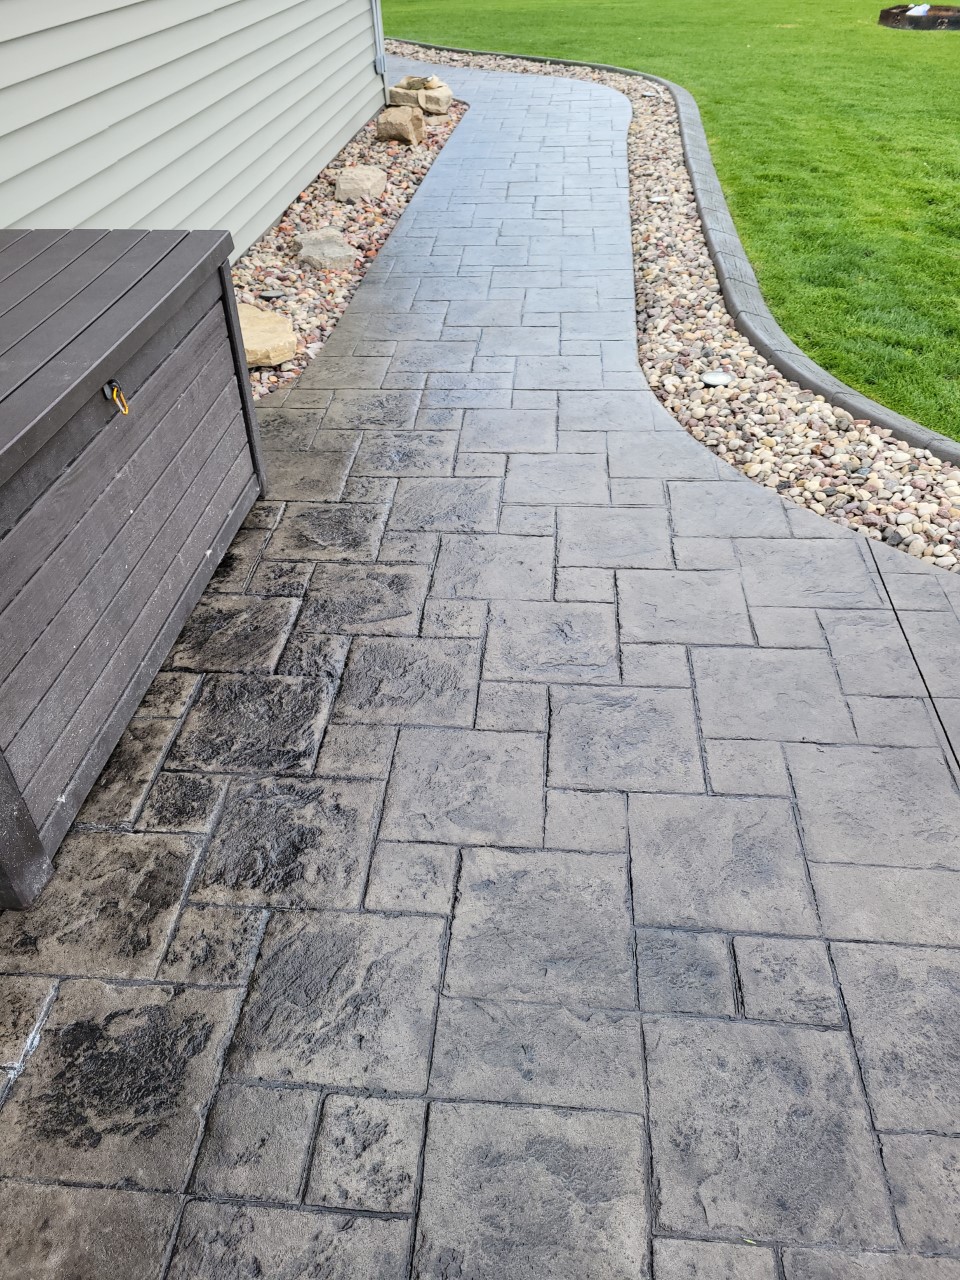
This 2-day project transformed a sunfaded and blotchy concrete surface into a refreshed and revitalized area. Covering 400 sq. ft, it involved redoing the color and also sealed all concrete curbing. Our team used Xylene and a Generac pressure washer to clean the surface and prepare it for the new color. Personal tip shared by our team is to always prep the surface properly before staining for best results. A pressure washer is very helpful in this case.
Black Simplicity: An Easy Stained Salt Finish Concrete Slab
Upgrade your patio material with the beauty of color. This project showcases how a simple salt finish concrete patio and outdoor concrete stain application can turn an ordinary concrete slab into a beautiful and unique feature for your home.
Concrete Color Change Transformation: Before & After
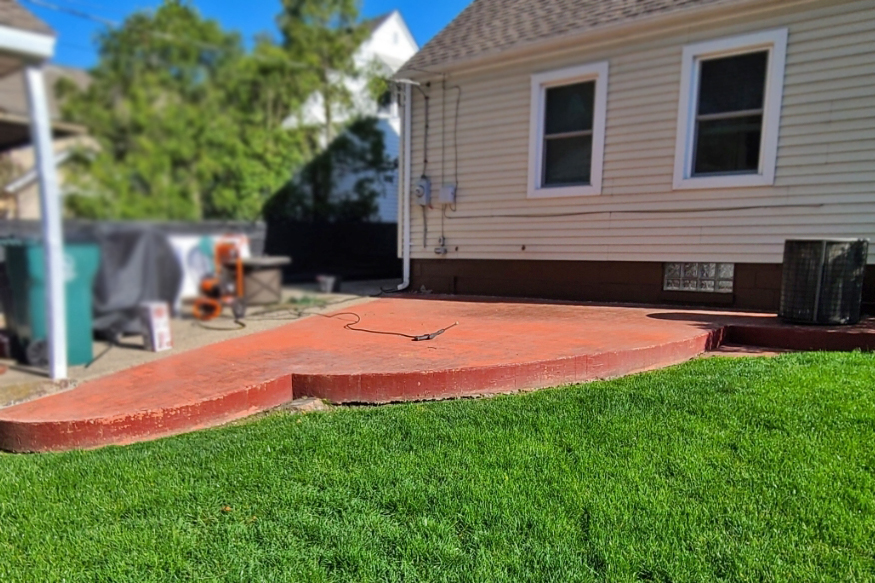
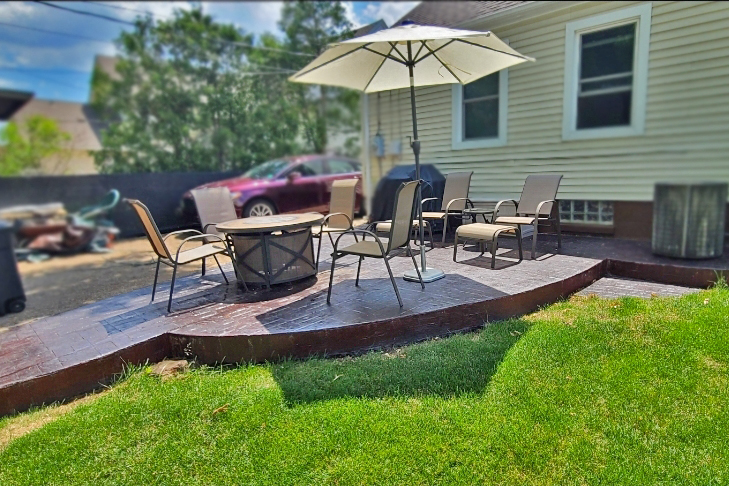
When I moved into my home, the patio was an eyesore with its unsightly orange color. Determined to enhance the outdoor living space, I set out to find a solution. With the help of Direct Colors, I was able to achieve the perfect look using a mix of charcoal and black Antiquing stain. The deep, dark color highlights the natural variations in the stamped concrete while also subtly showcasing the previous orange hue. To complete the transformation, I sealed the patio to make the color pop. I couldn’t be happier with my new living space!
- Project Completed In: 4 day(s)
- Estimate of Square Footage: 350 sq. ft.
- Project Description:
I was looking to recolor and stain my rather ugly orange patio that was there when I moved in. The patio was stamped so I knew there had to be a way to make it look good. Luckily, I found Direct Colors and got just the result I wanted. I mixed charcoal and black Antiquing stain to create a deep dark color which slightly showed the previous orange, creating a natural look. Then I sealed it to pop the color. I love it! - Personal Tips:
If you are covering an old color that is very bright, make sure to buy enough stain. It took me multiple layers due to the bright orange that was there before. Other than that, it was a rather simple process. I mixed some anti slip into the final sealer to ensure a finish that was also safe. - Direct Colors Products Used:
Charcoal Antiquing Stain & Seal Kit
Black Antiquing Stain & Seal Kit
Non Slip Additive - Other Products Used:
Two pump sprayers & deck brush
Crimson Revival: A Stamped Concrete Transformation
Journey through the four-day transformation of a 1236 sq. ft. stamped concrete patio in our “Crimson Revival” project. Starting with a disappointingly colored surface, this homeowner turned things around using Direct Colors’ Antiquing stain for a more vibrant, gloss-finished look. Not only does the Crimson Antiquing stain make the stamped area pop, but the high gloss concrete sealer also provides an attractive ‘wet look’ that highlights the beauty of the design. Dive into the before and after photos, the personal tips for dealing with stained concrete, and learn about the product choice that brought it all together.
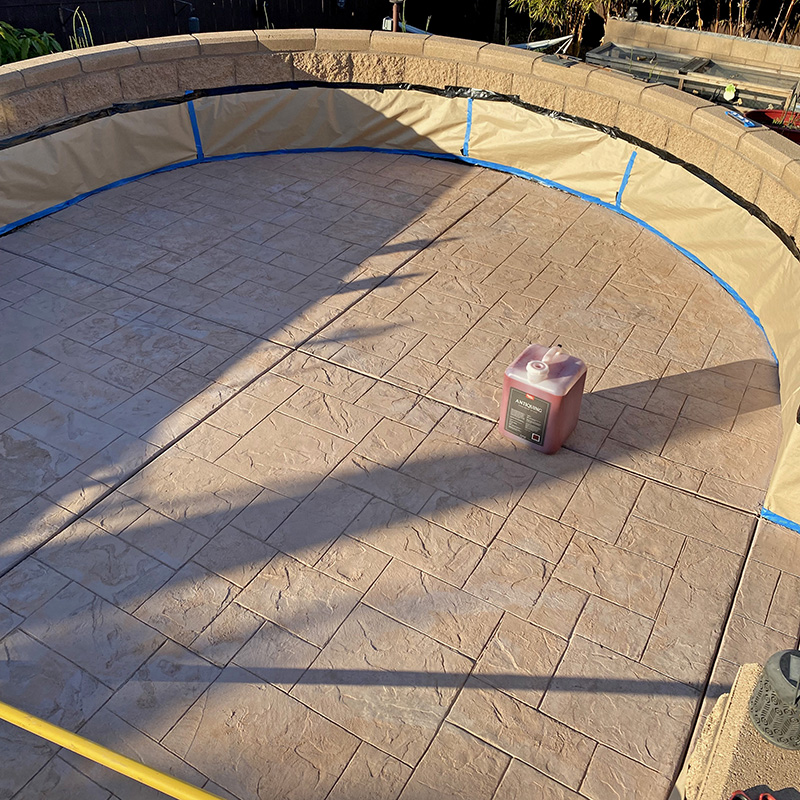
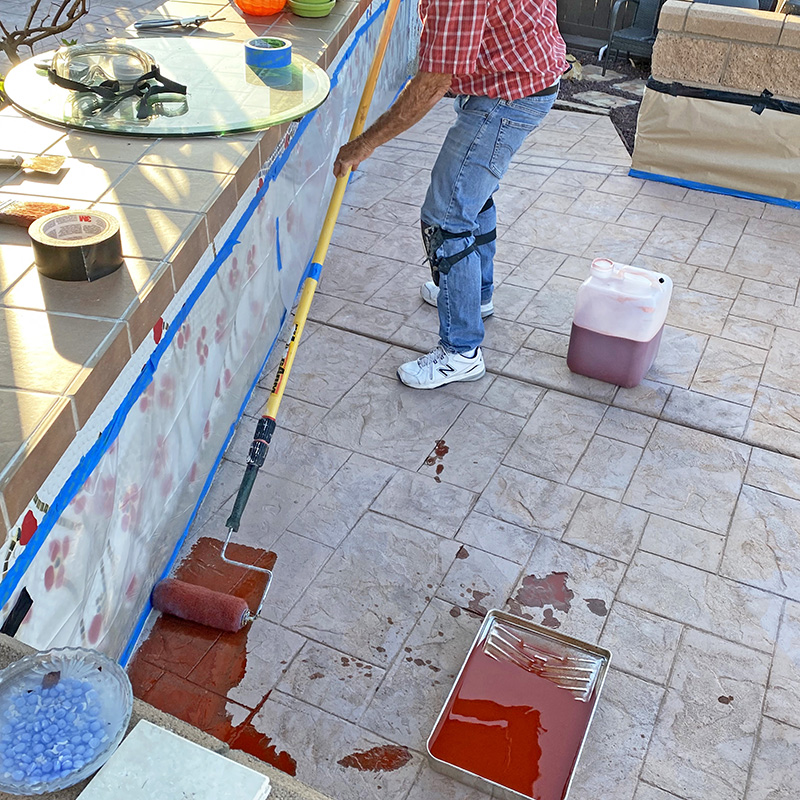
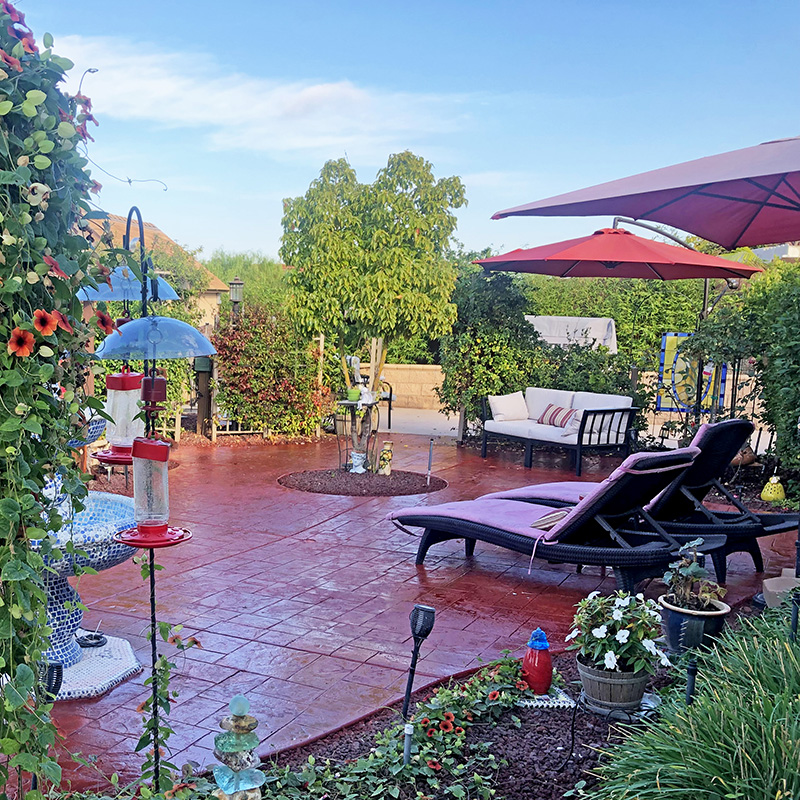
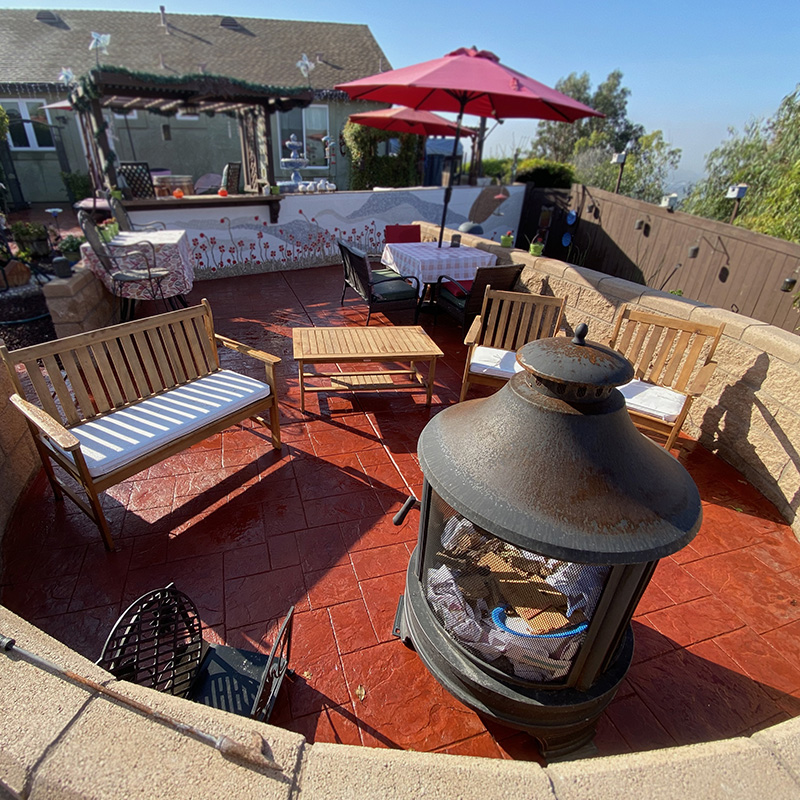
We recently had stamped concrete installed on our property, but were disappointed with the results as the color did not complement the retaining walls surrounding it. After previously using Direct Colors’ acid stain on a small area of our property, we decided to go with the Antiquing stain for the stamped concrete. The Antiquing stain provided a more solid color approach, and the Direct Colors website recommended it for stamped concrete. We opted for the high gloss EasySeal concrete sealer to achieve a shiny, wet look finish.
Personal Tips:
- To achieve optimal results, clean and etch the concrete surface to remove any water build up or calcium buildup before staining.
- Keep in mind that stamped concrete requires more stain than finished concrete, so order more than enough to ensure a solid color end product.
- Applying multiple thin coats of the sealer will prevent bubbles from forming on the surface.
Direct Colors Products Used:
-
- Crimson Antiquing stain
- High gloss EasySeal concrete sealer
Faded to Fabulous Back Patio Concrete Color
Bring new life to your stamped concrete patio with this DIY project using concrete stains on your existing concrete slab. This homeowner was able to revive a neglected patio that had been exposed to the harsh Colorado climate for years, and achieved a stunning result without breaking the bank!
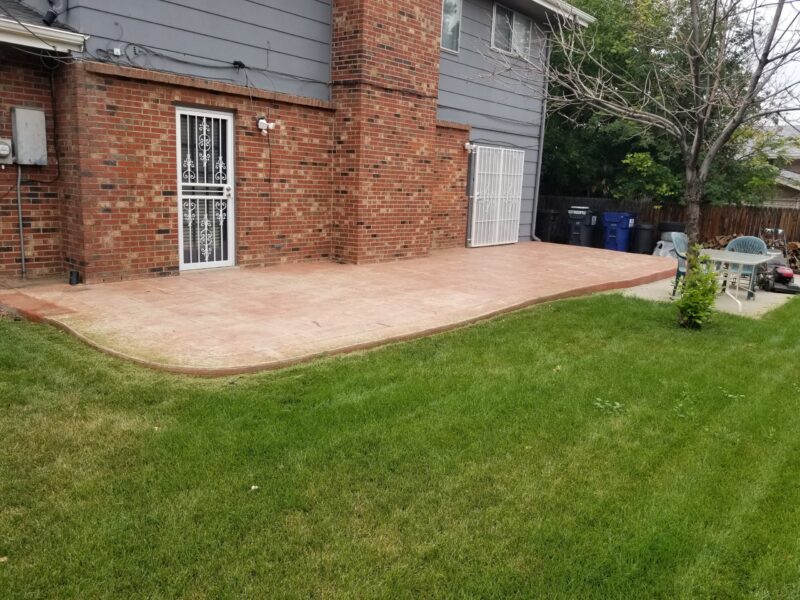
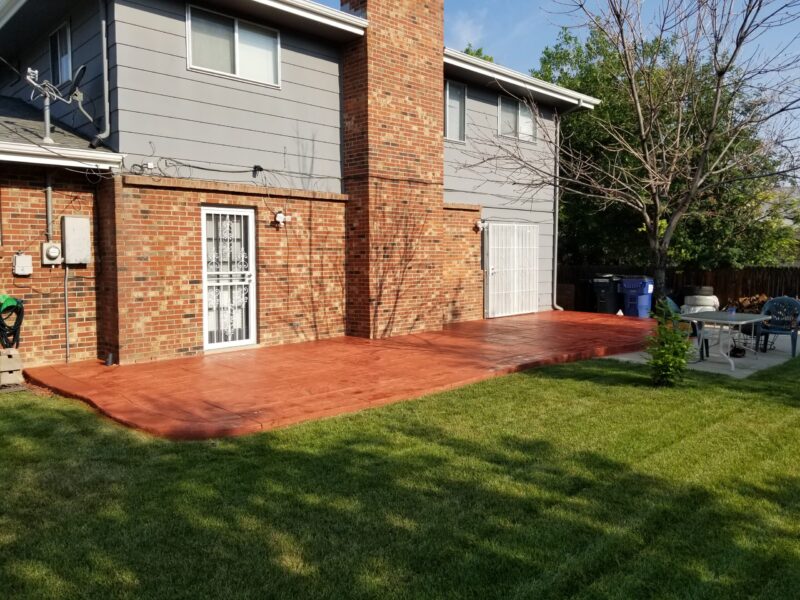
Project Description: After living in my home for five years, I realized that my stamped concrete patio had never been properly maintained. The previous sealer had worn off, leaving my patio exposed to the harsh Colorado climate. I came across Direct Colors and was inspired by the beautiful stamped concrete patios that had been transformed with their products. I initially sought out quotes for professional refinishing, but most estimates were upwards of $5k. Instead, I decided to tackle the project myself and am thrilled with the results.
Estimate of Square Footage: 450 sq. ft.
Personal Tips:
- Invest in a separate pump sprayer for the stain and sealer to avoid cross-contamination and ensure a more effective application.
- Clean the spray tip and roller thoroughly between coats of sealer to avoid clogging and uneven application.
- Use cardboard and tape to protect areas from overspray, and practice spraying evenly on a test surface before tackling the project.
Direct Colors Products Used:
- 3 Crimson Antiquing™ Stain & Seal Kits
- 16 oz Non Slip Concrete Sealer Additive
Other Products Used:
-
- Electric power washer for initial cleaning.
Stamped Concrete Patio Color Design Ideas
This homeowner was able to revitalize a new patio that was sealed incorrectly by the builder and achieved a stunning result. From filling in cracks to applying multiple colors, this project design idea showcases the power of Antiquing stains and the difference it can make in enhancing an outdoor living space.
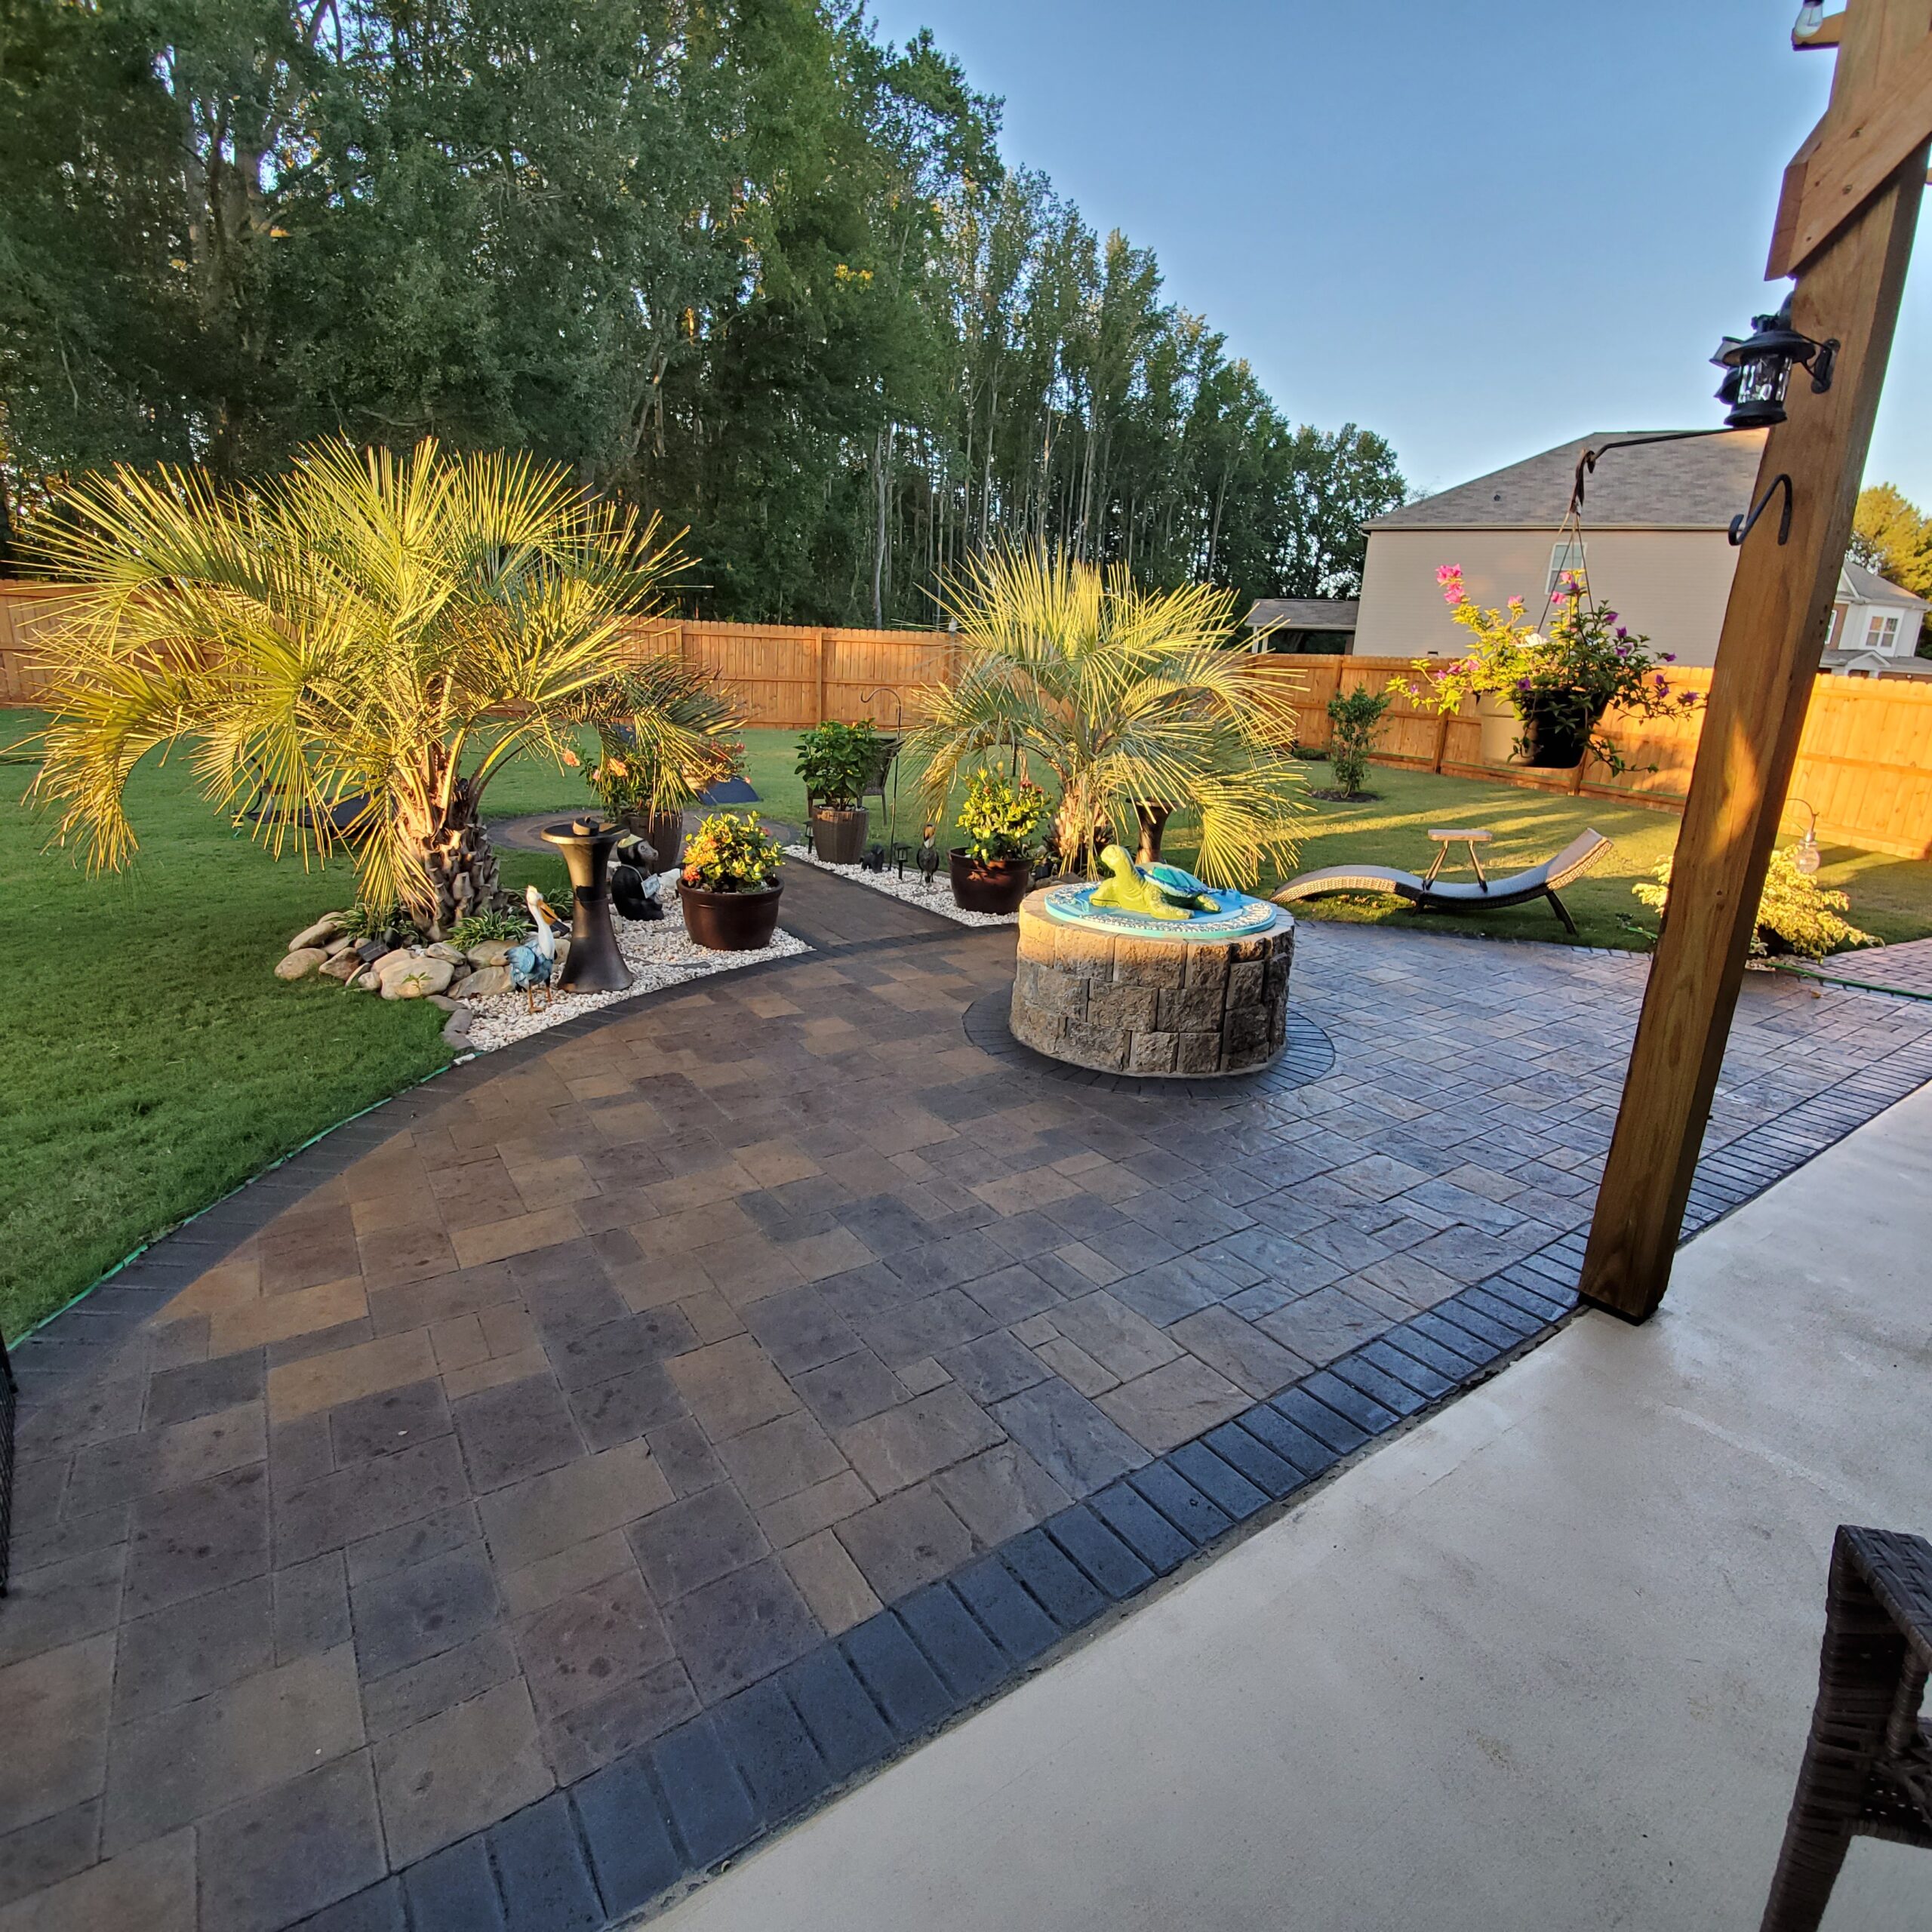
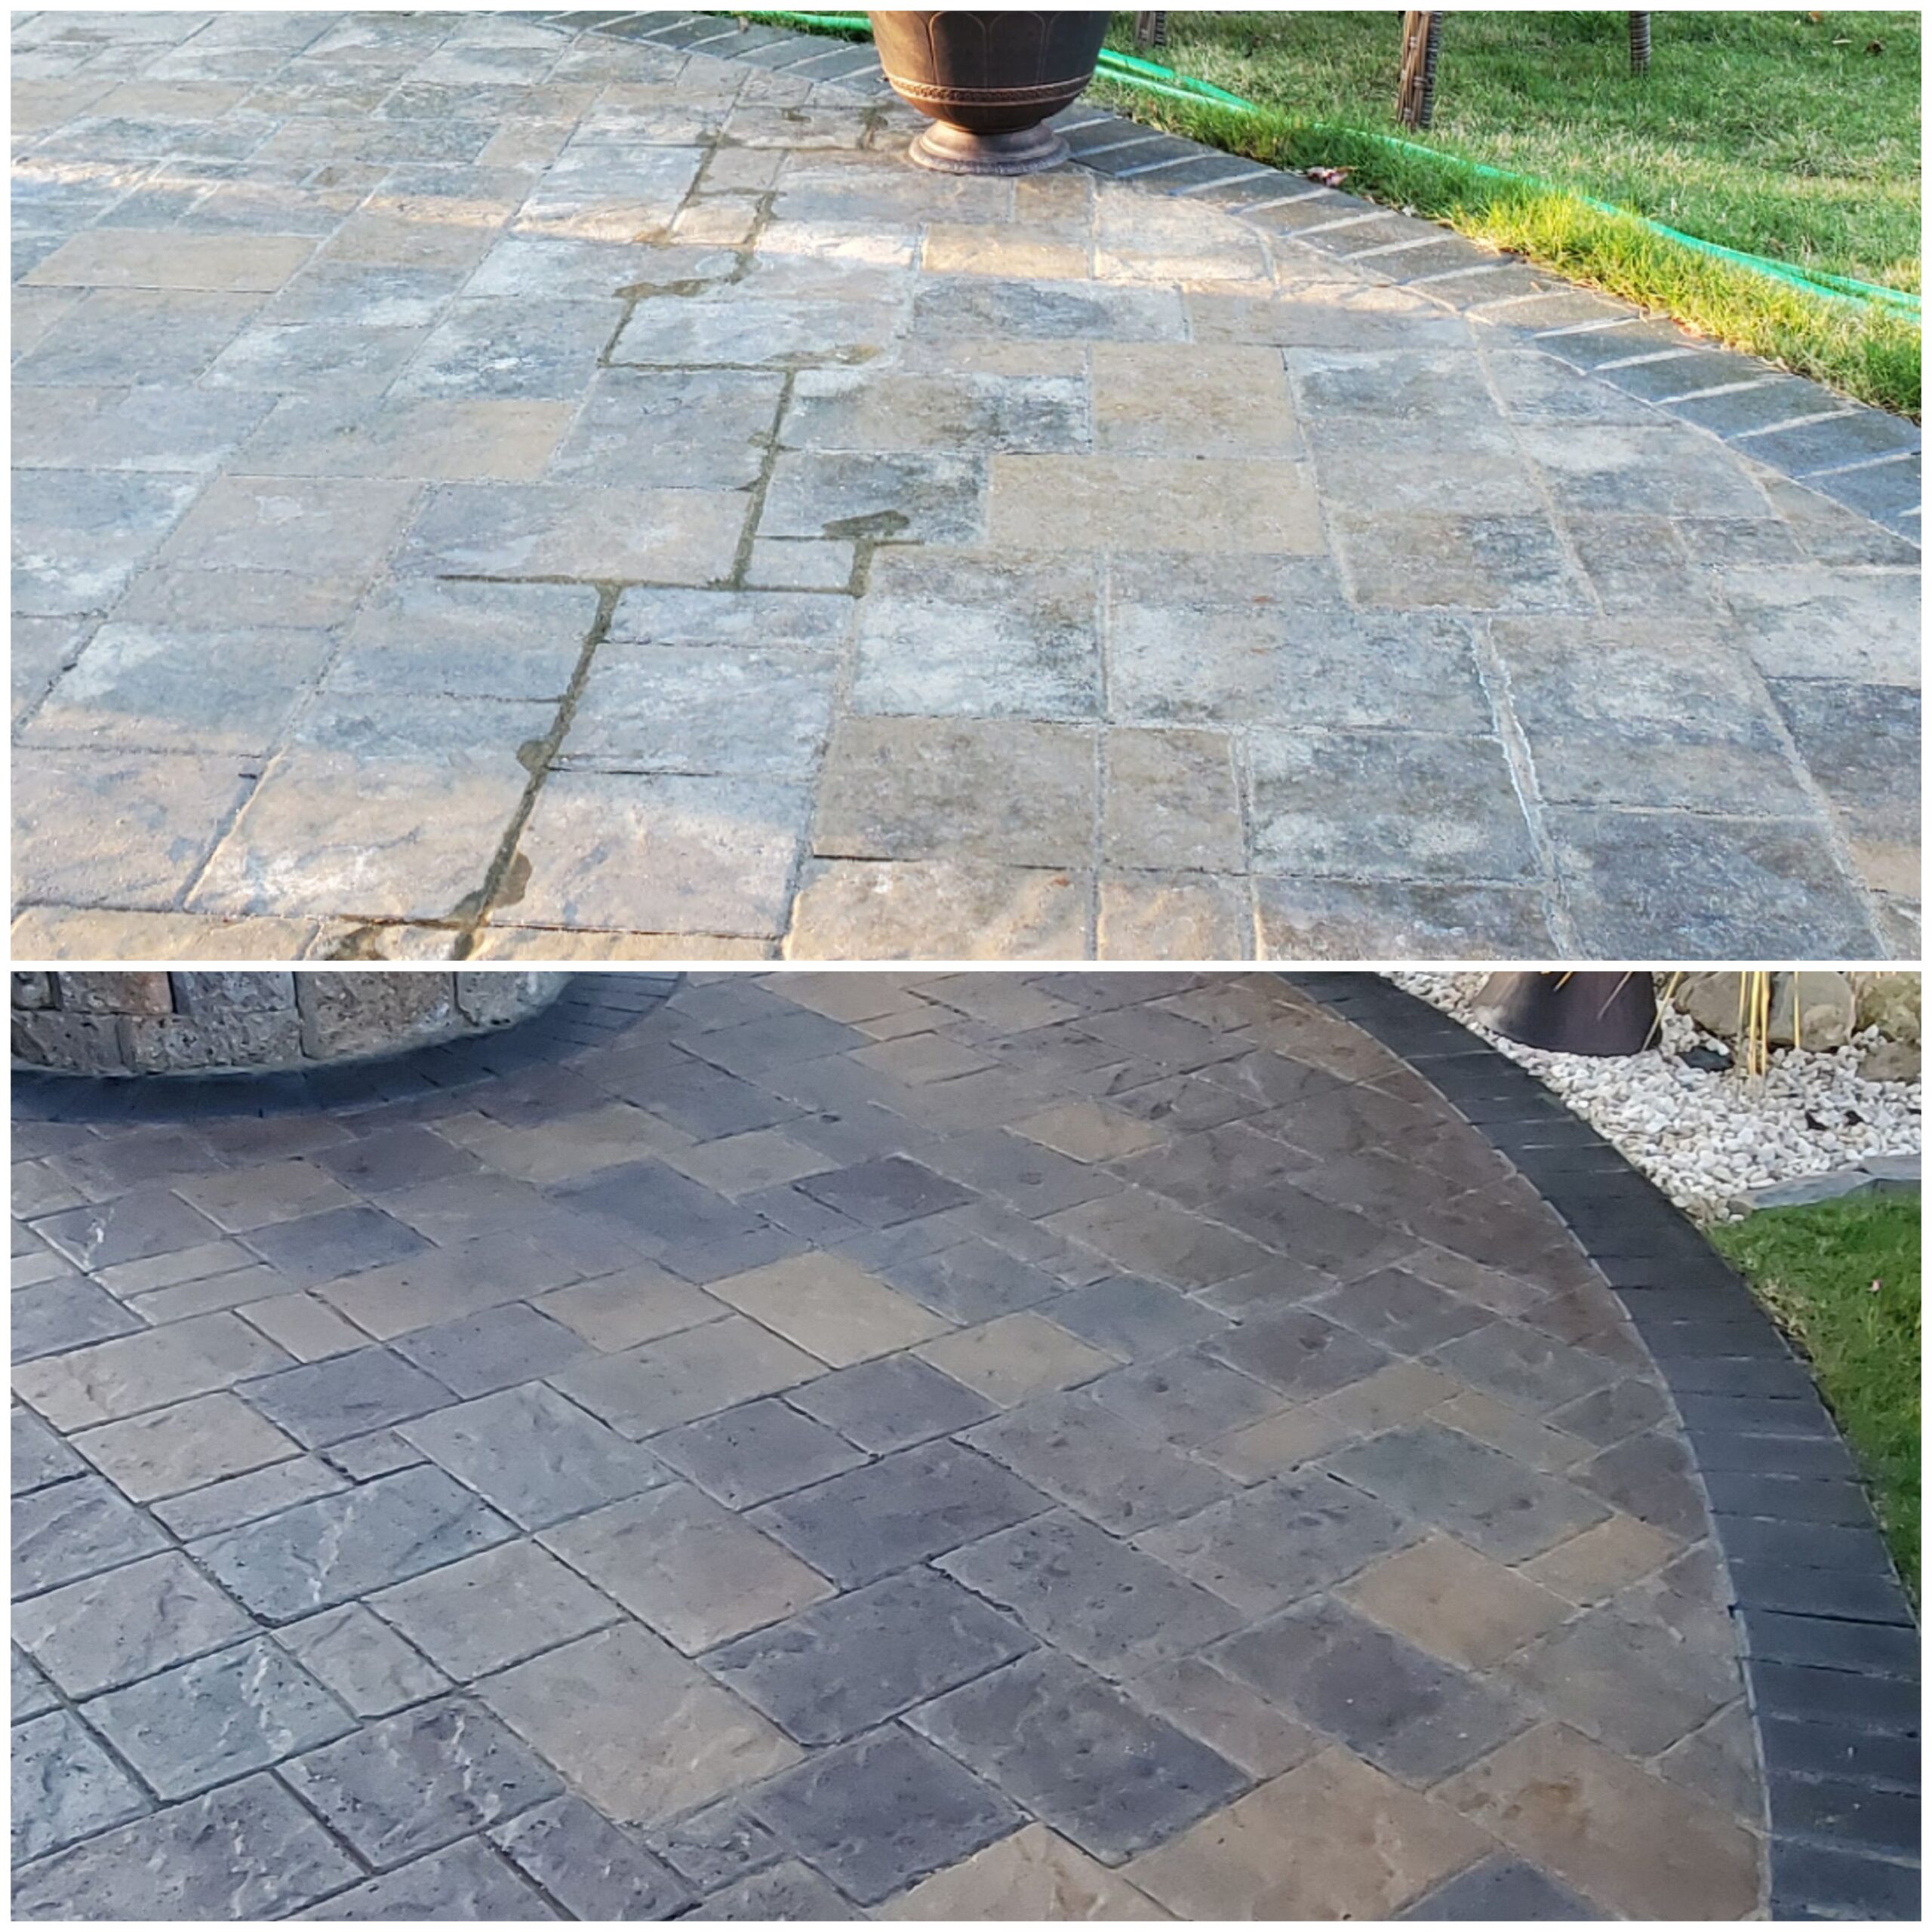
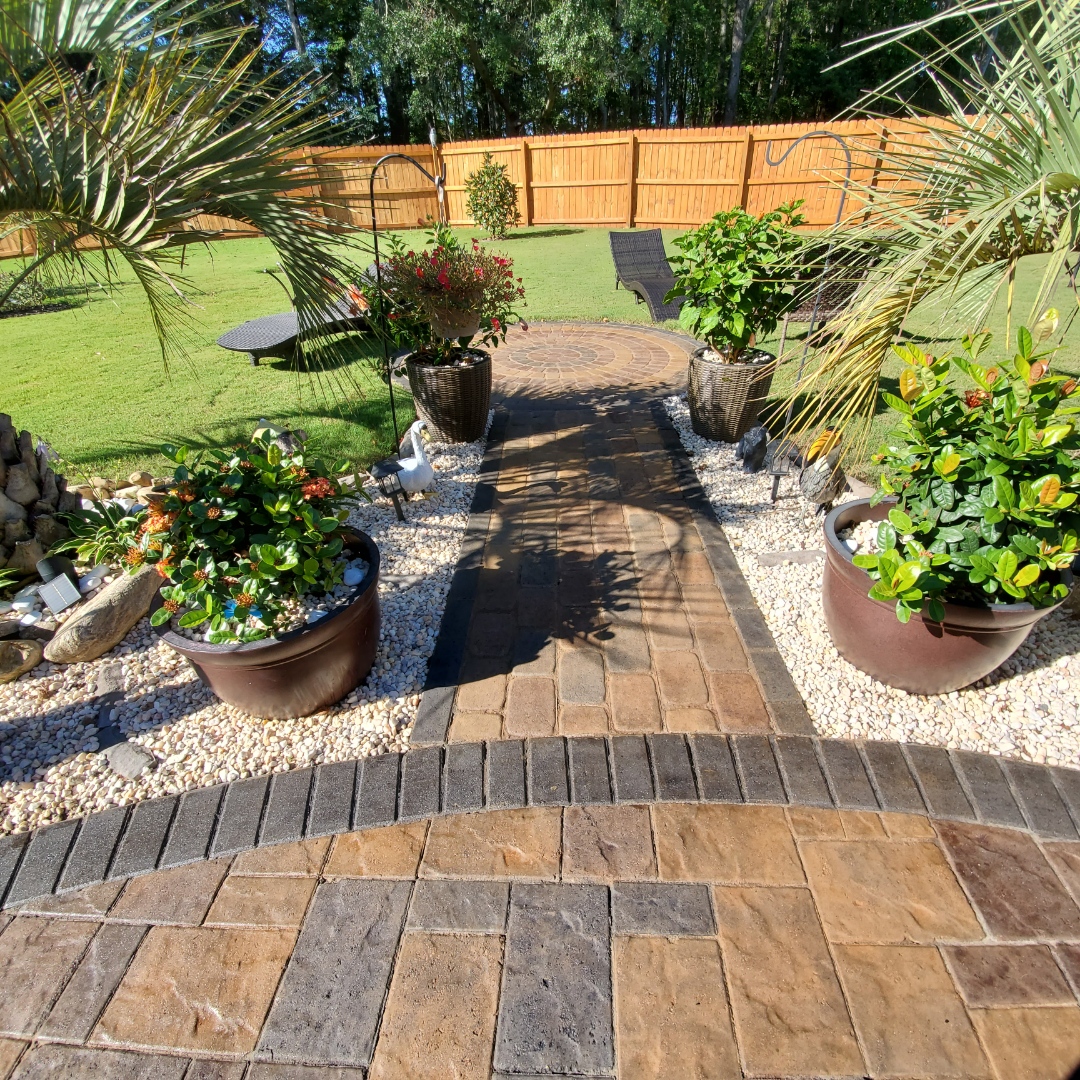
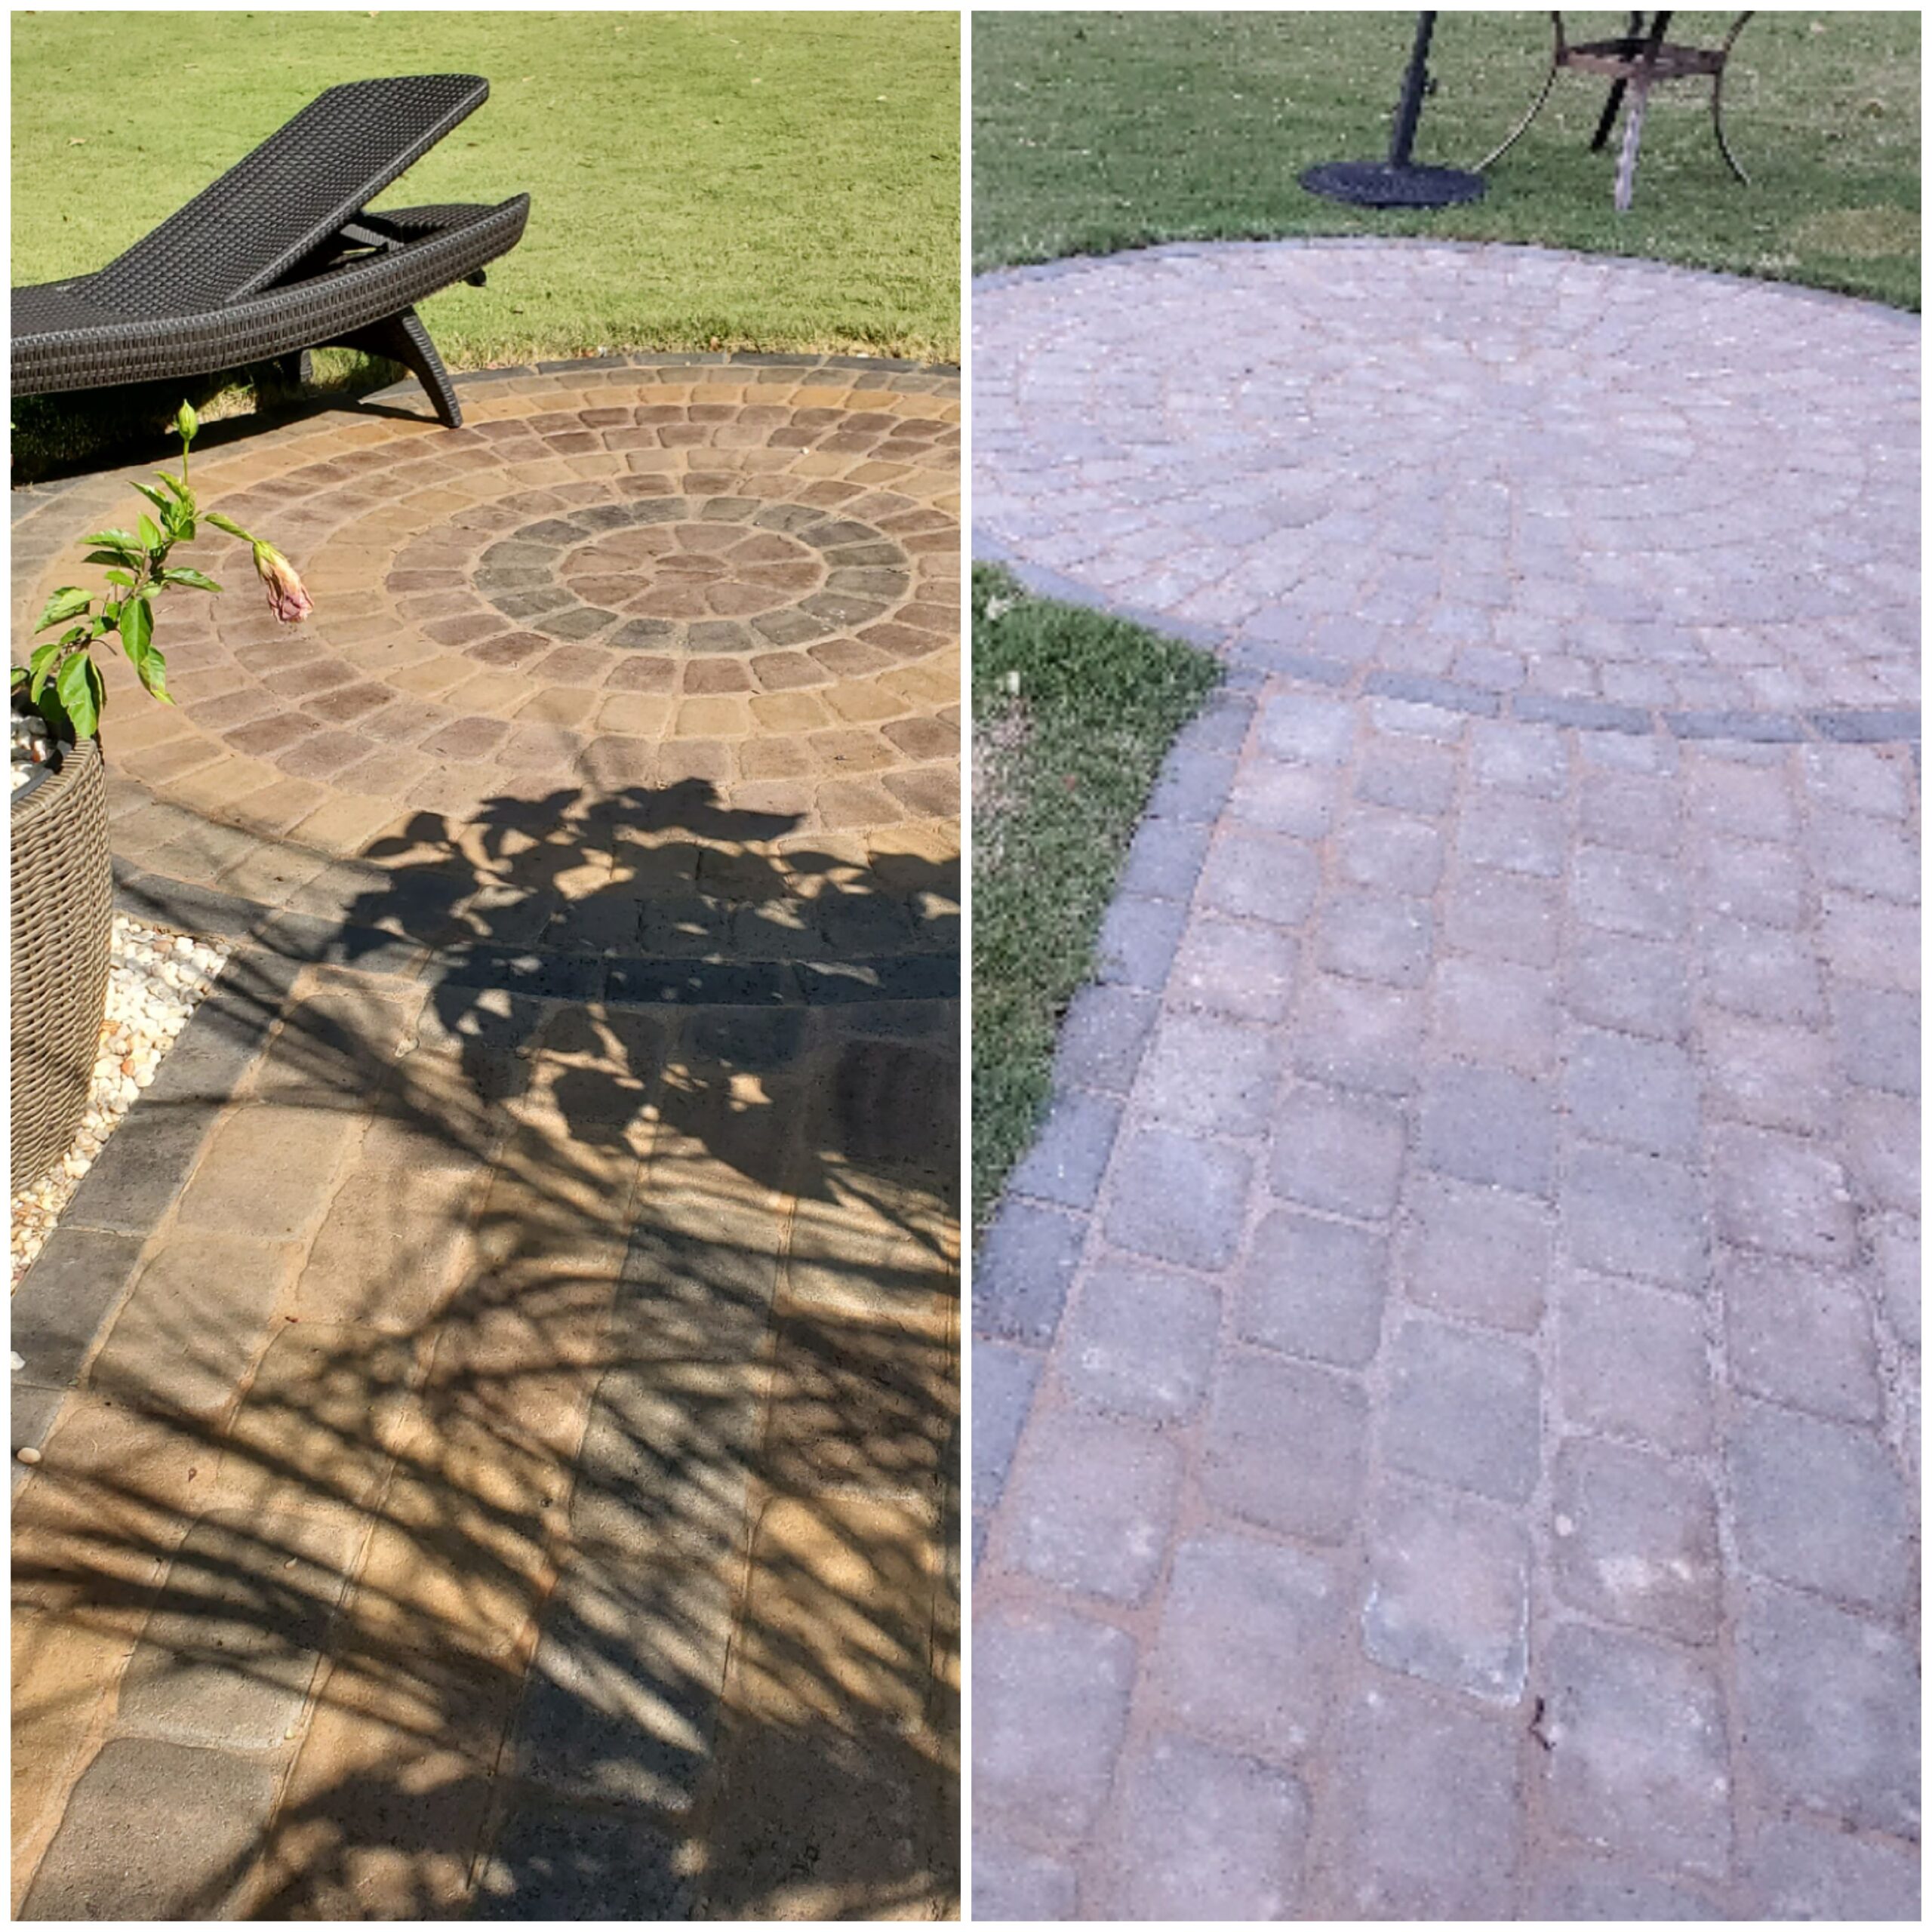
Project Description: After spending over $9,000 on a new patio, the homeowner was disappointed with the results due to the builder using an inferior sealer. In search of a solution to bring the patio to its full potential, they discovered Direct Colors and decided to give it a try. The results were astounding, and the patio now looks sharp and worth the money spent. The water beads on the surface, and the neighbors are impressed by the transformation. The homeowner is very happy with the outcome and recommends Direct Colors for anyone looking to enhance their patio.
Project Completed In: 2 weeks(s) Estimate of Square Footage: 500 sq. ft.
Personal Tips:
-
- Be sure to fill any cracks between pavers before sealing for a more polished look.
- For a unique and colorful design, try coloring each paver a different color.
- Apply at least 2 coats of sealer for optimal results.
Creating a Slate Multi-Colored Stamped Concrete Design
Bring a unique and colorful touch to your stamped concrete patio with this DIY project using Antiquing stains. This homeowner created a multi-colored patio that mimics the look of slate by individually staining each tile with antiquing stain in 4 different colors, and then adding EasySeal sealant for durability.
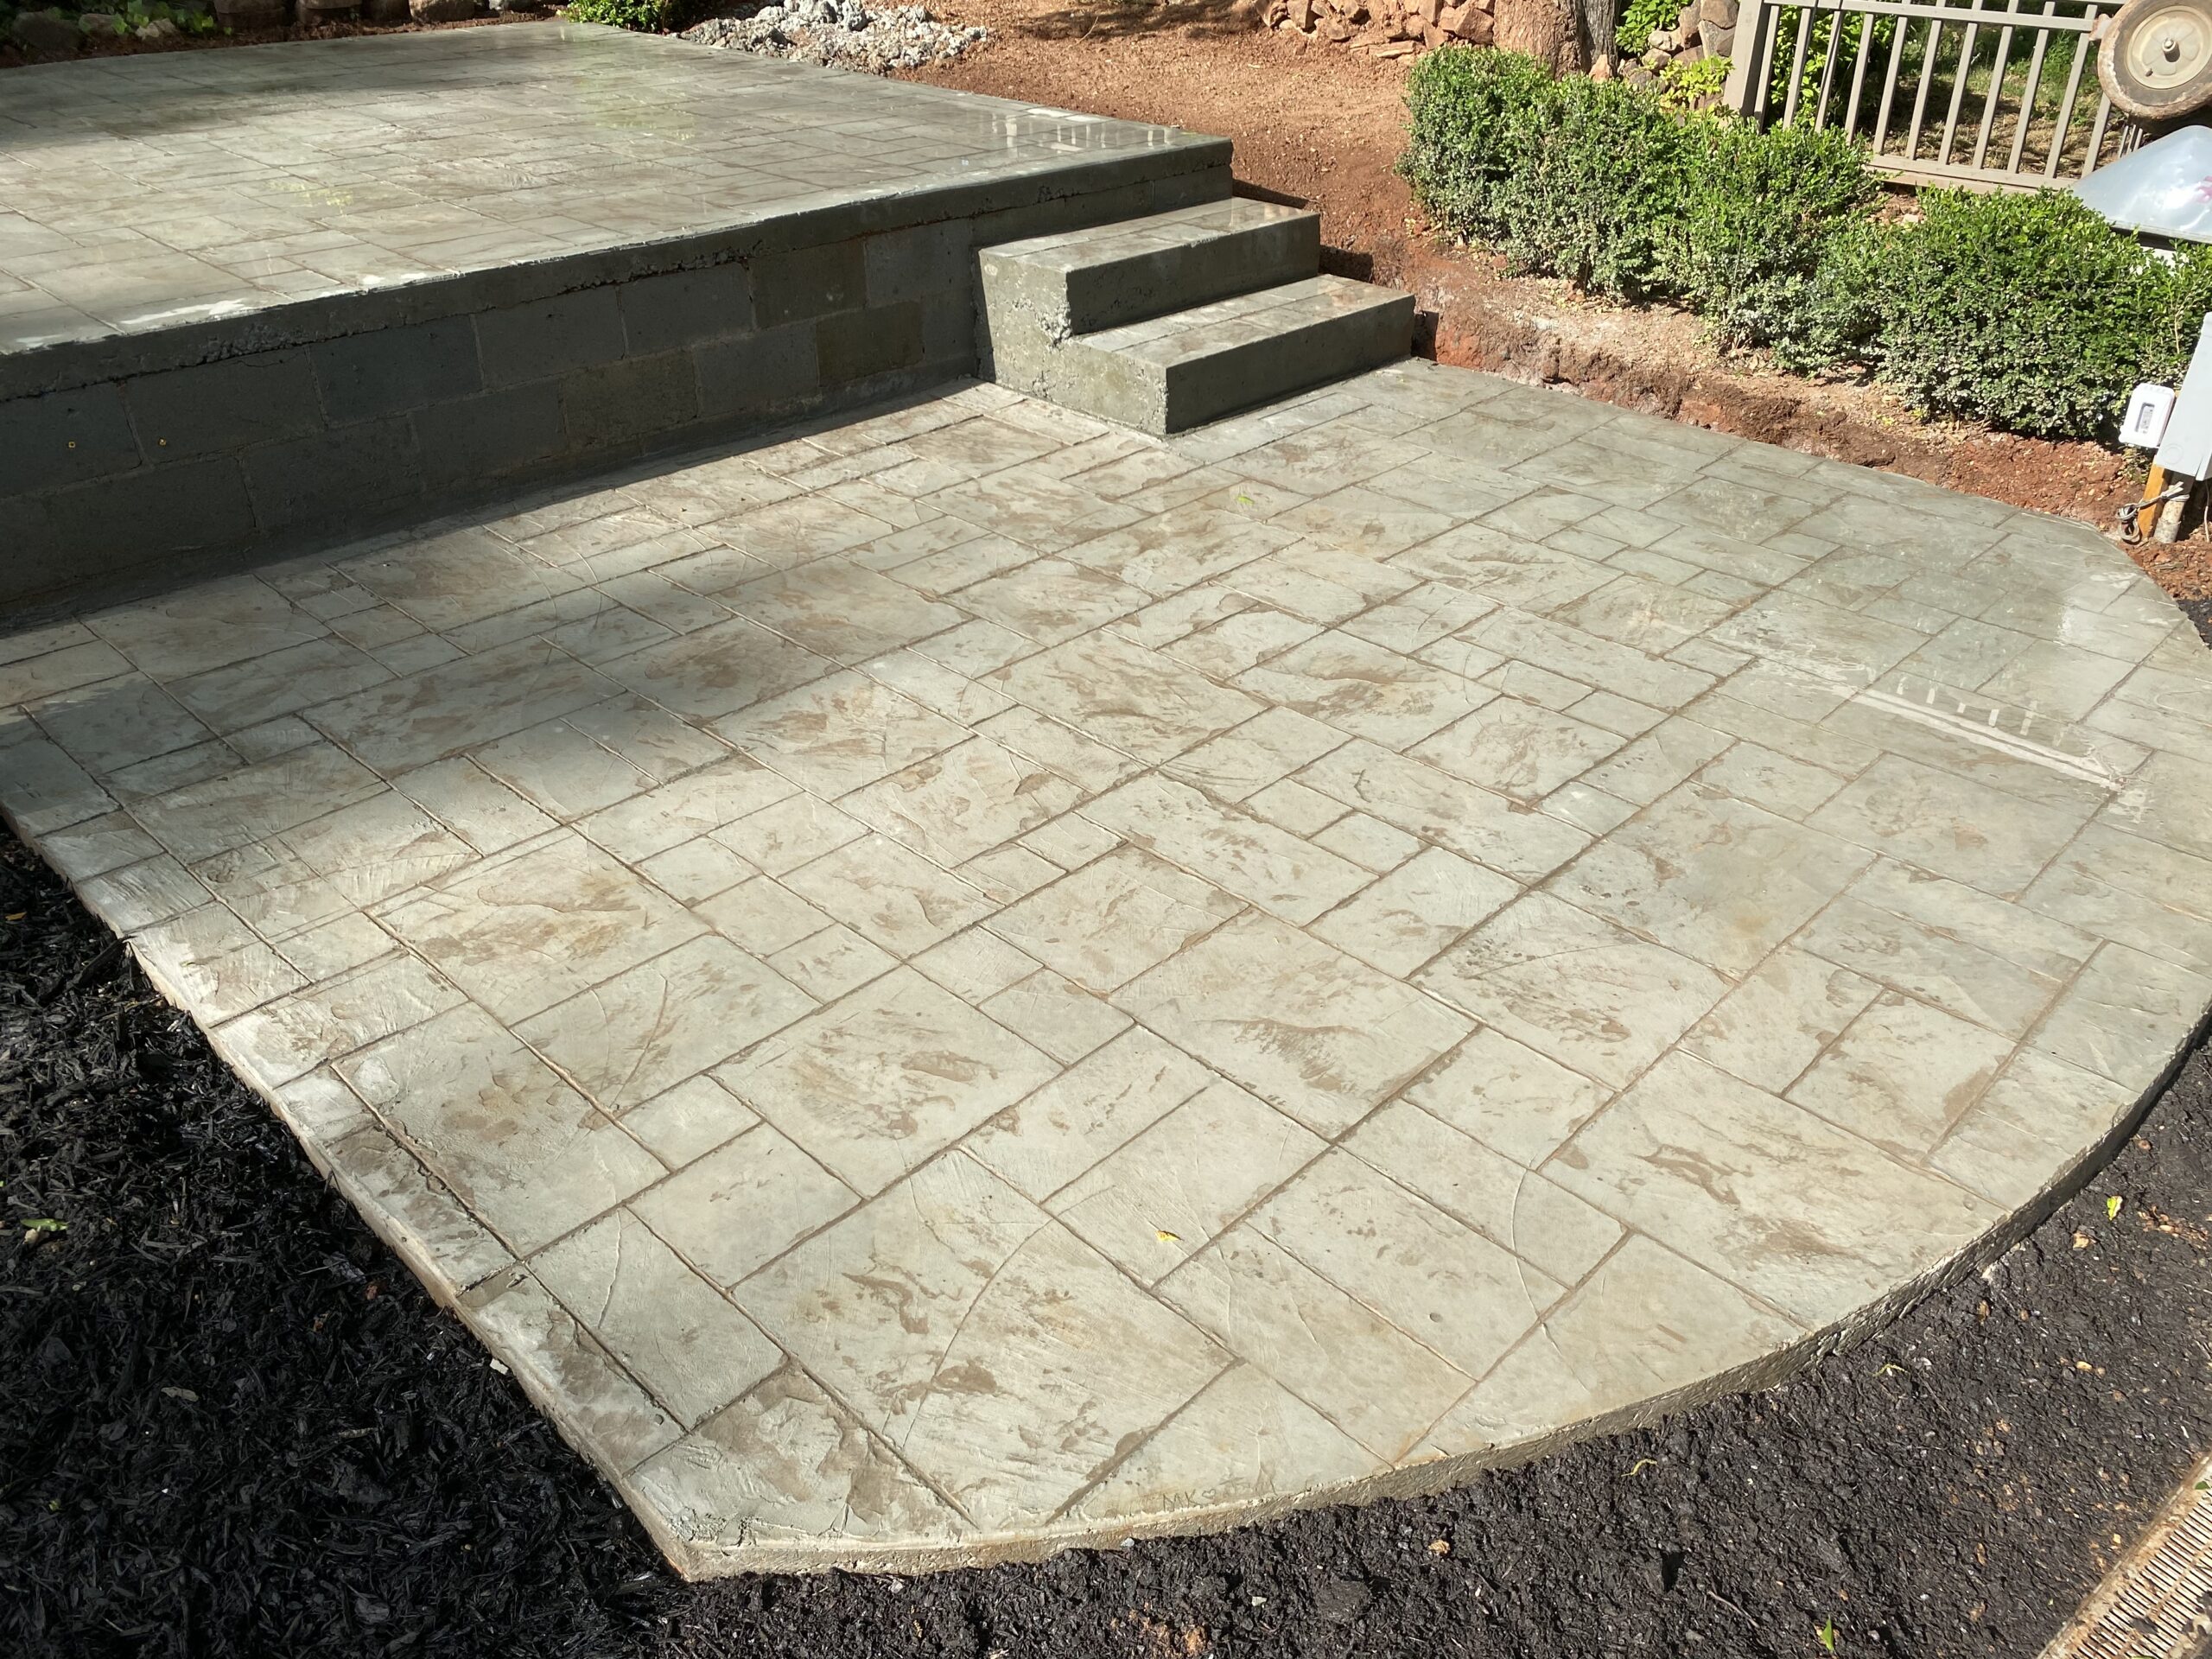
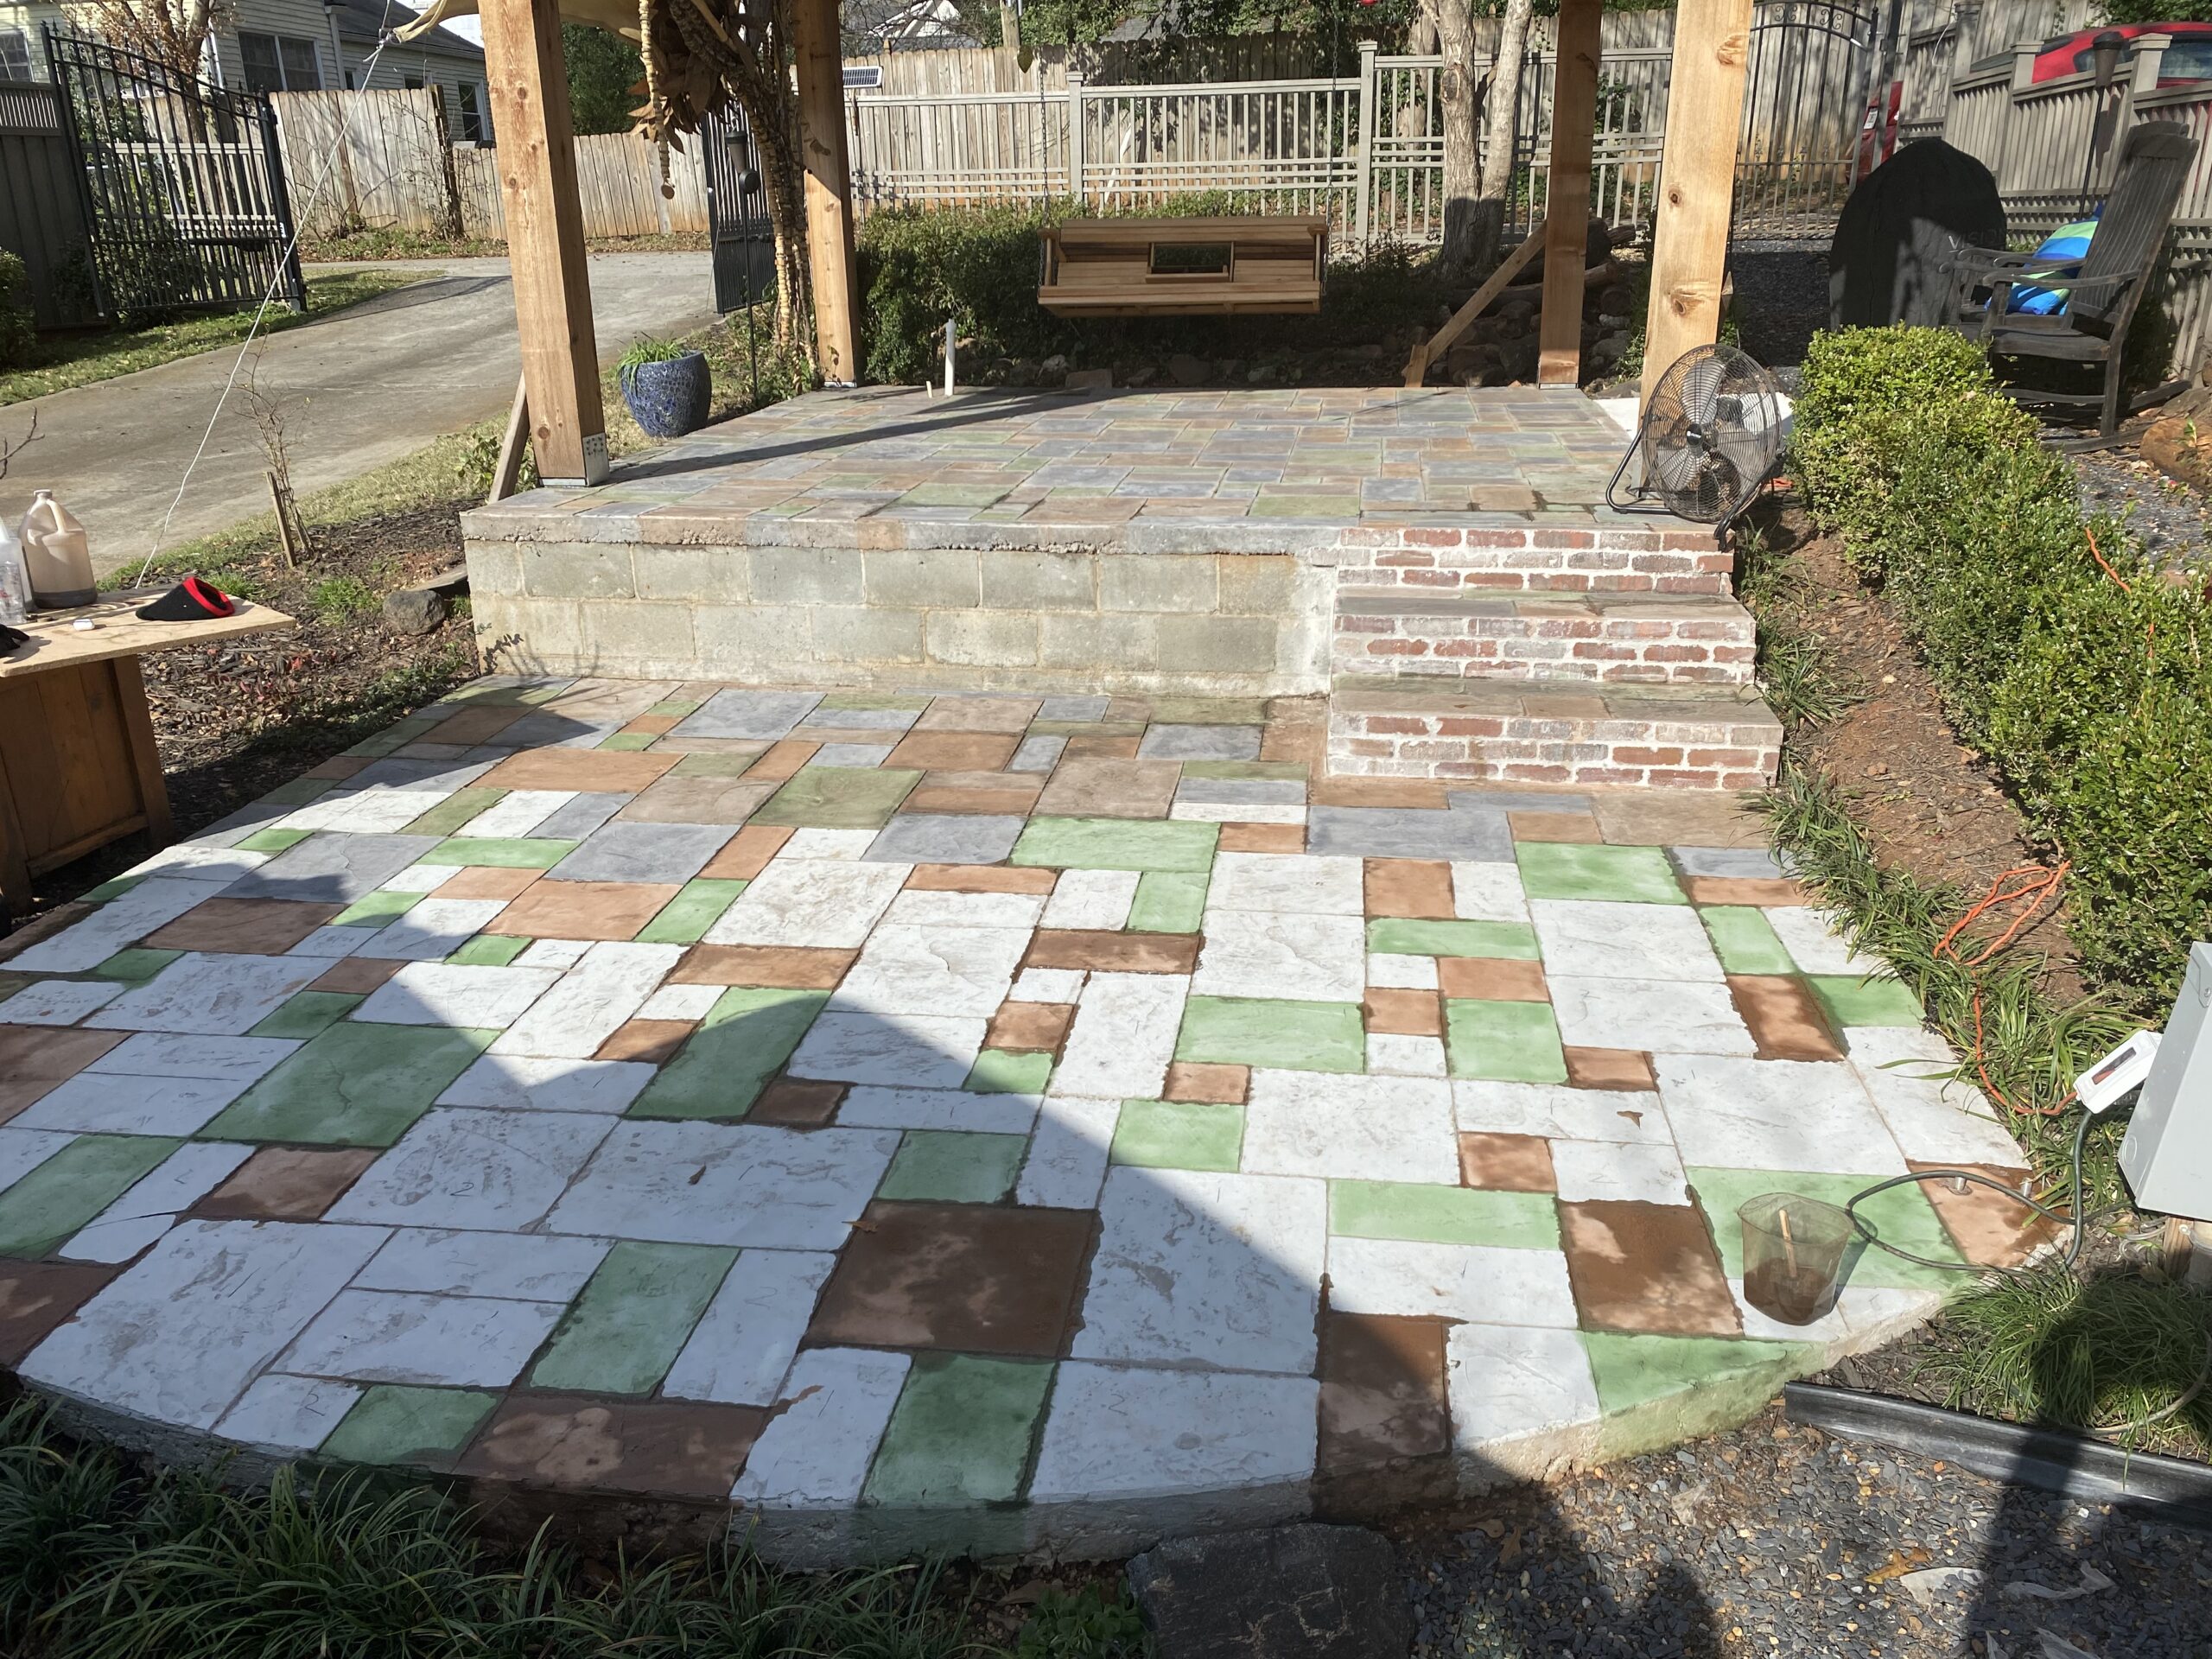
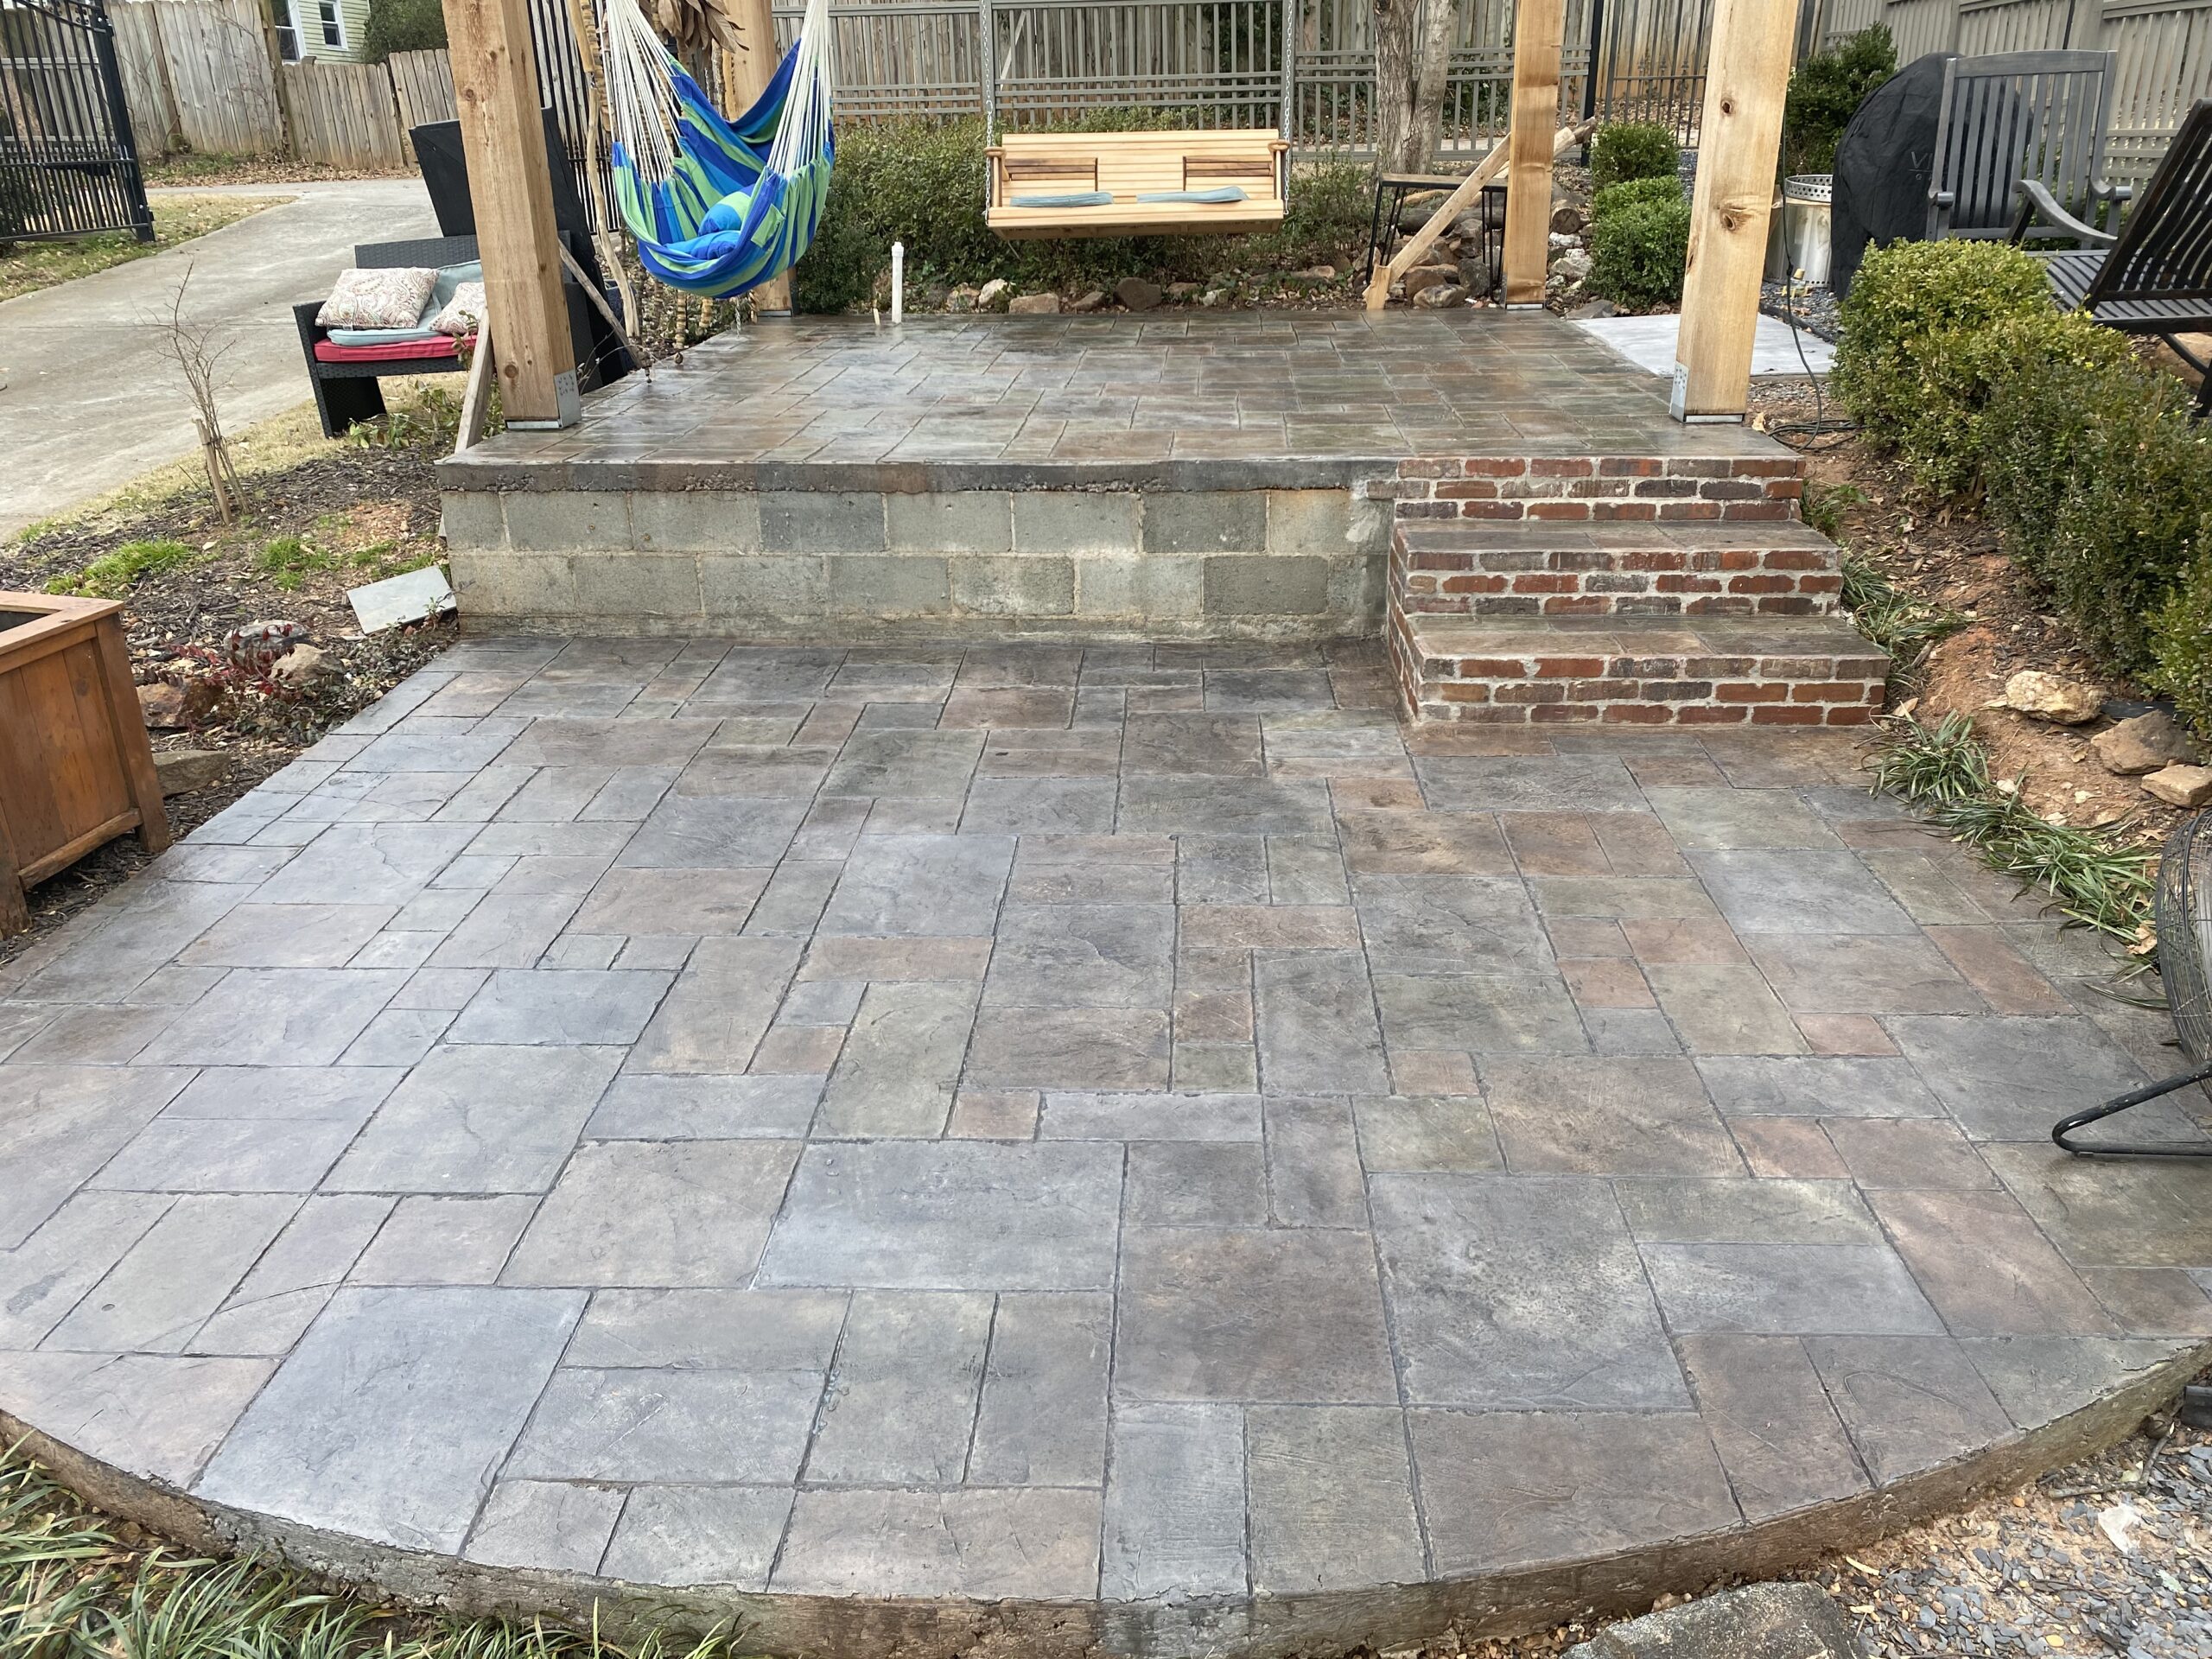
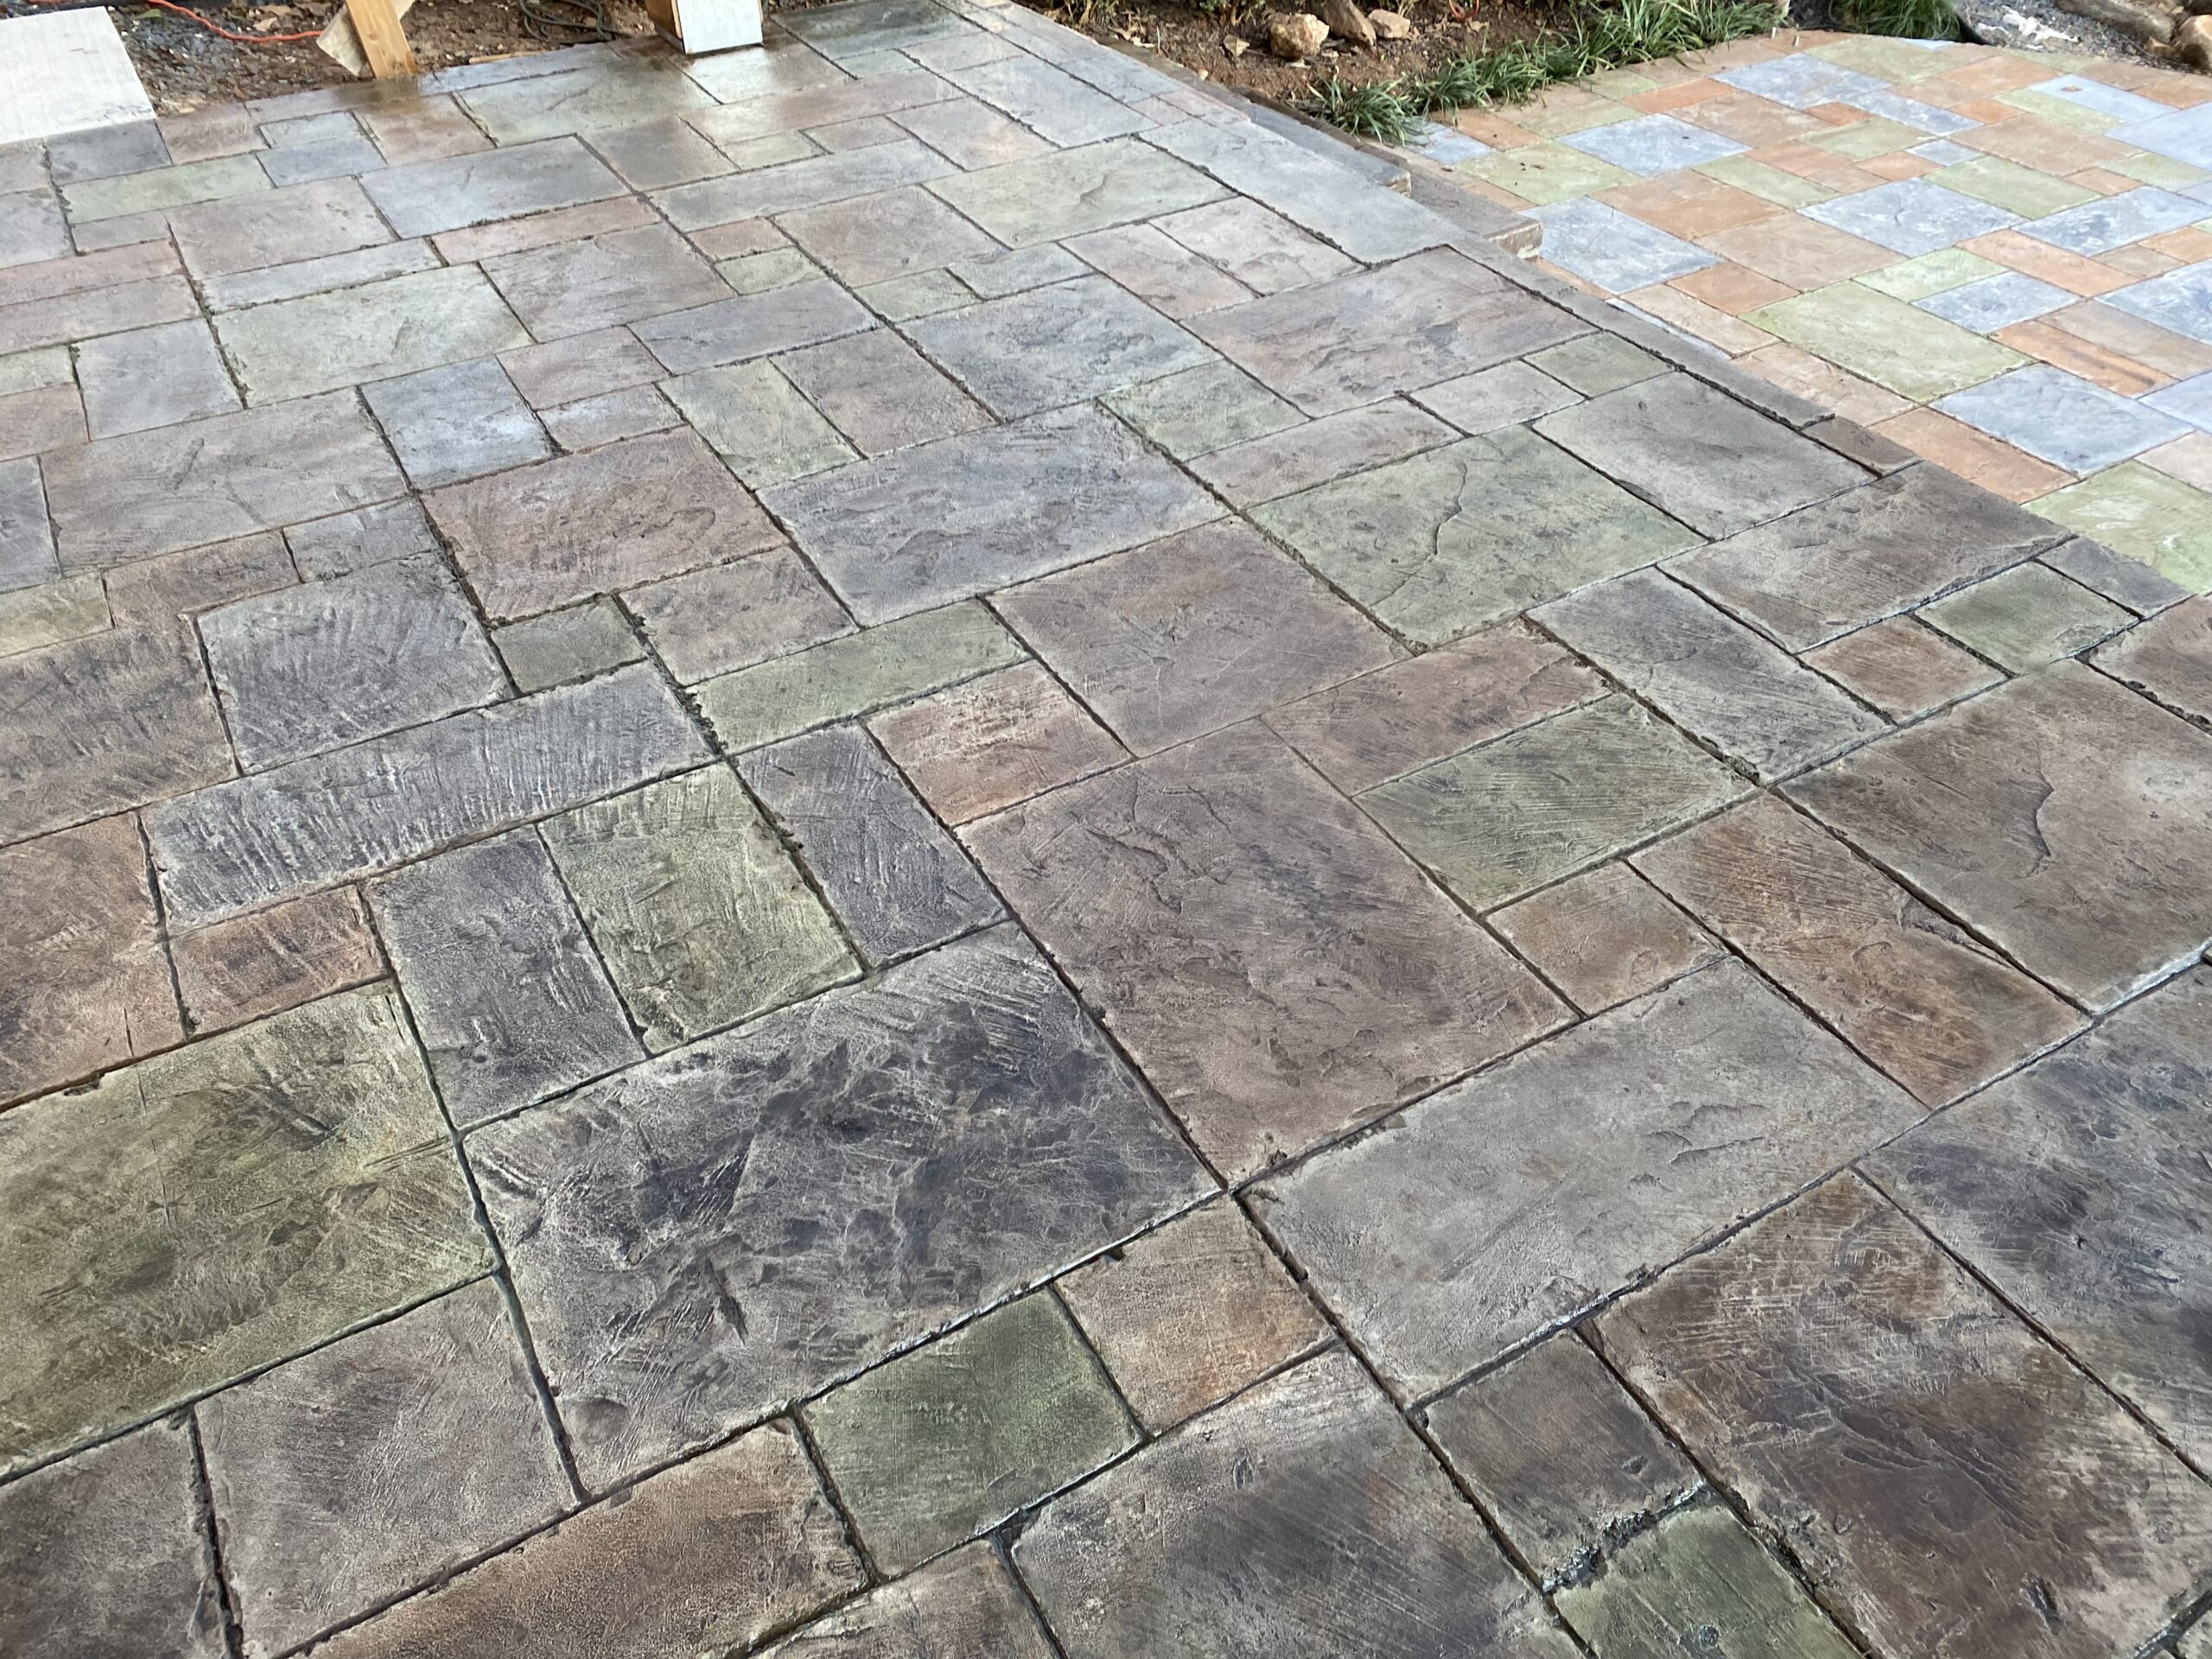
Project Description: This homeowner created a stamped concrete patio that mimics the look of slate and used Direct Colors’ Antiquing stain in 4 separate colors to stain each tile individually, then applied a top coat of charcoal to darken the overall appearance. To ensure safety and durability, a satin sealant was added followed by a final coat with a non-slip powder. The project was completed in just 3 days and the results are impressive.
Project Completed In: 3 day(s) Estimate of Square Foot: 336 sq. ft.
Personal Tips:
- Use a brush to stain each square individually, then spray the charcoal top coat with a pump sprayer and roll the sealer on after it’s dry.
Direct Colors Products Used:
-
- 3 Gal Charcoal Antiquing Stain
- 1 Gal Russet Antiquing Stain
- 1 Gal Fern Green Antiquing Stain
- 1 Gal Driftwood Antiquing Stain
- 2 Gal Satin Concrete Sealer
- 16oz non slip additive
Cumin Stained Concrete Slab Backyard Patio Ideas
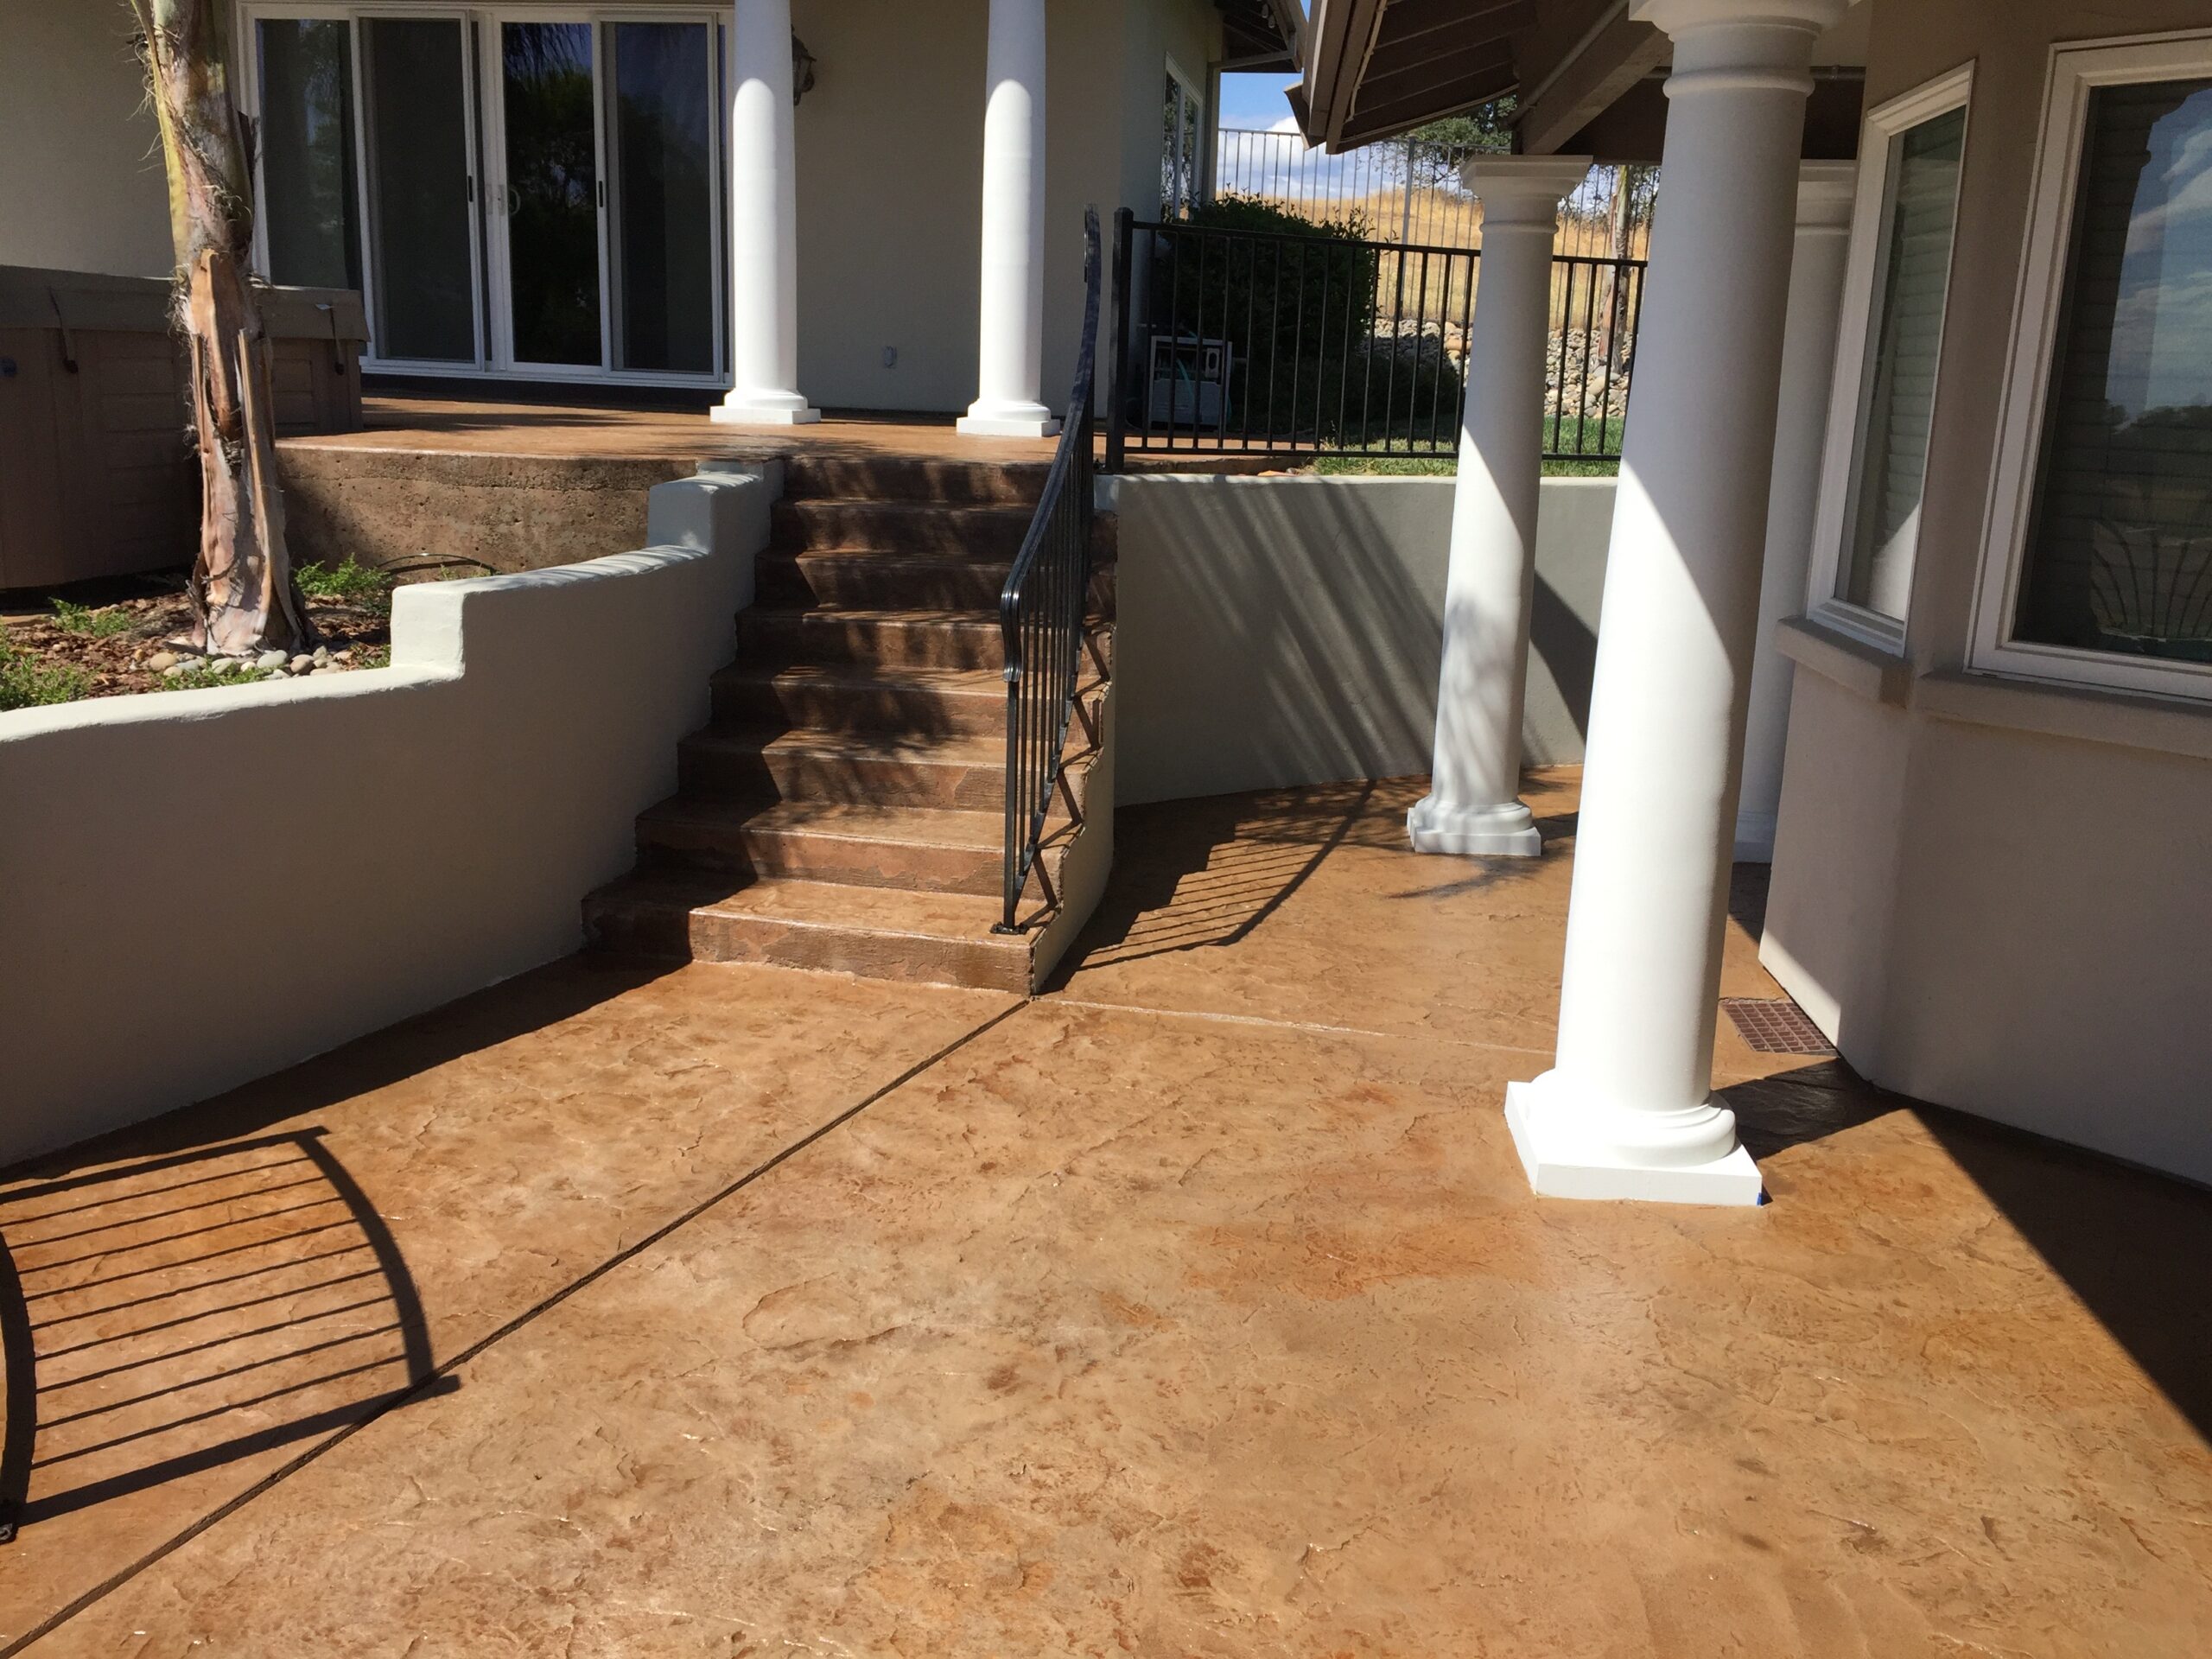
- Project Completed In: 5 day(s)
- Estimate of Square Footage: 1800 sq. ft.
- Project Description:
We have a 20 year-old concrete that hasn’t been taken care of. I was intimidated to stain because I’d seen DIY failures. Direct Colors Antiquing stain was super easy and came out great. I loved the opportunity to try samples before we decided to go with it. - Personal Tips:
Clean your sprayer Well! I had trouble with clogging until I took apart the stay tip and rinsed well.
Try the samples. It gives you a sense of what happens first and second coats, as well as what sealing adds to the depth of the color (besides letting you try different colors)
- Direct Colors Products Used:
Cumin Antiquing Stain & Seal Kit
ProCleaner & Degreaser
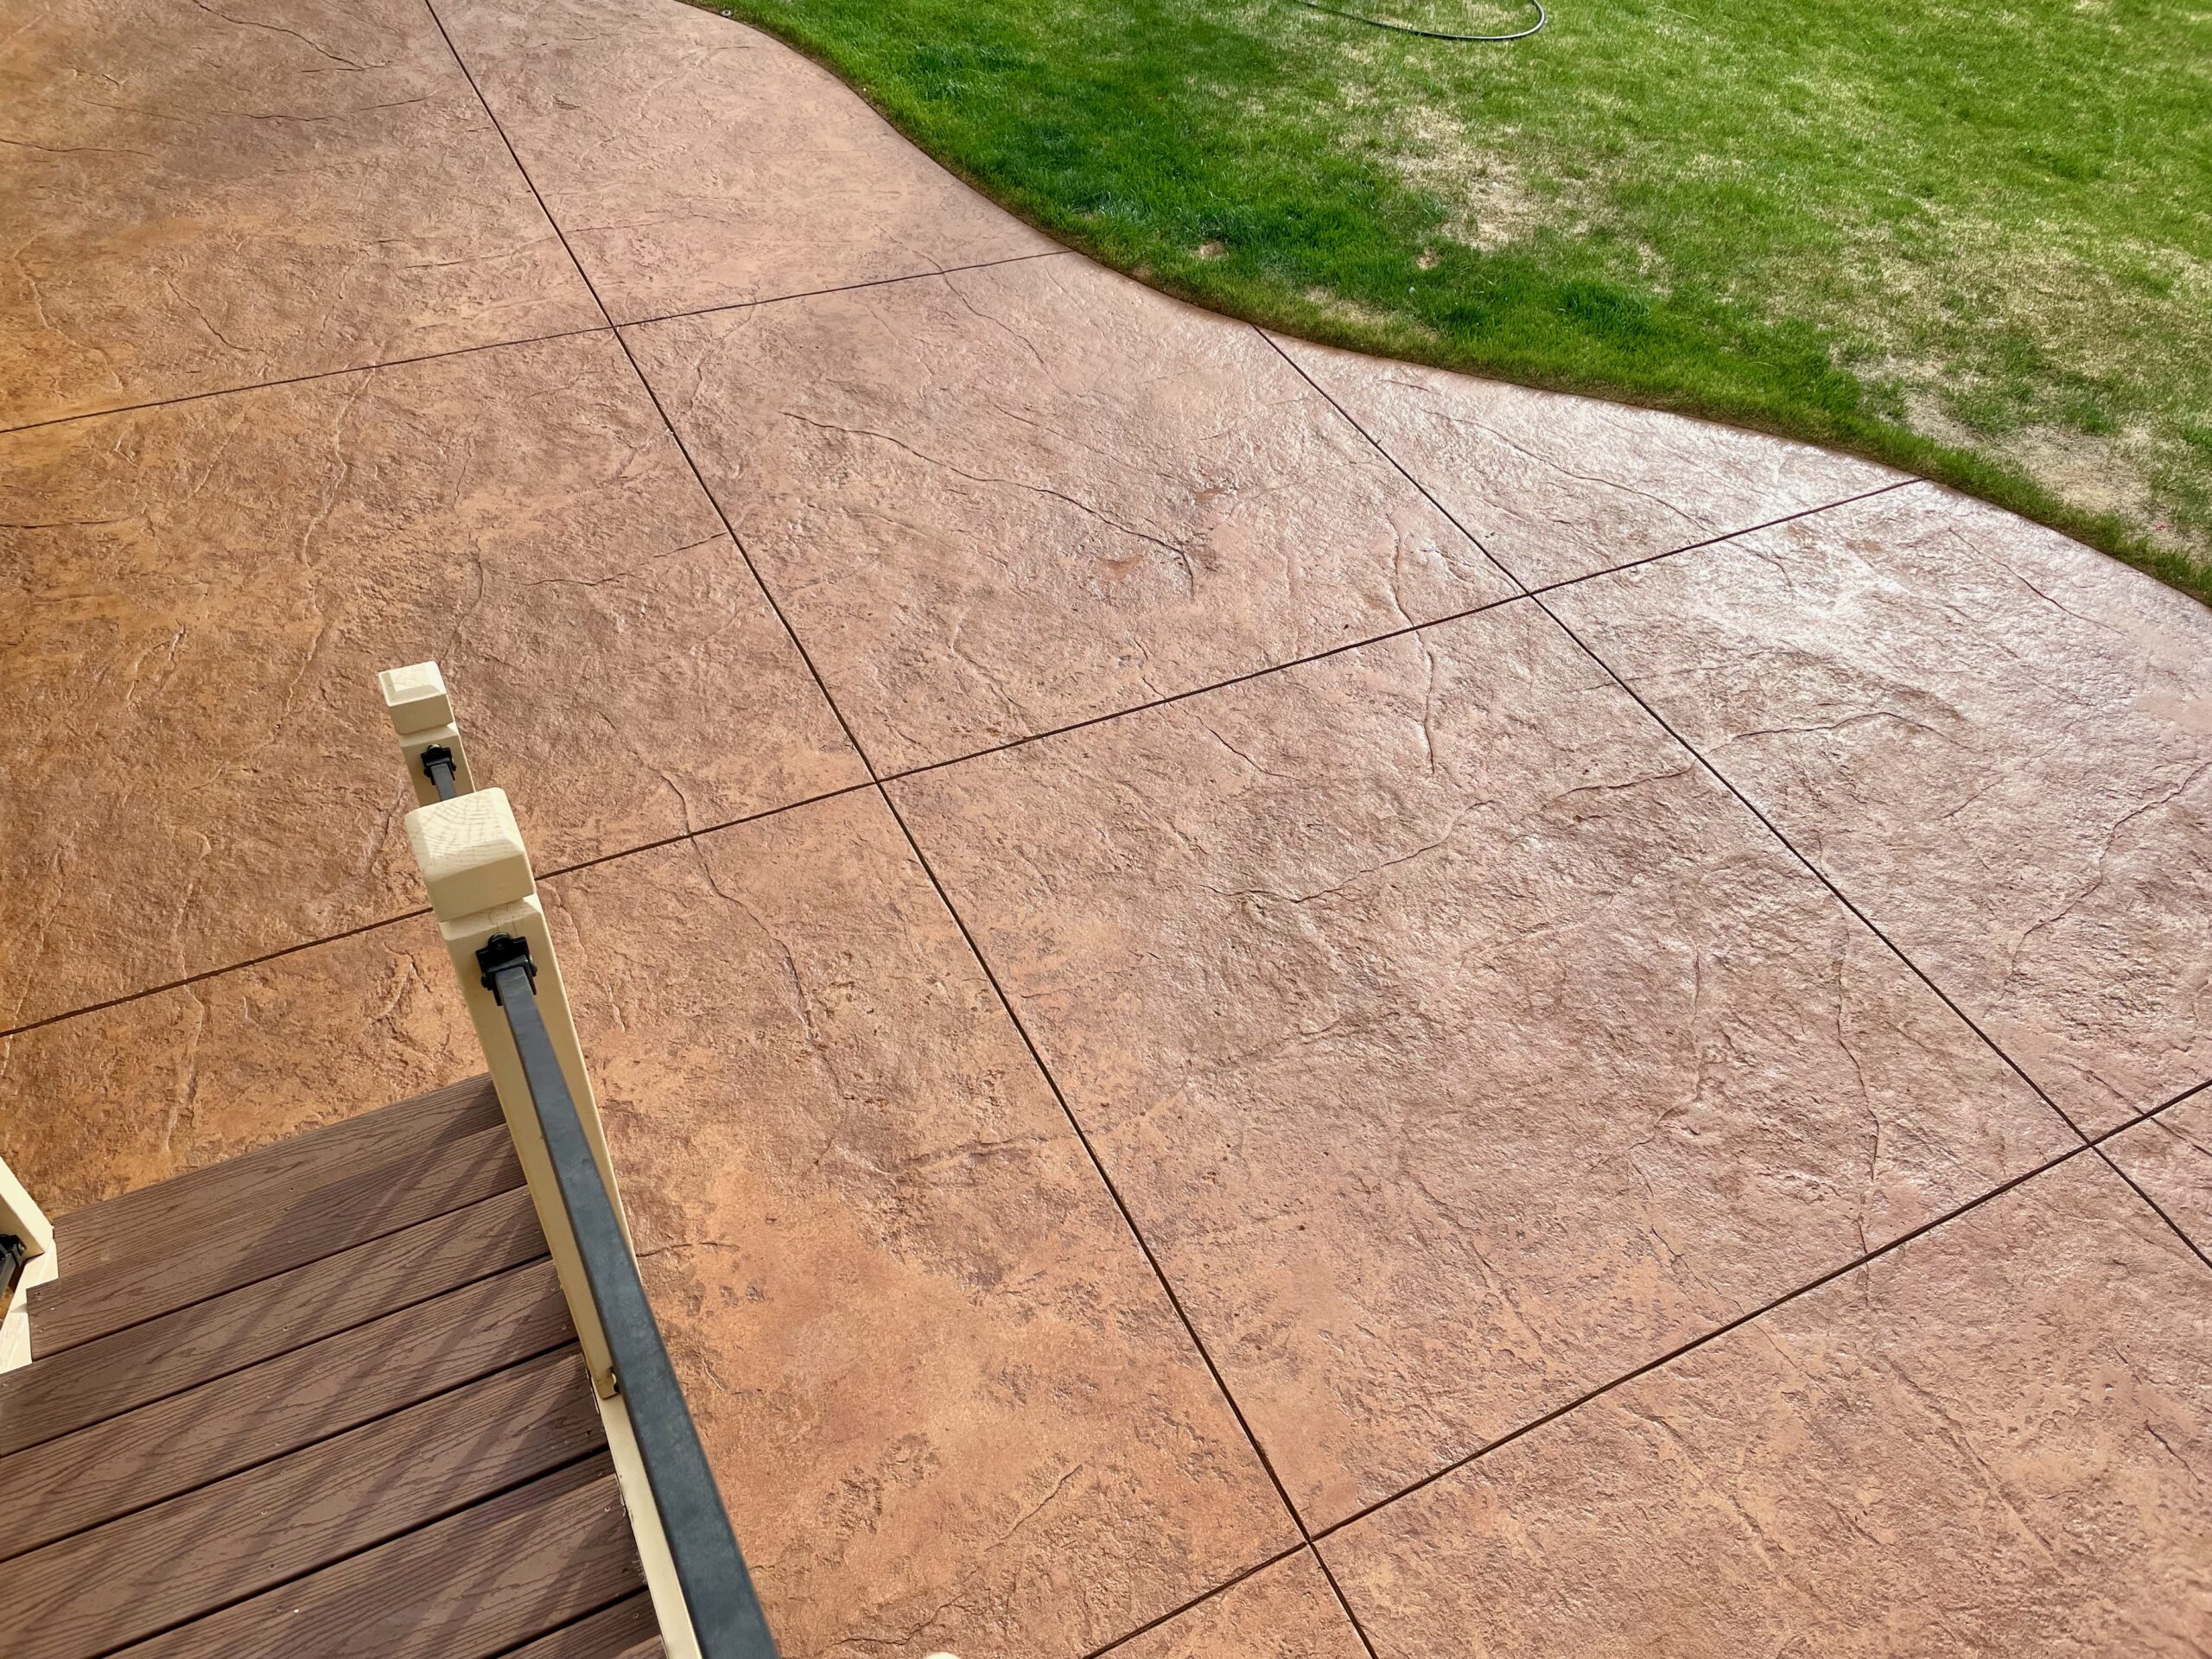
Project Info:
-
- Project Location: Outdoor
- New or existing concrete: Existing Concrete
- Concrete Texture: Stamped
- Estimate Square Footage: 600 (sq. ft.)
- Project Timeframe: 2 (days)
- Project role: DIY
- How did you hear about us: Google search
- Tell us about your project:
I have a stamped and stained patio that is about 600 square feet give or take. I ordered your sample kit (antiquing stain in Cumin) about a year ago and the door is perfect to replace the original look. The stain came surprisingly fast so today in 70 degree weather and about 10 percent humidity, I used the recommended Ace Hardware sprayer and applied the stain. After the drying period, I am going to apply two coats of the Easy Seal solvent based sealer. I would like to be able to use the ACE hardware sprayer again. Can you give me your thoughts on how to clean the sprayer. If I use regular paint thinner will that work or will it destroy the spray nozzles etc. I don’t see any videos on cleanup of equipment. Thanks
White-Washed Look Idea for a Pink Paver Brick Patio
This homeowner was able to change the color of their pink paver brick patio to a clean and inviting white-washed look with the help of Direct Colors’ team and products.
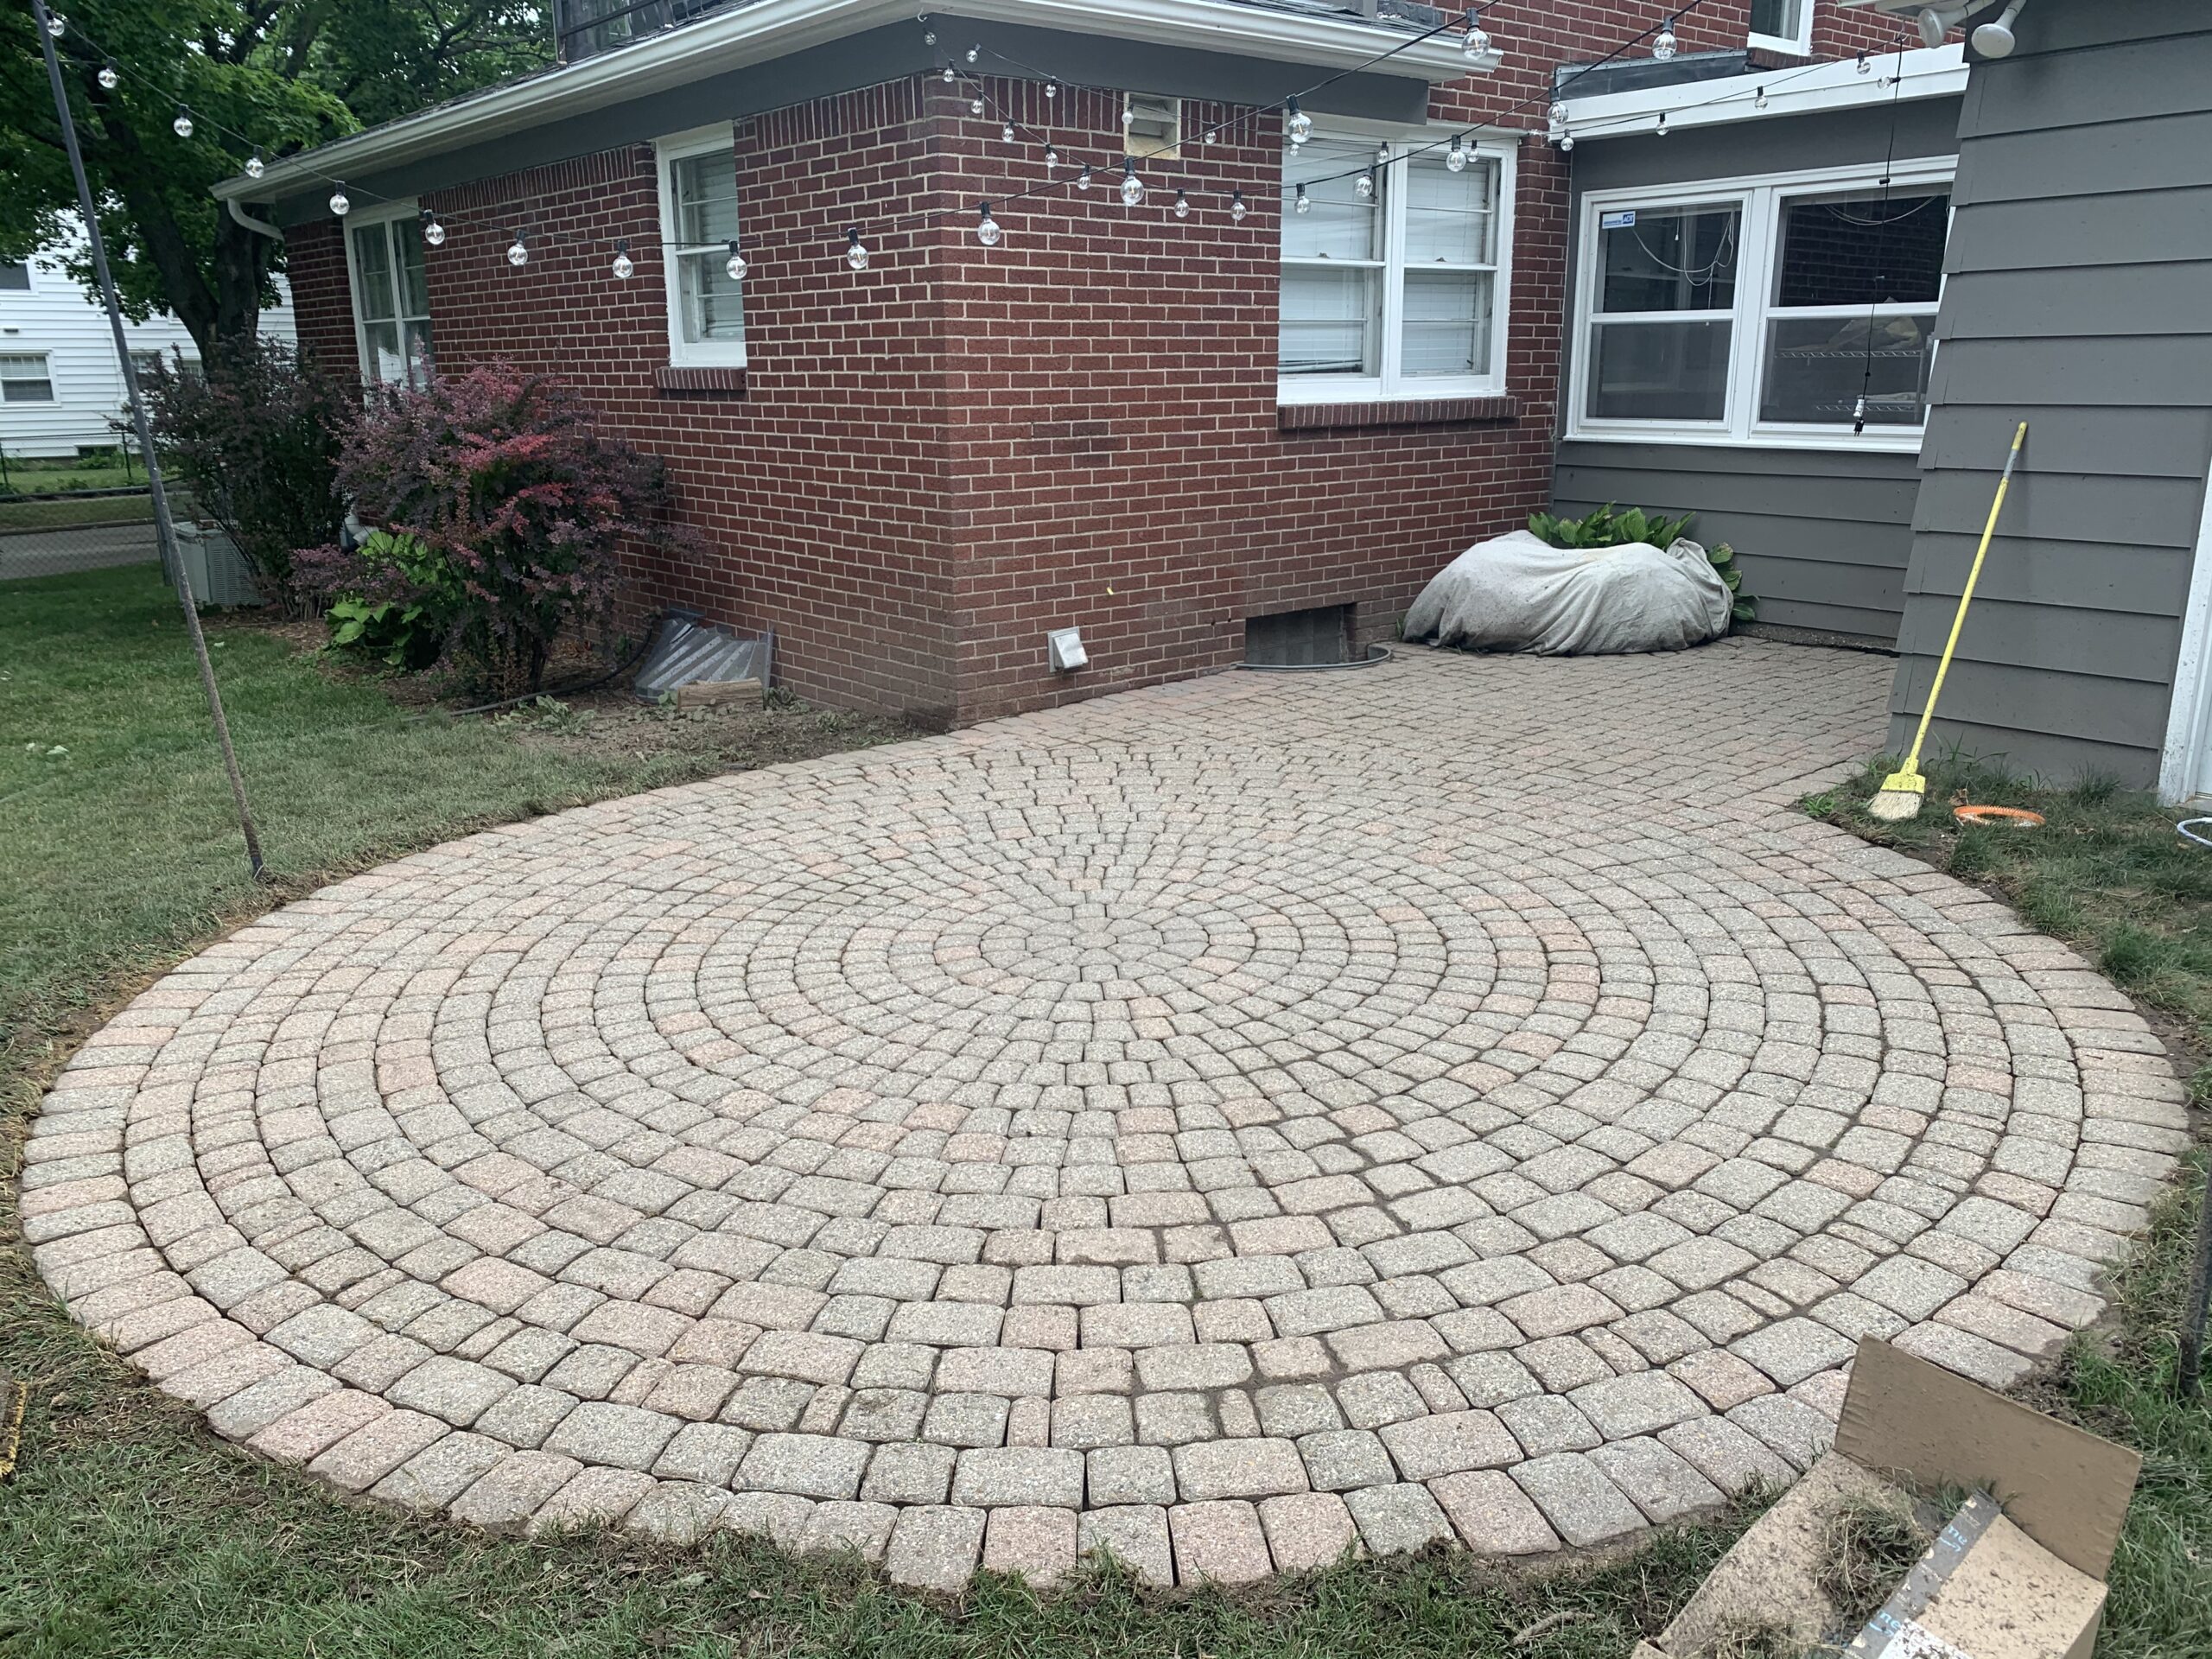
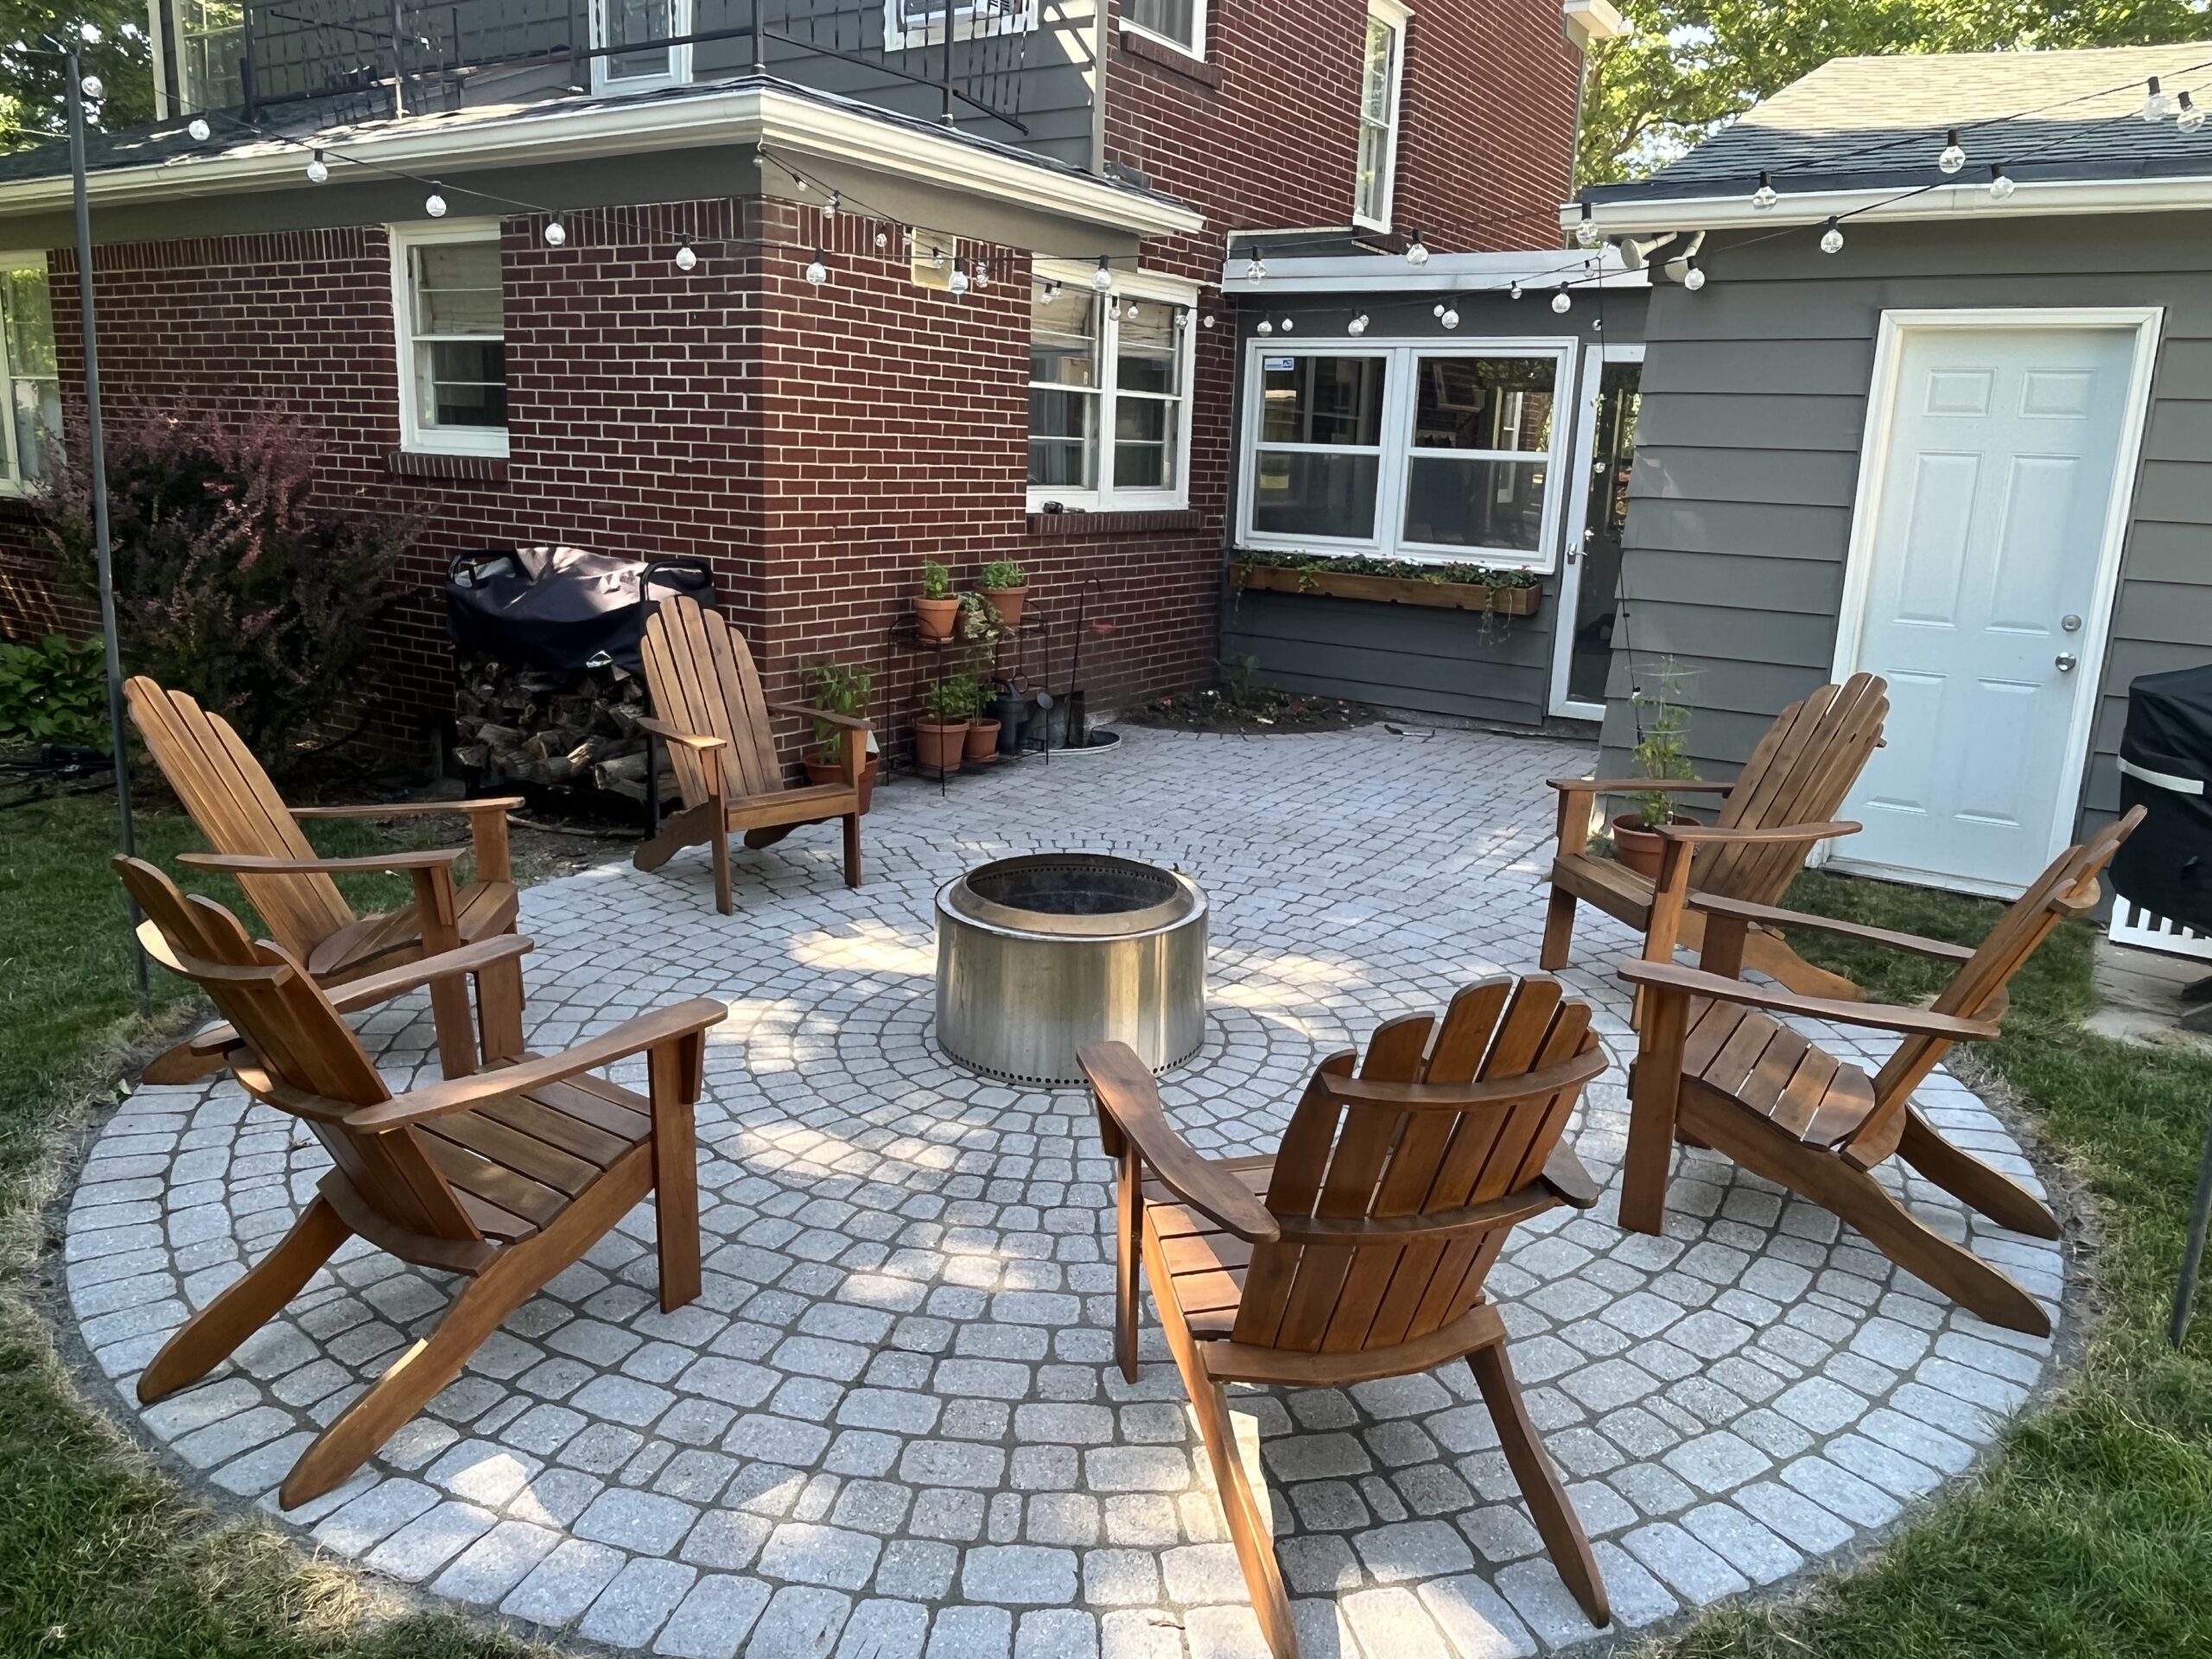
Project Description: The homeowner was not satisfied with the color of their pink paver brick patio and desired a clean, inviting, white-washed look. After researching paint, big box store products and even trying real lime wash which eventually failed, they decided to take a chance on Direct Colors and were glad they did. The project was completed in just 4 days and the results were impressive.
Project Completed In: 4 day(s) Estimate of Square Footage: 300 sq. ft.
Personal Tips:
- Take your time and do the work, as materials are expensive and your time is valuable.
- Utilize the Direct Colors team for guidance and advice, as the application process may vary depending on the surface and conditions.
- Be sure to prepare the surface properly by power washing and allowing it to dry before applying the product.
- Use a pro grade polymeric sand to finish the project.
Direct Colors Products Used:
- 5 gallons Portico white
- 2 gallons EasySeal satin
Other Products Used:
-
- Techniseal pro series hp next gel jointing sand
- Granite color to make the white pop a little bit
Circular Paver Perfection: A DIY Patio Design
Transform your outdoor dining space with a unique circular paver design and Portico paver stain colors. This homeowner used Terracotta and Charcoal stains to give their existing gray pavers a new look and added a cobblestone effect for a unique design
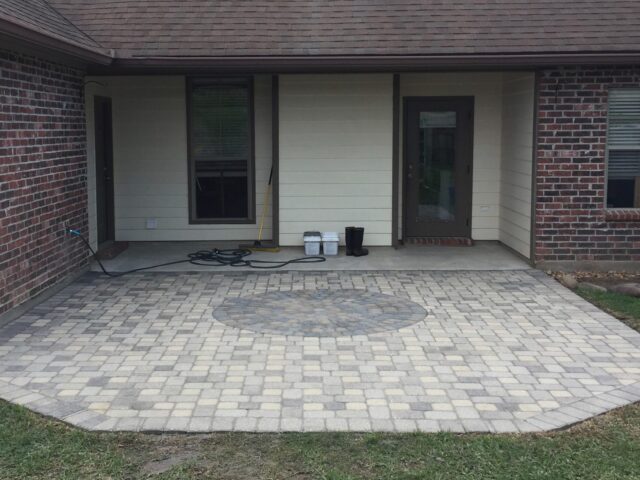
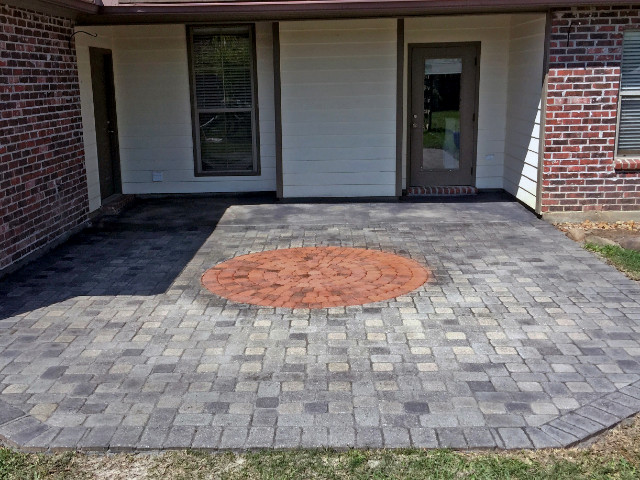
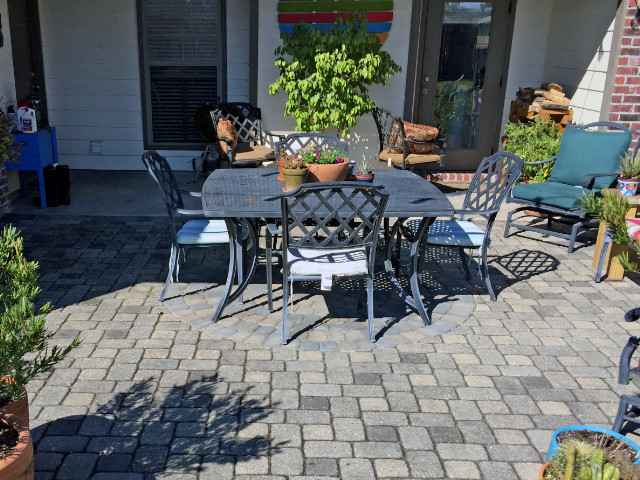
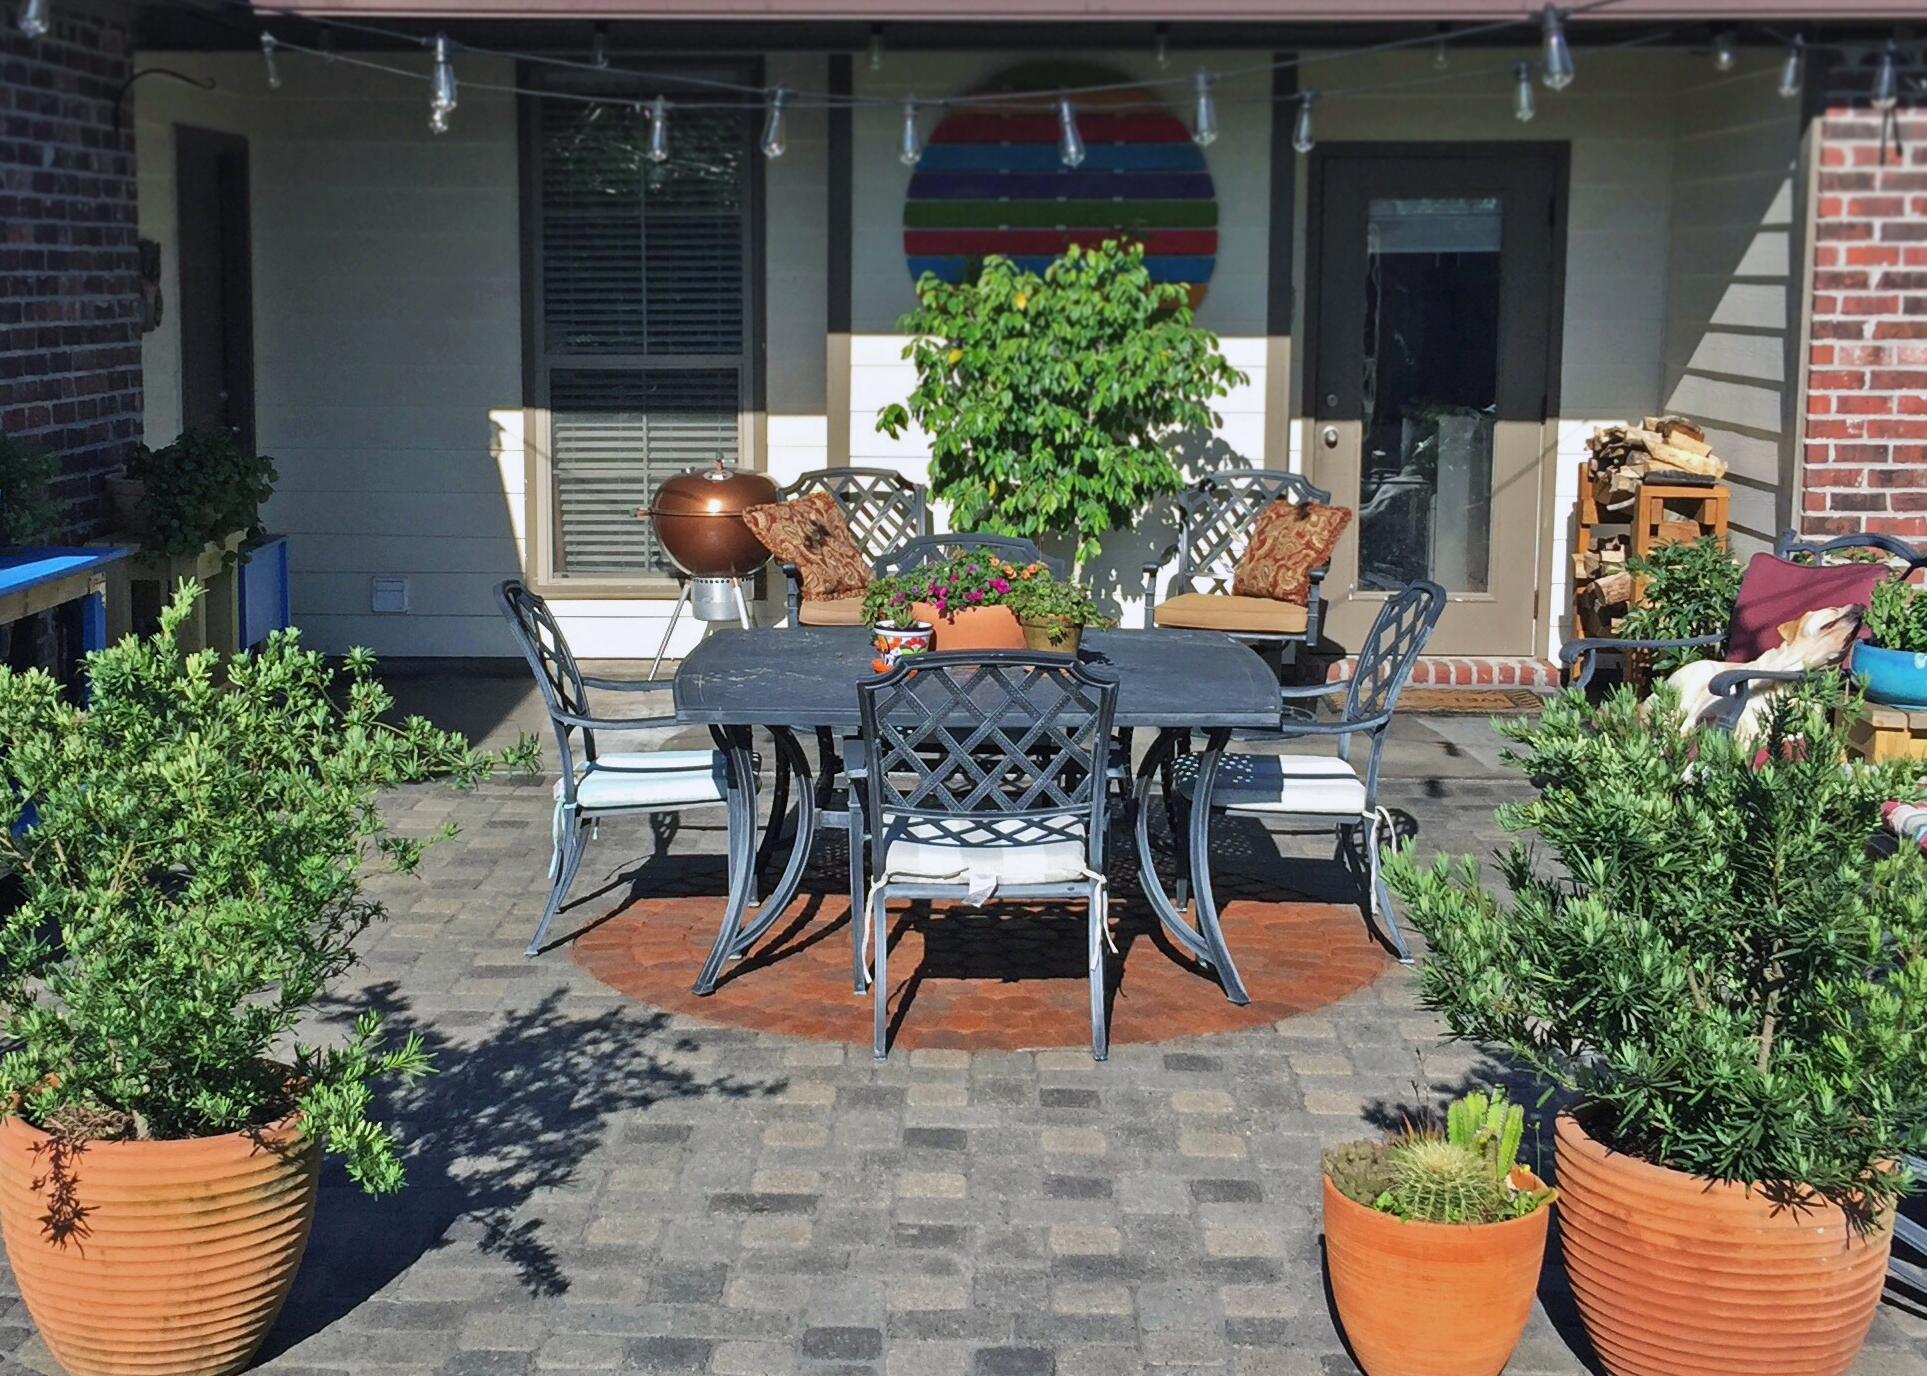
This paver patio project took place over the course of 5 days and covered an estimated 400 sq. ft. The homeowner had previously installed a patio with a brick fire pit in the center, but eventually removed the fire pit and filled the hole with river pebbles. When they couldn’t find a circular outdoor rug they liked, they decided to see if they could find a circular paver kit to fill in the hole. They found a kit, but the pavers came out mostly gray instead of having a reddish tint as expected. The homeowner then discovered Direct Colors and decided to stain the circle with Terra Cotta and the existing gray pavers with Charcoal. They also stained the concrete back porch. After pressure washing the existing pavers and adding polymeric sand, the homeowner sprayed on a coat of Terra Cotta in the circle and followed with Charcoal for the grays. They later added additional coats of Charcoal by brush to the darkest existing gray pavers and the darkest red pavers to give it a cobblestone effect. The project ended up requiring three coats of sealer. Personal tips from the homeowner include planning ahead if you want to maintain an edge between two distinct colors, being careful to avoid overspray and bleeding, and ordering extra bottles of stain and sealer if you have a large or porous surface. They also recommend being aware that very porous surfaces may absorb and spread the stain like alcohol on chalk.
Paver Panache: DIY Color-Rich Pathways
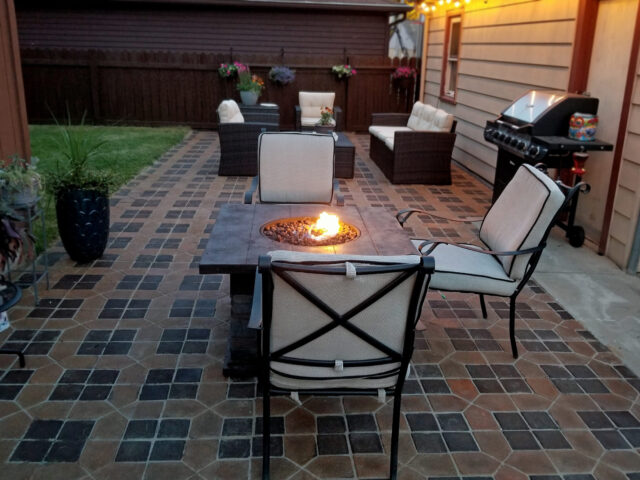
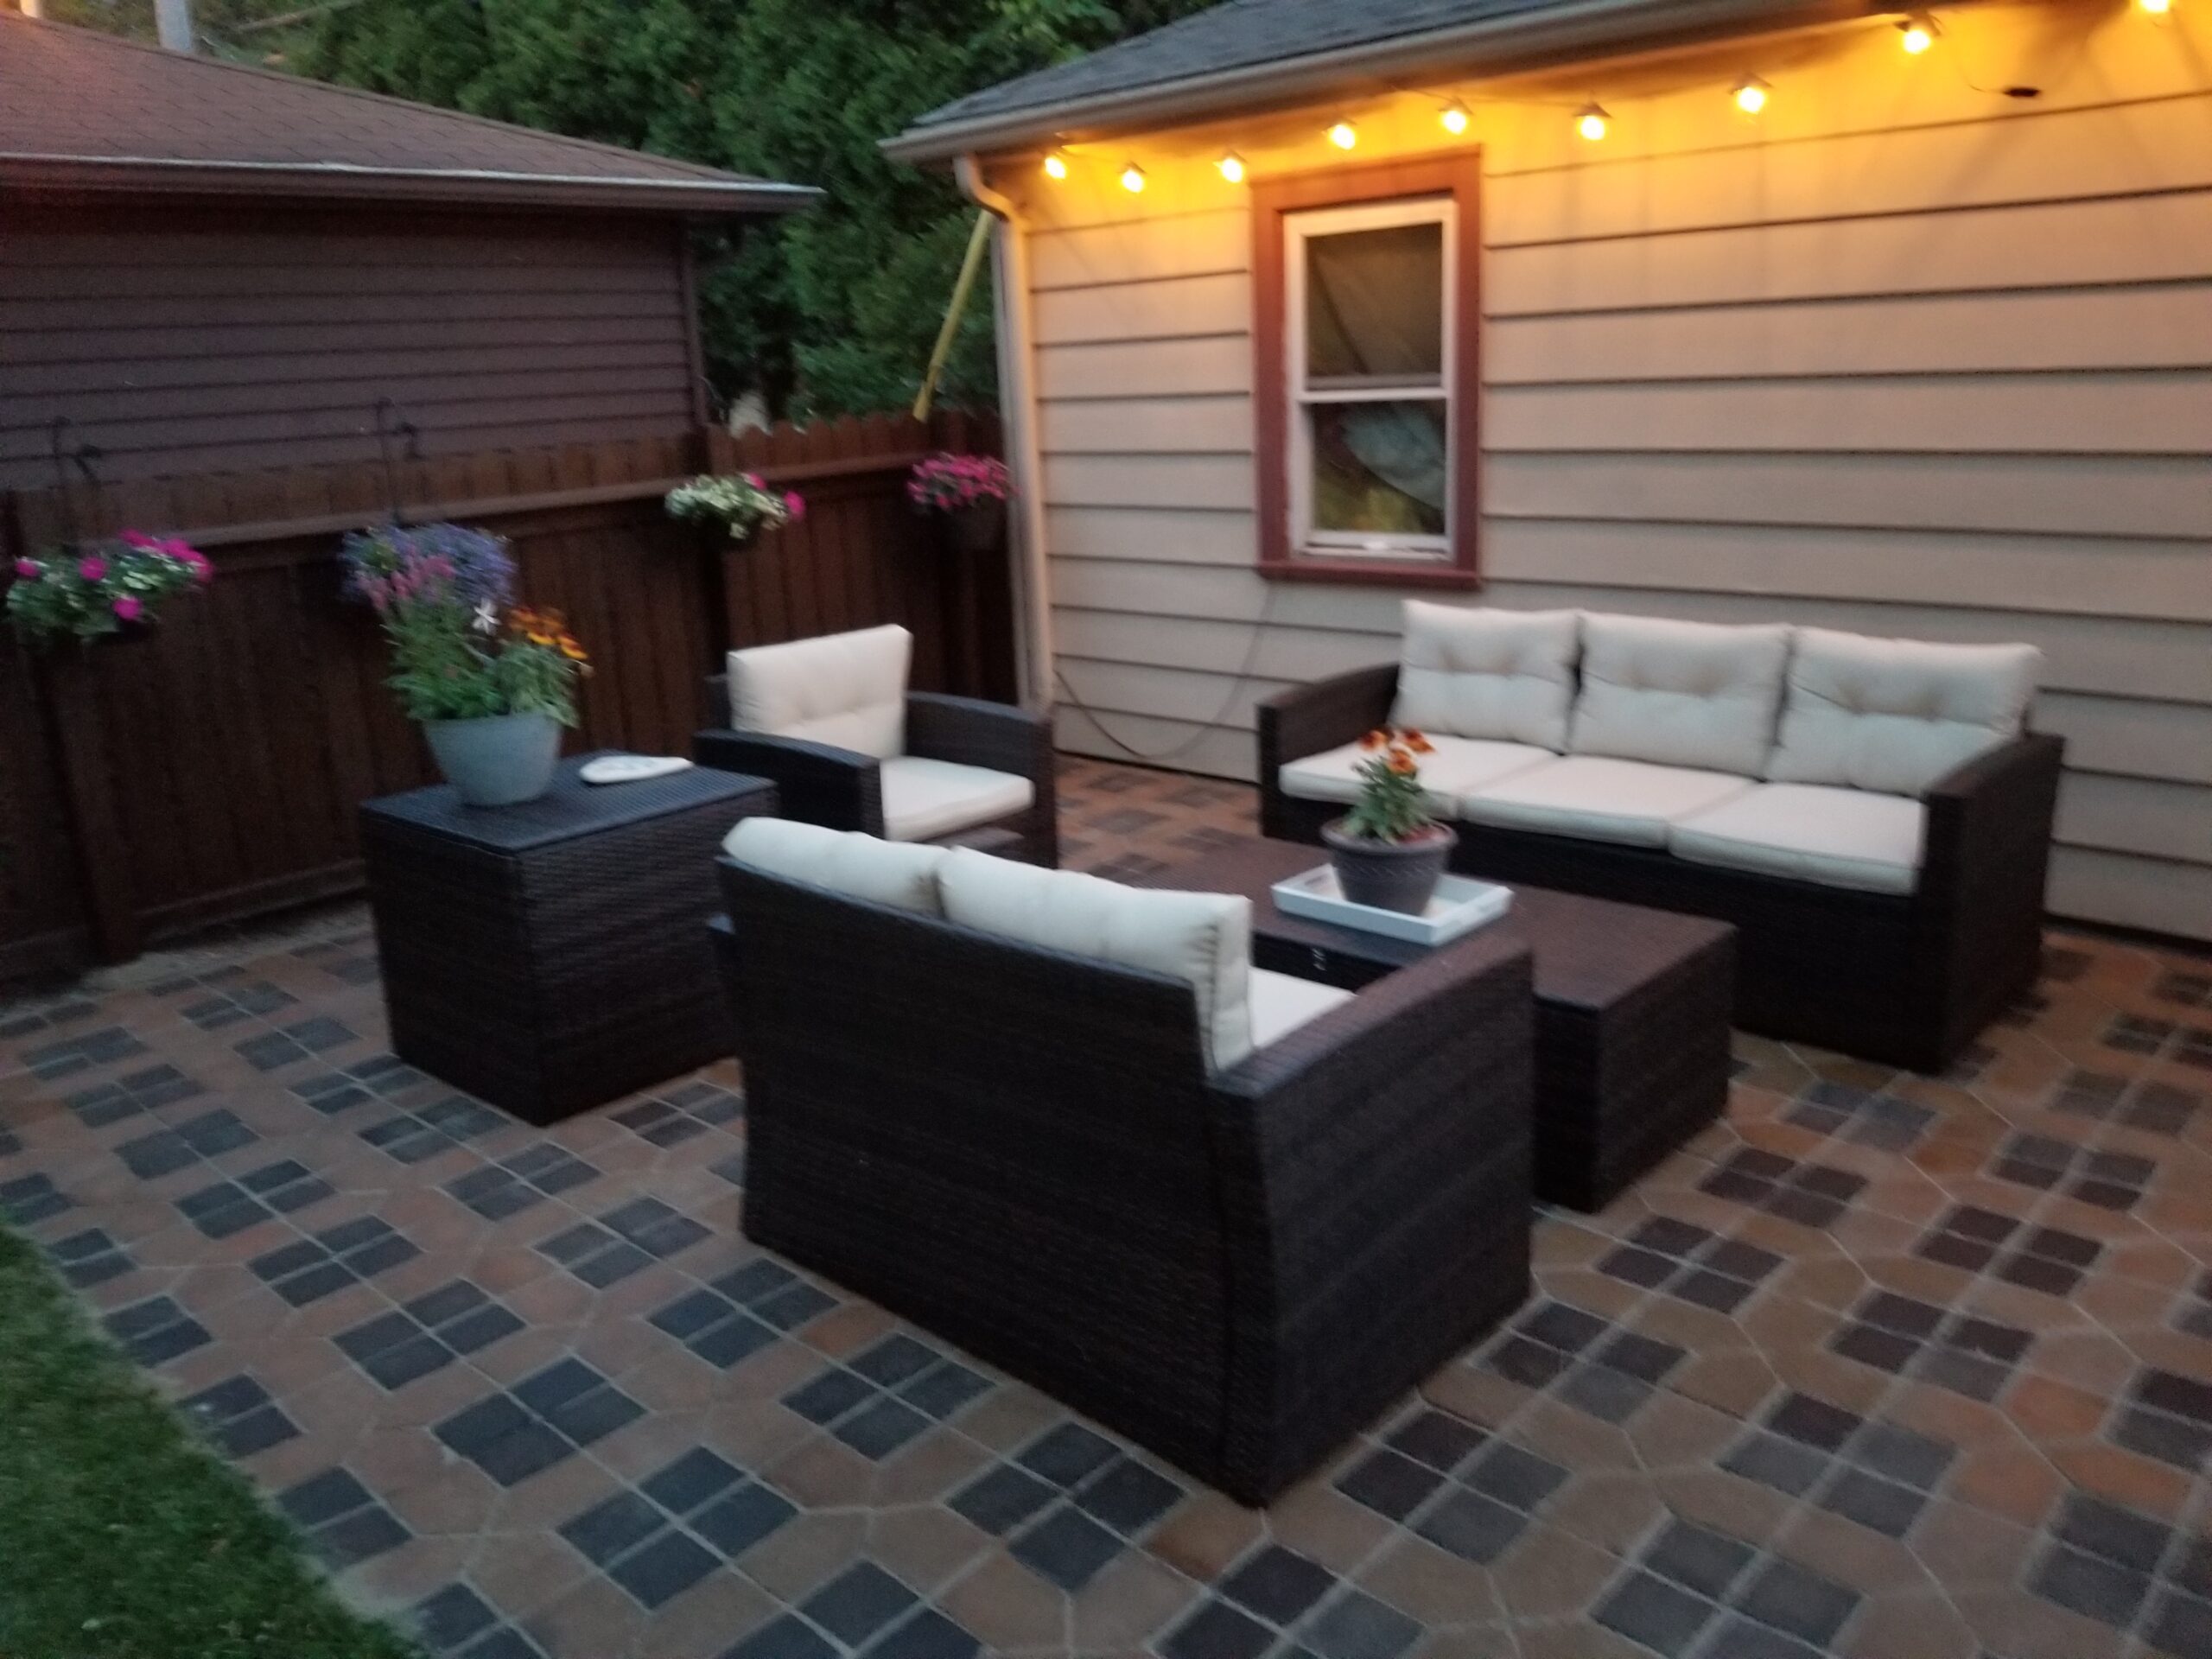
Step into a world of DIY ingenuity with our “Paver Panache” project. Starting with self-made pavers using a mold and colored cement, this ambitious homeowner enhanced the inconsistent color by applying acid stain to the blocks. The outcome? A uniquely personal and vibrant walkway.
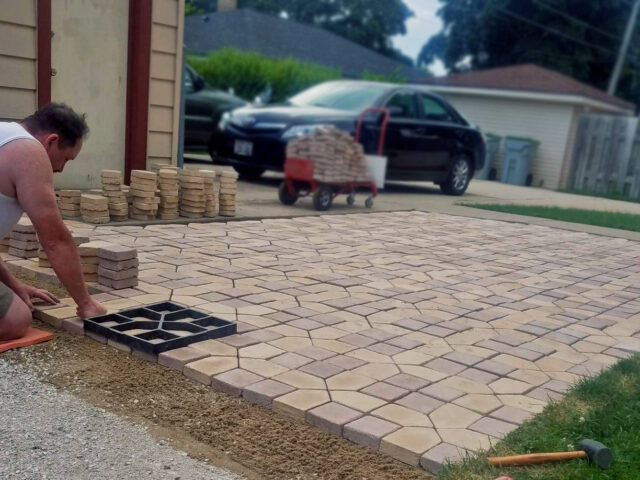
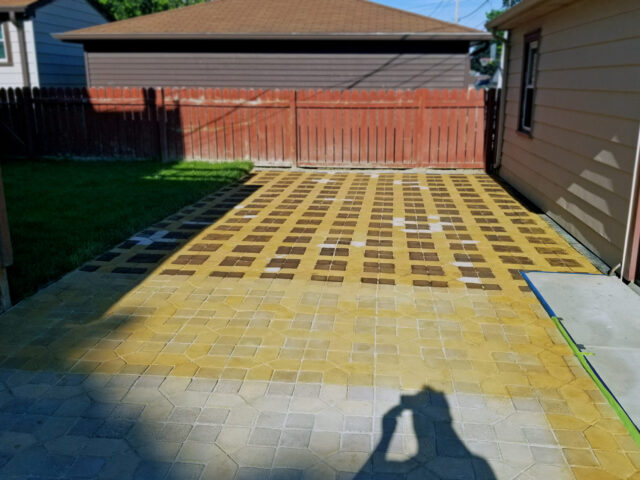
- Project Completed In: 7 day(s)
- Estimate of Square Footage: 500 sq. ft.
- Project Description:
I created my own pavers using a mold and colored cement. However, the cement color wasn’t entirely consistent or rich in color so I decided to acid stain the blocks. - Personal Tips:
Spray the entire area with light color, go back and paint brush the dark areas - Direct Colors Products Used:
Coffee Brown EverStain
Desert Amber EverStain
Solvent-Based, Satin EasySeal
Patio Upgrade: A Broom Finish Concrete Outdoor Kitchen Transformed With Acid Staining
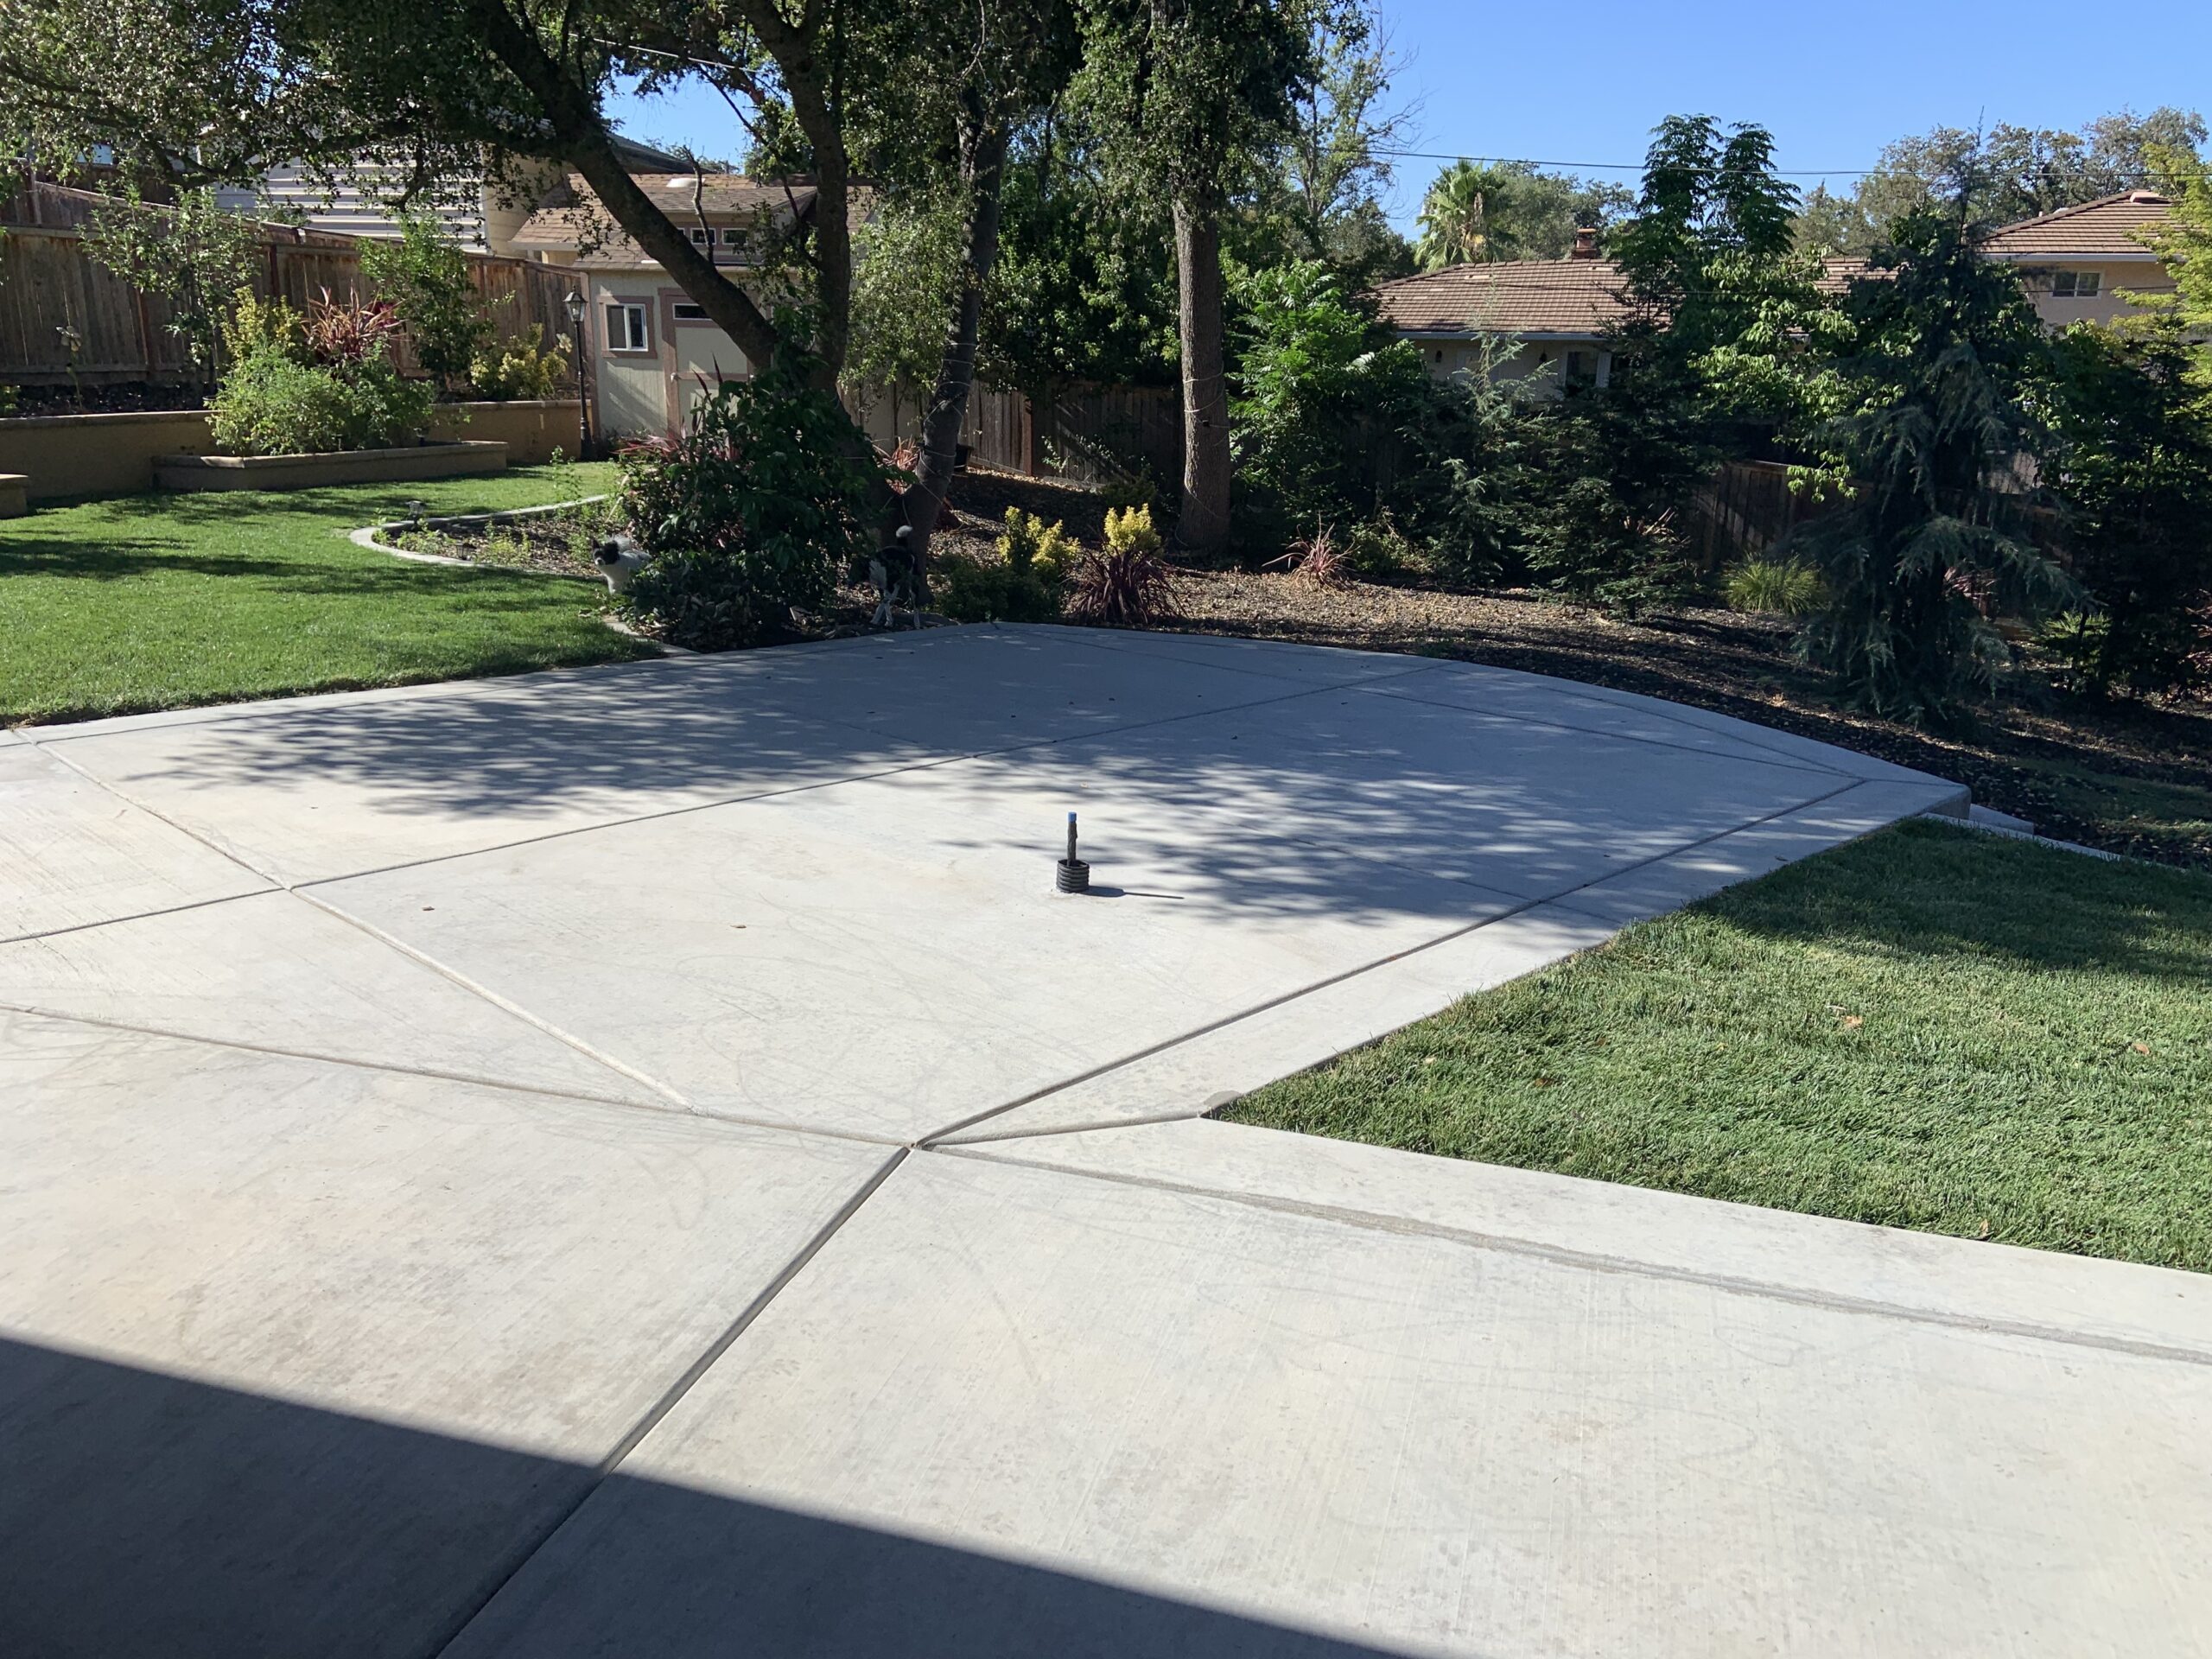
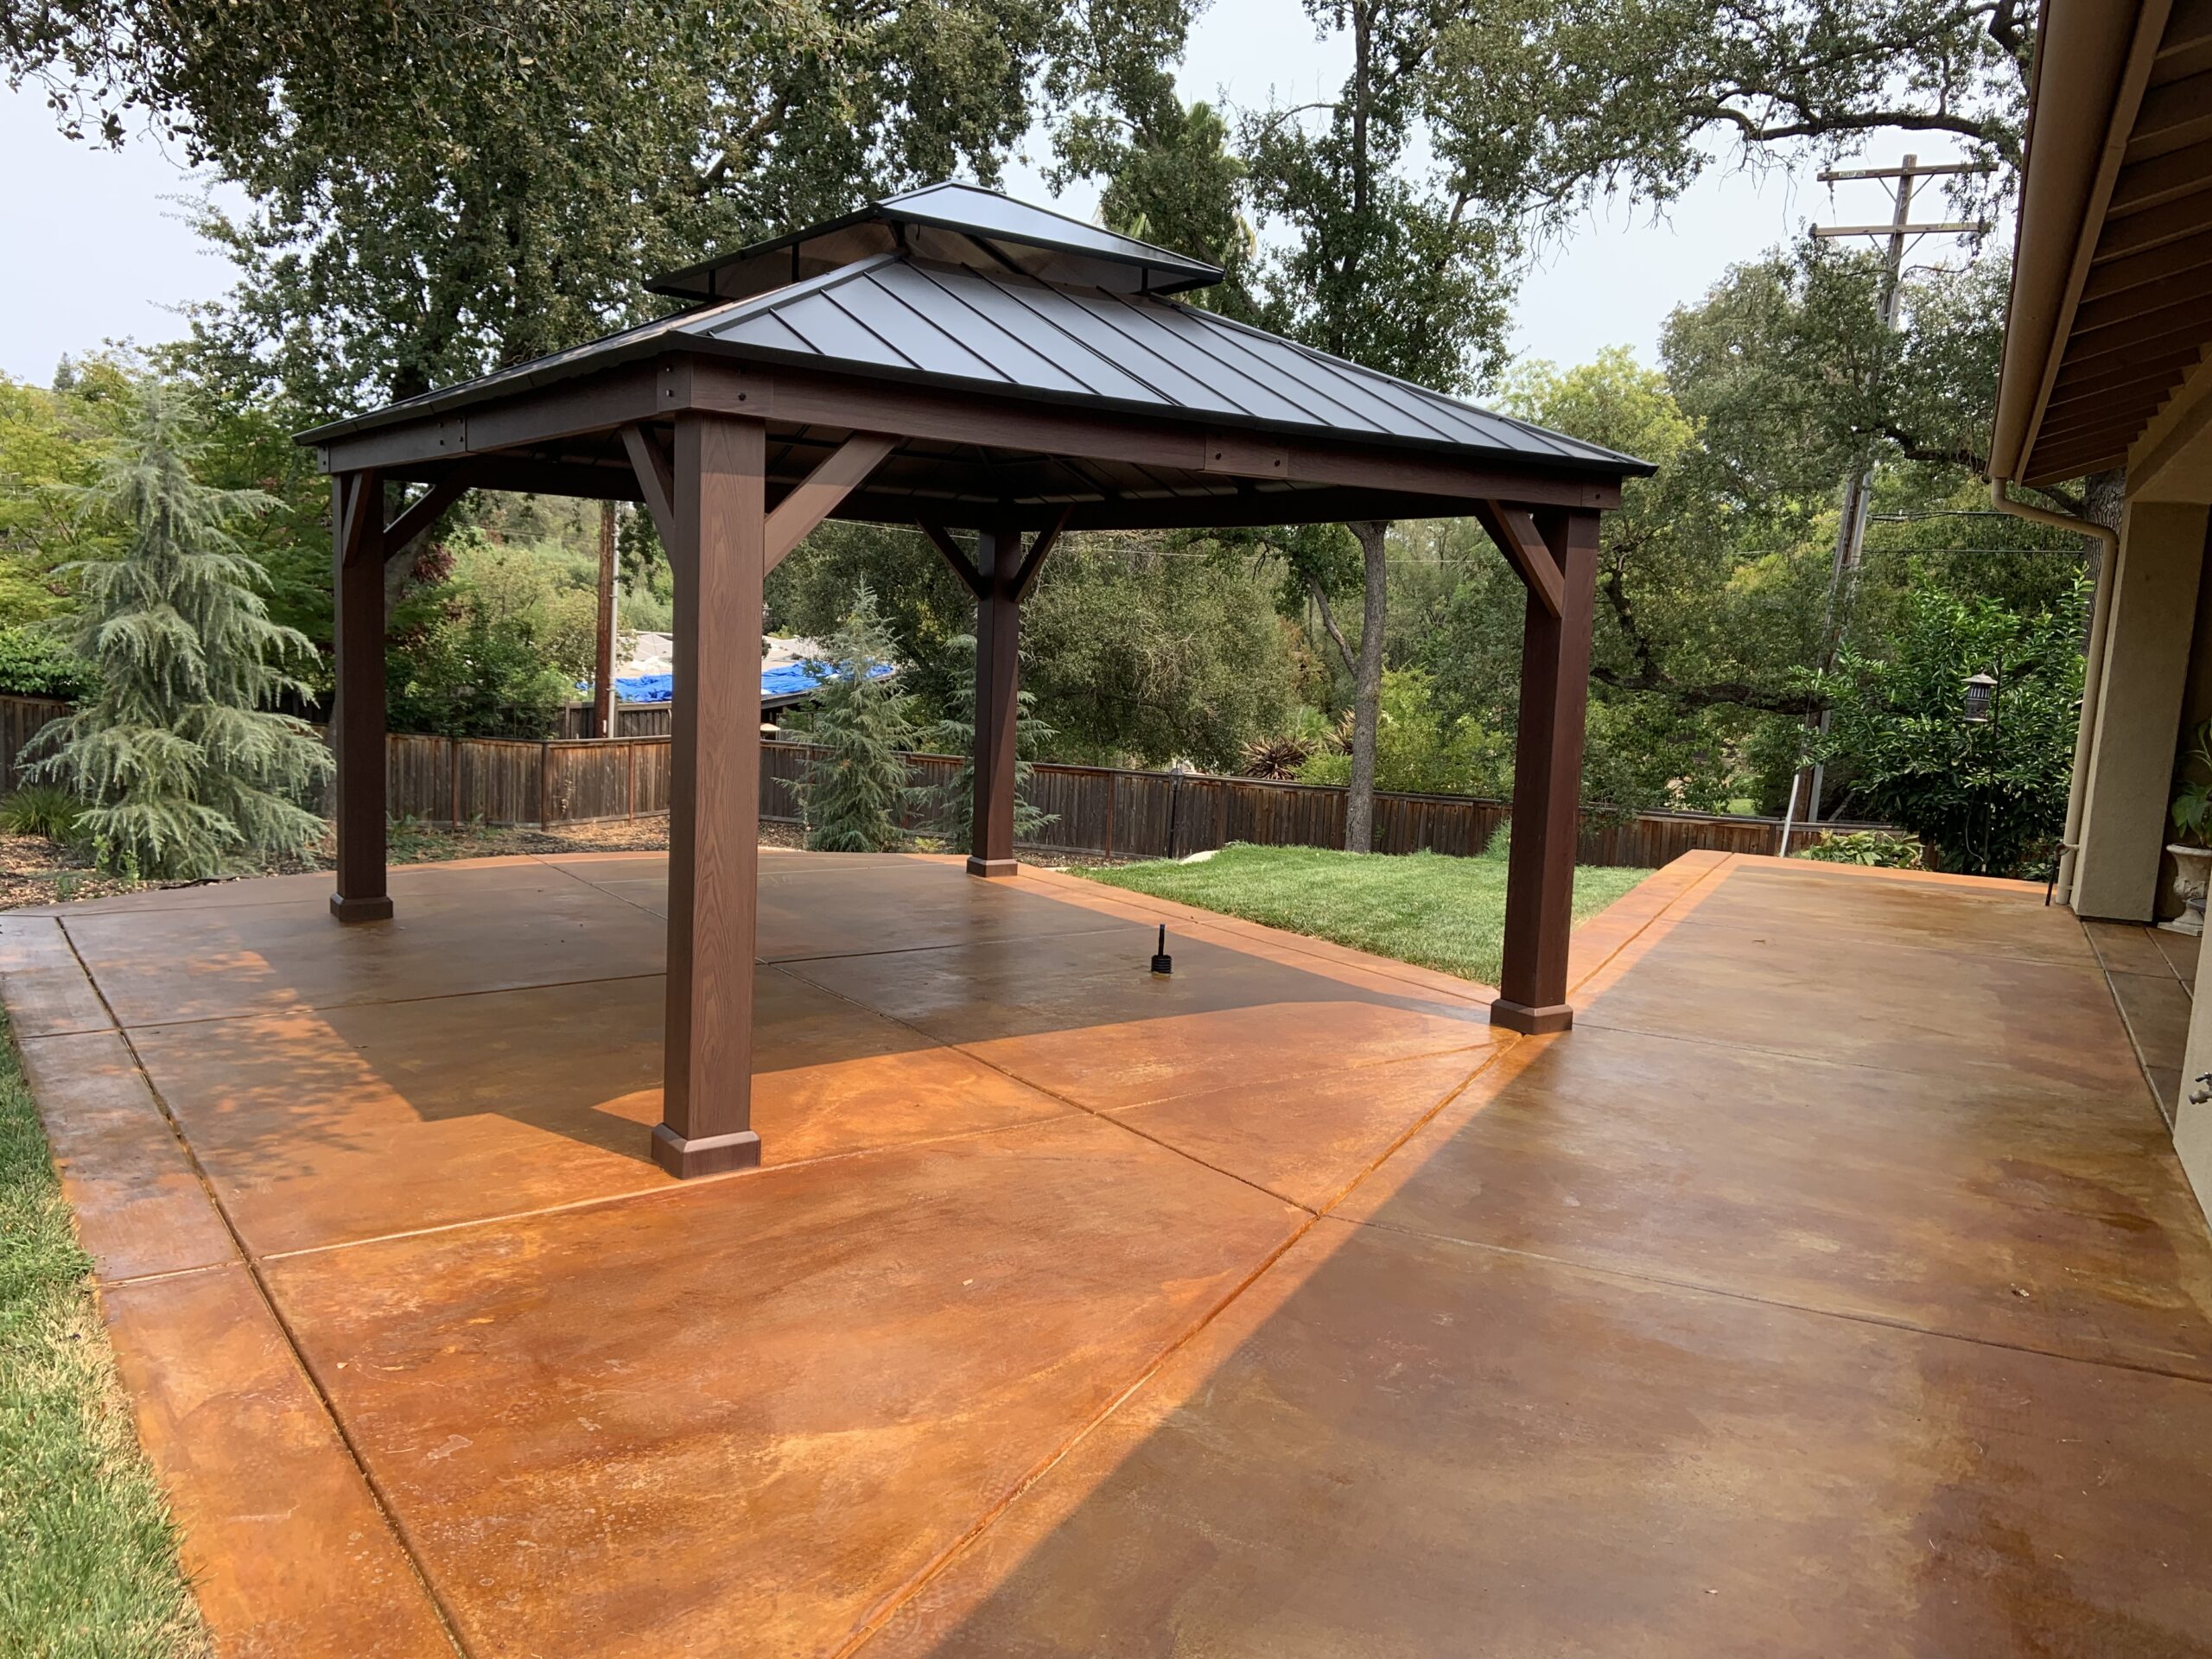
Upgrade your patio with this easy outdoor kitchen California room transformation project. By using a broom finish technique and acid staining, this 400 square foot surface was transformed into an elegant and functional outdoor living space. See the before and after photos and learn how you can achieve similar results with acid staining on your own broom finished concrete patio.
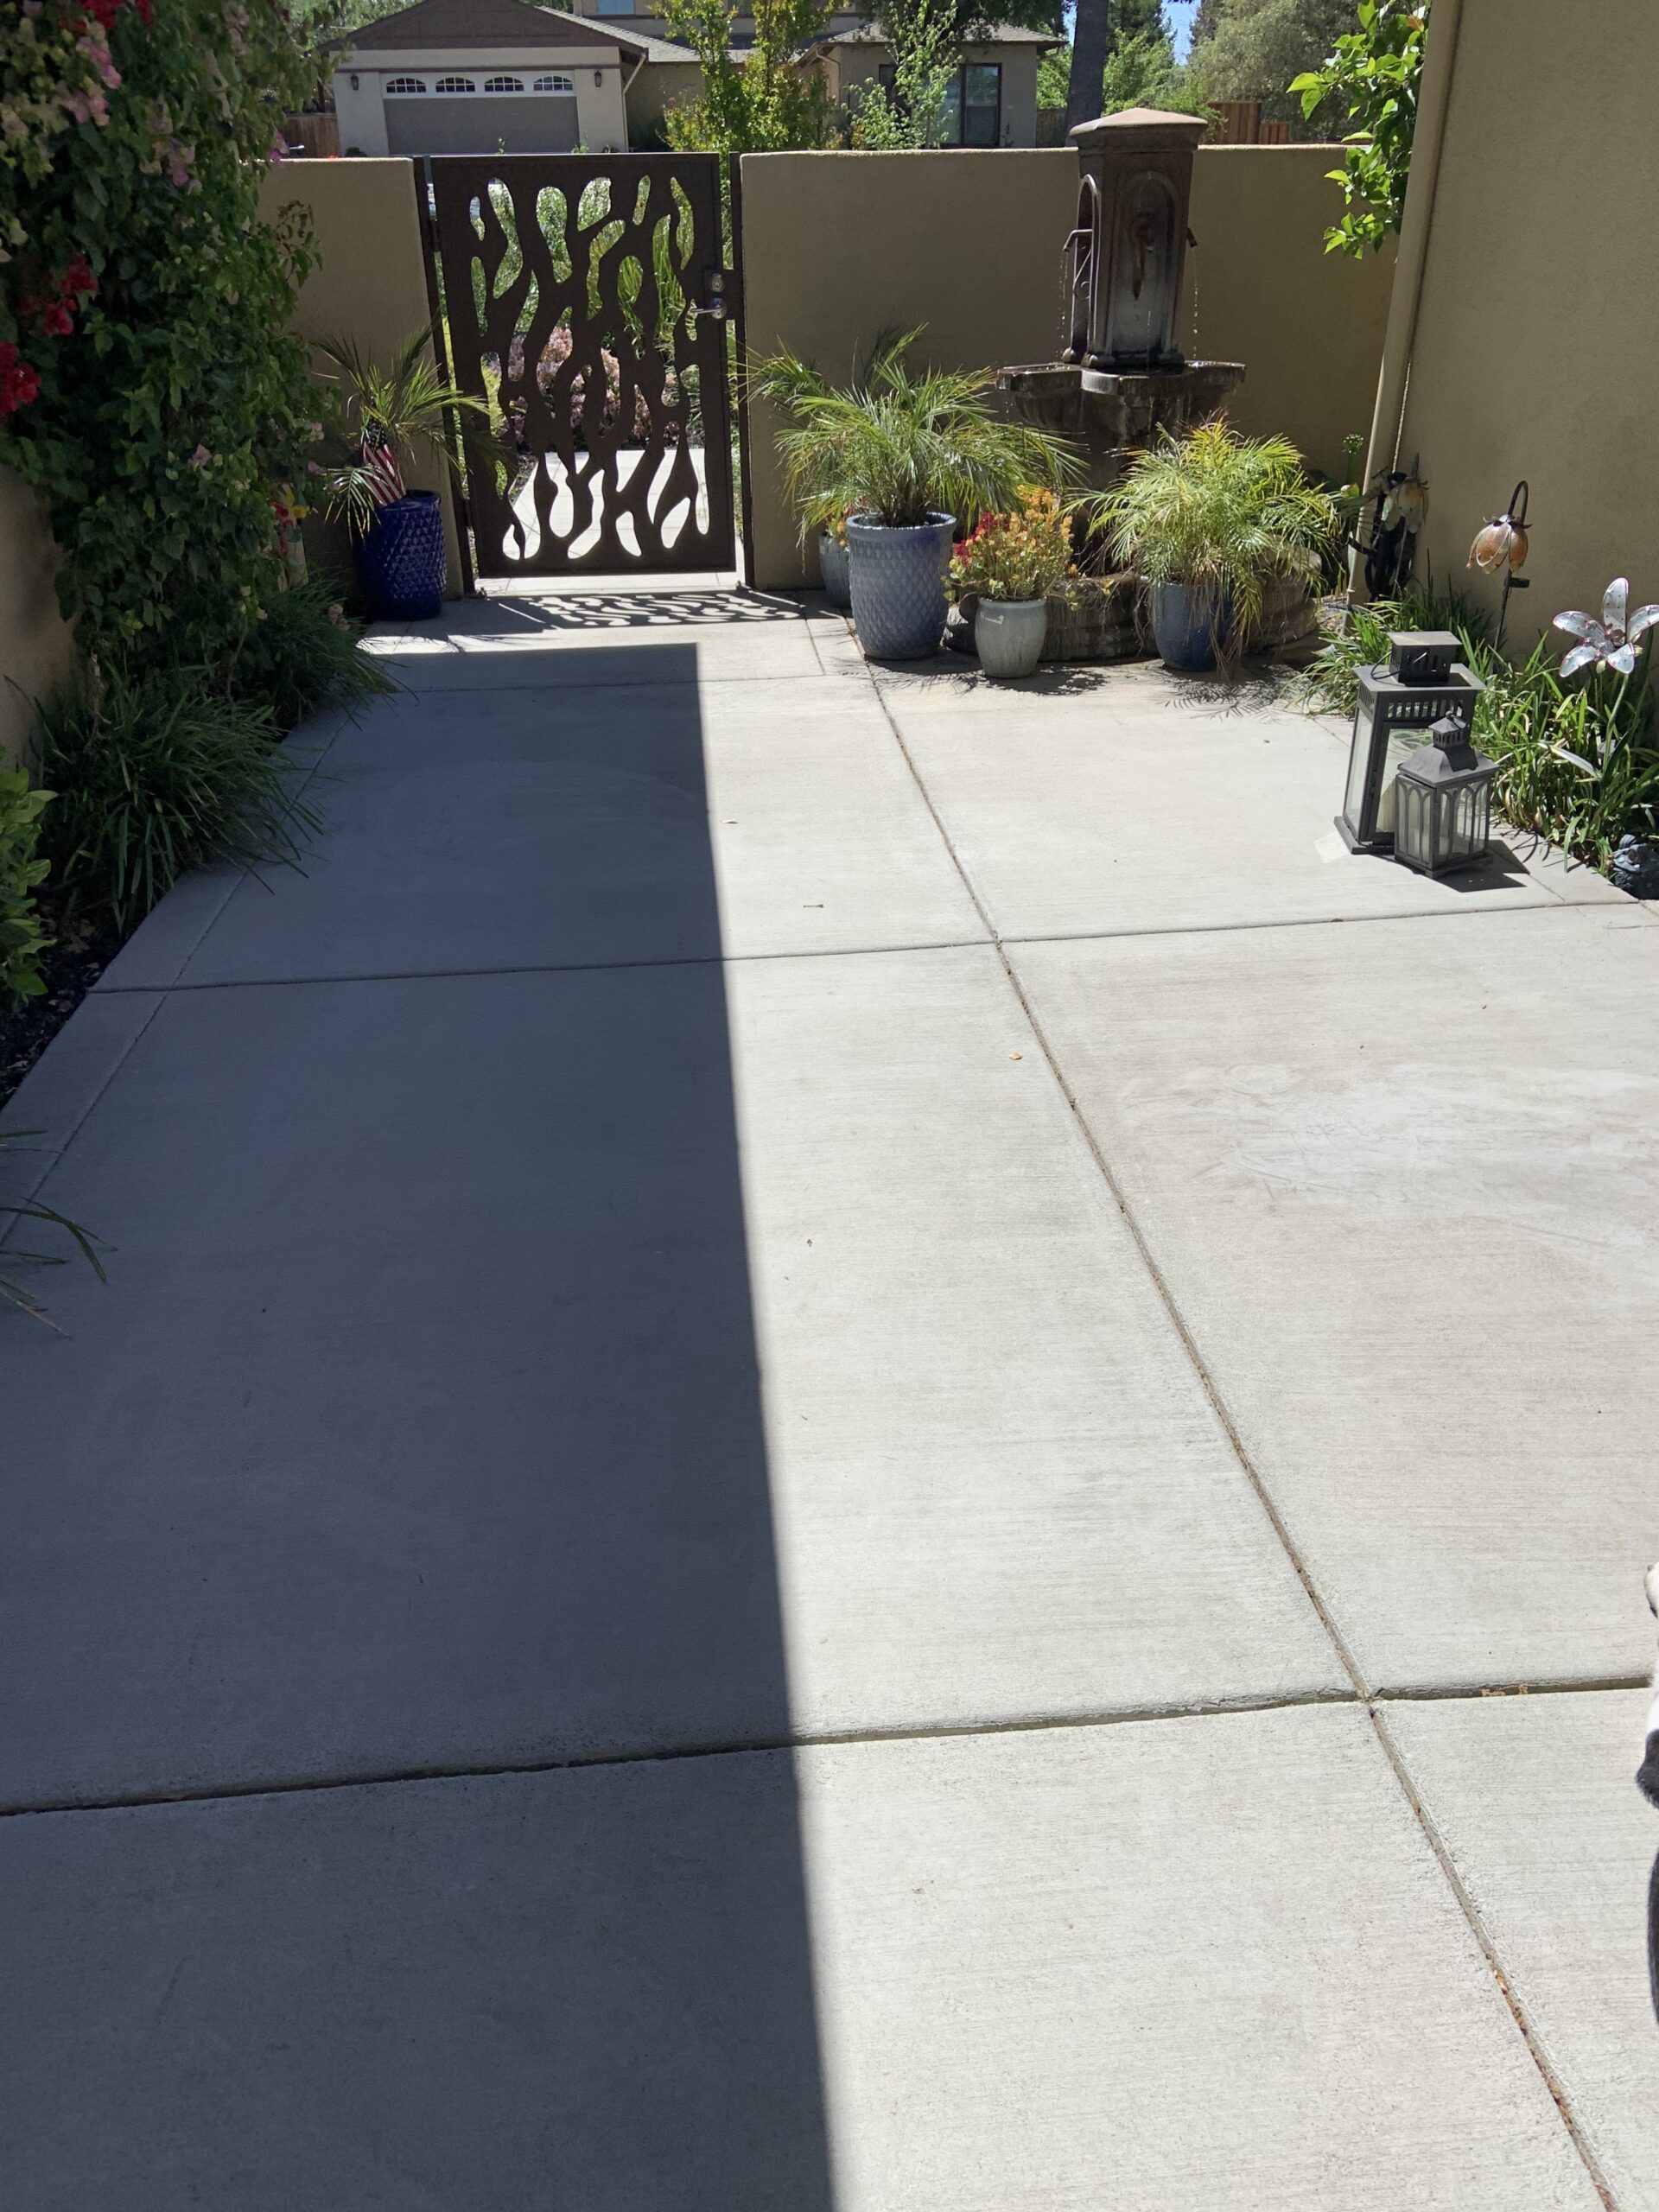
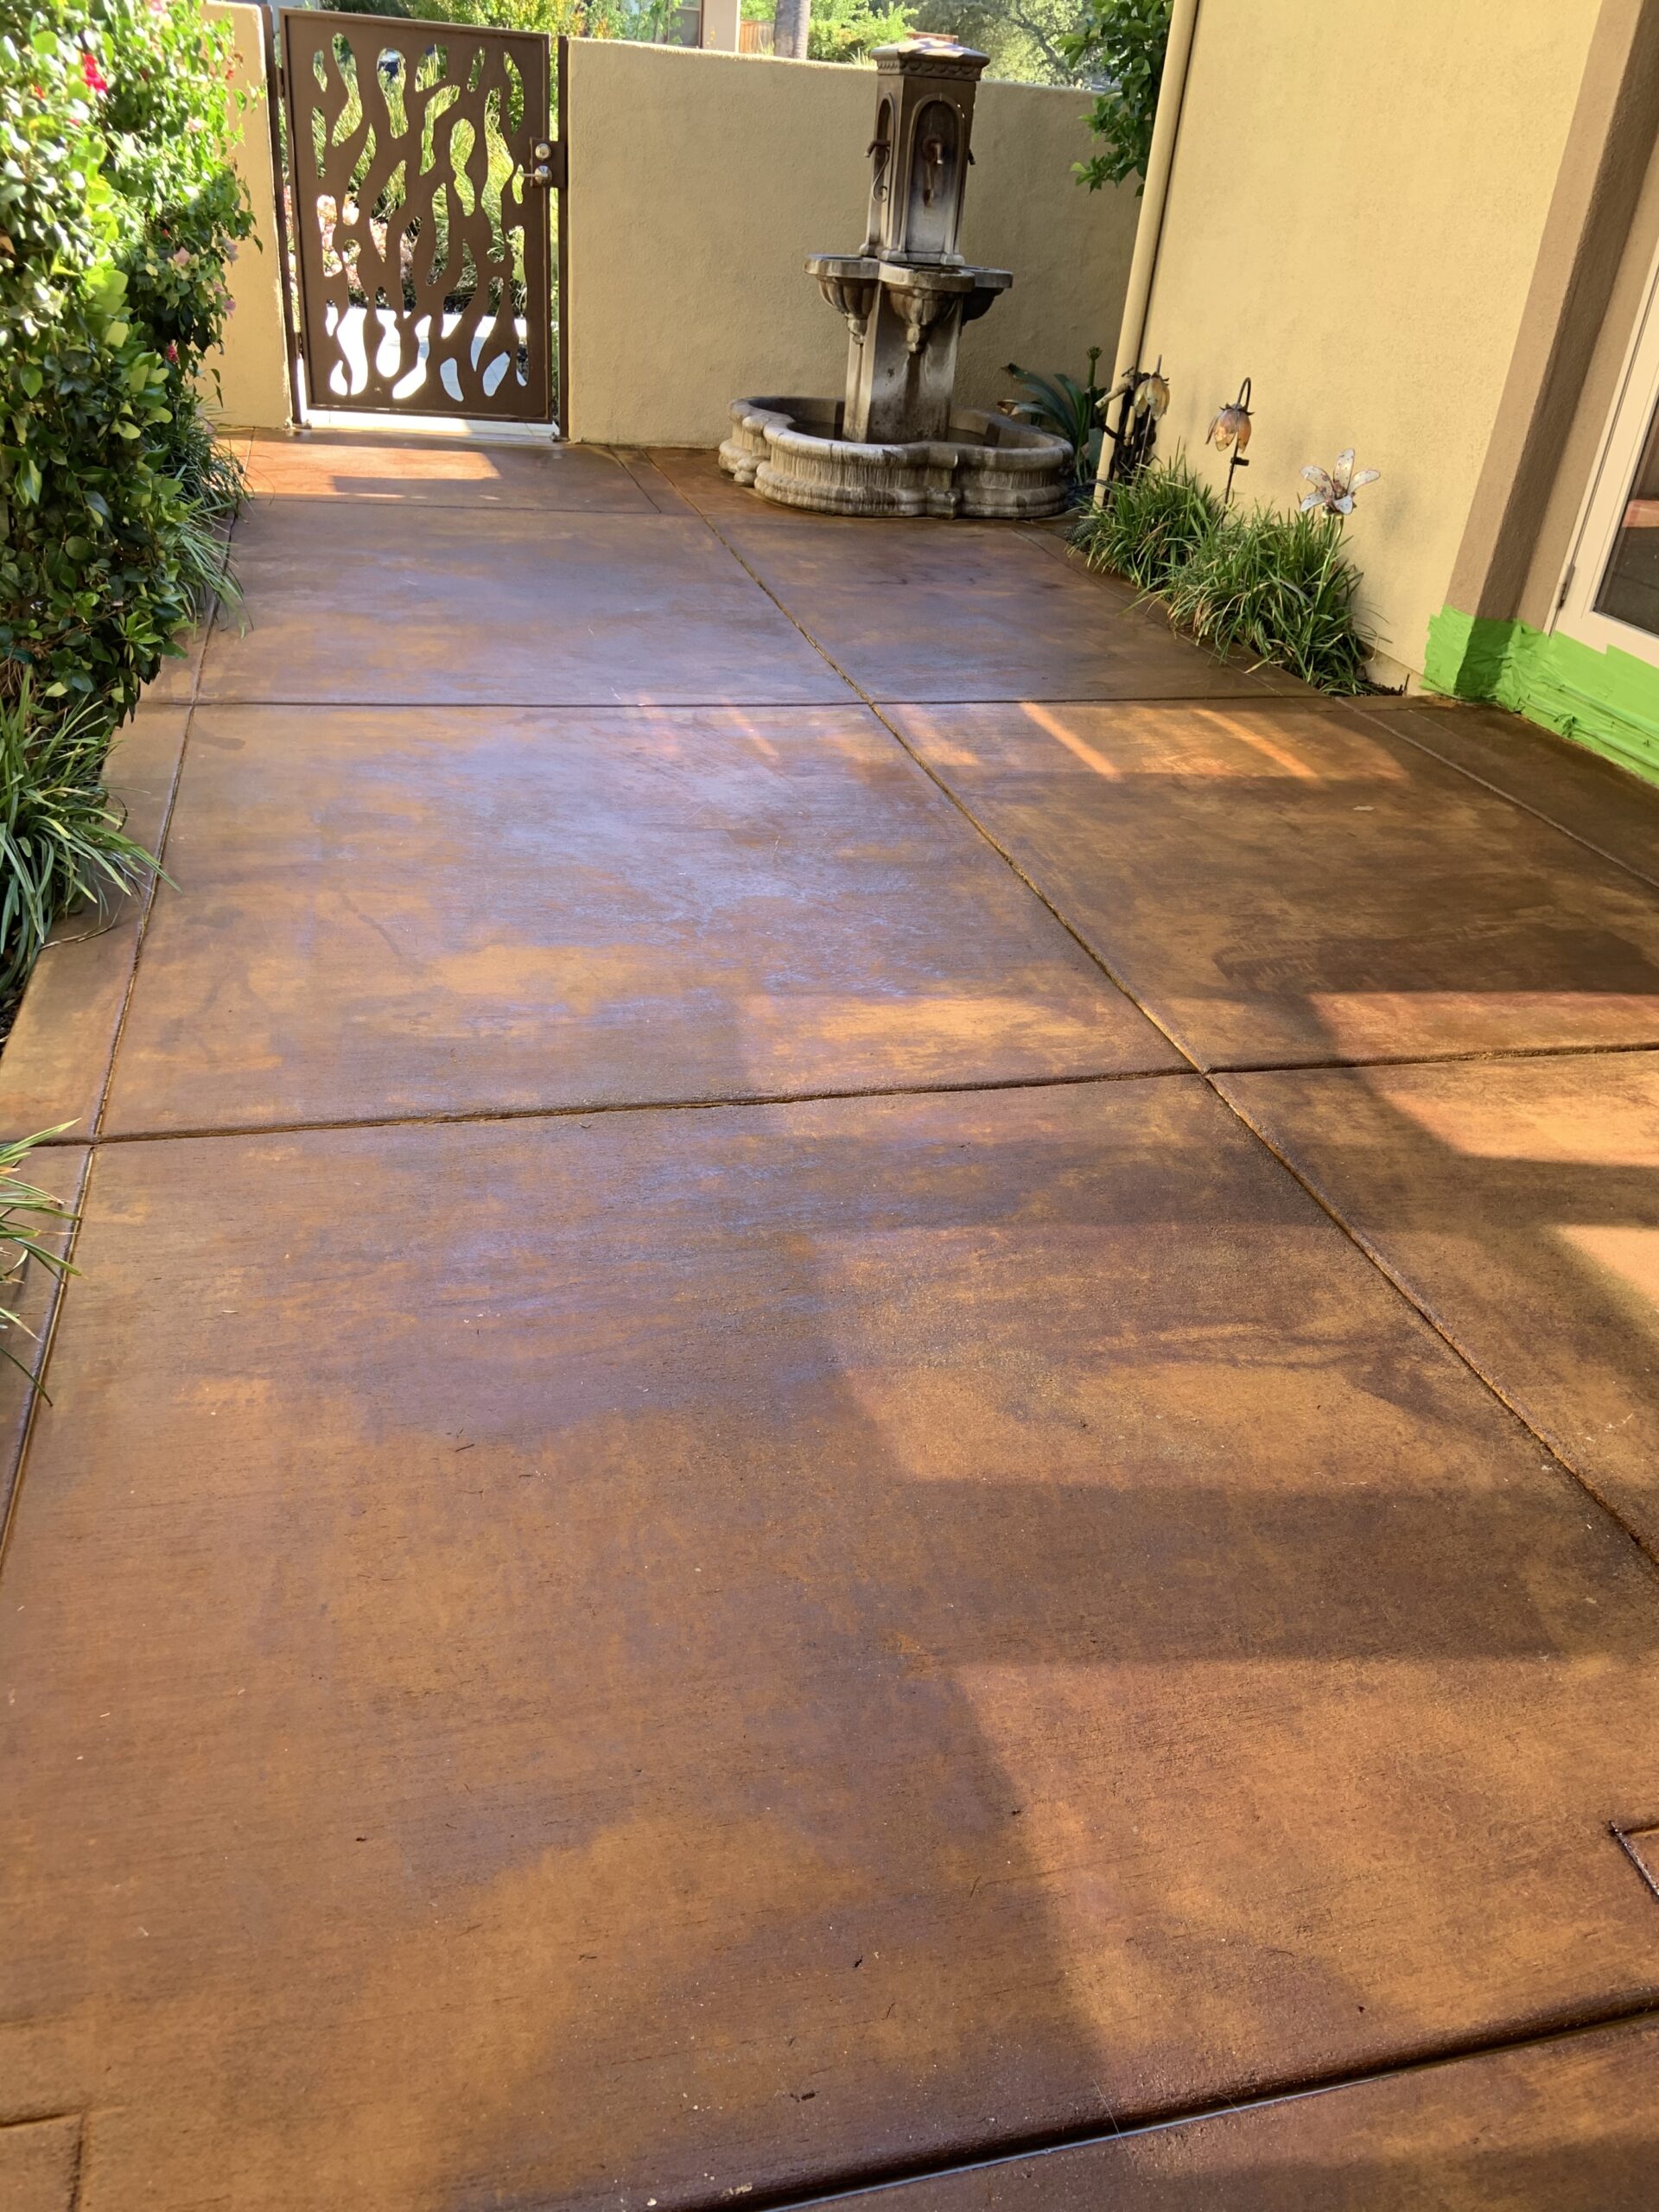
Courtyard Cola Craze: A Broom Finish Concrete Transformation With Acid Staining
Add a pop of color to your courtyard with this acid-stained broom finish concrete patio idea. Using the cola color, this project showcases how acid staining can create a vibrant and unique surface for your outdoor living space.
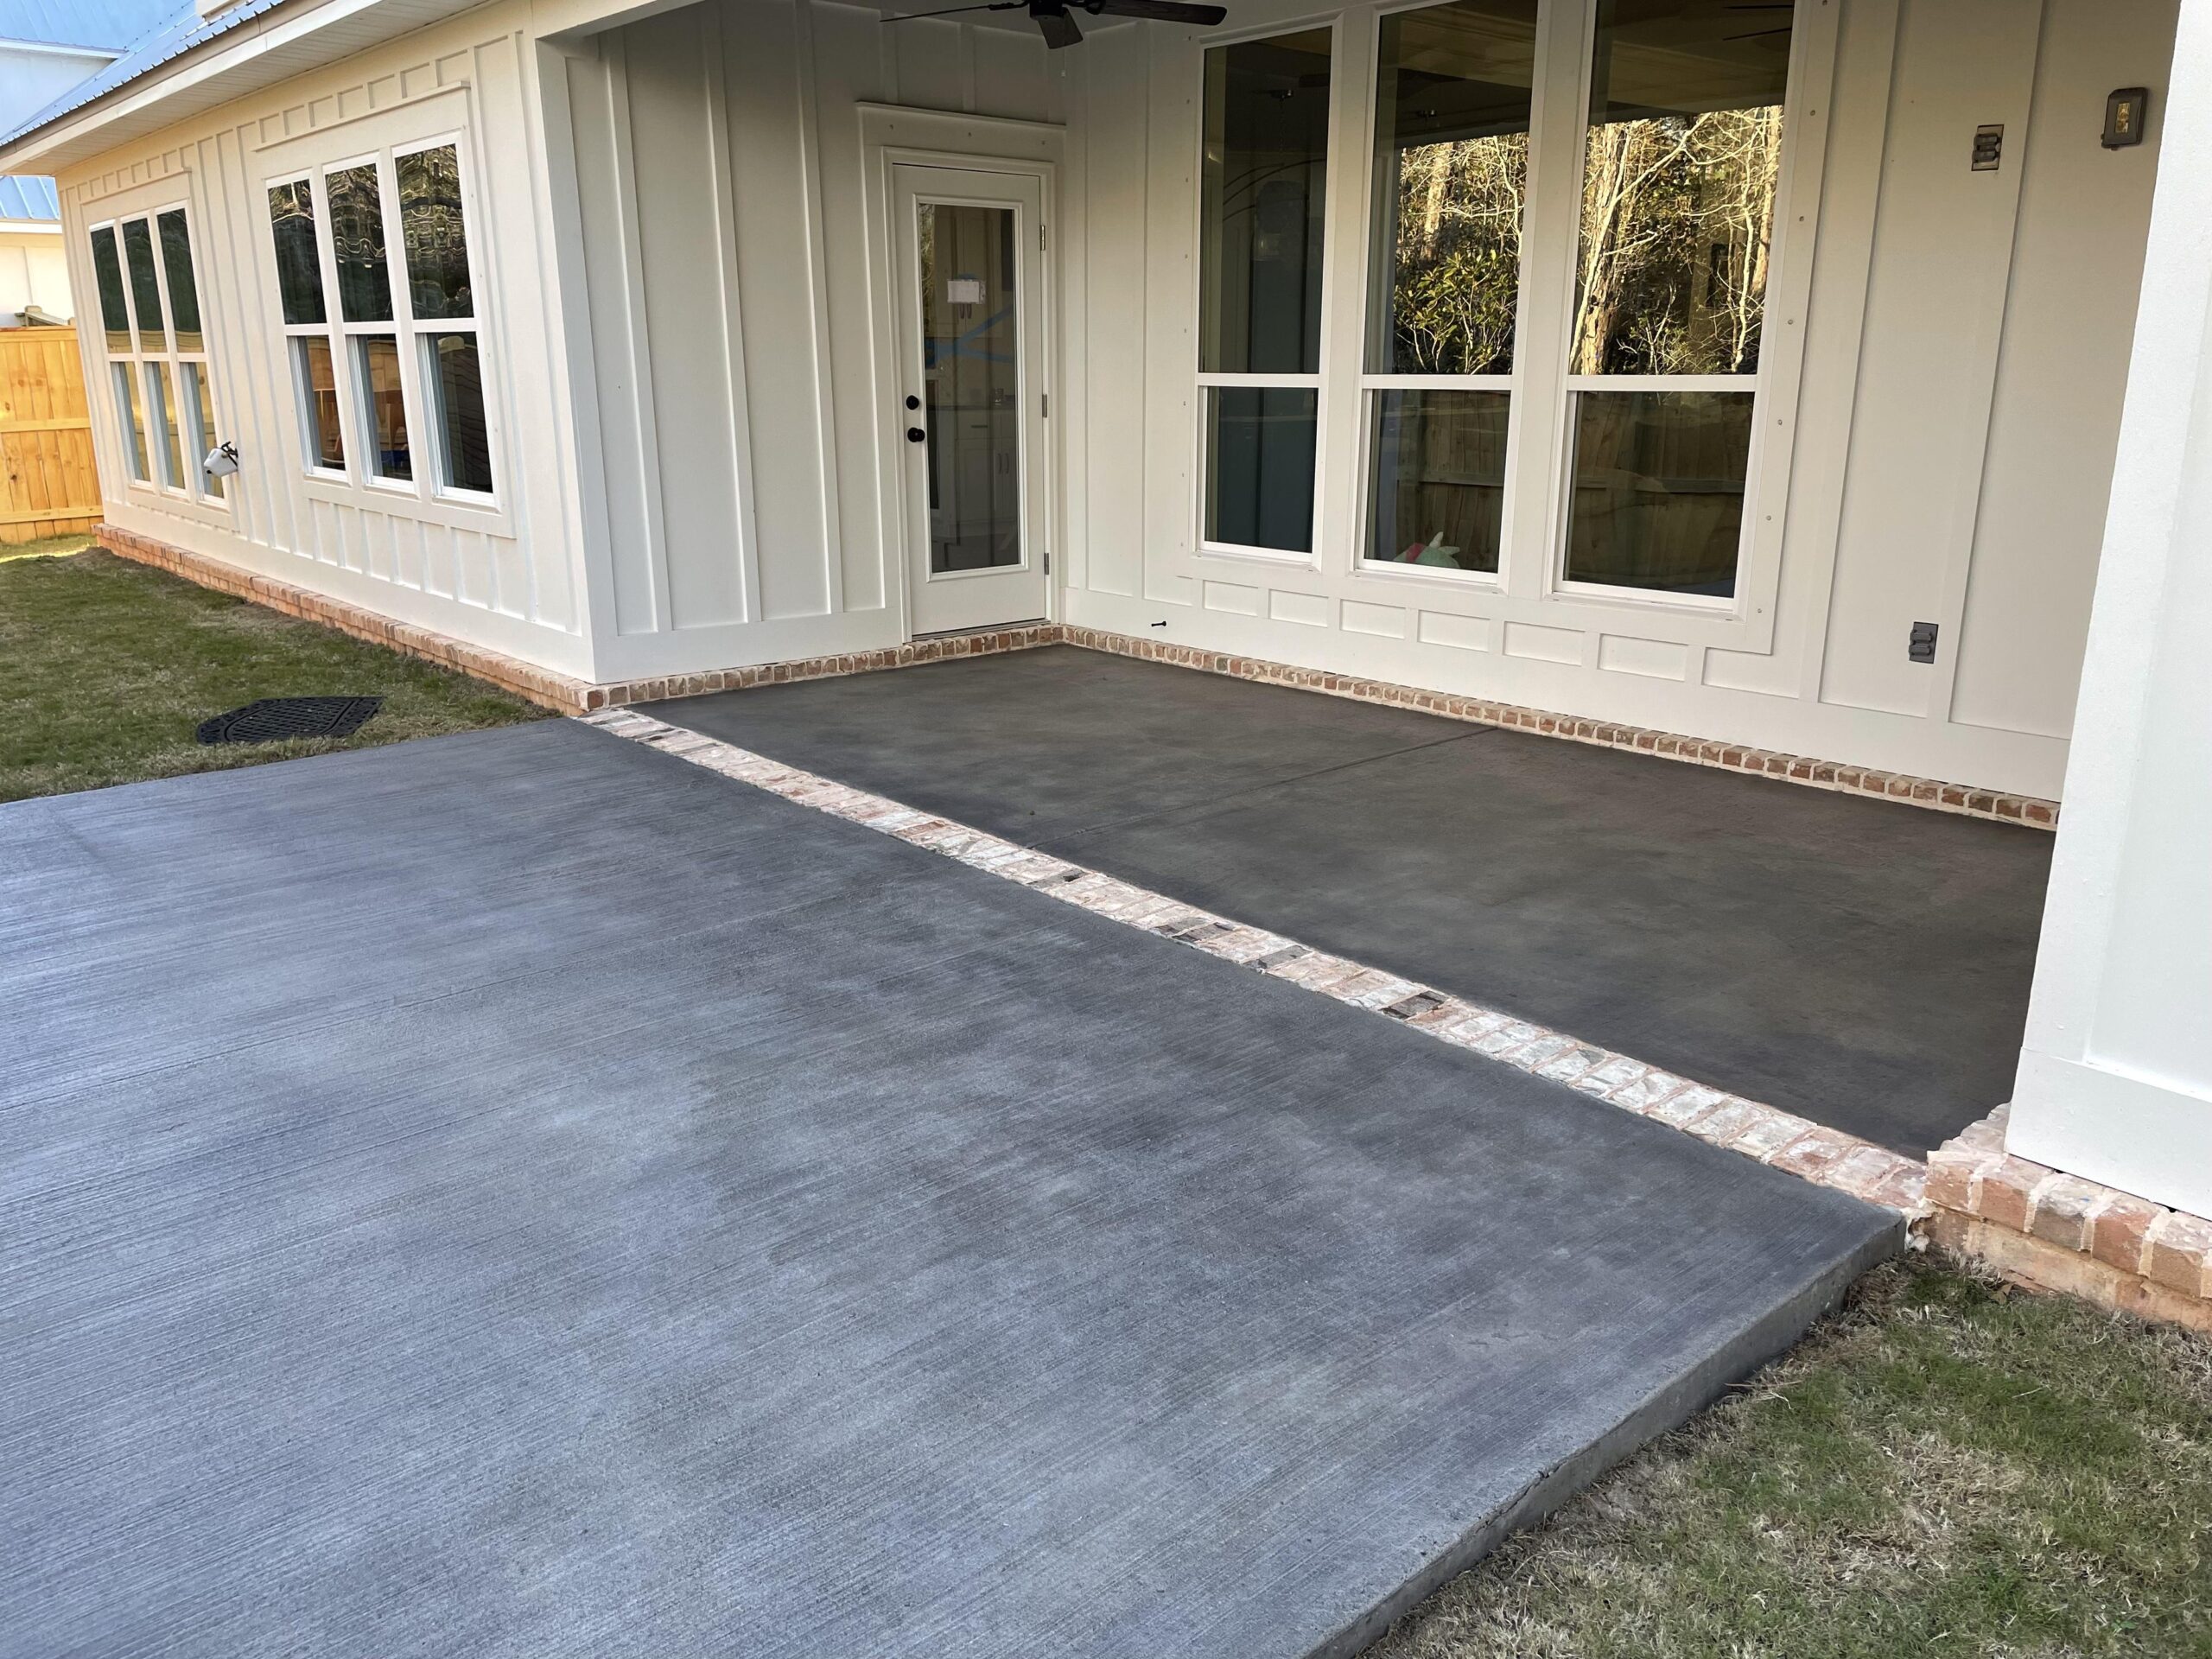
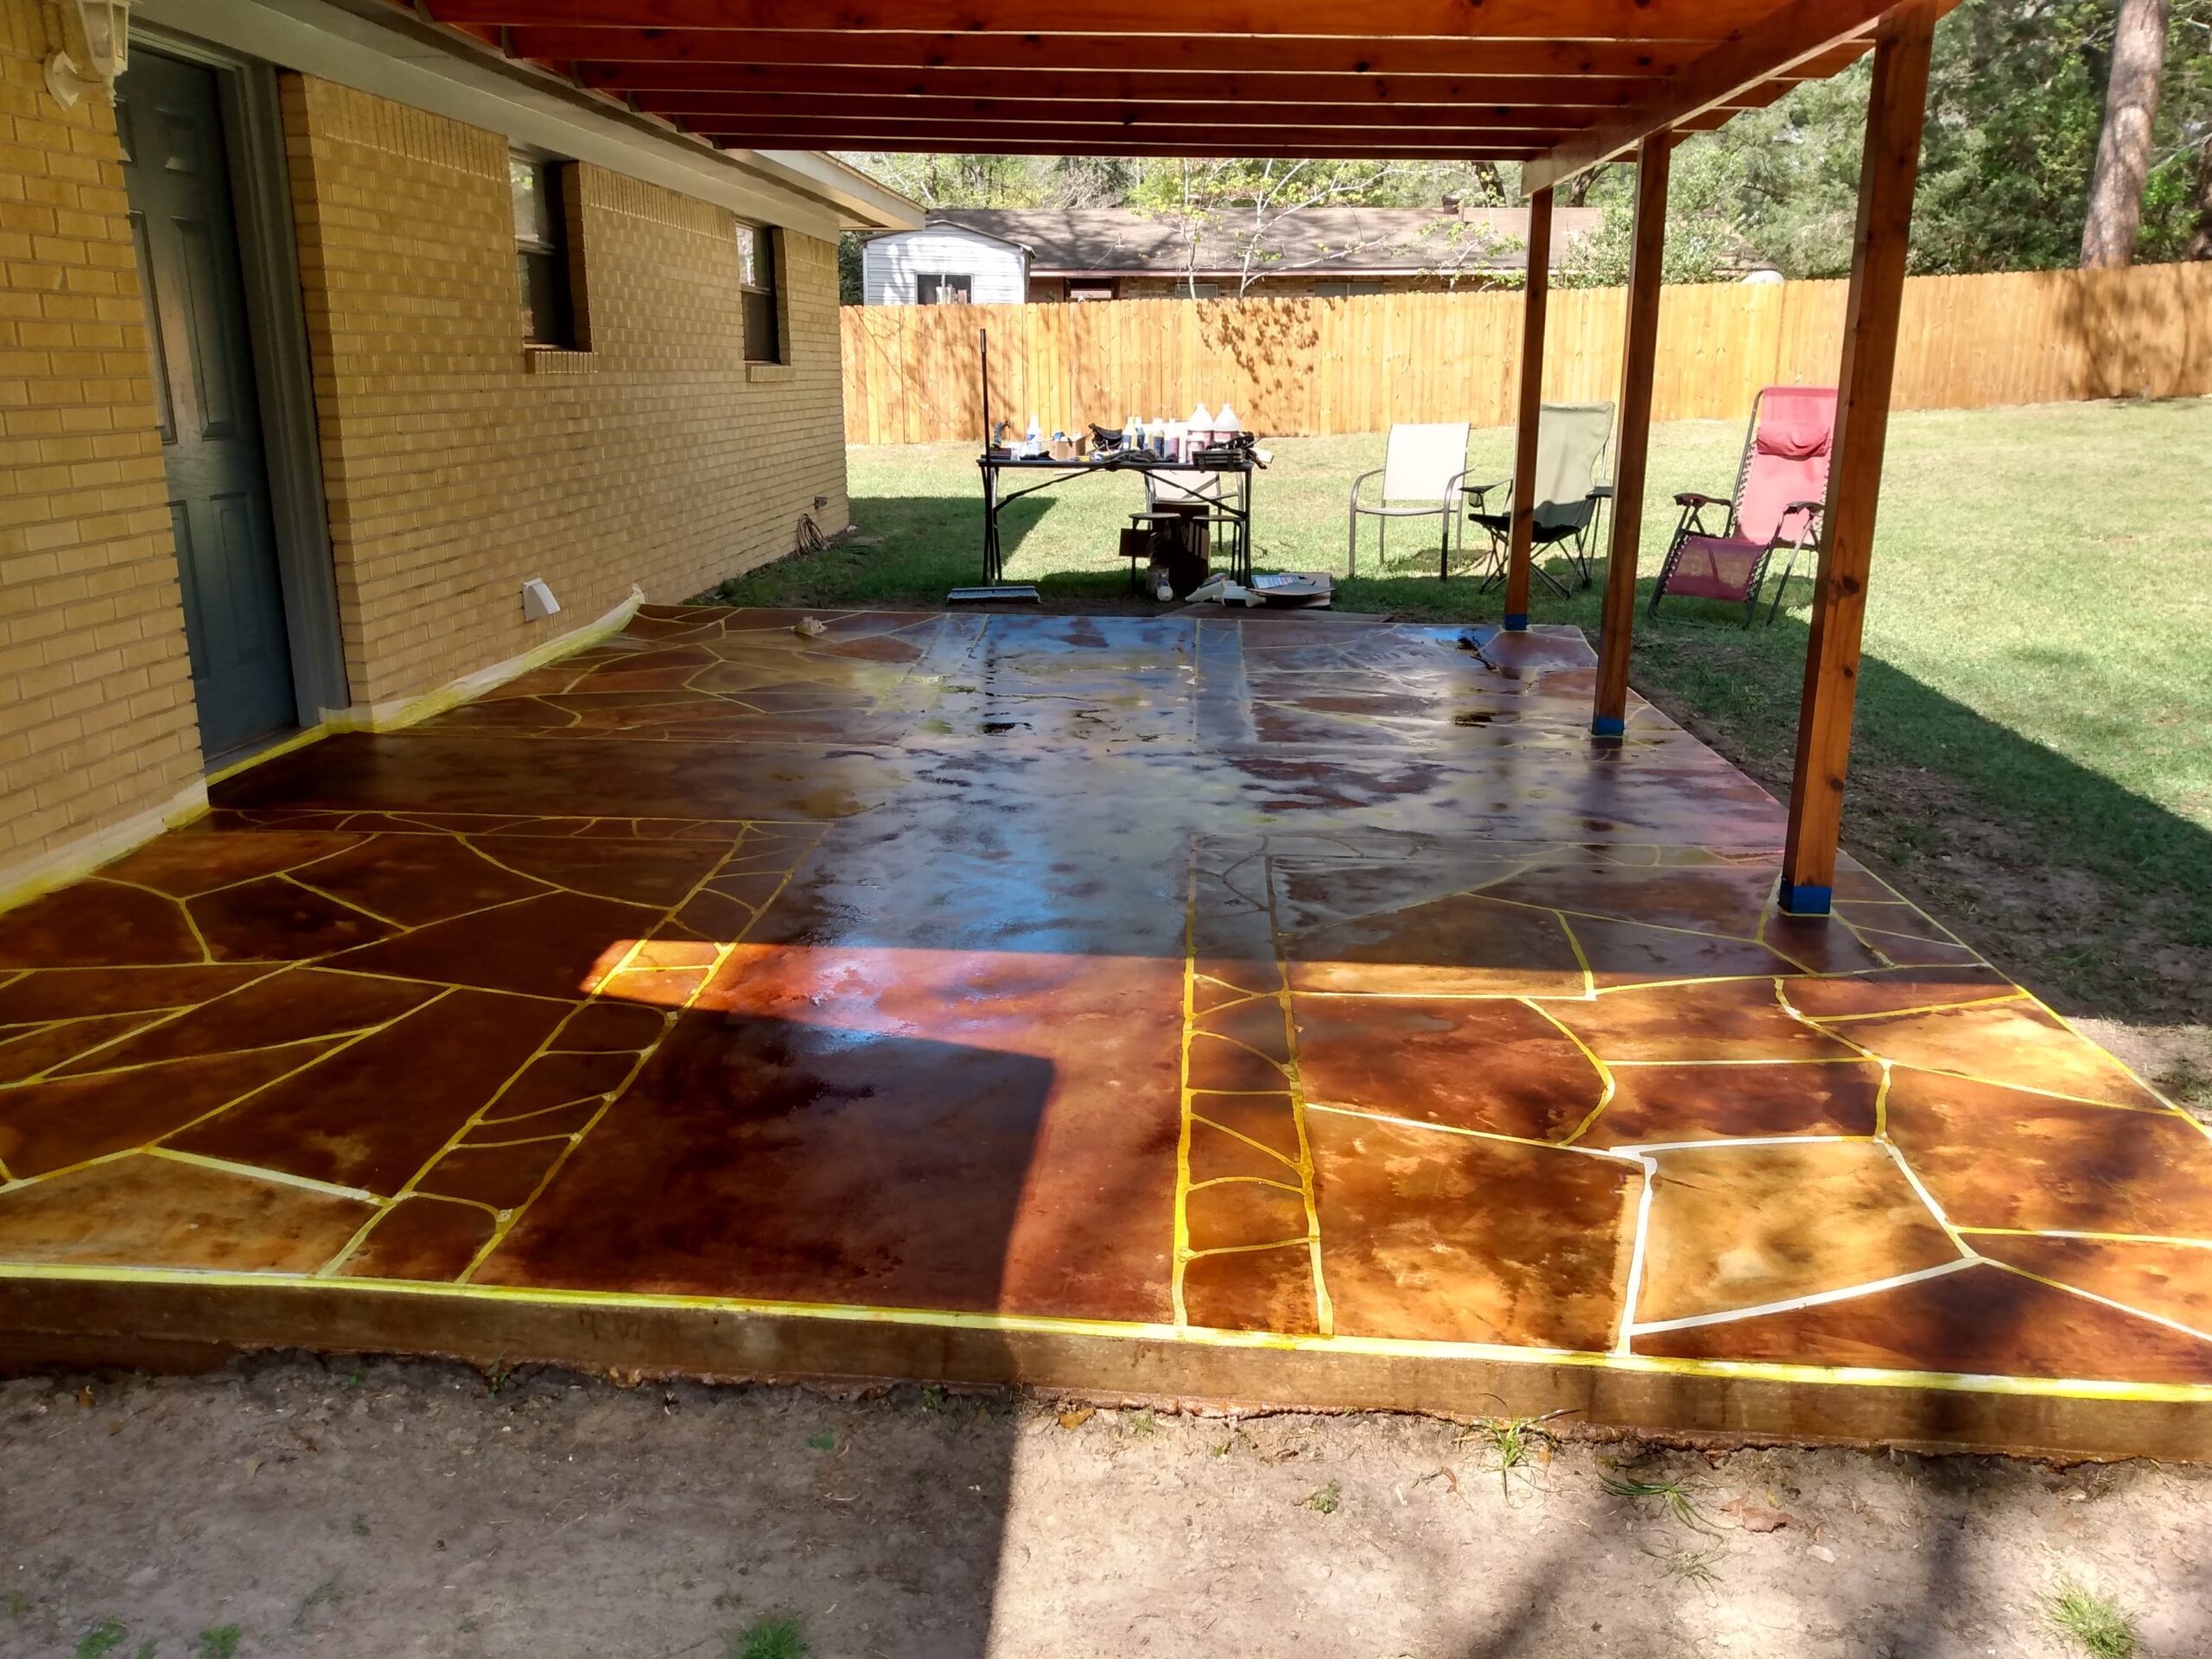
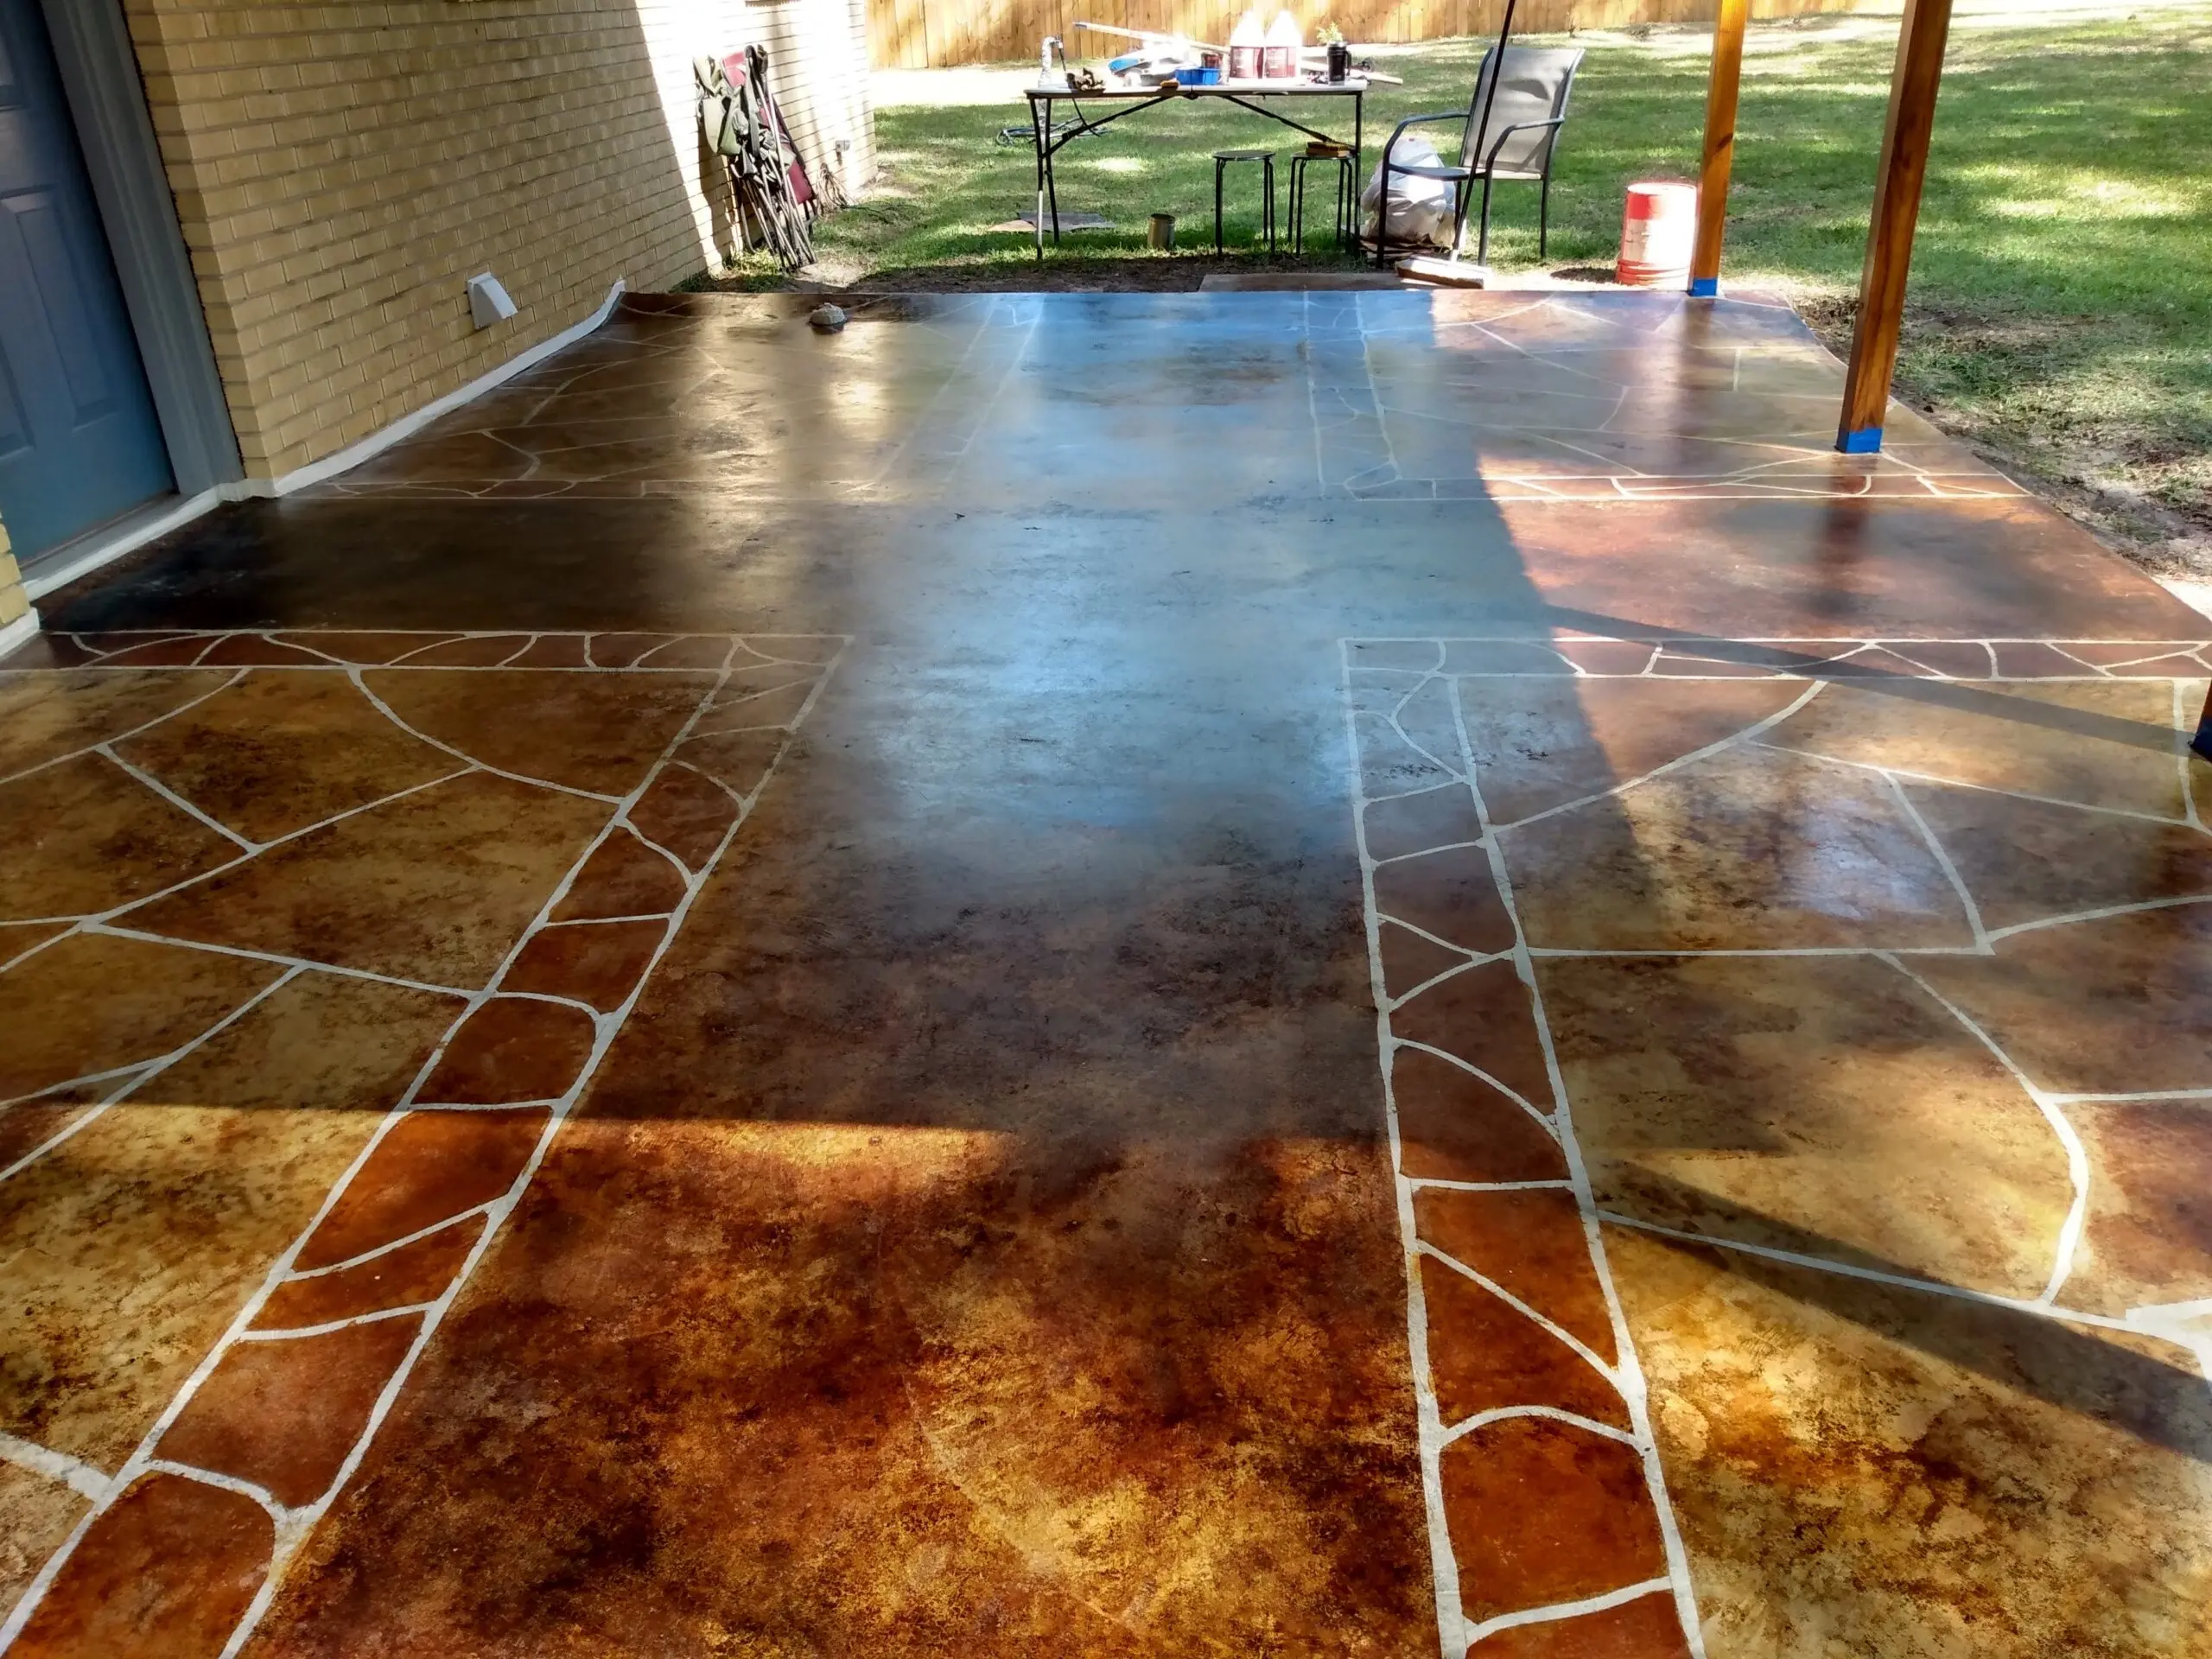
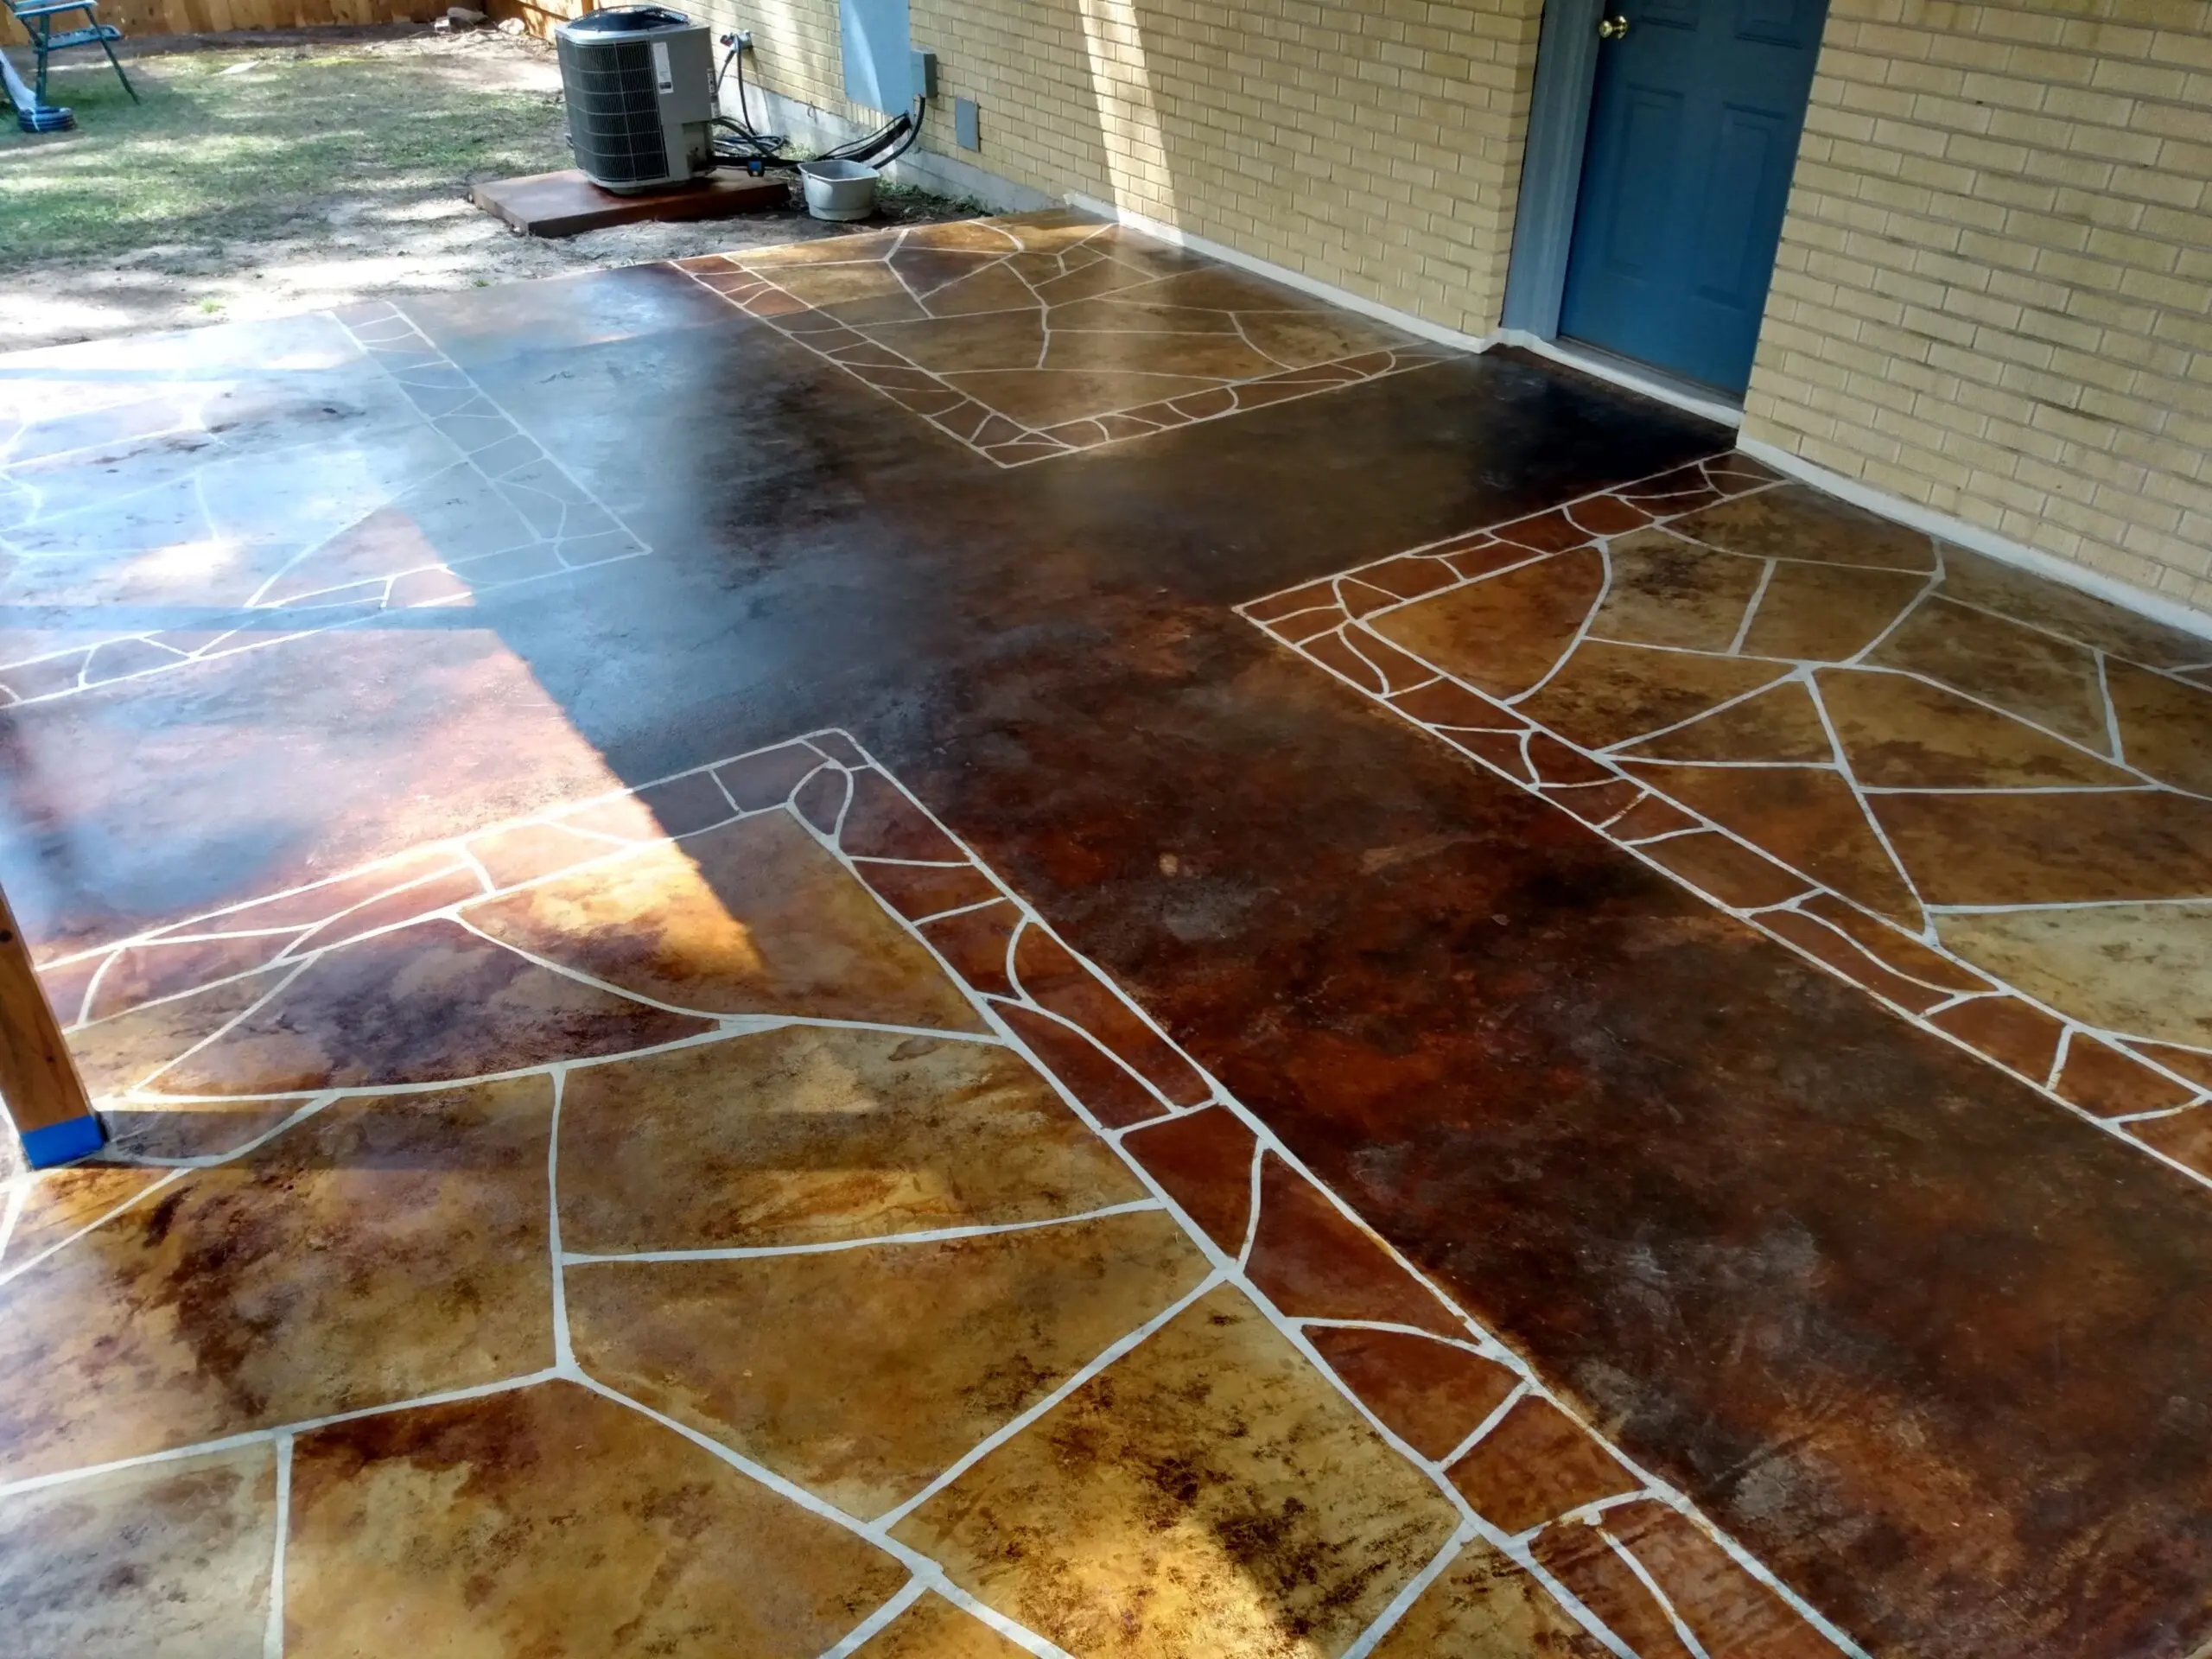
Flagstone Fix: Reviving a Cracked Patio
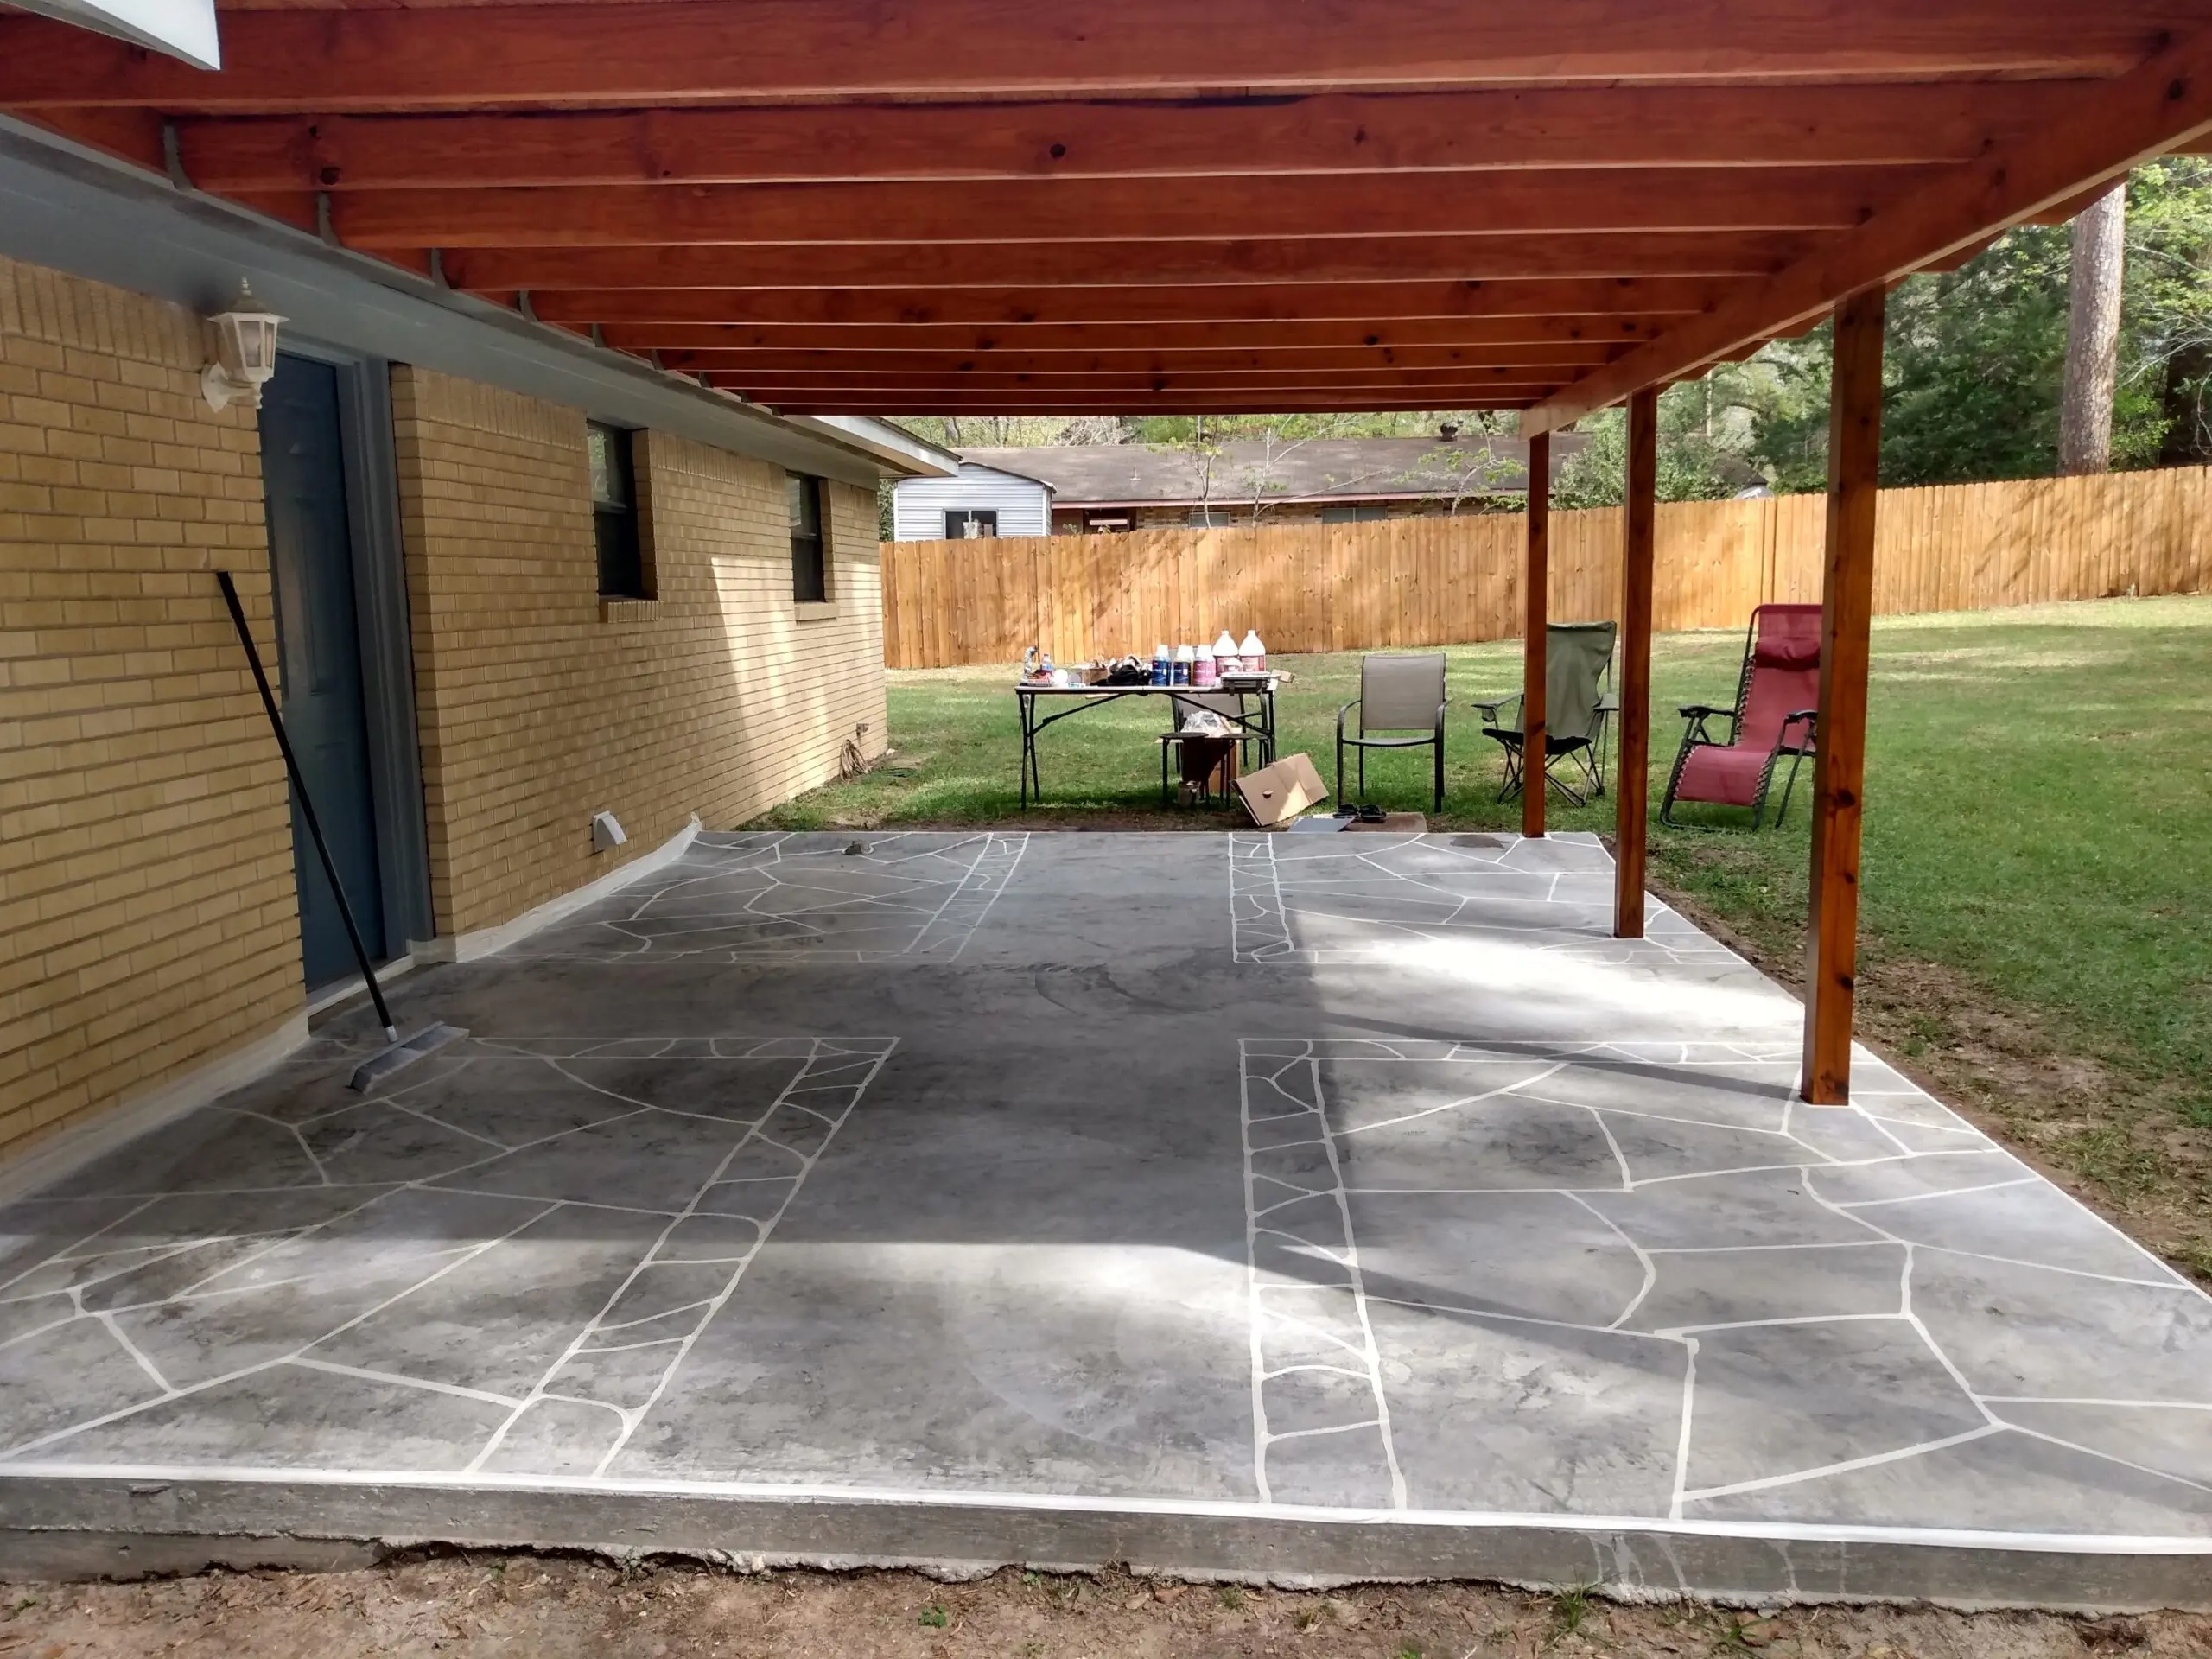
See how a customer turned a cracked patio into a beautiful space with a faux flagstone design and black EverStain™ acid stain. A simple tape and stain approach made all the difference!
Project Info:
- Project Completed In: 20 days (weather)
- Estimate of Square Footage: 300 sq. ft.
- Project Description:
Porch built ~3 years back and could never decide between lumber flooring or $$ pouring slab until I got referred to a concrete worker with a reasonable estimate who assured me of a ‘slick’ finished floor (I know, when wet, etc. but I wanted a smooth finish. He hand troweled the final pass) . Once the floor was poured internet searches for ideas led to this page https://directcolors.com/diy/concrete-patio-ideas/
The faux flagstone got me. Never the artistic type ever, I had to try this. Little over a month cure time, taped it off…Coffee Brown walk way, English Red border, Malayan Buff and mixtures in the ‘stones’, all EverStain™ Acid Stain, Easy Seal top coats. To say I’m well pleased with the outcome would be a major understatement.
ps. One quart container of sealer came damaged and an email to Customer Service had a replacement on my doorstep in a couple days! Direct Colors is the go to for this type of project. - Personal Tips:
Some colors (on my floor English Red) will overpower everything else losing the contrasting tones I desired for this project….note that I used a spray bottle, and yep it bled over everywhere even though I thought I was going light. Were I to do this again, I’d use a brush and LIGHTLY keep it in the borders even if multiple passes were necessary. This is only if you’re wanting to see a dramatic color difference at borders.
I attempted to clean up the border bleed over with a Scotch Brite pad/ ammonia solution only to discover a remarkable lightening of color …touched up with stain again to find just enough mineral content left to return much of the contrast I desired. Patience with a project of this nature pays off!
Spike shoes are mandatory! - Direct Colors Products Used:
1 Gal. Coffee Brown EverStain™ & EasySeal™ Gloss Kit
1 Gal. Malayan Buff EverStain™ & EasySeal™ Gloss Kit
16 Oz. OxiGrip™ Slip-Resistant Additive (5-gallon mix)
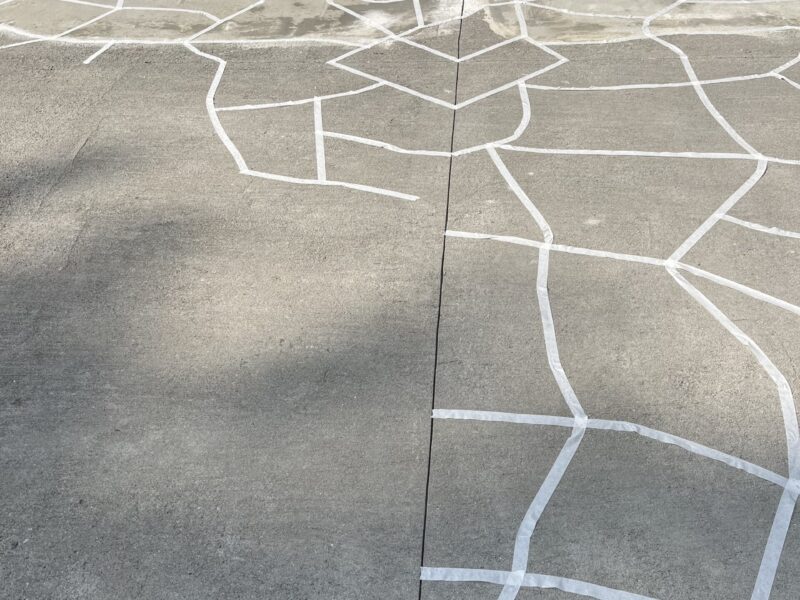
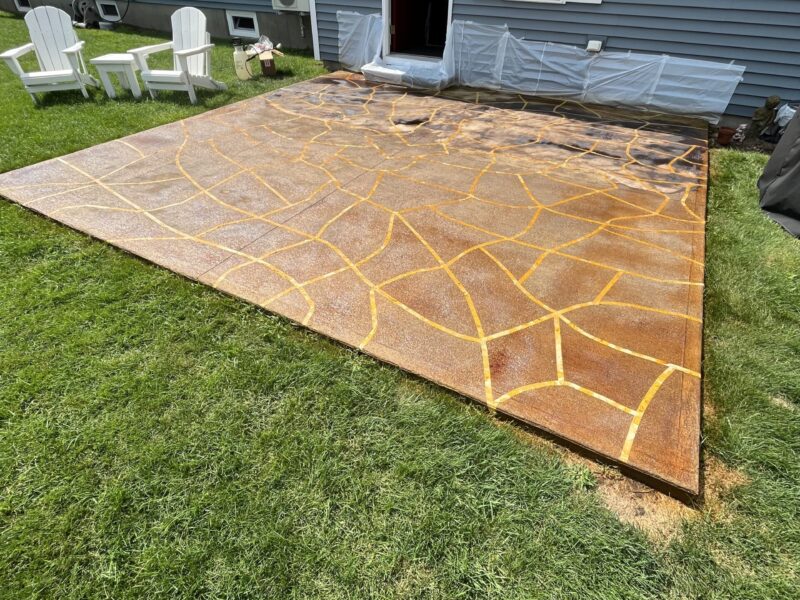
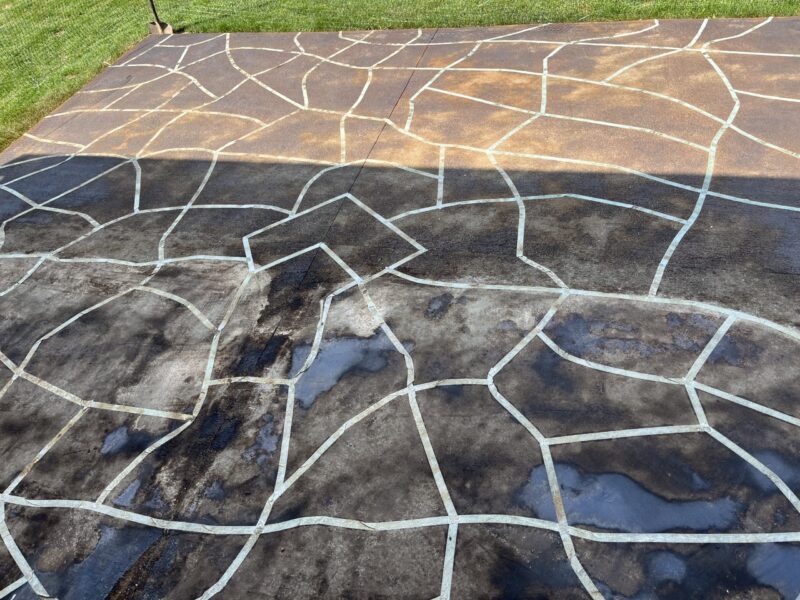
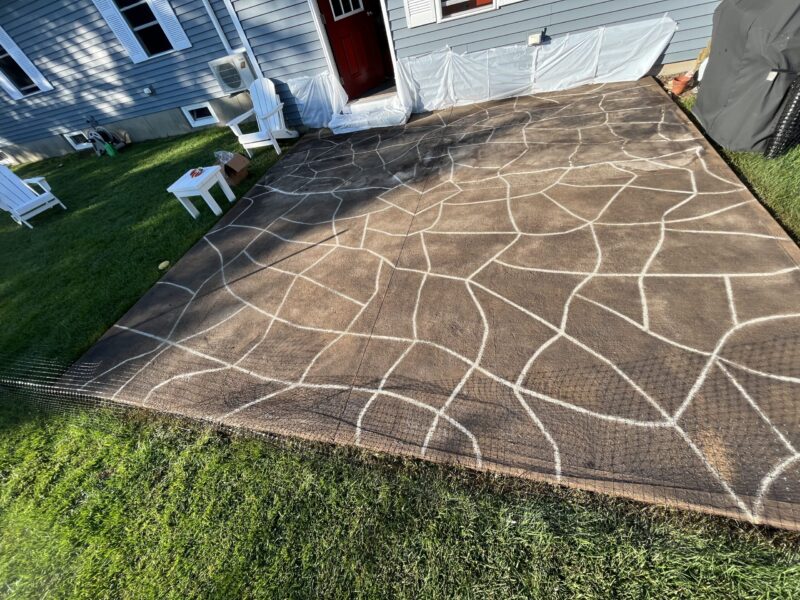
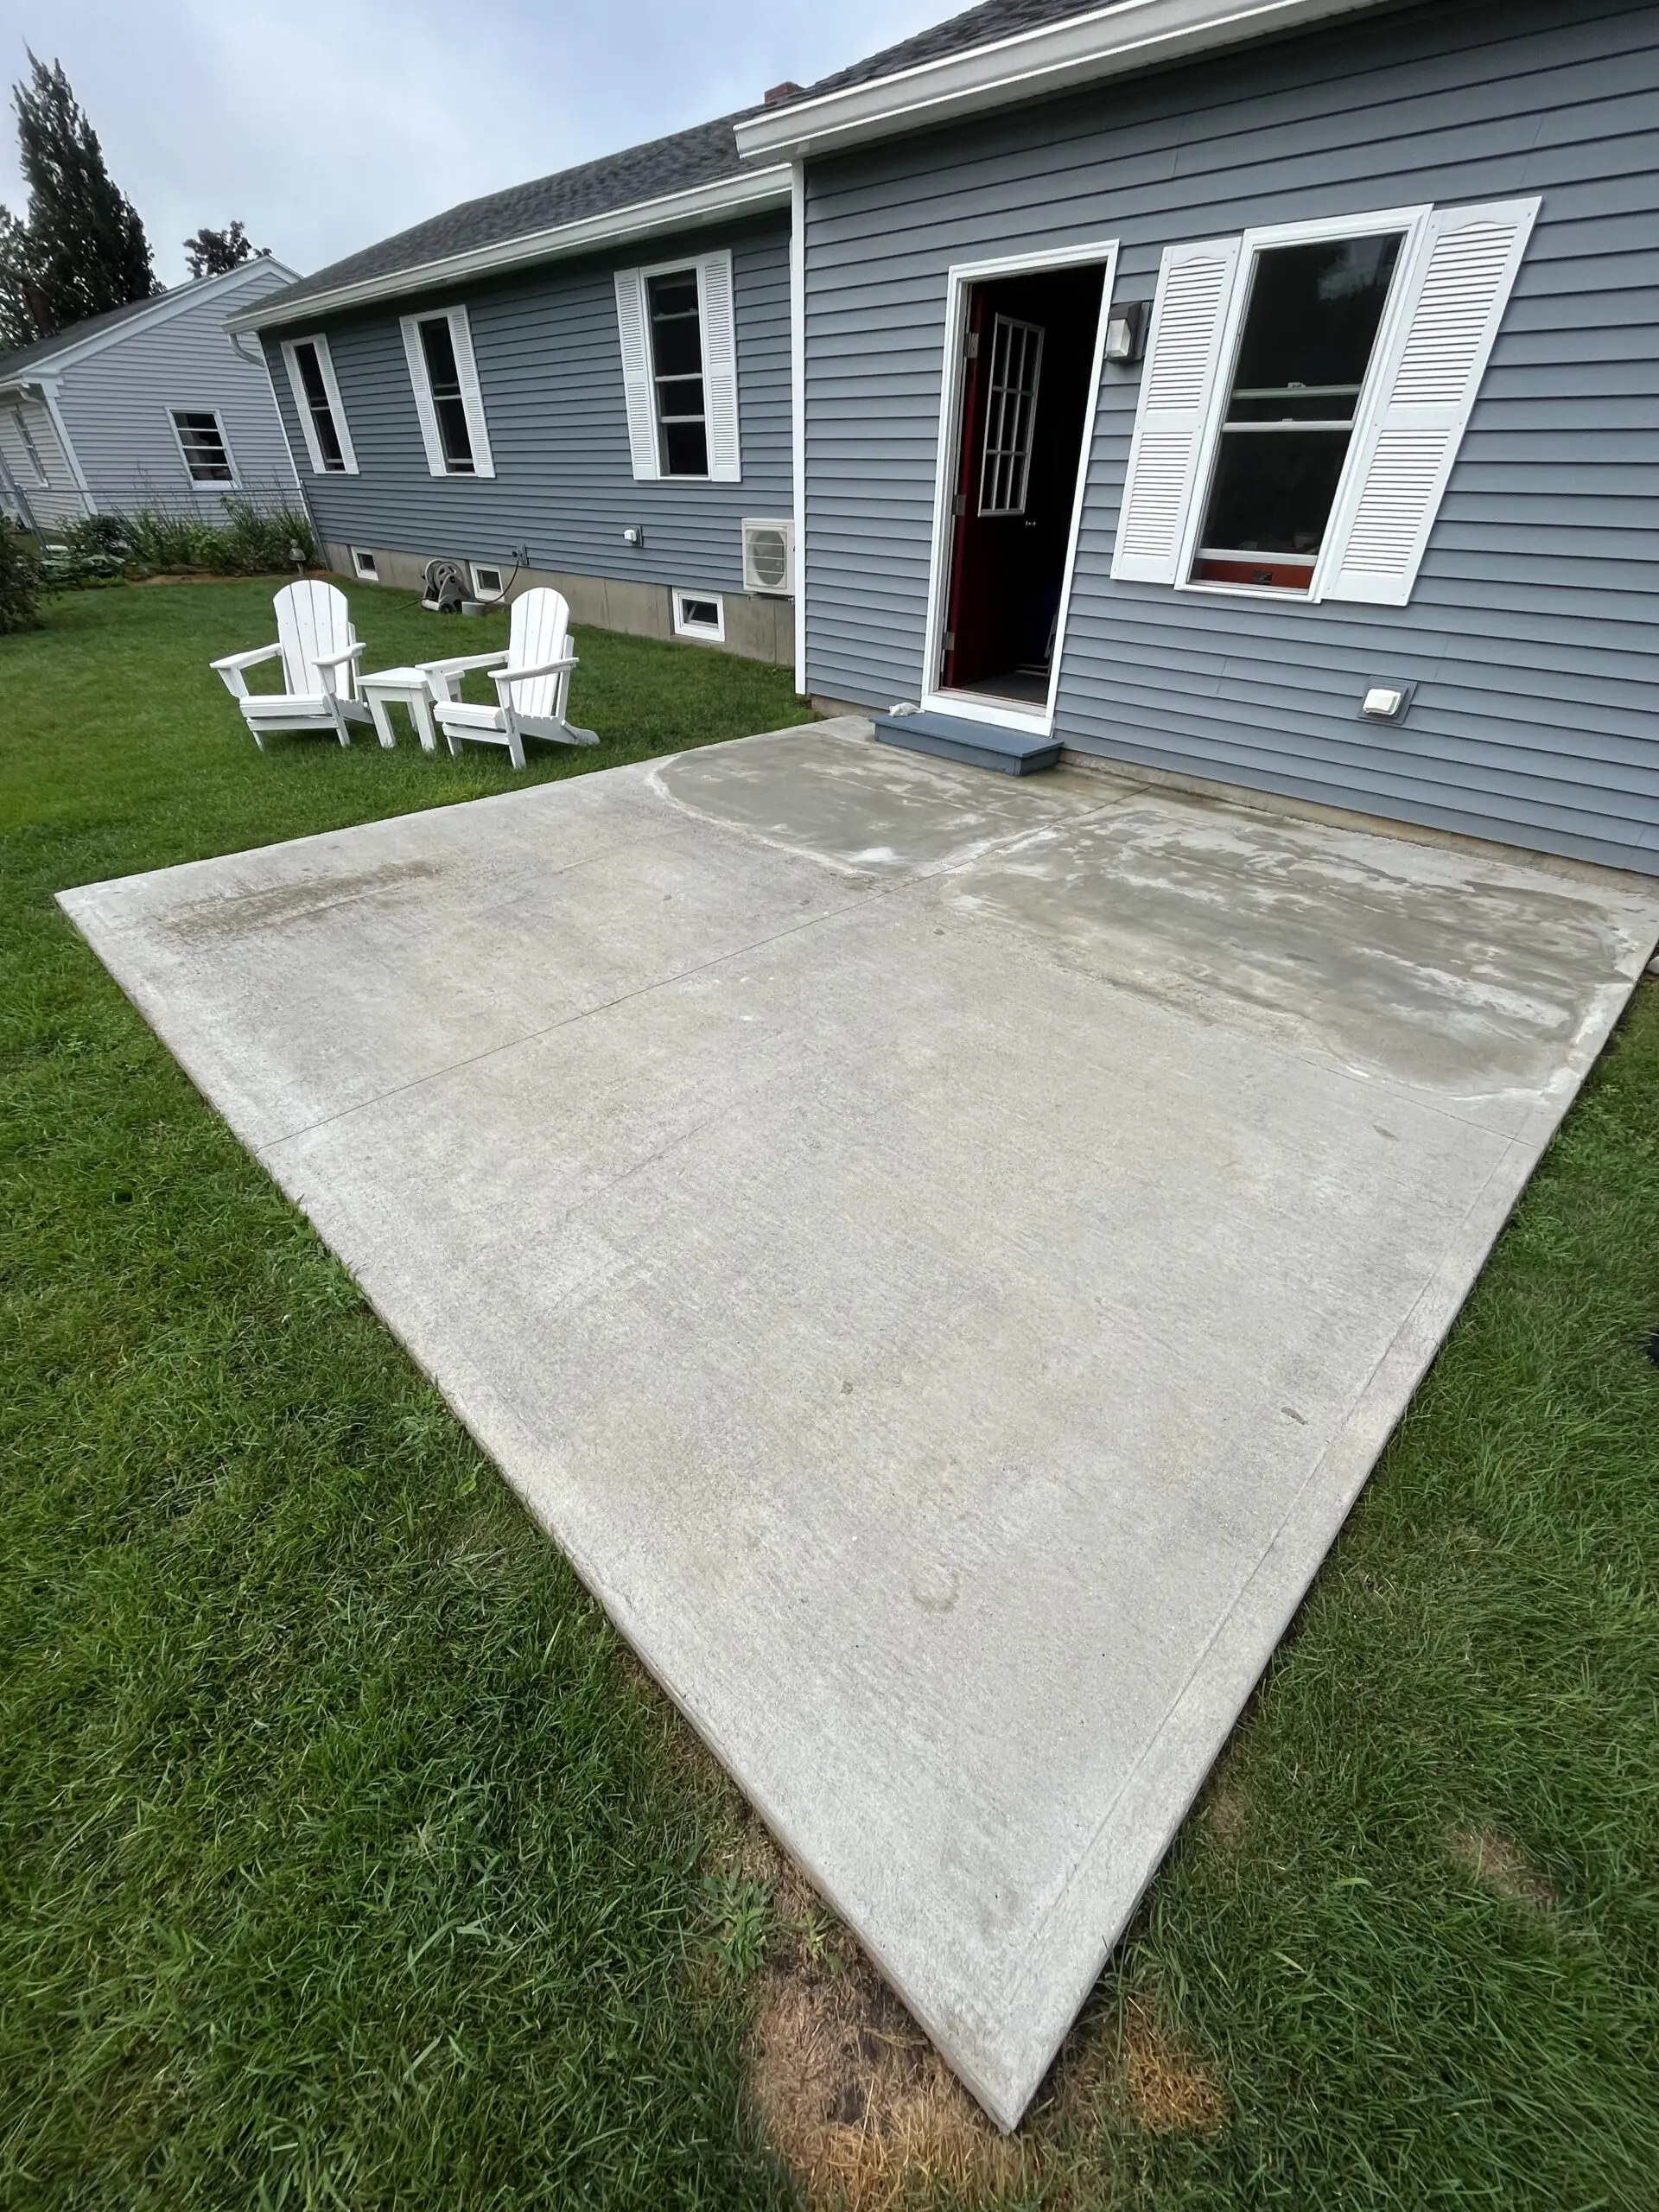
Flagstone Fix: Reviving a Cracked Patio
See how a customer turned a cracked patio into a beautiful space with a faux flagstone design and black EverStain™ acid stain. A simple tape and stain approach made all the difference!
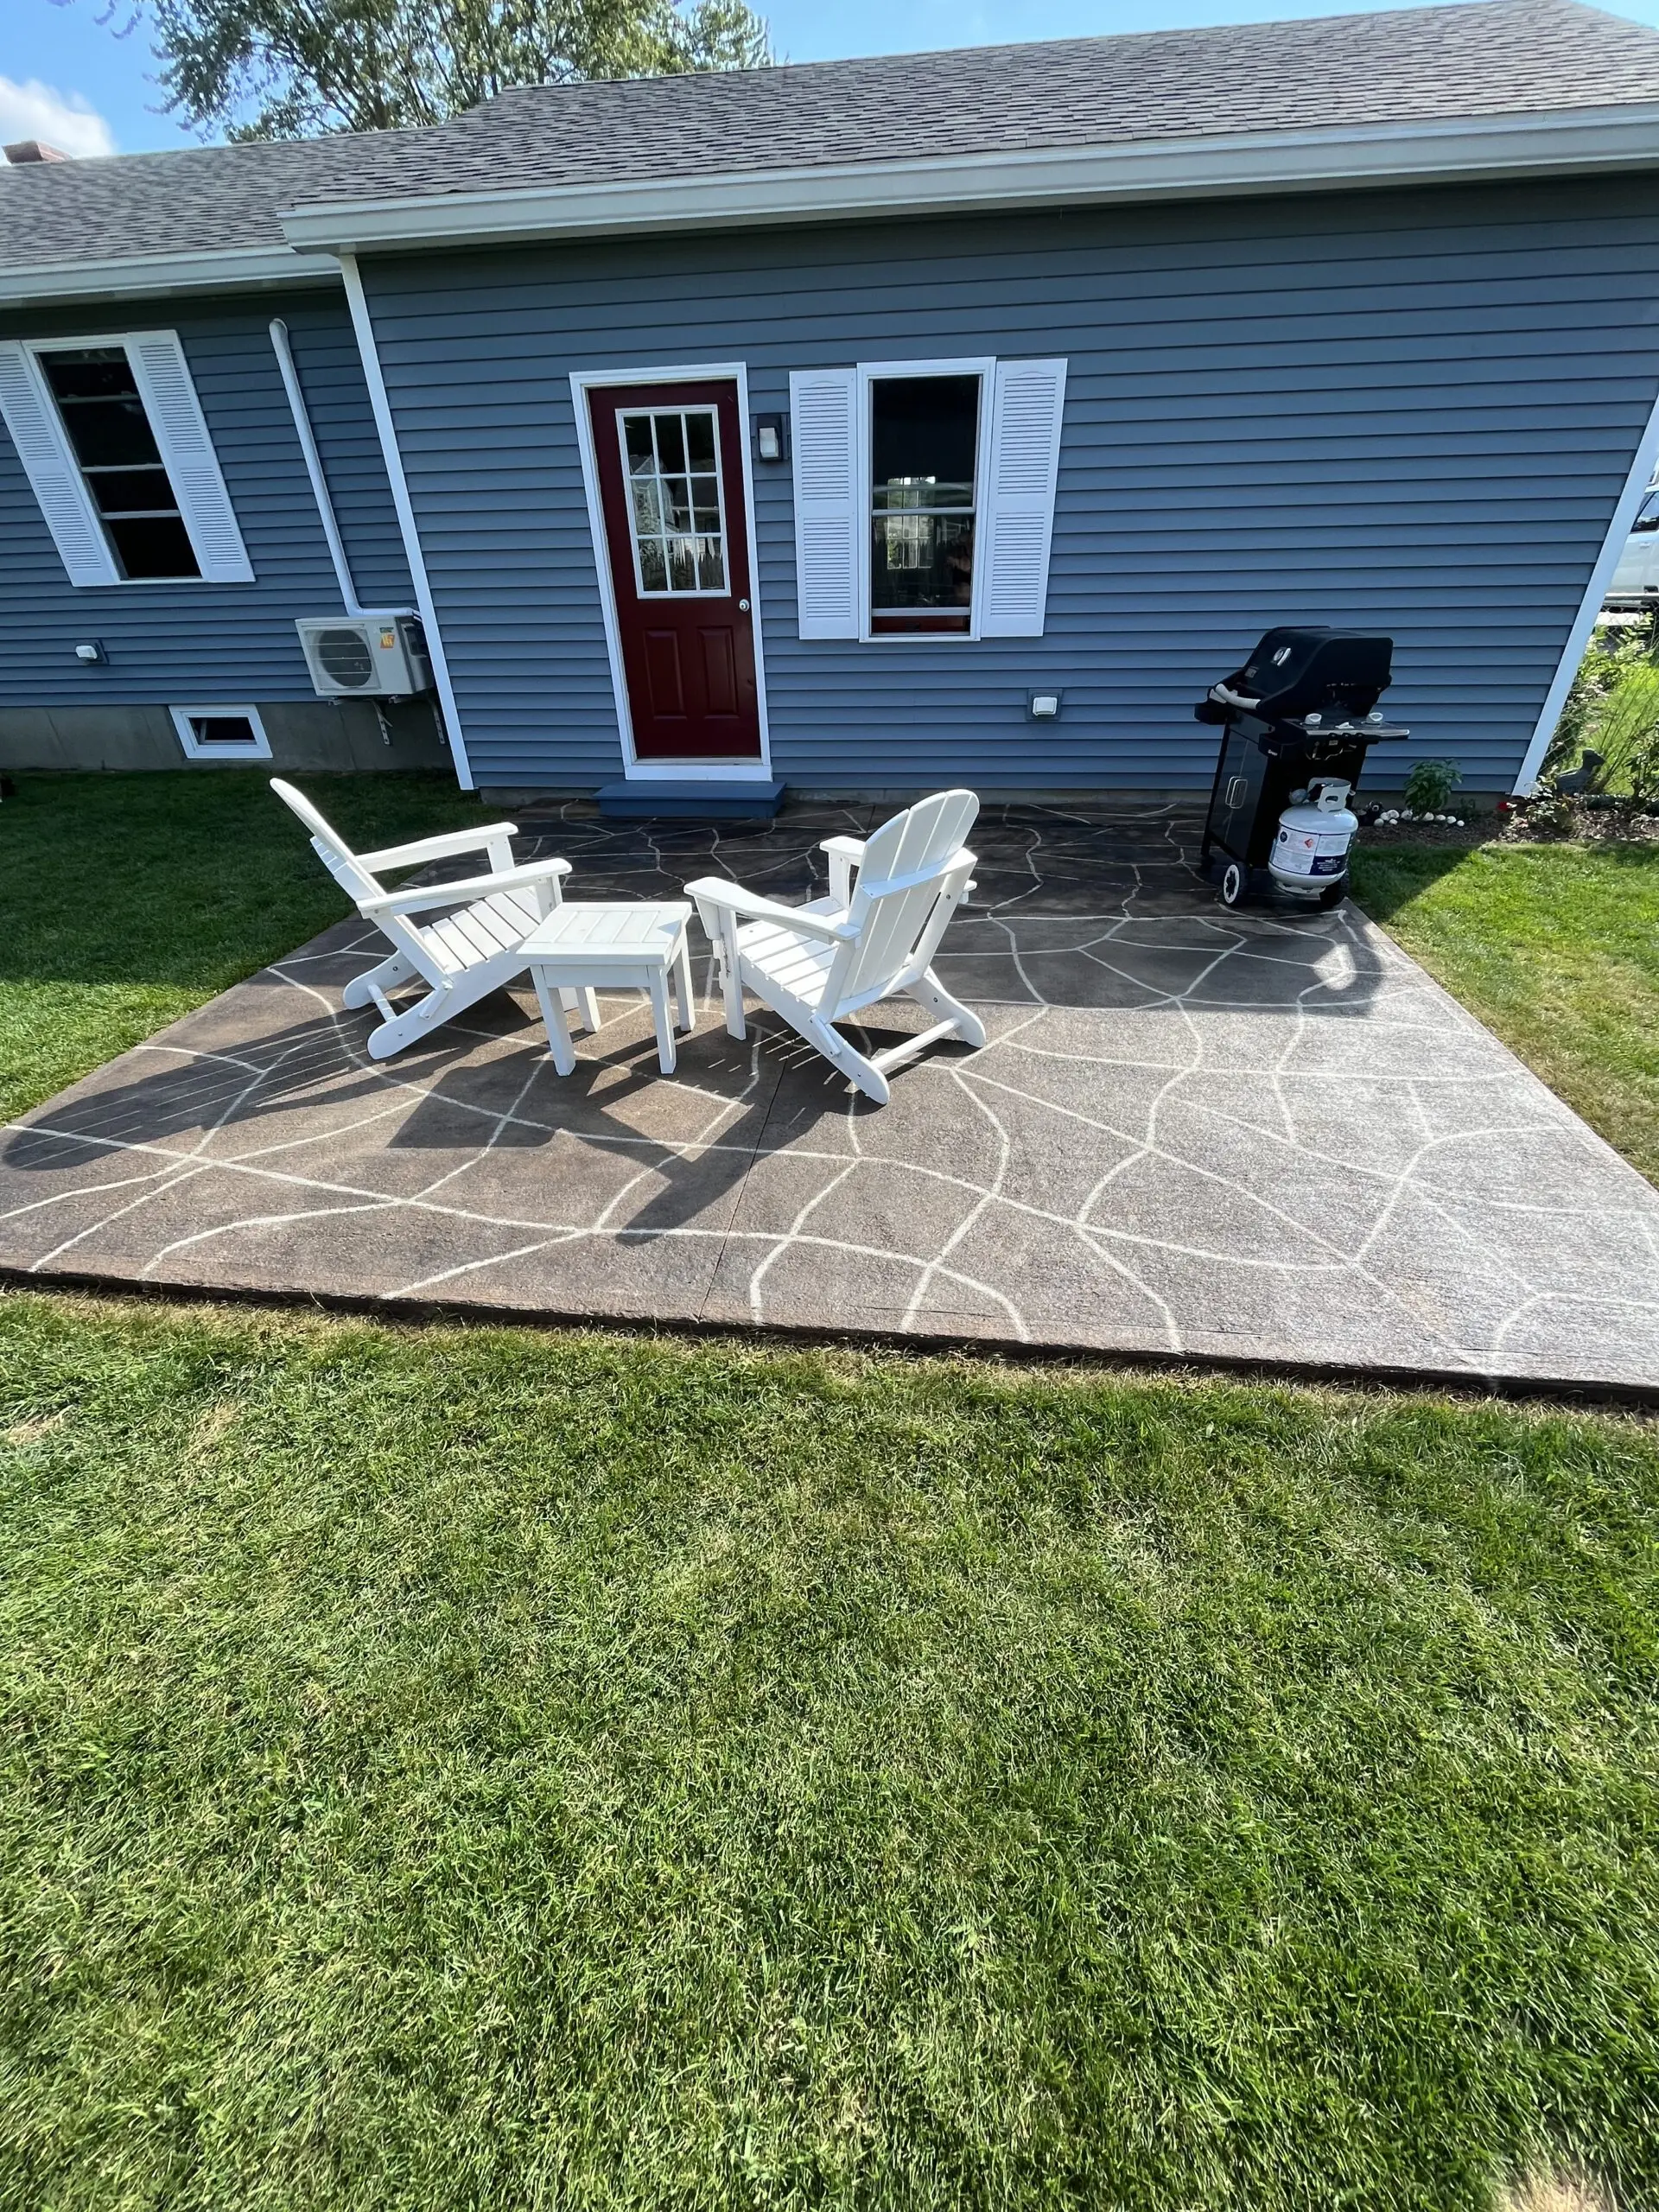
Project Info:
- Project Completed In: 2 day(s)
- Estimate of Square Footage: 200 sq. ft.
- Project Description:
My patio had a crack right across it. I tried repairing it by filling it. Then by cementing over it. No matter what it looked ugly. I saw the faux flagstone idea on your web site. Taped the design. Used black acid stain. Looks better! - Personal Tips:
Using sprayer is very easy. Make sure that you tape all around. It gets everywhere! - Direct Colors Products Used:
1 Gal. Black DIY EverStain™ & AcquaSeal™ Gloss Kit - Other Products Used:
None. Water to rinse. Sprayer. Masking tape.


