Black Concrete Stain: Outdoor Transformations Gallery
By Justin Richardson
Dive into our gallery and see how black concrete stain works its magic on outdoor areas! From cool patios to chic driveways, get ready to be inspired for your next backyard makeover.
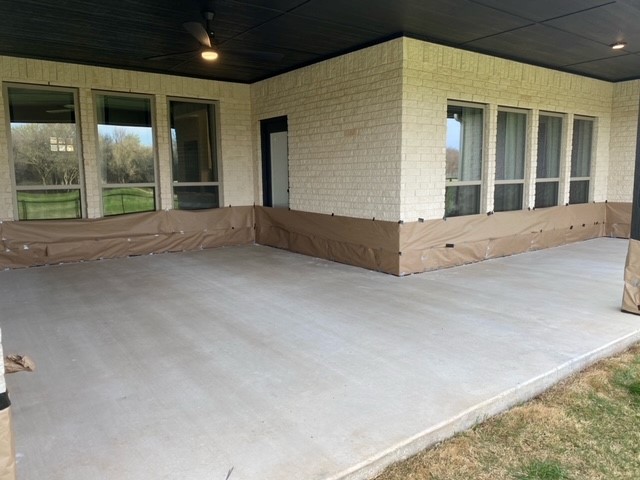
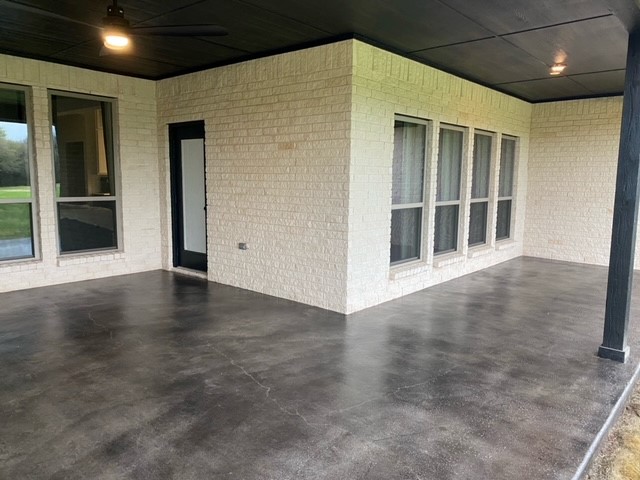
Create a stylish and modern look for your outdoor living space by staining your covered concrete patio with black Antiquing™ stain on a broomed finish. This technique adds visual interest and texture to your patio, while the black stain gives it a bold and contemporary touch.
Each photo in this gallery showcases real customer projects to inspire you. Keep in mind that our semi-transparent colorants mean the initial color and condition of your concrete will influence your final look, possibly leading to varied results. For best outcomes, please do a test patch on your specific surface before full application.
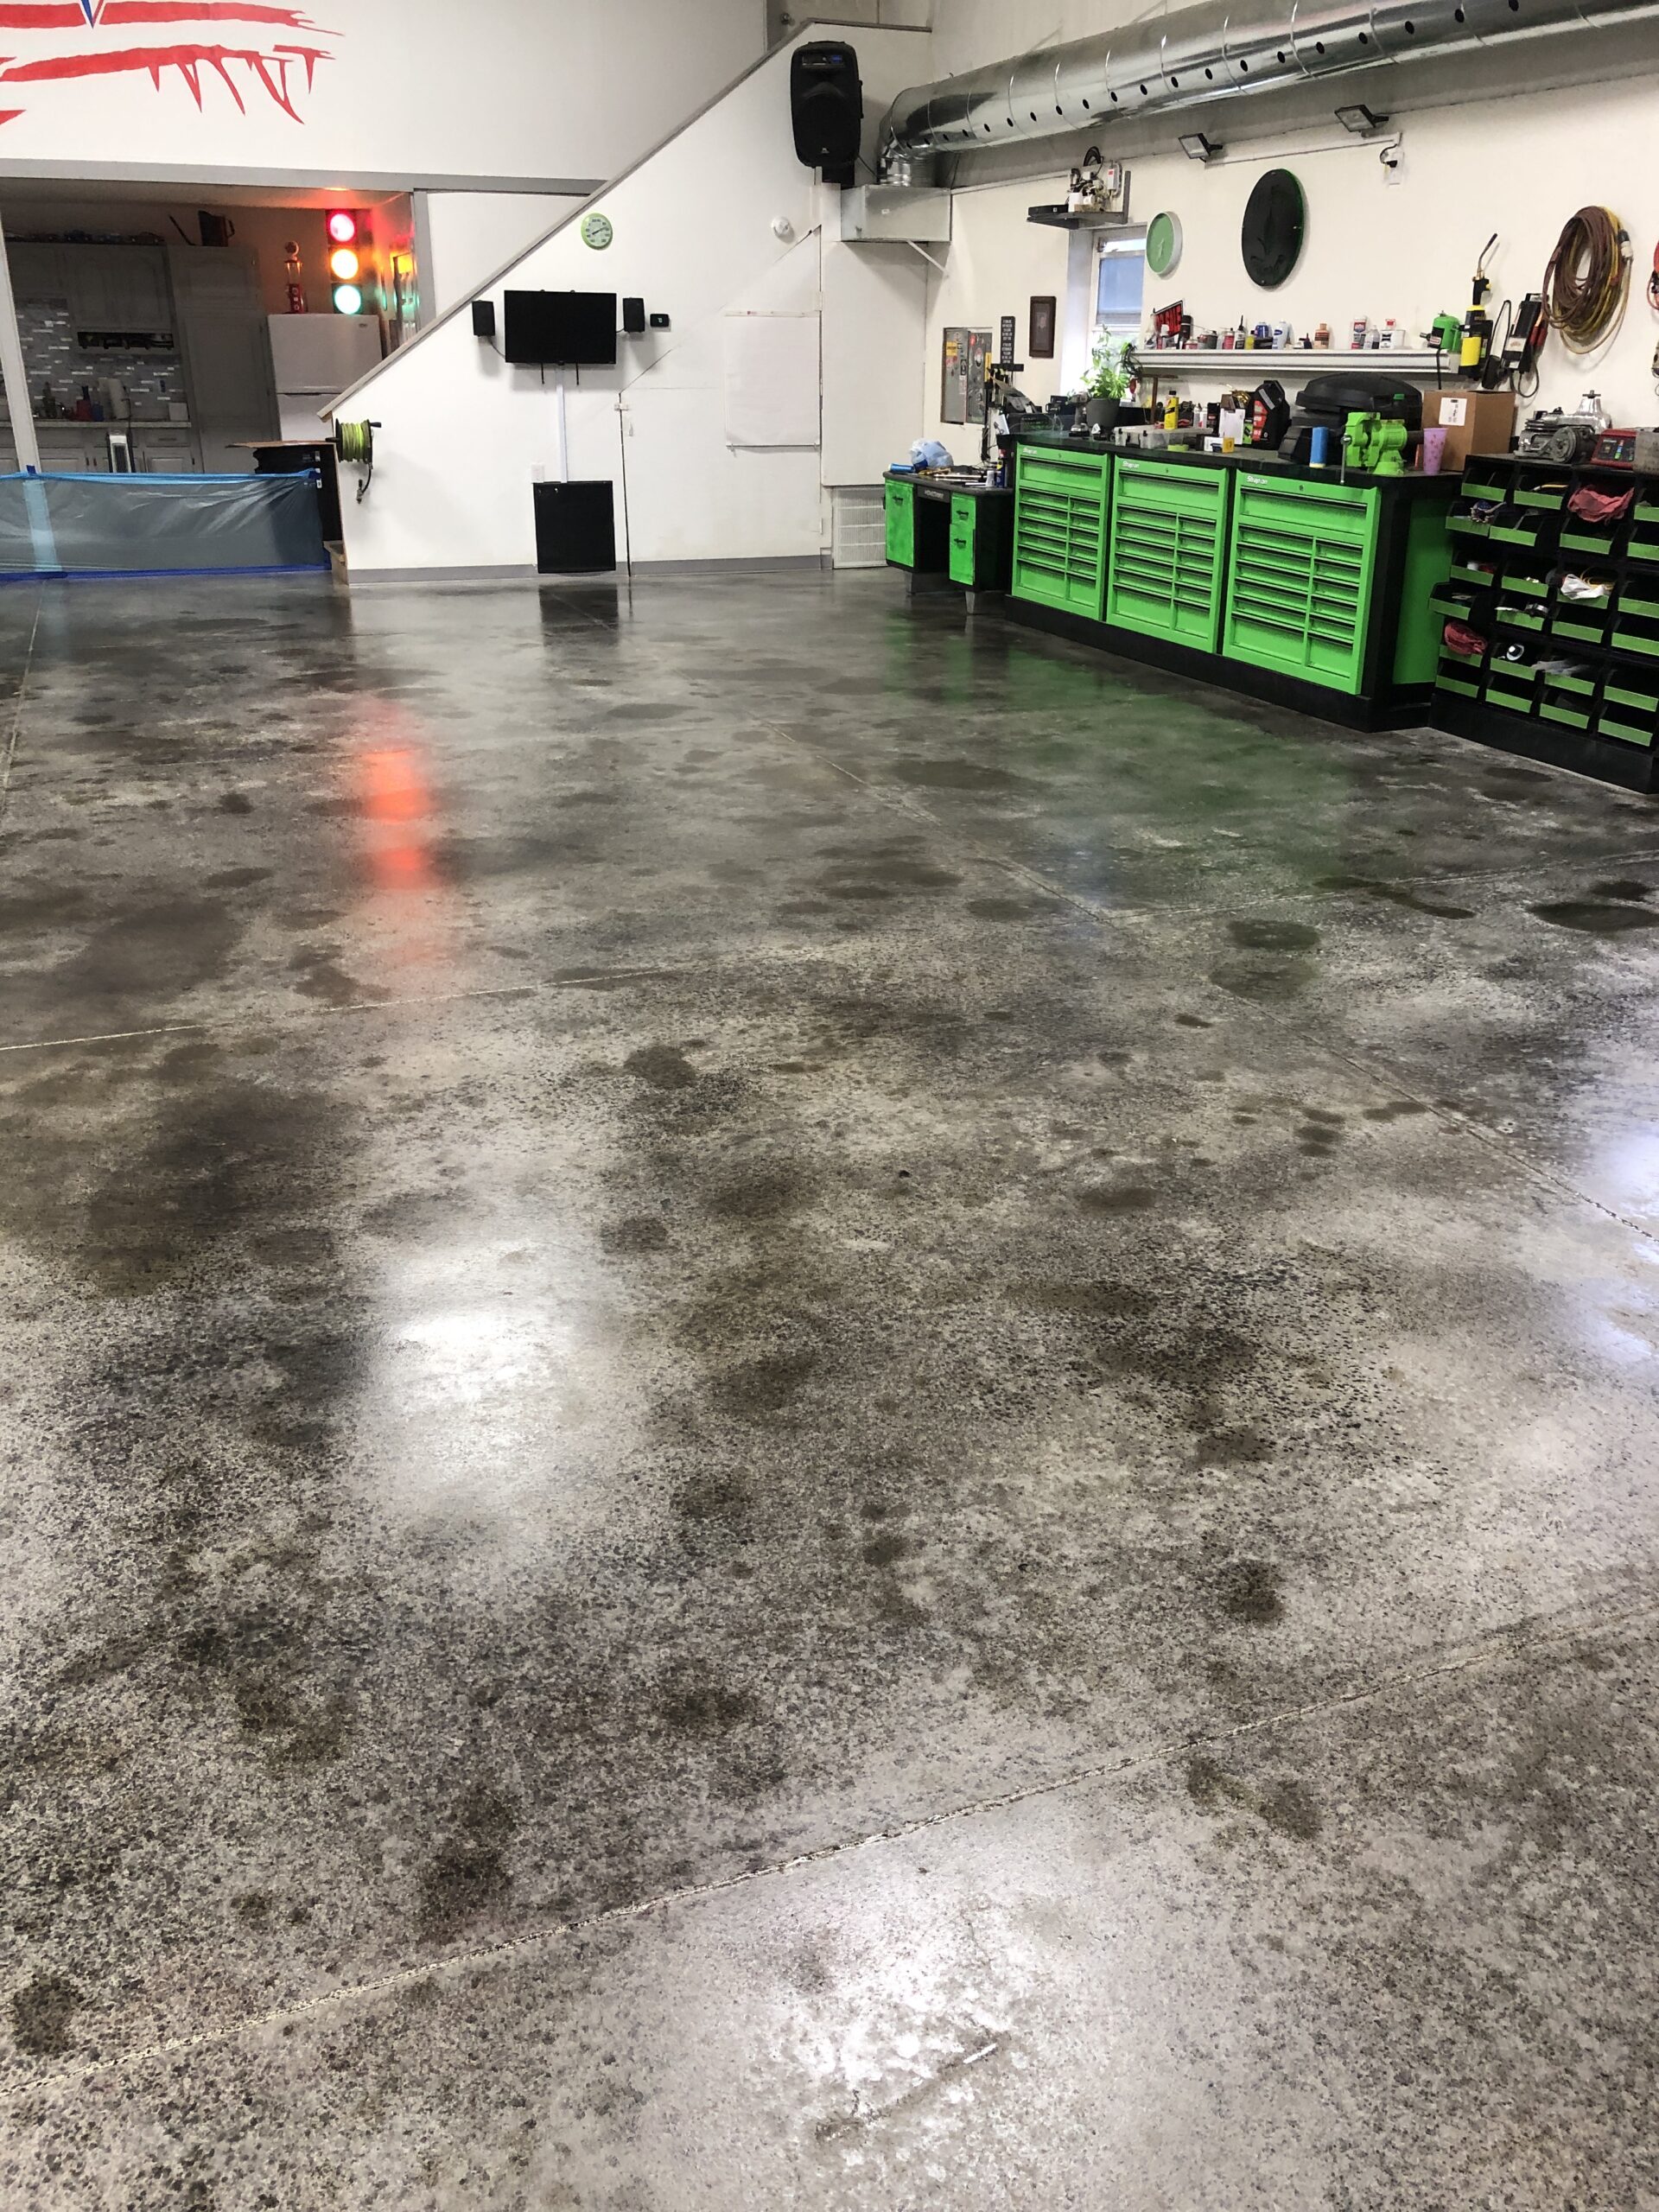
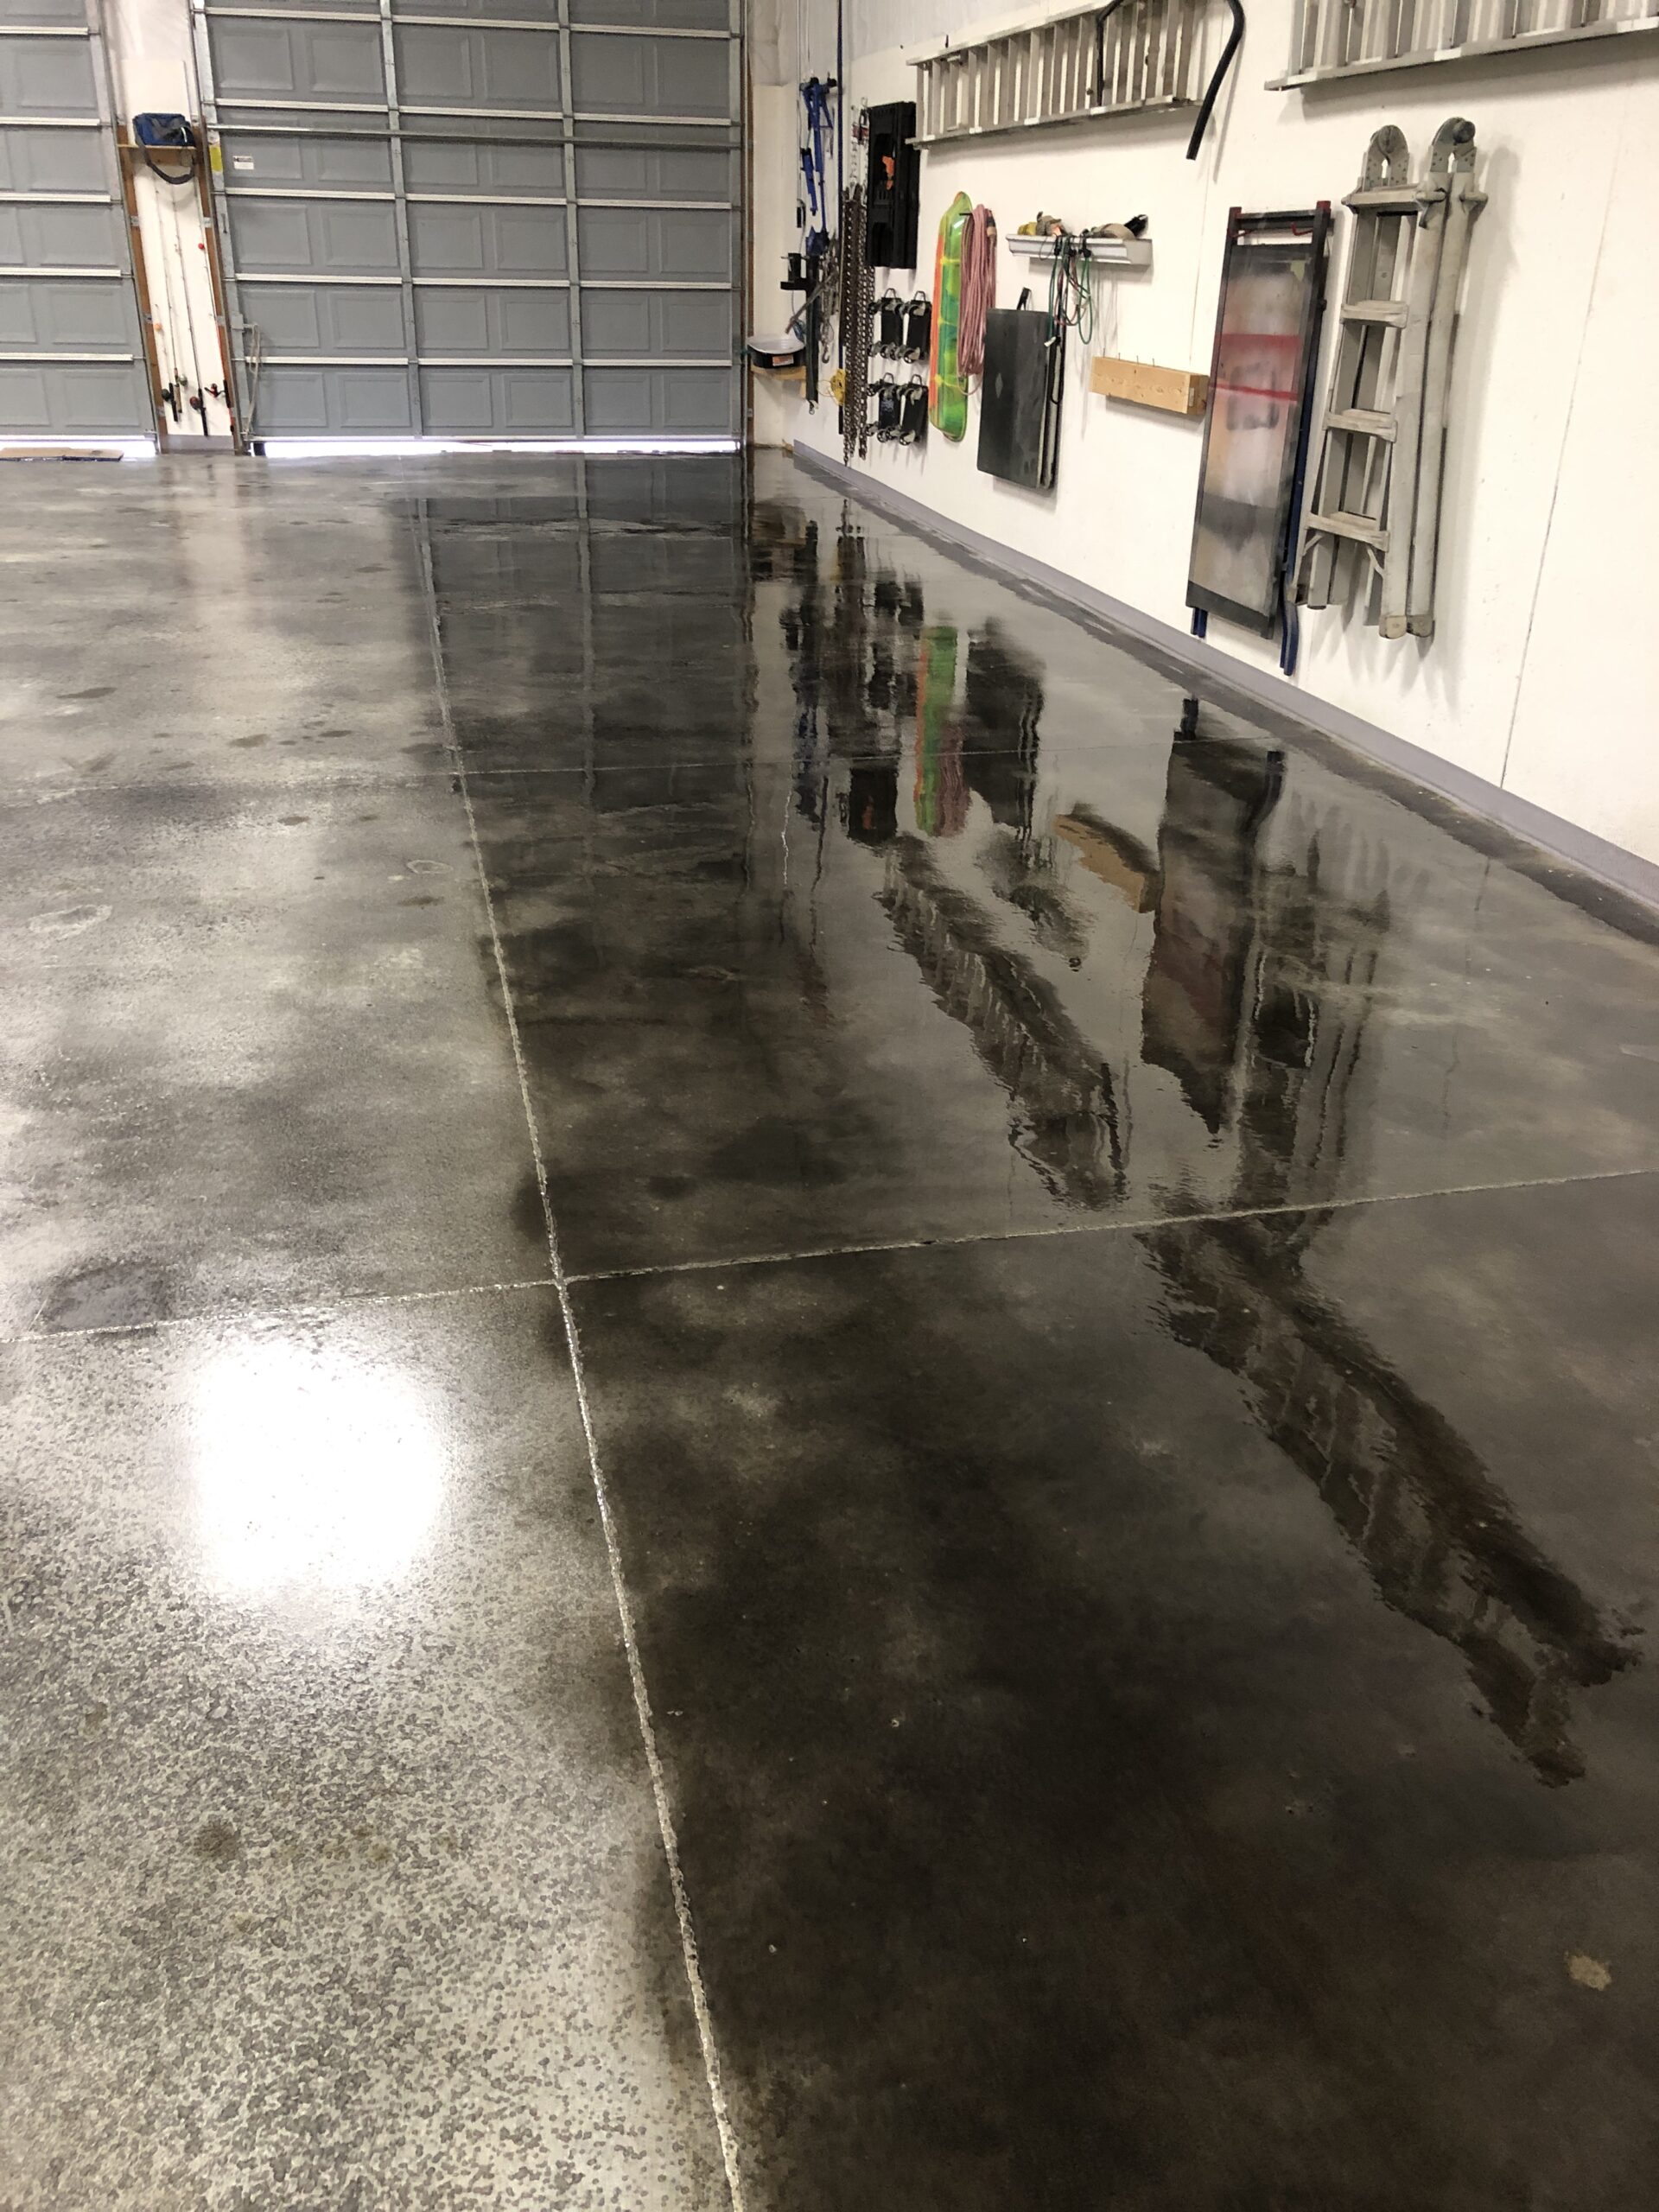
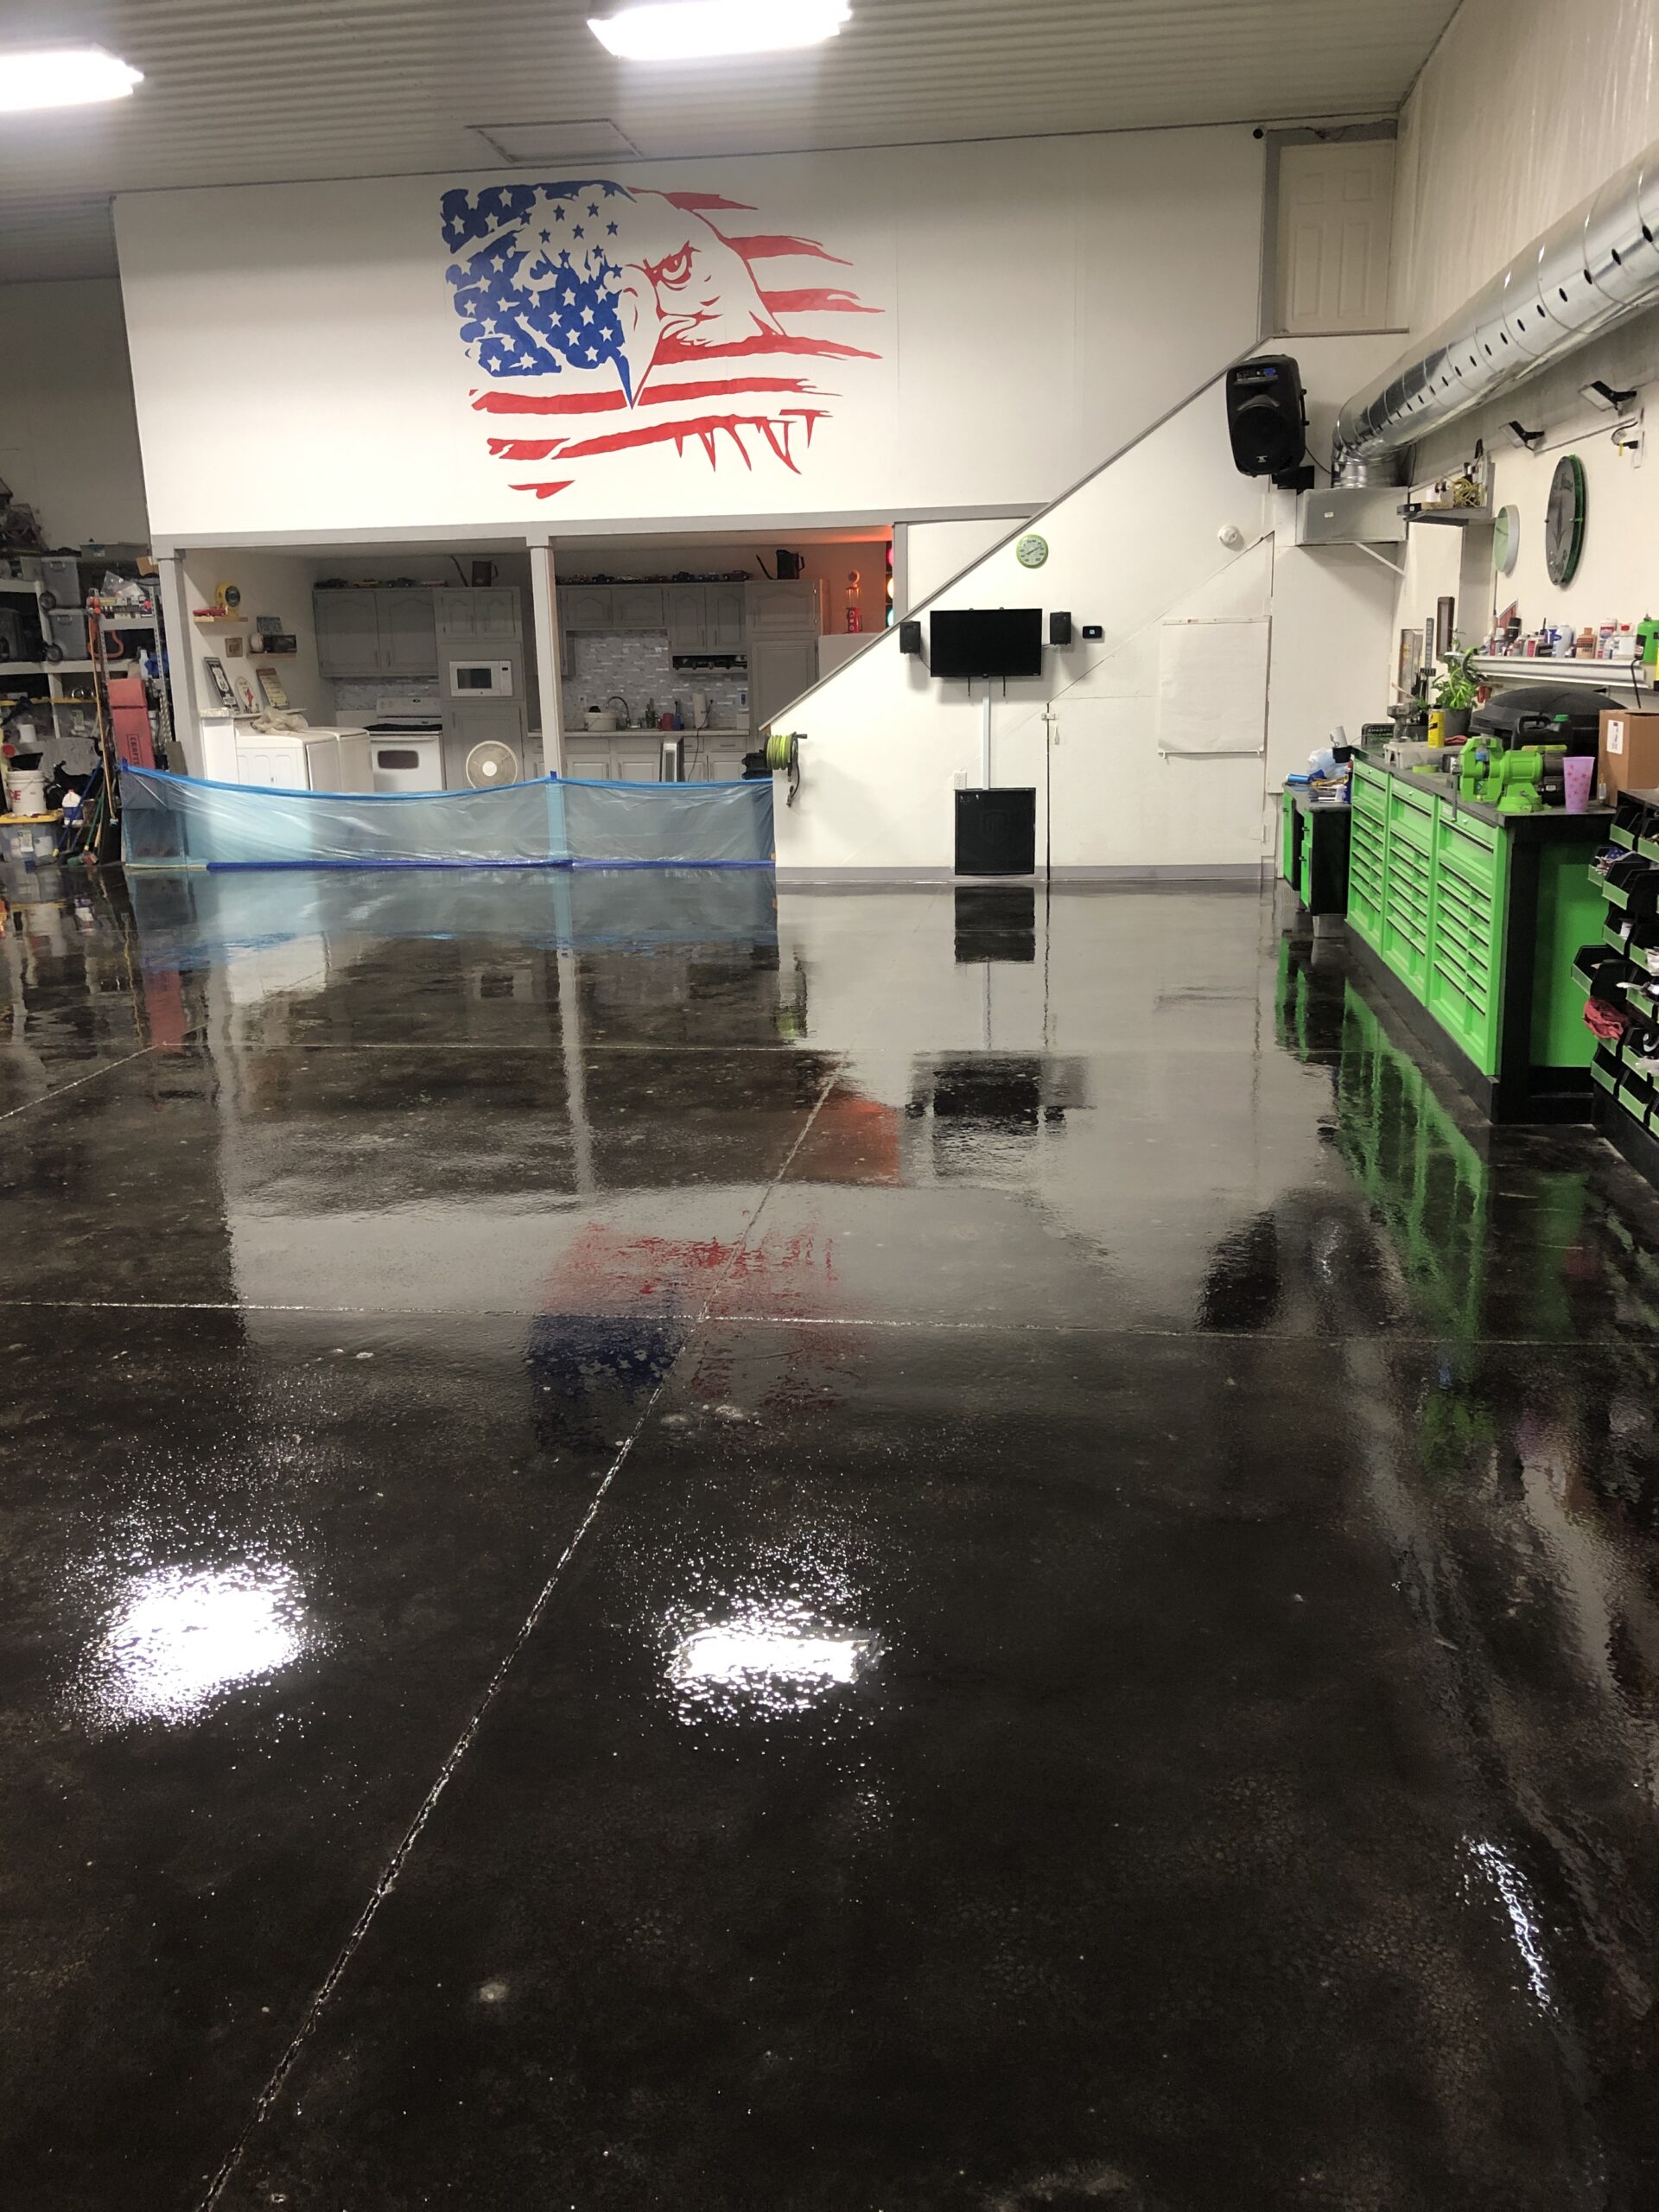
Transformed Barn Shop Floor with Black EasyTint™
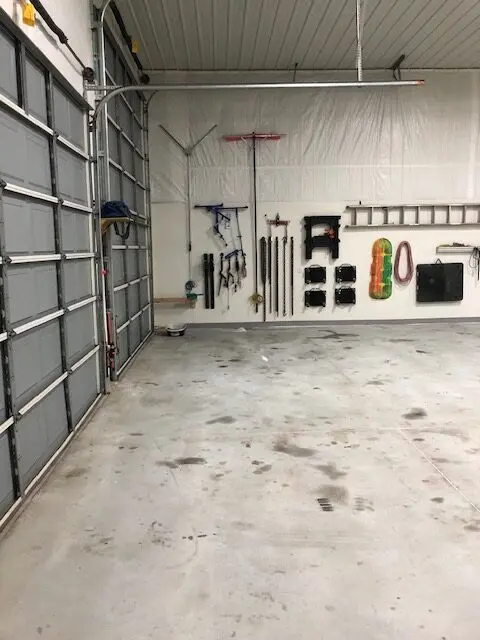
After a rigorous clean-up of this barn shop used for automotive repair, two applications of our black EasyTint™ were necessary to achieve a fresh, unified look. Despite initial challenges with extensive stains and overspray, the final outcome delivered a functional yet aesthetically pleasing floor, ready for family gatherings and celebrations.
Sporty Sophistication: A High Gloss Black Score
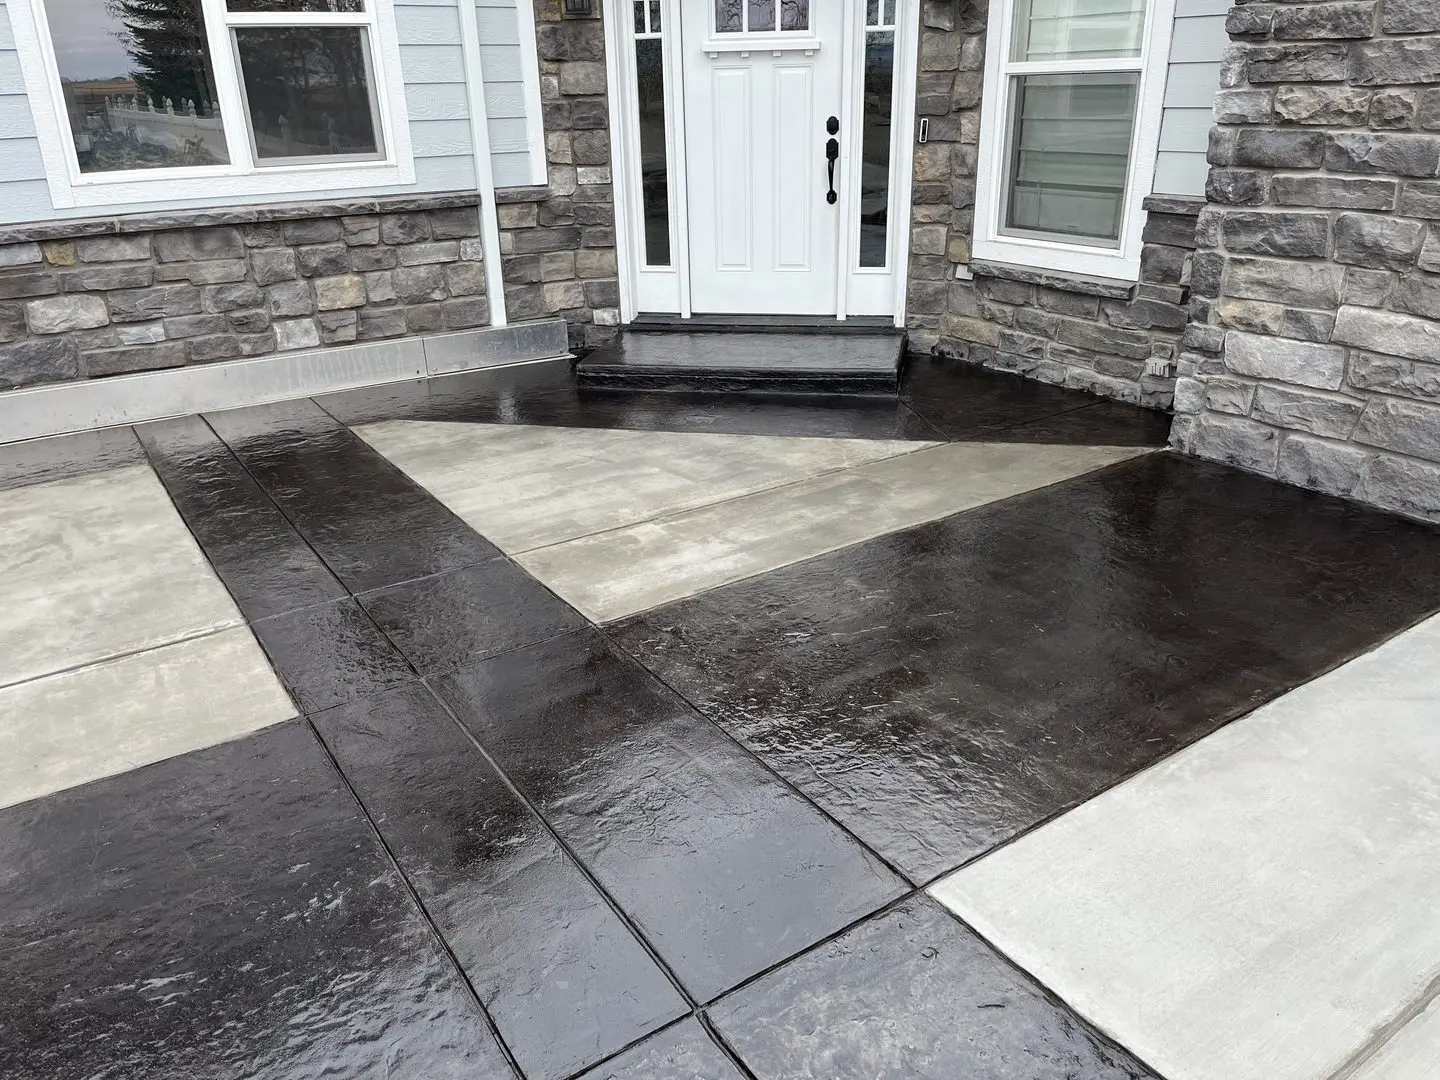
Get ready for a slam dunk with our “Sporty Sophistication” project. This scored concrete front porch and driveway design is a true game-changer, featuring a black EasyTint™ tinted sealer in a high gloss finish for an elevated touch. But that’s not all – the driveway doubles as a basketball court with professionally marked lines, and a black free-throw area and 3-point arch for added contrast.
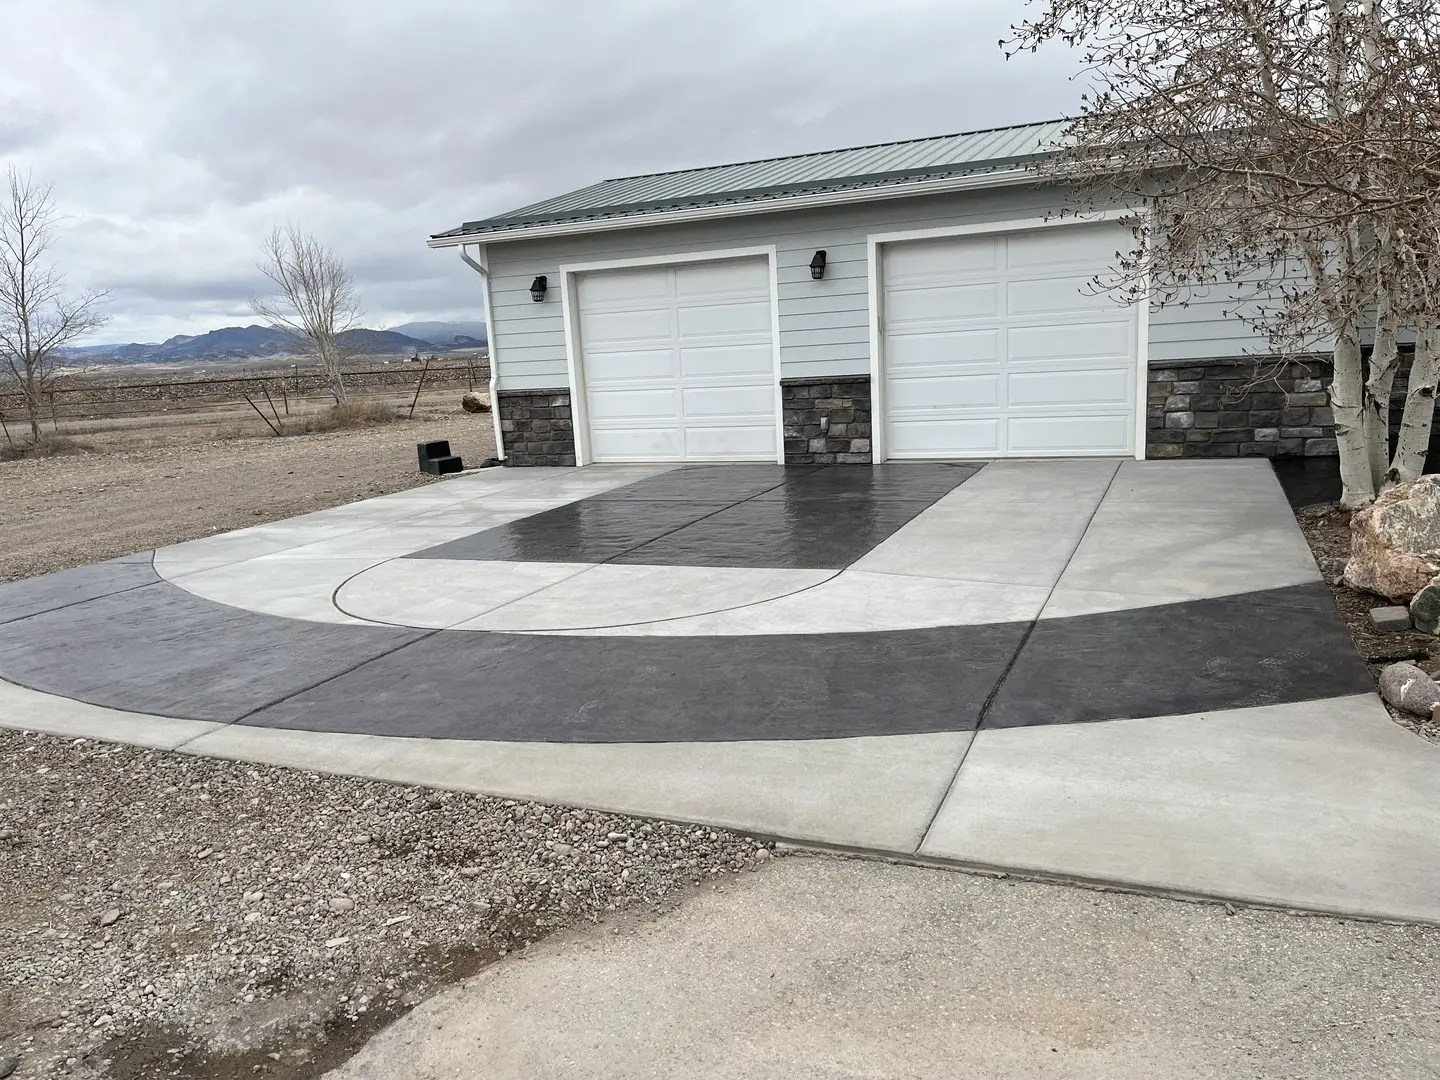
Elegantly Stained with EasyTint Black
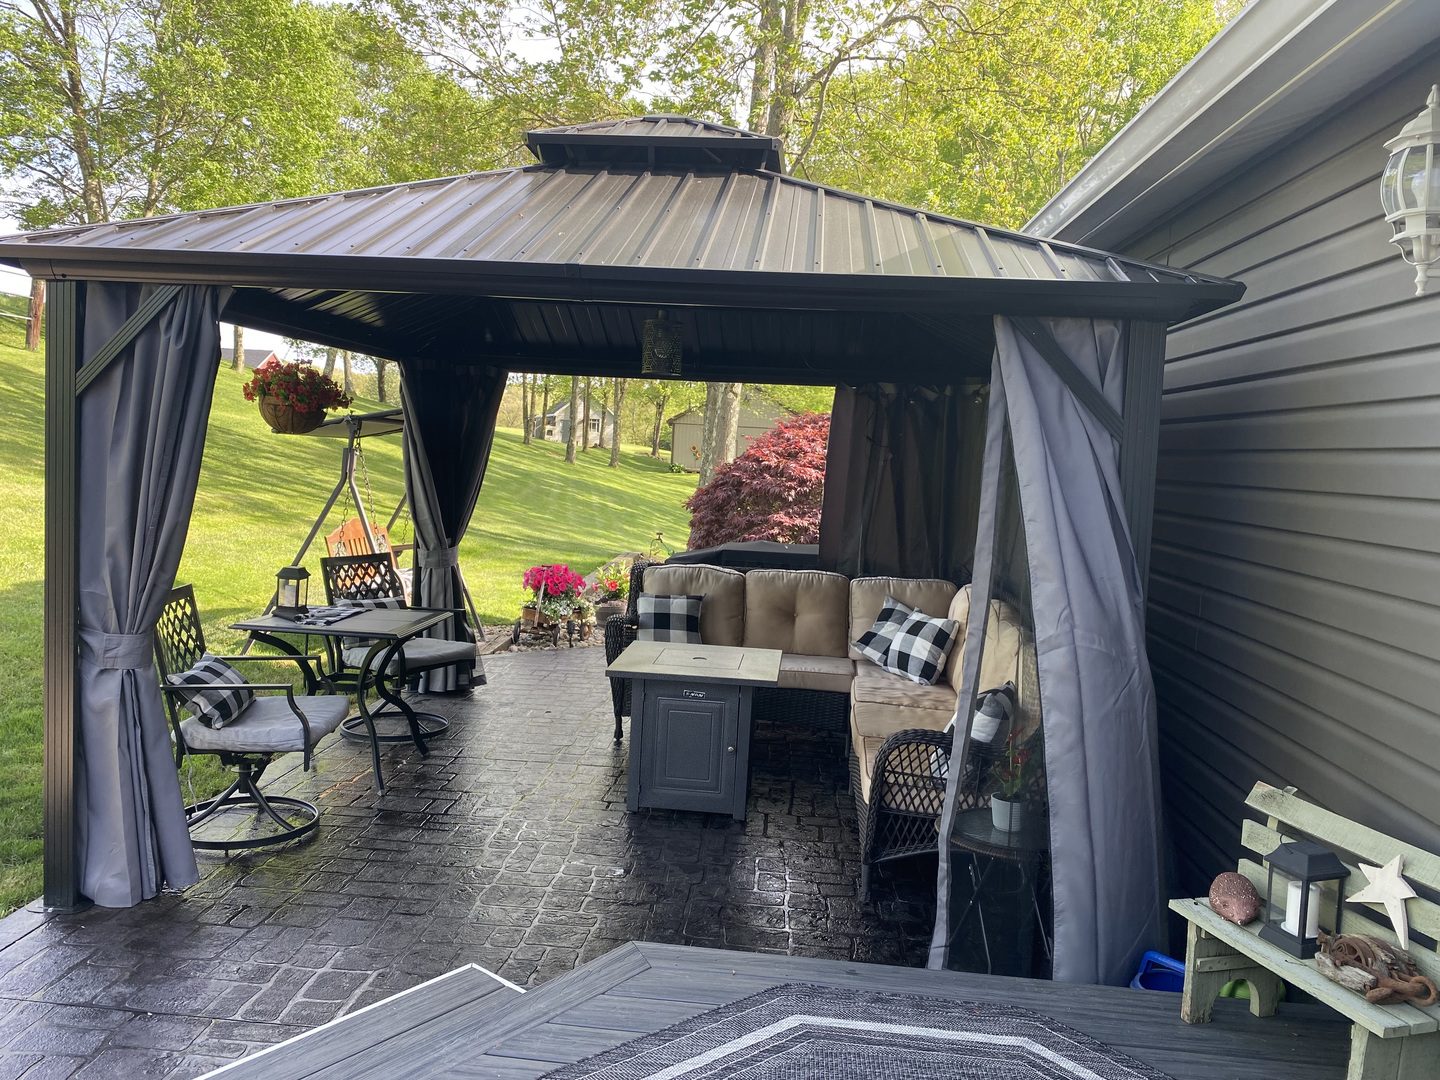
From Worn to Refreshed and Vibrant
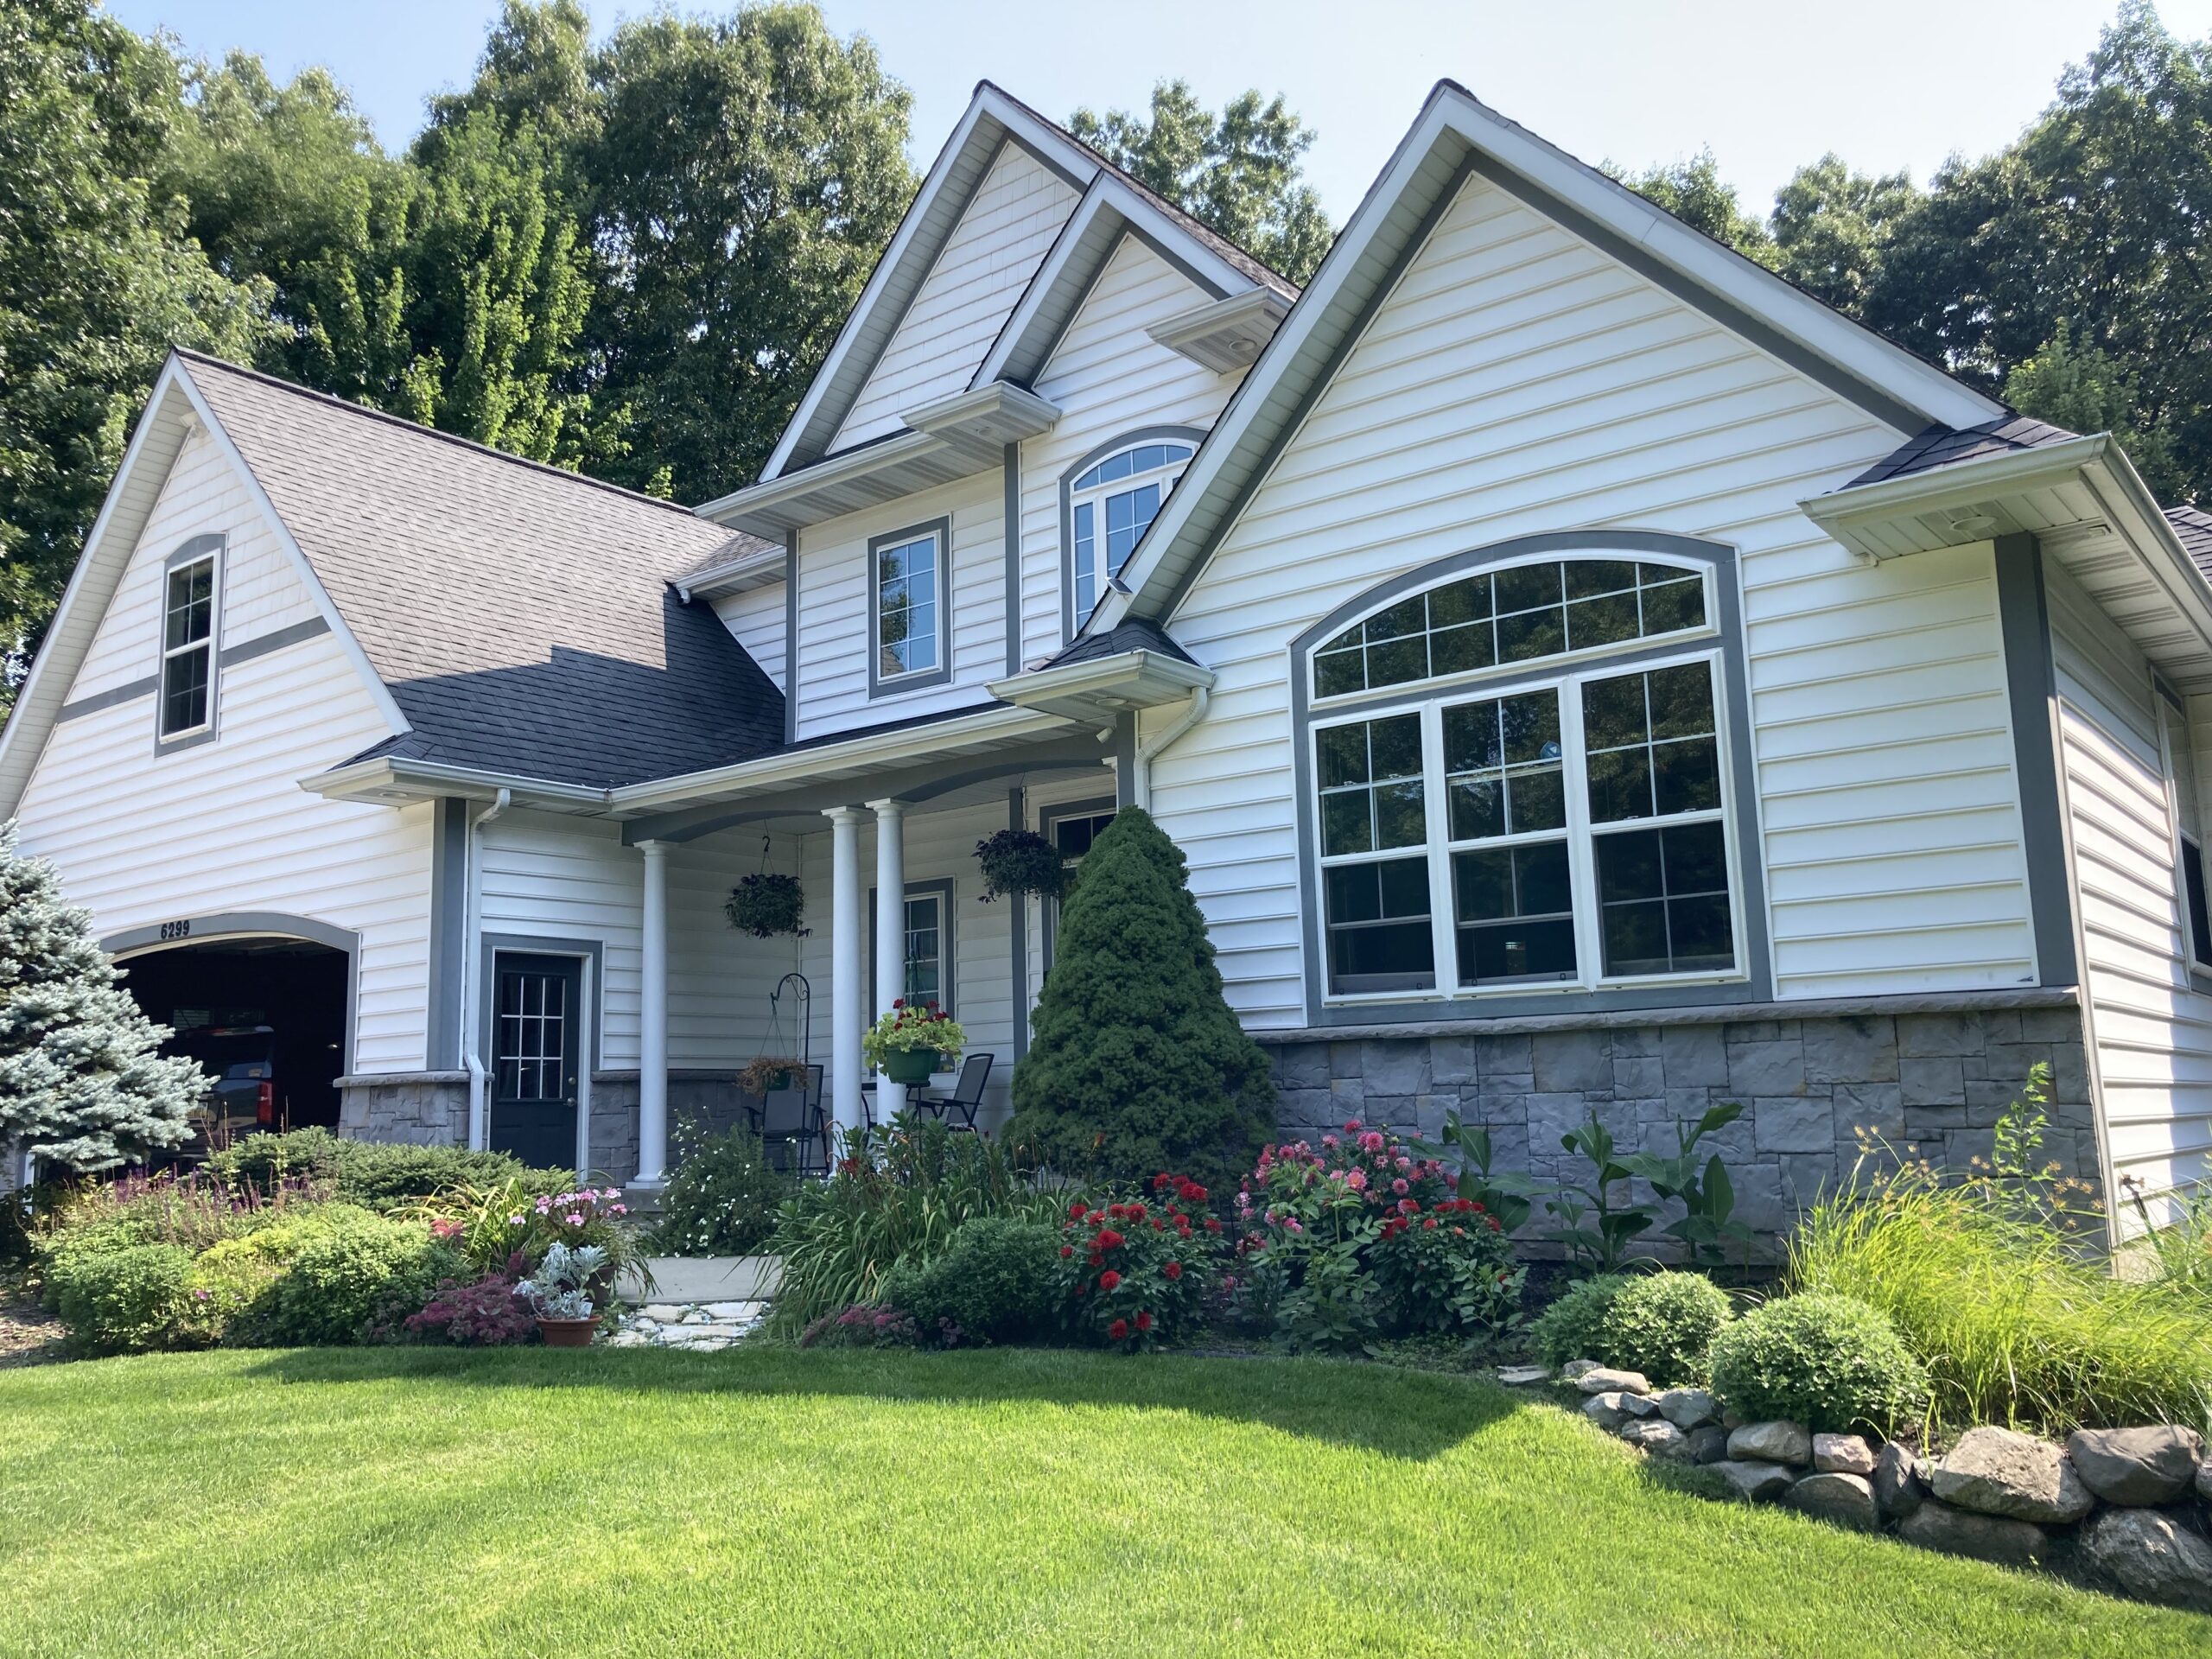
Black Portico™ Charm: A Stone & Trim Tango!
Swapping out grey for a dashing dark charcoal, this home’s stone facade got a radiant revamp. Complementing wood trim follows suit, creating a harmonious, eye-catching ensemble.
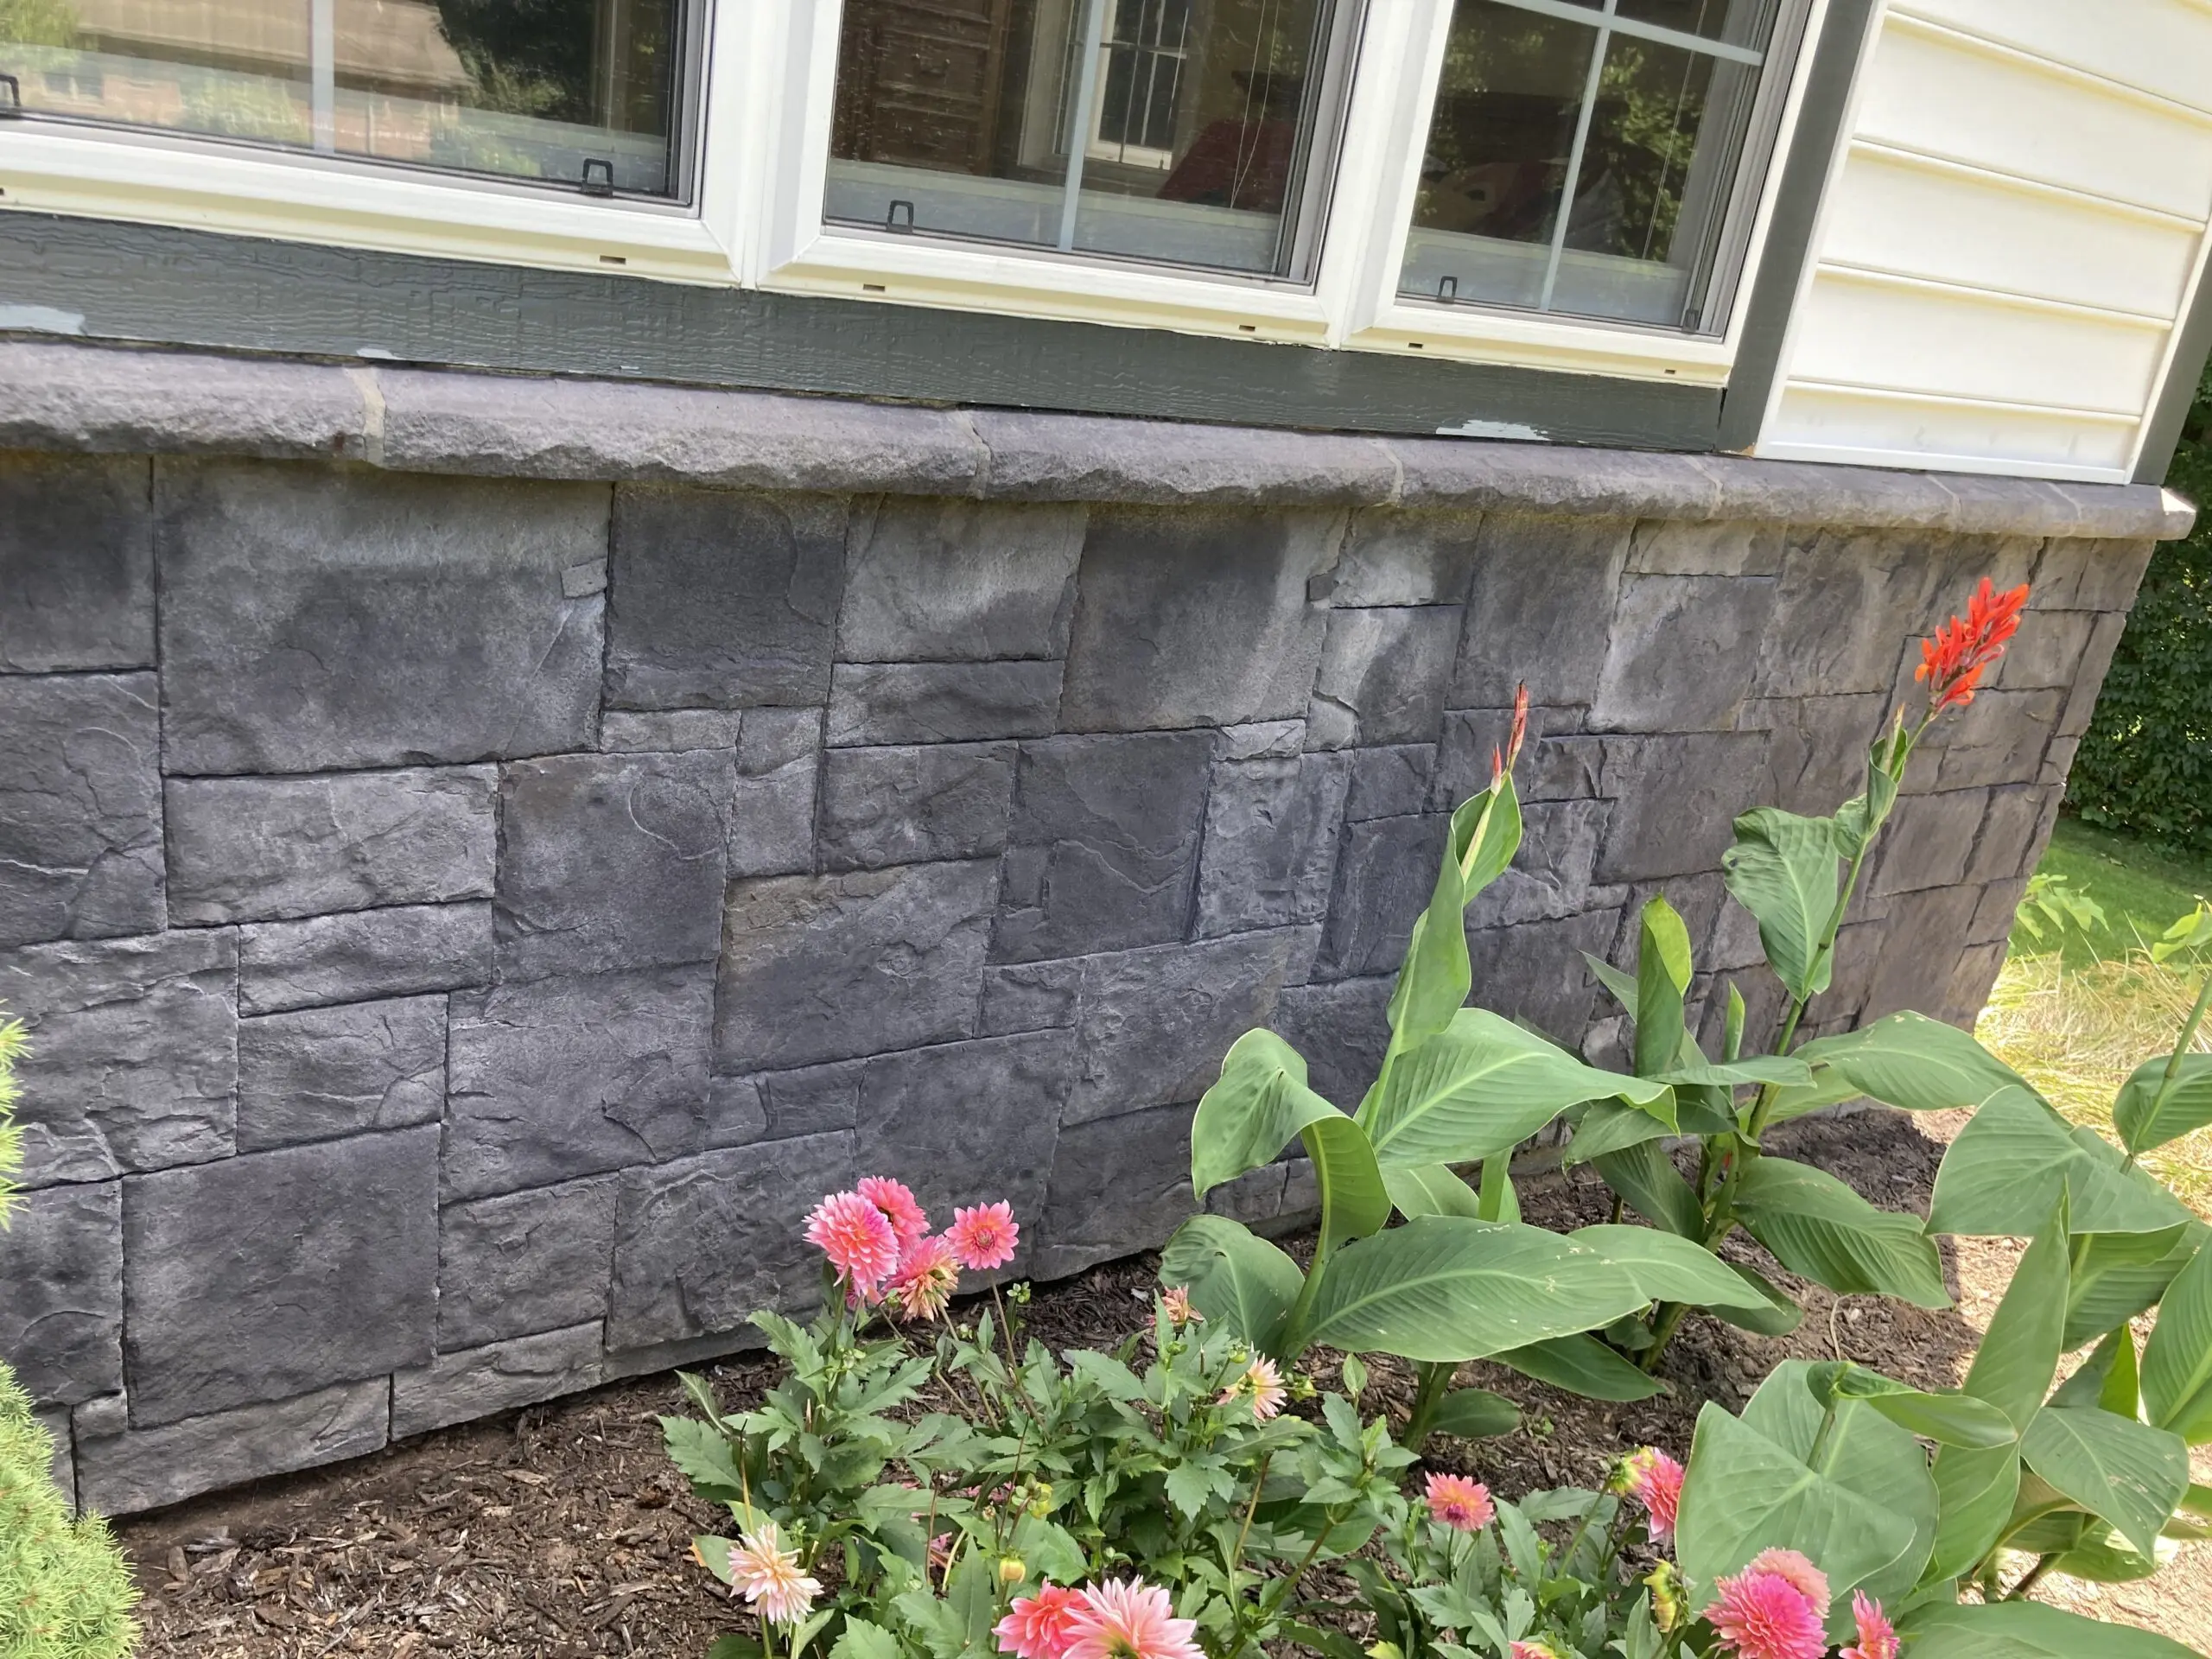
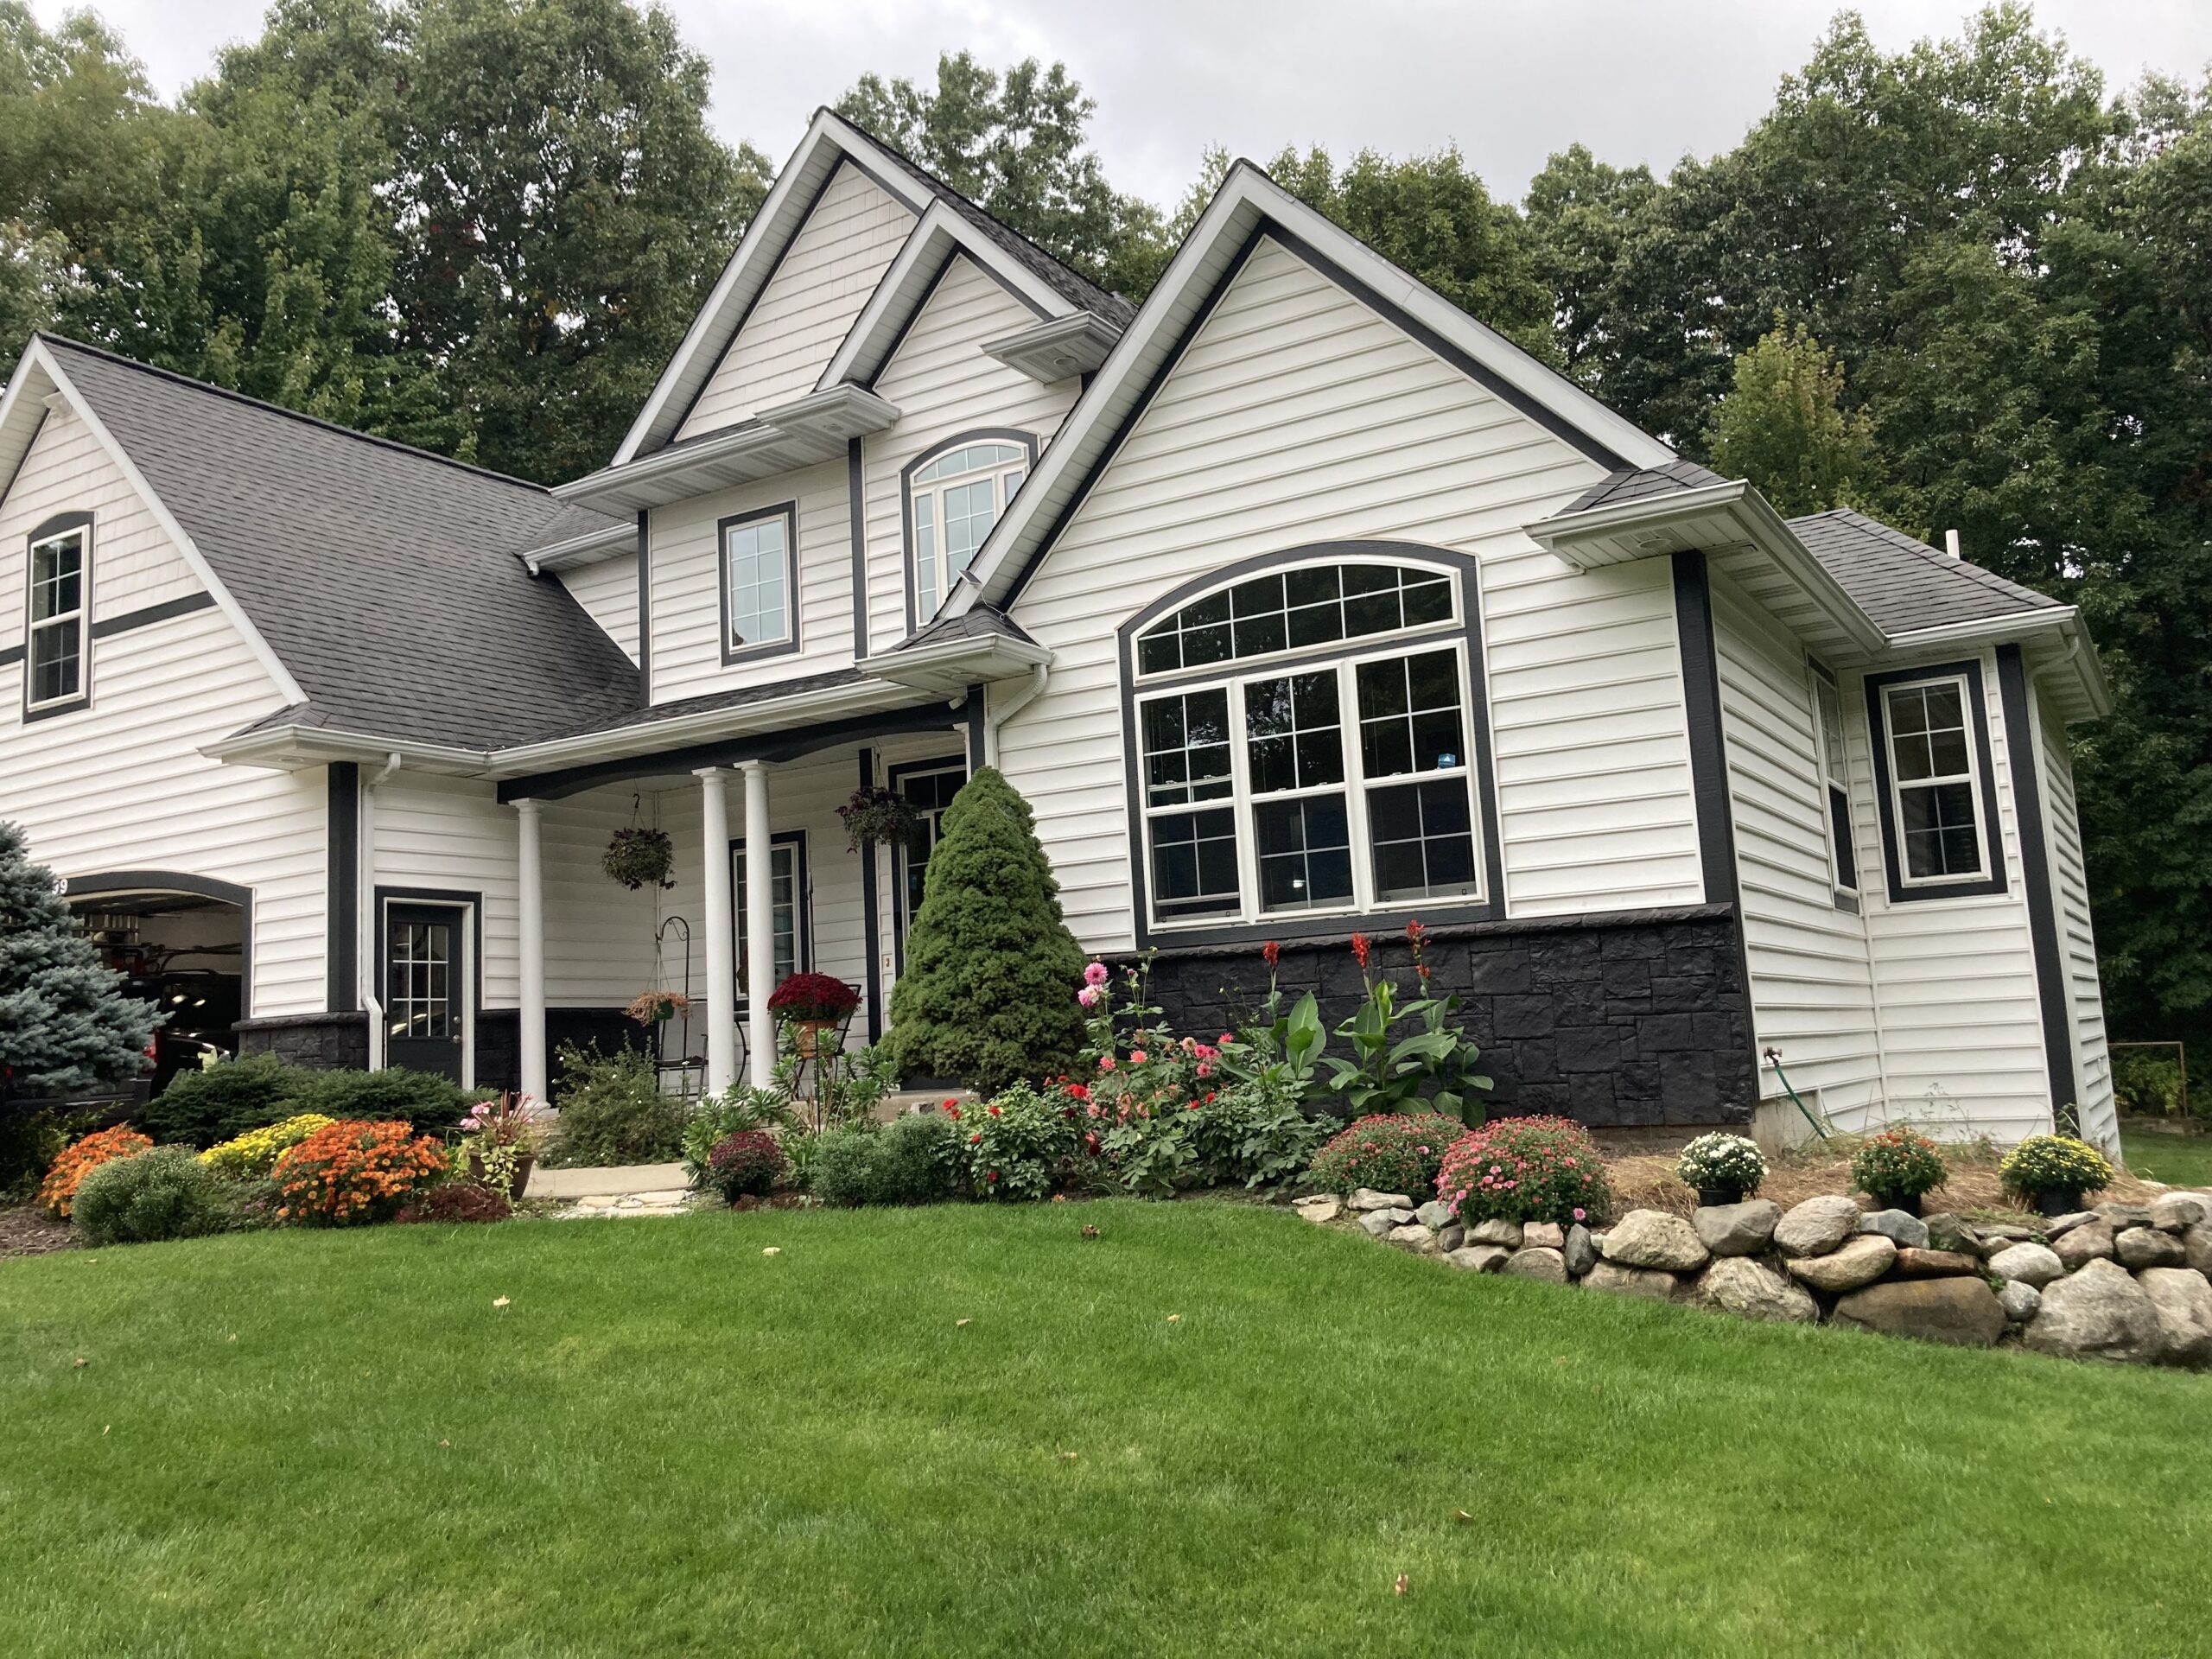
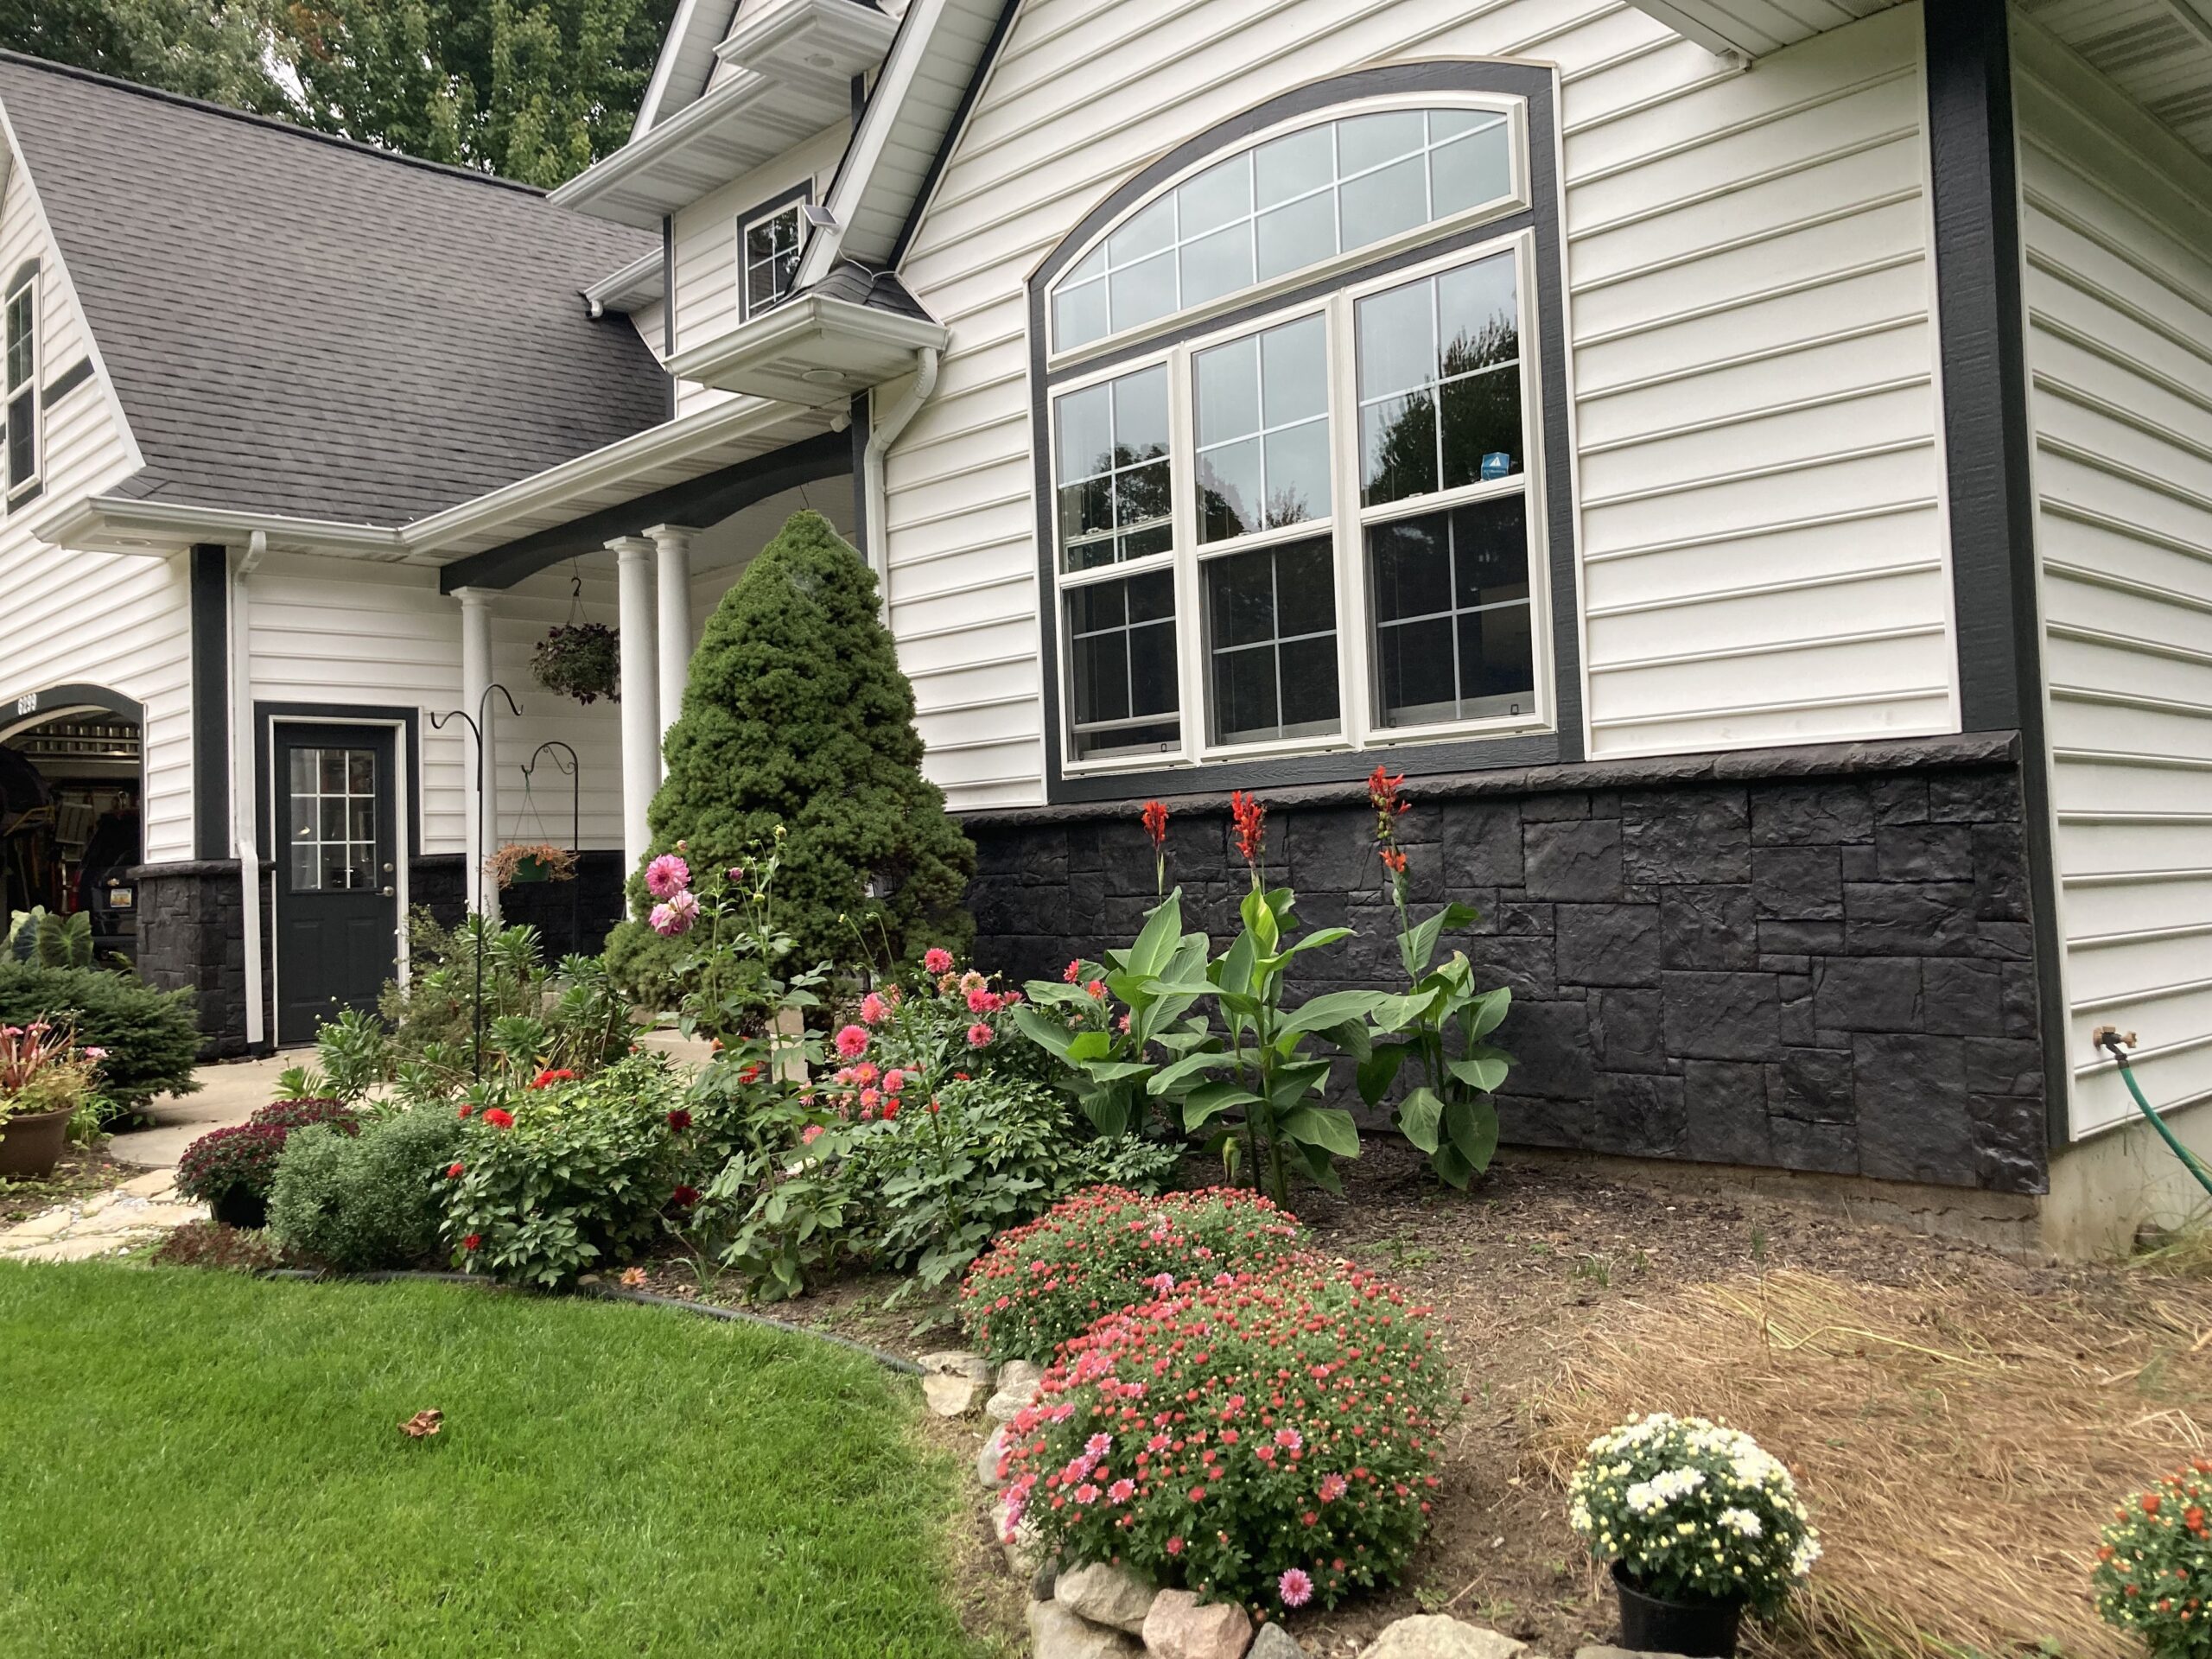
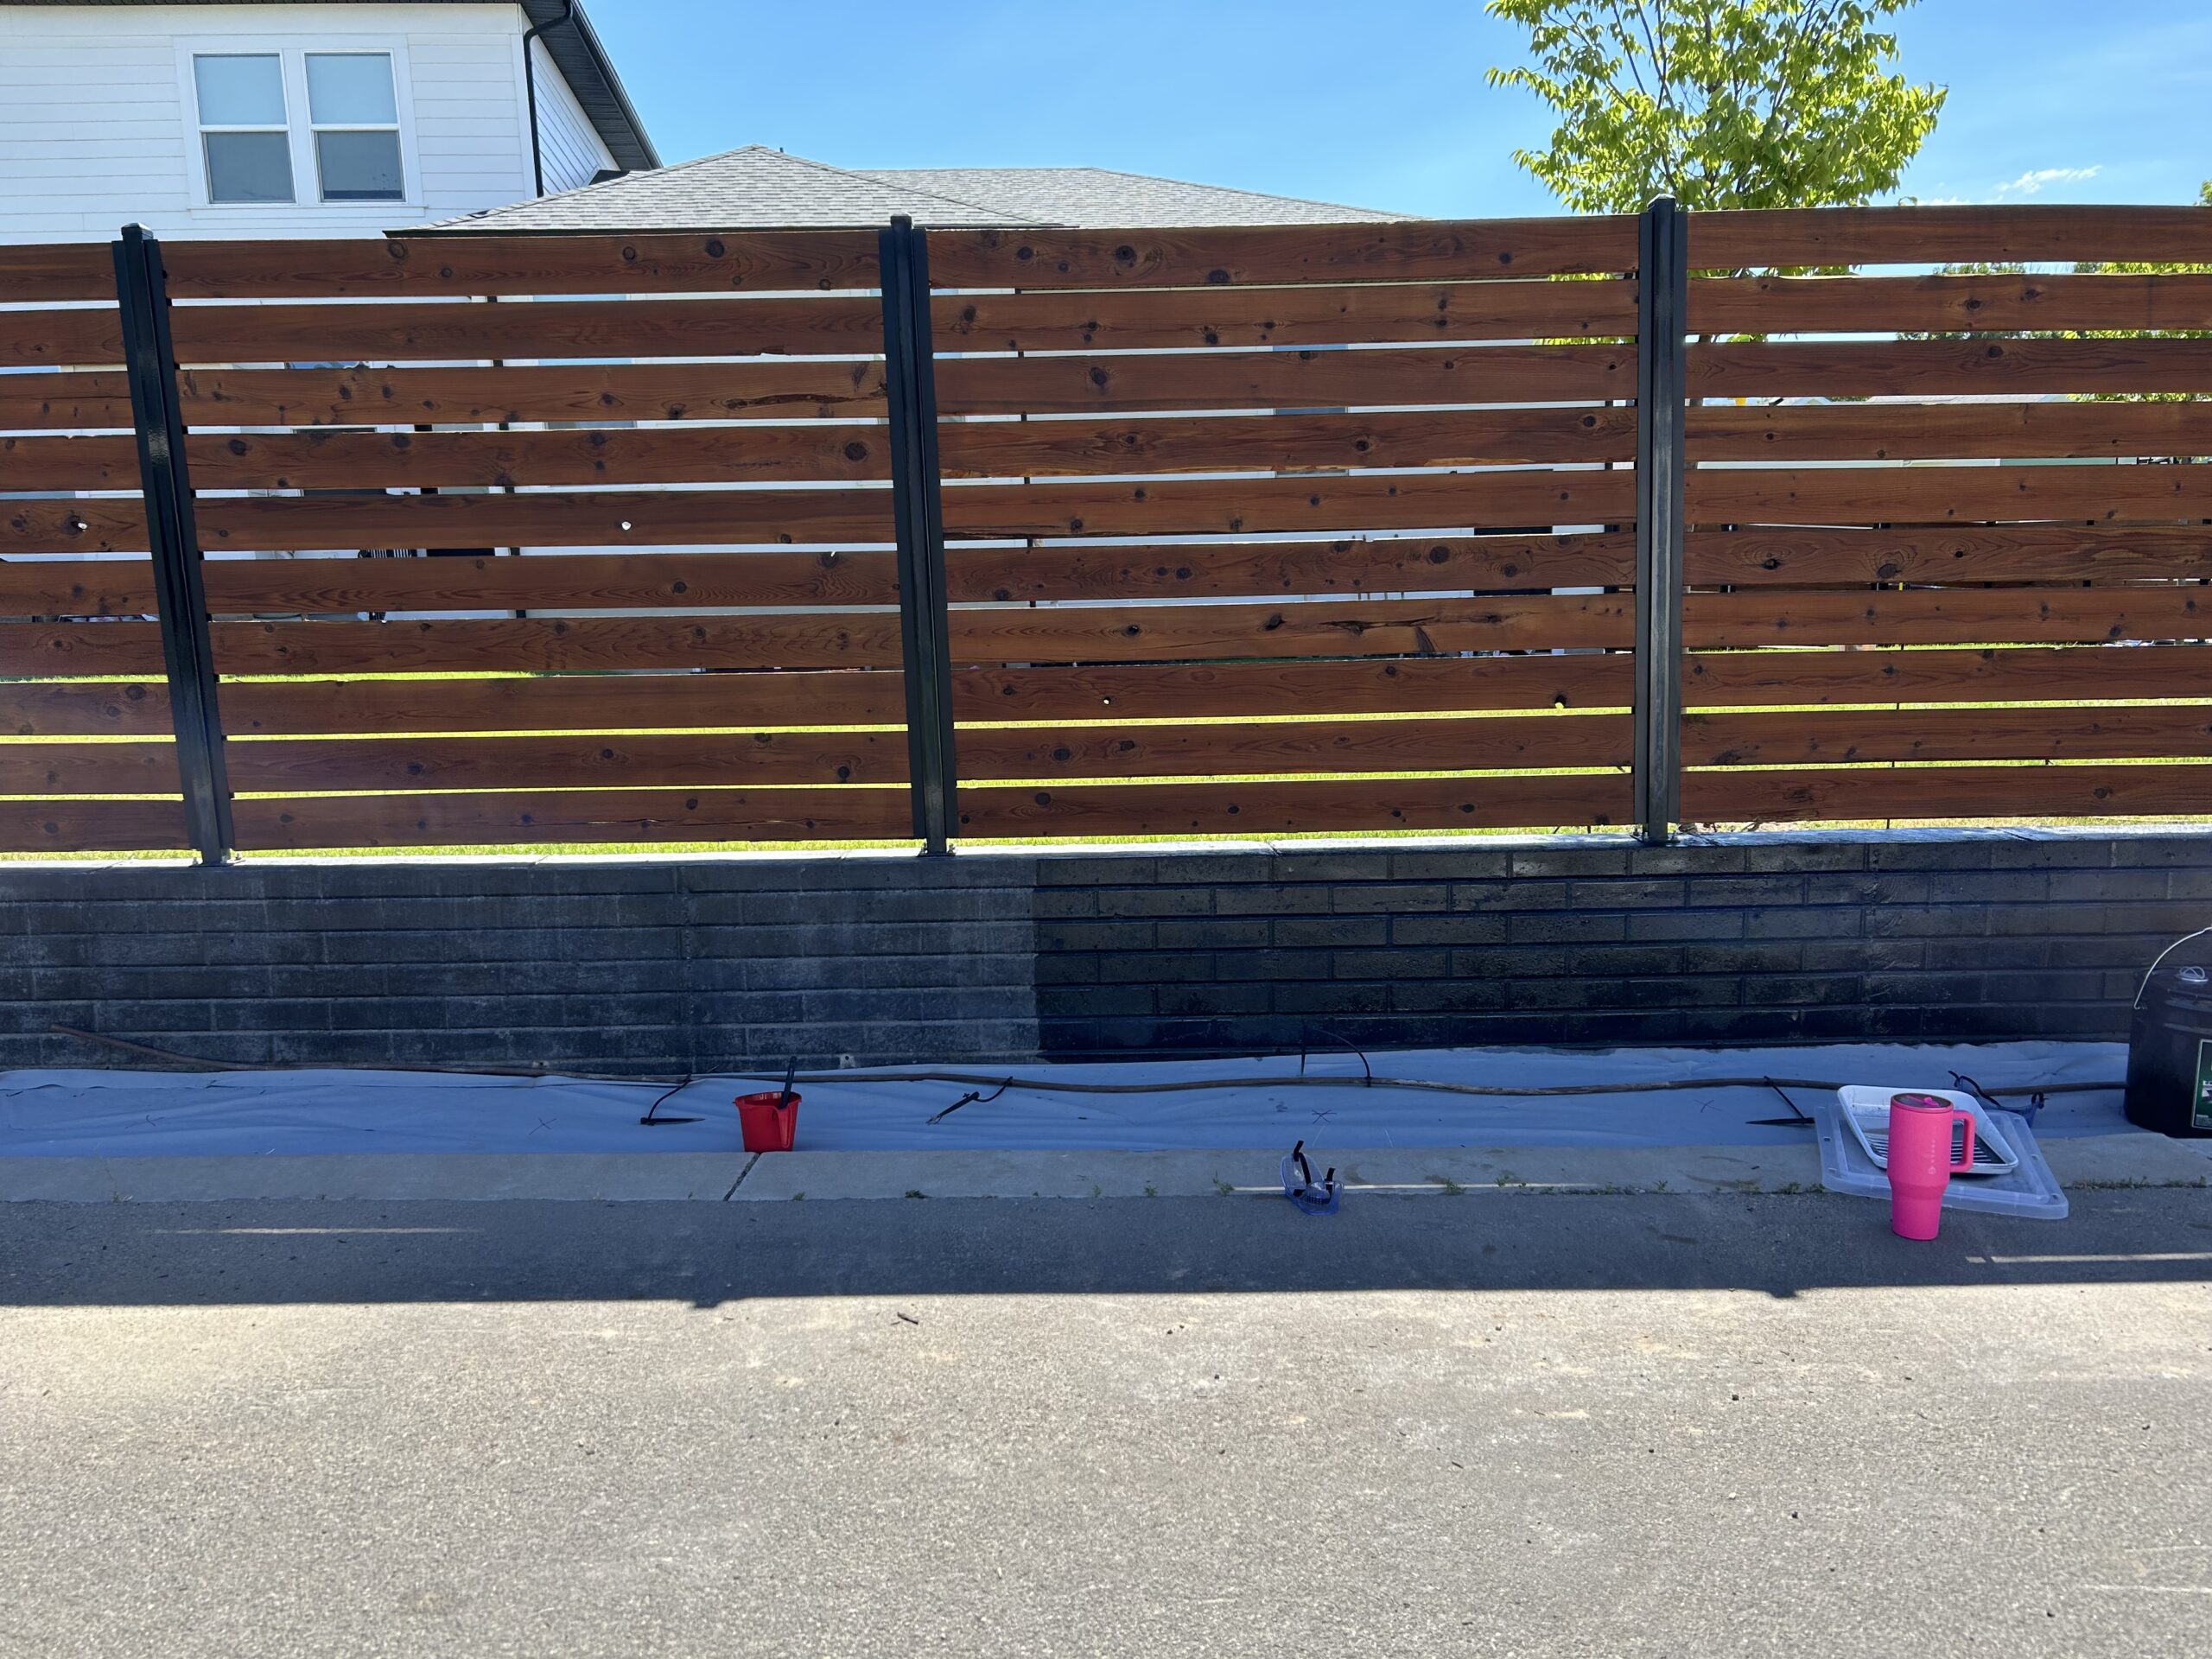
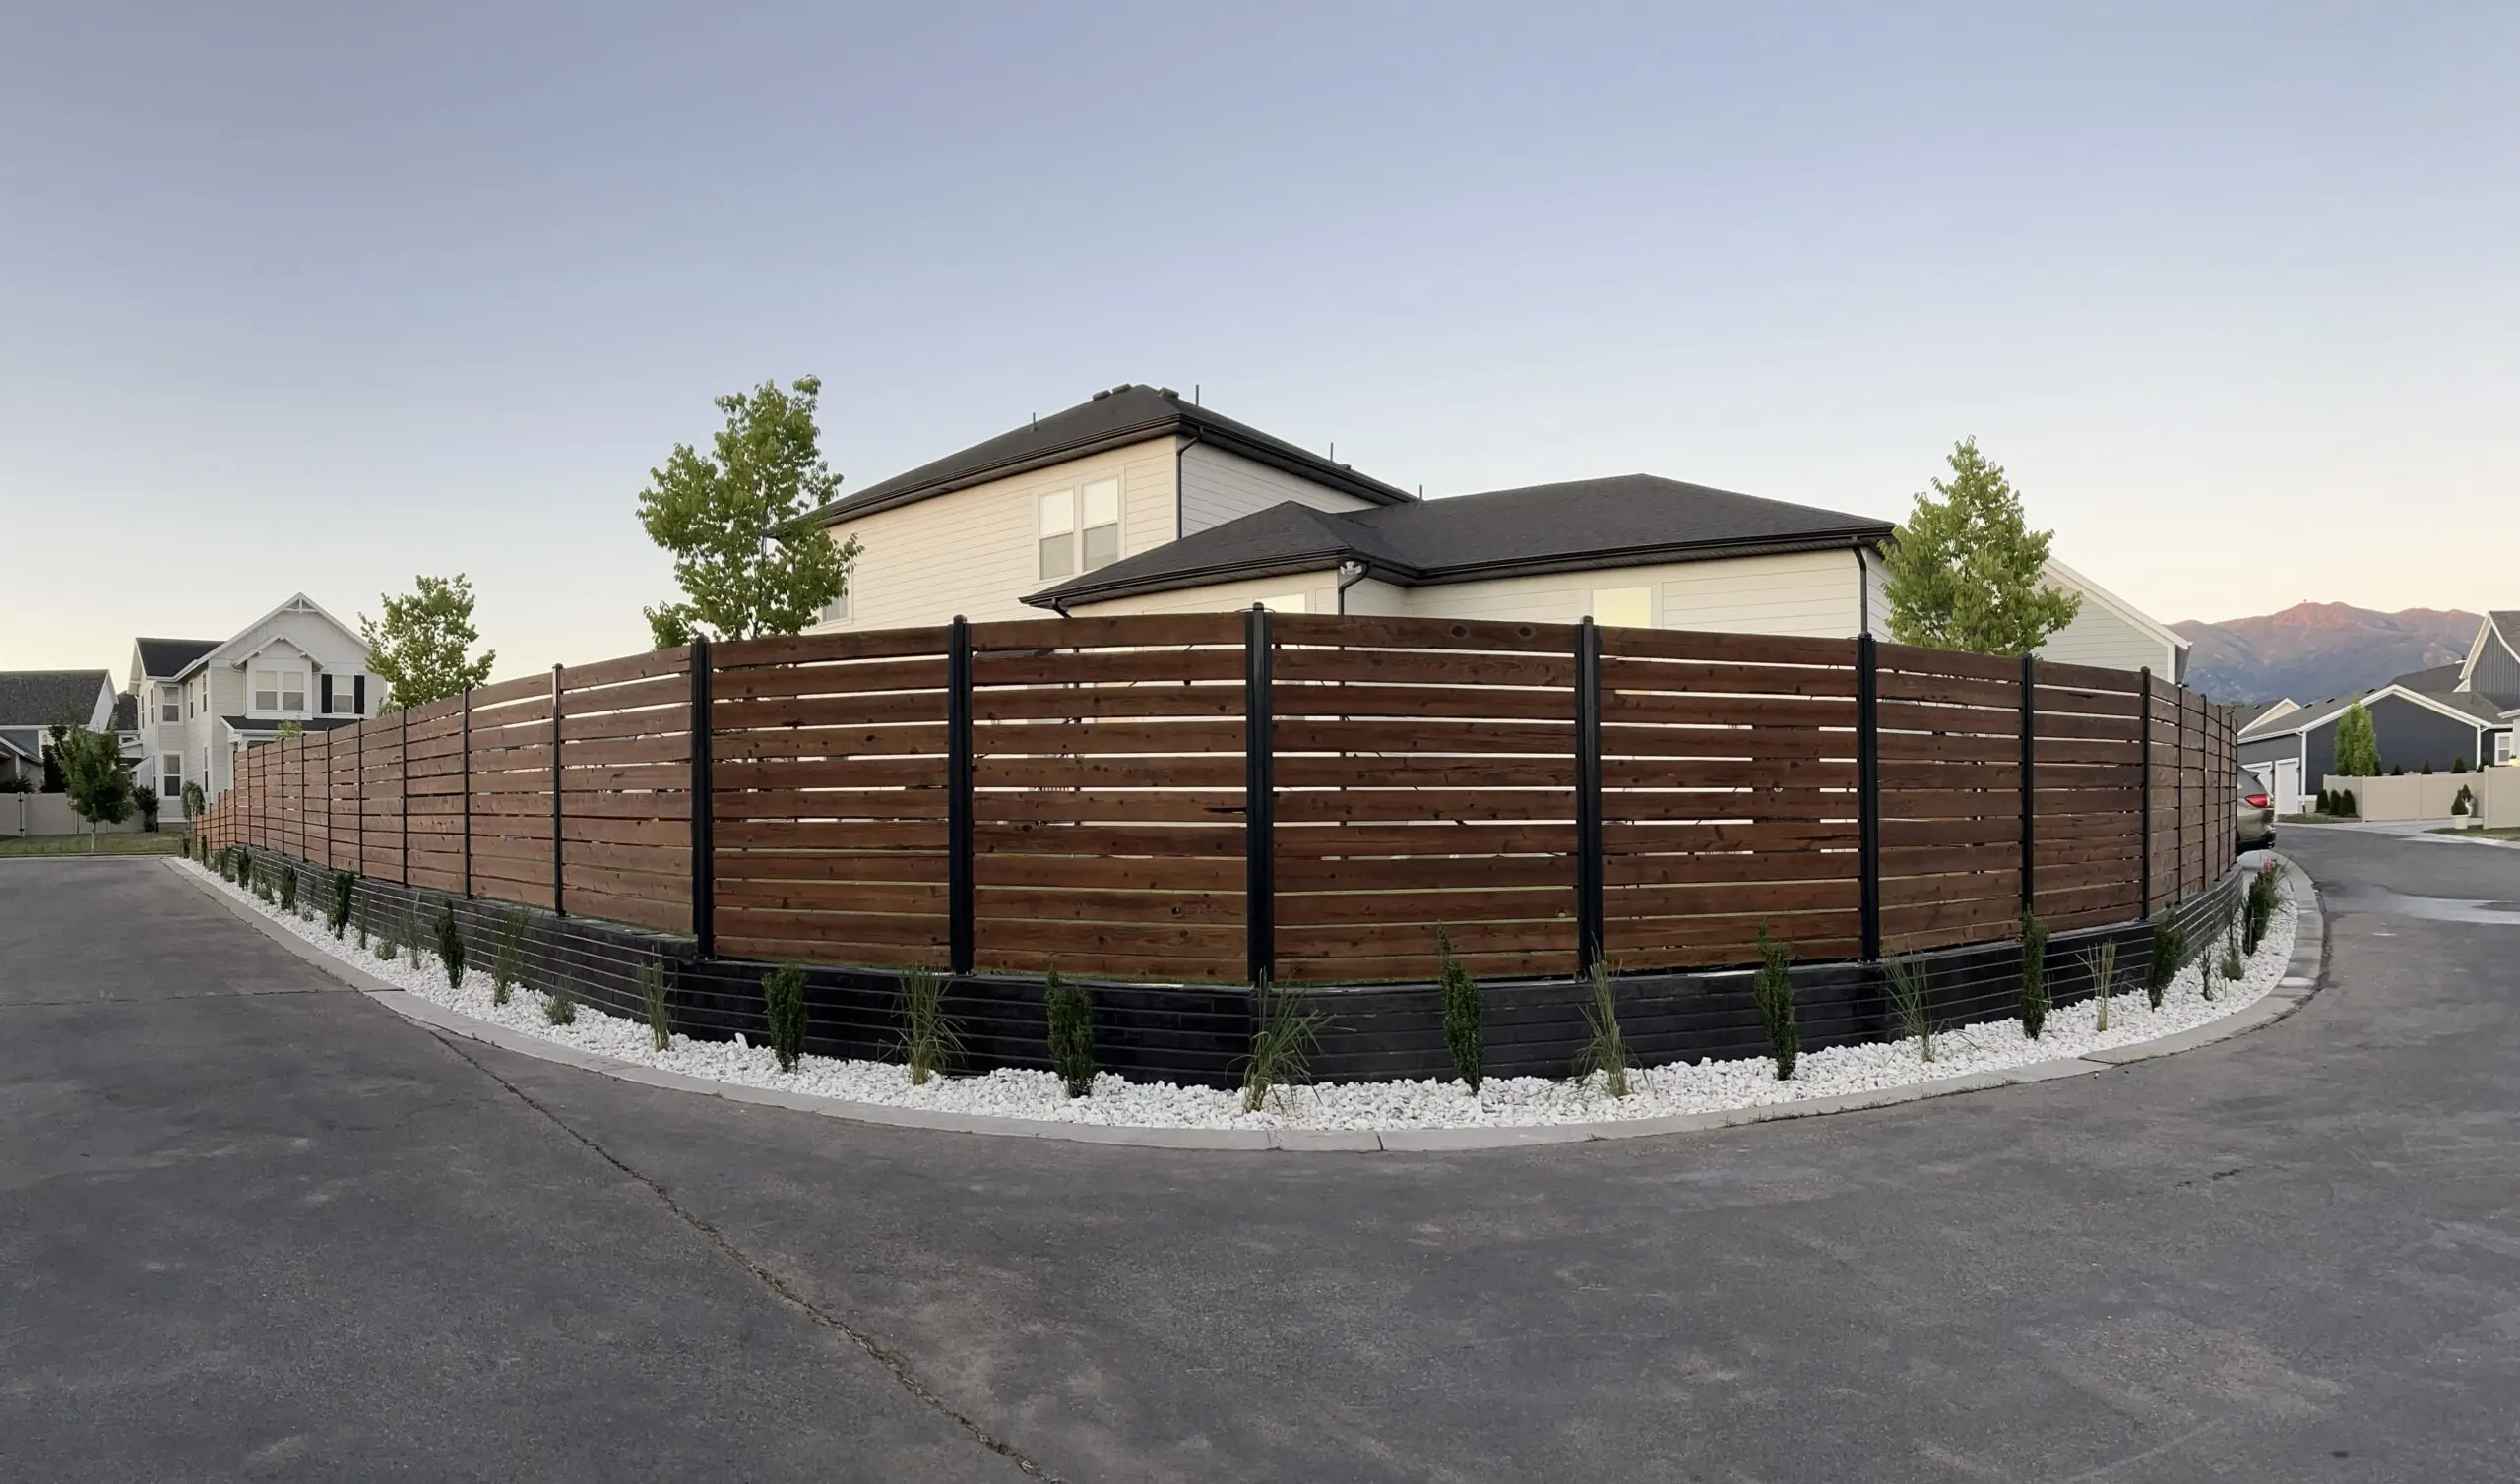
Black Concrete Retaining Wall Revamp
Originally installed in 2021, this black concrete retaining wall was initially stained using a pump sprayer. To enhance its appearance, a second round of staining was done this year using a paintbrush for crevices and a roller for broader areas. The application of two coats made a significant difference, resulting in a more polished and durable finish just in time for planting season.
Project Info:
- Project Completed In: 180 day(s)
- Estimate of Square Footage: 40 sq. ft.
- Project Description:
We wanted to upgrade the kitchen in our ‘Hunting Camp’/seasonal home, and decided to create our own concrete countertops. Through much trial and error, testing of concrete and colors, we are finally done! Many of our test pieces have become park bench for ourselves and our friends.
Included are before, during and after pictures, plus one of the first park benches.
For the countertops, we used acid stain in Coffee Brown, Desert Amber and Seagrass. Through the testing, I learned to go easy on the Coffee Brown and to not be afraid of the Seagrass! I also learned to ‘just walk away’ and let the acid stain do its thing without overdoing it.
We love the final outcome and want to thank Direct Colors for their continued help and urgent assistance at each step along the way! Your customer service is top notch!
Personal Tips:
I would recommend doing small test pieces before a big project to figure out what color combinations and techniques you like. It is so important to know that, to a very large degree, you cannot control the final outcome, but with research, practice, and patience, anyone can do this. - Direct Colors Products Used:
1 Gal. Desert Amber DIY EverStain™ & AcquaSeal™ Satin Kit
1 Gal. Coffee Brown EverStain™
1 Gal. Seagrass EverStain™
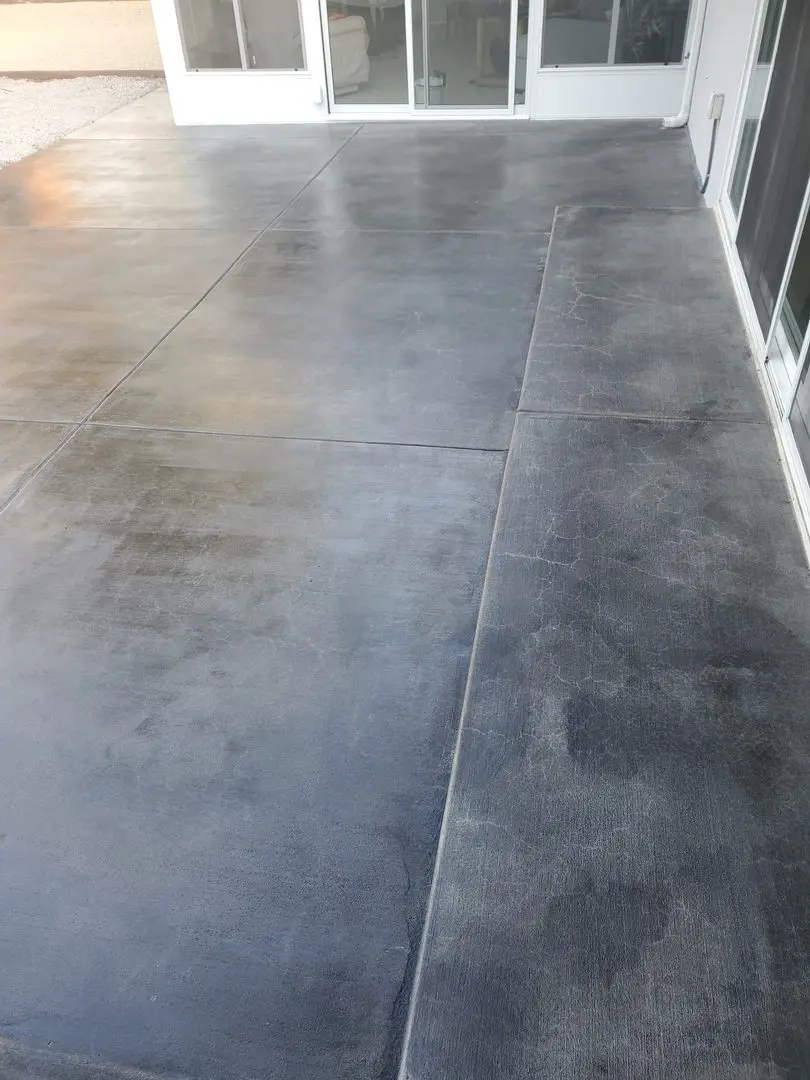
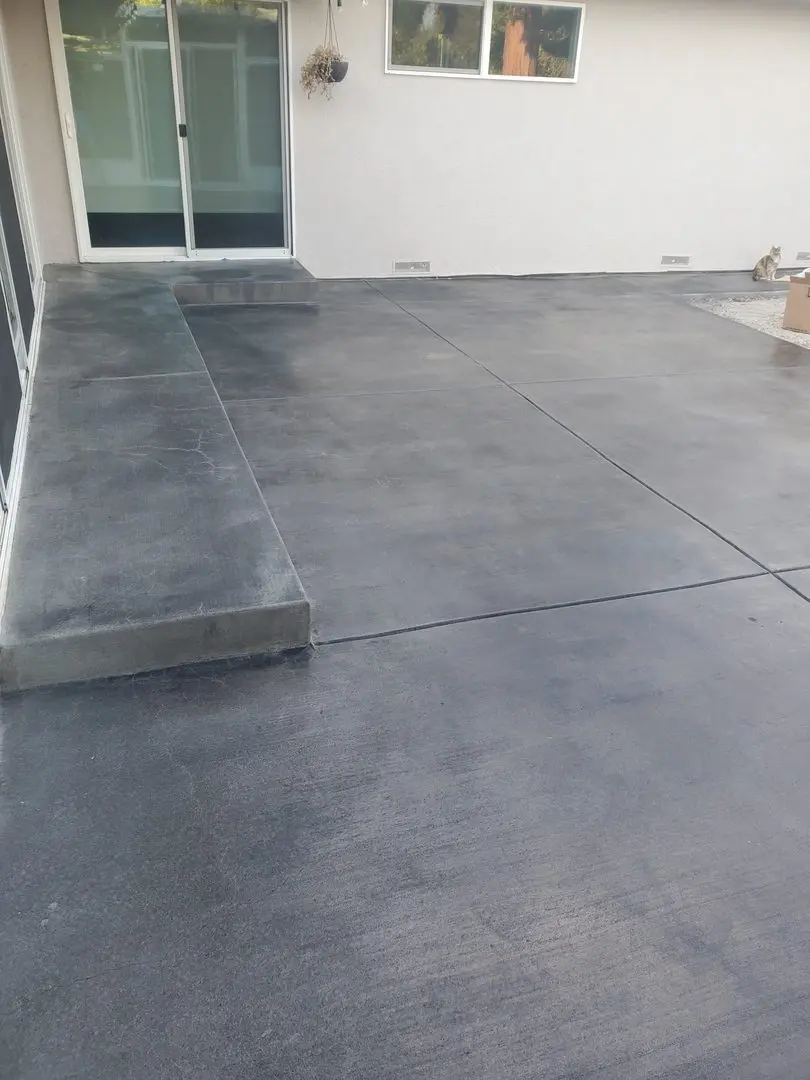
Pitch-Perfect Patio: Black is the New Backyard!
This back patio has been transformed with Black Antiquing stain, ushering in a sleek and modern vibe perfect for chic alfresco moments.
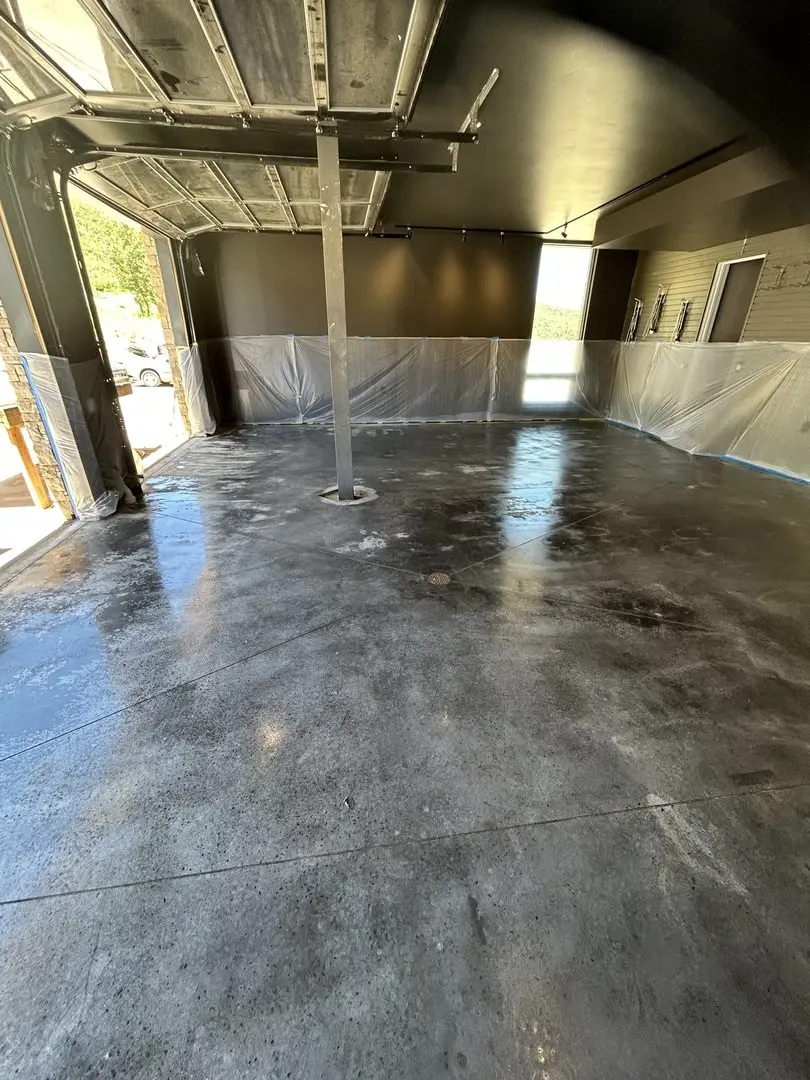
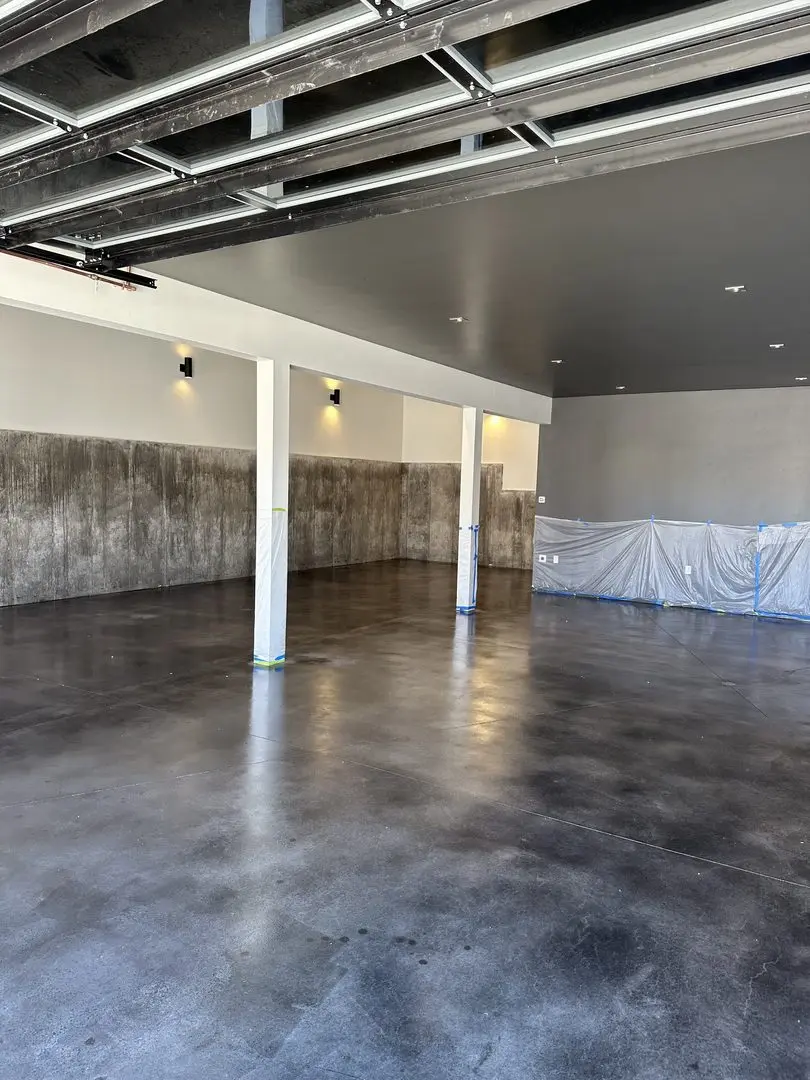
Monochrome Modernity: A Garage Floor Revamp
Breathing life into a standard garage floor, Antiquing™ Black Stain was employed to deliver a nuanced, mottled appearance, offering both style and simplicity to this modernized space.
Project Info:
- Project Completed In: 7 day(s)
- Estimate of Square Footage: 500 sq. ft.
- Project Description:
I created my own pavers using a mold and colored cement. However the cement color wasn’t entirely consistent or rich in color, so I decided to acid stain the blocks. - Personal Tips:
Spray the entire area with light color, go back and paint brush the dark areas. - Direct Colors Products Used:
Desert Amber, coffee brown, solvent based satin sealer.
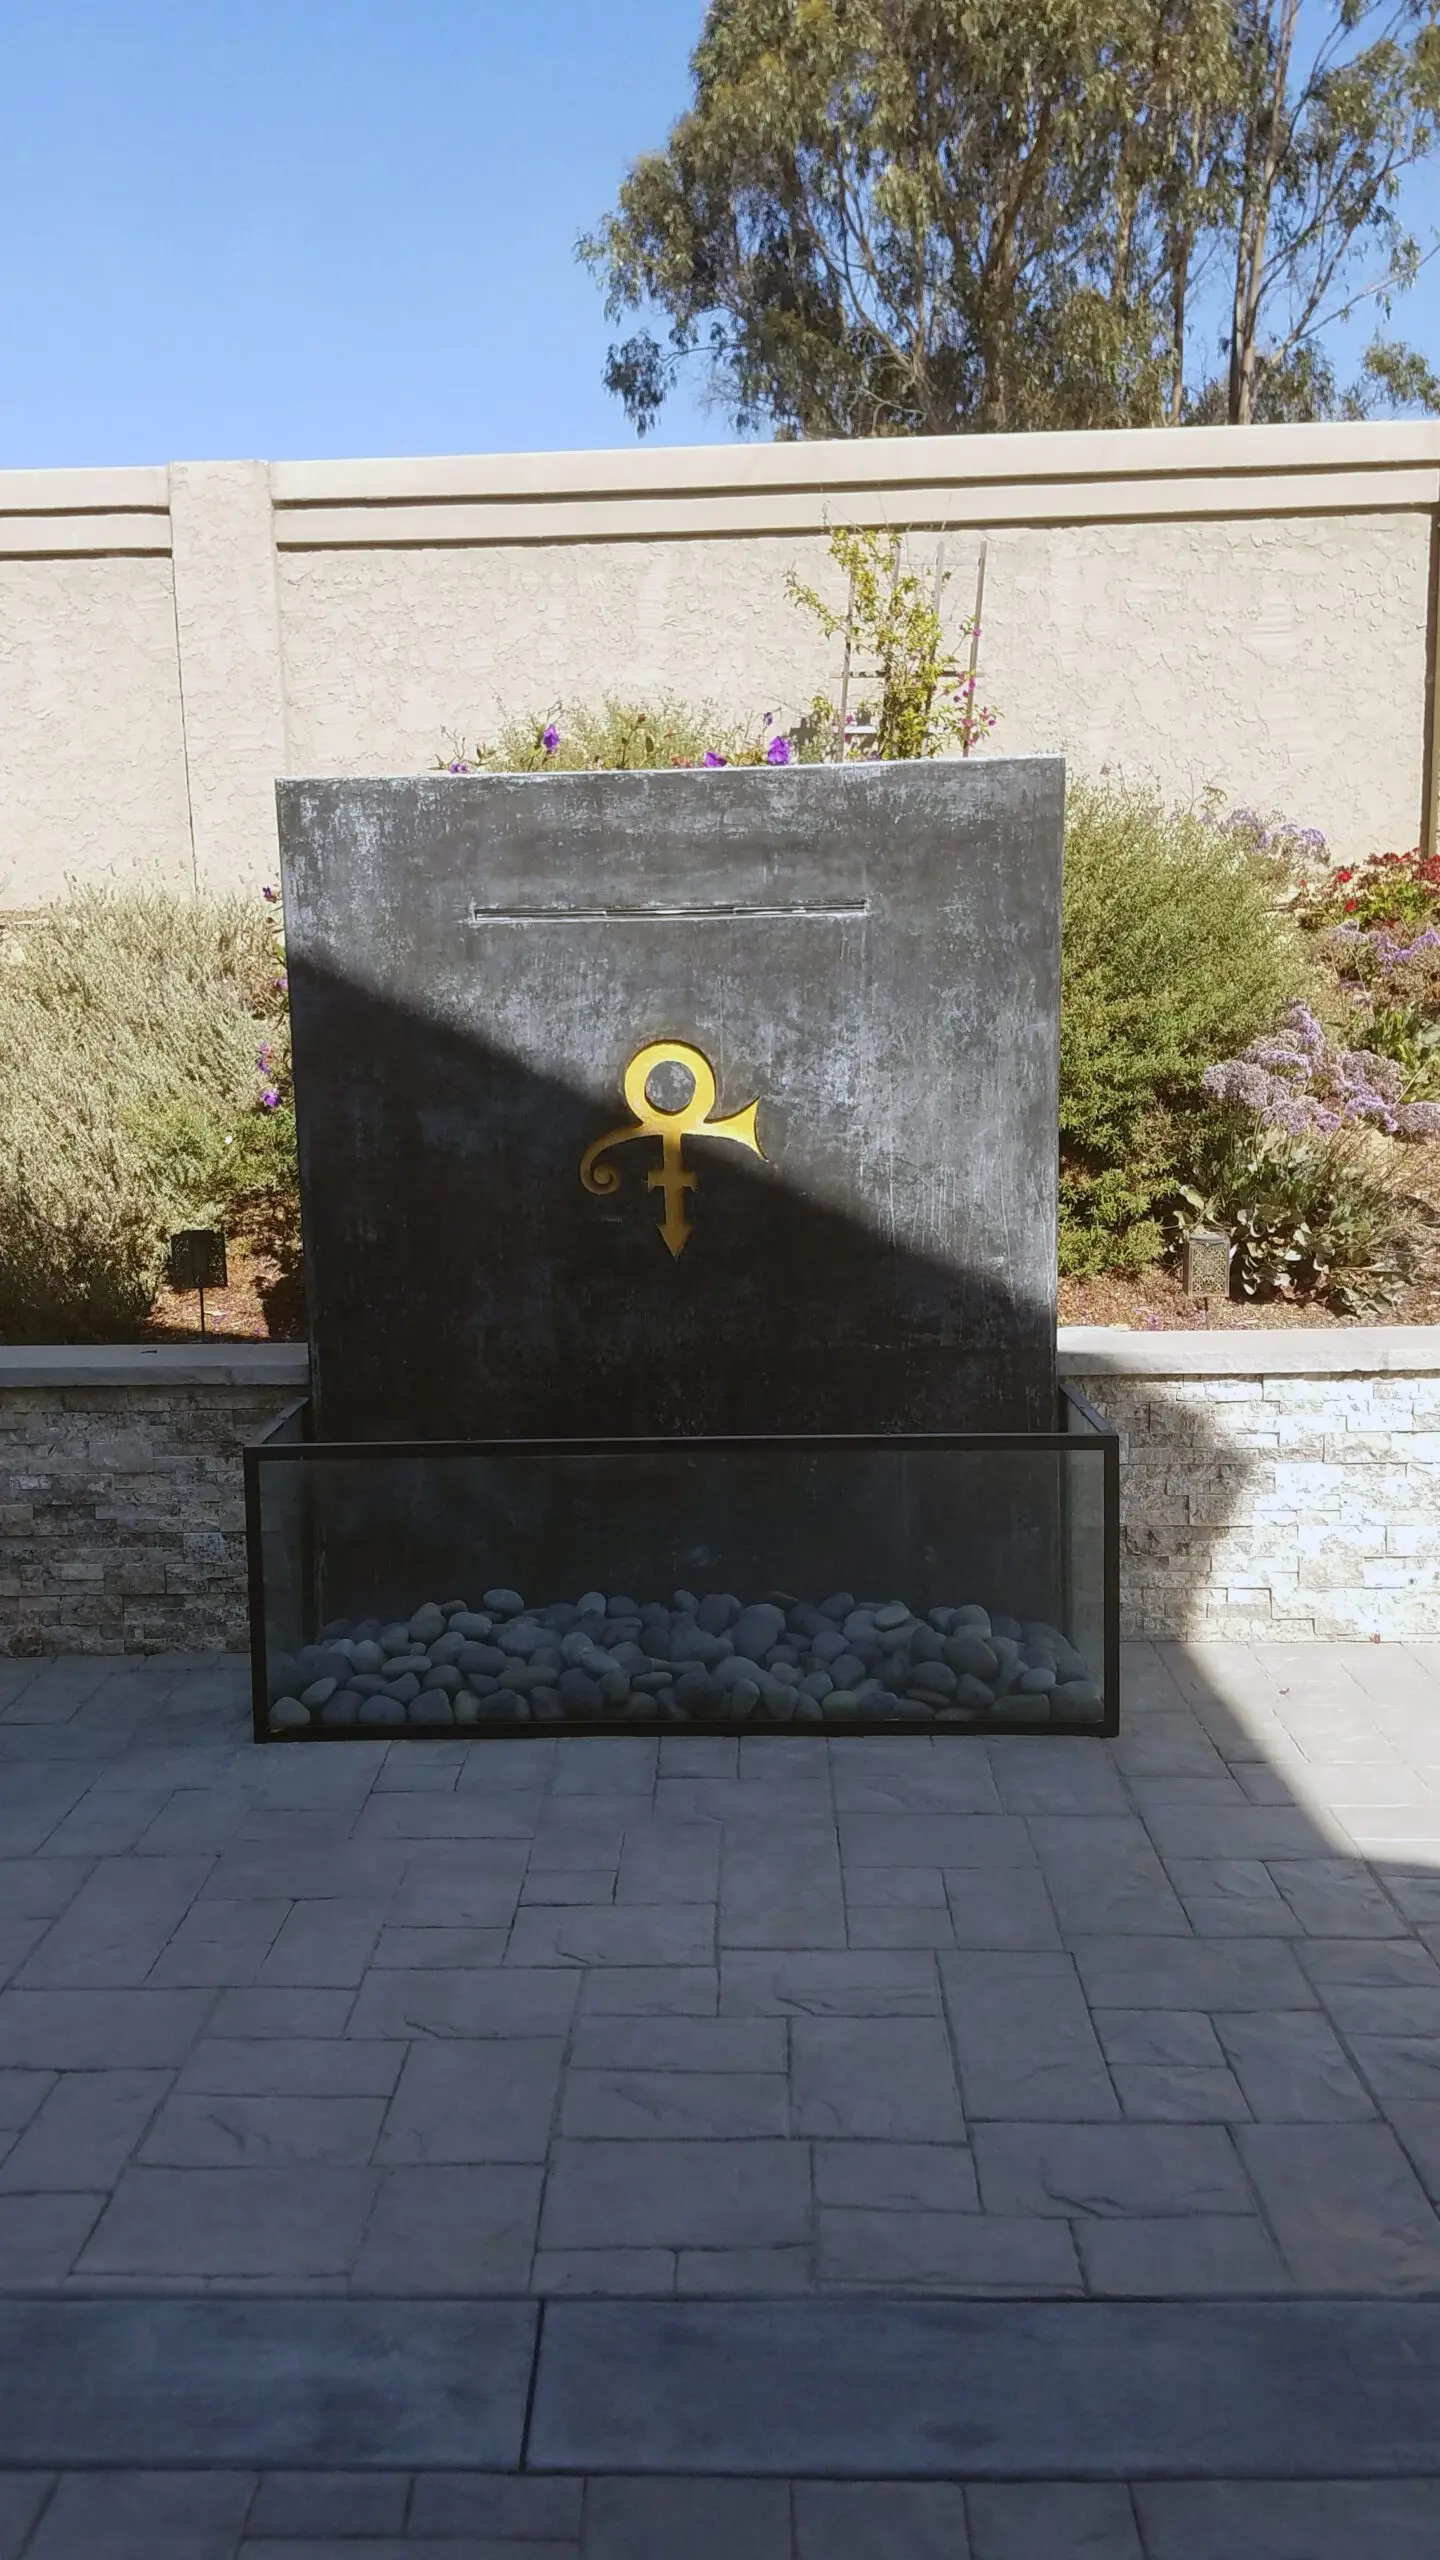
Purple Reign Revival: A Tribute in Black and Gold
Step into a world of musical nostalgia with our “Purple Reign Revival” project. This concrete patio, boasting a monument dedicated to the iconic singer Prince, was rejuvenated from its faded state using black ColorWave®. The square monument proudly displays Prince’s signature symbol, engraved in gold, standing as a stylish and striking tribute. Let the before and after photos inspire you to turn your own patio into a space that truly sings.

Project Info:
- Project Completed In: Over 3 months
- Estimate of Square Footage: 600 sq. ft.
- Project Description:
I recently bought a house built in 1978 that had very light carpet for the game room and 2 bedrooms. Having a dog and knowing I was going to use the game room as my art studio, I knew before I moved in that the carpet would have to go. From a cost perspective as well as aesthetic and functionality, I knew I wanted to go with stained concrete. I also wanted to use gold leaf on any cracks as my own version of kintsugi, the Japanese practice of repairing broken pottery covering the mended areas with gold as a way to honor the journey of the piece.But I had no idea what the concrete looked like under the carpet until AFTER I moved in and had to pull back the carpet for needed structural repairs. It was then I discovered a HUGE crack and long story short, I needed to get stitches to hold the slab together to protect against further movement. The concrete was so messed up as well that I began to second guess my decision to acid stain. But I had a vision and started in on the prep.My floor had everything wrong with it and prep was brutal. I tried mechanical and solvent methods to remove all the things that were on it, but was unsuccessful on the carpet pad adhesive, some of the high heat paint, and a few other things of questionable origin. Again, I began to despair of my decision because I couldn’t get it prepped to look as nice as the pics showed on the website. But there was no turning back at this point, so just did my best and went for it.And I must say, I worried too much! I did use multiple colors of stain which provided camouflage for some of the areas I struggled with and it turned out beautifully! I decided to highlight the stitched crack making it more dramatic. I added some acrylic paint after the first layer of sealer to even some areas out and also did the gold leaf on the crack.It’s a one of a kind floor that fully captures what happens in this room. I have art classes to help people process their brokenness, seeing their life from a higher perspective that shows how all the broken and hard can be something beautiful. It’s a great visual aid! - Personal Tips:
1. Do your best on prep, but don’t stress. I totally over thought it
2. Have a helper. I did it by myself and it was A LOT
3. I filled some divots with concrete patch and some with epoxy. They will both take the stain differently but I think I would do all patch next time as the epoxy is too shiny compared to the rest of the floor. - Direct Colors Products Used:
1 Gal. CitrusEtch™ Concrete Etcher
2 x 1 Gal. Desert Amber EverStain™ & AcquaSeal™ Satin Kit
1 Gal. AcquaSeal™ Satin Concrete Sealer
1 Qt. Seagrass EverStain™ Acid Stain
1 Qt. Coffee Brown EverStain™ Acid Stain
1 Qt. Malayan Buff EverStain™ Acid Stain
4 Oz. Black EverStain™ Acid Stain
2 x 1 Gal. ProWax Polish™ Satin - Other Products Used:
Acrylic art paint in Yellow Oxide, Raw Sienna, Burnt Sienna, and Burnt Umber that blended with my stain colors nicely.Imitation gold leaf sheets and special gold leaf adhesive and sealer (I would go with gold leaf paint if I did it again)
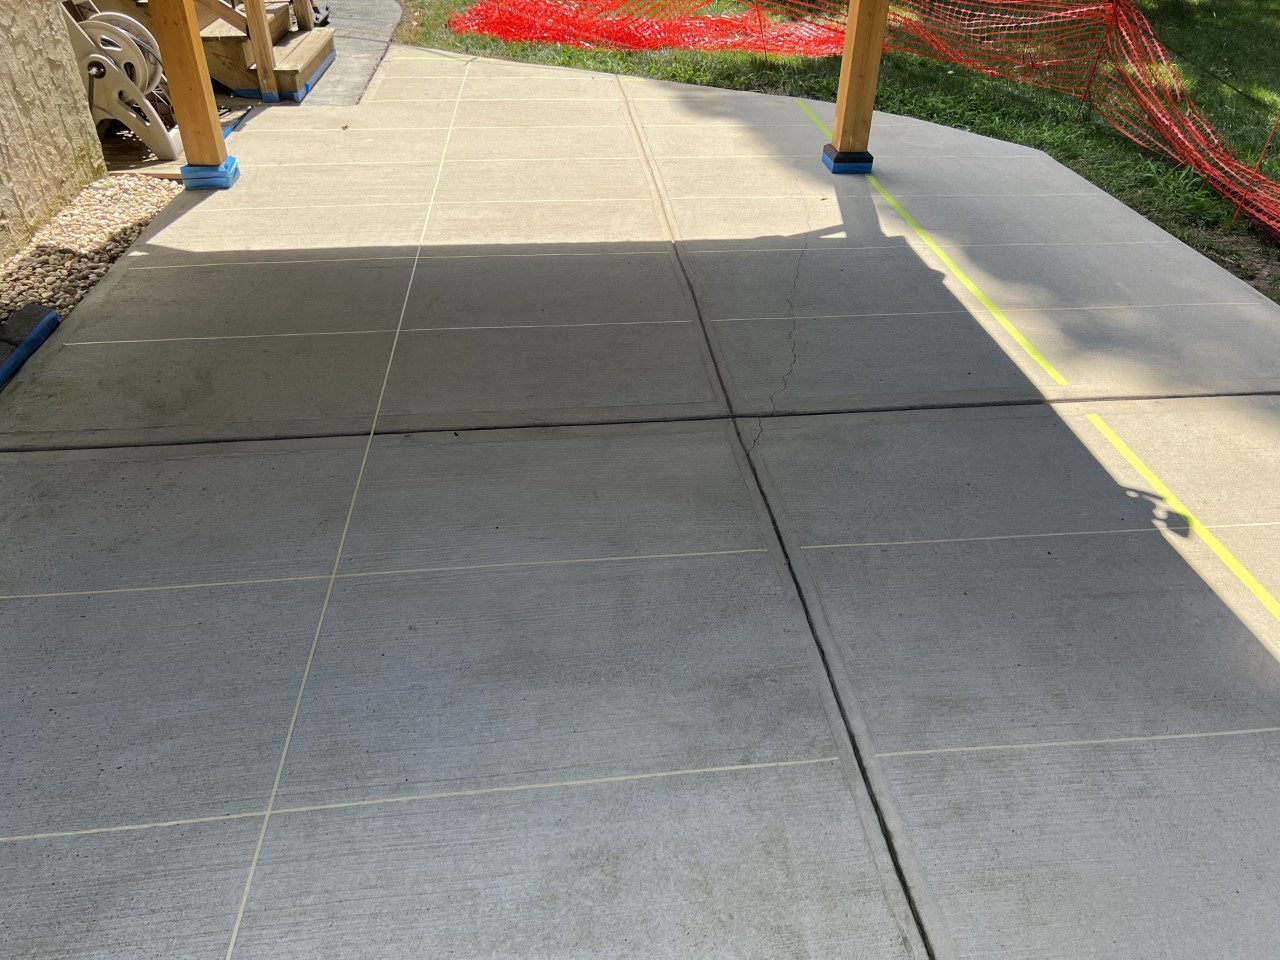
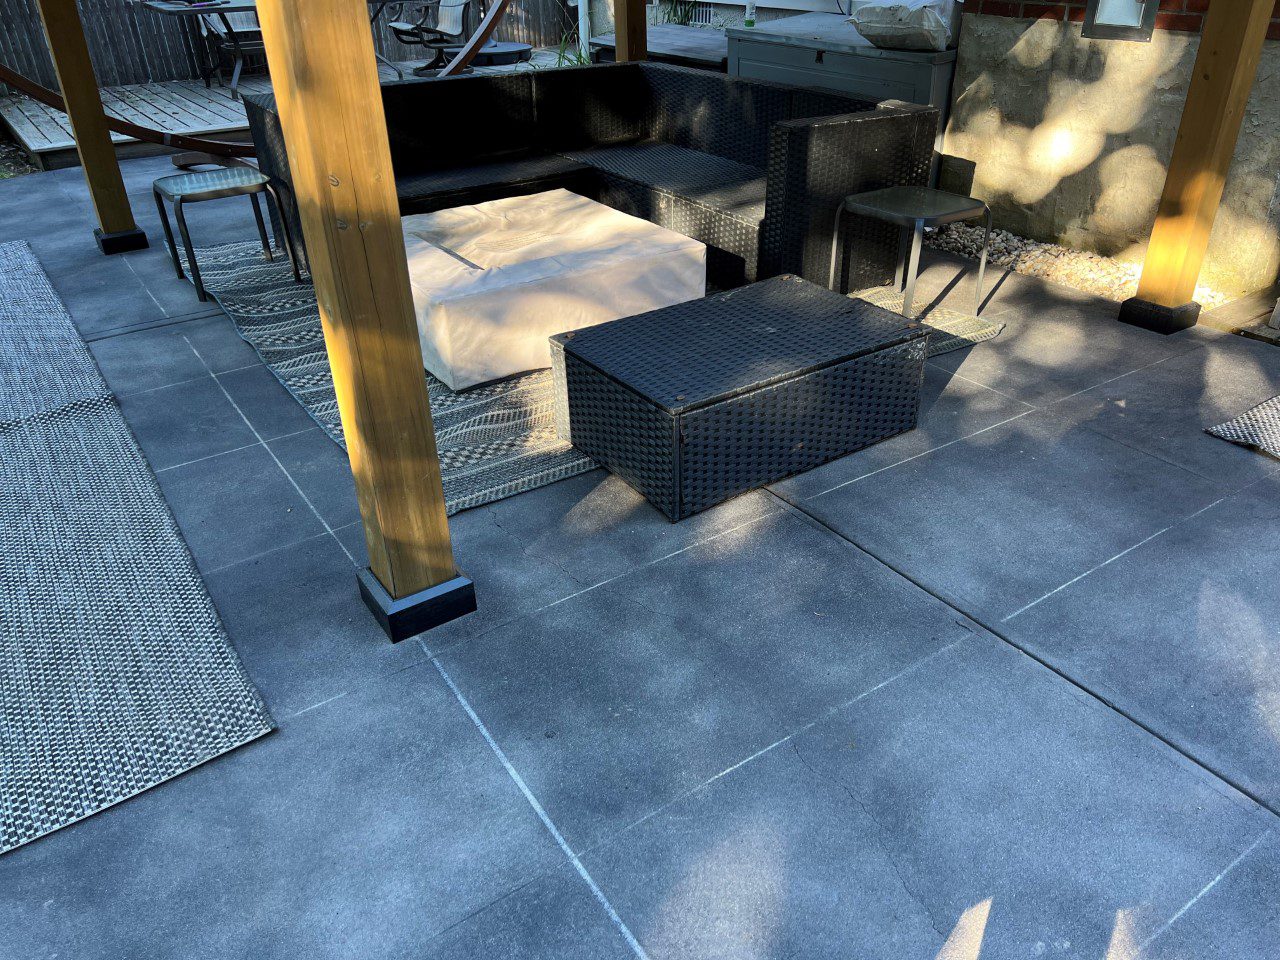
Mottled Black Stain Tile Design
This project features a covered scored concrete patio stained with a mottled black Antiquing™ stain. The homeowner used tape to create a large tile design on the concrete, resulting in a unique and eye-catching pattern. The mottled effect adds depth and texture to the surface, while the tile design adds a decorative touch.
Project Info:
- Project Completed In: Over 3 months
- Estimate of Square Footage: 600 sq. ft.
- Project Description:
I recently bought a house built in 1978 that had very light carpet for the game room and 2 bedrooms. Having a dog and knowing I was going to use the game room as my art studio, I knew before I moved in that the carpet would have to go. From a cost perspective as well as aesthetic and functionality, I knew I wanted to go with stained concrete. I also wanted to use gold leaf on any cracks as my own version of kintsugi, the Japanese practice of repairing broken pottery covering the mended areas with gold as a way to honor the journey of the piece.But I had no idea what the concrete looked like under the carpet until AFTER I moved in and had to pull back the carpet for needed structural repairs. It was then I discovered a HUGE crack and long story short, I needed to get stitches to hold the slab together to protect against further movement. The concrete was so messed up as well that I began to second guess my decision to acid stain. But I had a vision and started in on the prep.My floor had everything wrong with it and prep was brutal. I tried mechanical and solvent methods to remove all the things that were on it, but was unsuccessful on the carpet pad adhesive, some of the high heat paint, and a few other things of questionable origin. Again, I began to despair of my decision because I couldn’t get it prepped to look as nice as the pics showed on the website. But there was no turning back at this point, so just did my best and went for it.And I must say, I worried too much! I did use multiple colors of stain which provided camouflage for some of the areas I struggled with and it turned out beautifully! I decided to highlight the stitched crack making it more dramatic. I added some acrylic paint after the first layer of sealer to even some areas out and also did the gold leaf on the crack.It’s a one of a kind floor that fully captures what happens in this room. I have art classes to help people process their brokenness, seeing their life from a higher perspective that shows how all the broken and hard can be something beautiful. It’s a great visual aid! - Personal Tips:
1. Do your best on prep, but don’t stress. I totally over thought it
2. Have a helper. I did it by myself and it was A LOT
3. I filled some divots with concrete patch and some with epoxy. They will both take the stain differently but I think I would do all patch next time as the epoxy is too shiny compared to the rest of the floor. - Direct Colors Products Used:
1 Gal. CitrusEtch™ Concrete Etcher
2 x 1 Gal. Desert Amber EverStain™ & AcquaSeal™ Satin Kit
1 Gal. AcquaSeal™ Satin Concrete Sealer
1 Qt. Seagrass EverStain™ Acid Stain
1 Qt. Coffee Brown EverStain™ Acid Stain
1 Qt. Malayan Buff EverStain™ Acid Stain
4 Oz. Black EverStain™ Acid Stain
2 x 1 Gal. ProWax Polish™ Satin - Other Products Used:
Acrylic art paint in Yellow Oxide, Raw Sienna, Burnt Sienna, and Burnt Umber that blended with my stain colors nicely.Imitation gold leaf sheets and special gold leaf adhesive and sealer (I would go with gold leaf paint if I did it again)
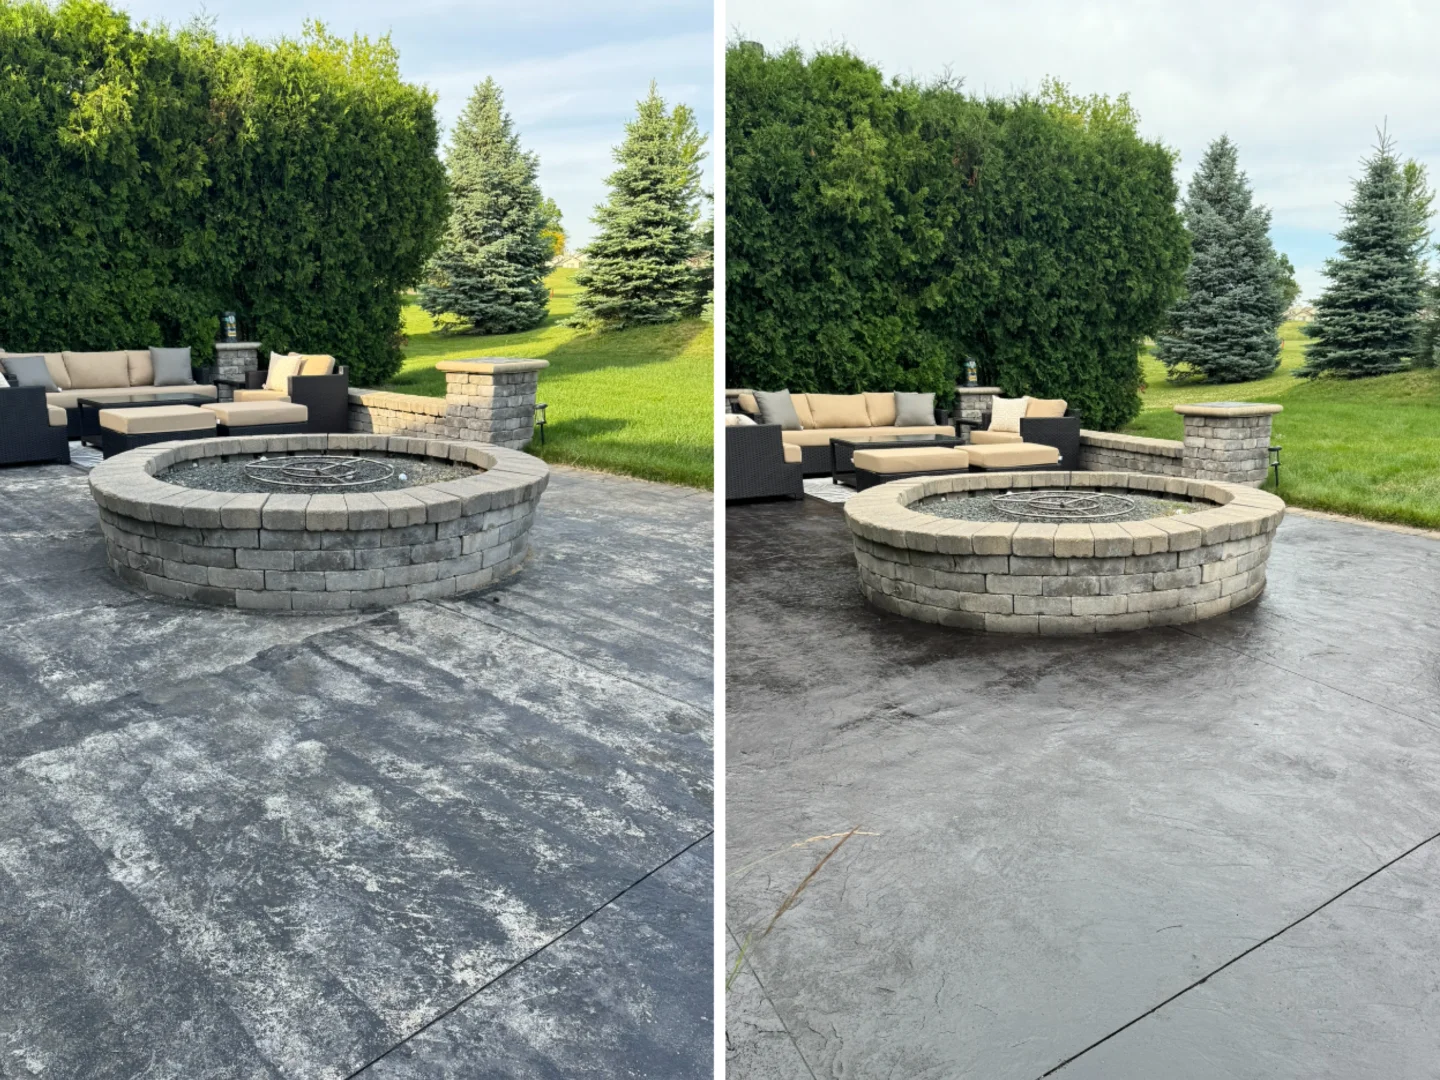
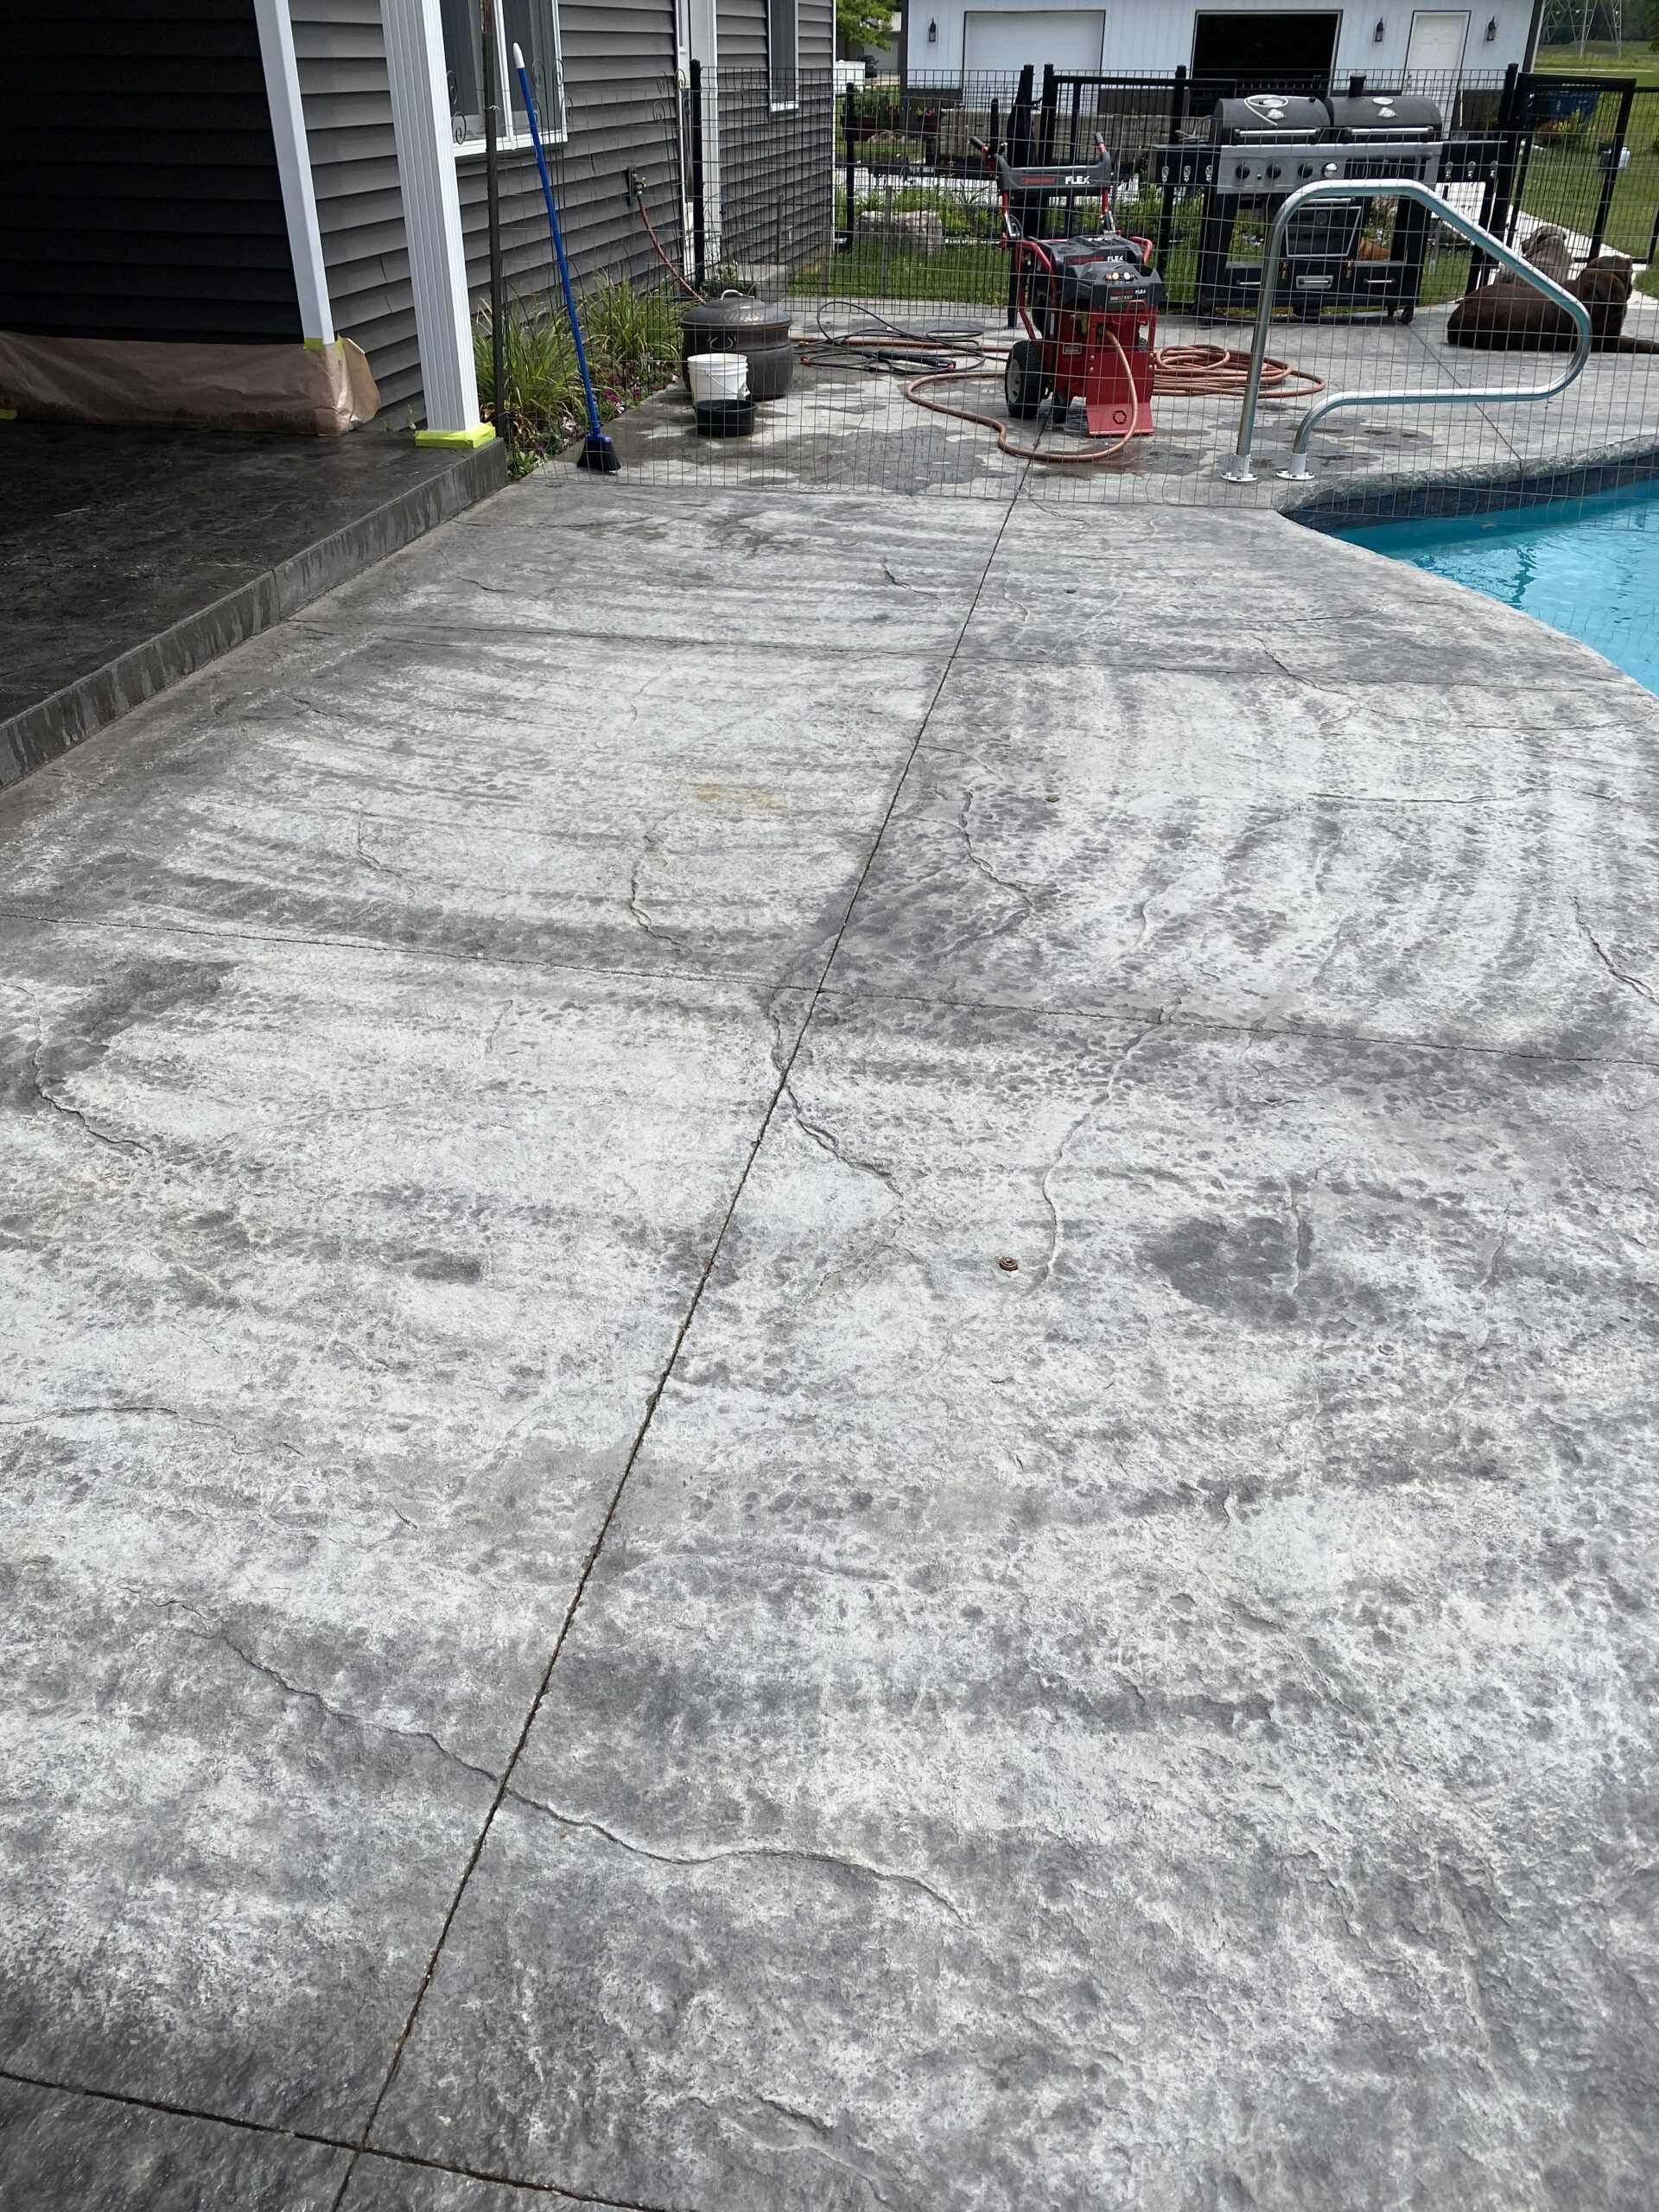
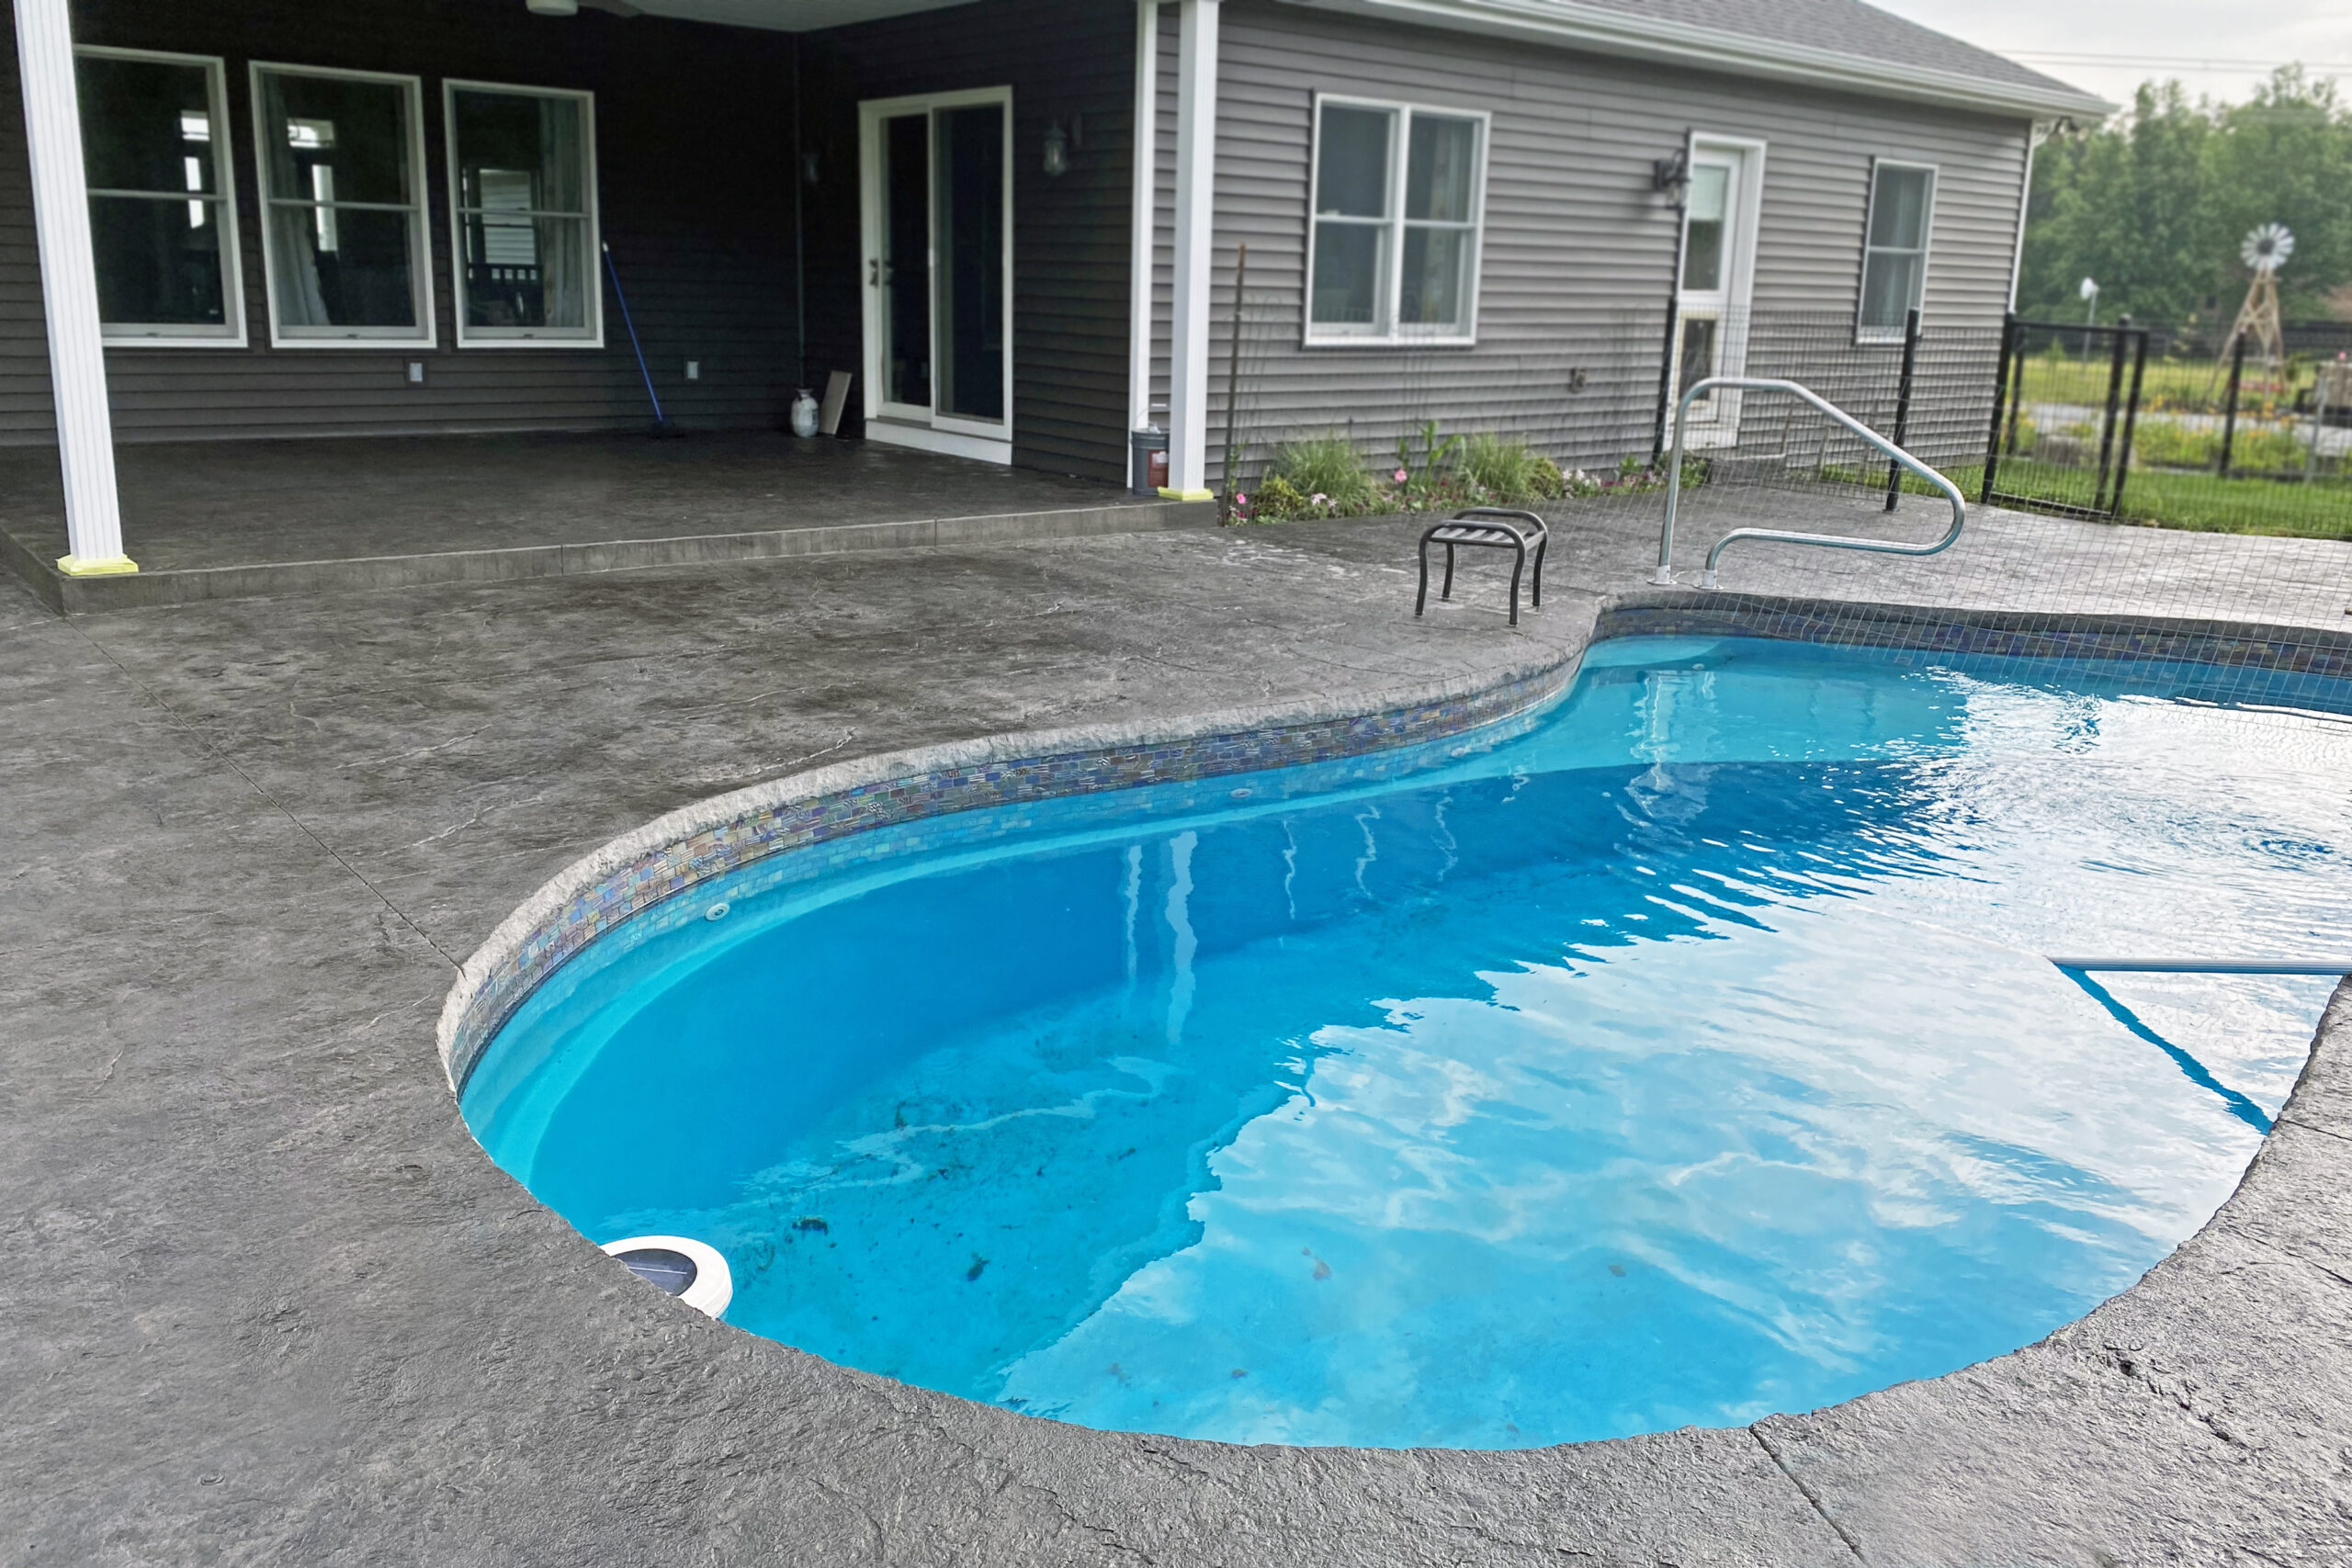
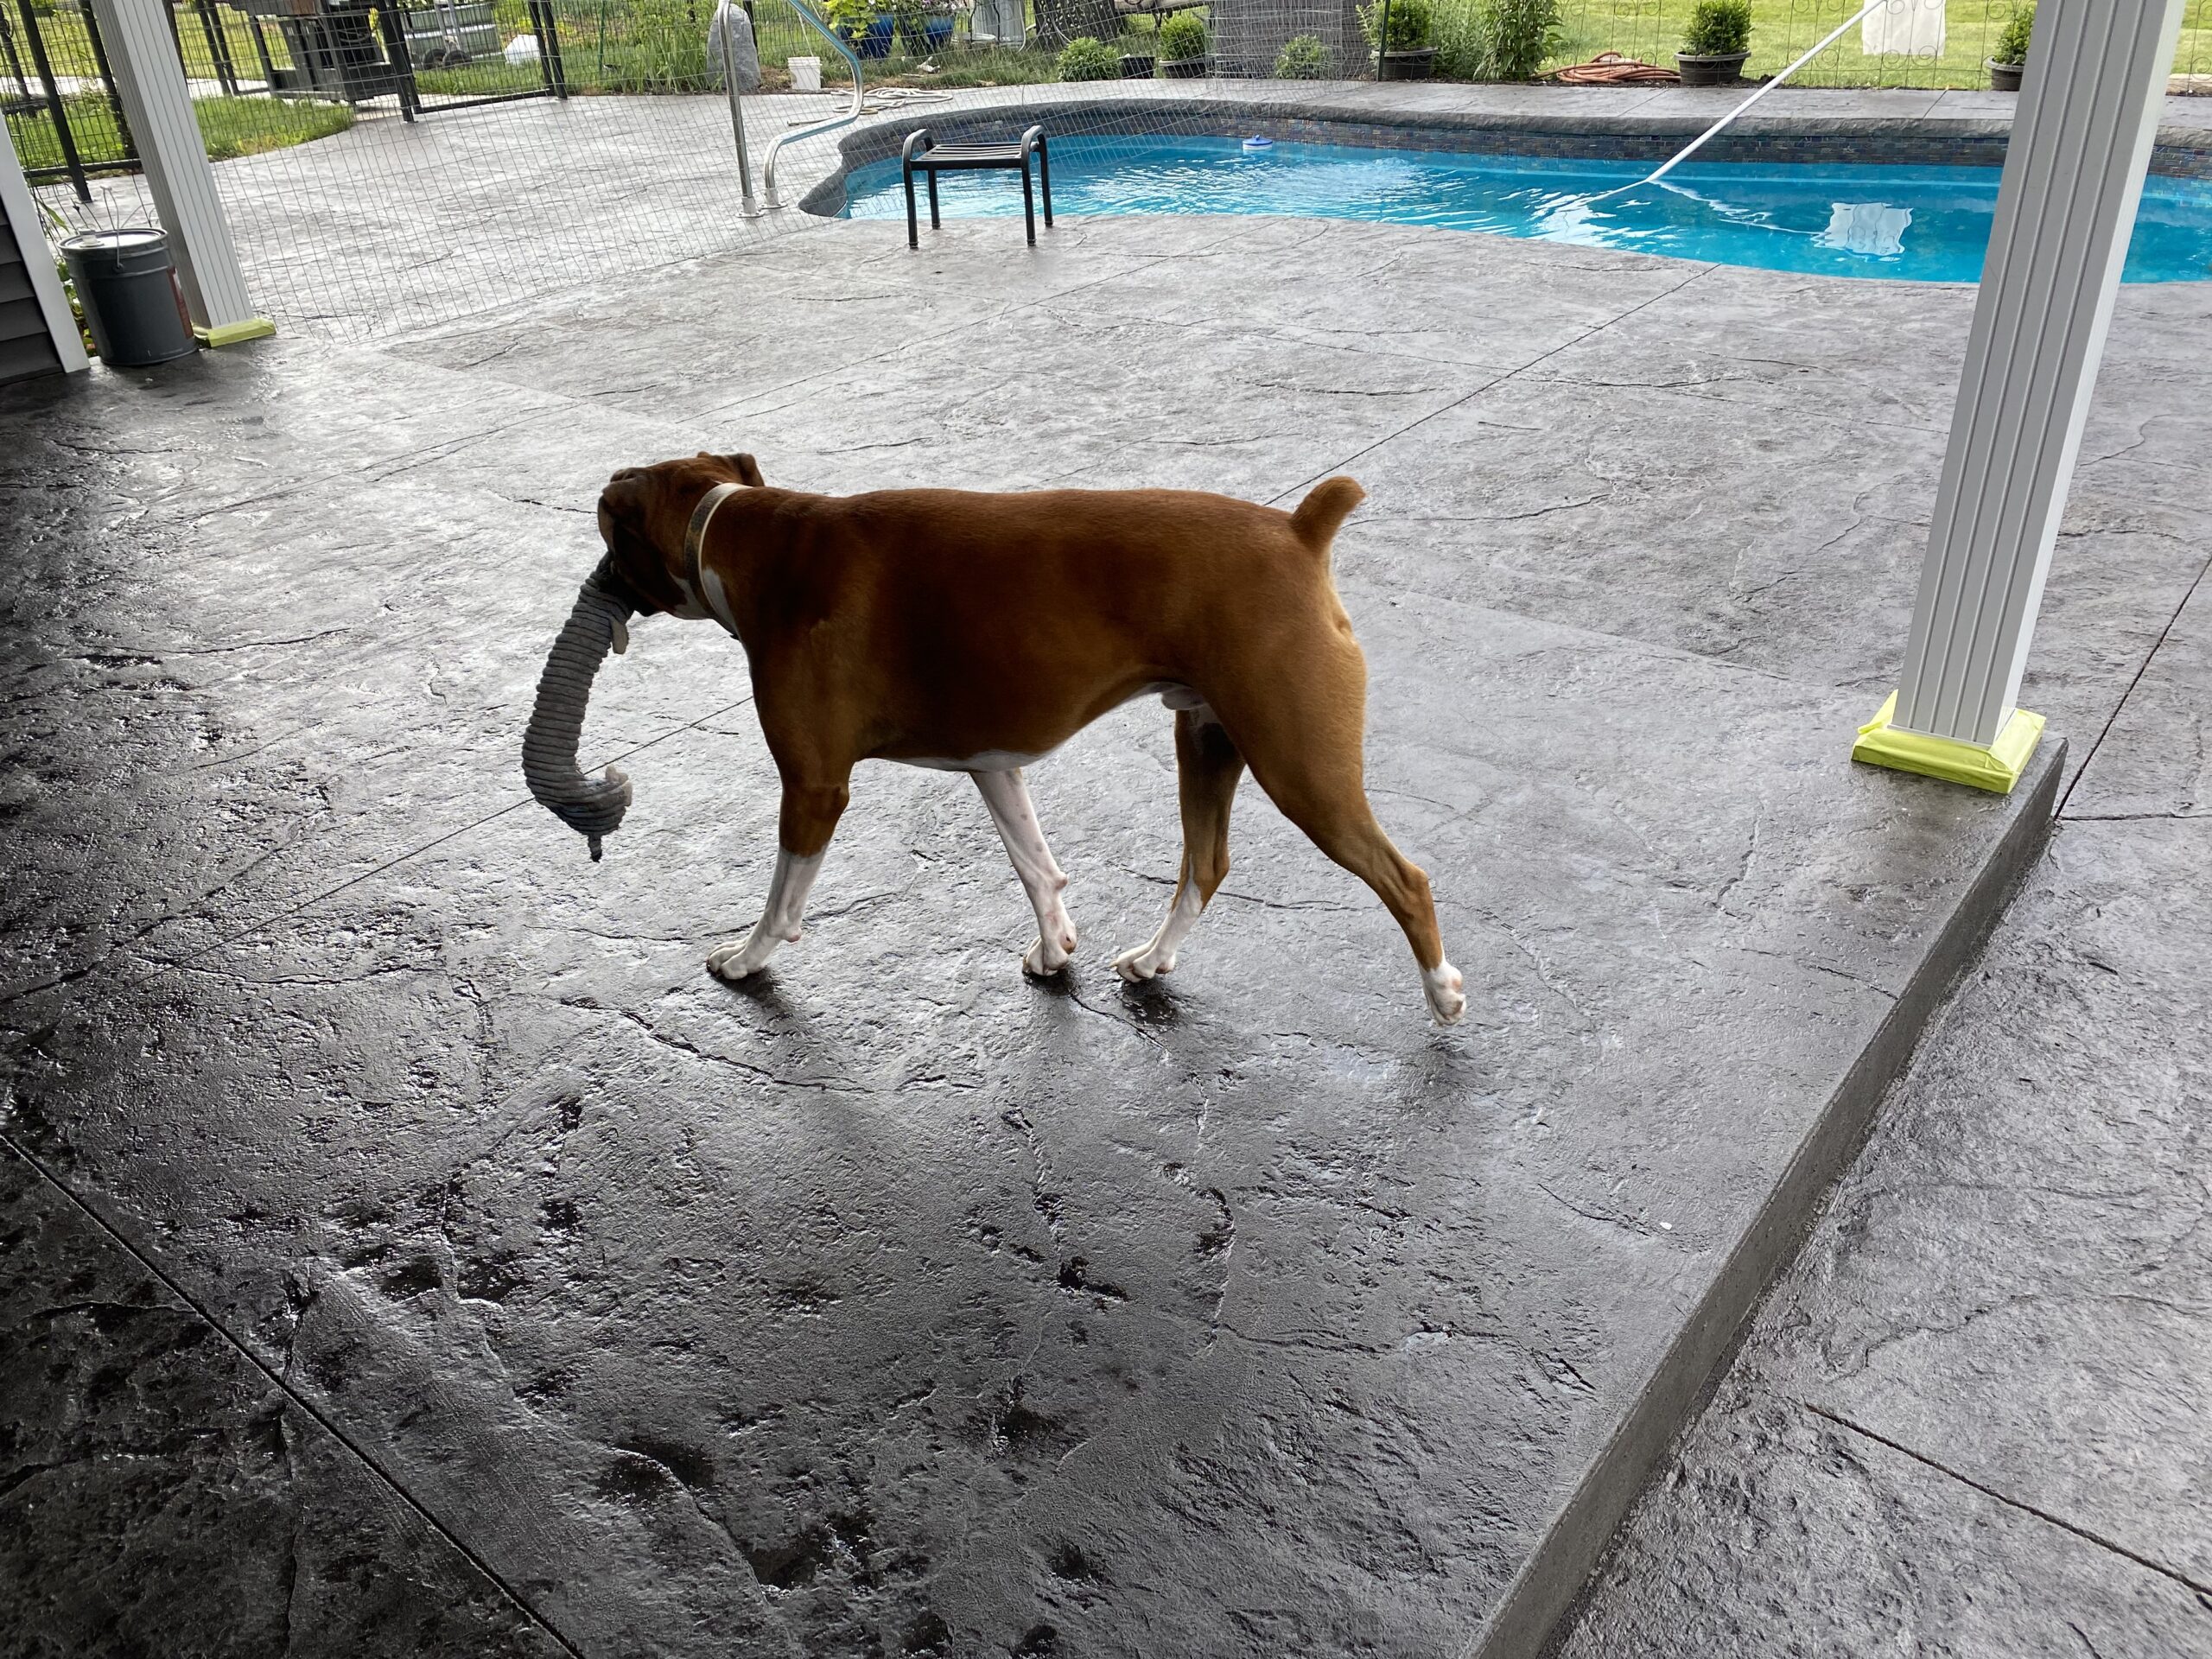
Saving a Stamped Concrete Surface with a DIY Solution
This DIY project features a homeowner who encountered a problem with their original stamped concrete surface. Due to hasty installation and power washing, the dark charcoal color and sealer were destroyed, leaving unsightly streaks. In search of a solution, they discovered a DIY product that saved their stamped concrete surface.
Project Info:
- Project Completed In: 180 day(s)
- Estimate of Square Footage: 40 sq. ft.
- Project Description:
We wanted to upgrade the kitchen in our ‘Hunting Camp’/seasonal home, and decided to create our own concrete countertops. Through much trial and error, testing of concrete and colors, we are finally done! Many of our test pieces have become park bench for ourselves and our friends.
Included are before, during and after pictures, plus one of the first park benches.
For the countertops, we used acid stain in Coffee Brown, Desert Amber and Seagrass. Through the testing, I learned to go easy on the Coffee Brown and to not be afraid of the Seagrass! I also learned to ‘just walk away’ and let the acid stain do its thing without overdoing it.
We love the final outcome and want to thank Direct Colors for their continued help and urgent assistance at each step along the way! Your customer service is top notch!
Personal Tips:
I would recommend doing small test pieces before a big project to figure out what color combinations and techniques you like. It is so important to know that, to a very large degree, you cannot control the final outcome, but with research, practice, and patience, anyone can do this. - Direct Colors Products Used:
1 Gal. Desert Amber DIY EverStain™ & AcquaSeal™ Satin Kit
1 Gal. Coffee Brown EverStain™
1 Gal. Seagrass EverStain™
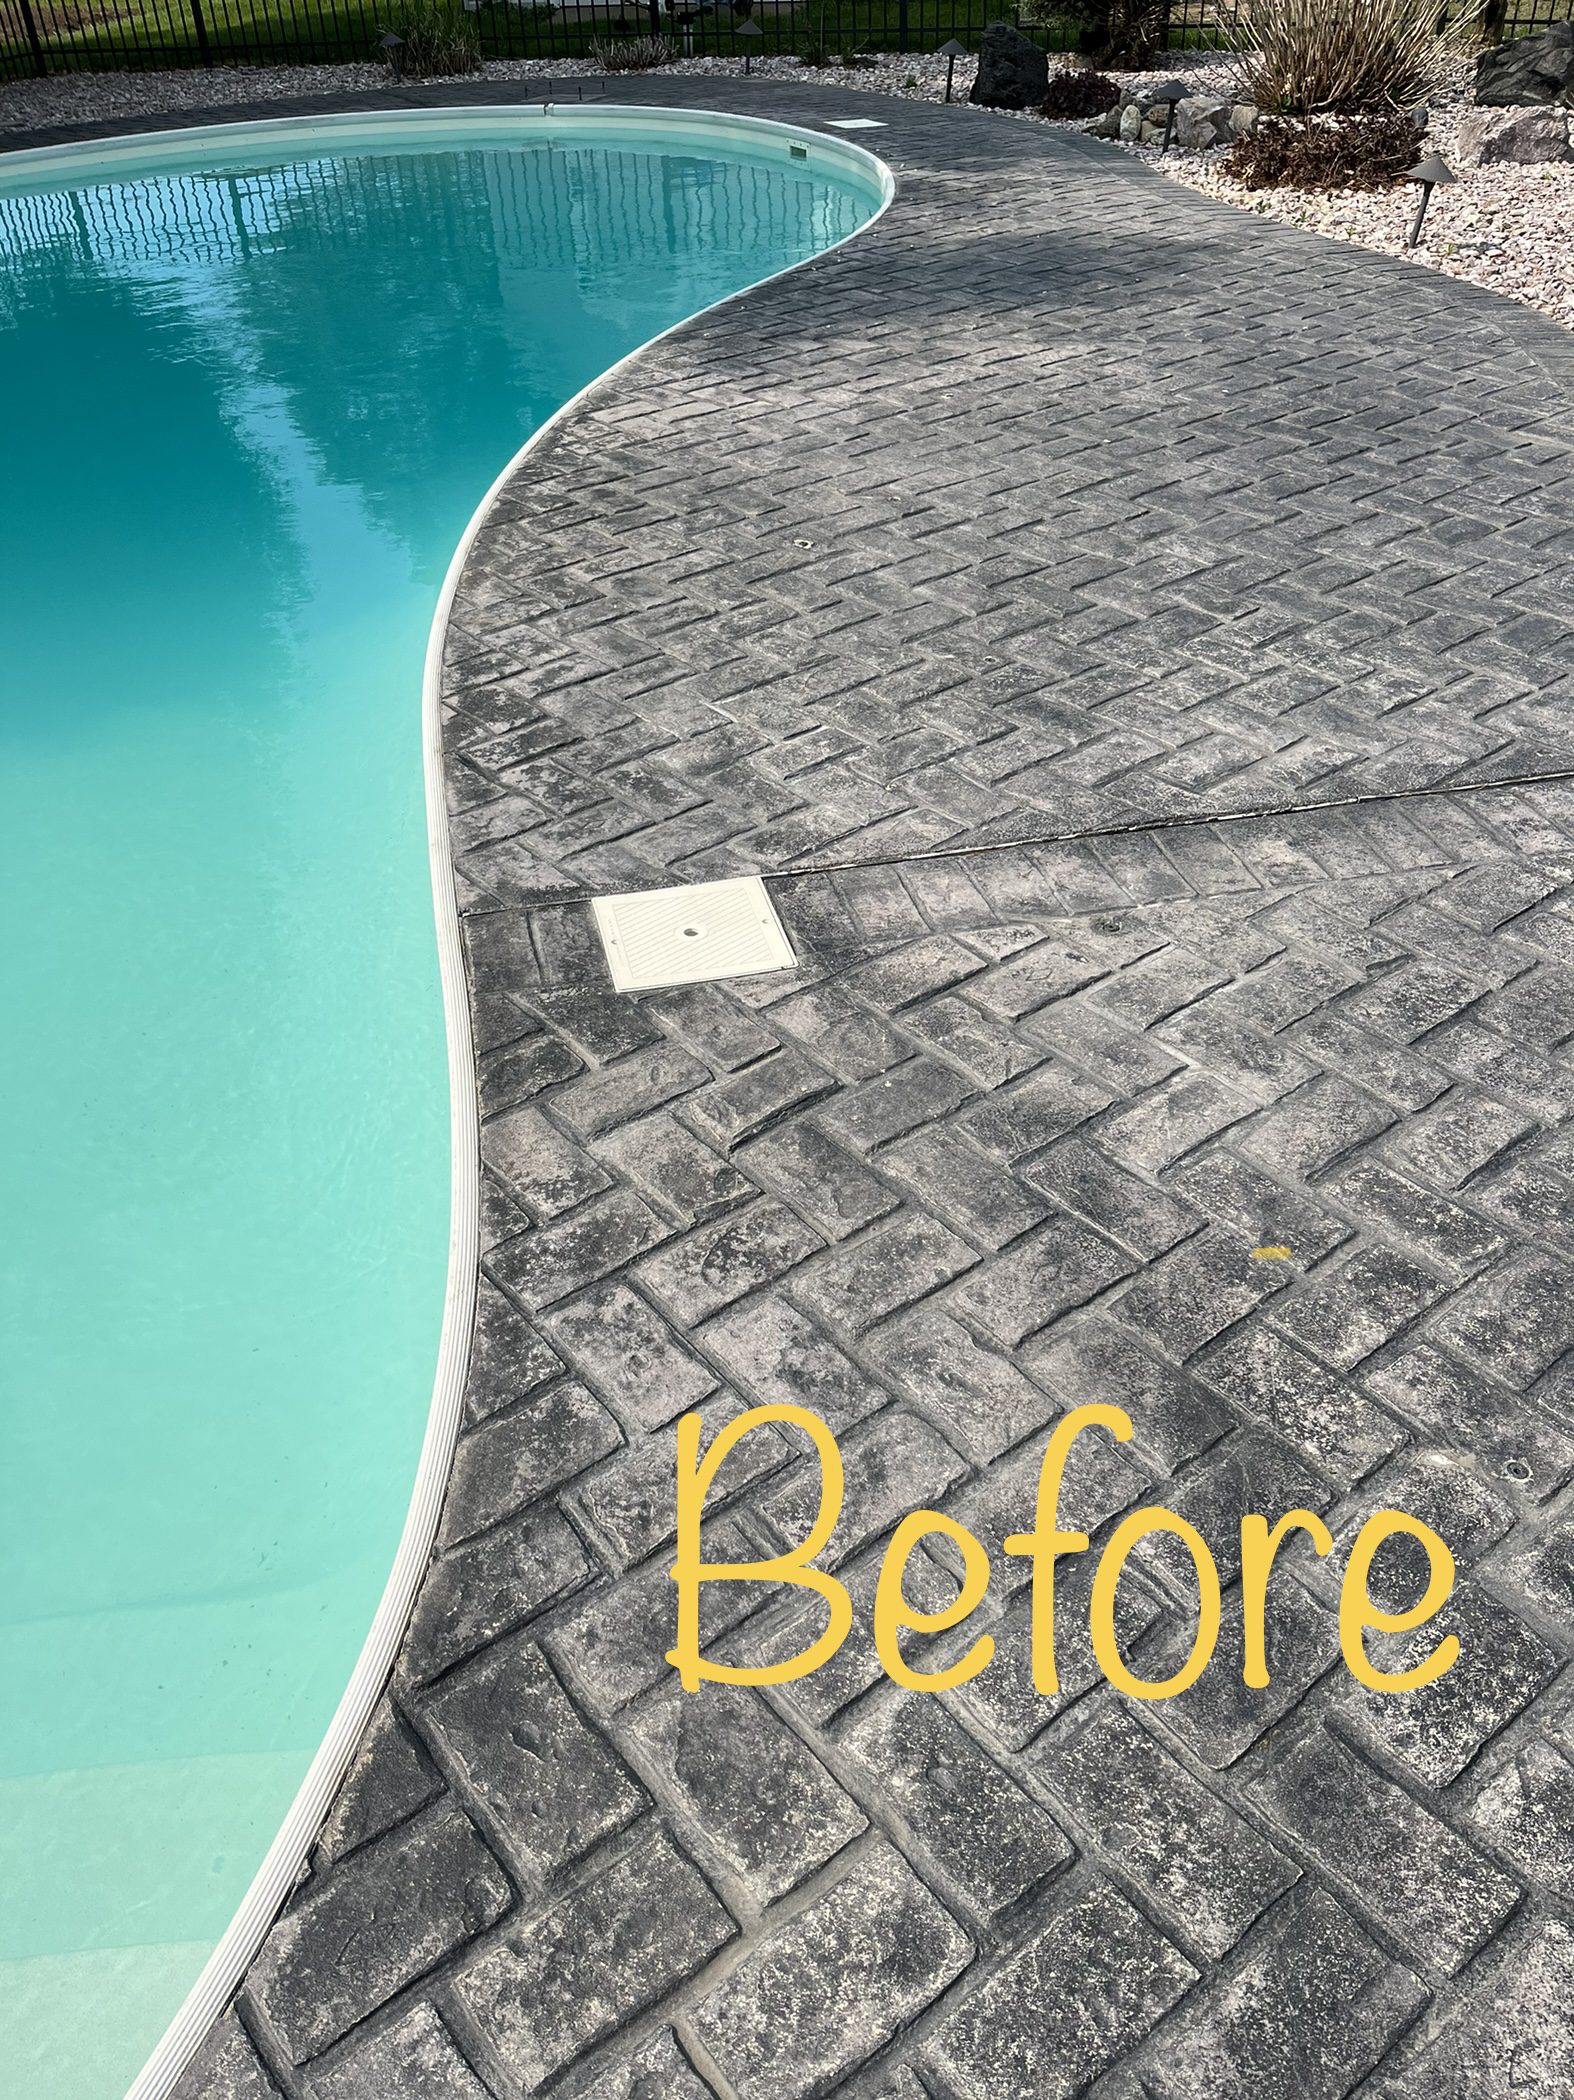
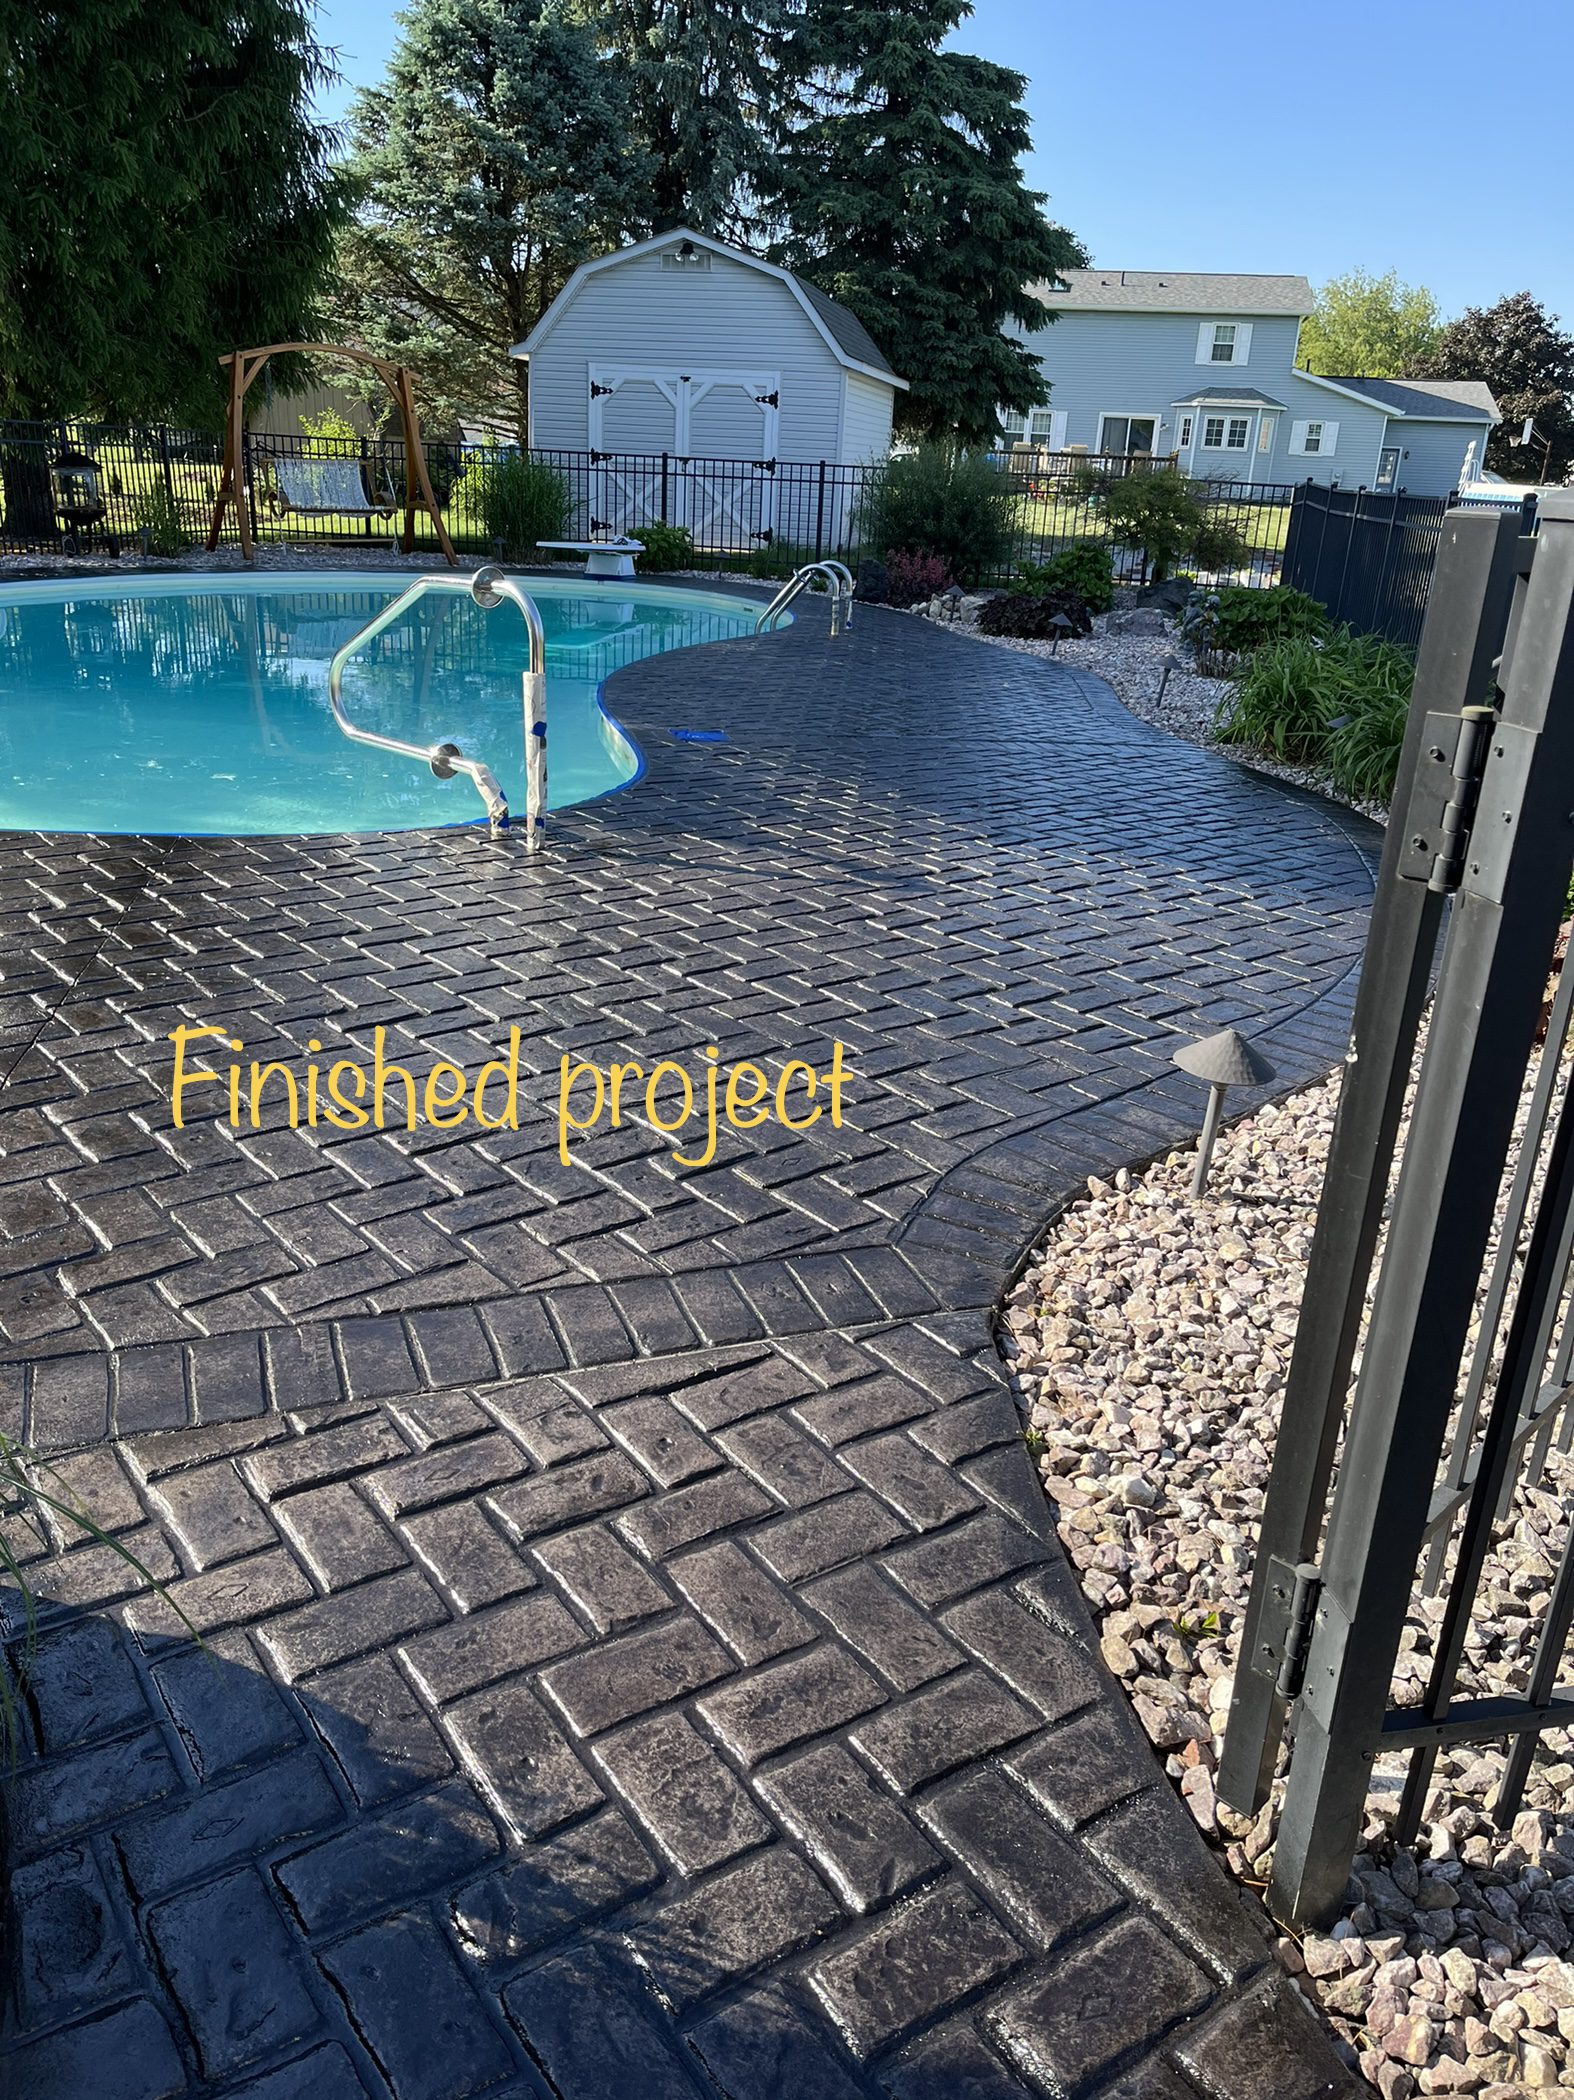
Reviving Neglected Stamped Concrete Pool Deck
This DIY project features a family that revived their old stamped concrete pool area with Antiquing™ stain and sealer. After letting the area go for 19 years with only one big box store sealer application, they decided to take matters into their own hands.
Project Info:
- Project Completed In: 180 day(s)
- Estimate of Square Footage: 40 sq. ft.
- Project Description:
We wanted to upgrade the kitchen in our ‘Hunting Camp’/seasonal home, and decided to create our own concrete countertops. Through much trial and error, testing of concrete and colors, we are finally done! Many of our test pieces have become park bench for ourselves and our friends.
Included are before, during and after pictures, plus one of the first park benches.
For the countertops, we used acid stain in Coffee Brown, Desert Amber and Seagrass. Through the testing, I learned to go easy on the Coffee Brown and to not be afraid of the Seagrass! I also learned to ‘just walk away’ and let the acid stain do its thing without overdoing it.
We love the final outcome and want to thank Direct Colors for their continued help and urgent assistance at each step along the way! Your customer service is top notch!
Personal Tips:
I would recommend doing small test pieces before a big project to figure out what color combinations and techniques you like. It is so important to know that, to a very large degree, you cannot control the final outcome, but with research, practice, and patience, anyone can do this. - Direct Colors Products Used:
1 Gal. Desert Amber DIY EverStain™ & AcquaSeal™ Satin Kit
1 Gal. Coffee Brown EverStain™
1 Gal. Seagrass EverStain™
If you’re looking to choose the best stain for your pool concrete deck, check out our comprehensive guide titled “How To Choose The Best Pool Concrete Deck Stain“. This guide provides all the information you need to make an informed decision, including factors to consider, types of stains available, and application tips. Read on to ensure your pool area is both beautiful and functional.
For more concrete stained patio ideas, head over to “Stained Concrete Patio Ideas: Before And Afters, Tips, And Customer Stories“. This resource is packed with plenty of inspiration, tips, and customer stories to help you plan and execute your dream patio. Whether you’re looking for a bold and vibrant statement or a more subdued and natural look, you’ll find plenty of ideas and guidance here.
Interested in projects specifically using acid stain? Explore our dedicated Black EverStain™ Acid Stain Project Gallery for inspiration
