Awesome DIY Makeovers with EverStain’s Desert Amber
Note: Remember, folks, these projects are here to spark your imagination and get those creative juices flowing! But keep in mind, your results might be a bit different. The condition of your concrete can make a big difference in how the Desert Amber stain turns out.
By Justin Richardson
Rugged Retreat: Garage Transformation with Desert Amber, Cola, and Coffee Brown
This garage has taken on a whole new identity! With Desert Amber, Cola, and Coffee Brown acid stains, what was once a mere storage space has become a rustic outdoorsman’s man cave. The finish is sealed with high gloss AcquaSeal™ and completed with a Gloss ProWax Polish™, lending a professional, polished finish. For a closer look at how this transformation was accomplished, check out the blog, “From Garage to Outdoorsman’s Paradise: A DIY Acid Stain Makeover“.
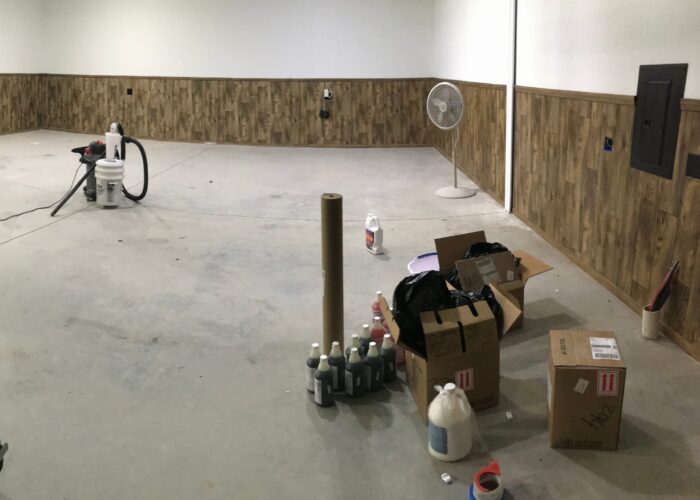
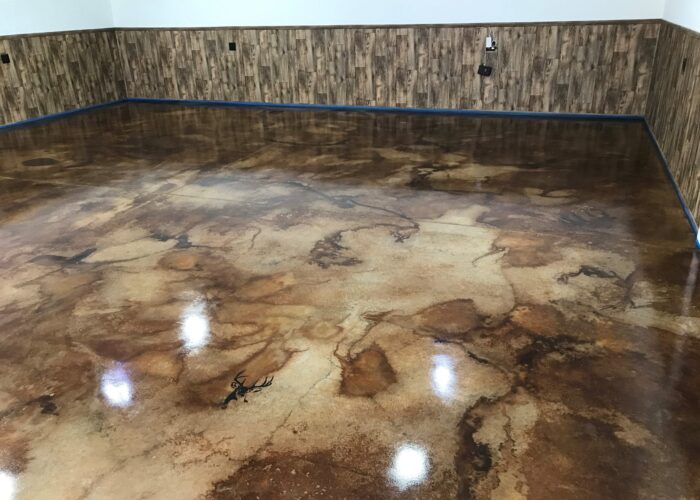
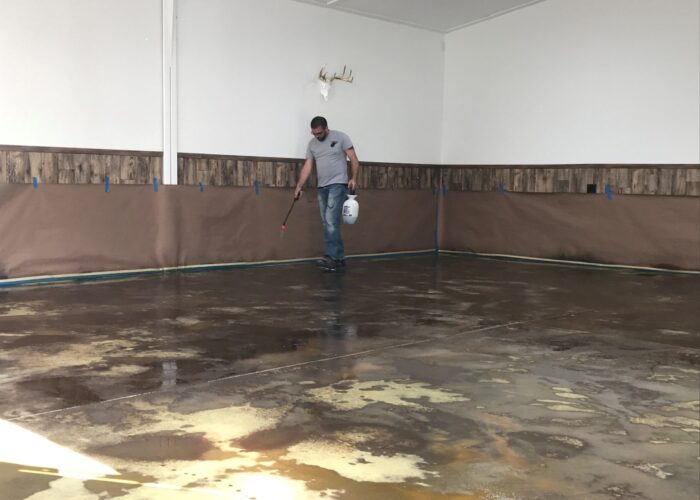
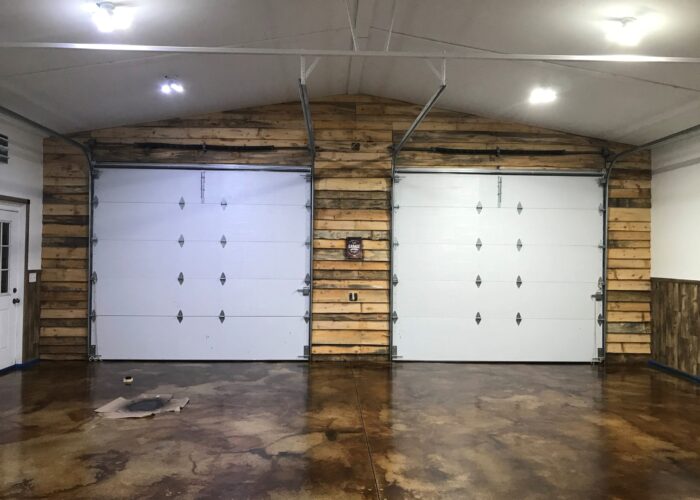
Please be aware that each photo in this gallery showcases projects accomplished with our EverStain™ Acid Stain and is provided by actual customers, serving as a source of inspiration. However, since EverStain™ is semi-transparent, the final appearance of your project will be influenced by the initial color and condition of your concrete surface, and thus, your final results might vary. For the best results, we strongly recommend performing a small test on your specific surface before applying the stain to the entire project to ensure the final look aligns with your expectations.
Basement Makeover: DIY Magic with Desert Amber and Coffee Brown
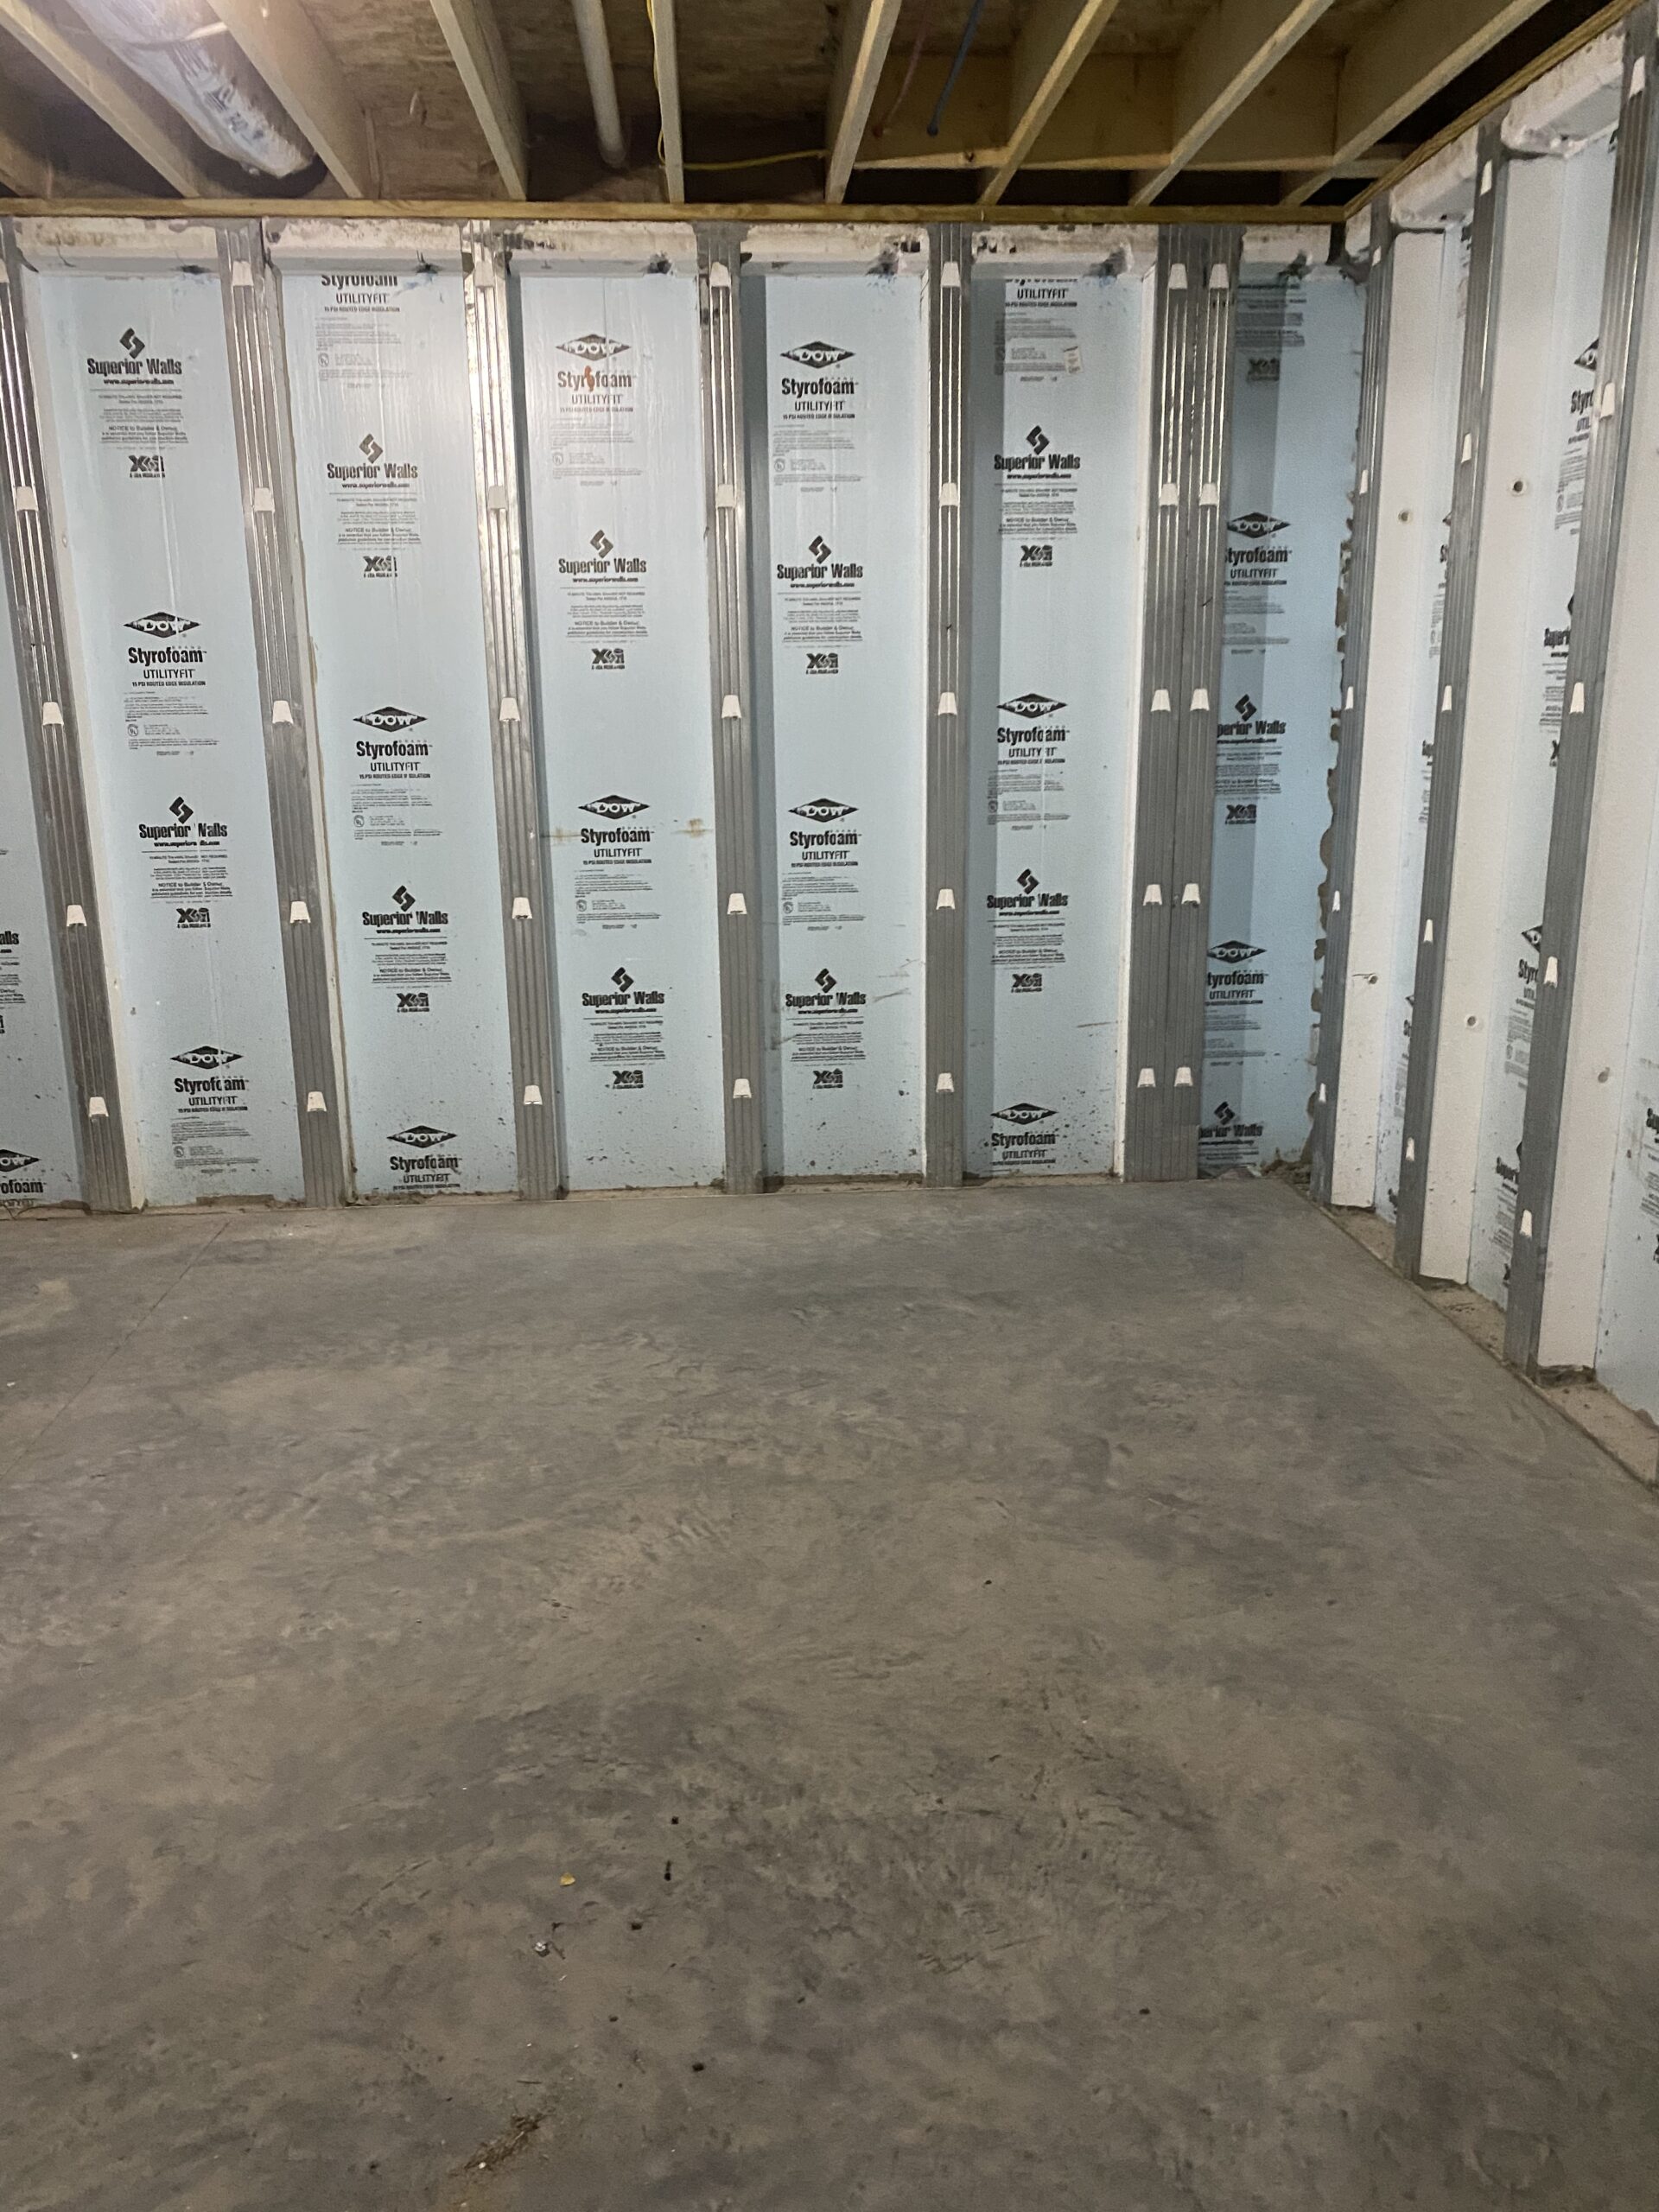
Check out this awesome DIY basement transformation! For more detailed information on this project, check out the blog, “Make Concrete Floors Look Like Leather With Acid Stains.”
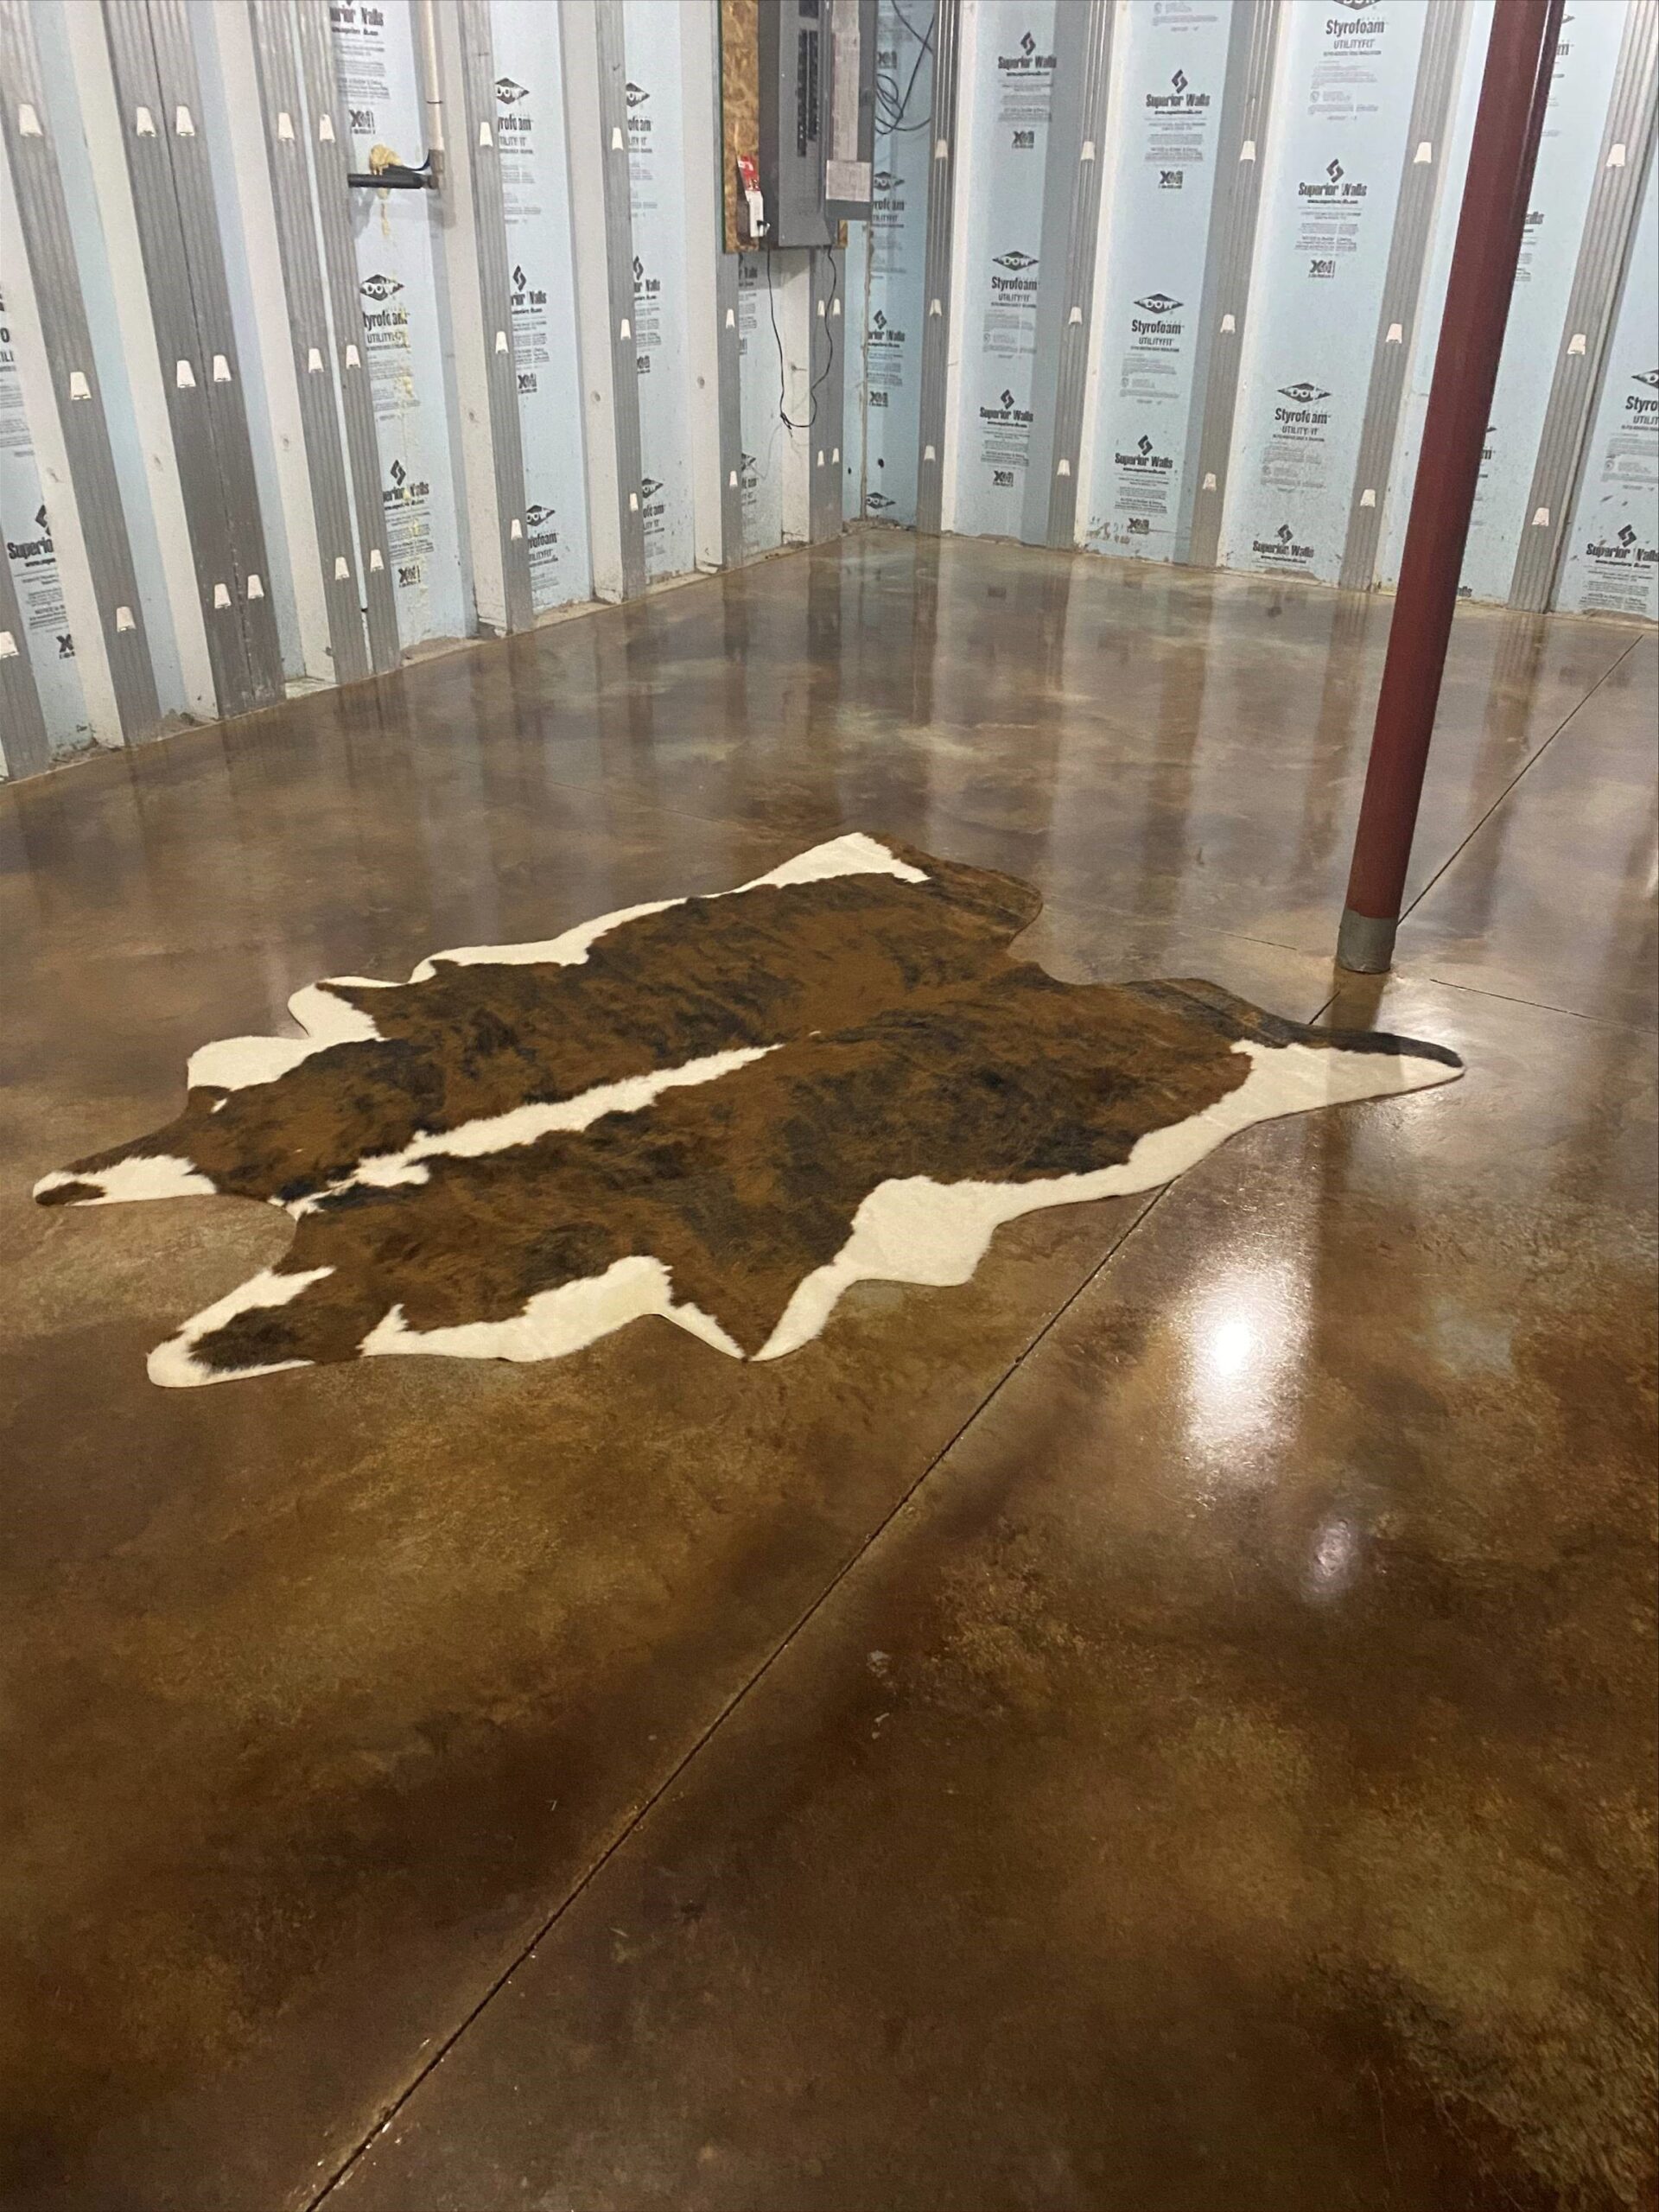
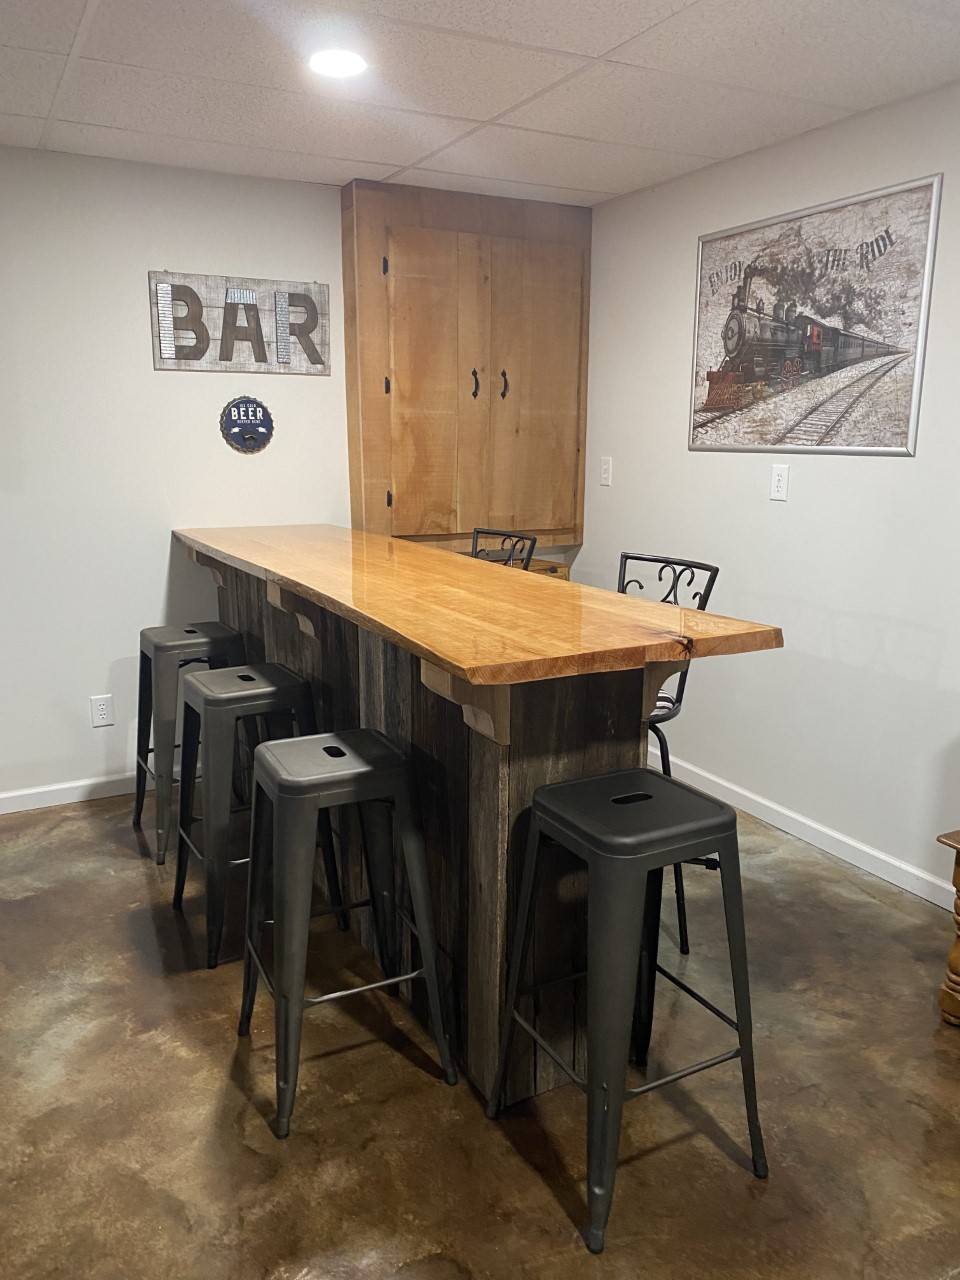
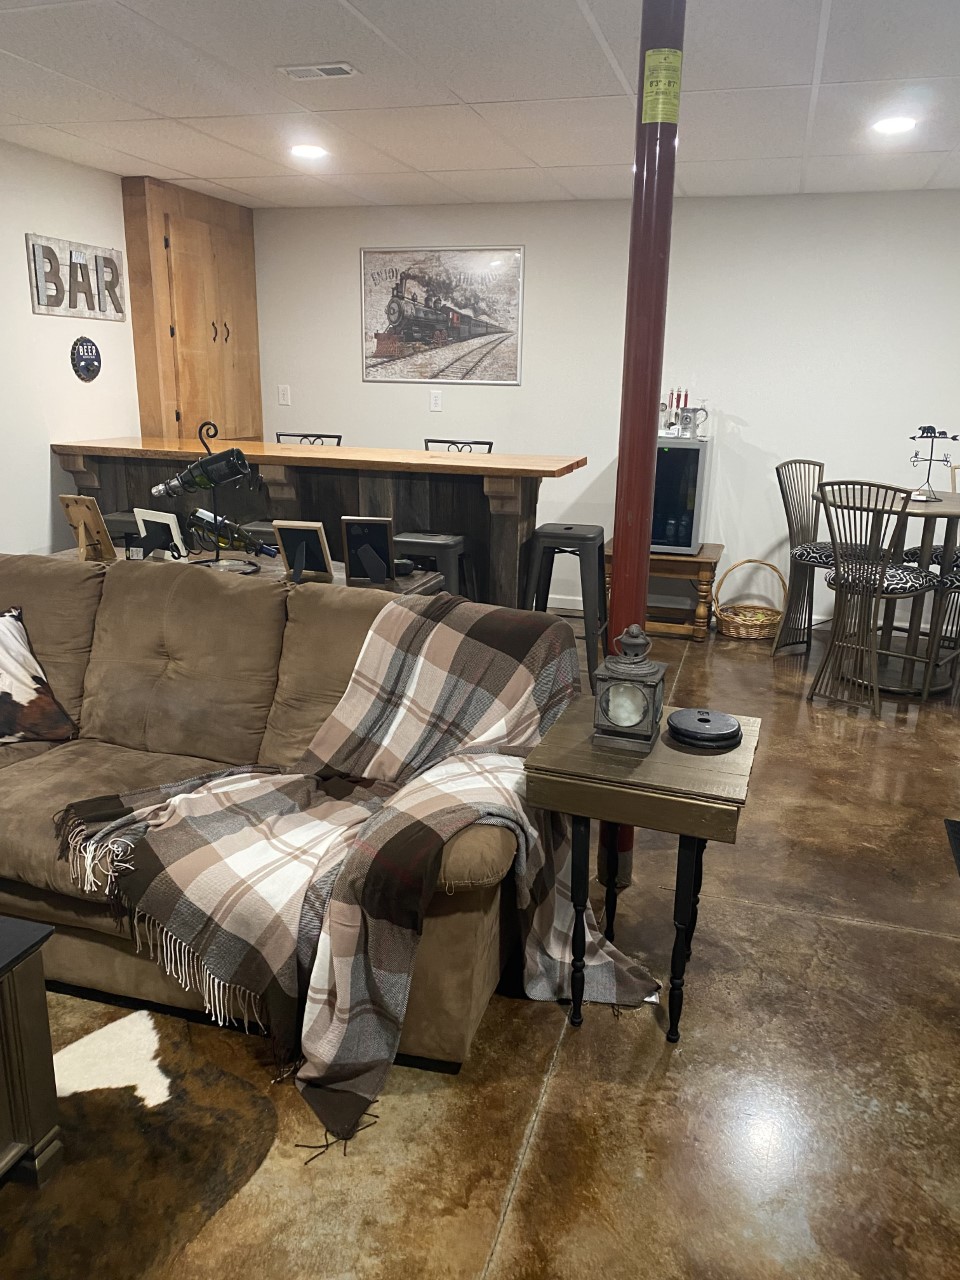
Project Info:
- Project Completed In: 8 day(s)
- Estimate of Square Footage: 400 sq. ft.
- Project Description:
We’ve been wanting to try this since the basement floors were poured in November 2019. This 400 sq. ft. area will be a family/rec room. We decided to do the floors ourselves before the drywall, etc. goes up. For that, we have pros coming to complete very soon. Our basement is framed in and divided into three spaces; two will be completed and the third is a large storage area. We are so pleased with how this turned out we are going to do it during “phase two” of our basement remodel, applying it on the second living space which will include a laundry room, workout area a half bath.We are very amateur DIYers, so if we can do this anyone can! We chose to use desert amber and coffee brown as our two color acid stain process. Our home is mostly “French Country farmhouse”, but this space will be a little more casual incorporating industrial farmhouse and rustic elements, including a reclaimed wood feature wall, live edge bar area and sliding barn door. - Personal Tips:
Be patient! Watch the “how to” videos featured on this website. If you have a question don’t be afraid to call or email customer service. They respond quickly, professionally and are very helpful and friendly. If your surface requires etching, be sure to clean it thoroughly before it dries. Hence the photo with white shoe prints. Where your spikes when doing this. It took about 12 scrubbings and a hand sander to clean that up! - Direct Colors Products Used:
1 Gal. CitrusEtch™ Concrete Etcher
4 Oz. ProClean Neutralizer™
1 Gal. Desert Amber EverStain™ & AcquaSeal™ Gloss Kit
1 Gal. Coffee Brown DIY EverStain™ & AcquaSeal™ Gloss Kit
1 Gal. ProWax™ Polish Gloss
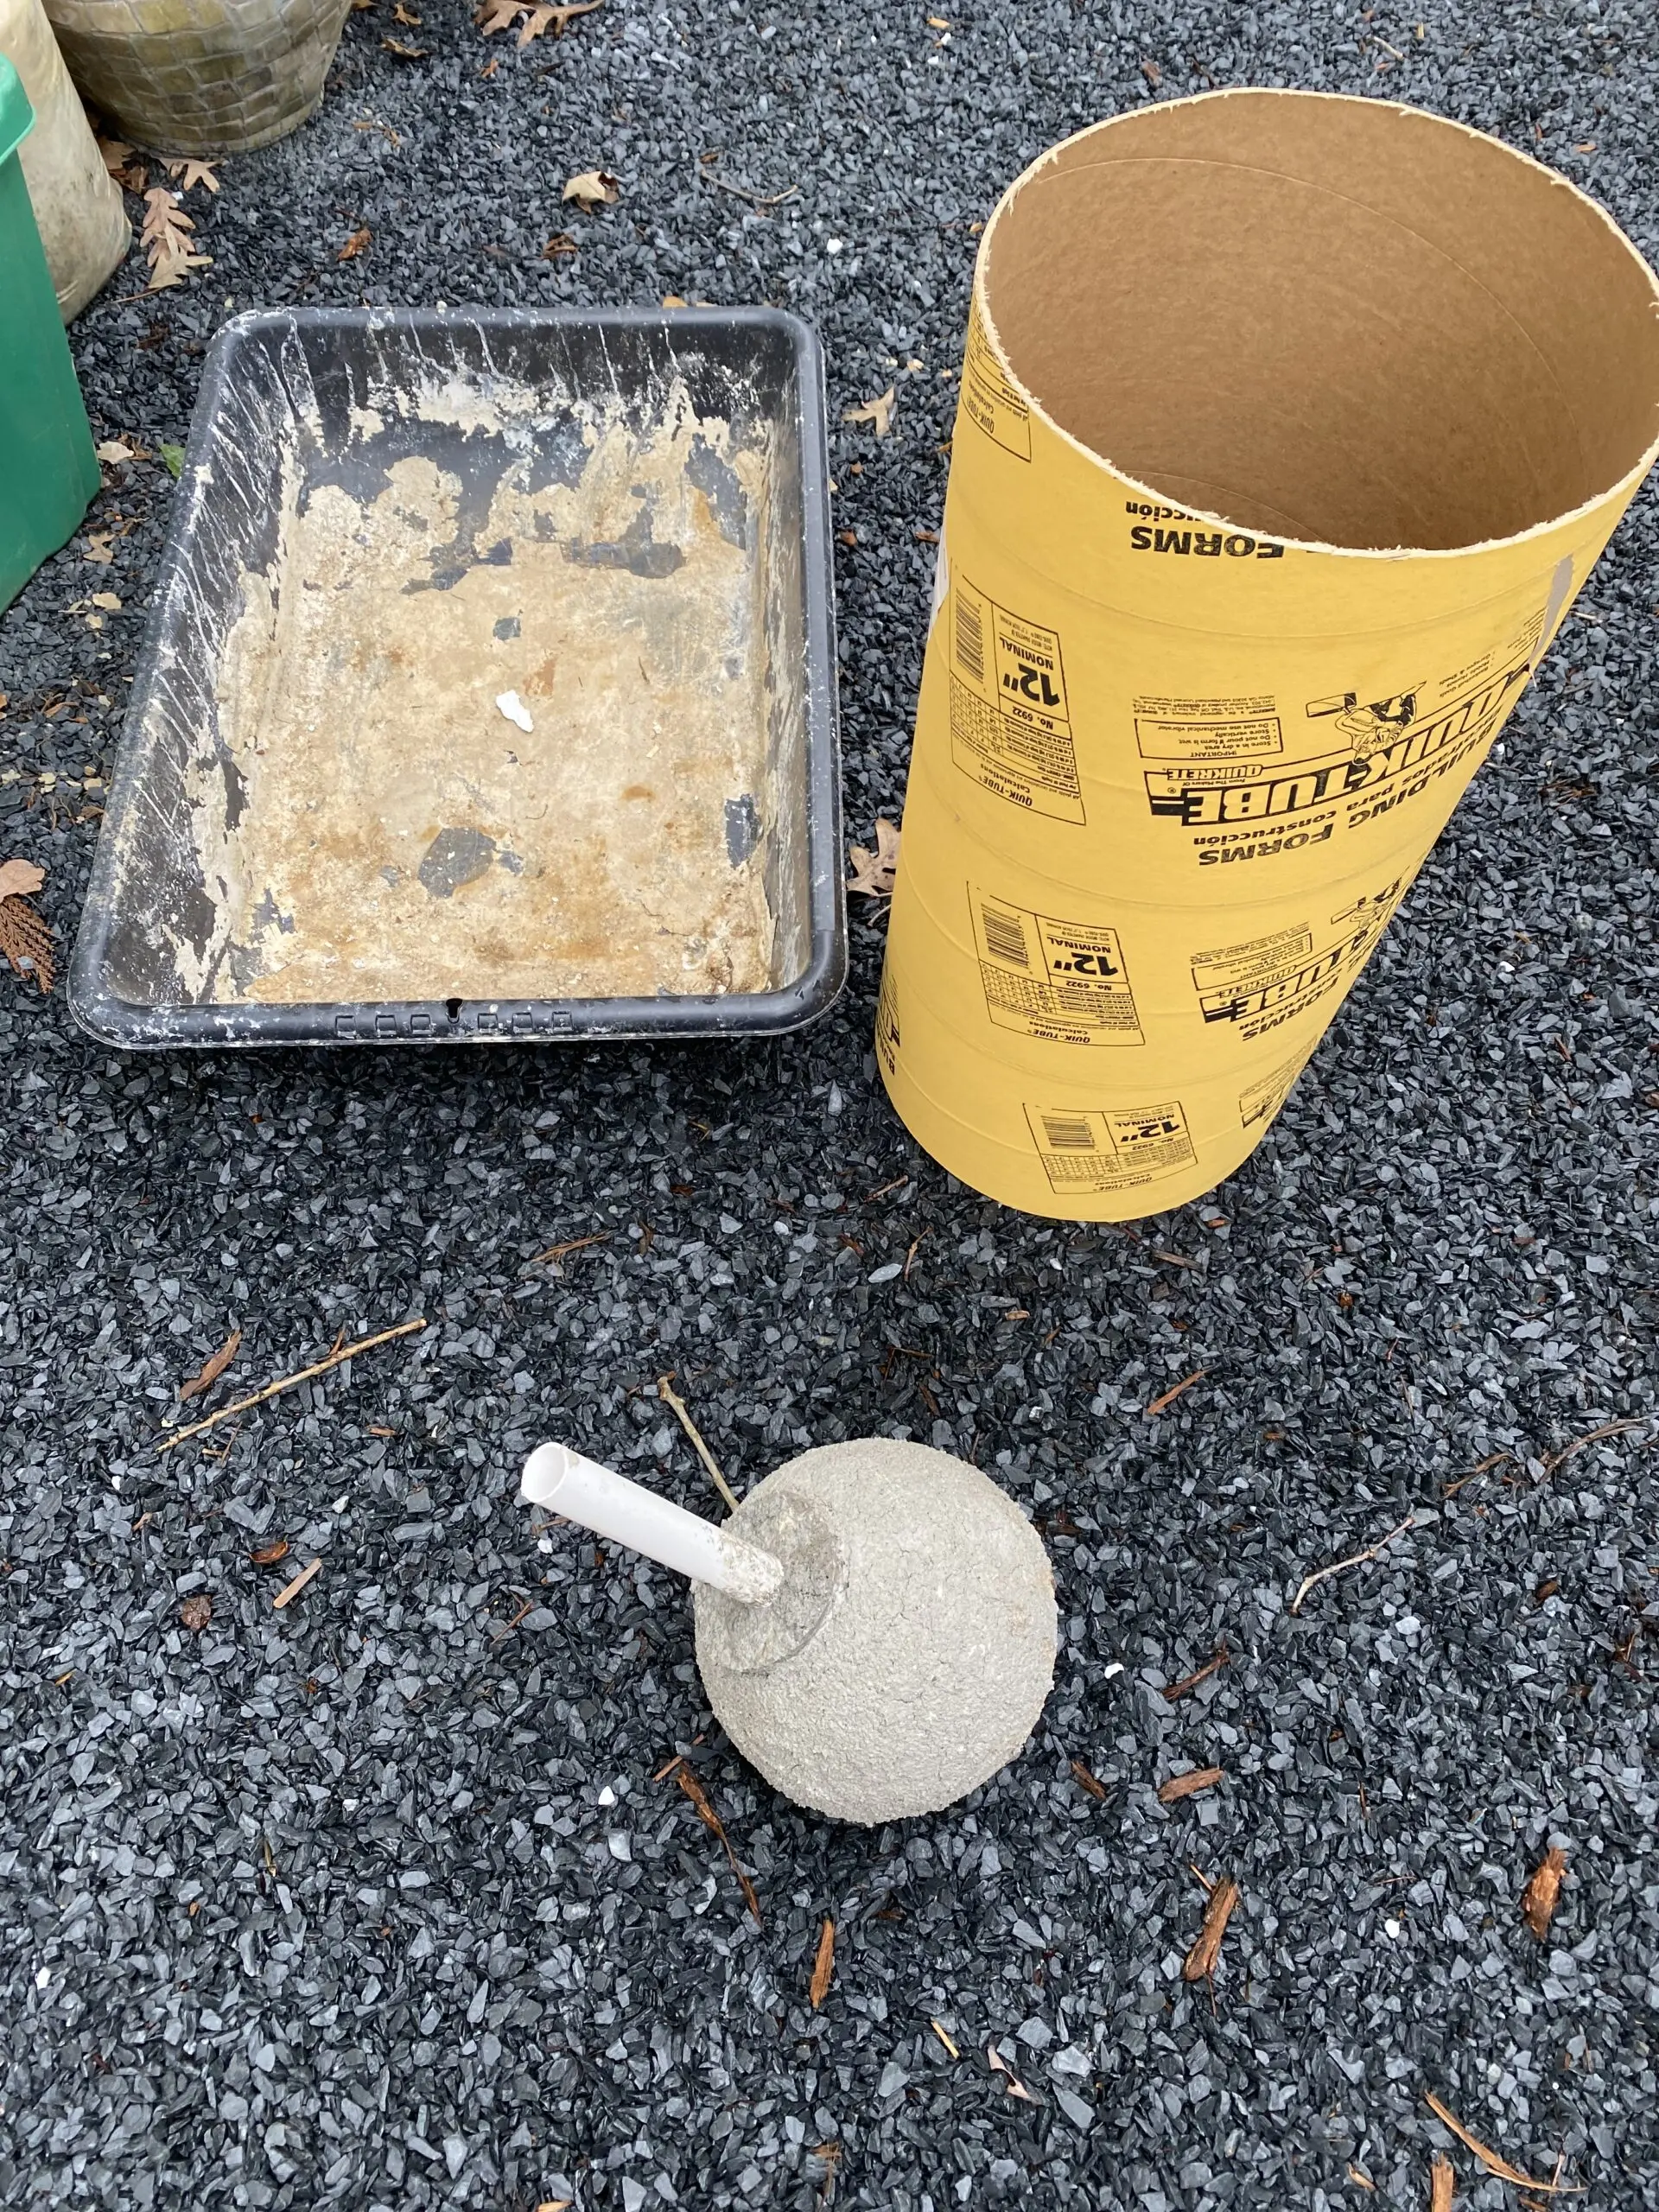
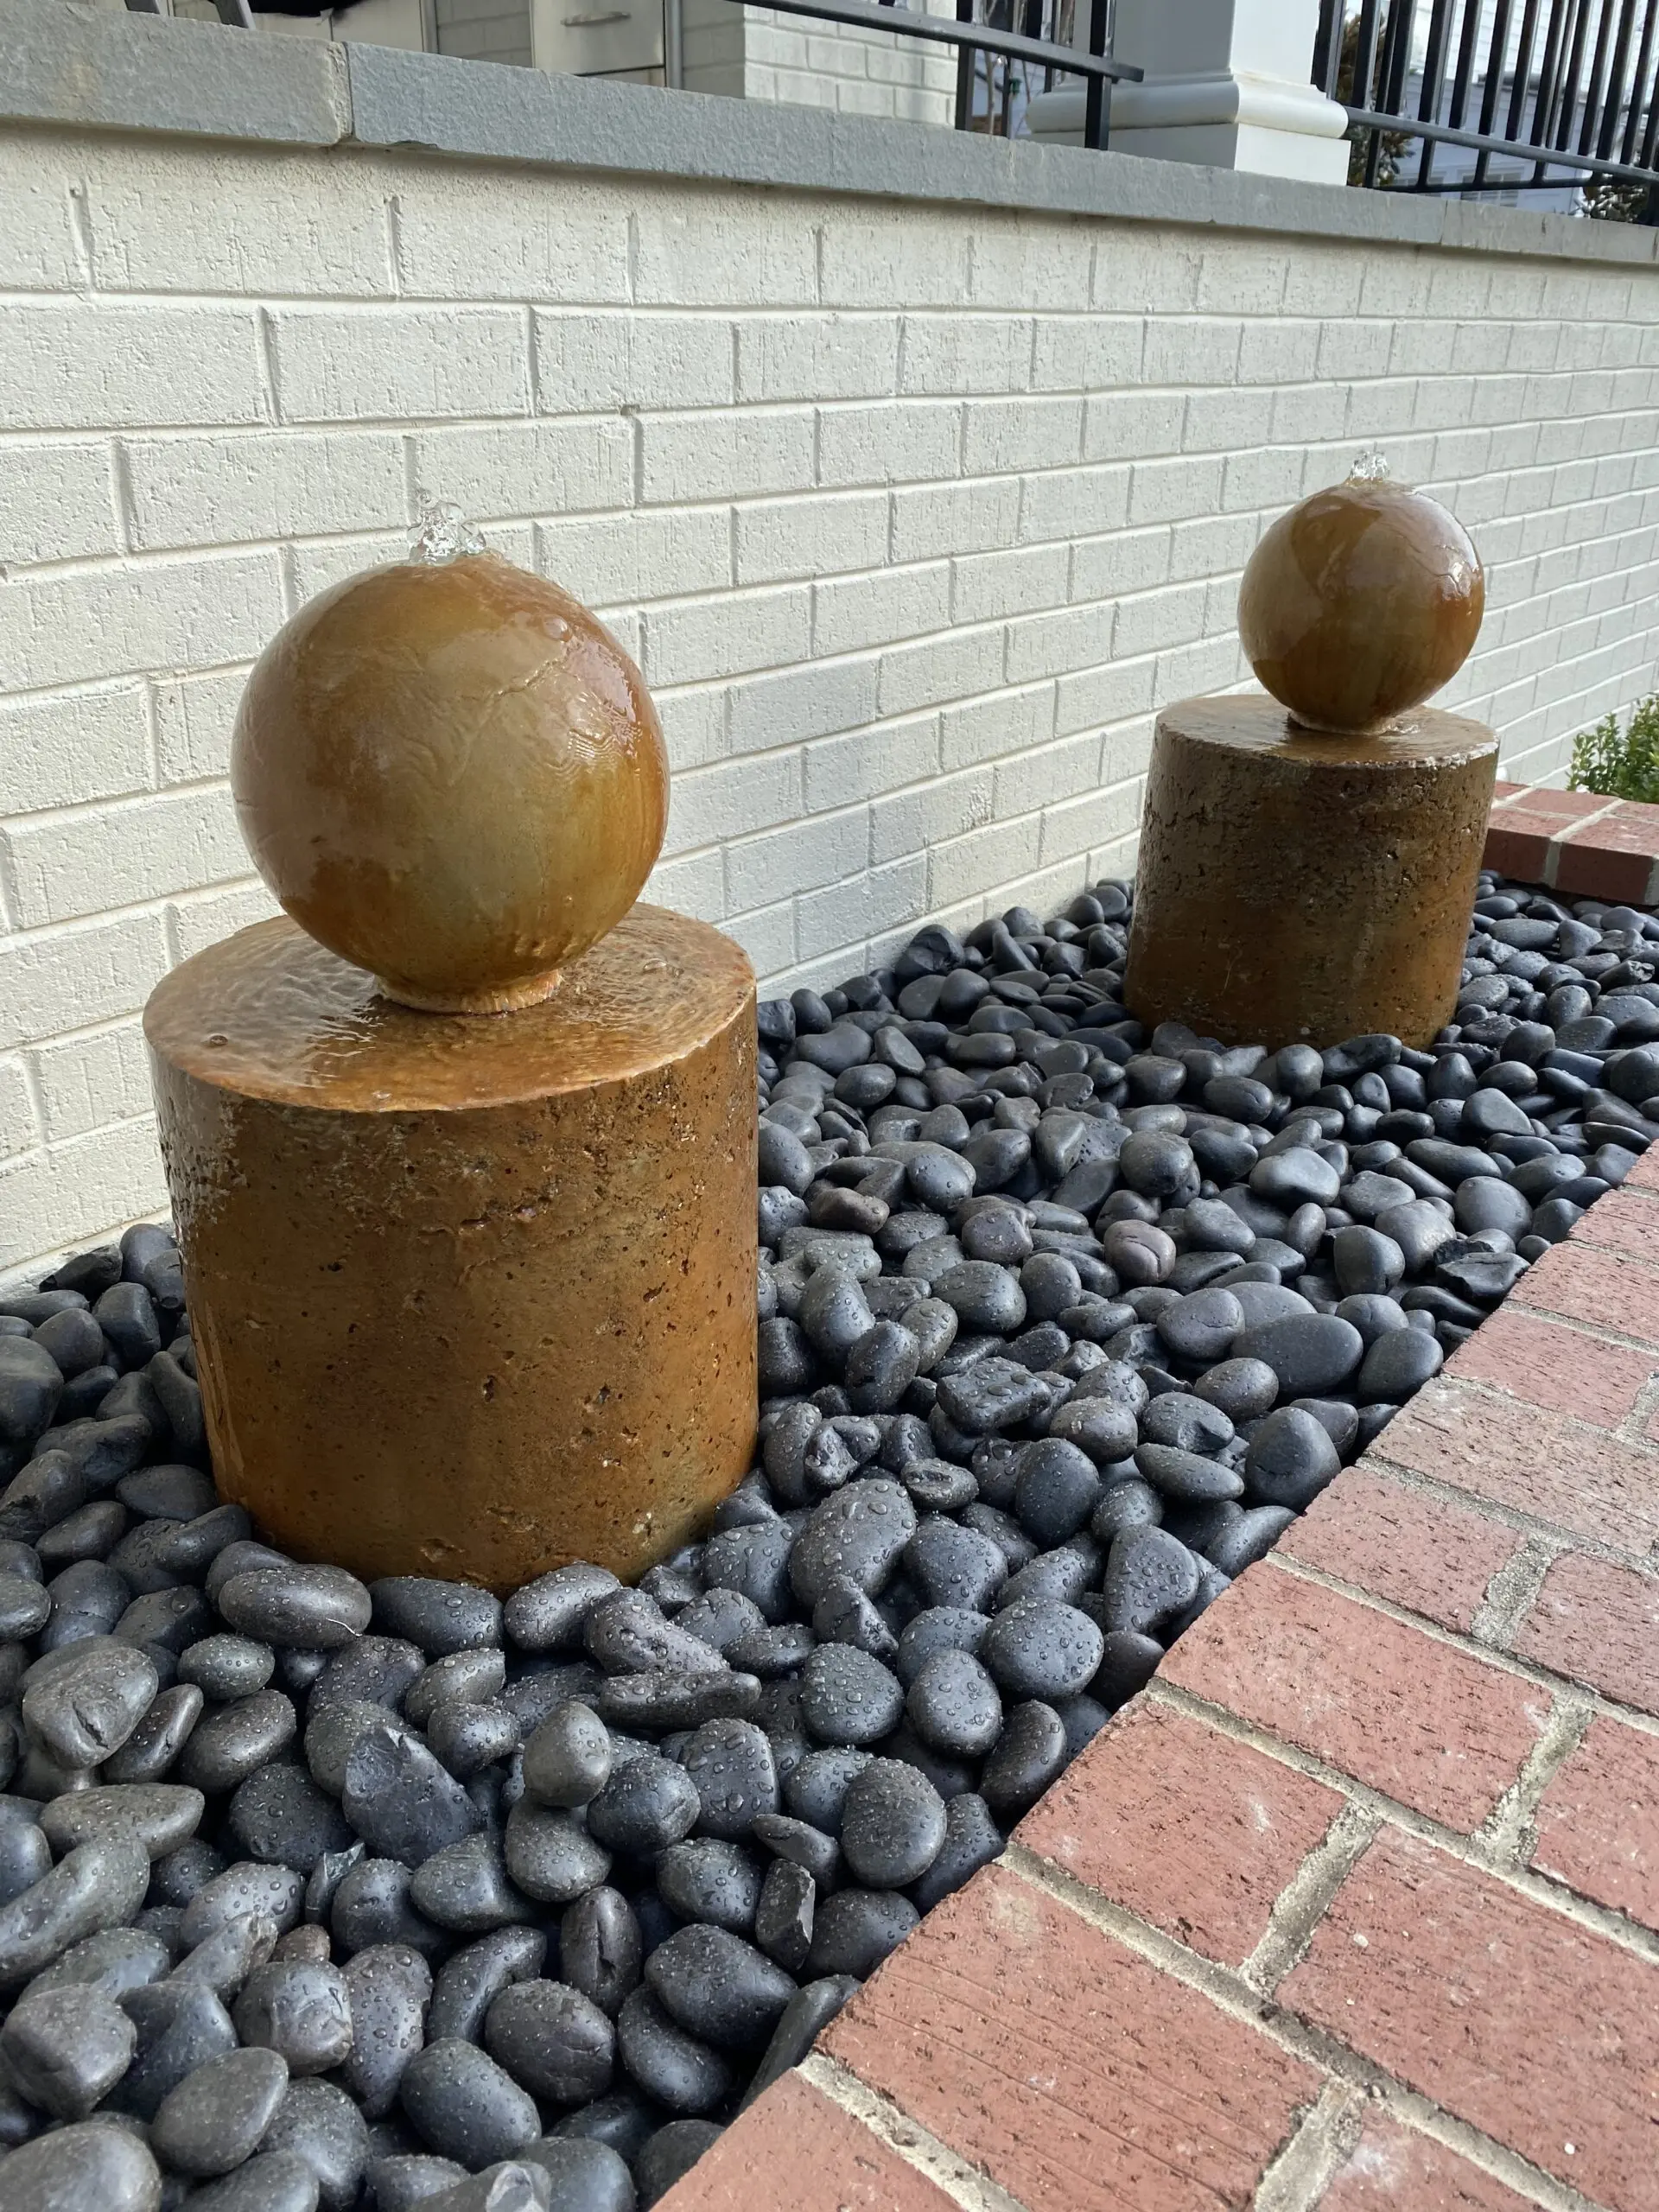
Patio Pop: Vibrant DIY Concrete Fountain
Get inspired by this unique DIY concrete fountain project! Using EverStain’s Malayan Buff and Desert Amber, this DIYer turned an ordinary fountain into a vibrant backyard centerpiece. Handy tips like using spray bottles and a sponge for color blending helped them achieve this stunning result. For a full step-by-step guide, be sure to check out the blog, “How to Stain a Concrete Fountain: A Step-by-Step DIY Guide“.
Farmhouse Flair: Barndominium Flooring Upgrade with Malayan Buff and Desert Amber
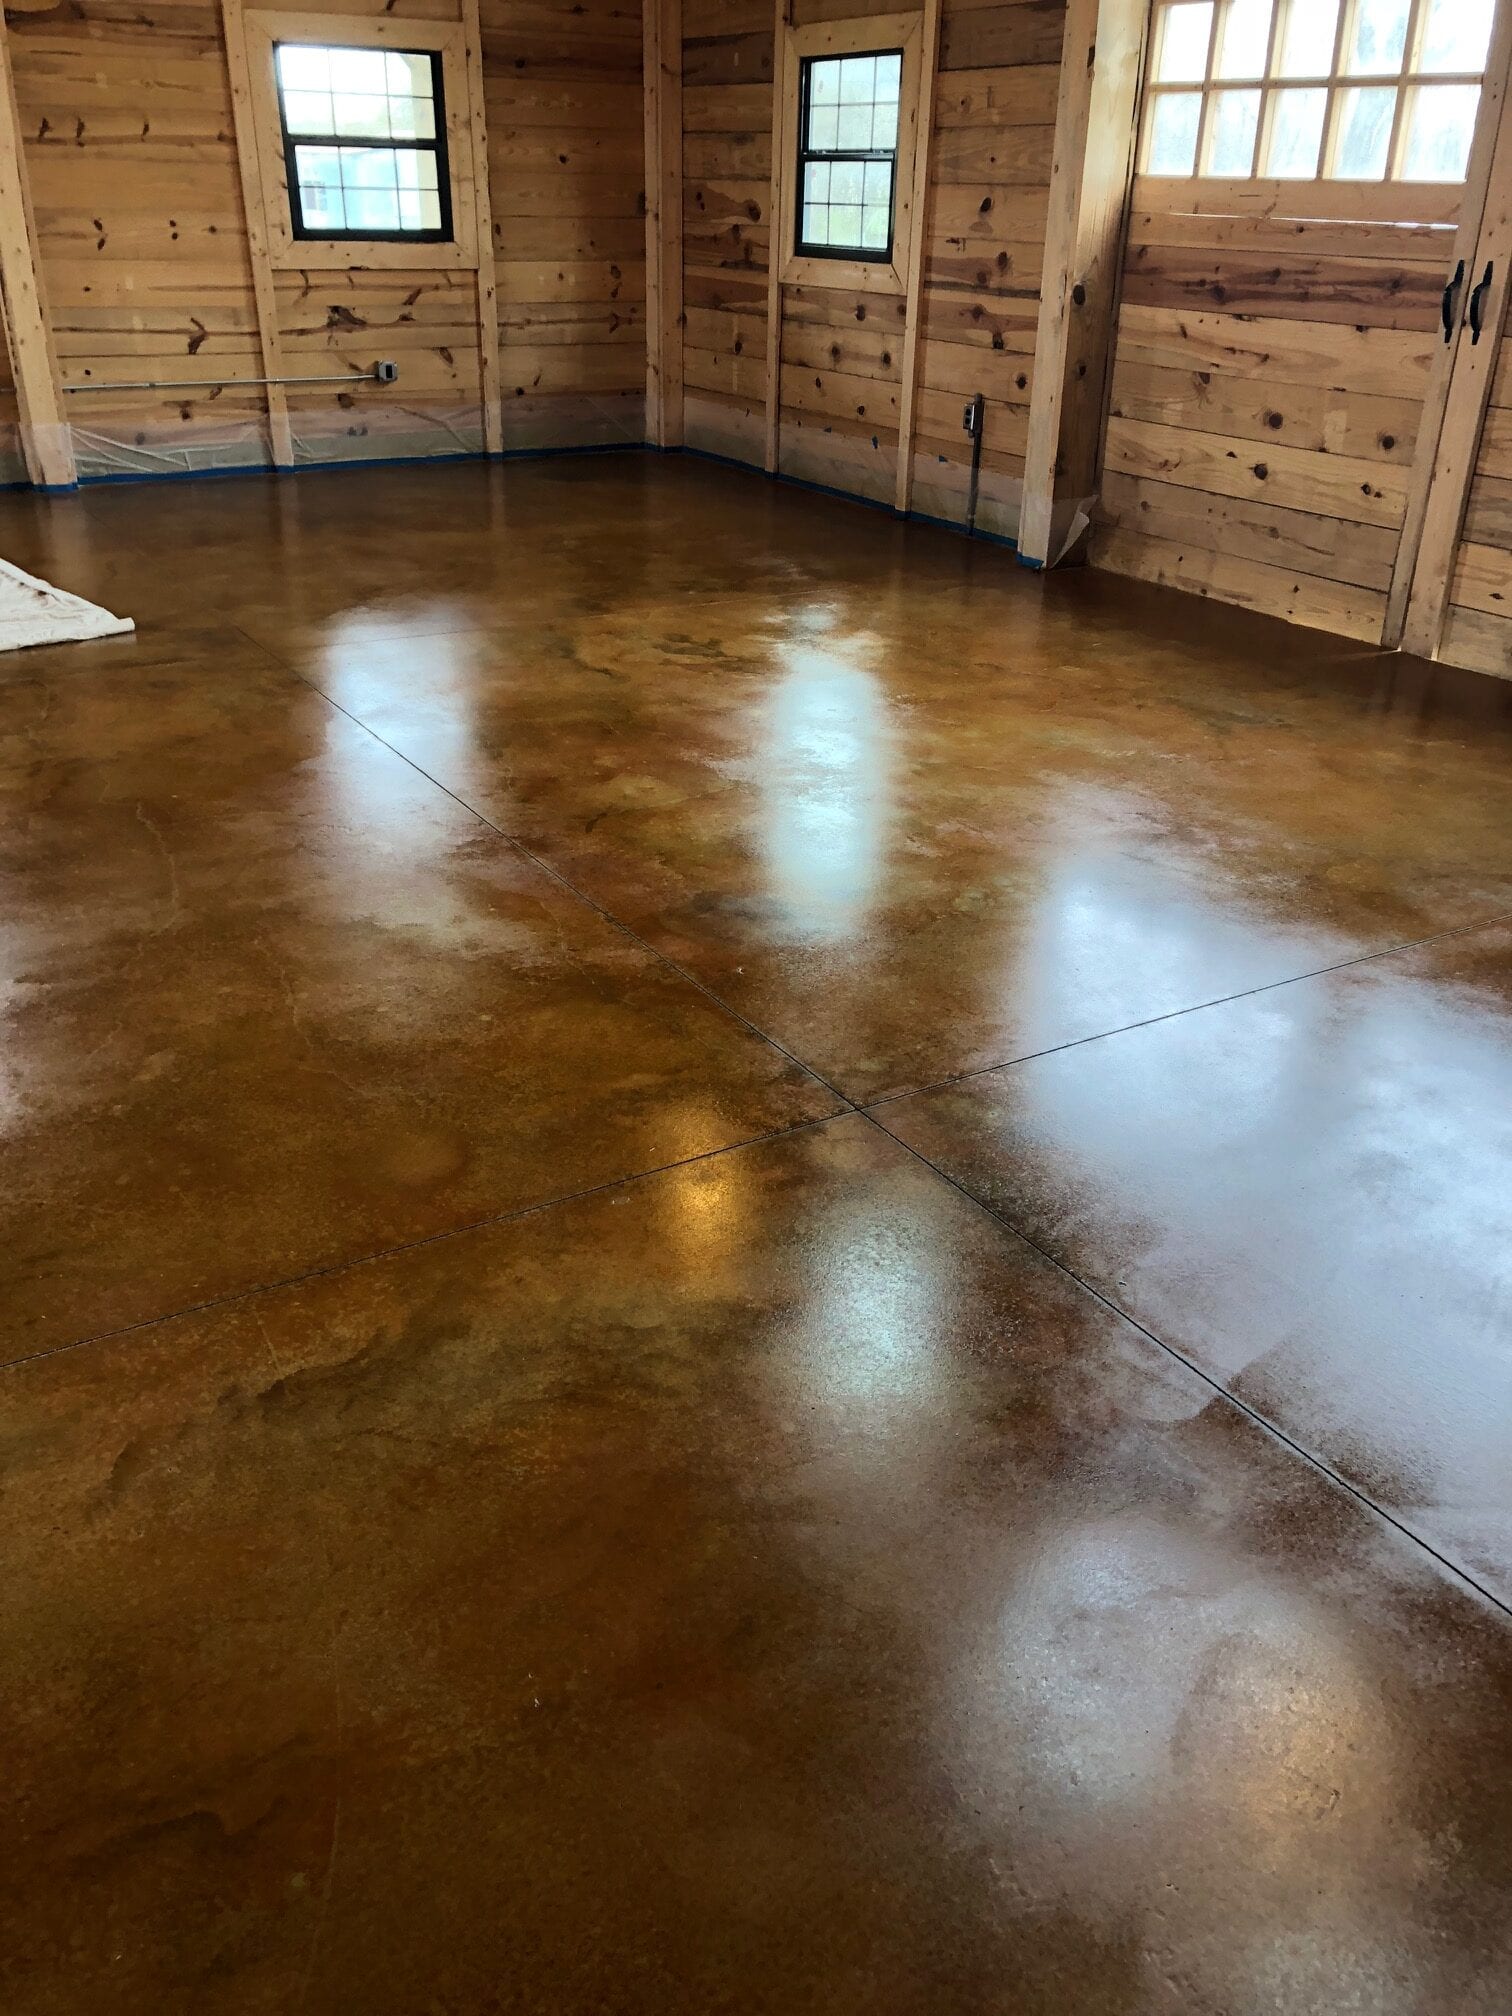
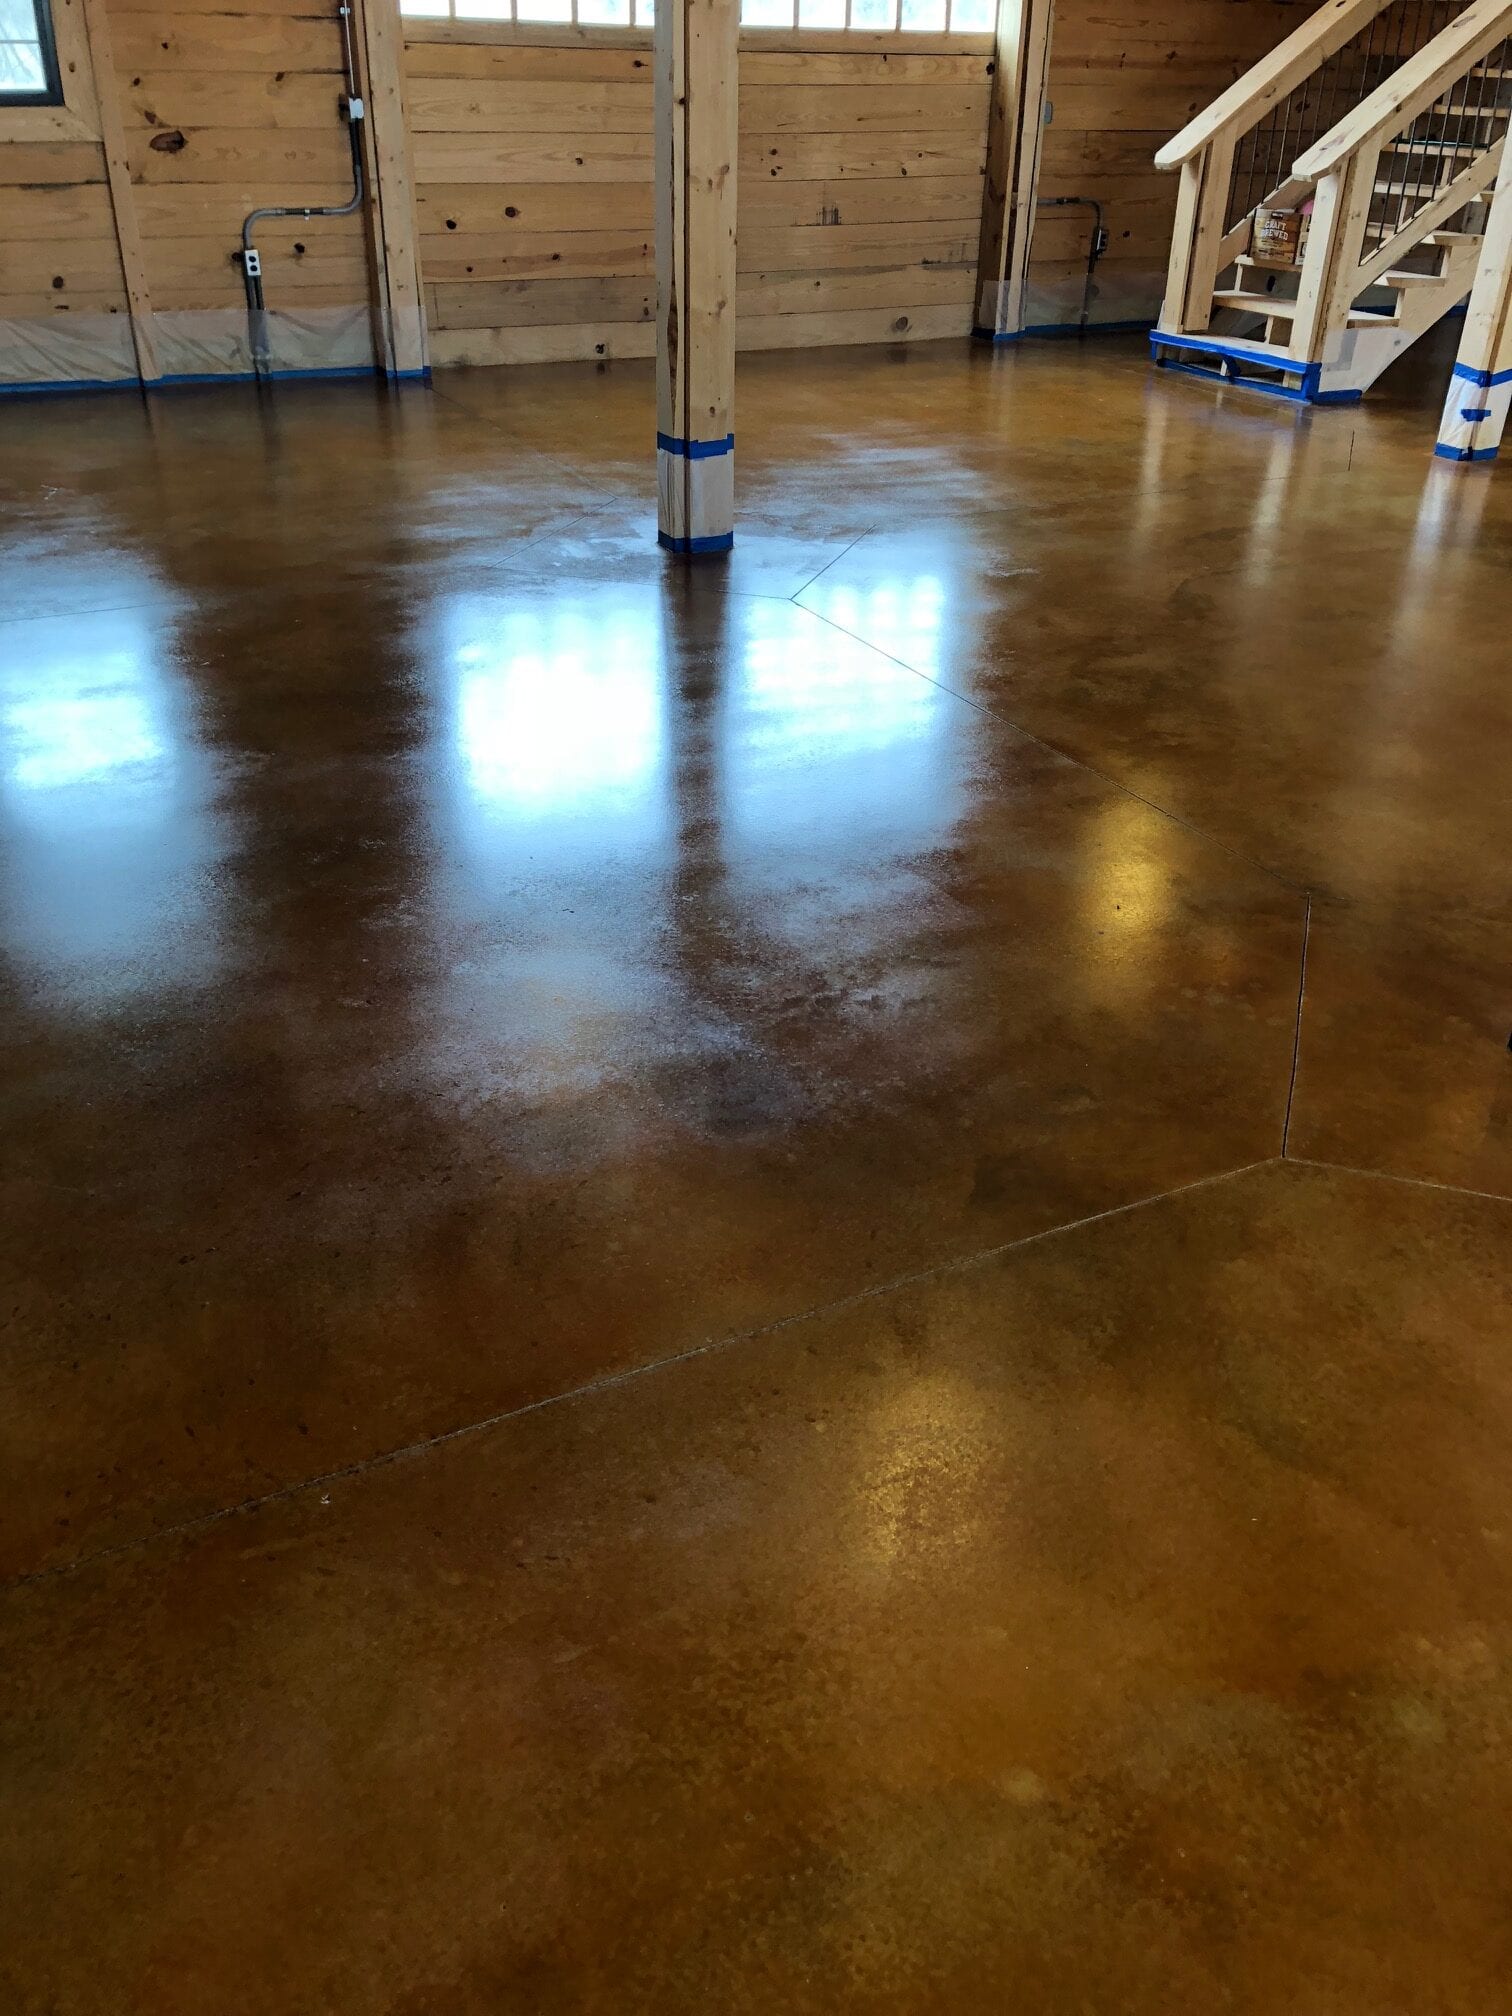
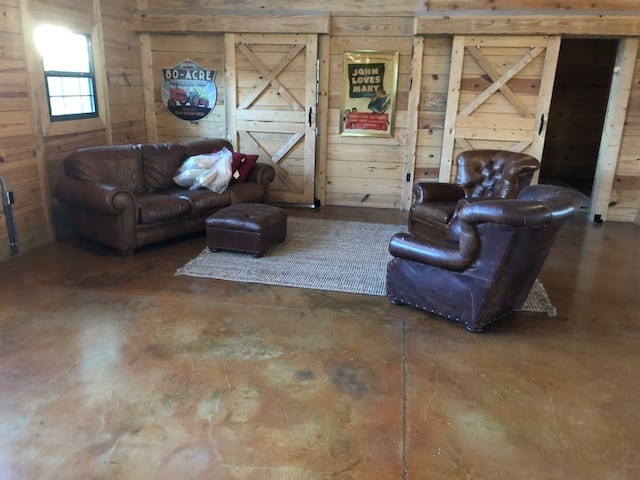
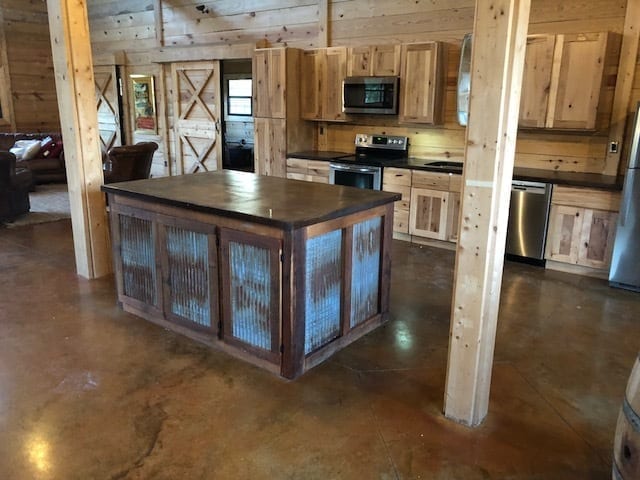
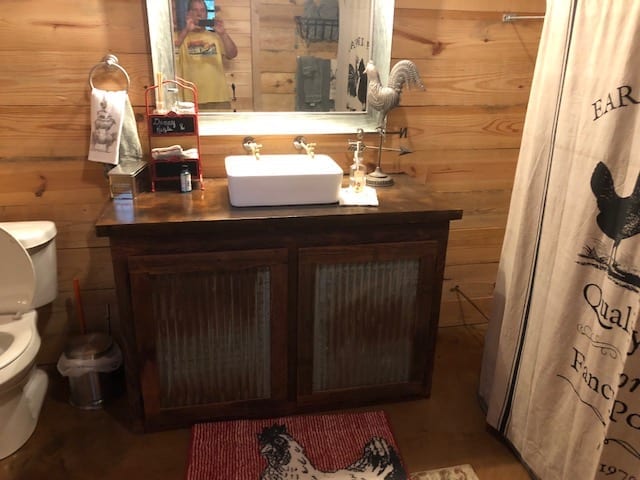
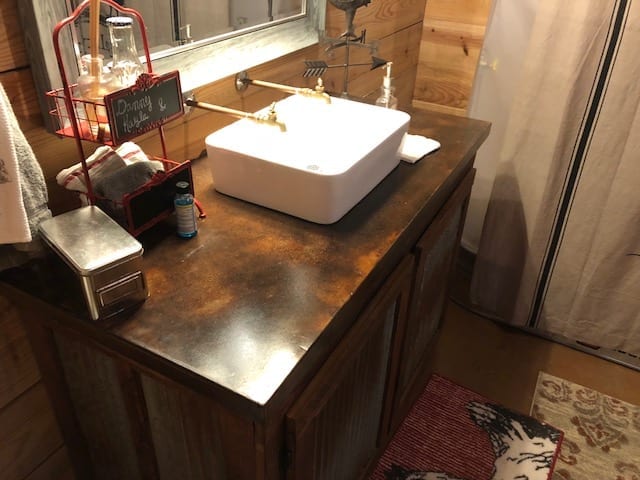
Get ready to be charmed by this rustic farmhouse-style Barndominium revamp! Our DC customer used a combination of Malayan Buff and Desert Amber to create a warm and inviting living space. This earthy and homely acid stain works wonders from the bathroom to the kitchen, bringing a uniform and cozy vibe throughout the entire house. Have a look, and you might find the inspiration you need for your next flooring project!
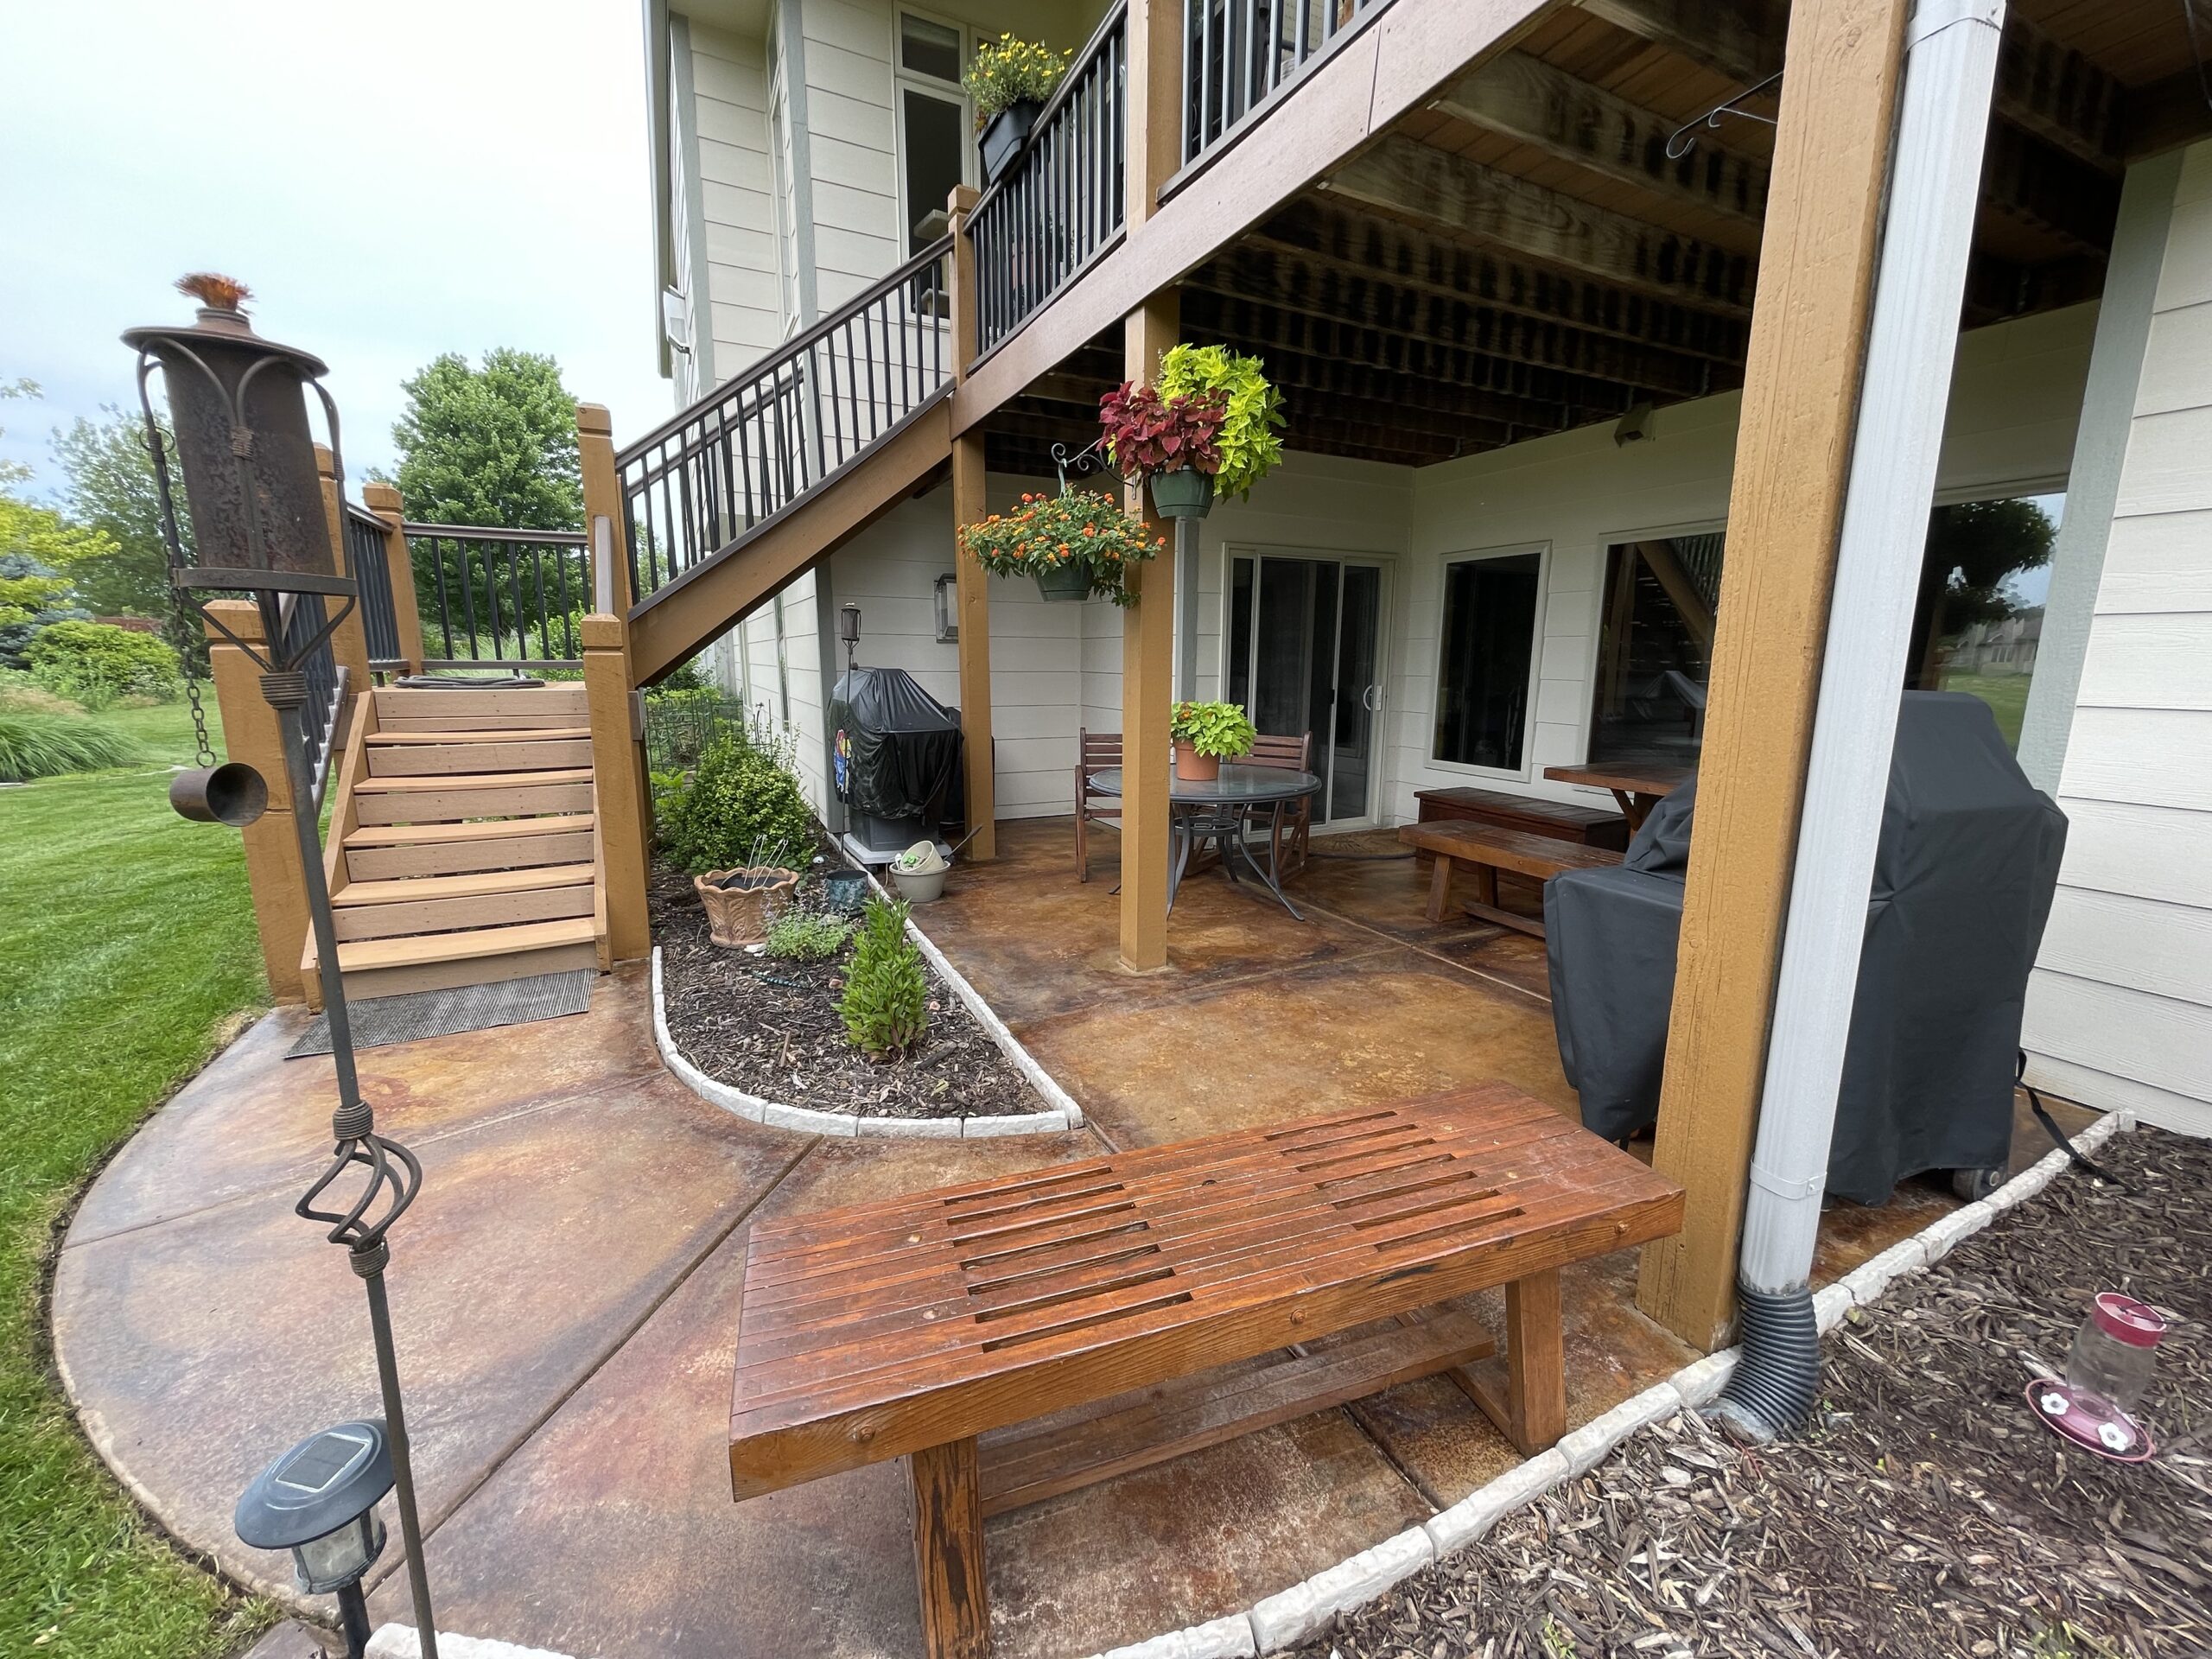
Patio Perfection: A Concrete Facelift with Malayan Buff, Desert Amber, and English Red
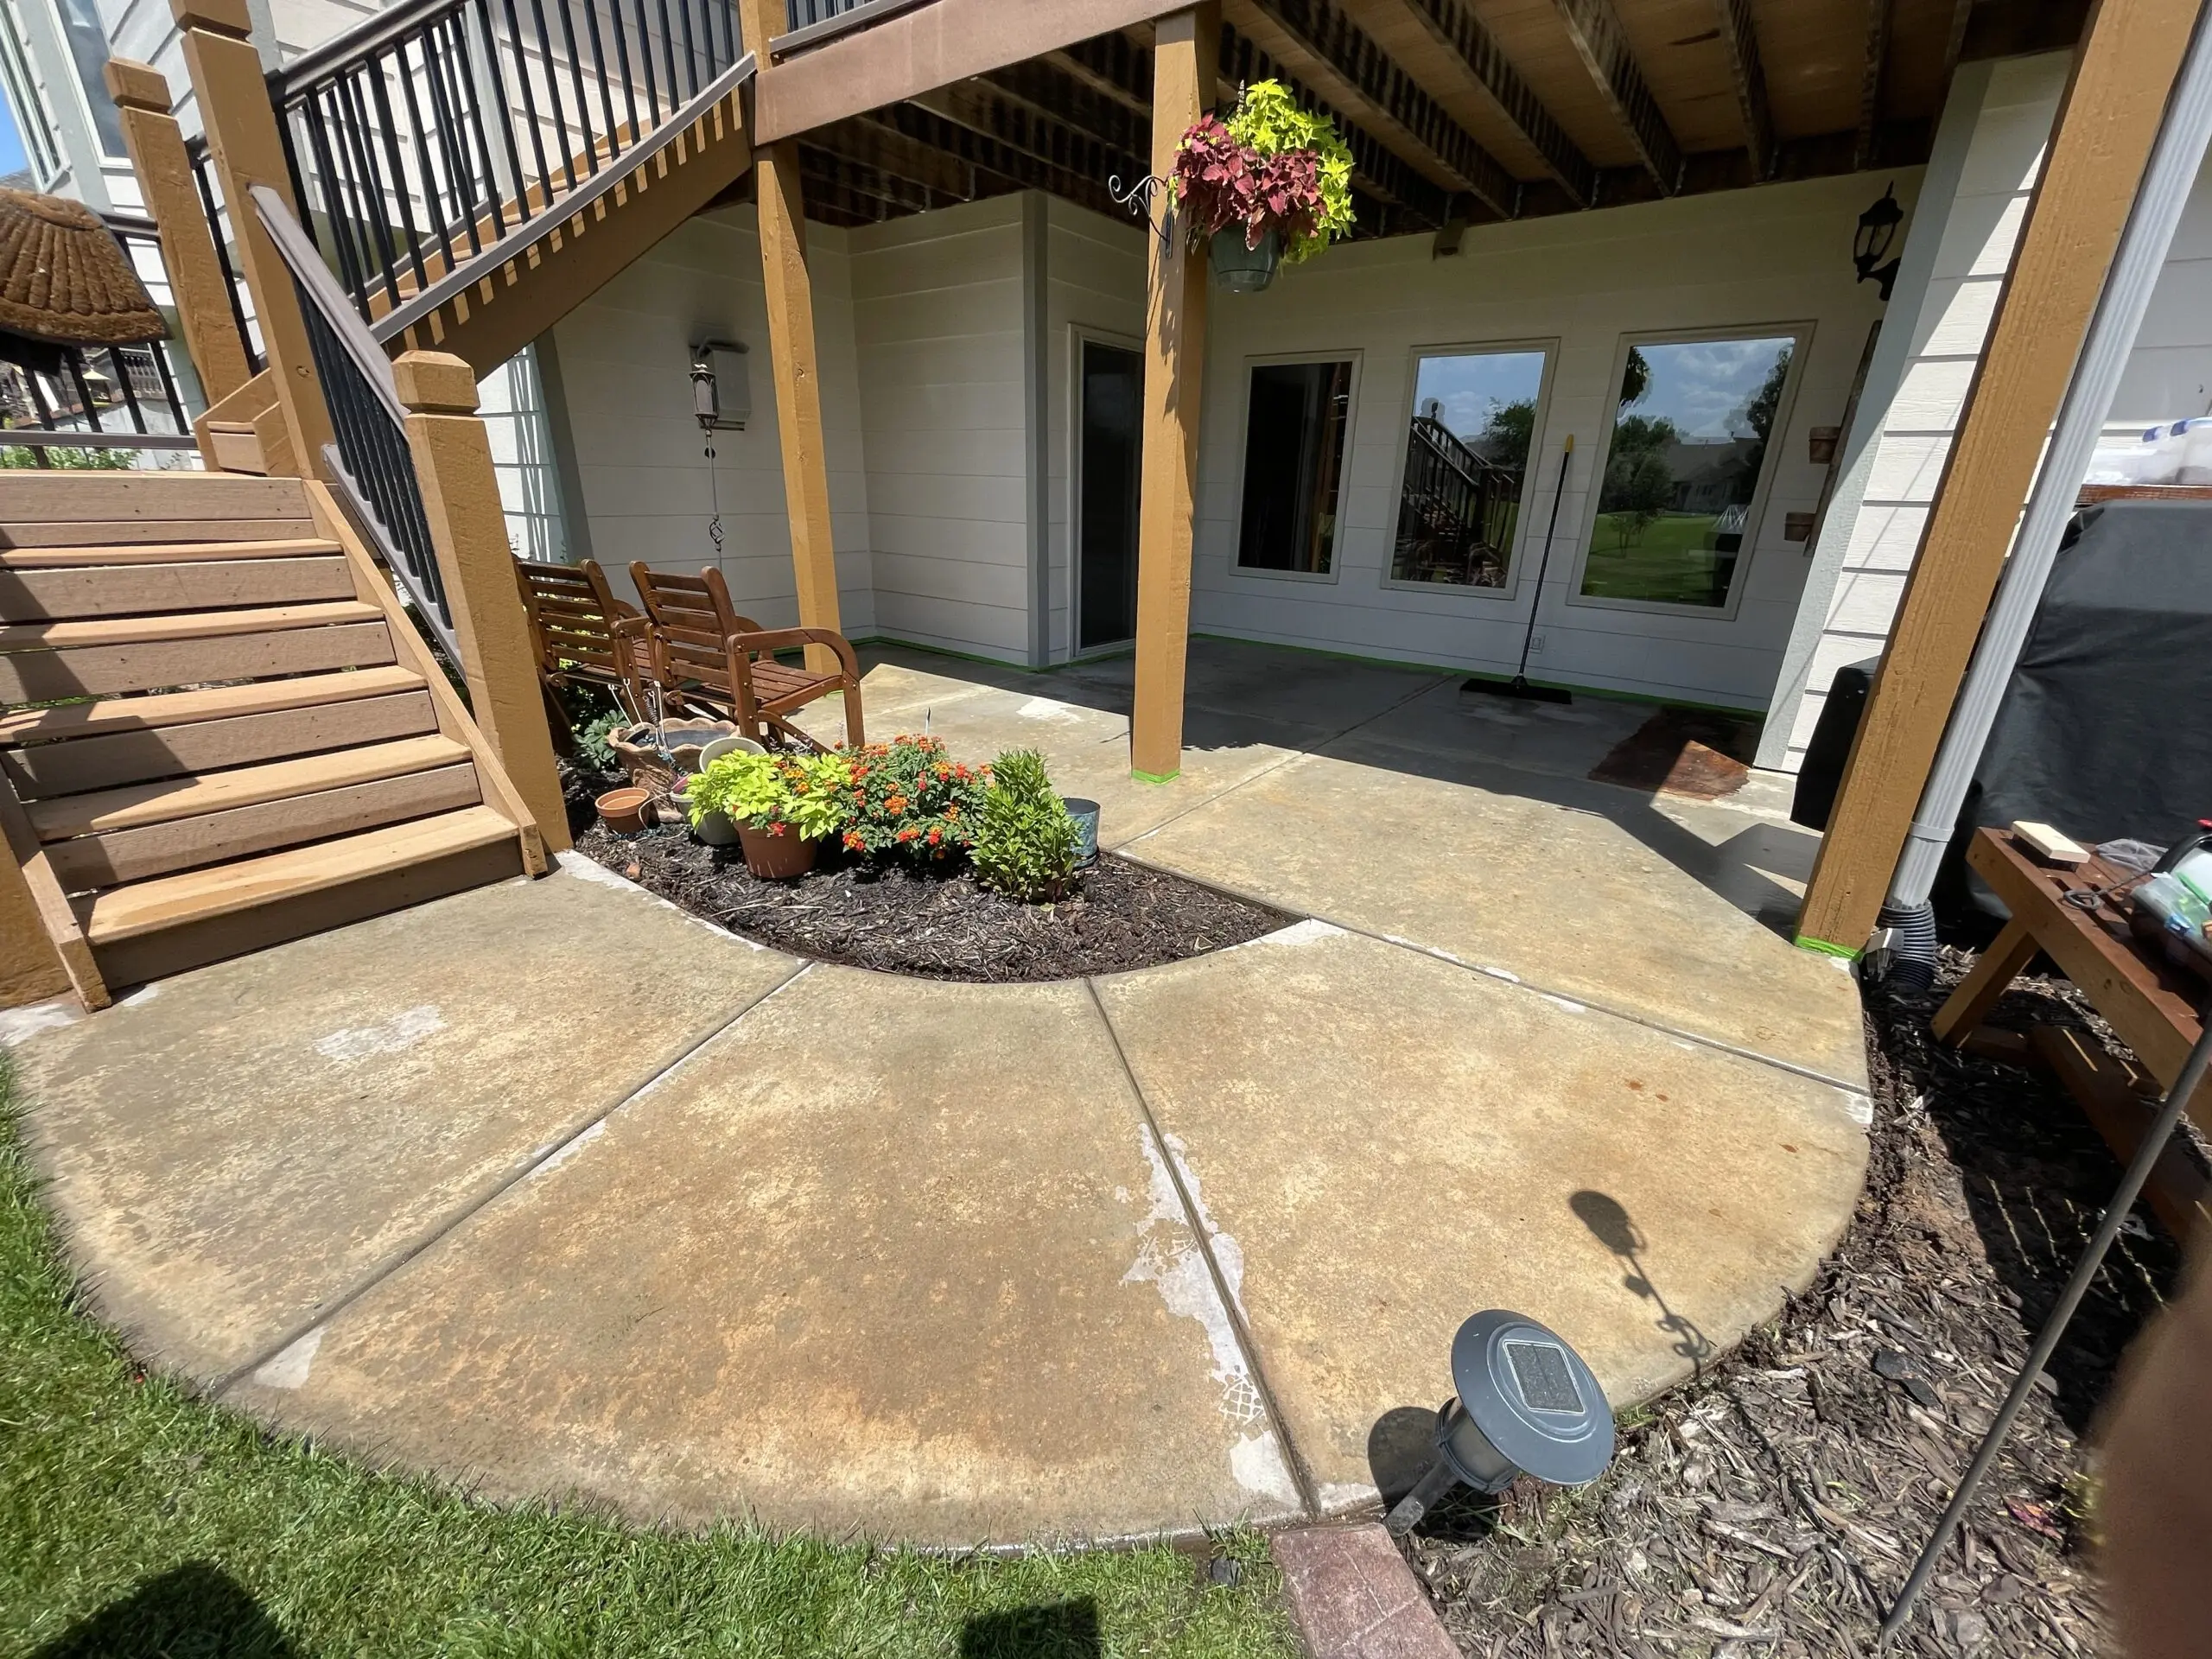
Ever wondered how a simple concrete patio can be transformed into a gorgeous outdoor living space? Here’s the answer! This DIYer took their 35-year-old patio from drab to fab using Everstain™ acid stains.
Project Info:
- Project Completed In: 4 day(s)
- Estimate of Square Footage: 225 sq. ft.
- Project Description:
My patio has some 35 year old redwood furniture that I decided to refinish which I did. Using Cabot’s wood finish and I sanded it down. After finishing noticing the gray concrete did not help appearance and I had bought some gel acid stain from direct colors pre-pandemic and never used them. Ended up getting Everstain Acid stain we 3 gallons of acid stain with neutralizer and sealant. I used some shoes with spikes and applied as directed by web site using a sprayer. Following advice of outlining the sections with the lighter color then using the Malayan buff filling in between the desert amber, then streaked it with the antique red to add dimension and almost create a look like grain in wood. I let it dry overnight to get maximum paint absorption then got it damp with light water and brushed with large broom. I then applied the sealant in 2 coats. The first coat was rolled on and the second was sprayed on. The most difficult part of project was moving the furniture off and back on patio. The prep work has to be done with power washing and taping up the sides of the house. - Personal Tips:
If you are going to spray use wide tape to block off things that you don’t want sprayed. I used 1 inch, probably should use wider if the wind catches it you got it on your house. - Direct Colors Products Used:
1 Gal. Desert Amber EverStain™ & EasySeal™ Gloss Kit
1 Gal. Malayan Buff EverStain™ & EasySeal™ Gloss Kit
1 Gal. English Red EverStain™ & EasySeal™ Gloss Kit
Radiant Reveal: Hydronic Radiant Floor Transformed with Coffee Brown & Desert Amber
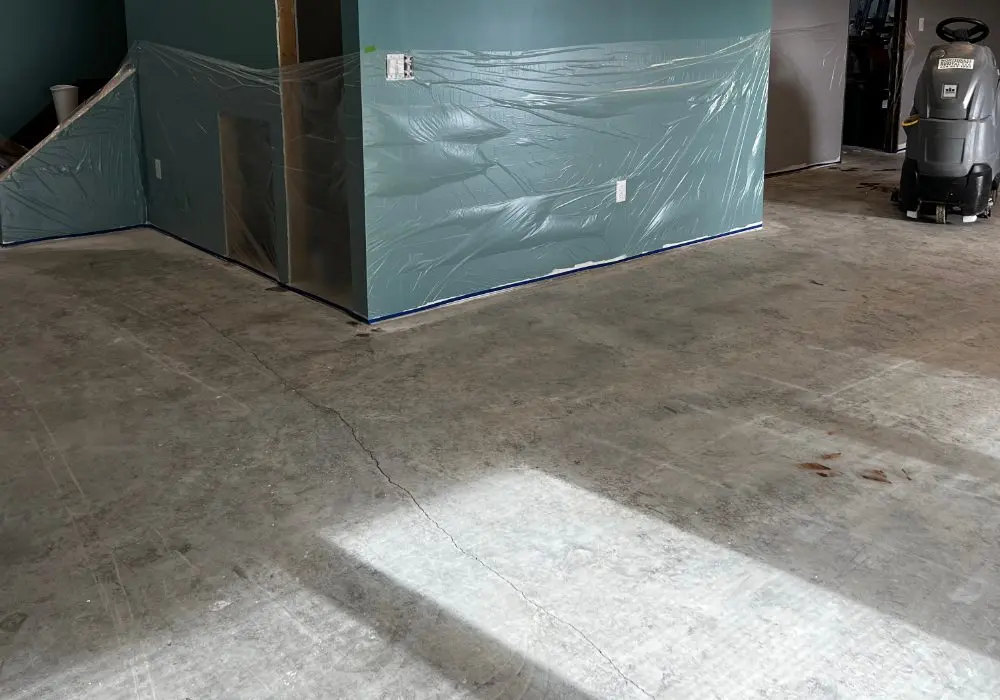
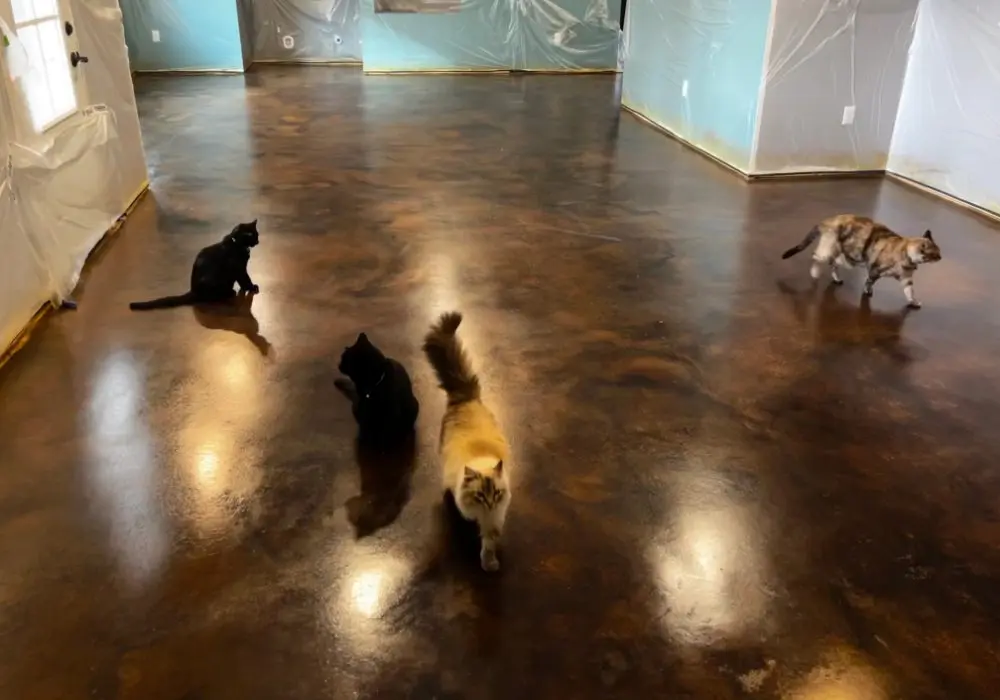
This DIYer used Everstain’s DIY kit in Coffee Brown & Desert Amber to transform their basement floor into a stunning showcase. After installing a hydronic radiant floor system, they sought a way to reveal rather than conceal it. The result? A magnificent “marbling” effect achieved with the wet-on-wet method.
Project Info:
- Project Completed In: 10 day(s)
- Estimate of Square Footage: 1100 sq. ft.
- Project Description: We just moved in to our new construction home after 19 long months of building (timeframe due to the pandemic).
We installed a hydronic radiant floor system in our basement and didn’t want to cover it up with carpet or LVP so we started researching other possible options. We ended up on Pinterest and that’s how discovered Direct Colors. We explored their website & galleries and really liked what we saw so we called and asked a few questions & the next day we ordered a DIY trial kit to try out & help us decide colors & combinations to get te look we wanted.
We chose the EverStain DIY kit in Coffee Brown & Desert Amber along with the Satin Acrylic sealer.
Overall, our project took roughly 10 days start to finish and we are absolutely thrilled with the results. - Personal Tips:
– Highly recommend doing the DIY trial kit! It really helped us decide which colors we needed to achieve the look we wanted & it also gave us really good insight to the entire process.
– We ended up a little short on the Everstain and had to order another gallon because I underestimated how much product we’d need to achieve a “marbling” effect using the wet on wet method. I watched all the technique videos but didn’t take into account the extra amount of product we’d need to allow for some pooling of the acid stain in the areas we wanted darker. The space we acid stained was approximately 1100 sq ft and I only ordered enough Everstain for 1200sq ft. so I ordered an additional gallon of coffee brown to finish the floor.
-We rented a ride-on floor scrubbing machine that also sucked up water which I’d highly recommend over hand scrubbing if you have a large area to clean & prep. It really saved our backs!
-Embrace the imperfections of your concrete. Don’t expect perfect results on a floor that wasn’t perfect to begin with. Our basement was poured earlier this year & while prepping it to etch, we found several rough spots, a few trowel marks, a couple small chips and a long, narrow crack. We just blended all the flaws into our marbling technique design & they blend in so well it’s really hard to spot them now. - Direct Colors Products Used:
1 Gal. Desert Amber DIY EverStain™ & AcquaSeal™ Satin Kit
1 Gal. Coffee Brown DIY EverStain™ & AcquaSeal™ Satin Kit
1 Gal. Coffee Brown EverStain™ & AcquaSeal™ Satin Kit
1 Gal. ProWax™ Polish Gloss - Other Products Used:
Rust oleum 3-in-1 cleaner, degrease, etch
Hunter’s Haven: Kitchen Countertop Transformation with Acid Stain
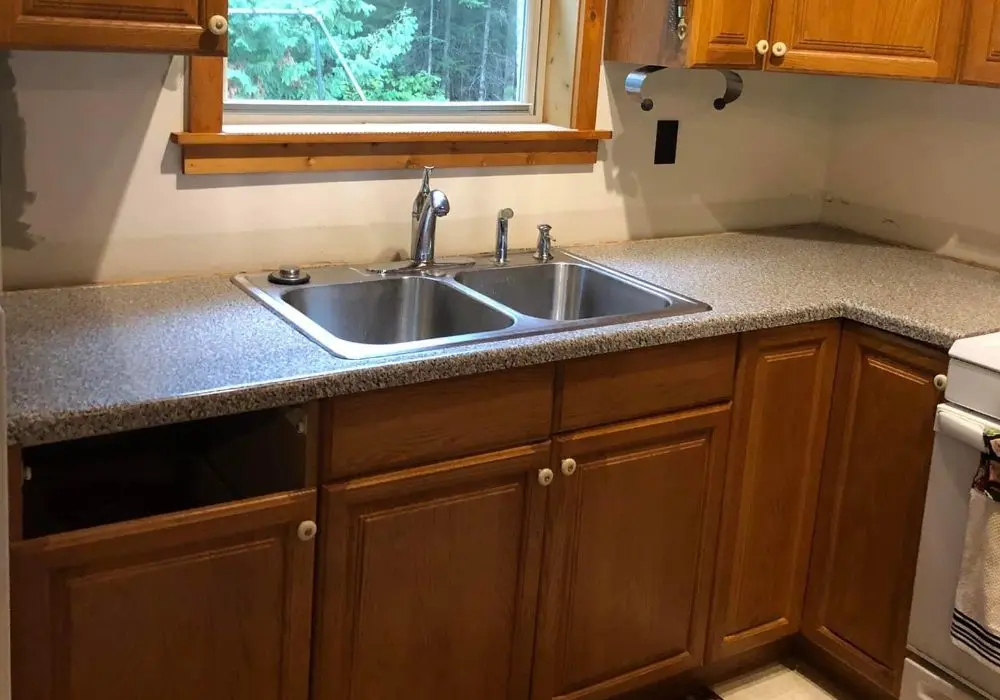
This homeowner decided to create their own concrete countertops, choosing a striking blend of Coffee Brown, Desert Amber, and Seagrass acid stains. The result? Countertops that steal the show! Learn how trial, error, and embracing the unexpected led to this impressive result.
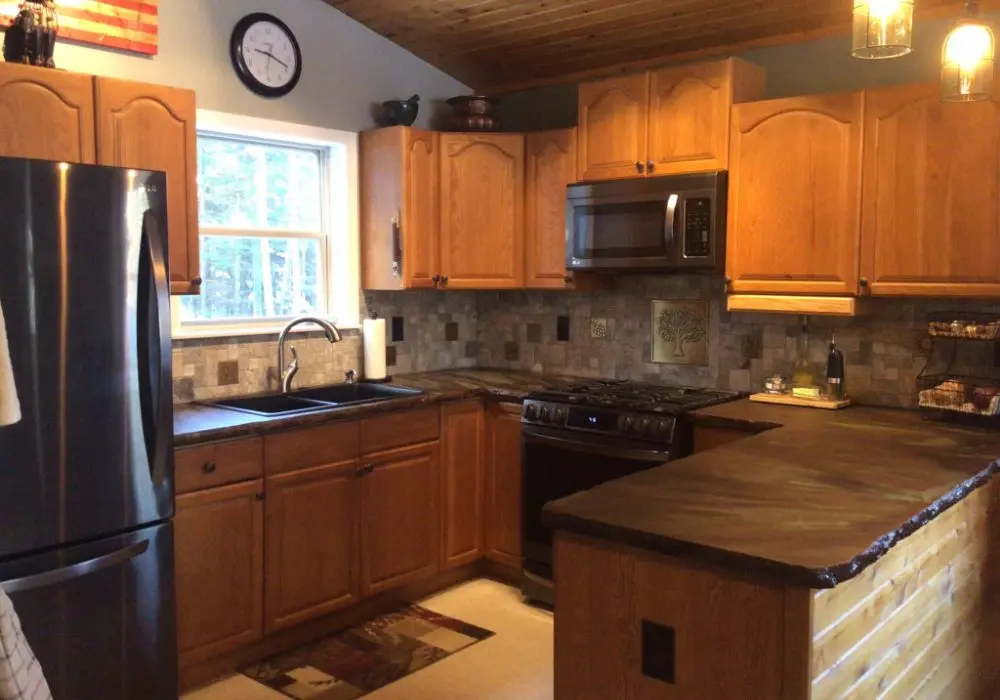
Project Info:
- Project Completed In: 180 day(s)
- Estimate of Square Footage: 40 sq. ft.
- Project Description:
We wanted to upgrade the kitchen in our ‘Hunting Camp’/seasonal home, and decided to create our own concrete countertops. Through much trial and error, testing of concrete and colors, we are finally done! Many of our test pieces have become park bench for ourselves and our friends.
Included are before, during and after pictures, plus one of the first park benches.
For the countertops, we used acid stain in Coffee Brown, Desert Amber and Seagrass. Through the testing, I learned to go easy on the Coffee Brown and to not be afraid of the Seagrass! I also learned to ‘just walk away’ and let the acid stain do its thing without overdoing it.
We love the final outcome and want to thank Direct Colors for their continued help and urgent assistance at each step along the way! Your customer service is top notch!
Personal Tips:
I would recommend doing small test pieces before a big project to figure out what color combinations and techniques you like. It is so important to know that, to a very large degree, you cannot control the final outcome, but with research, practice, and patience, anyone can do this. - Direct Colors Products Used:
1 Gal. Desert Amber DIY EverStain™ & AcquaSeal™ Satin Kit
1 Gal. Coffee Brown EverStain™
1 Gal. Seagrass EverStain™
Family Fun Garage Floor Makeover
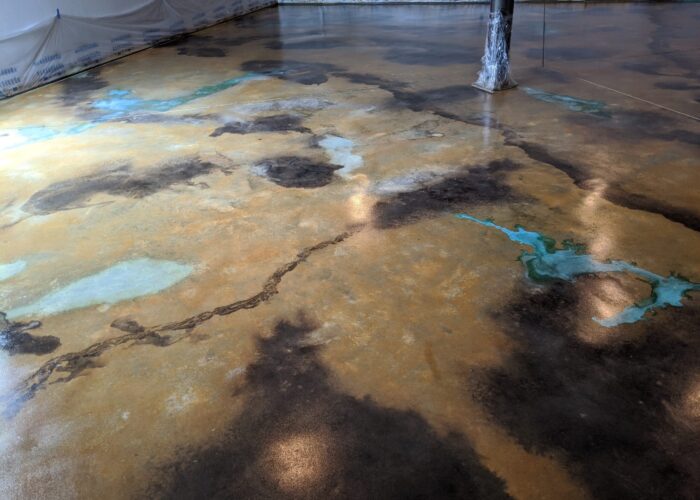
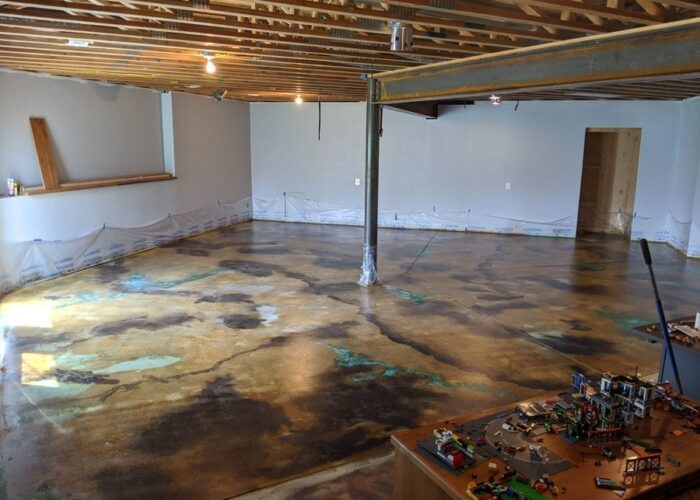
Concrete veining is one of those techniques that is only achievable using concrete acid stain. The marbled result and vibrant colors are hallmarks of concrete acid stain’s reaction to concrete surfaces. If you’re thinking of adding some concrete veining to your surfaces, you’ve come to the right place.
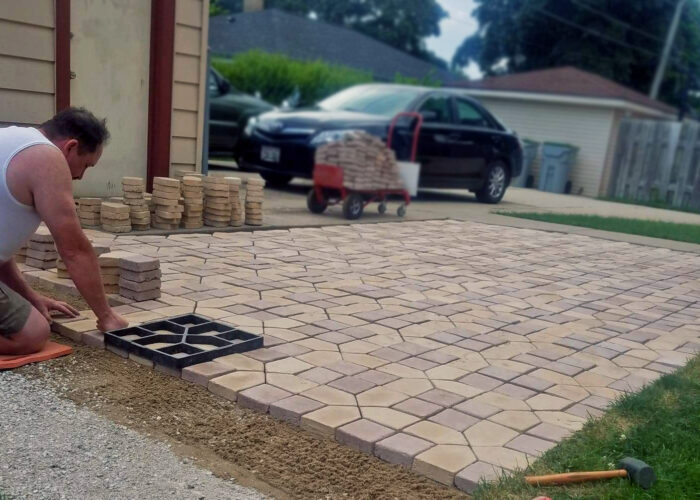
Paving Perfection: DIY Pavers Enhanced with Desert Amber and Coffee Brown
This DIYer started with homemade pavers and colored cement but found the color to be inconsistent. By using Desert Amber and Coffee Brown EverStain acid stains, he was able to achieve a richer, more vibrant result.
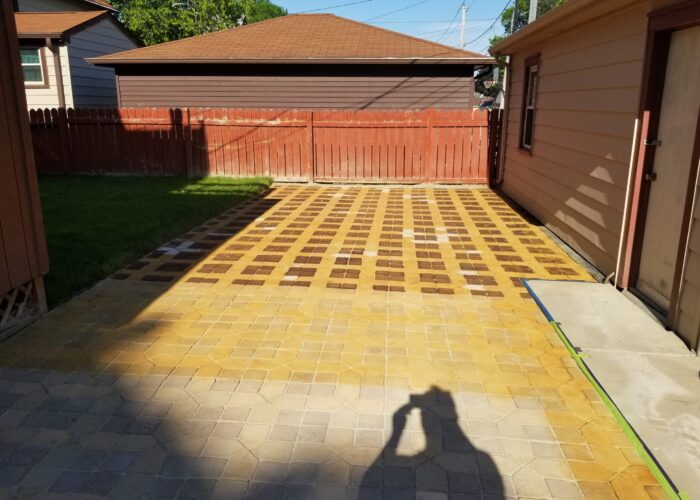
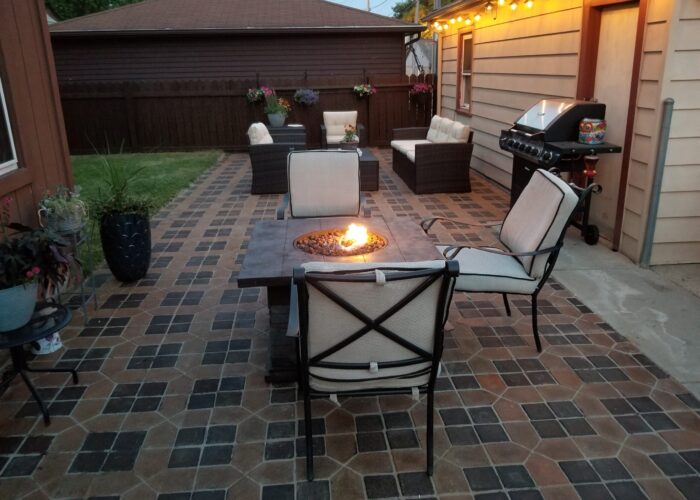
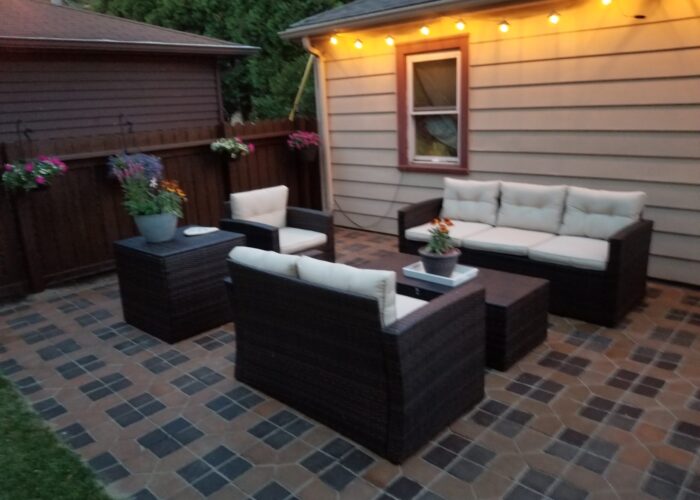
Project Info:
- Project Completed In: 7 day(s)
- Estimate of Square Footage: 500 sq. ft.
- Project Description:
I created my own pavers using a mold and colored cement. However the cement color wasn’t entirely consistent or rich in color, so I decided to acid stain the blocks. - Personal Tips:
Spray the entire area with light color, go back and paint brush the dark areas. - Direct Colors Products Used:
Desert Amber, coffee brown, solvent based satin sealer.
The Kintsugi-Inspired Acid Stained Concrete Floor Transformation
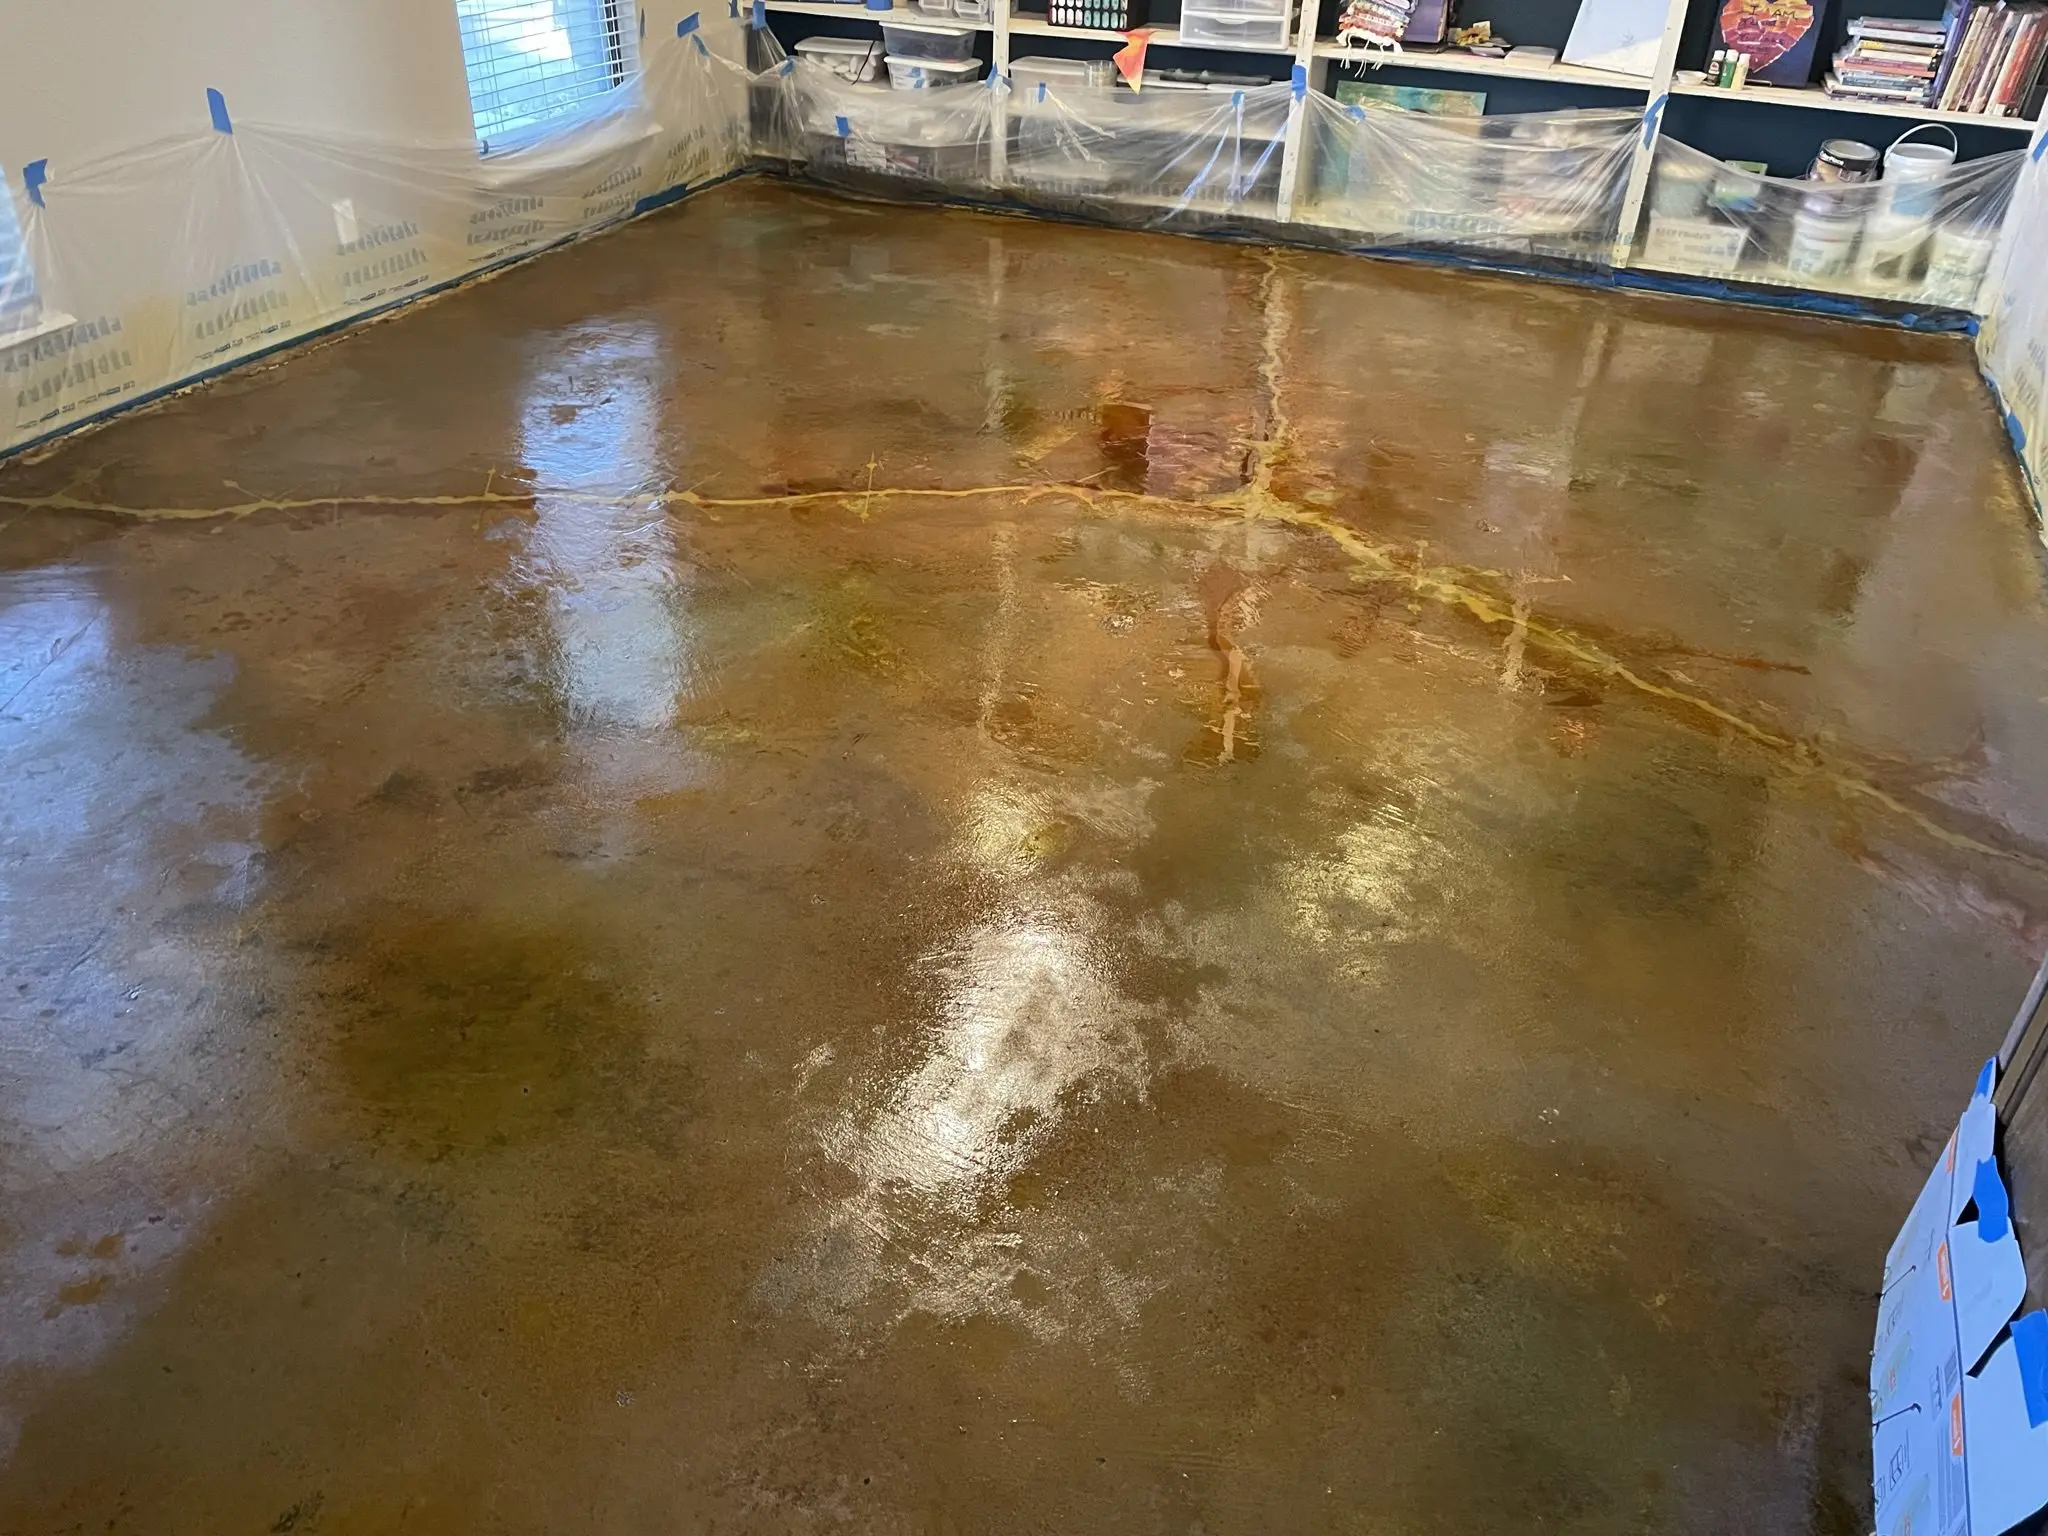
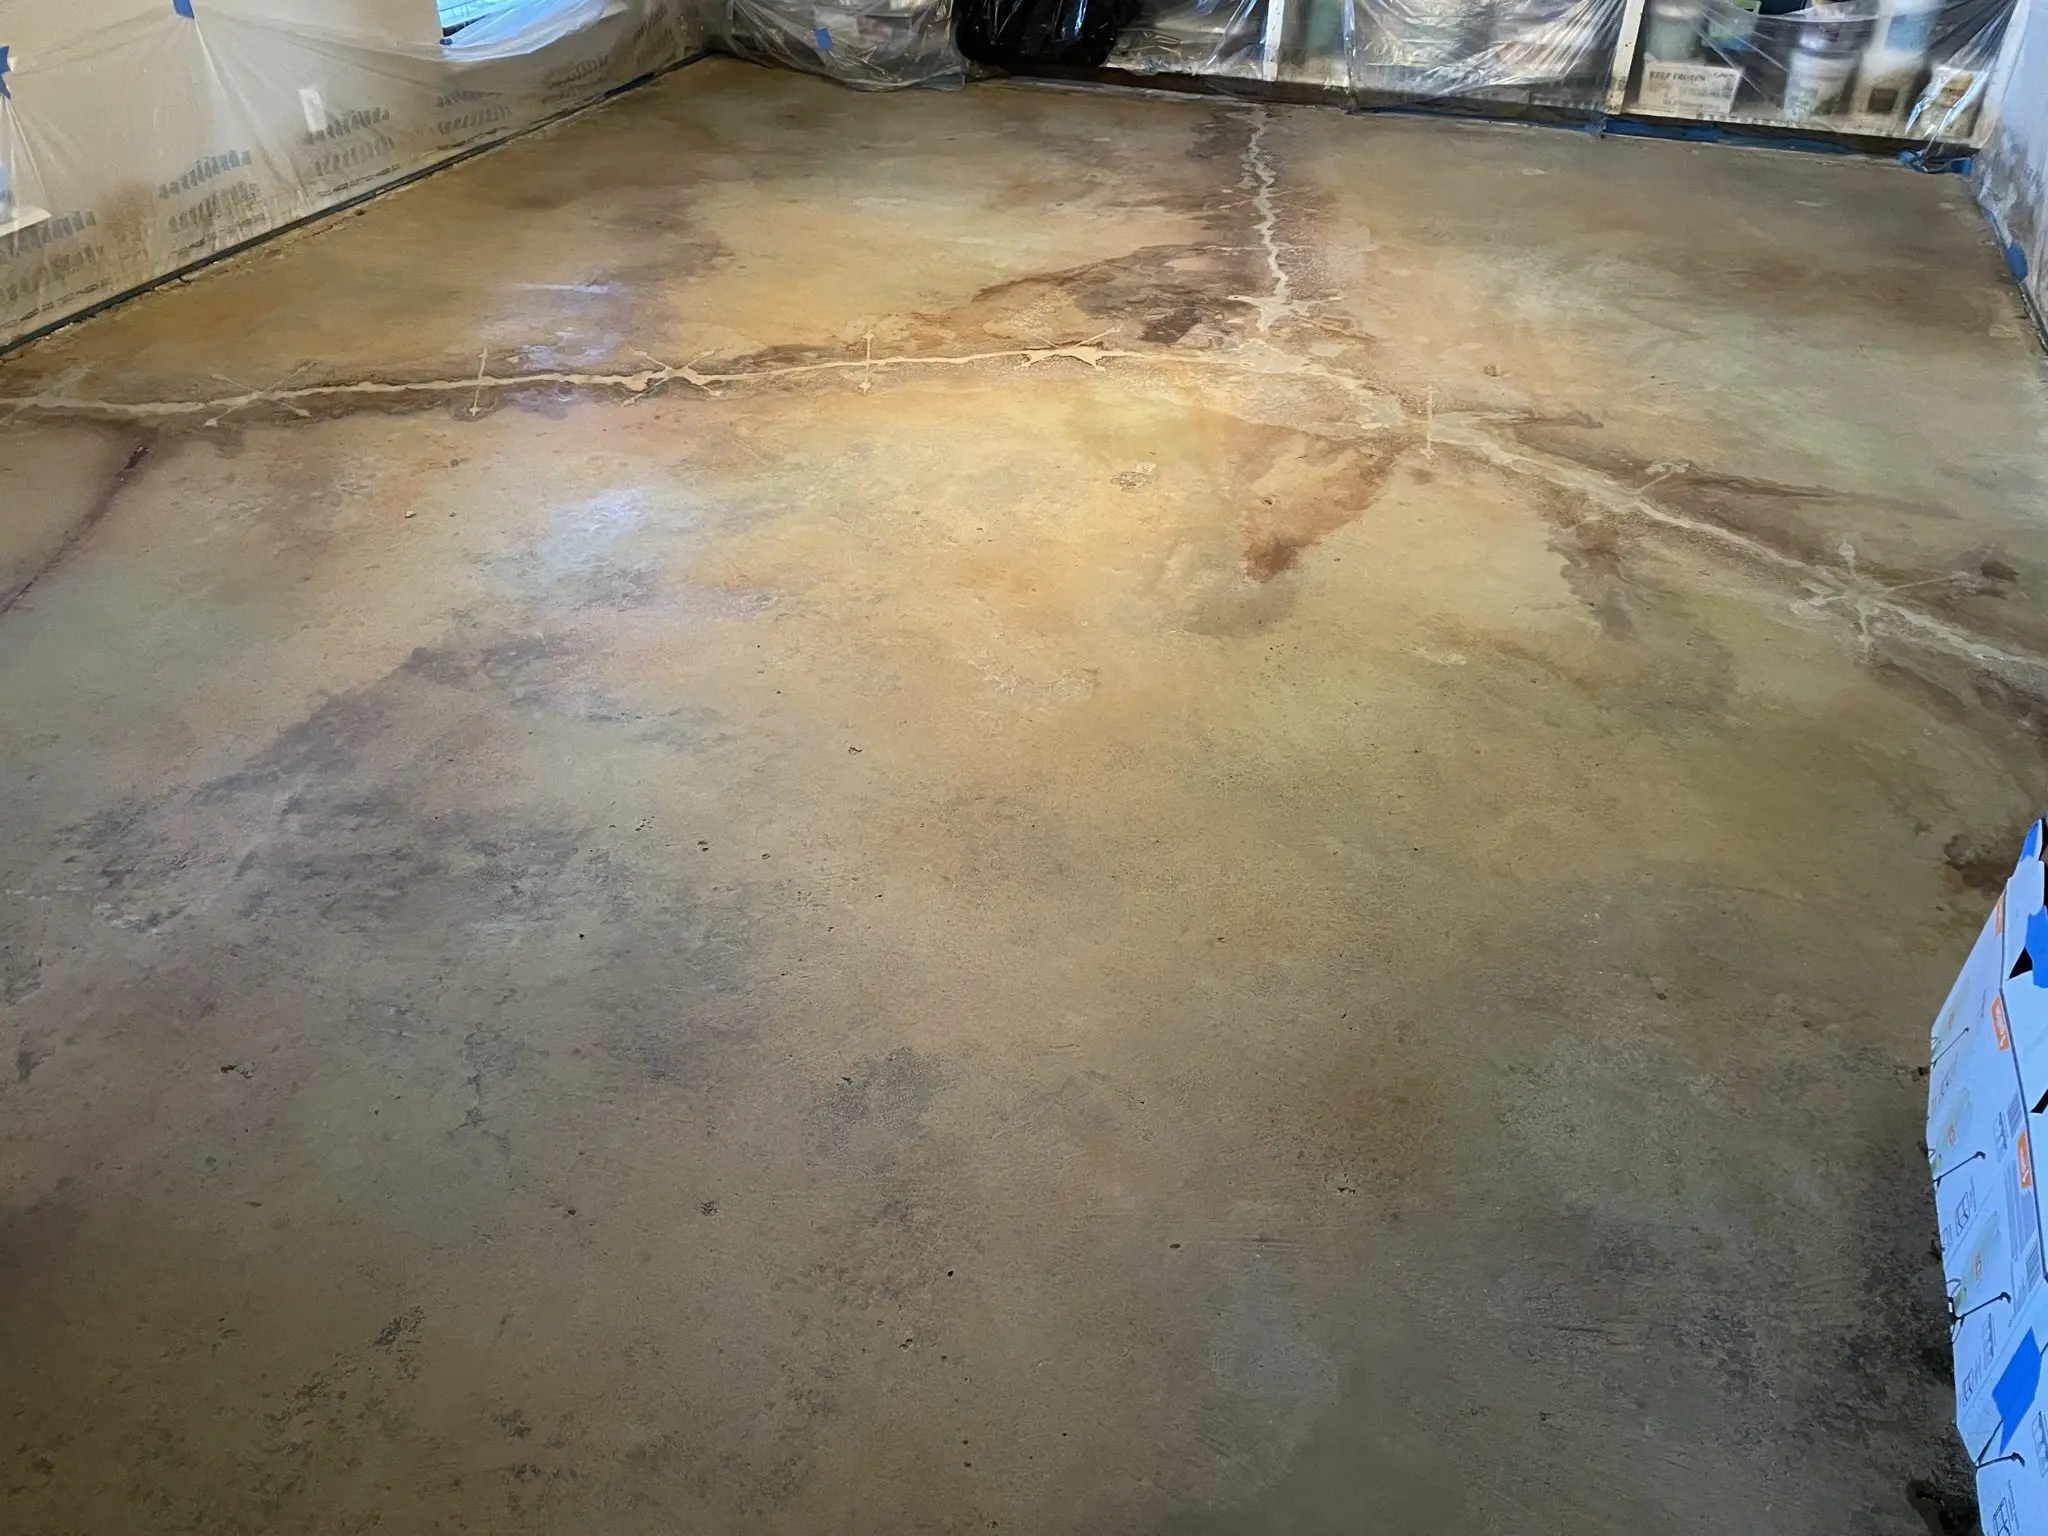
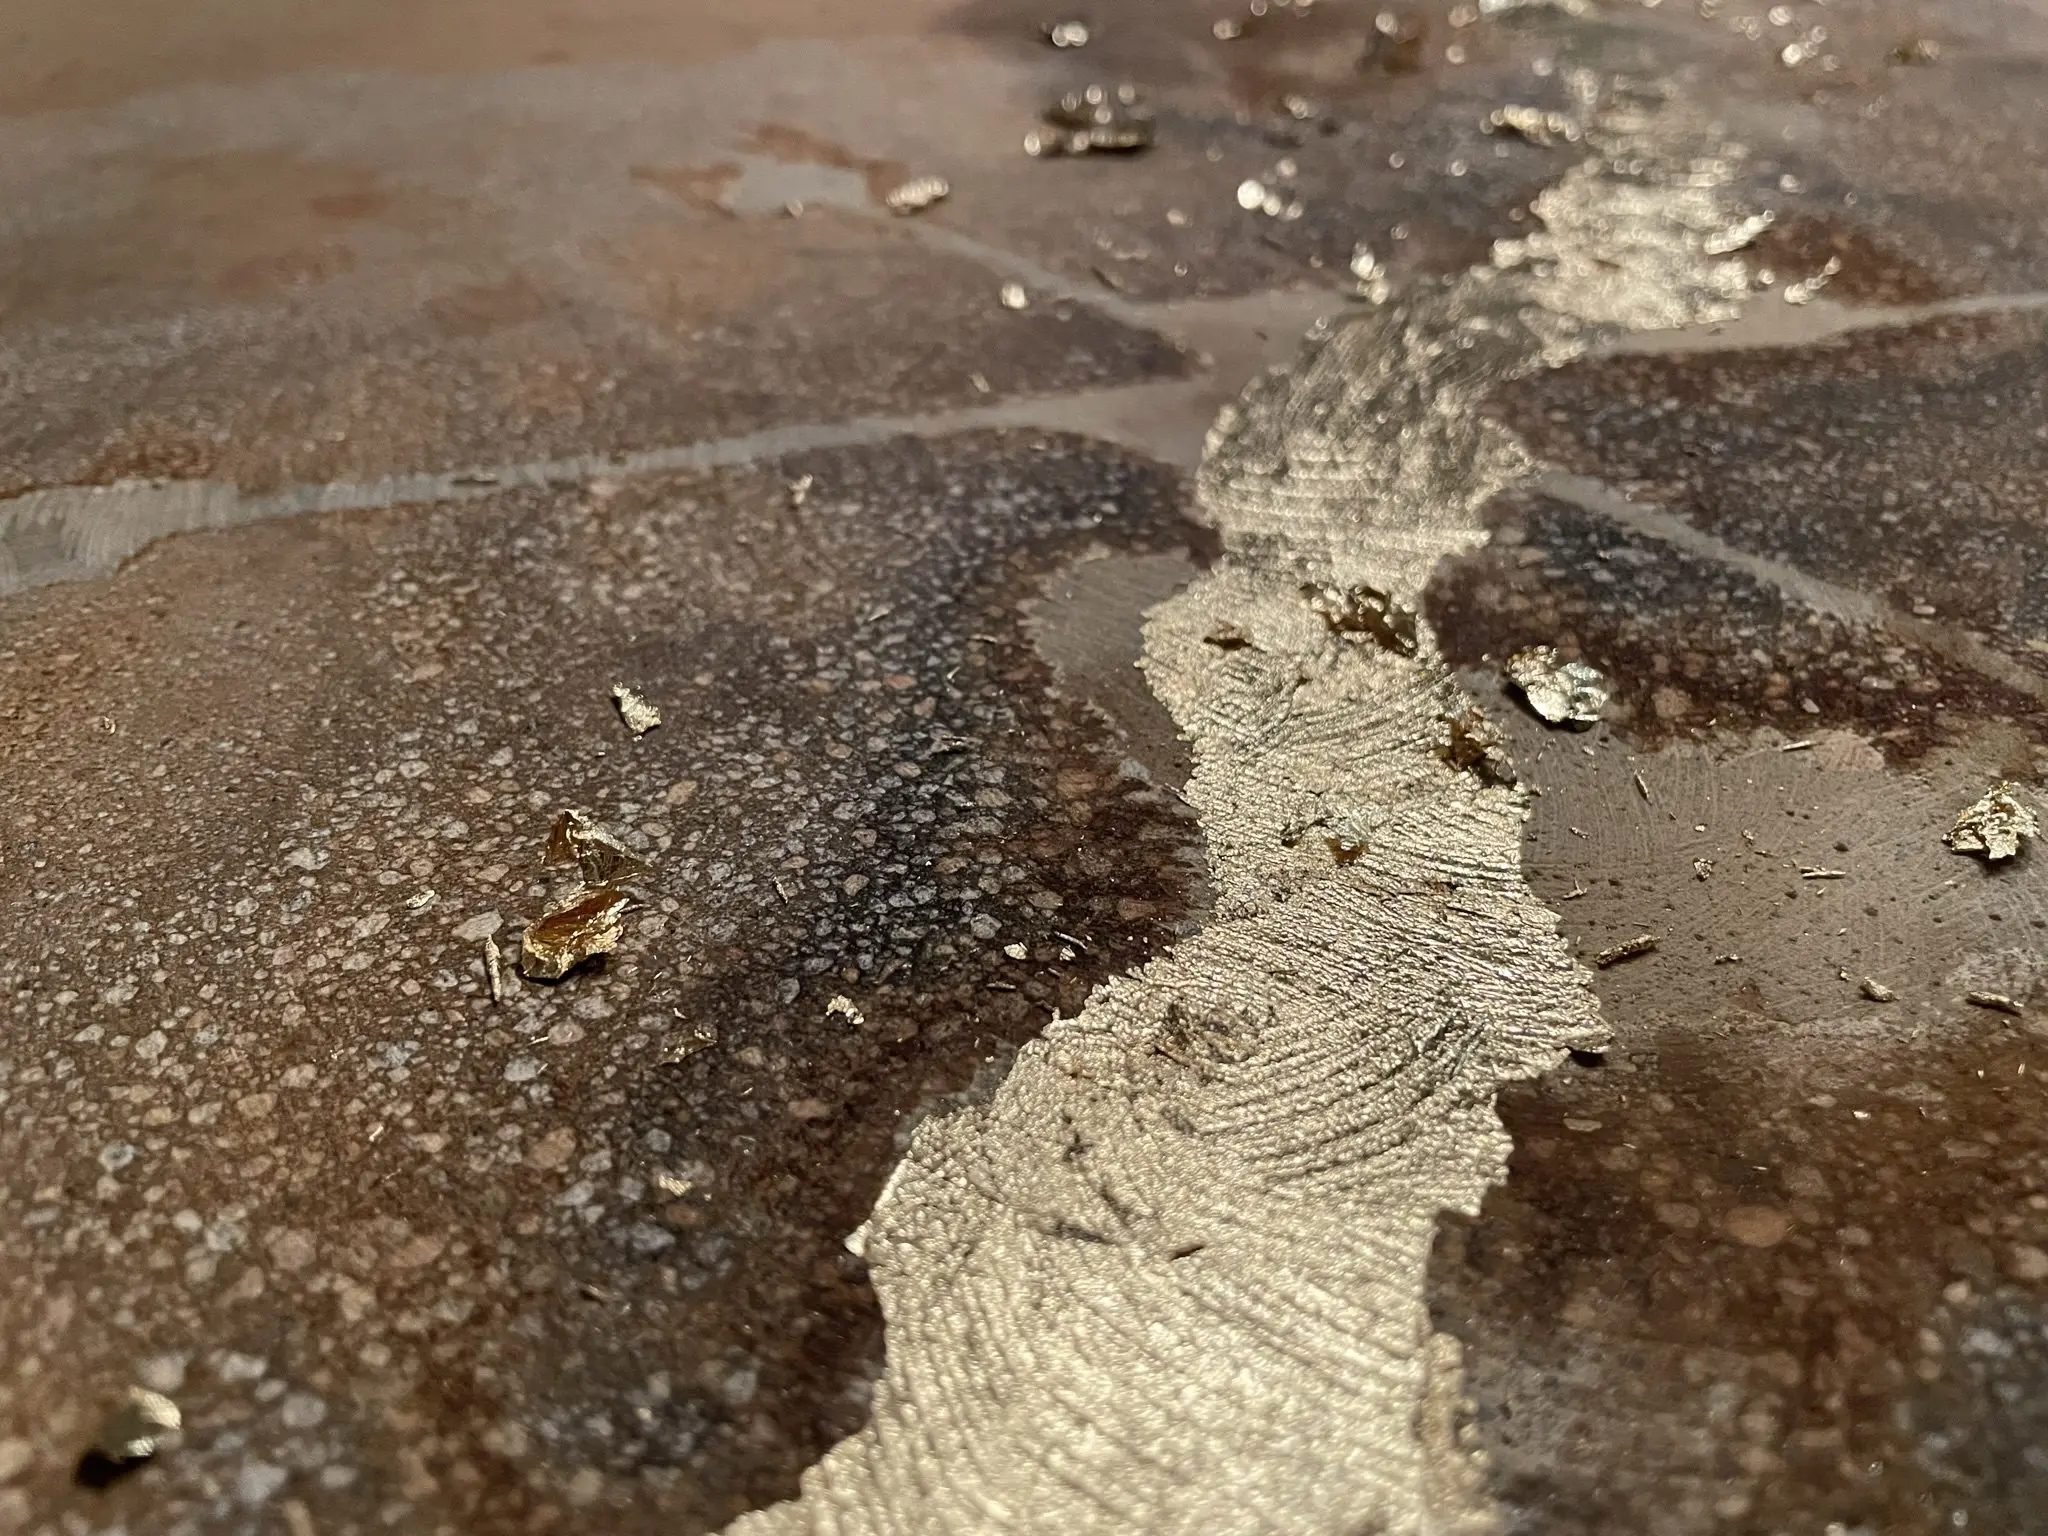
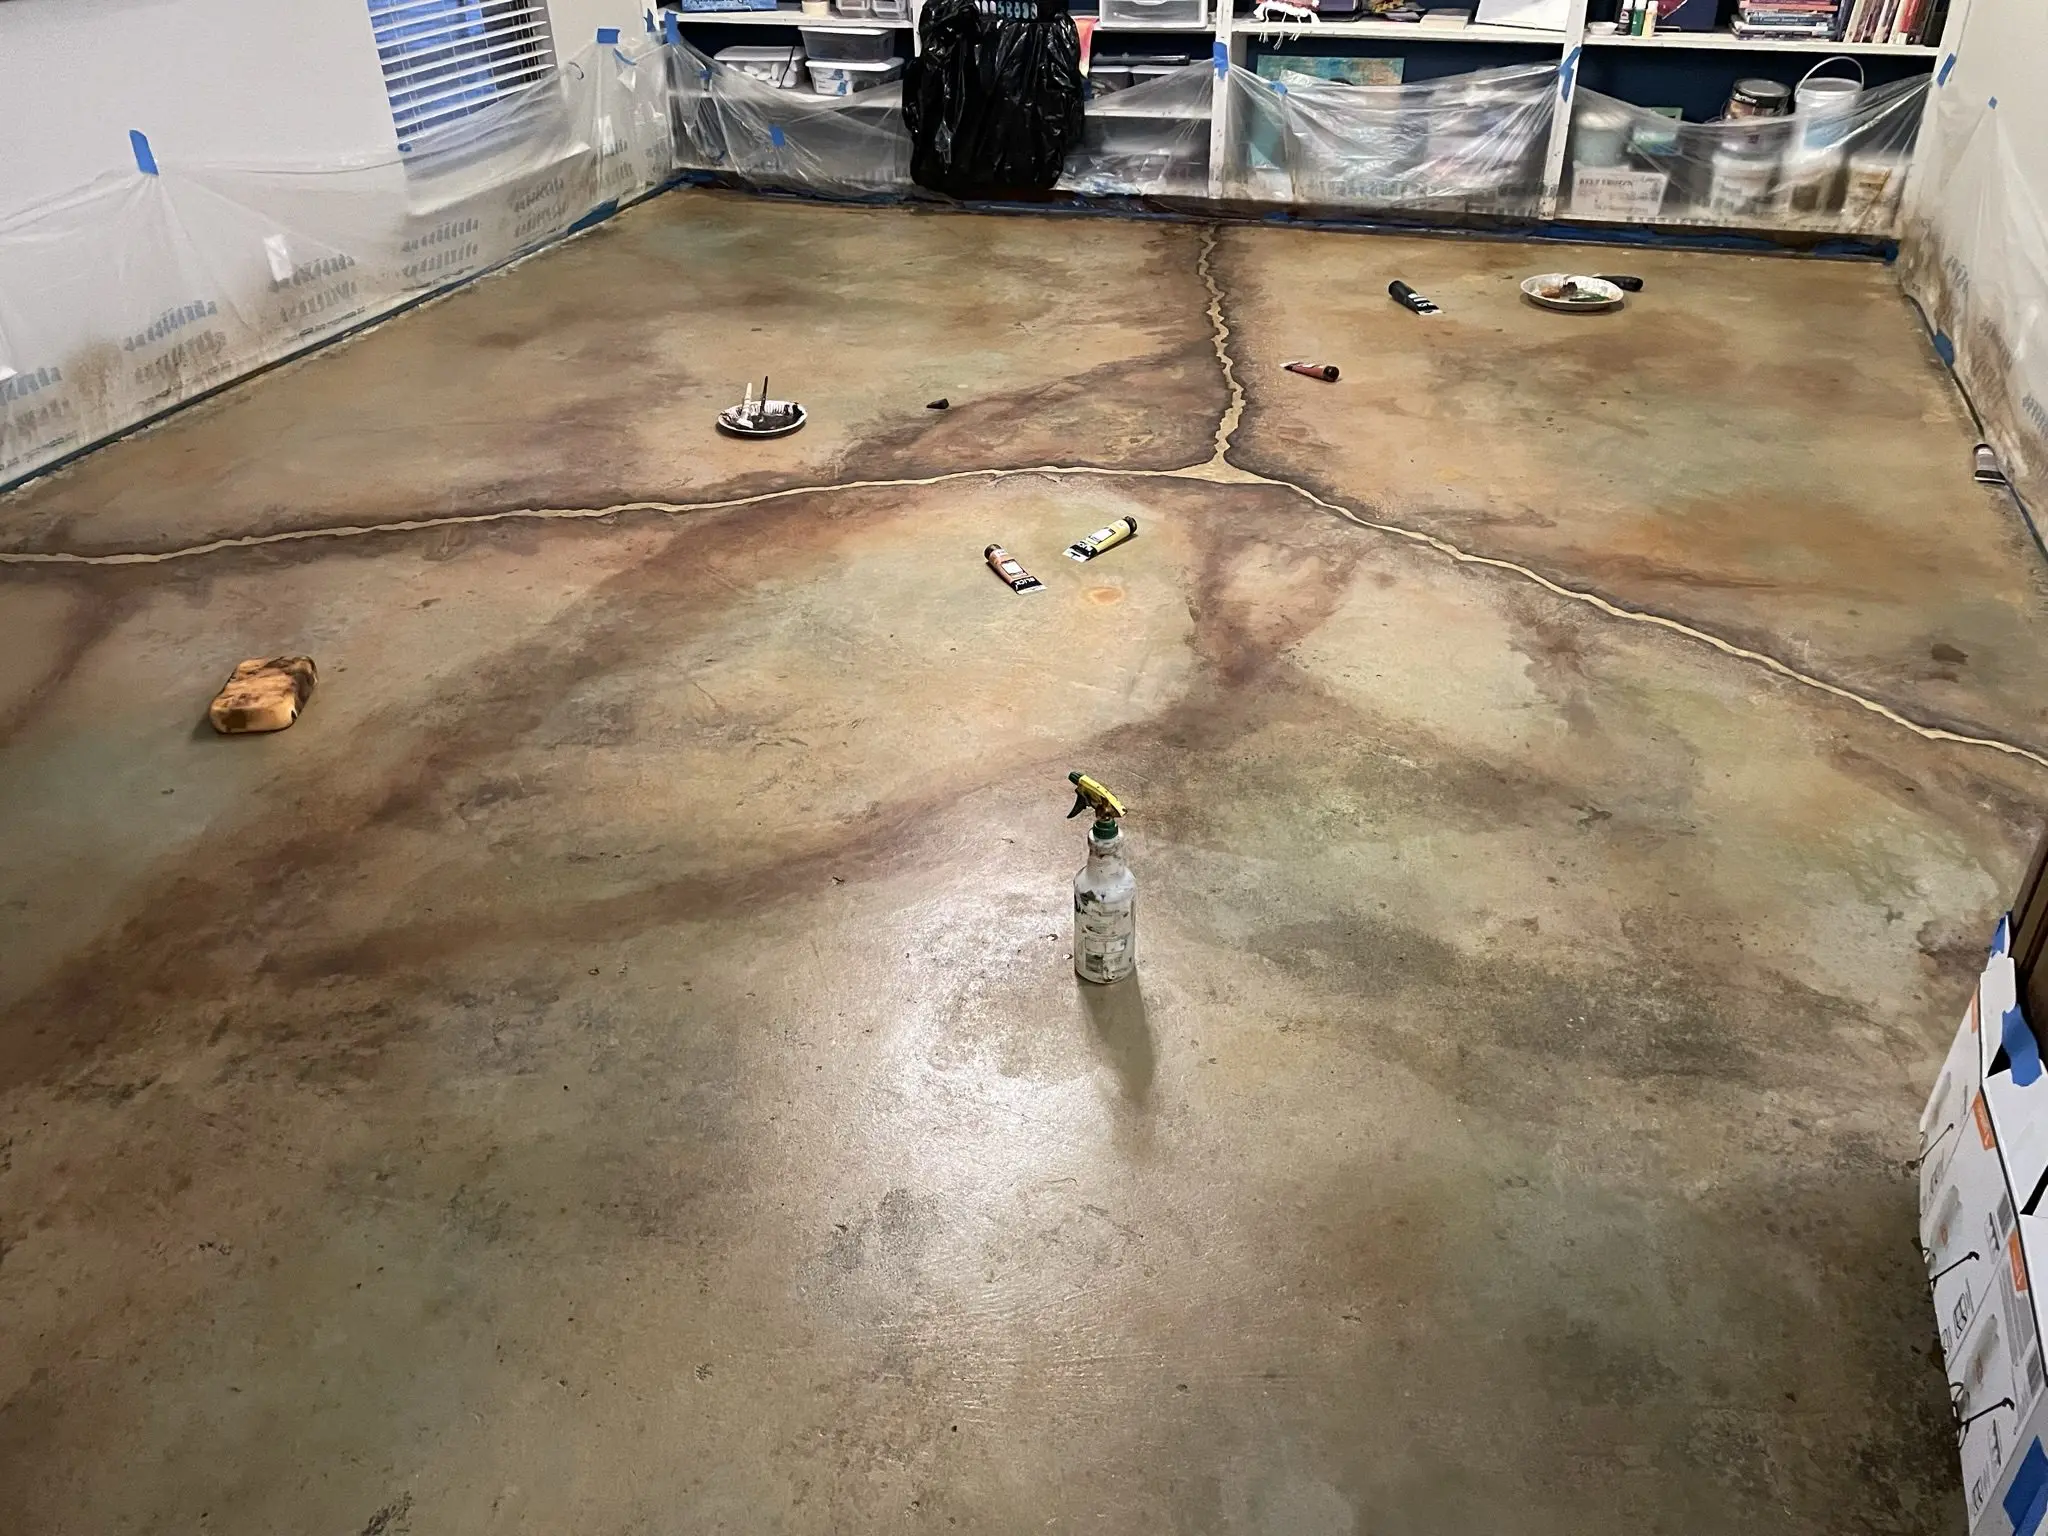
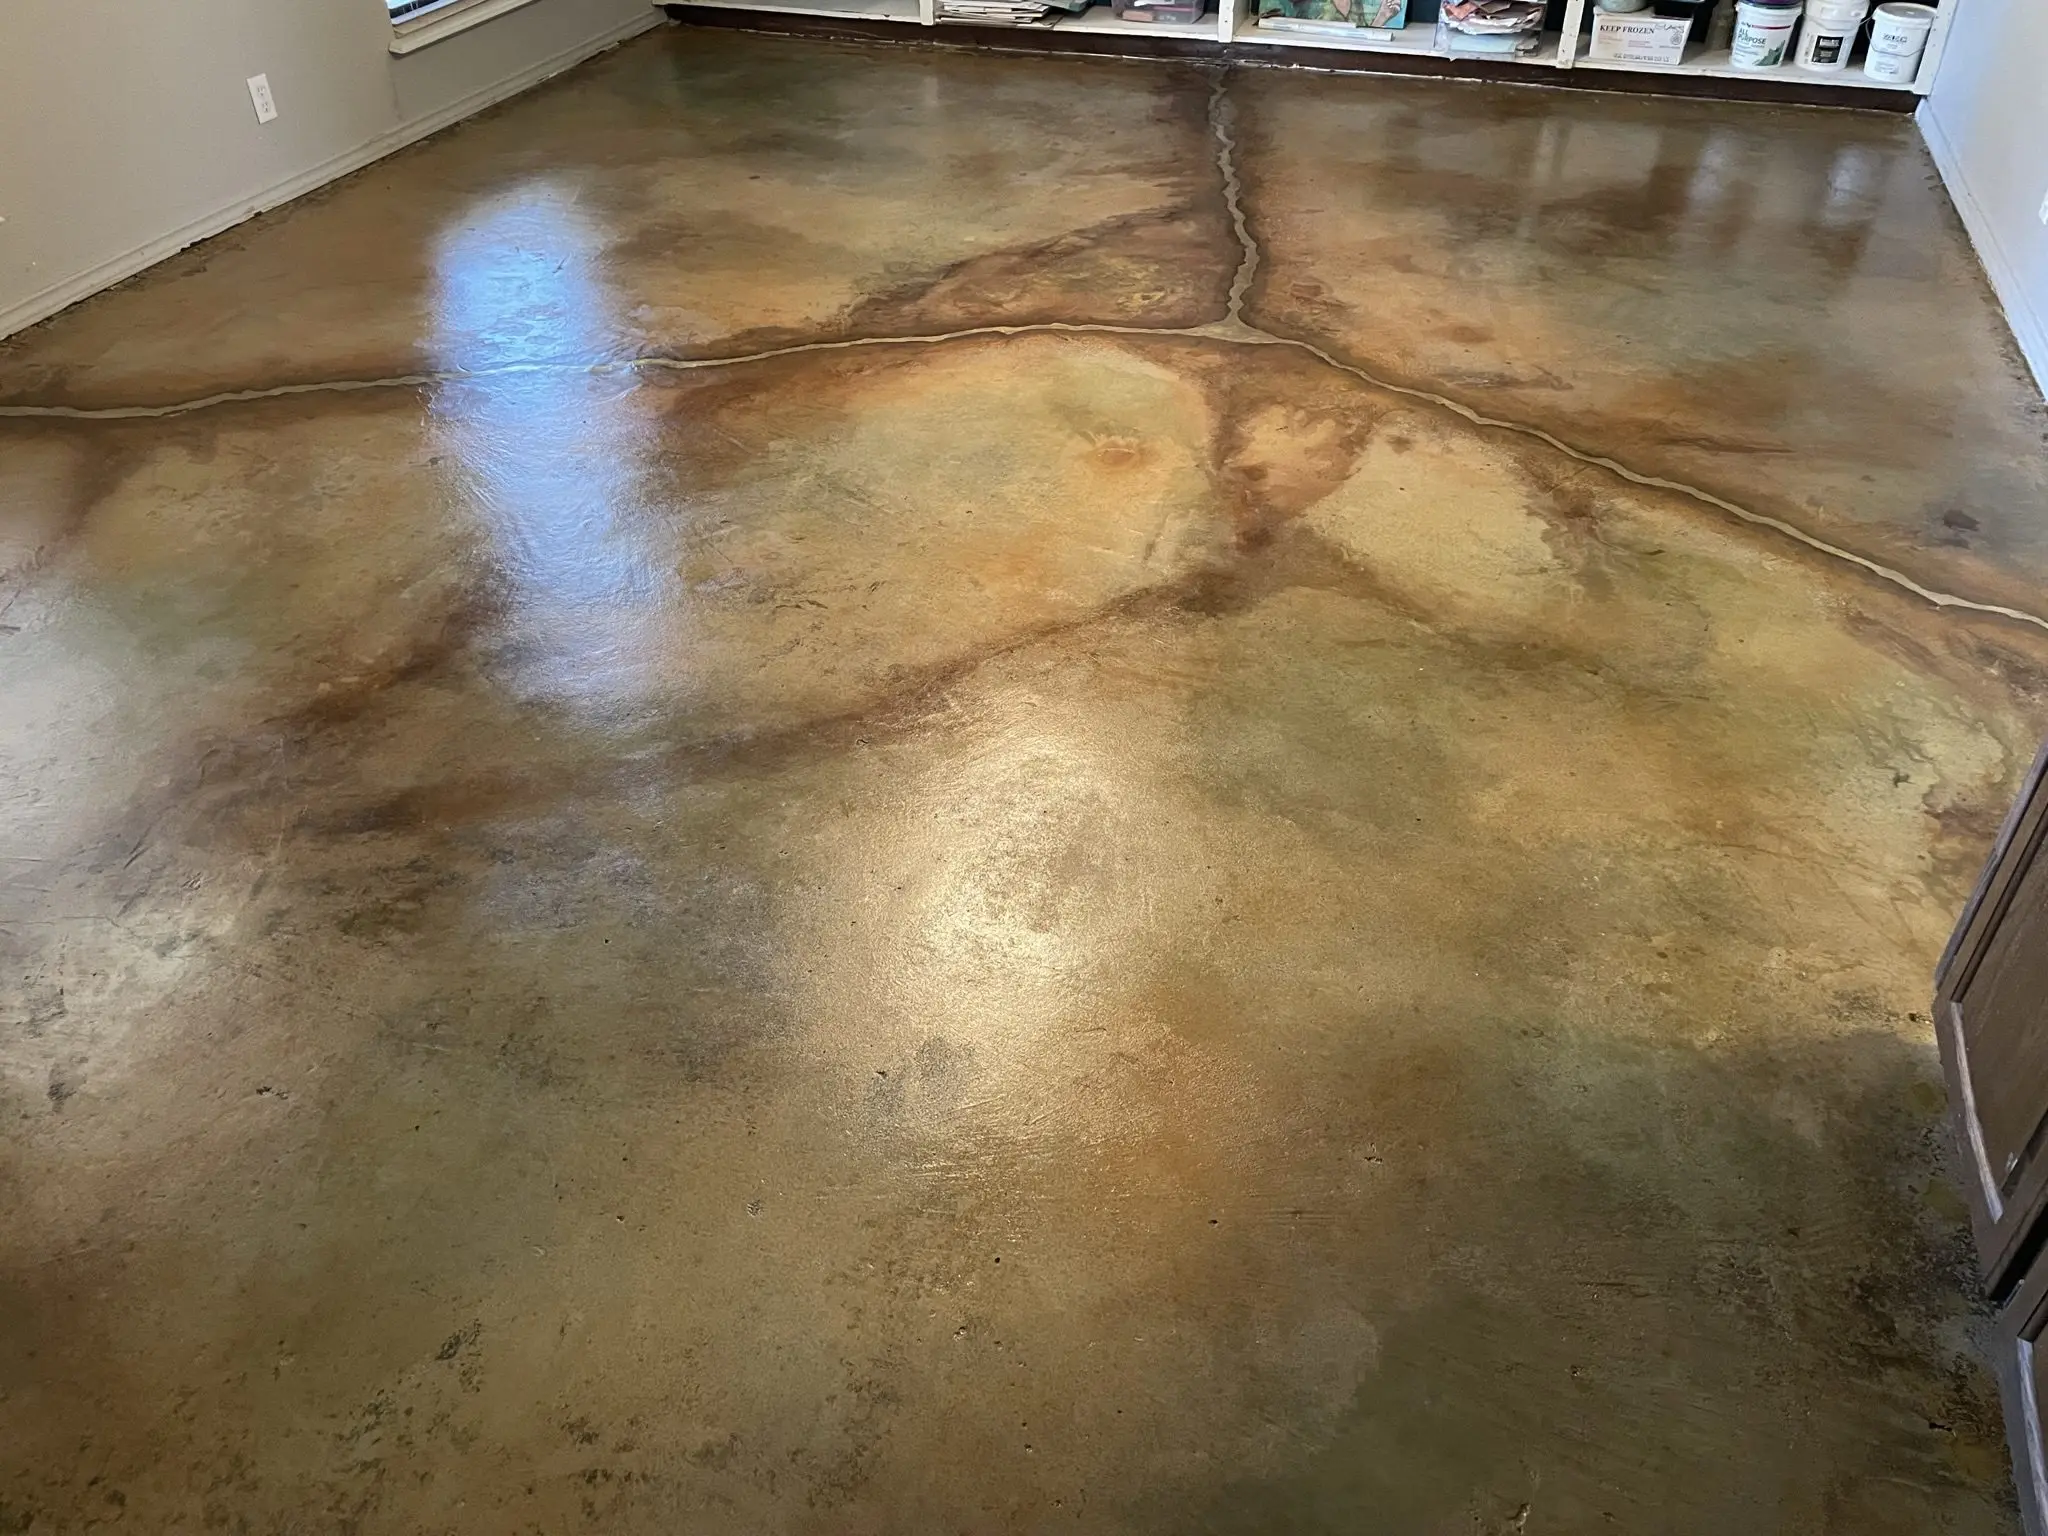
Inspired by Kintsugi, the Japanese art of repairing broken pottery with gold, the homeowner chose to accentuate the floor’s imperfections instead of hiding them. Acid stains in Desert Amber, Seagrass, Coffee Brown, Malayan Buff, and Black EverStain were used to create a multi-tone effect, while gold leaf was applied to the crack to highlight its presence, symbolizing resilience and transformation. The project serves as a tangible representation of the homeowner’s art classes, which focus on acknowledging and turning life’s struggles into something beautiful.
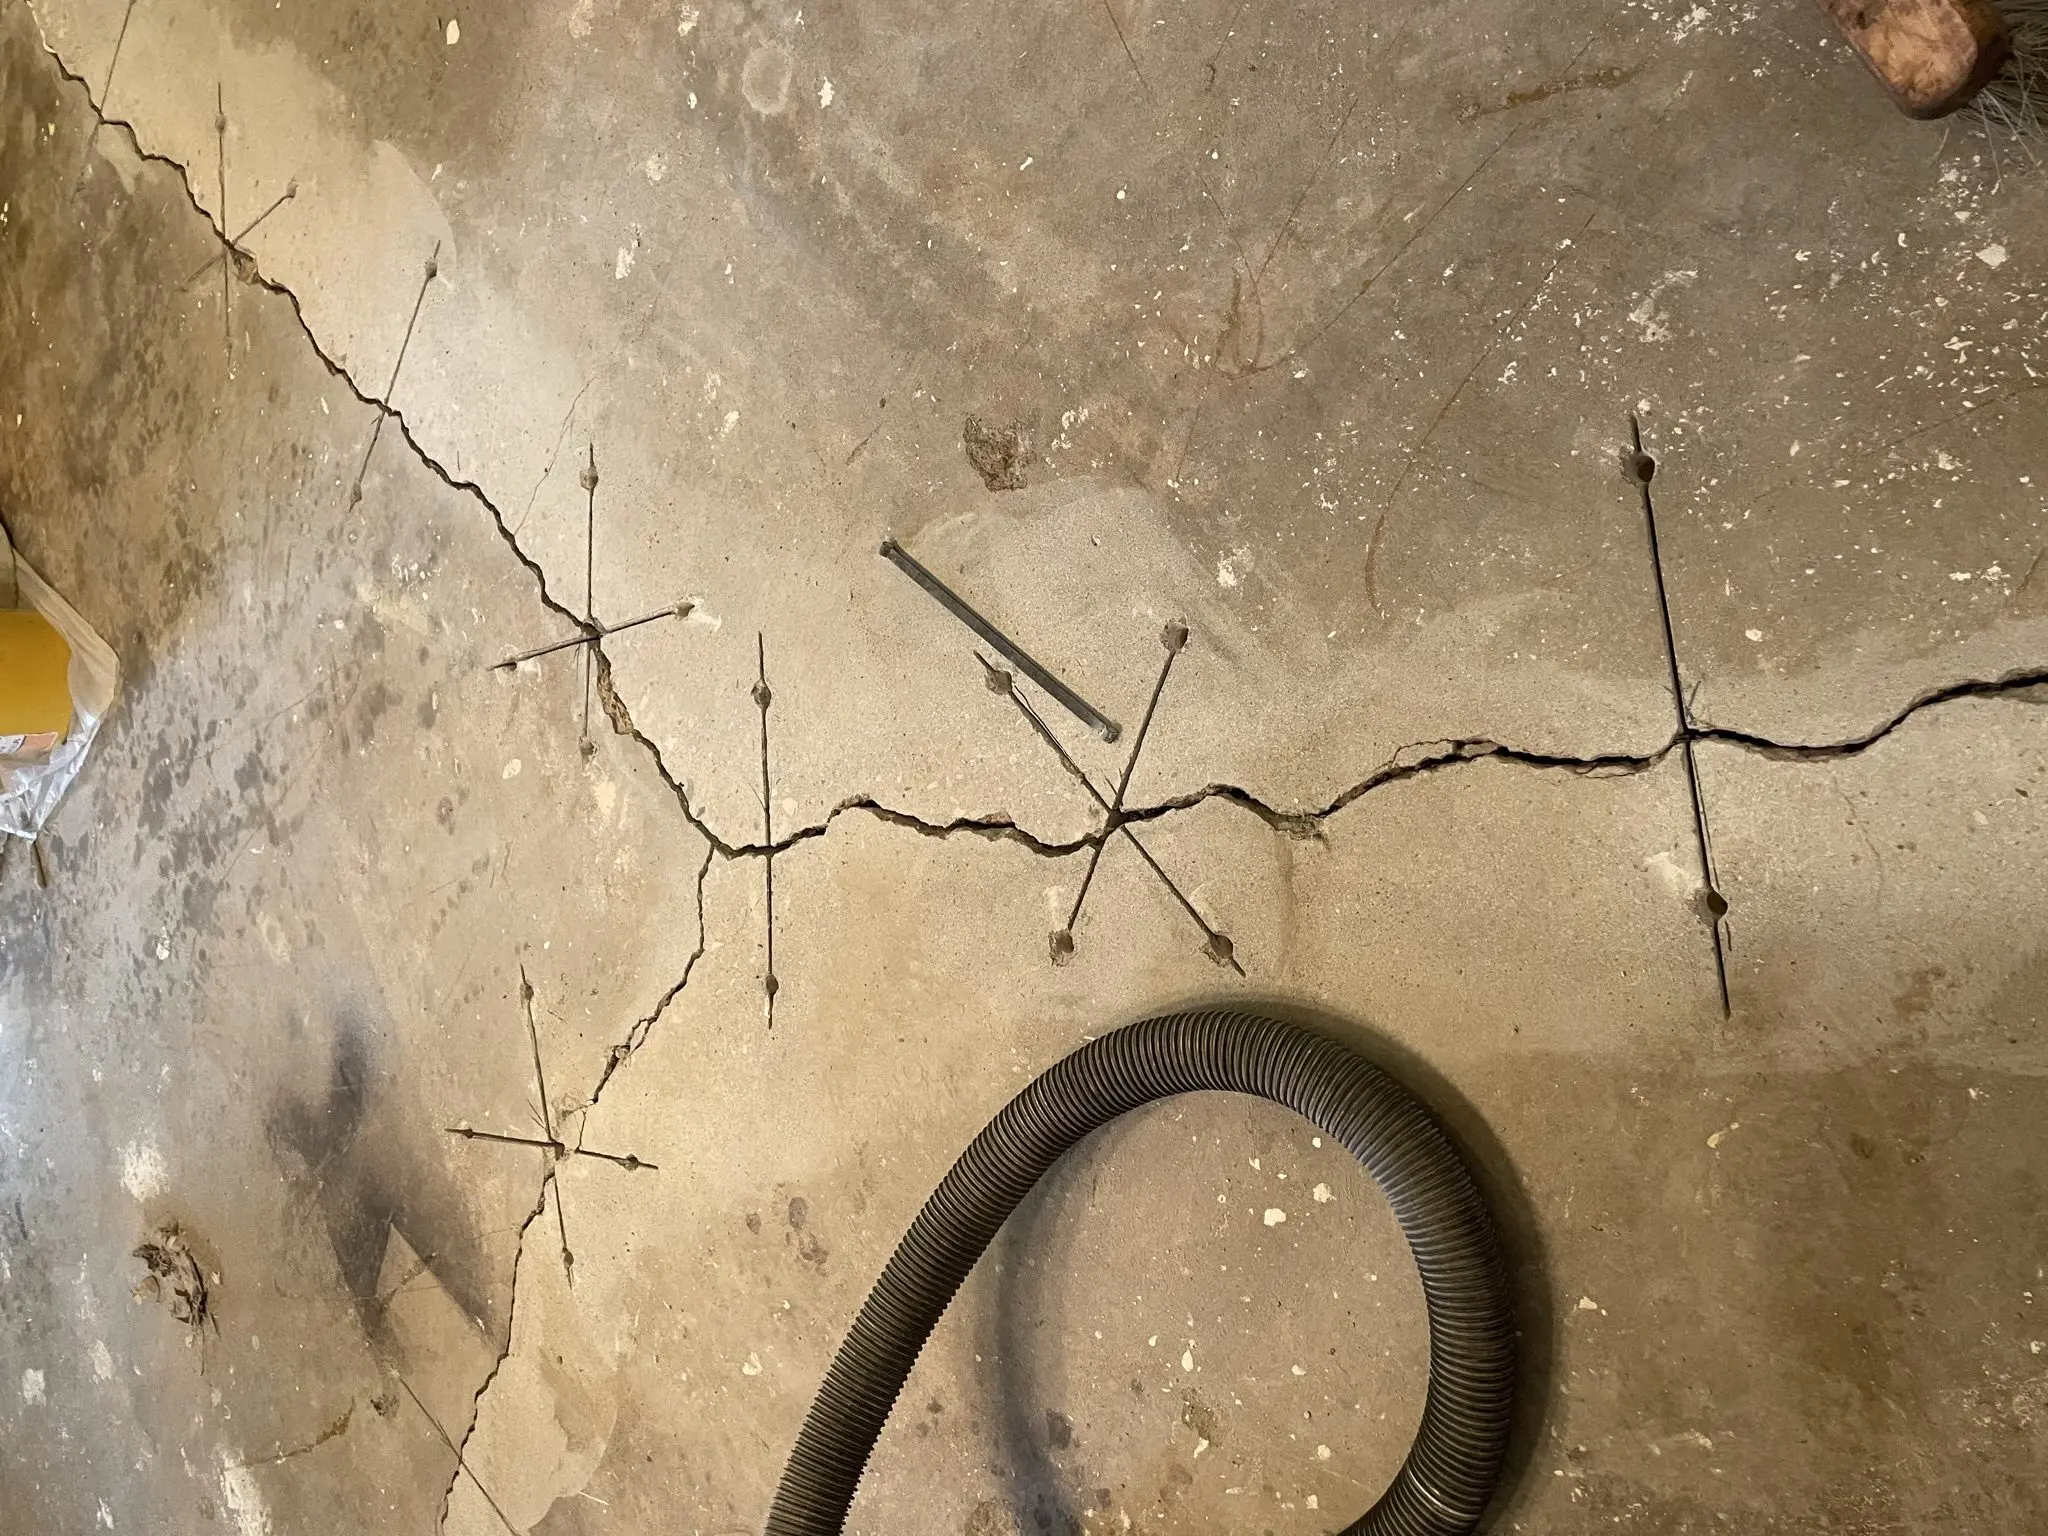
Project Info:
- Project Completed In: Over 3 months
- Estimate of Square Footage: 600 sq. ft.
- Project Description:
I recently bought a house built in 1978 that had very light carpet for the game room and 2 bedrooms. Having a dog and knowing I was going to use the game room as my art studio, I knew before I moved in that the carpet would have to go. From a cost perspective as well as aesthetic and functionality, I knew I wanted to go with stained concrete. I also wanted to use gold leaf on any cracks as my own version of kintsugi, the Japanese practice of repairing broken pottery covering the mended areas with gold as a way to honor the journey of the piece.But I had no idea what the concrete looked like under the carpet until AFTER I moved in and had to pull back the carpet for needed structural repairs. It was then I discovered a HUGE crack and long story short, I needed to get stitches to hold the slab together to protect against further movement. The concrete was so messed up as well that I began to second guess my decision to acid stain. But I had a vision and started in on the prep.My floor had everything wrong with it and prep was brutal. I tried mechanical and solvent methods to remove all the things that were on it, but was unsuccessful on the carpet pad adhesive, some of the high heat paint, and a few other things of questionable origin. Again, I began to despair of my decision because I couldn’t get it prepped to look as nice as the pics showed on the website. But there was no turning back at this point, so just did my best and went for it.And I must say, I worried too much! I did use multiple colors of stain which provided camouflage for some of the areas I struggled with and it turned out beautifully! I decided to highlight the stitched crack making it more dramatic. I added some acrylic paint after the first layer of sealer to even some areas out and also did the gold leaf on the crack.It’s a one of a kind floor that fully captures what happens in this room. I have art classes to help people process their brokenness, seeing their life from a higher perspective that shows how all the broken and hard can be something beautiful. It’s a great visual aid! - Personal Tips:
1. Do your best on prep, but don’t stress. I totally over thought it
2. Have a helper. I did it by myself and it was A LOT
3. I filled some divots with concrete patch and some with epoxy. They will both take the stain differently but I think I would do all patch next time as the epoxy is too shiny compared to the rest of the floor. - Direct Colors Products Used:
1 Gal. CitrusEtch™ Concrete Etcher
2 x 1 Gal. Desert Amber EverStain™ & AcquaSeal™ Satin Kit
1 Gal. AcquaSeal™ Satin Concrete Sealer
1 Qt. Seagrass EverStain™ Acid Stain
1 Qt. Coffee Brown EverStain™ Acid Stain
1 Qt. Malayan Buff EverStain™ Acid Stain
4 Oz. Black EverStain™ Acid Stain
2 x 1 Gal. ProWax Polish™ Satin - Other Products Used:
Acrylic art paint in Yellow Oxide, Raw Sienna, Burnt Sienna, and Burnt Umber that blended with my stain colors nicely.Imitation gold leaf sheets and special gold leaf adhesive and sealer (I would go with gold leaf paint if I did it again)


