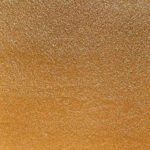
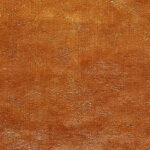
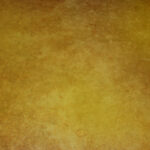
The Malayan Buff EverStain™ Collection
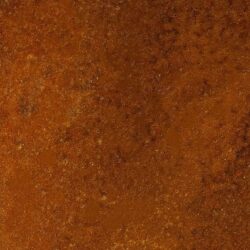
Browse through our gallery of unique customer projects, each one a testament to the beauty and durability of Malayan Buff EverStain™ concrete acid stain.
By Justin Richardson
The Whiskey Bar Revival: A DIY Basement Makeover by @carharthomestead
Step into the world of Kaitlyn Carhart, the creative force behind @carharthomestead, as she transforms her basement into a cozy Whiskey bar. Tucked away in New York’s Finger Lakes region, this endeavor stands as a testament to her love for neutral hues, natural textures, and Nordic-minimalistic style.
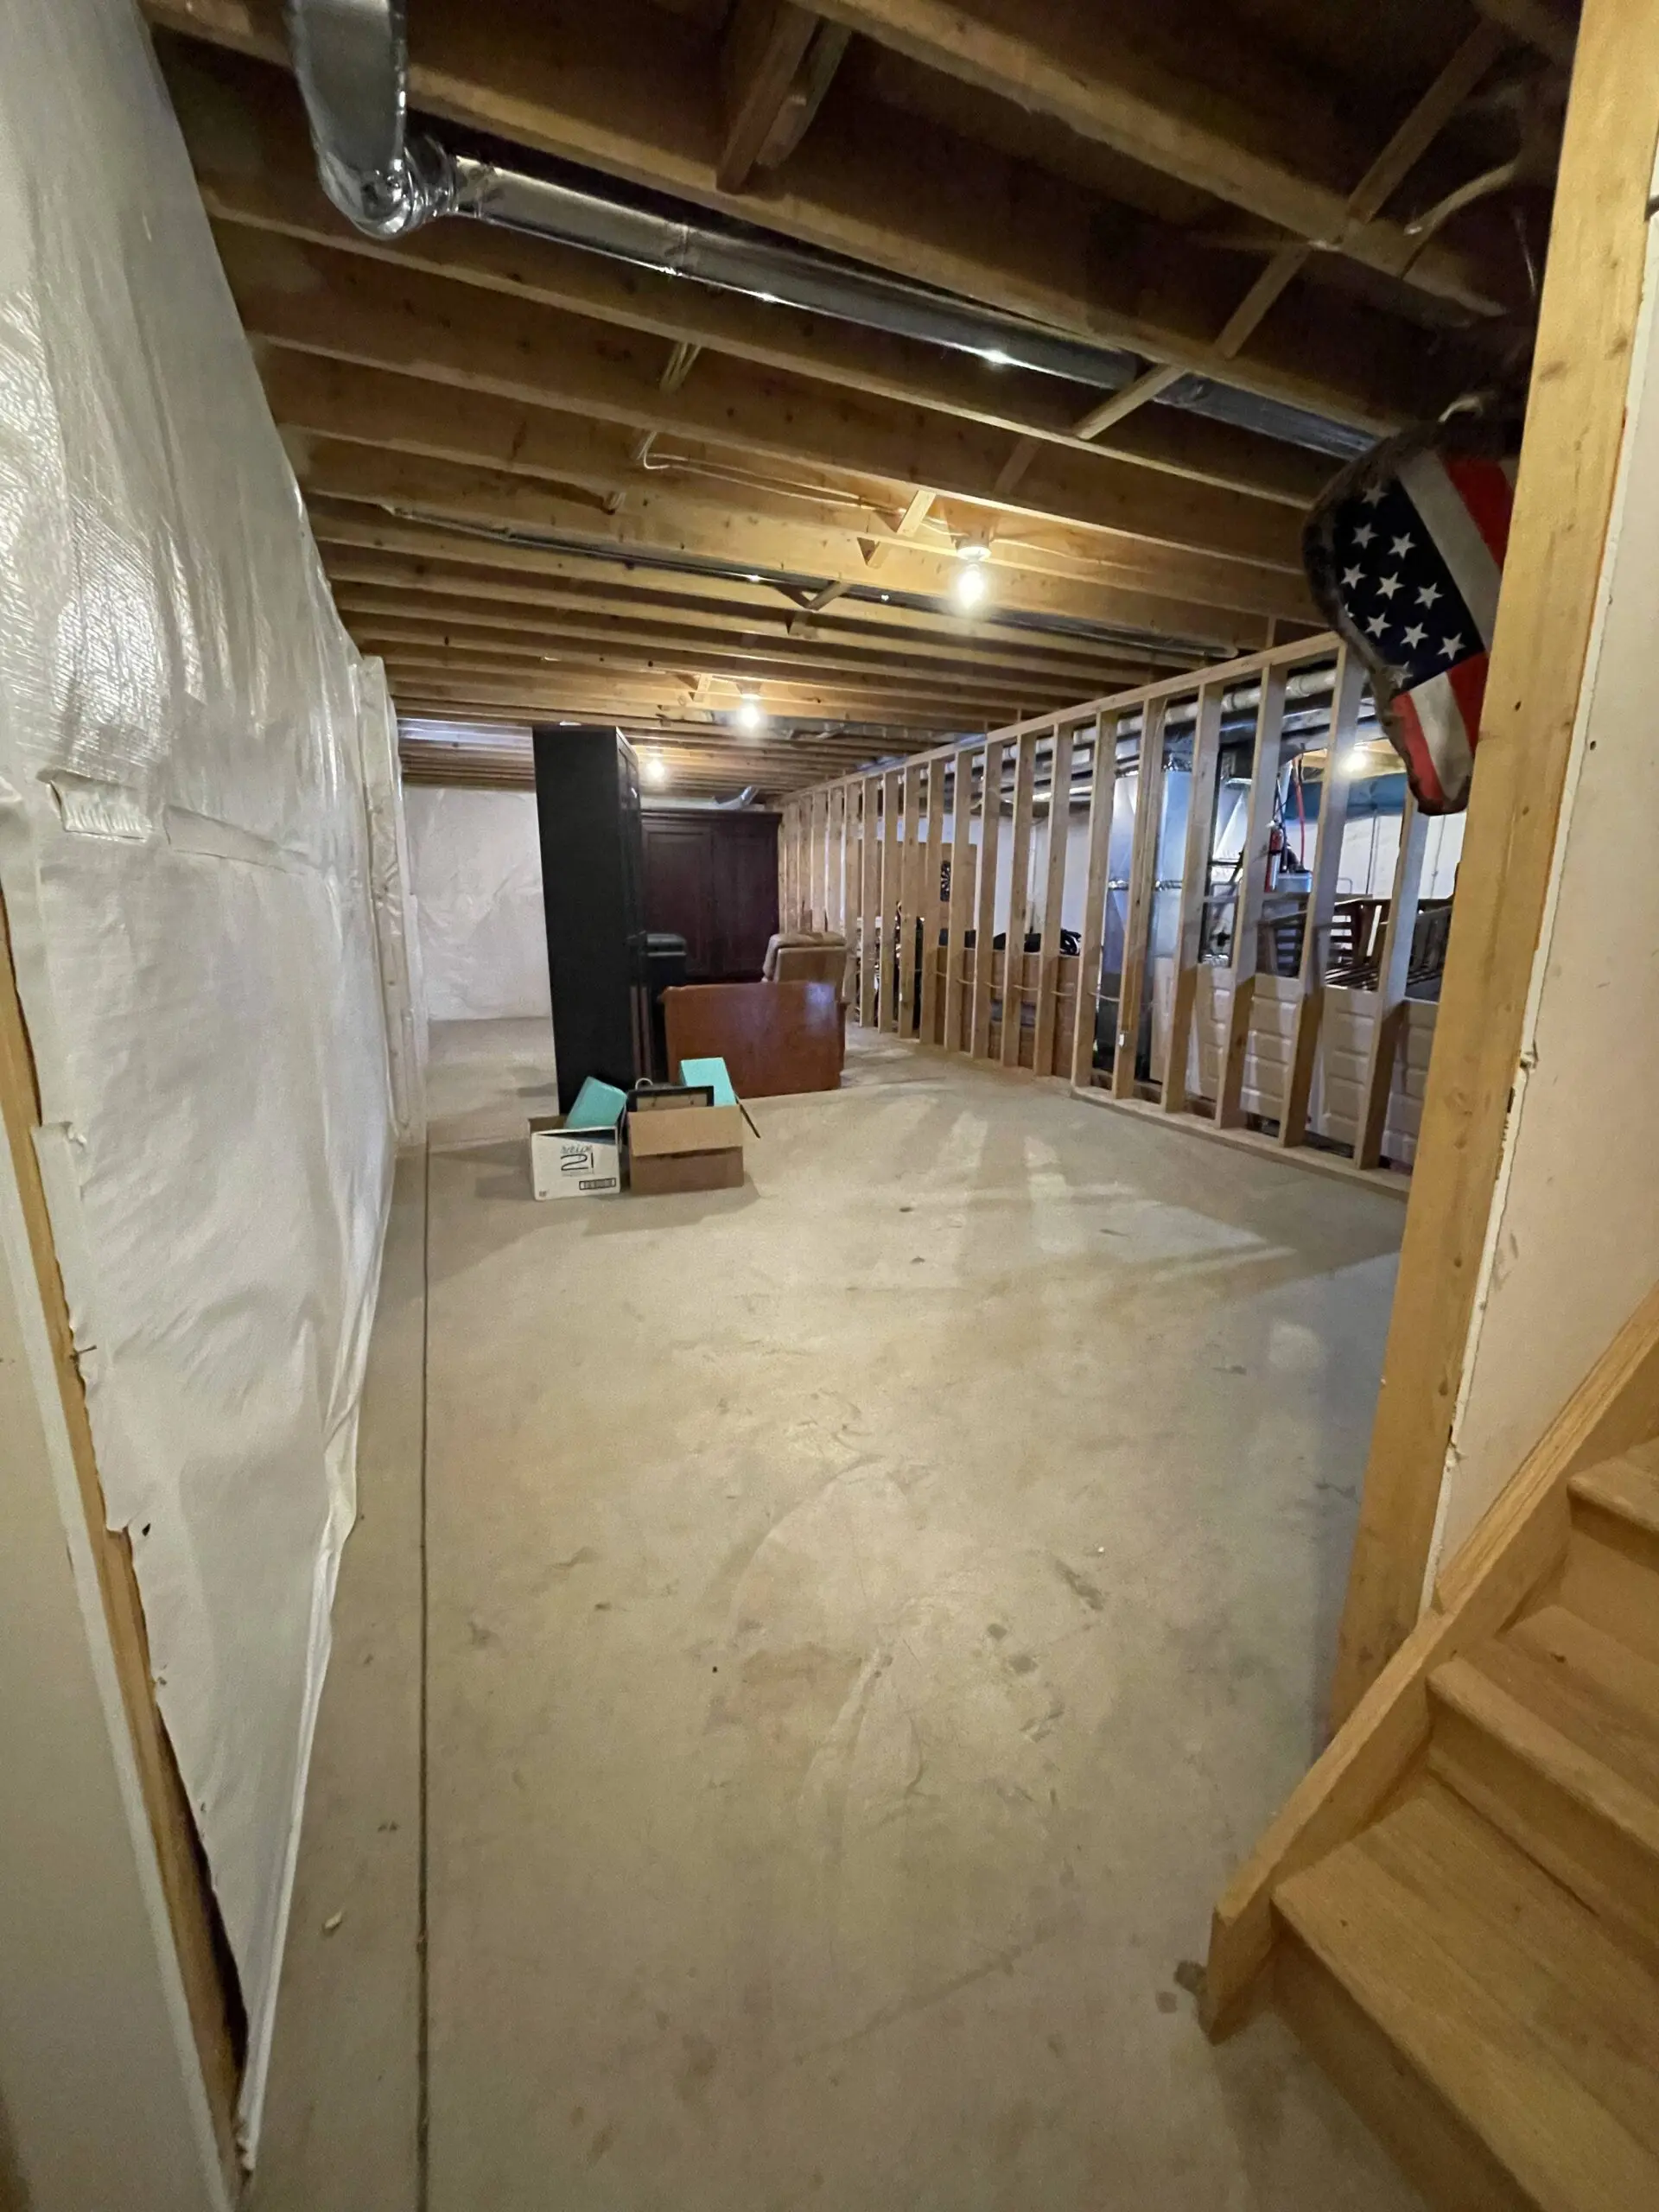
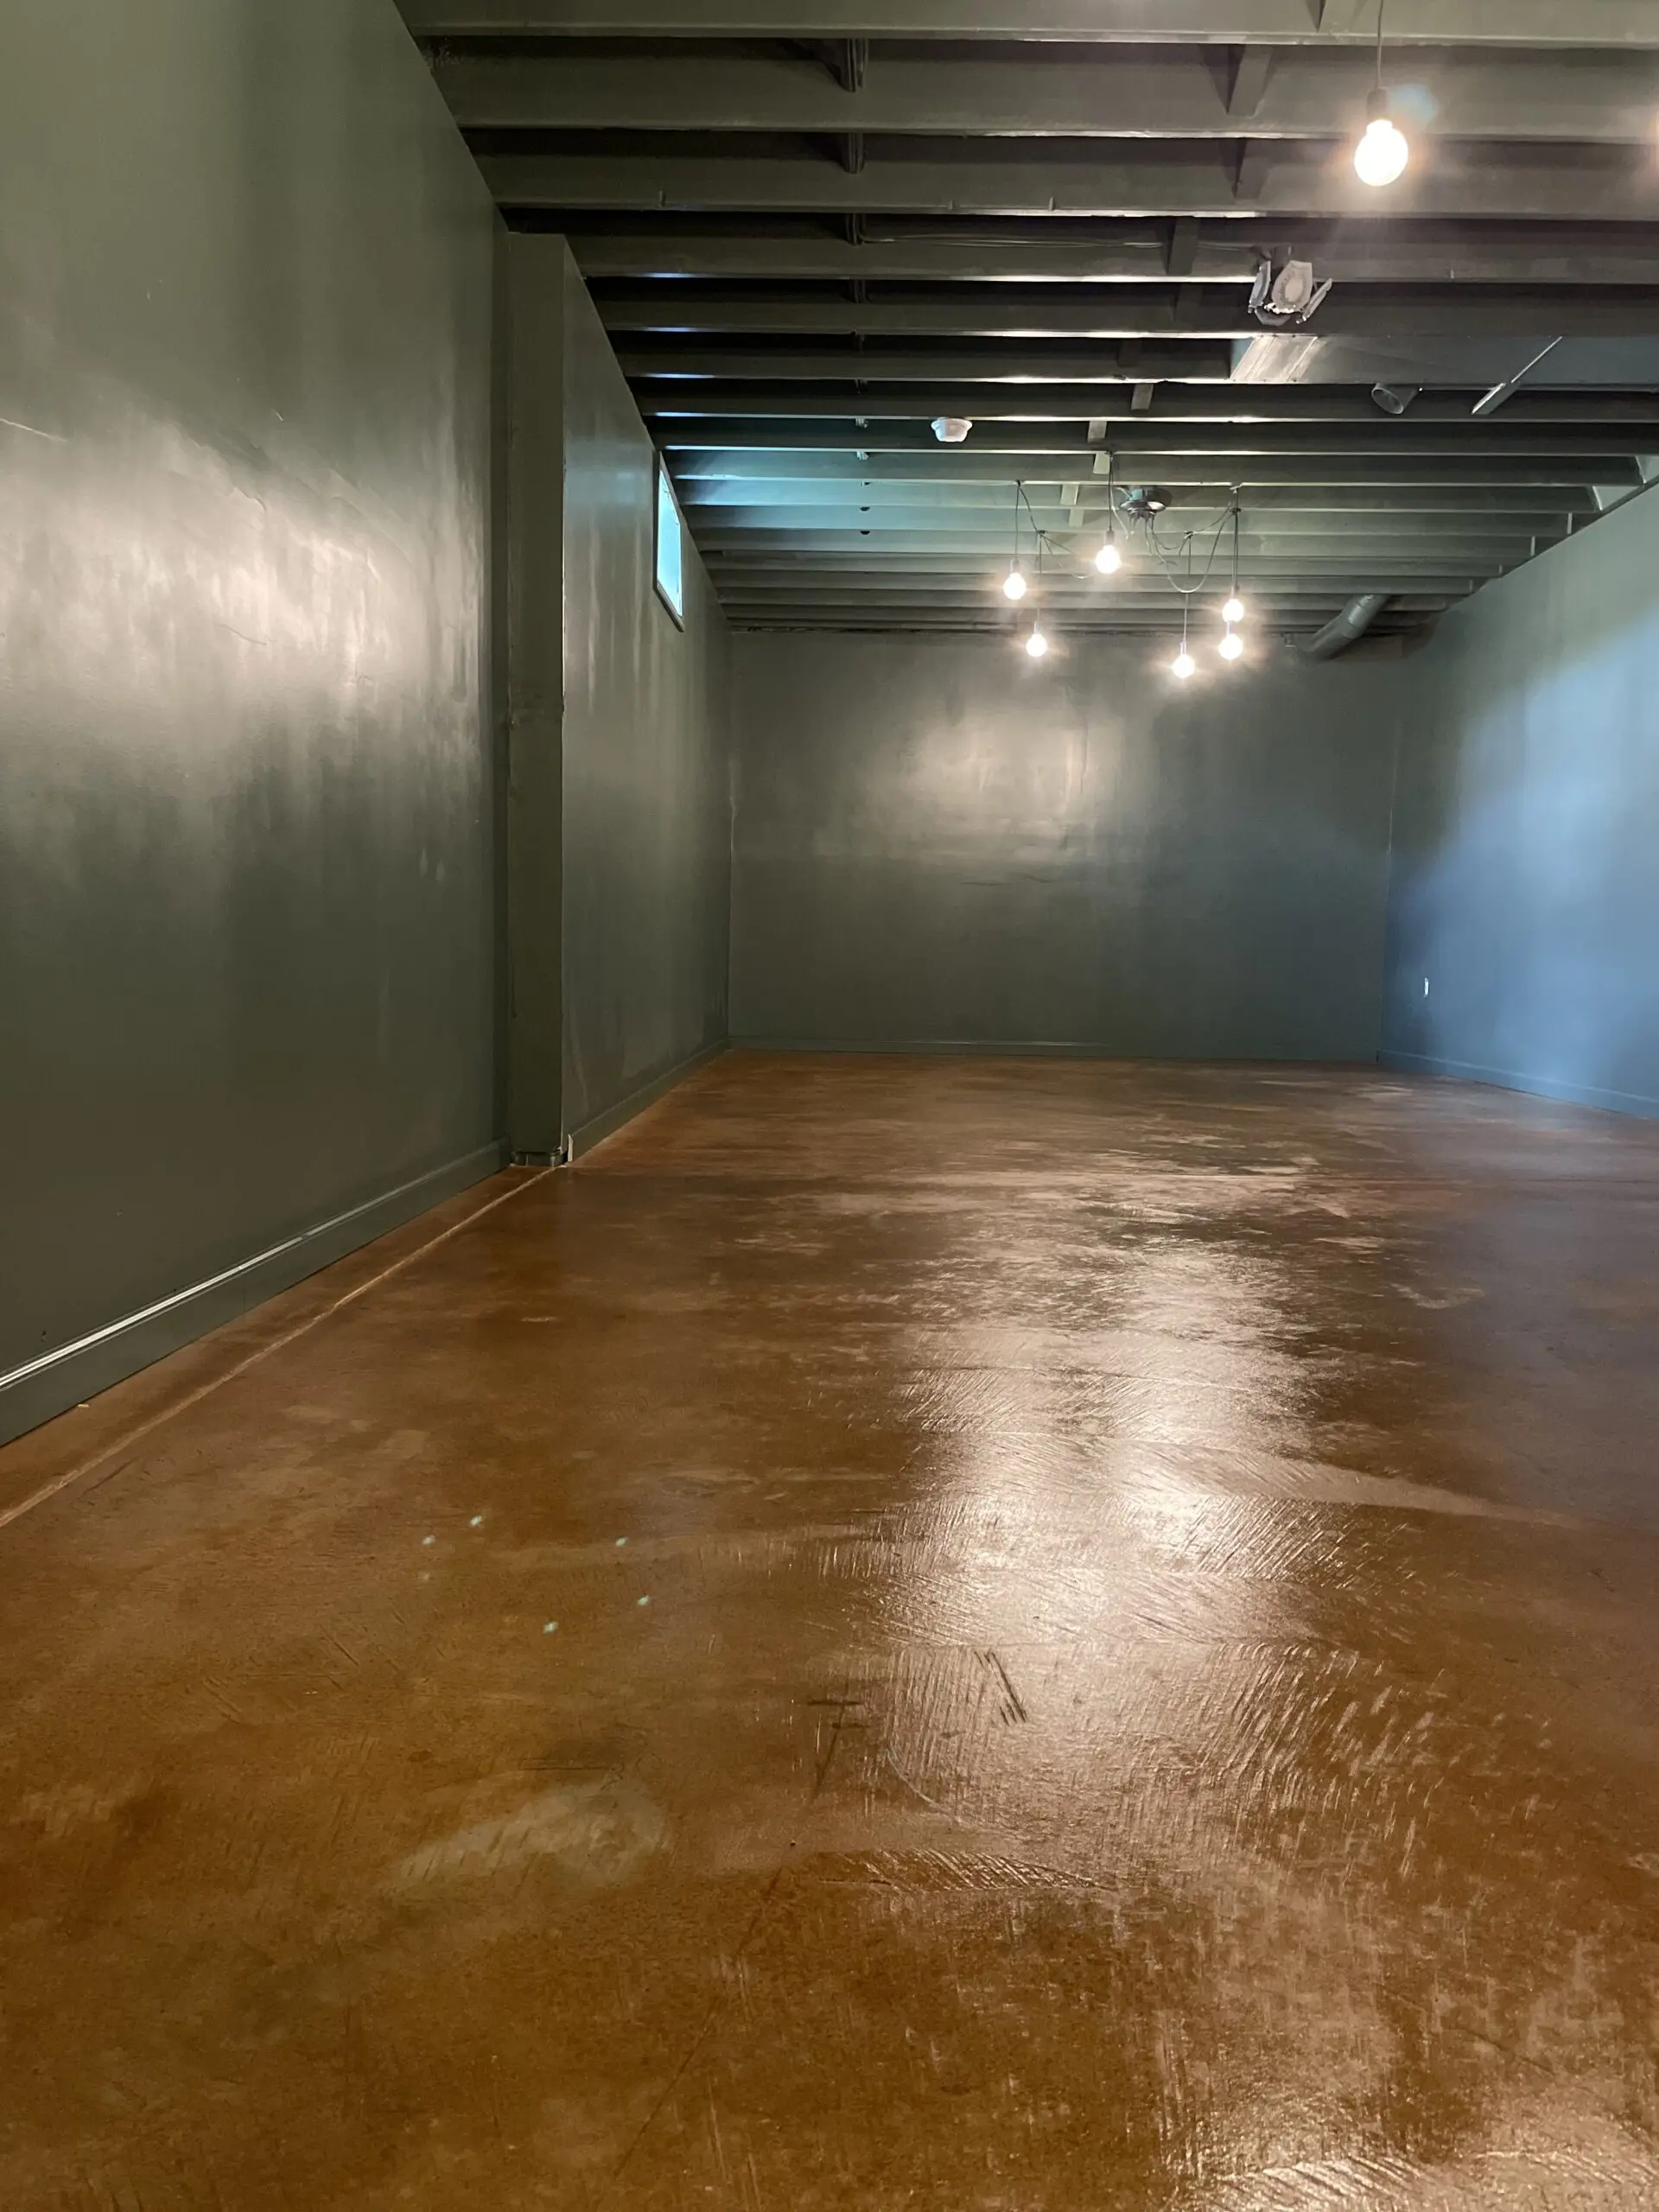
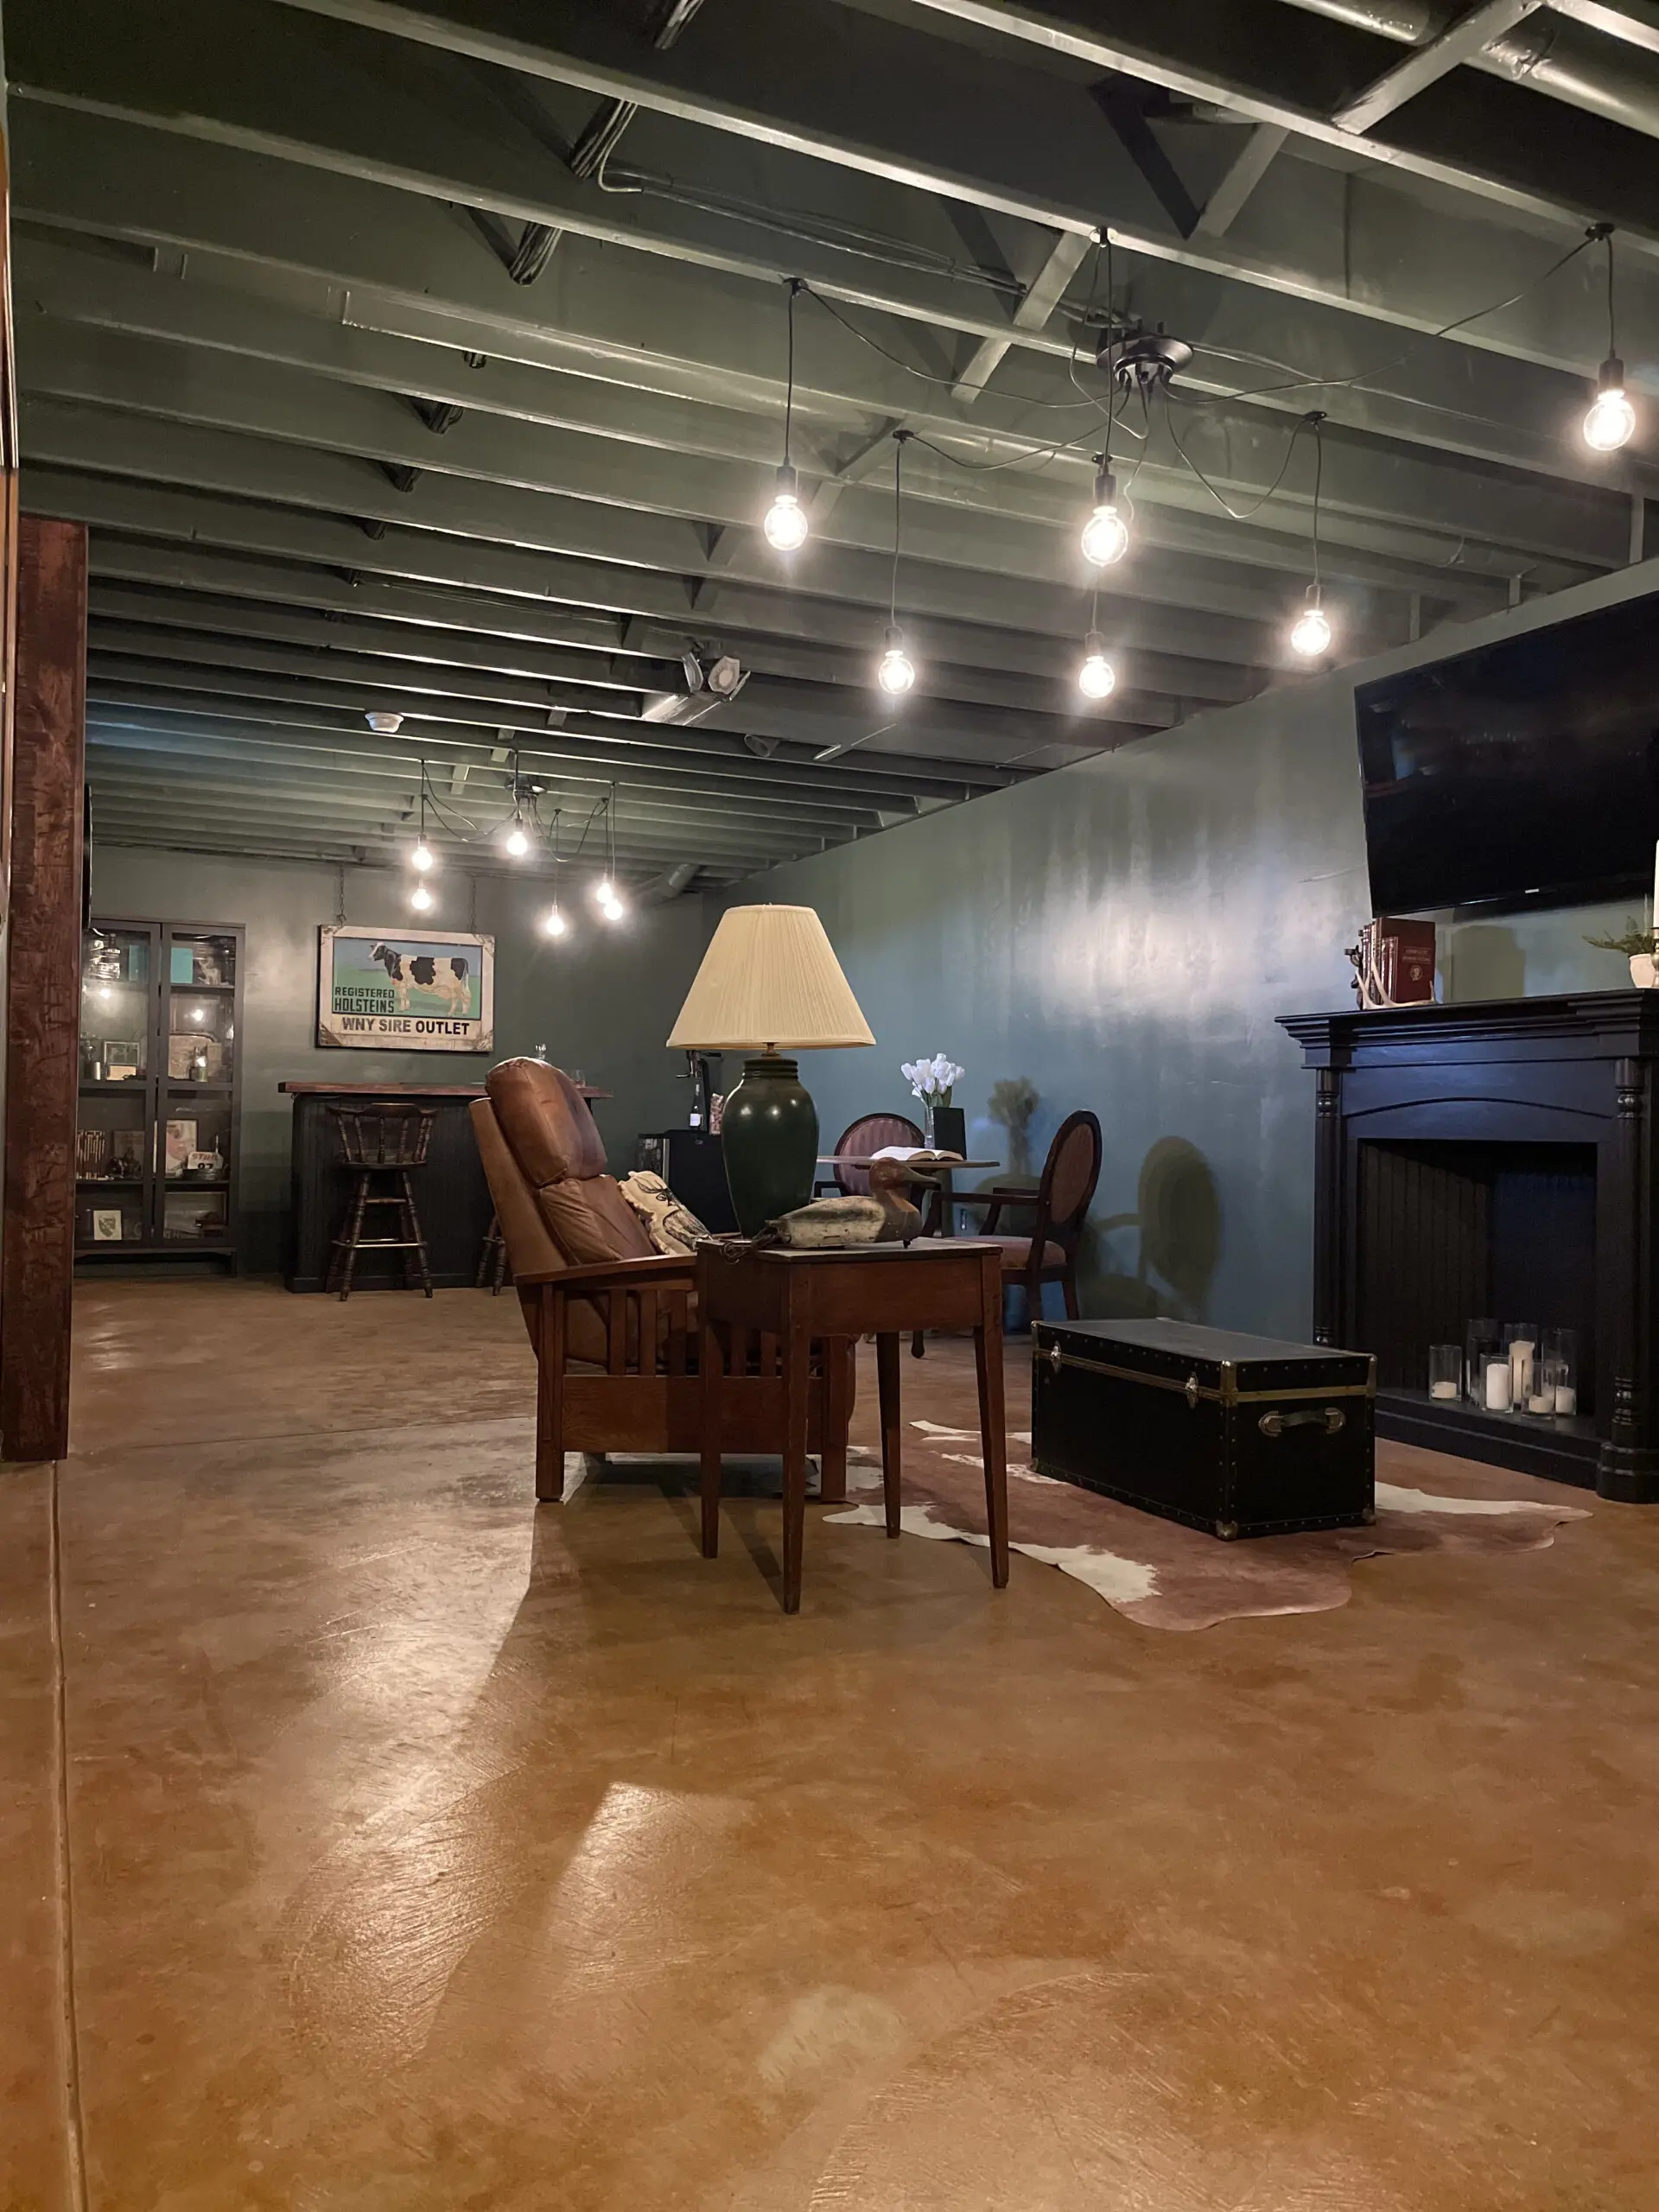
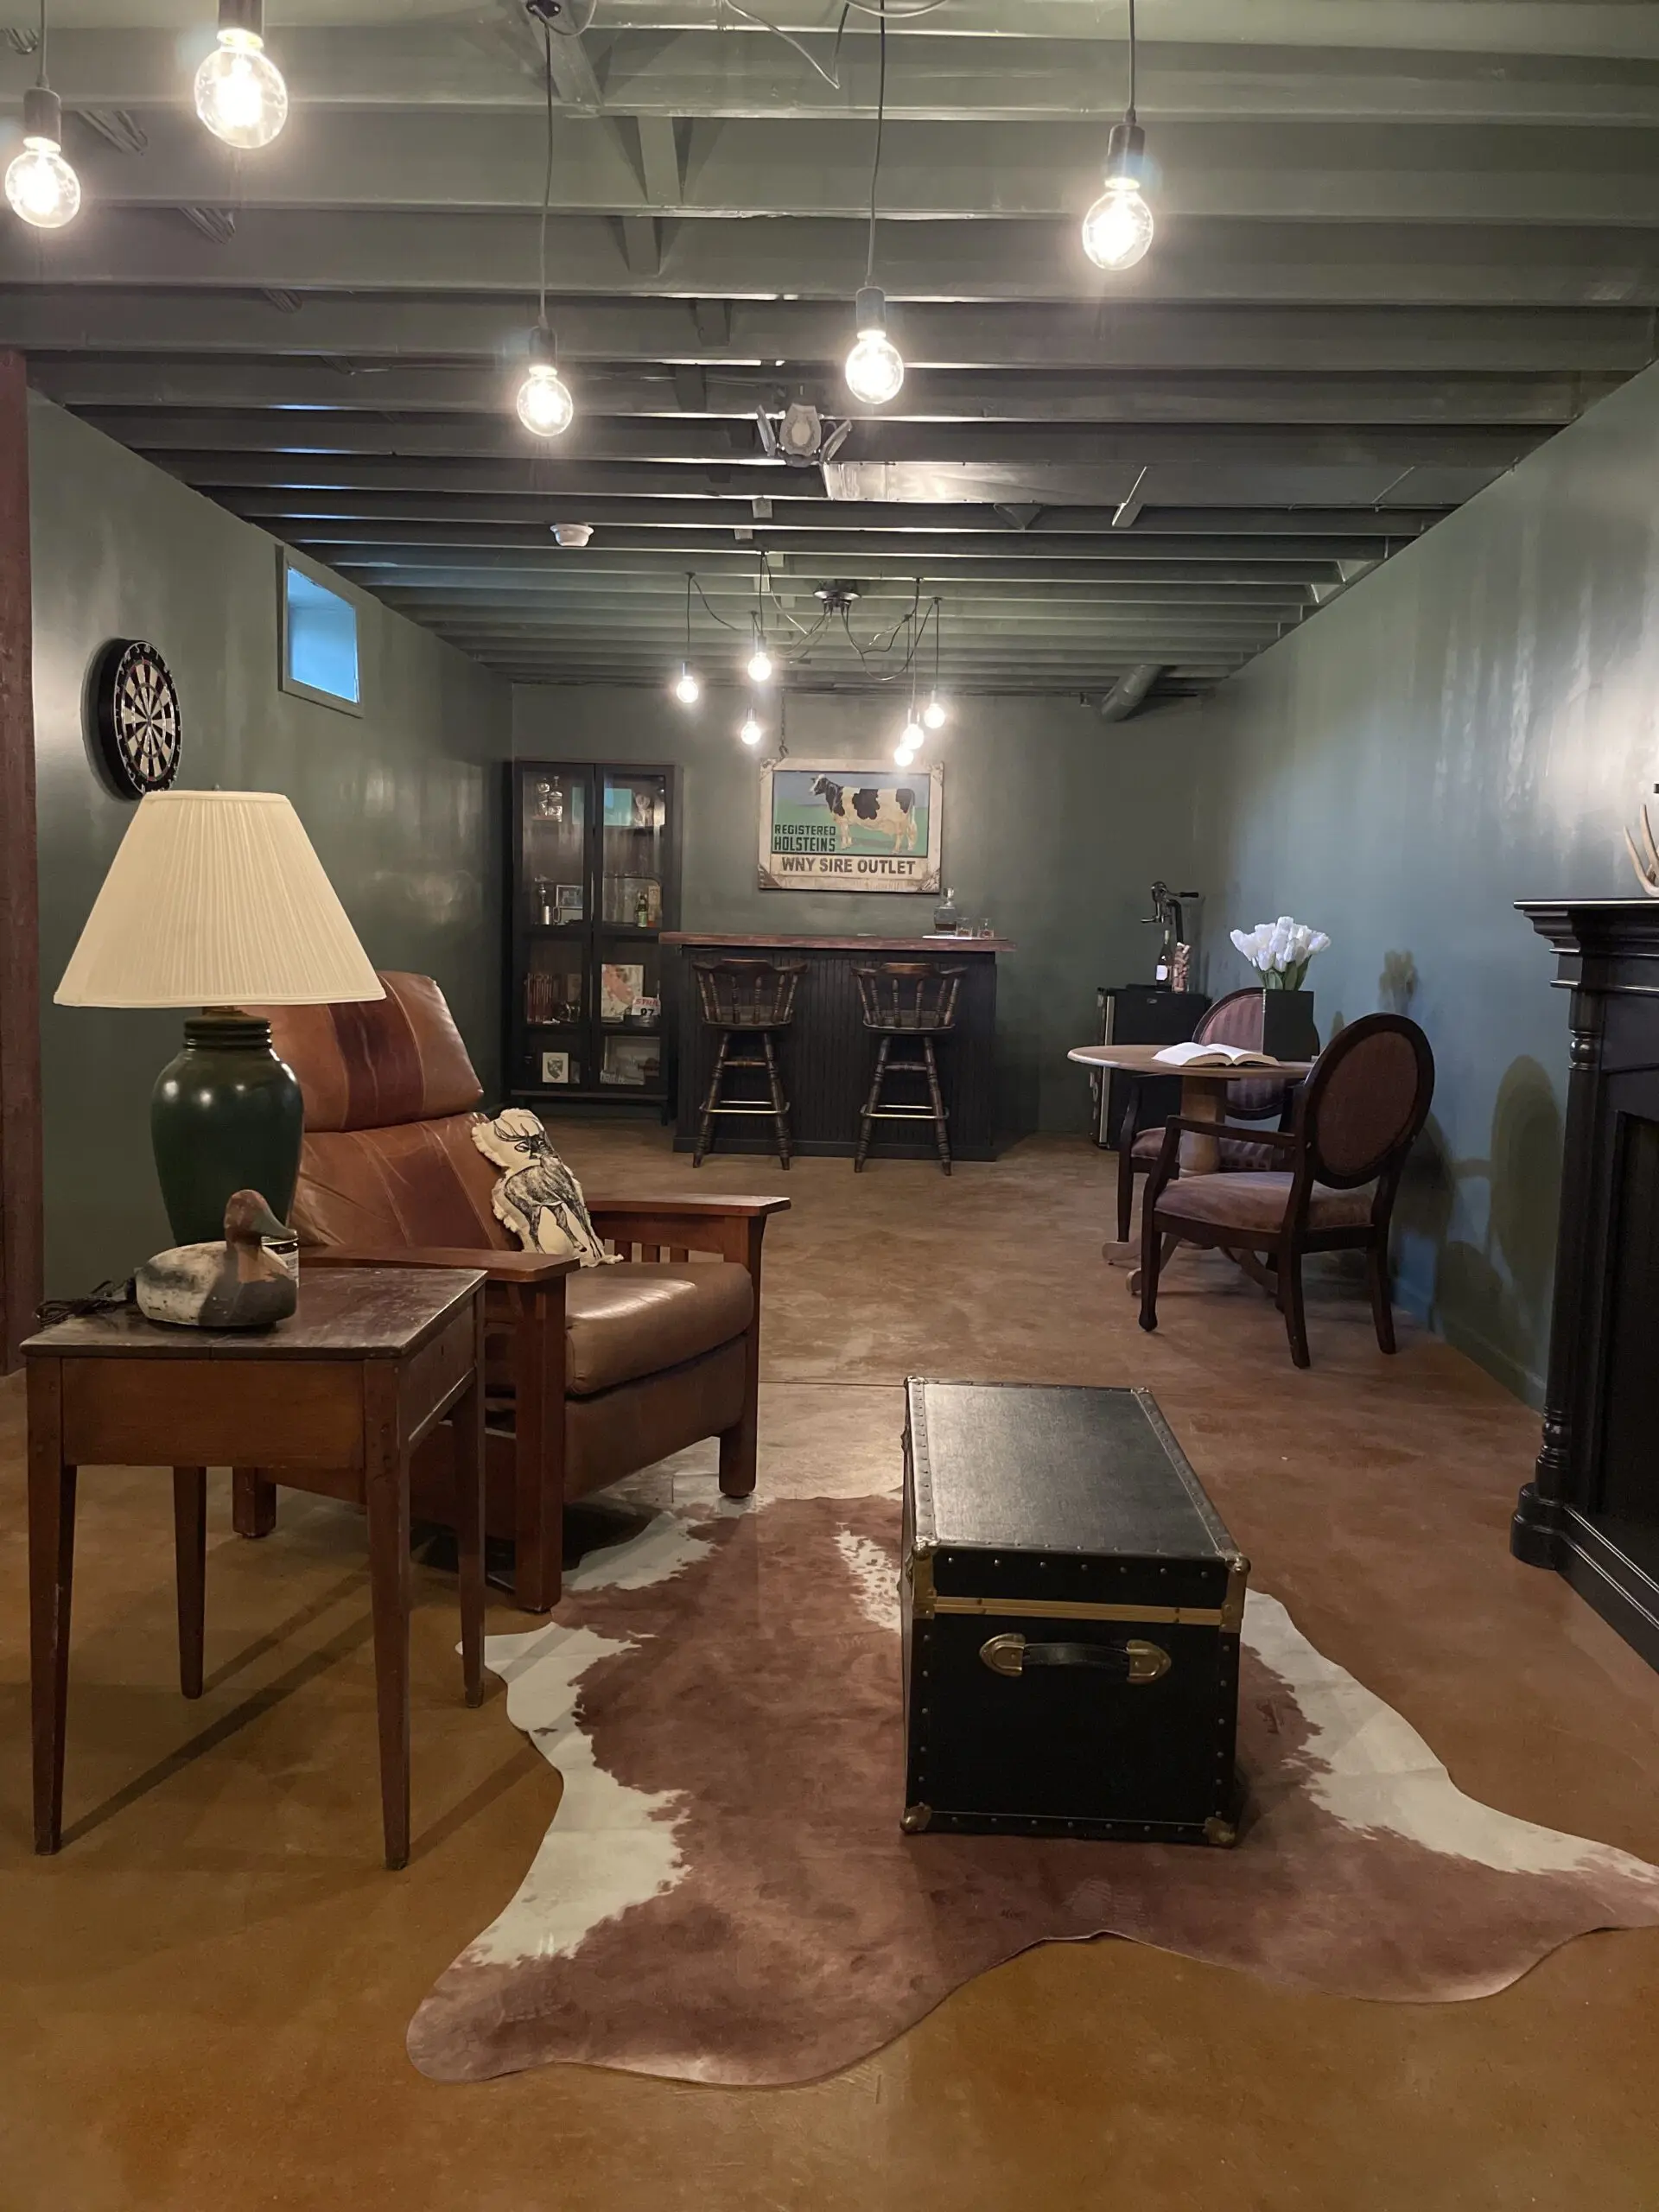
Please be aware that each photo in this gallery showcases projects accomplished with our EverStain™ Acid Stain and is provided by actual customers, serving as a source of inspiration. However, since EverStain™ is semi-transparent, the final appearance of your project will be influenced by the initial color and condition of your concrete surface, and thus, your final results might vary. For the best results, we strongly recommend performing a small test on your specific surface before applying the stain to the entire project to ensure the final look aligns with your expectations.
Reviving History: The Armour Chapel Restoration
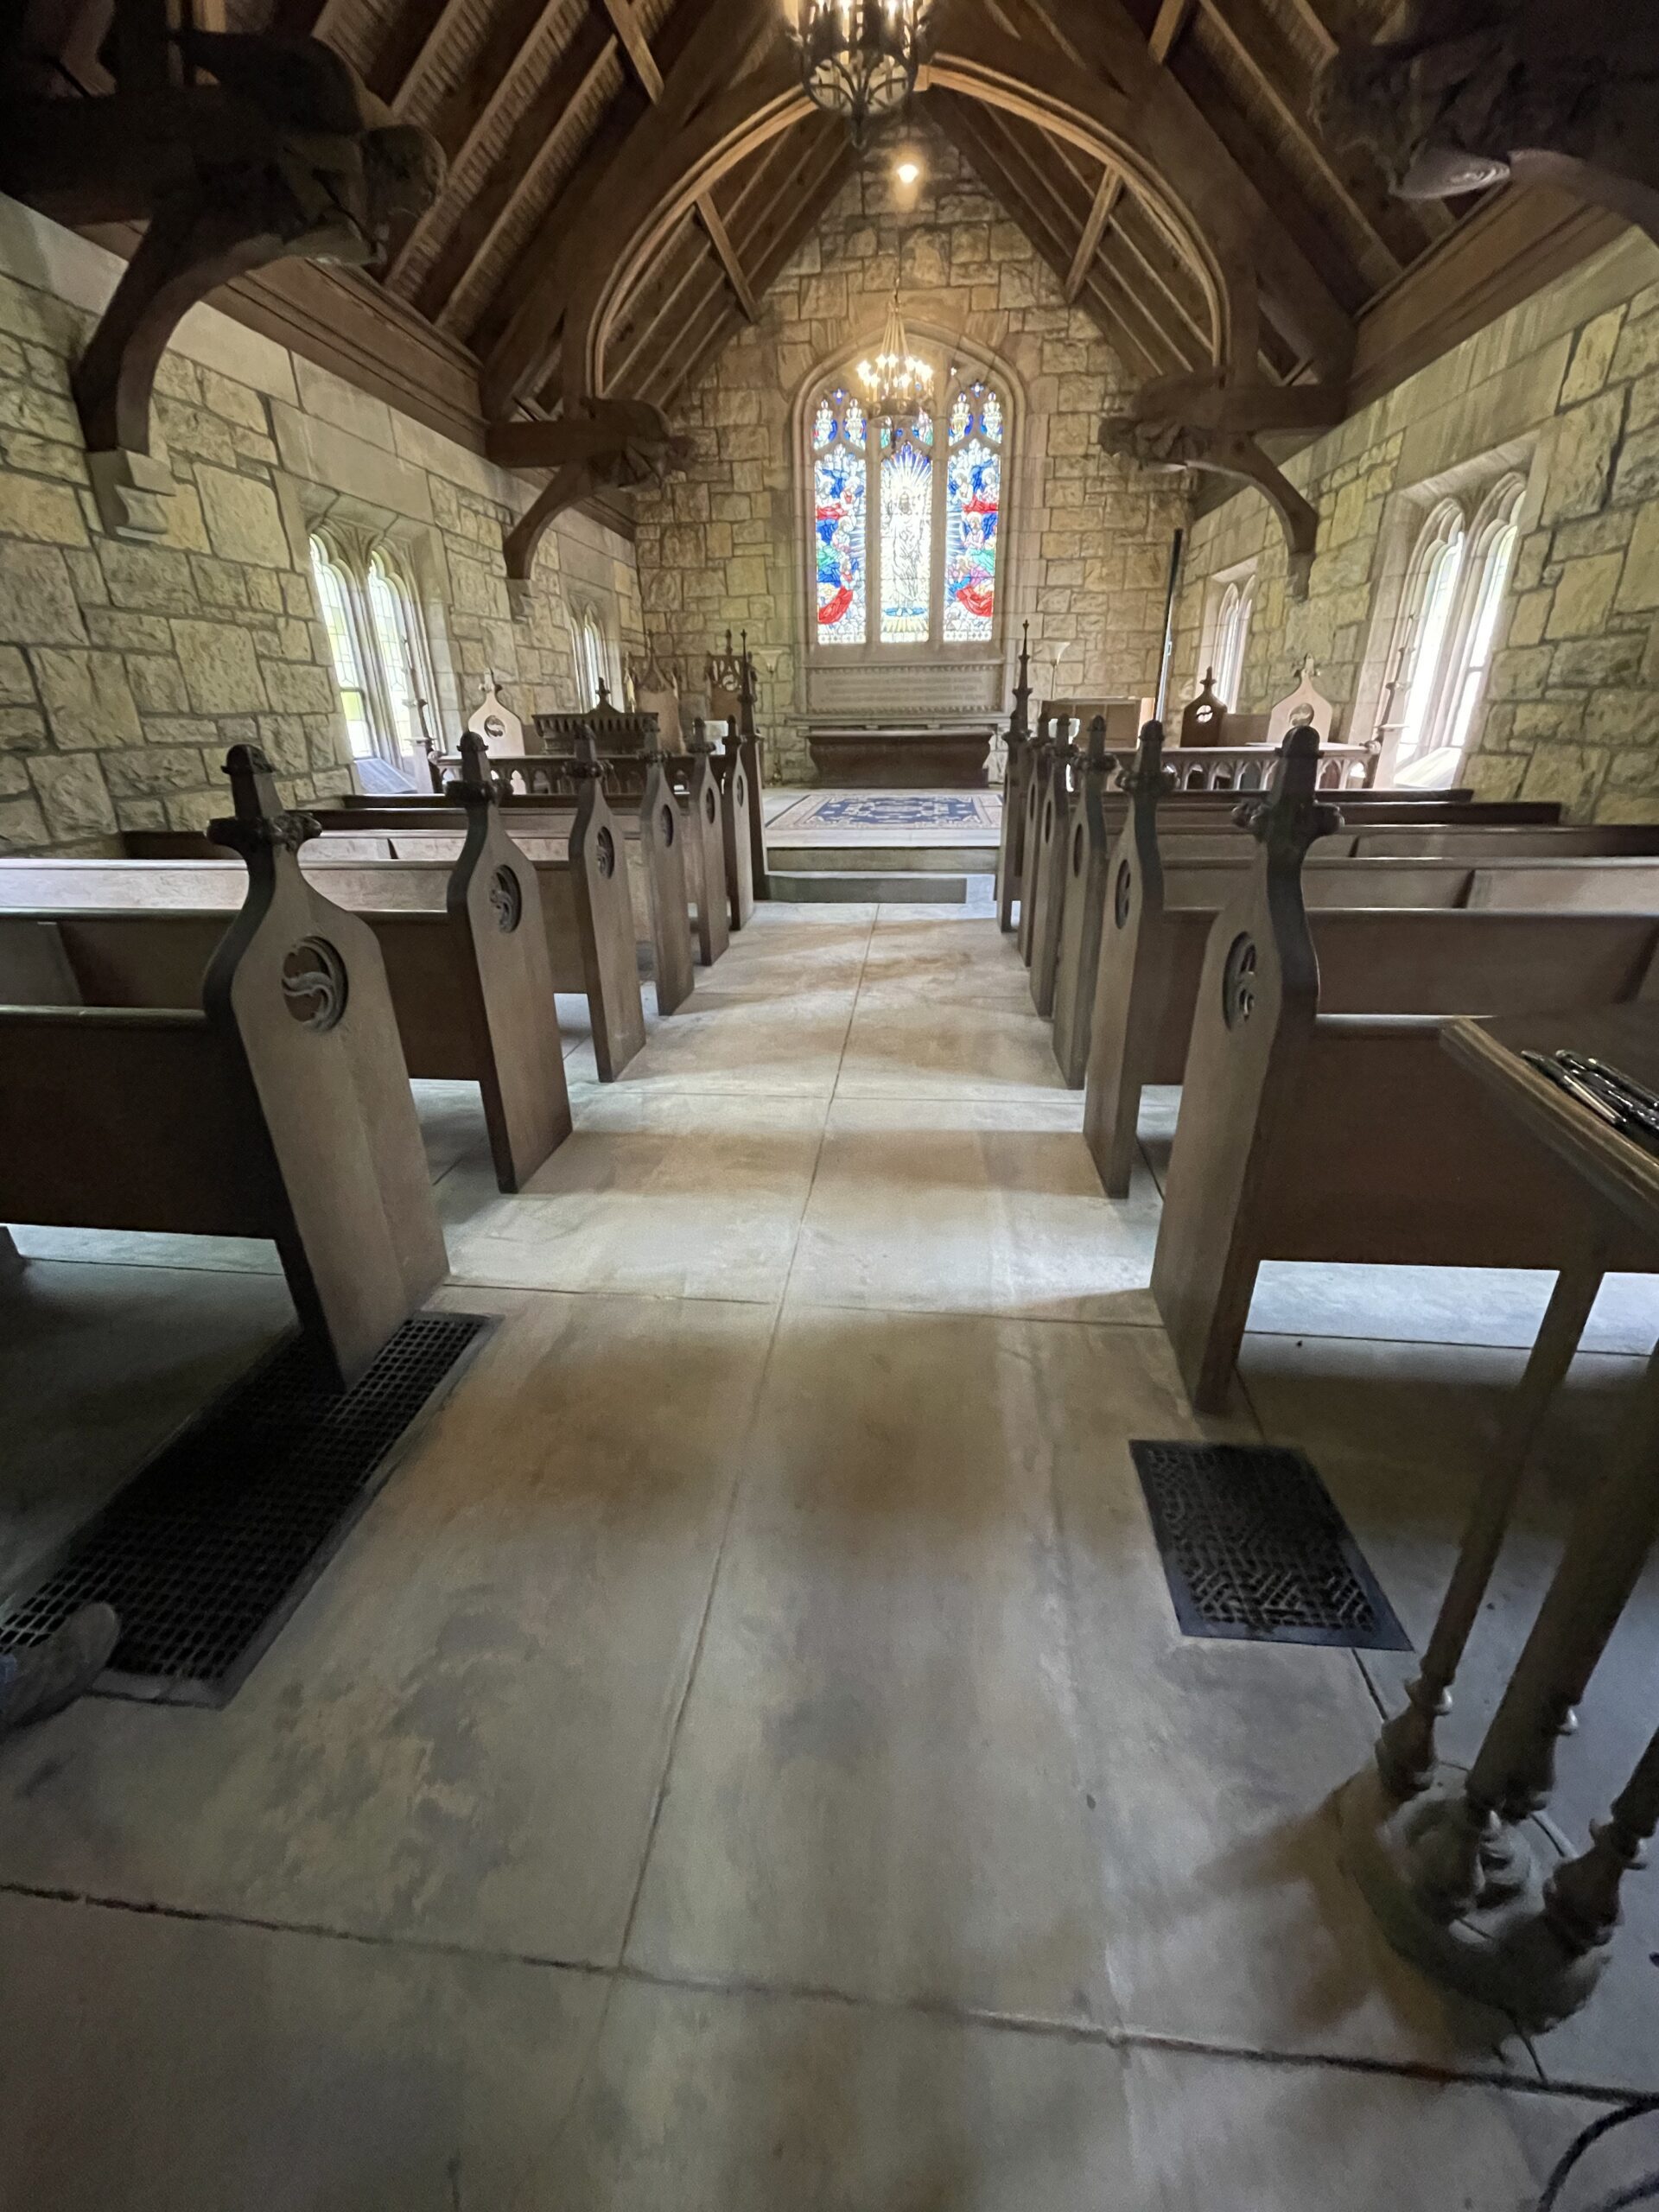
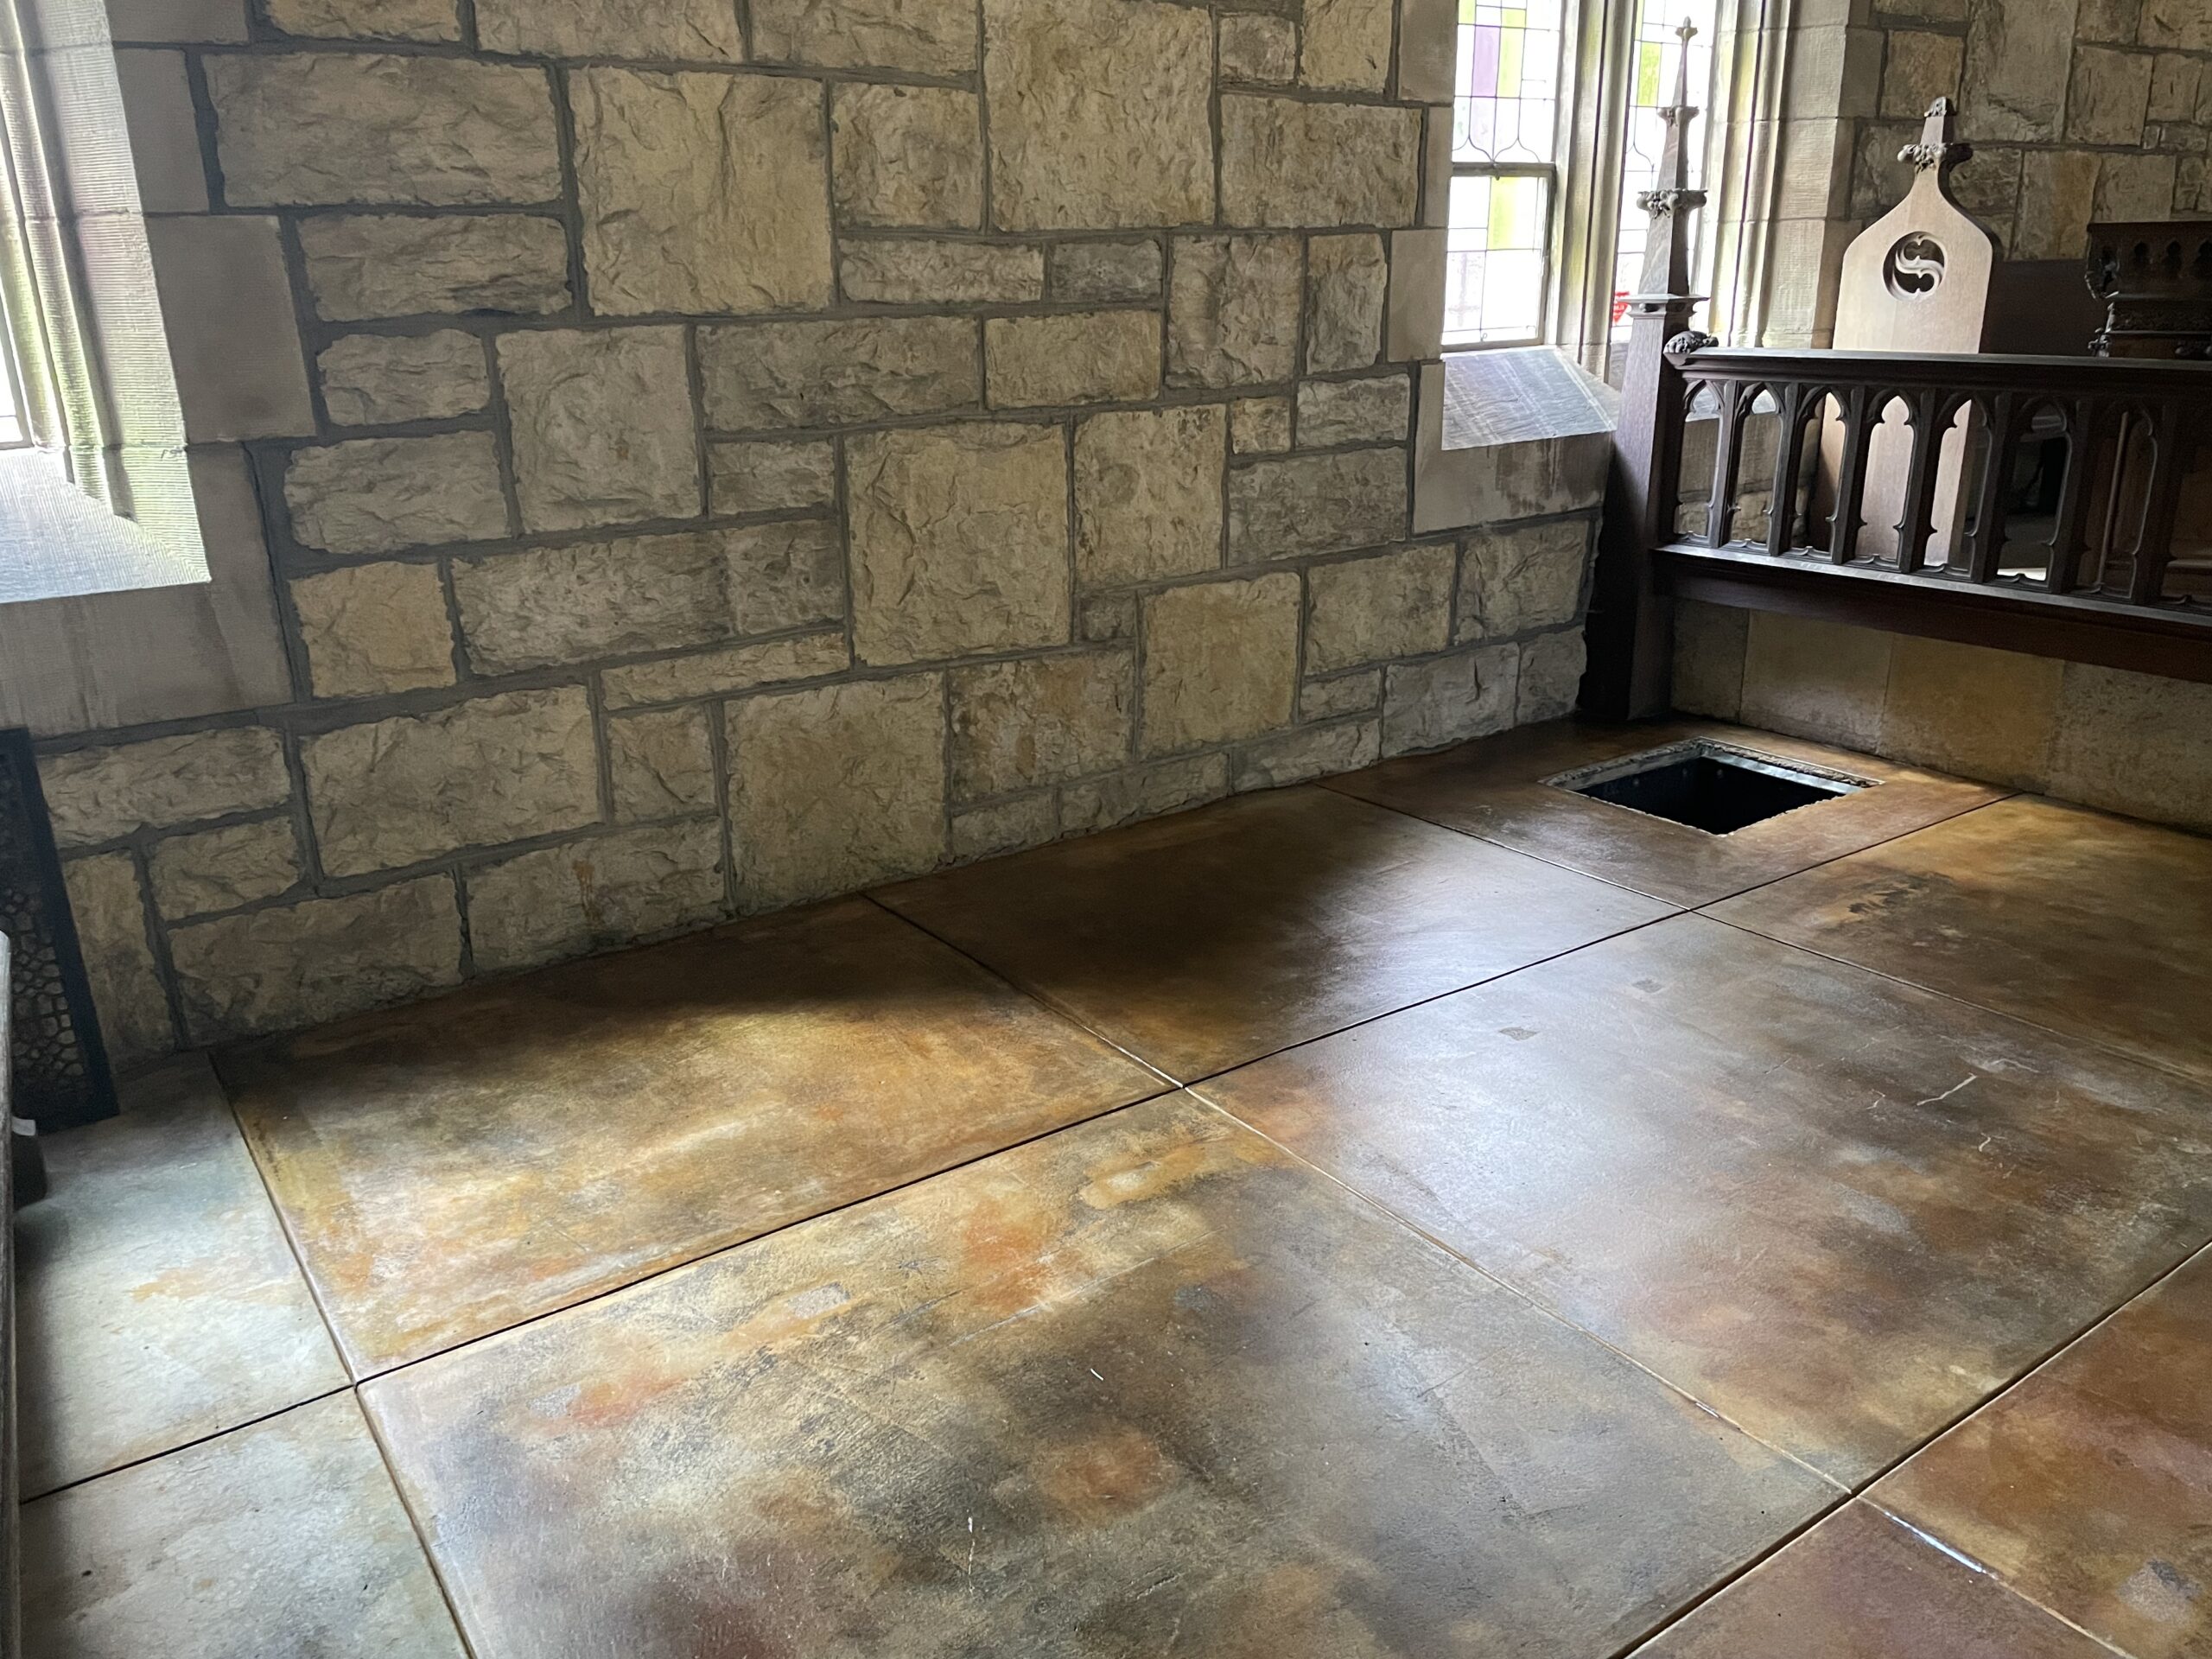
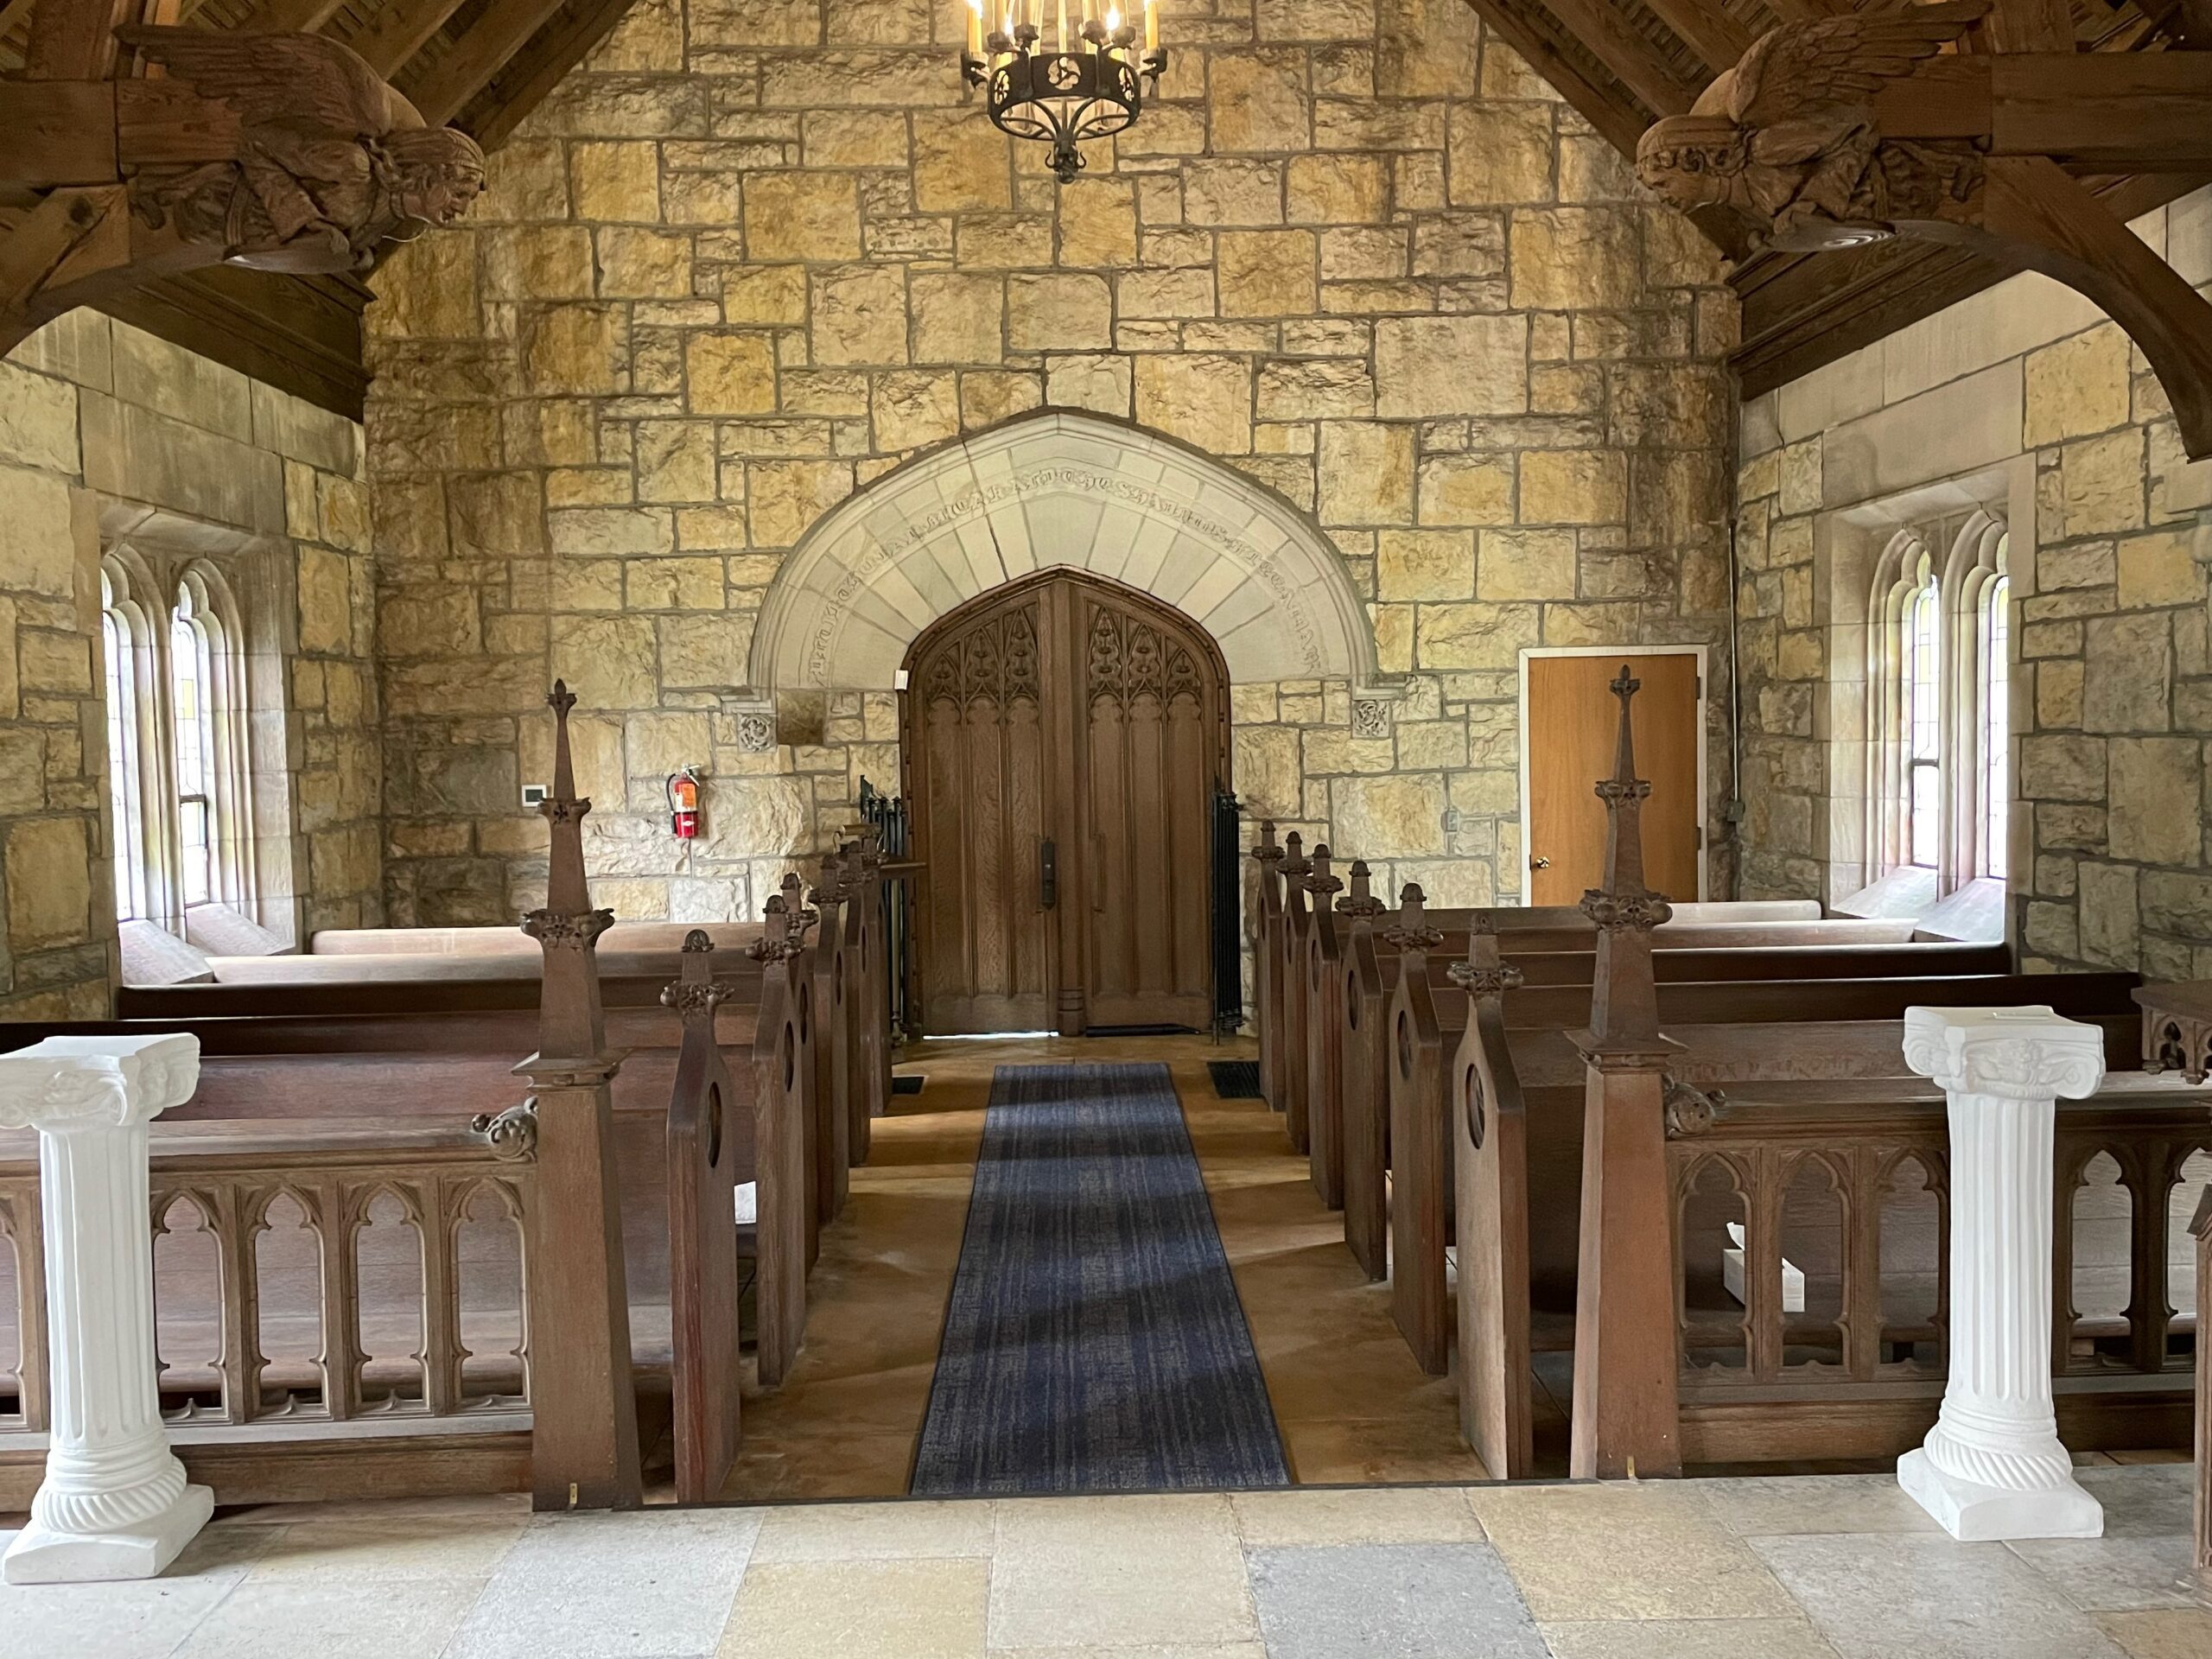
Witness the transformation of the 1902 Armour Chapel, as volunteers brought its concrete floor back to life using our Malayan Buff EverStain™. Despite the challenges of dealing with a century-old dirt-encrusted floor and no running water on-site, their dedication, combined with our stain and sealer, turned the blackened gray floor into a beautiful, warm, and inviting space. Learn from their experience and don’t forget to mask areas you don’t want stained!

Project Info:
- Project Completed In: 10 day(s)
- Estimate of Square Footage: 1500 sq. ft.
- Project Description:
The Armour Chapel was built in 1902 in memory of Kirkland B Armour of the Armour meat packing company by his wife Annie. The concrete floor was in sad shape & had about 120 years of dirt on it! The color was a sort of blackened gray & not at all attractive. We cleaned the floor thoroughly, sanded the concrete by hand and then used Direct Colors Malayan Buff to stain the floor. This was quite an endeavor because there is no running water available at the chapel! All water was transported in gallon jugs. We then sealed the floor with the satin finish sealer. This project was completed by Elmwood volunteers who donated their time & effort to bring the floor back to life. - Personal Tips:
Take your time & be sure to mask off areas you don’t want stained! - Direct Colors Products Used:
5 Gal. Malayan Buff EverStain™ & AcquaSeal™ Satin Kit - Other Products Used:
Lots of sandpaper!
Culinary Canvas: A Commercial Kitchen Transformation by @fruitfulvintagechef
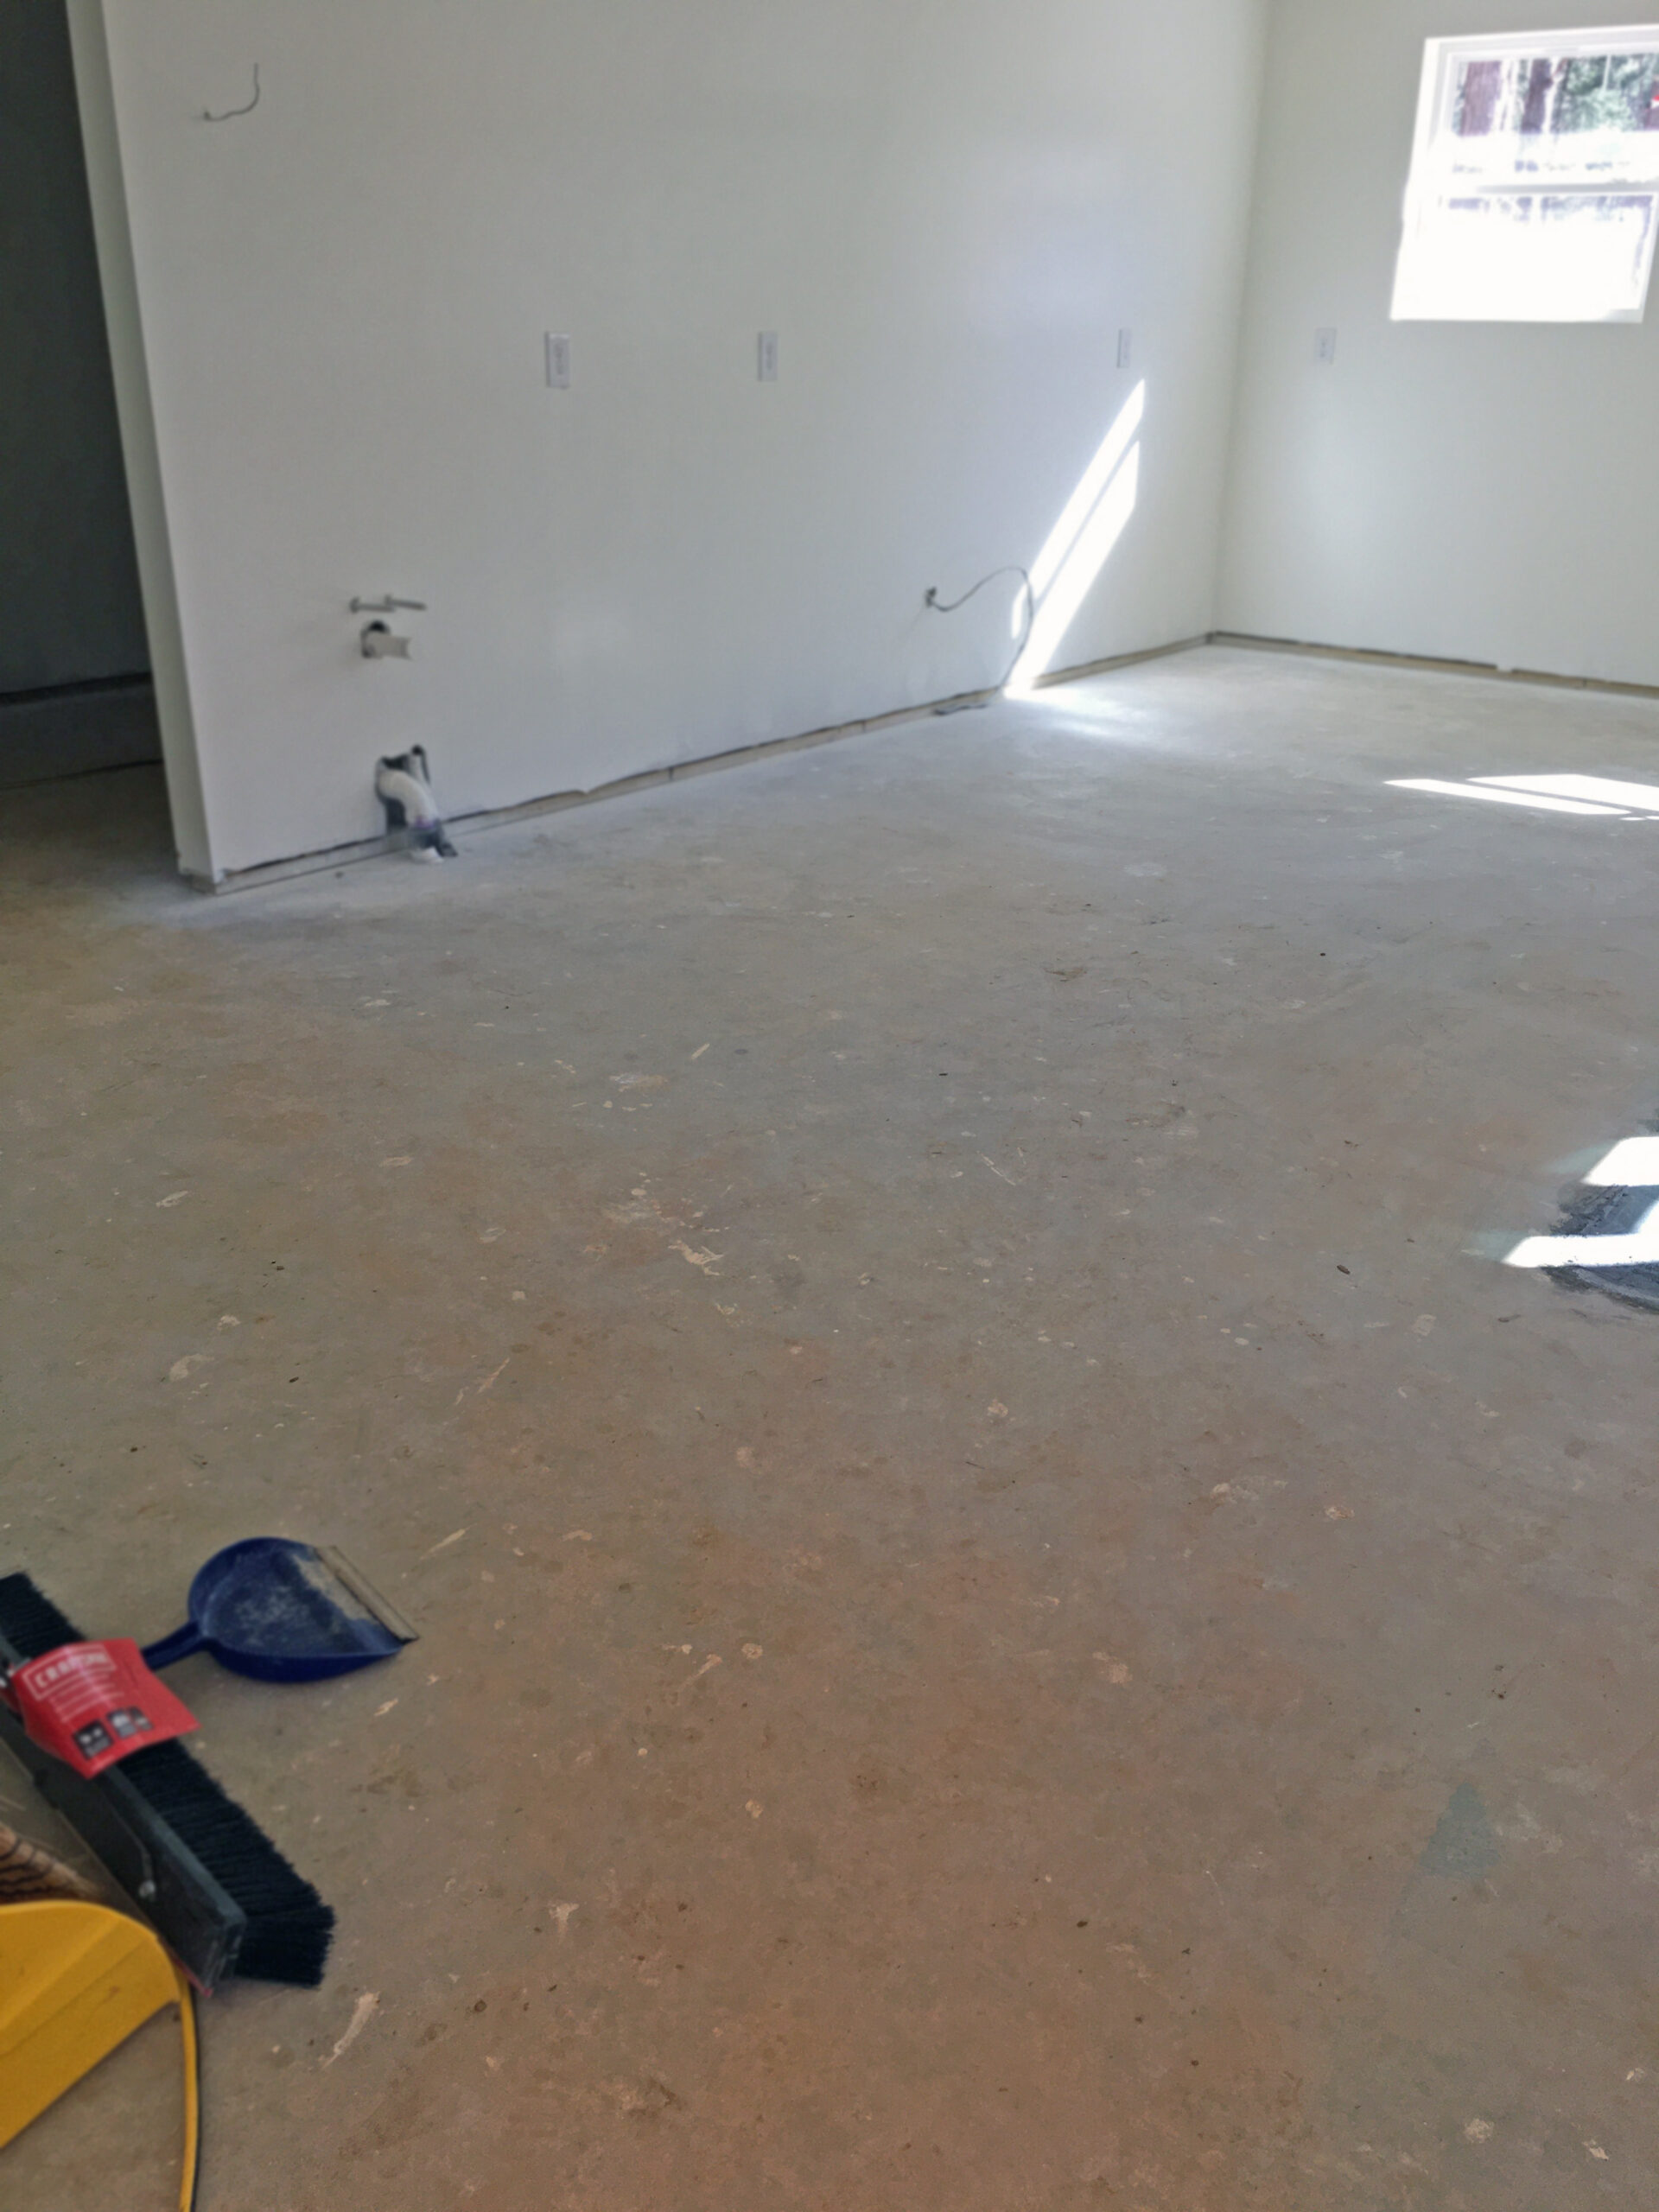
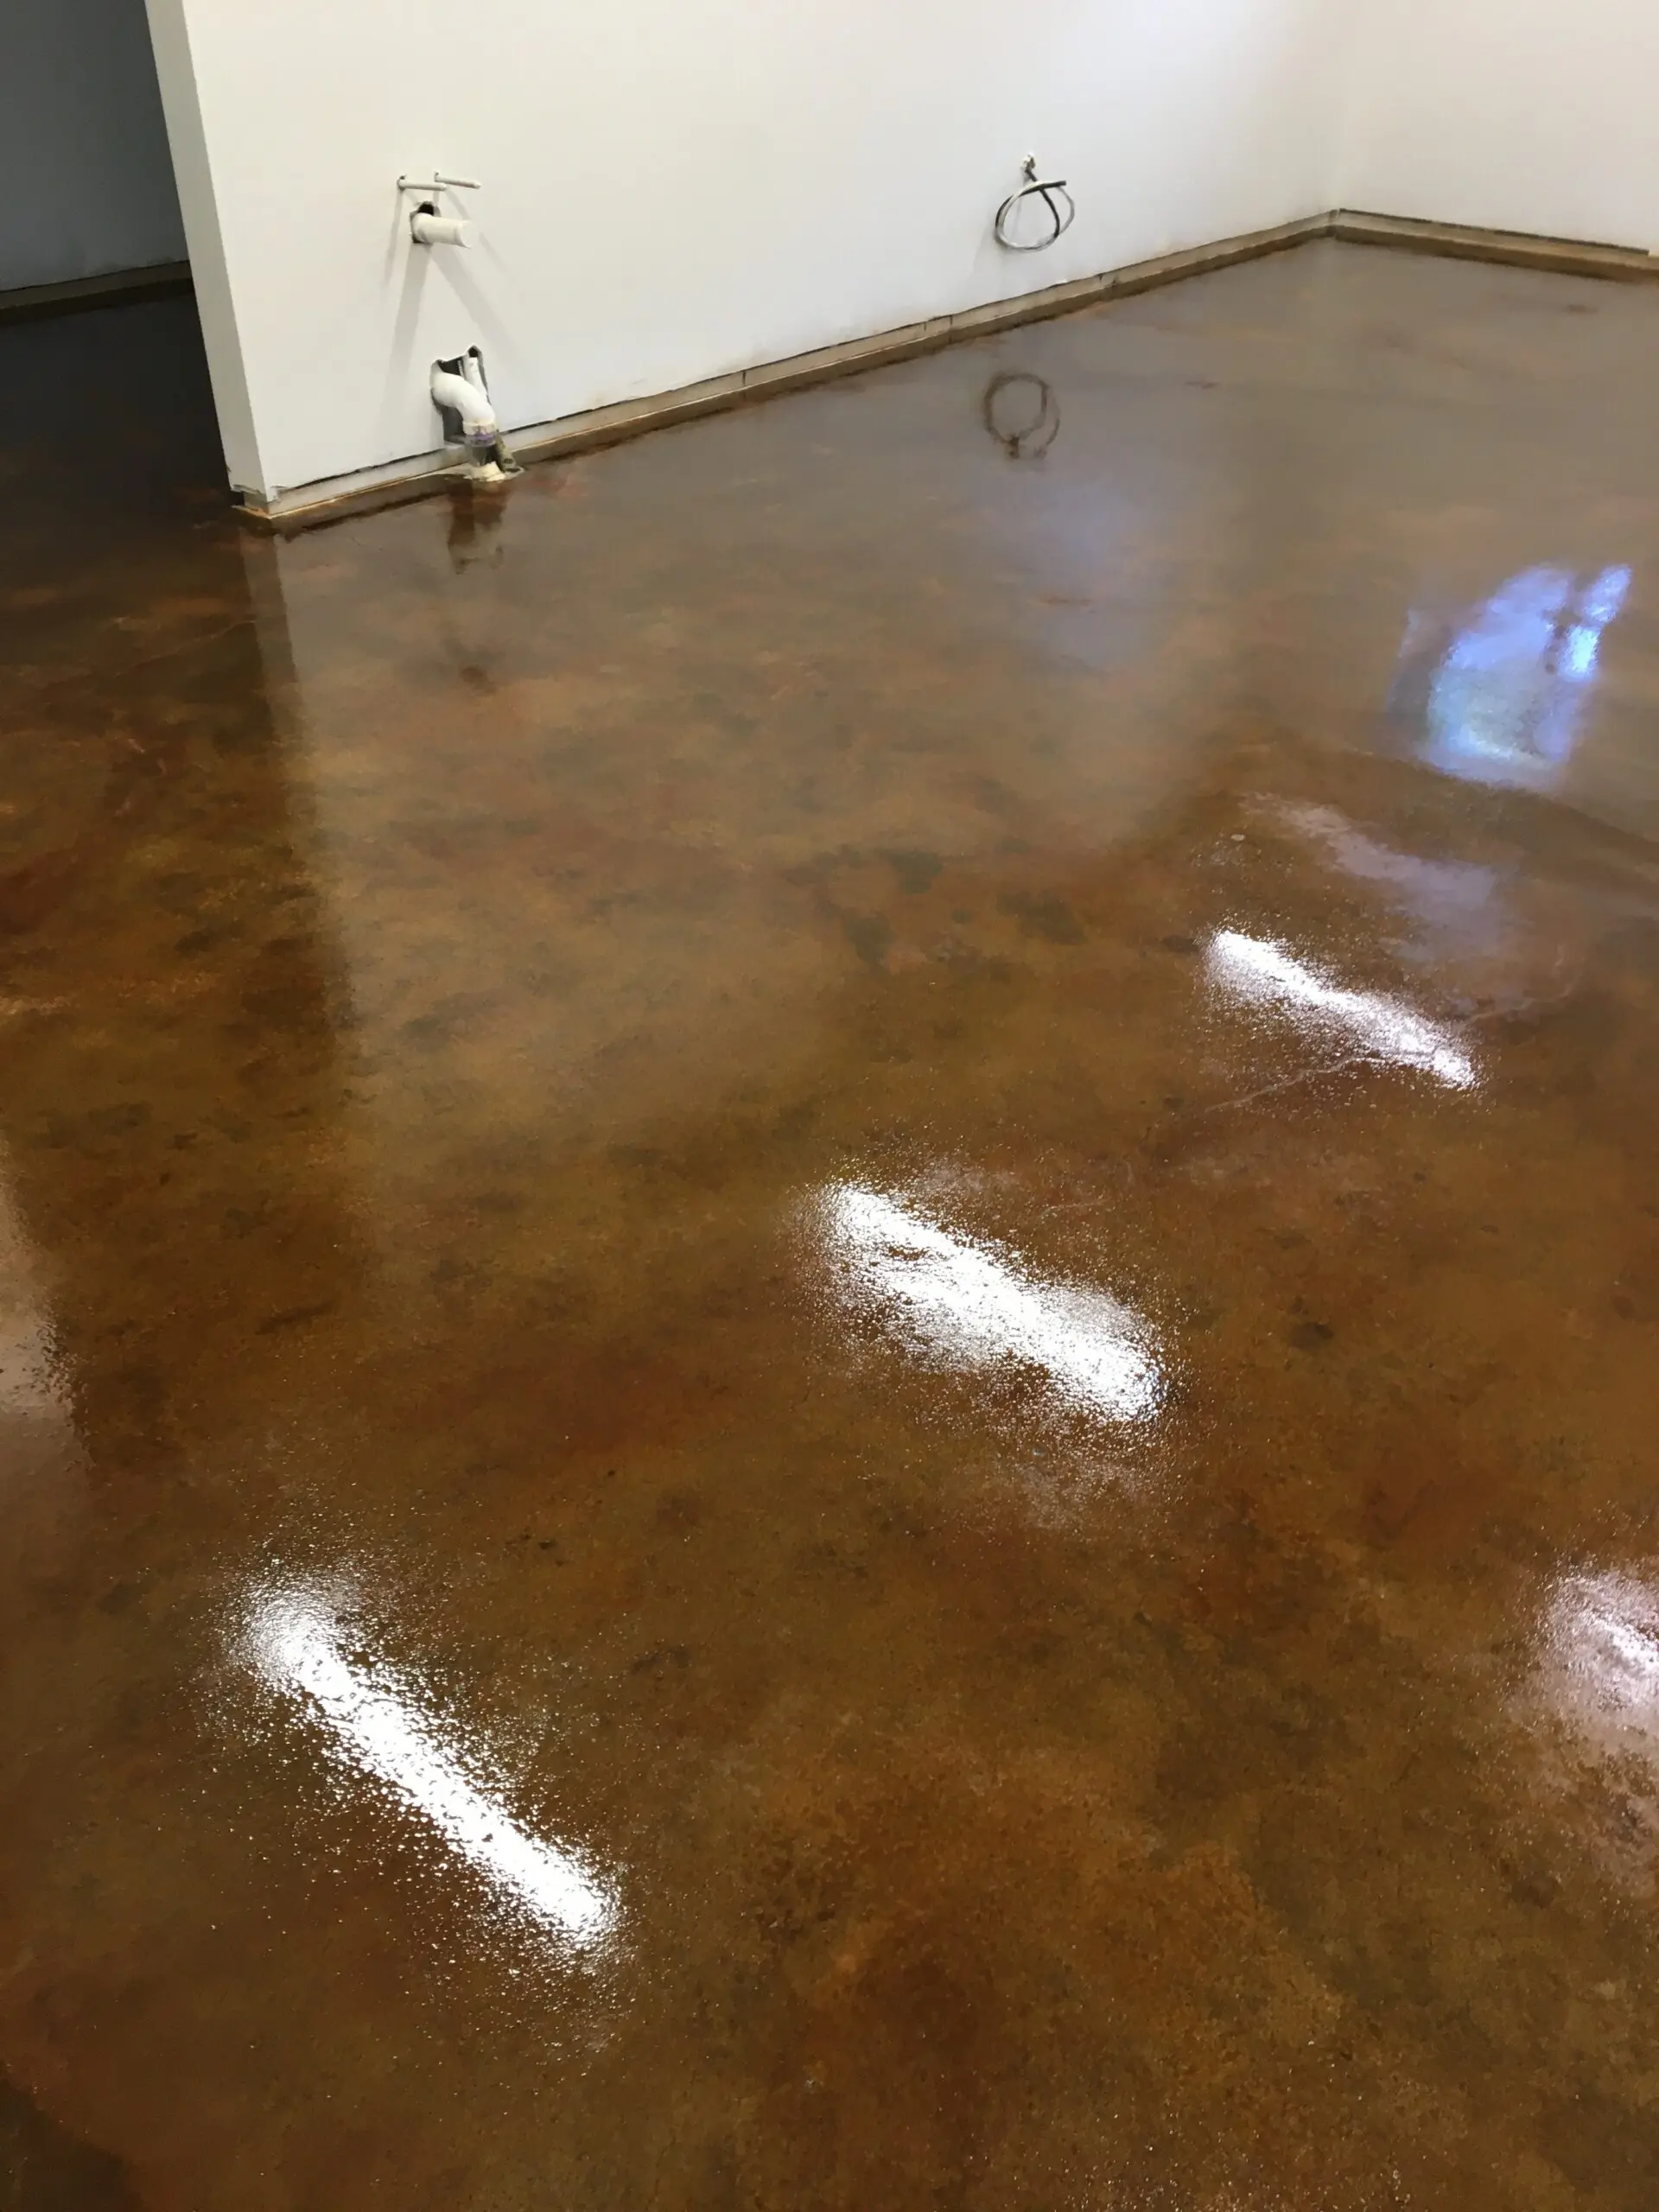
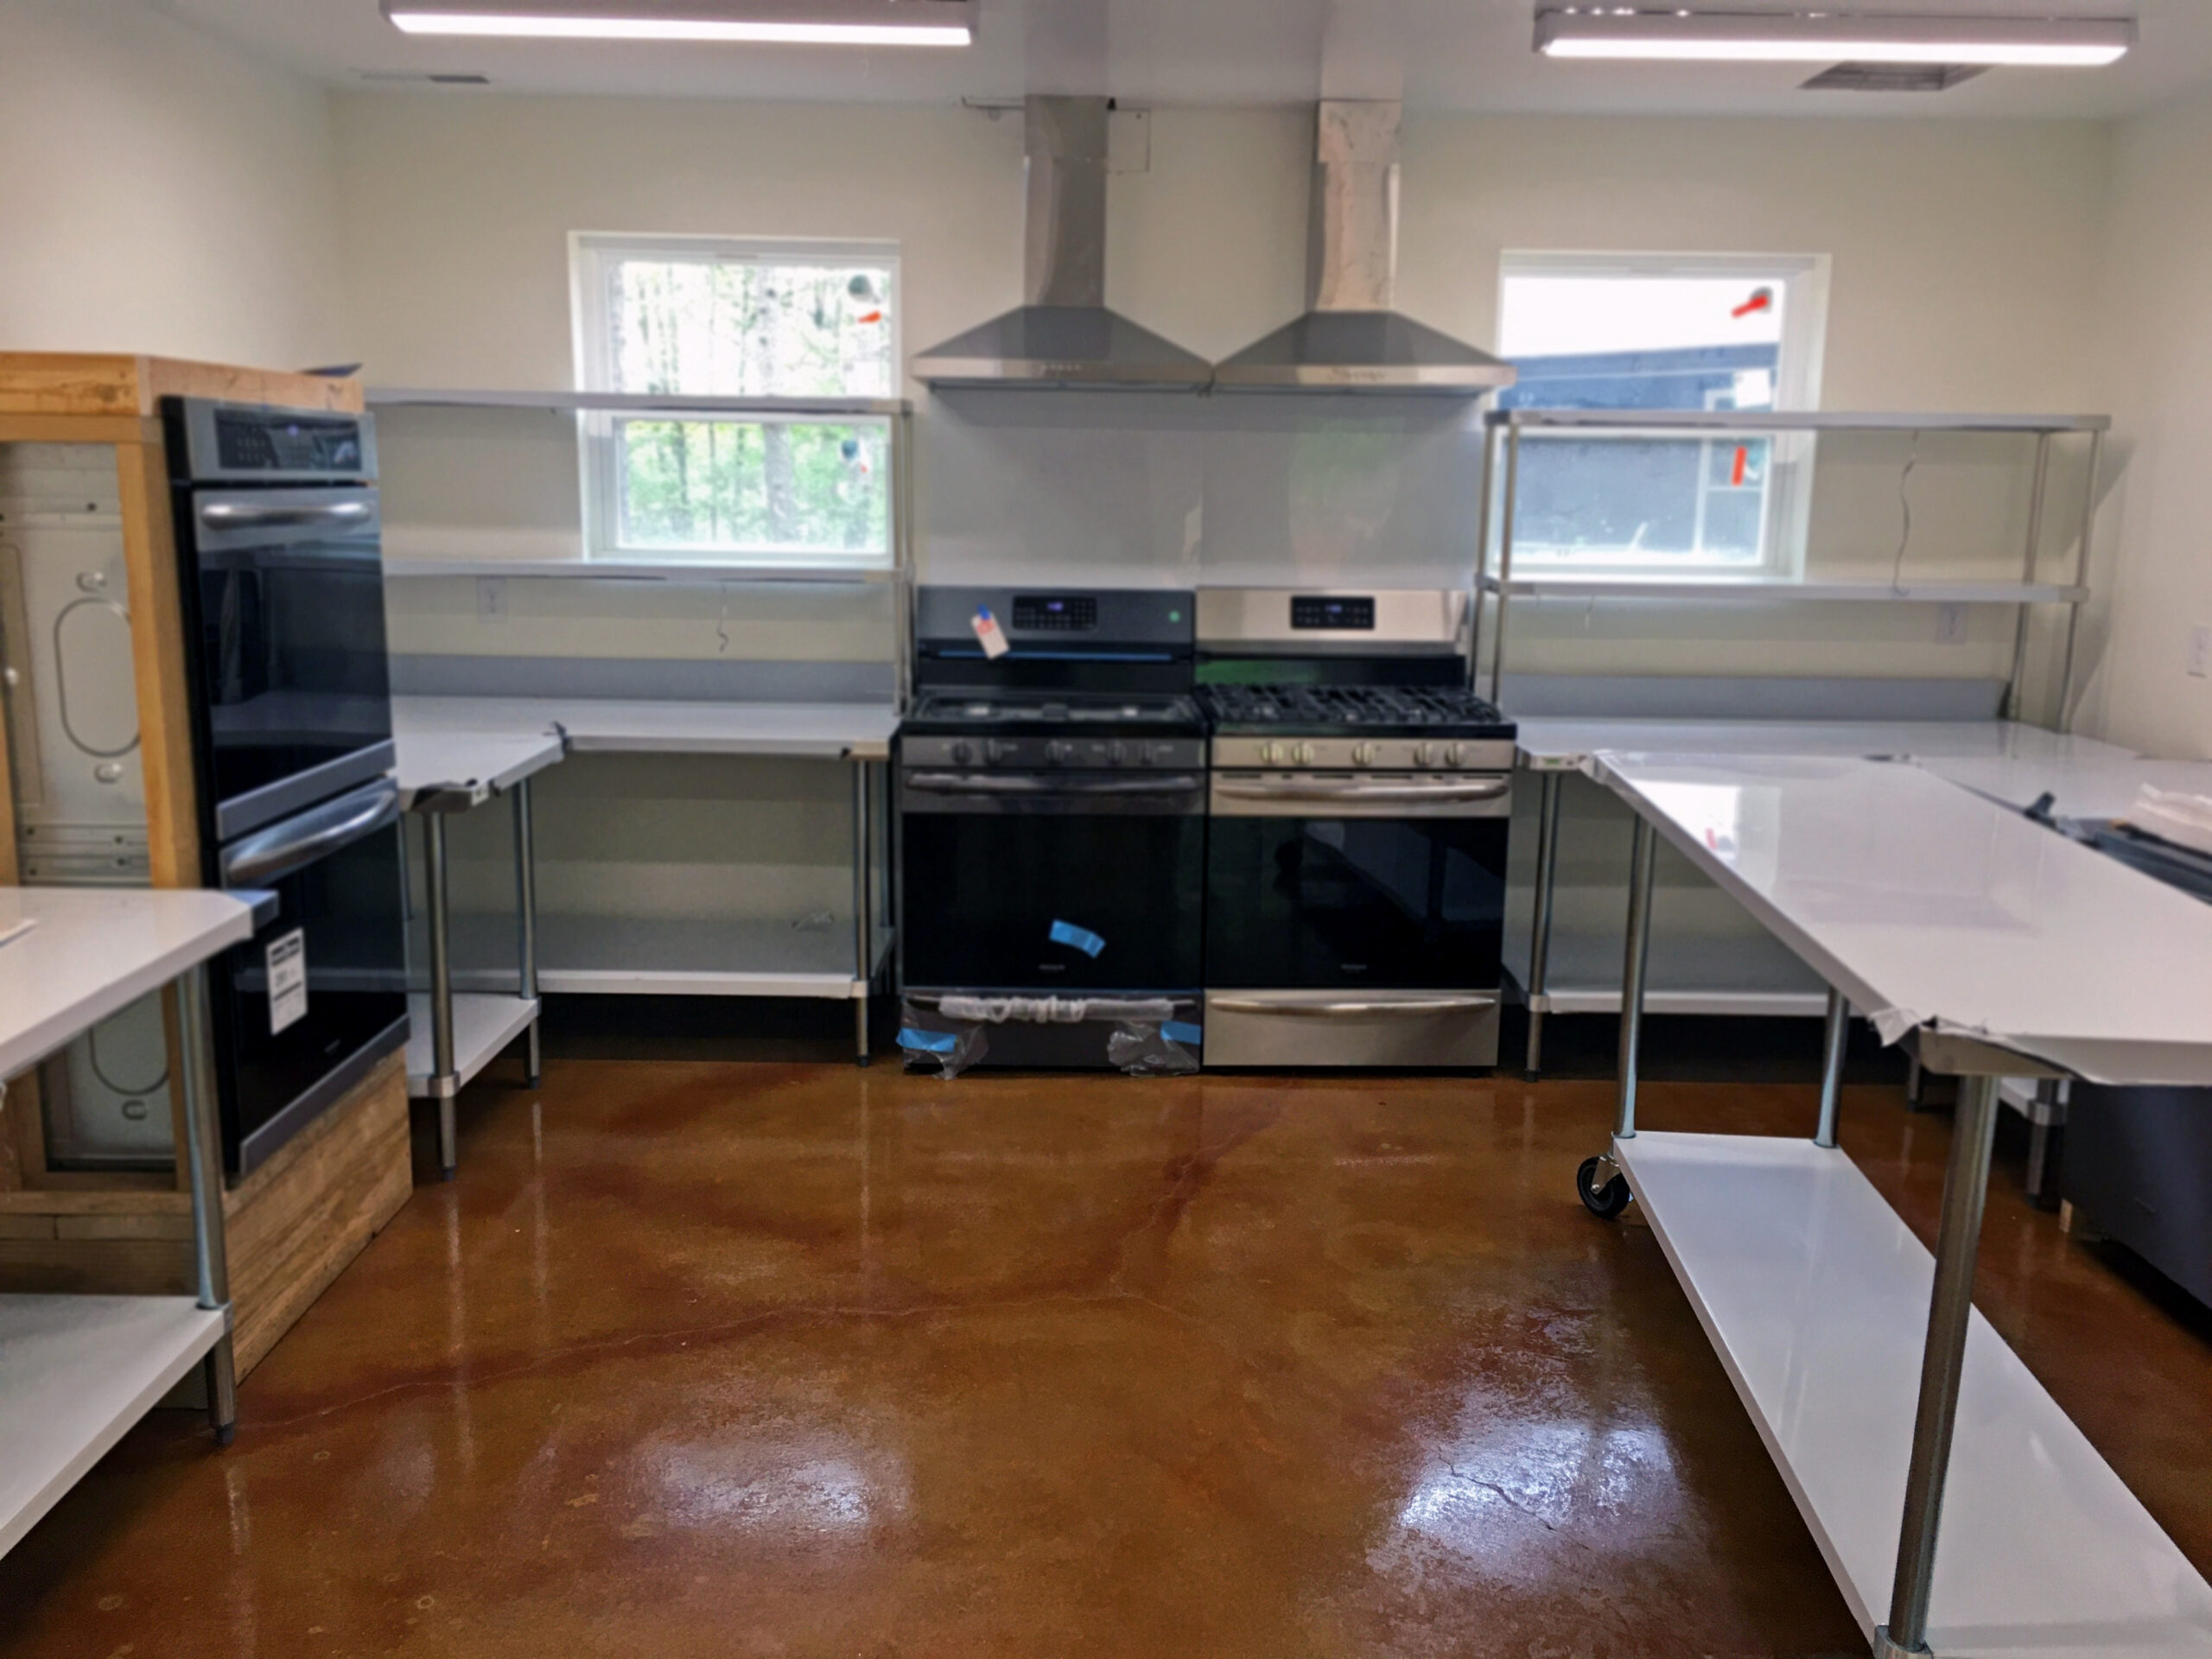
Step into the transformed commercial kitchen of @fruitfulvintagechef, where a fresh concrete slab was converted into a dynamic and durable floor using our DIY acid stain and sealer. After an initial professional grind, the application of our products infused color and life into the kitchen. The process was swift, smooth, and cost-effective, with Direct Colors’ team offering expert advice throughout.
Project Info:
- Project Completed In: 5 day(s)
- Estimate of Square Footage: 575 sq. ft.
- Project Description:
I used your acid stain for my commercial kitchen for my personal chef service. We have a newly constructed building with a concrete slab. We had the concrete ground down professionally first and then wanted to add color. We chose Direct Colors DIY acid stain with sealer. The process went smoothly and didn’t take long. The product was also reasonably priced. Shane was a great help in explaining what to purchase and how to apply each item. We love the final outcome and so glad we went this route with Direct Colors DIY acid stain and sealer! - Personal Tips:
1. Invest in multiple sprayers to avoid having to clean out the sprayer and save time.
2. Use respirator with appropriate filters. The smell is extremely strong.
3. Spiked shoes work great too. - Direct Colors Products Used:
1 Gal. Malayan Buff DIY EverStain™ & EasySeal™ Satin Kit
2 x 1 Gal. Malayan Buff EverStain™ & EasySeal™ Satin Kit - Other Products Used:
Respirator
Slice of Style: Mill House Pizza Restaurant’s Flooring Facelift
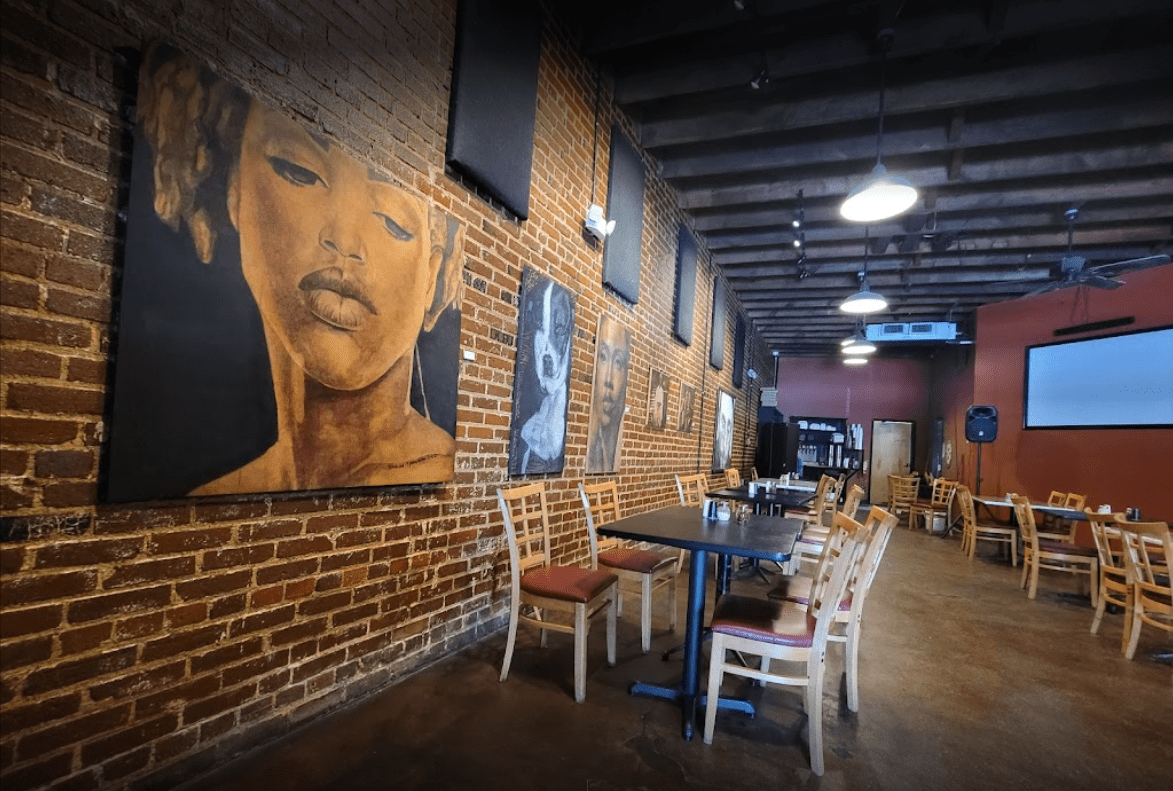
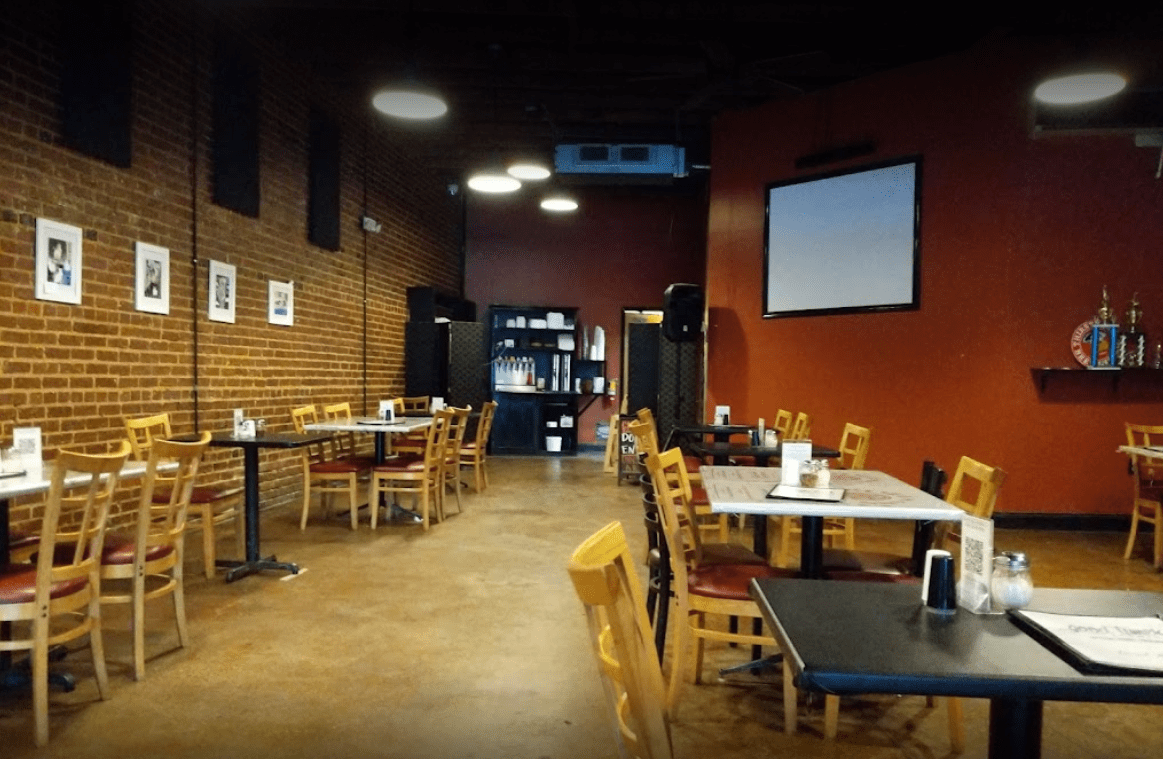
Dive into the tasty transformation of the Mill House Pizza Restaurant‘s concrete floor, where acid stain and concrete dye created a feast of character and charm. The neutral Malayan Buff EverStain™ acid stain partnered perfectly with the eatery’s exposed brick walls, enriching its rustic allure. Despite the floor’s 30-year vintage and problem areas, Vibrance™ concrete dye came to the rescue, evening out the floor color beautifully. This project serves as a flavorful example of revitalizing older concrete floors. For detailed insights on how this floor was refreshed, check out our blog post, “6 Steps To Fix Acid Staining Problems On Concrete Floors”.
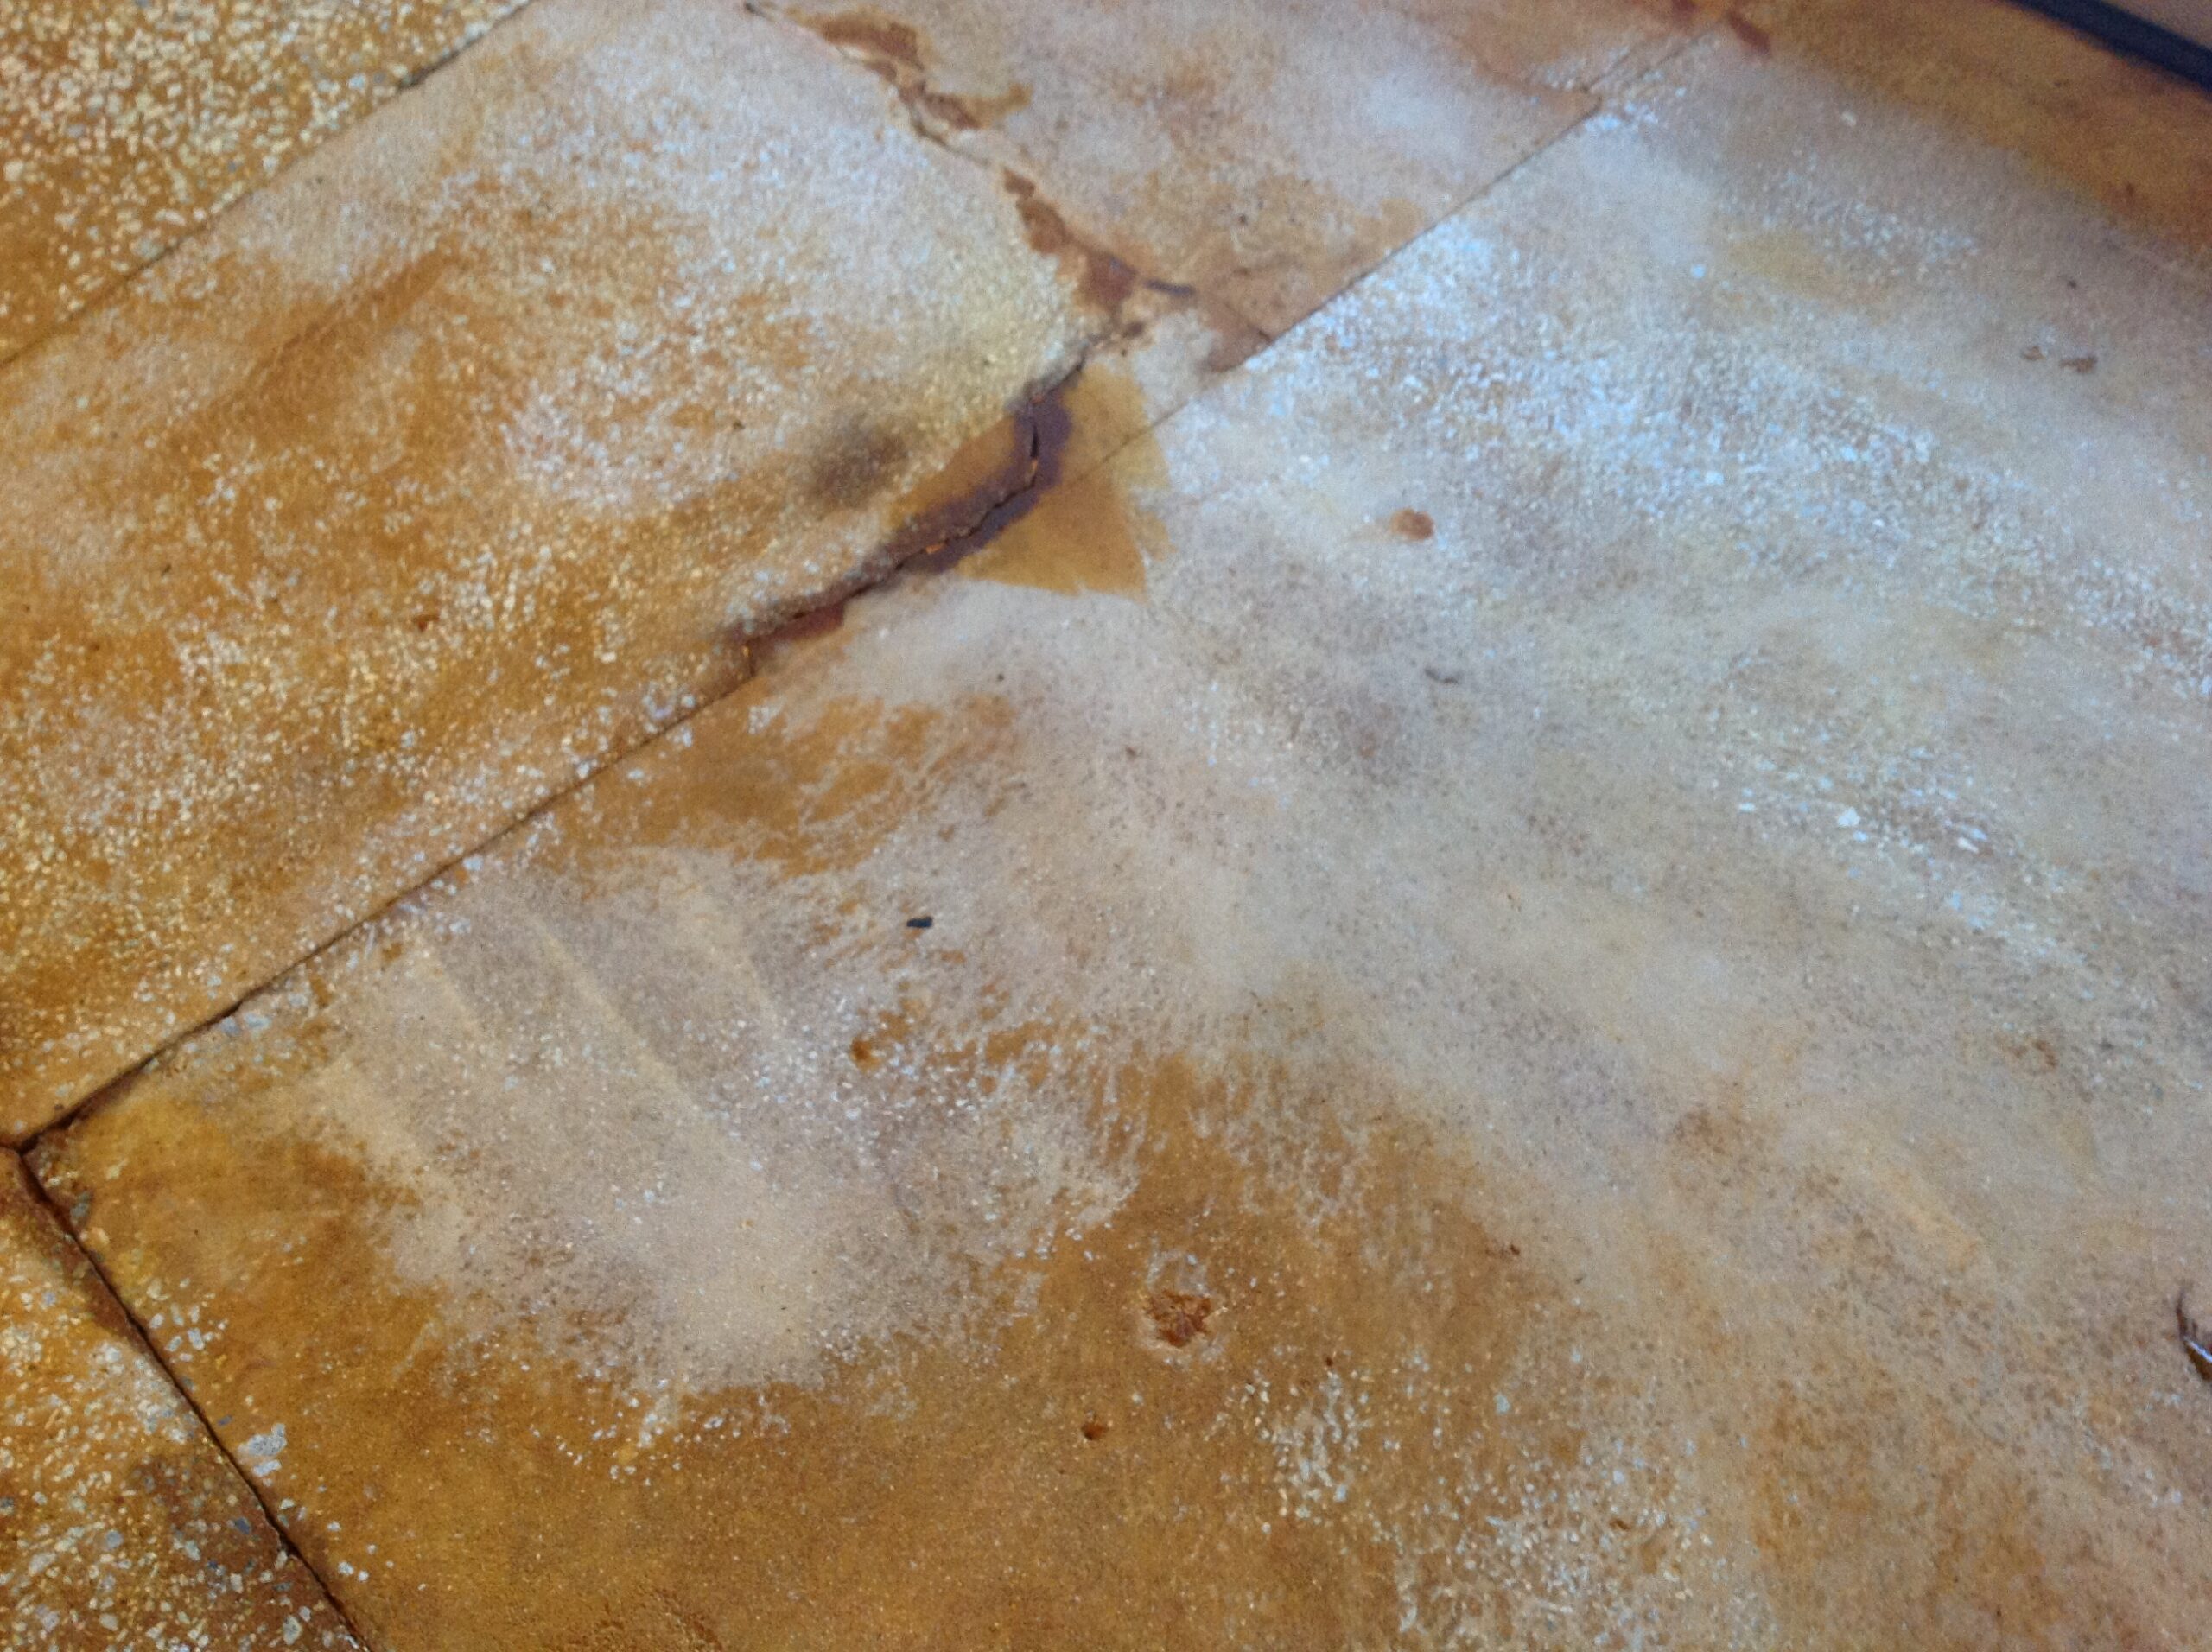
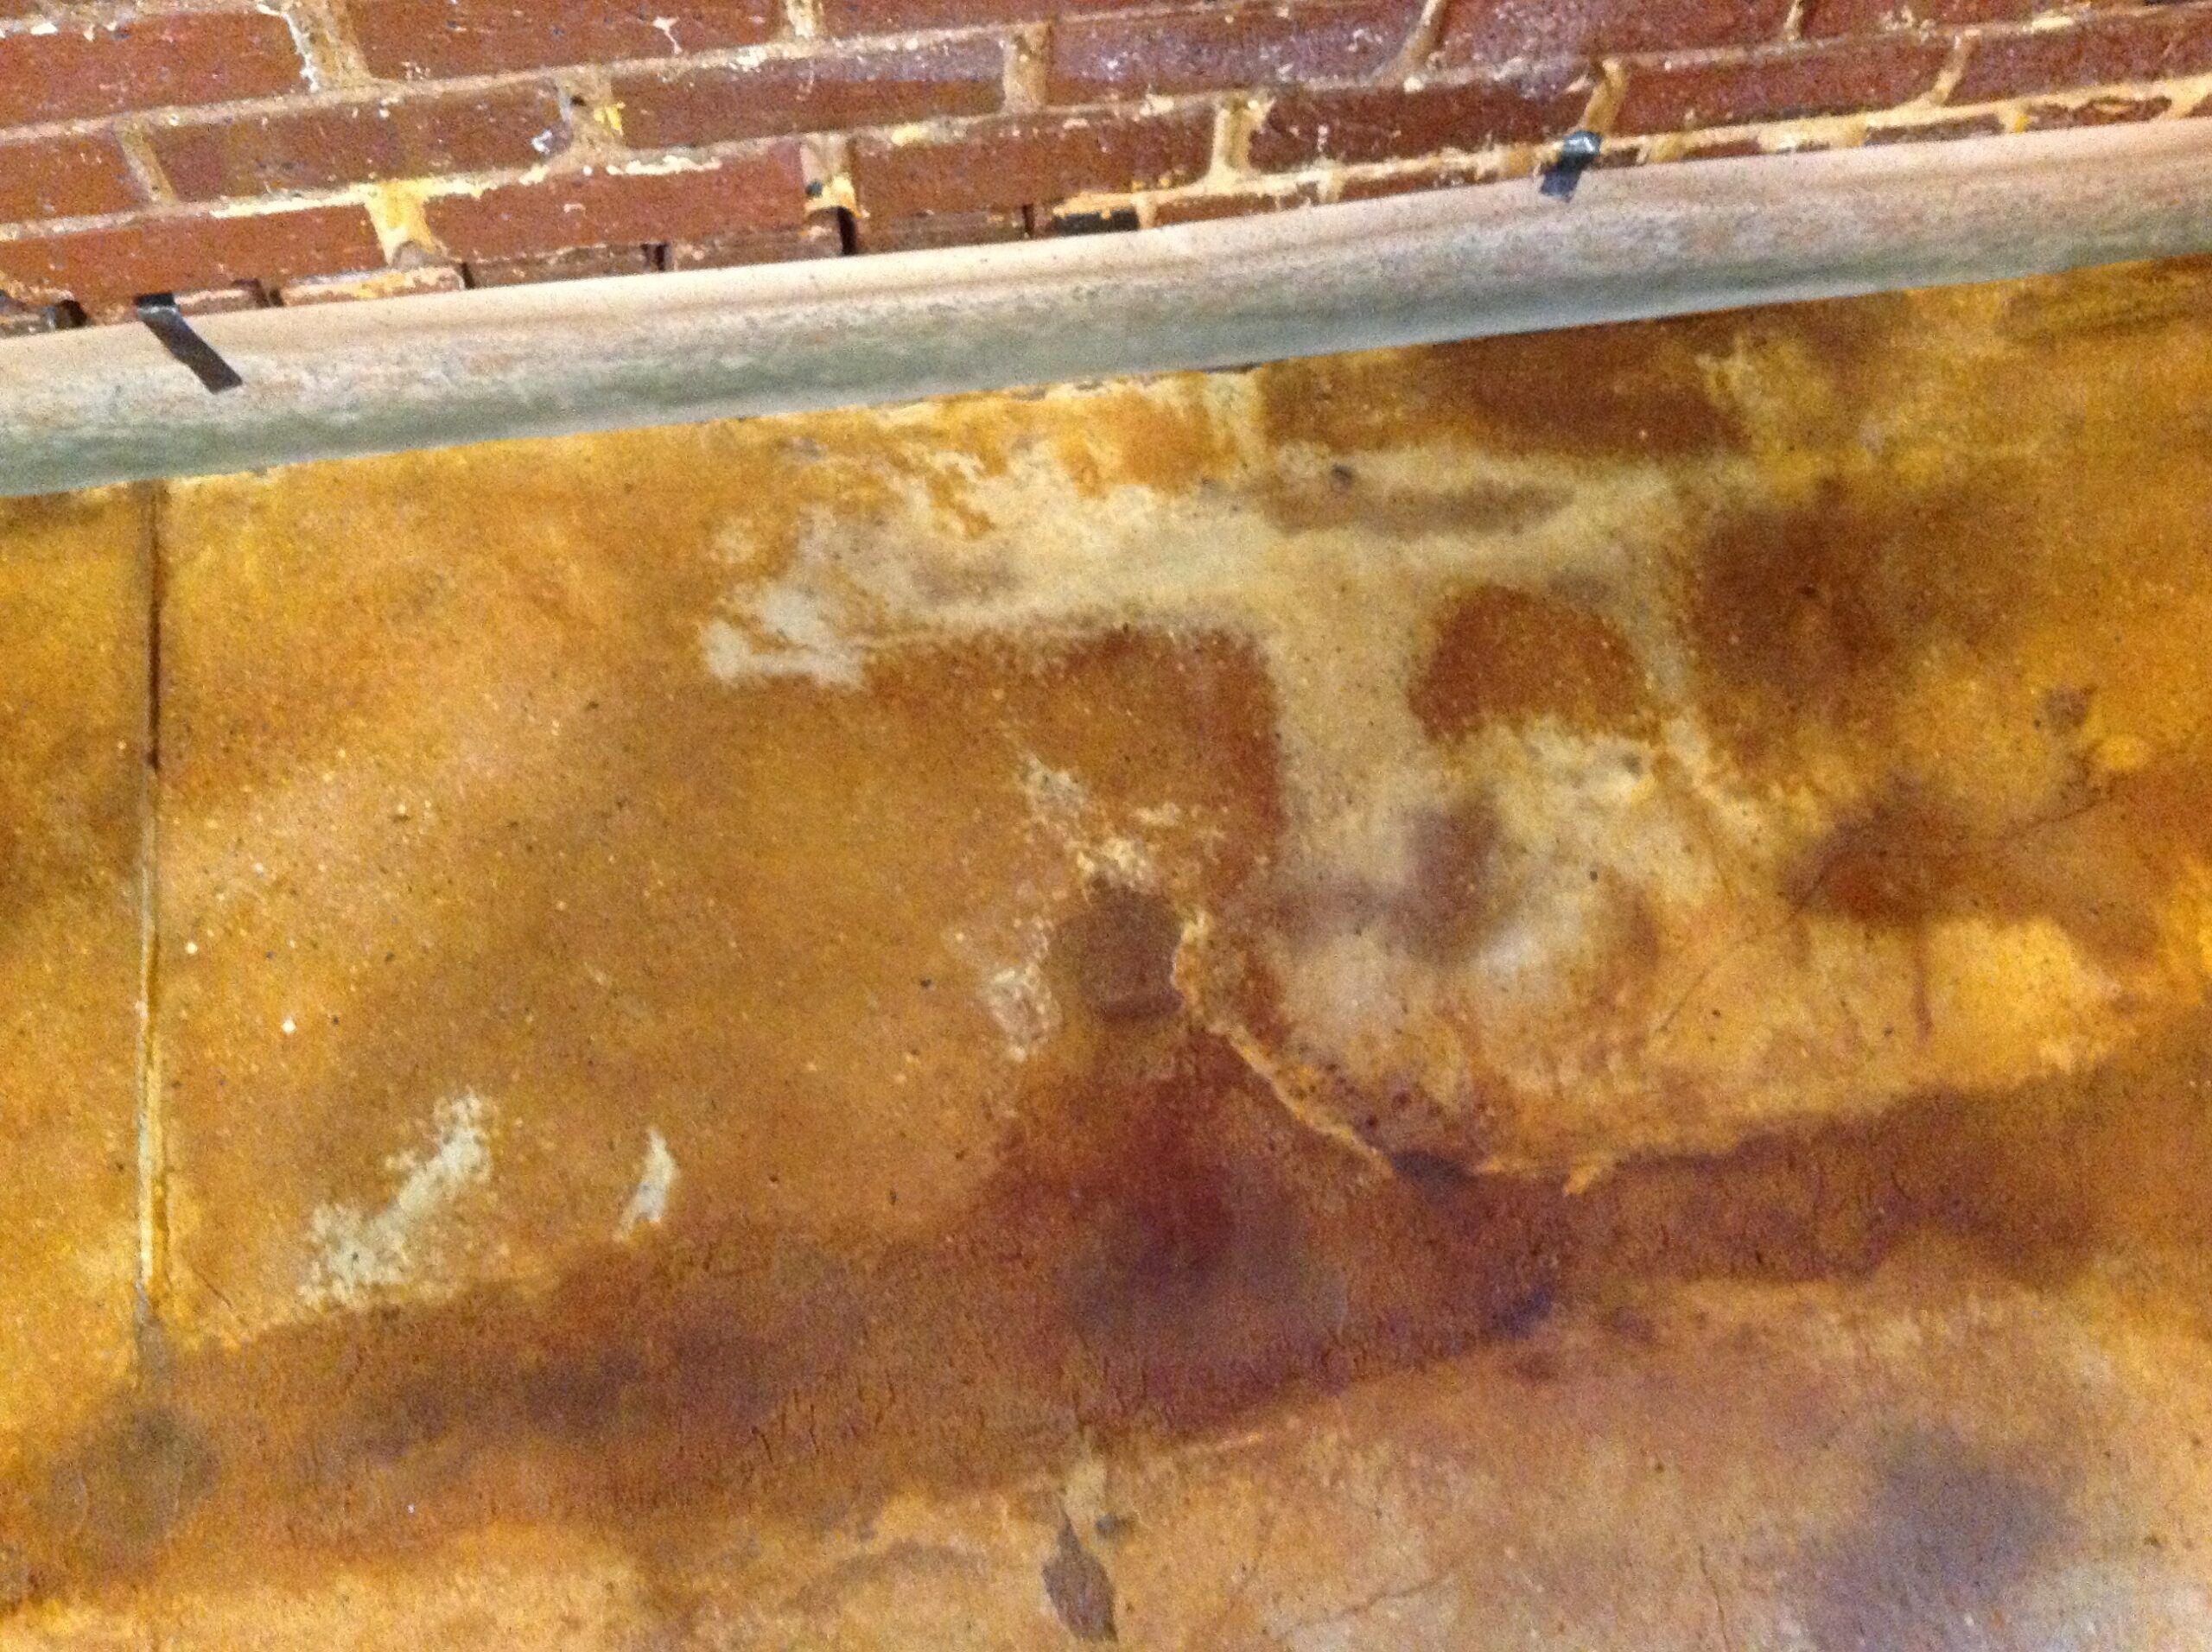
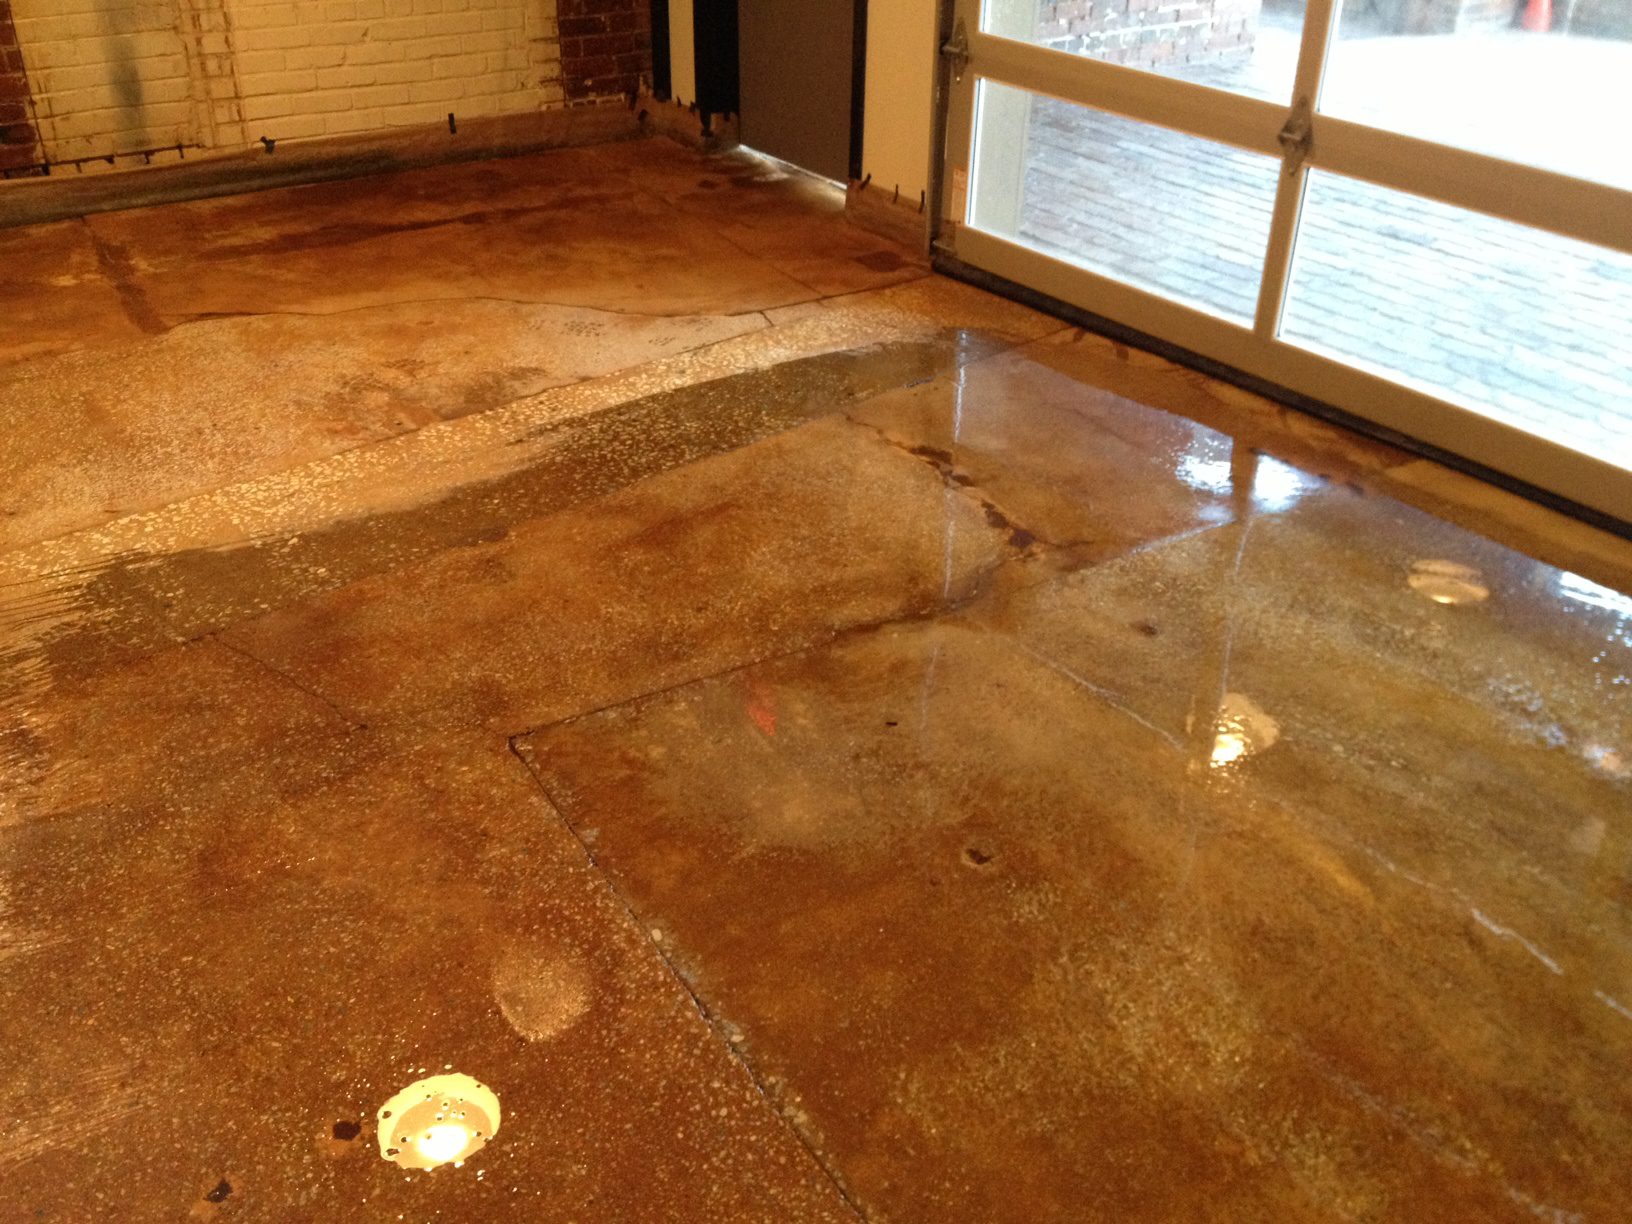
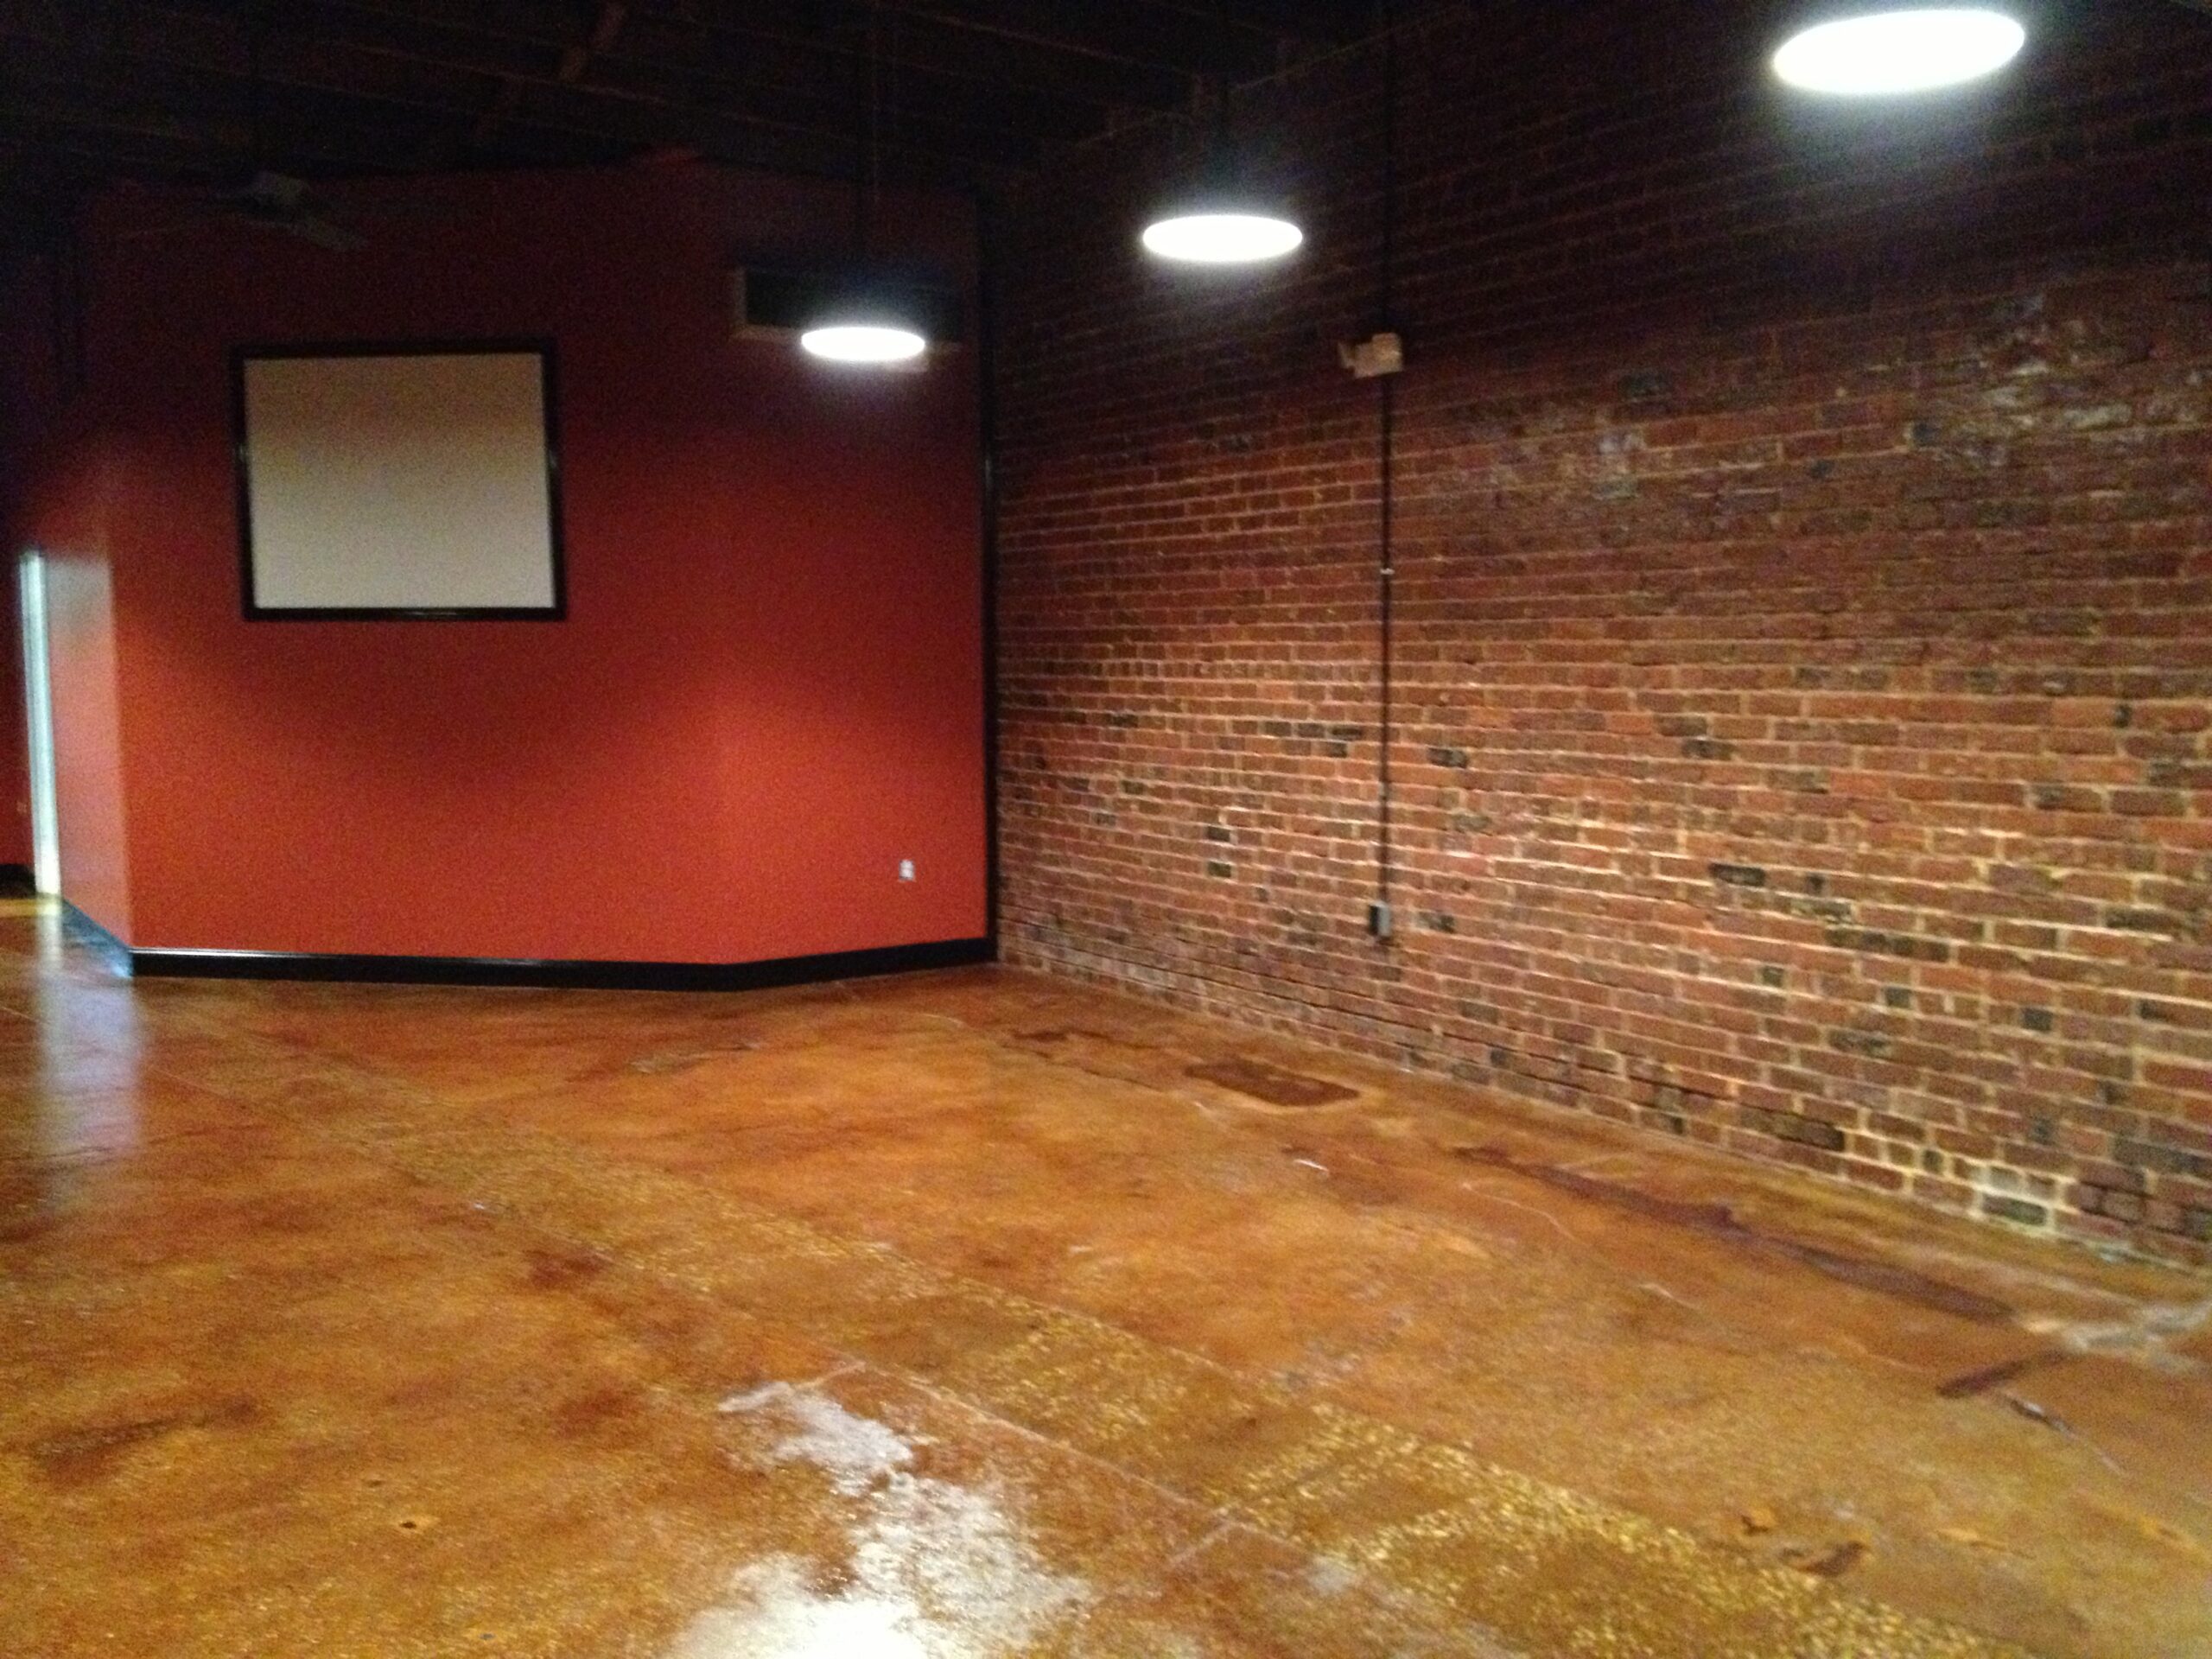
Fresh Pour, New Hue: A Home Transformation
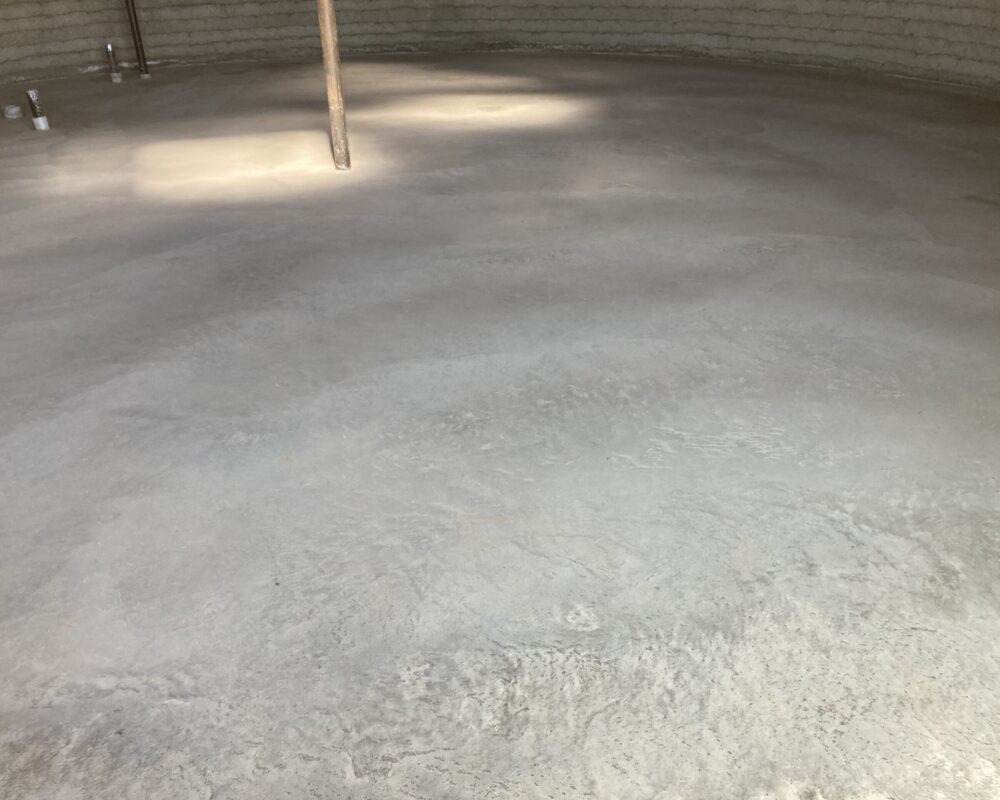
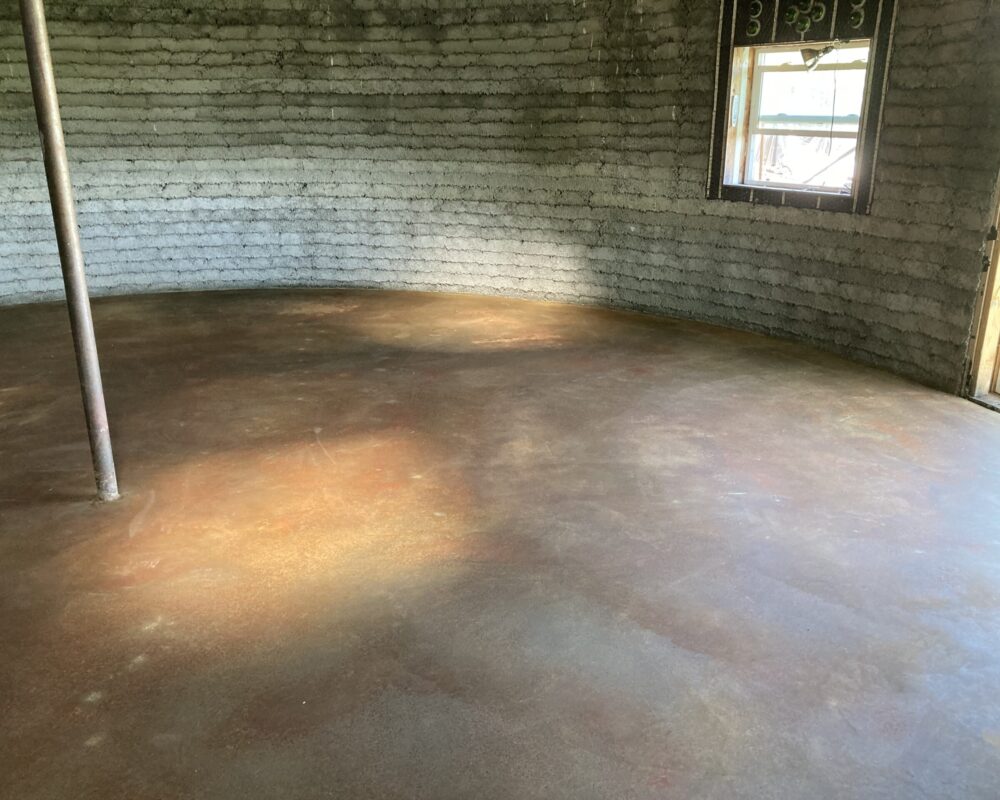
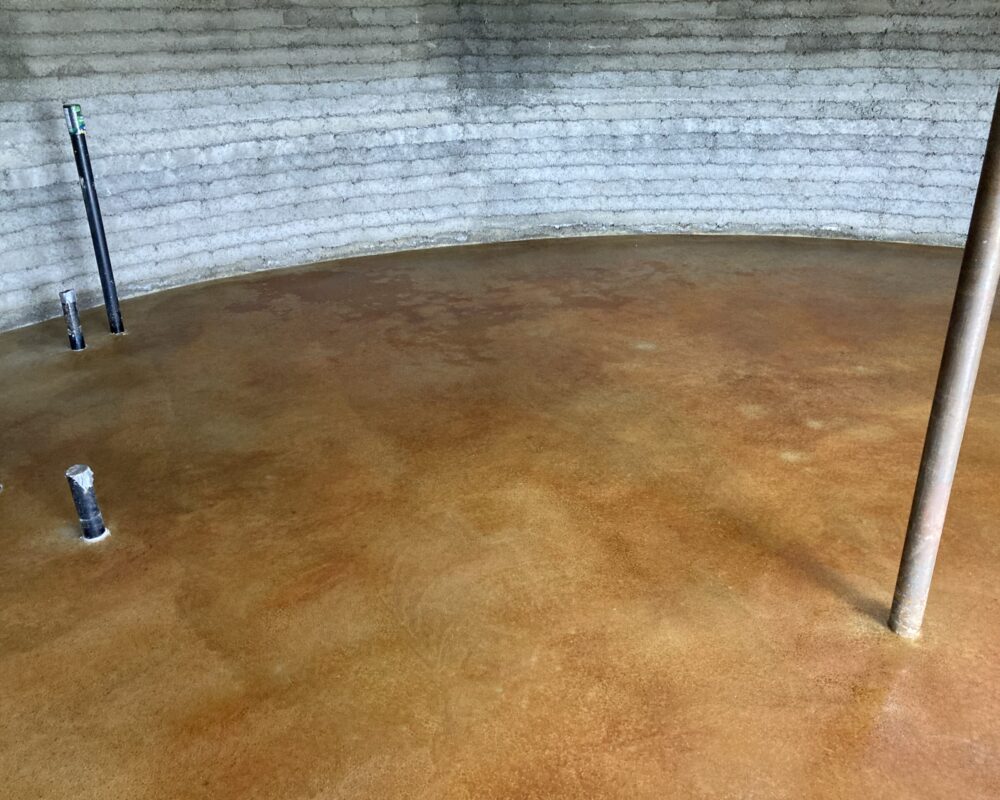
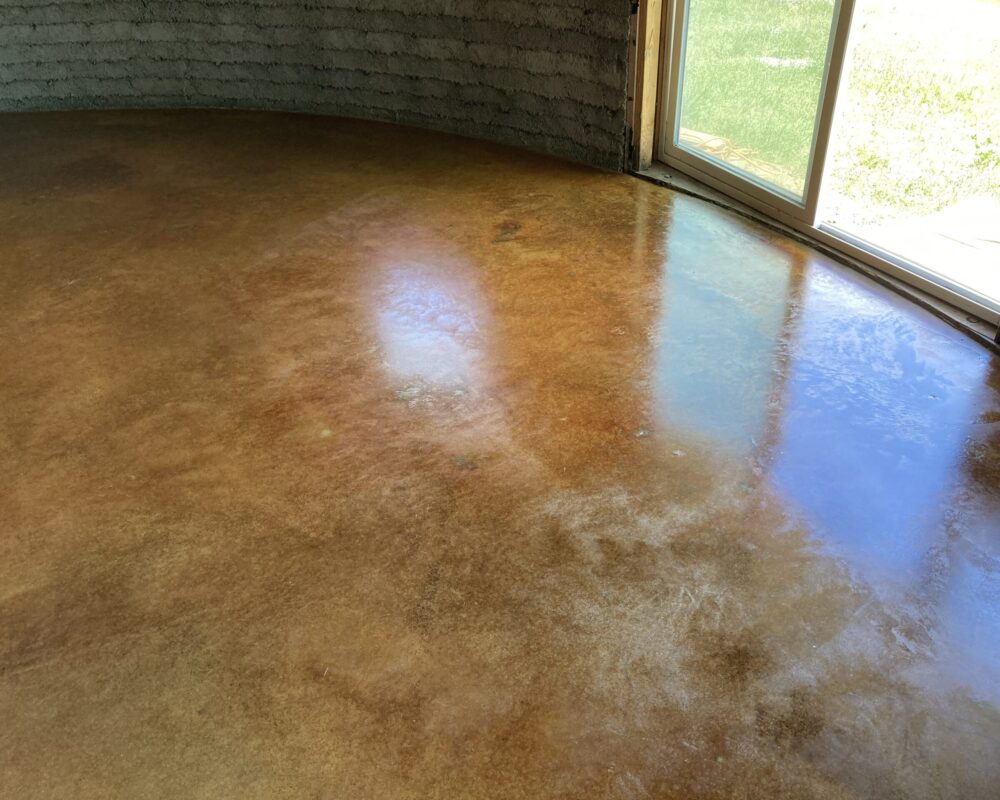
Explore the creation of a vibrant new floor in a residential setting, where freshly poured concrete met with the captivating tones of our stain. The homeowners patiently waited for the concrete to cure, applied the stain, added more for depth of color, and then sealed and waxed the surface. Note their valuable tip about the neutralizing scrub and rinse, a crucial step in the process that can take several hours to complete.
Project Info:
- Project Completed In: 26 day(s)
- Estimate of Square Footage: 600 sq. ft.
- Project Description:
New floor for our home. Brand new concrete pour. Waited 30 days for cure and then applied the stain. Determined we needed a bit more color so ordered more stain. Applied the color, then the sealer and finally the wax. - Personal Tips:
In our experience, the neutralizing scrub and rinse took several hours to complete. People need to be aware this is a significant part of the process. - Direct Colors Products Used:
1 Gal. Malayan Buff DIY EverStain™ & AcquaSeal™ Satin Kit
2 x 1 Gal. Malayan Buff EverStain™ & AcquaSeal™ Satin Kit
1 Gal. ProWax Polish™ Satin - Other Products Used:
A mop
Weekend Floor Revamp: Achieving Deep, Lustrous Hues with Malayan Buff
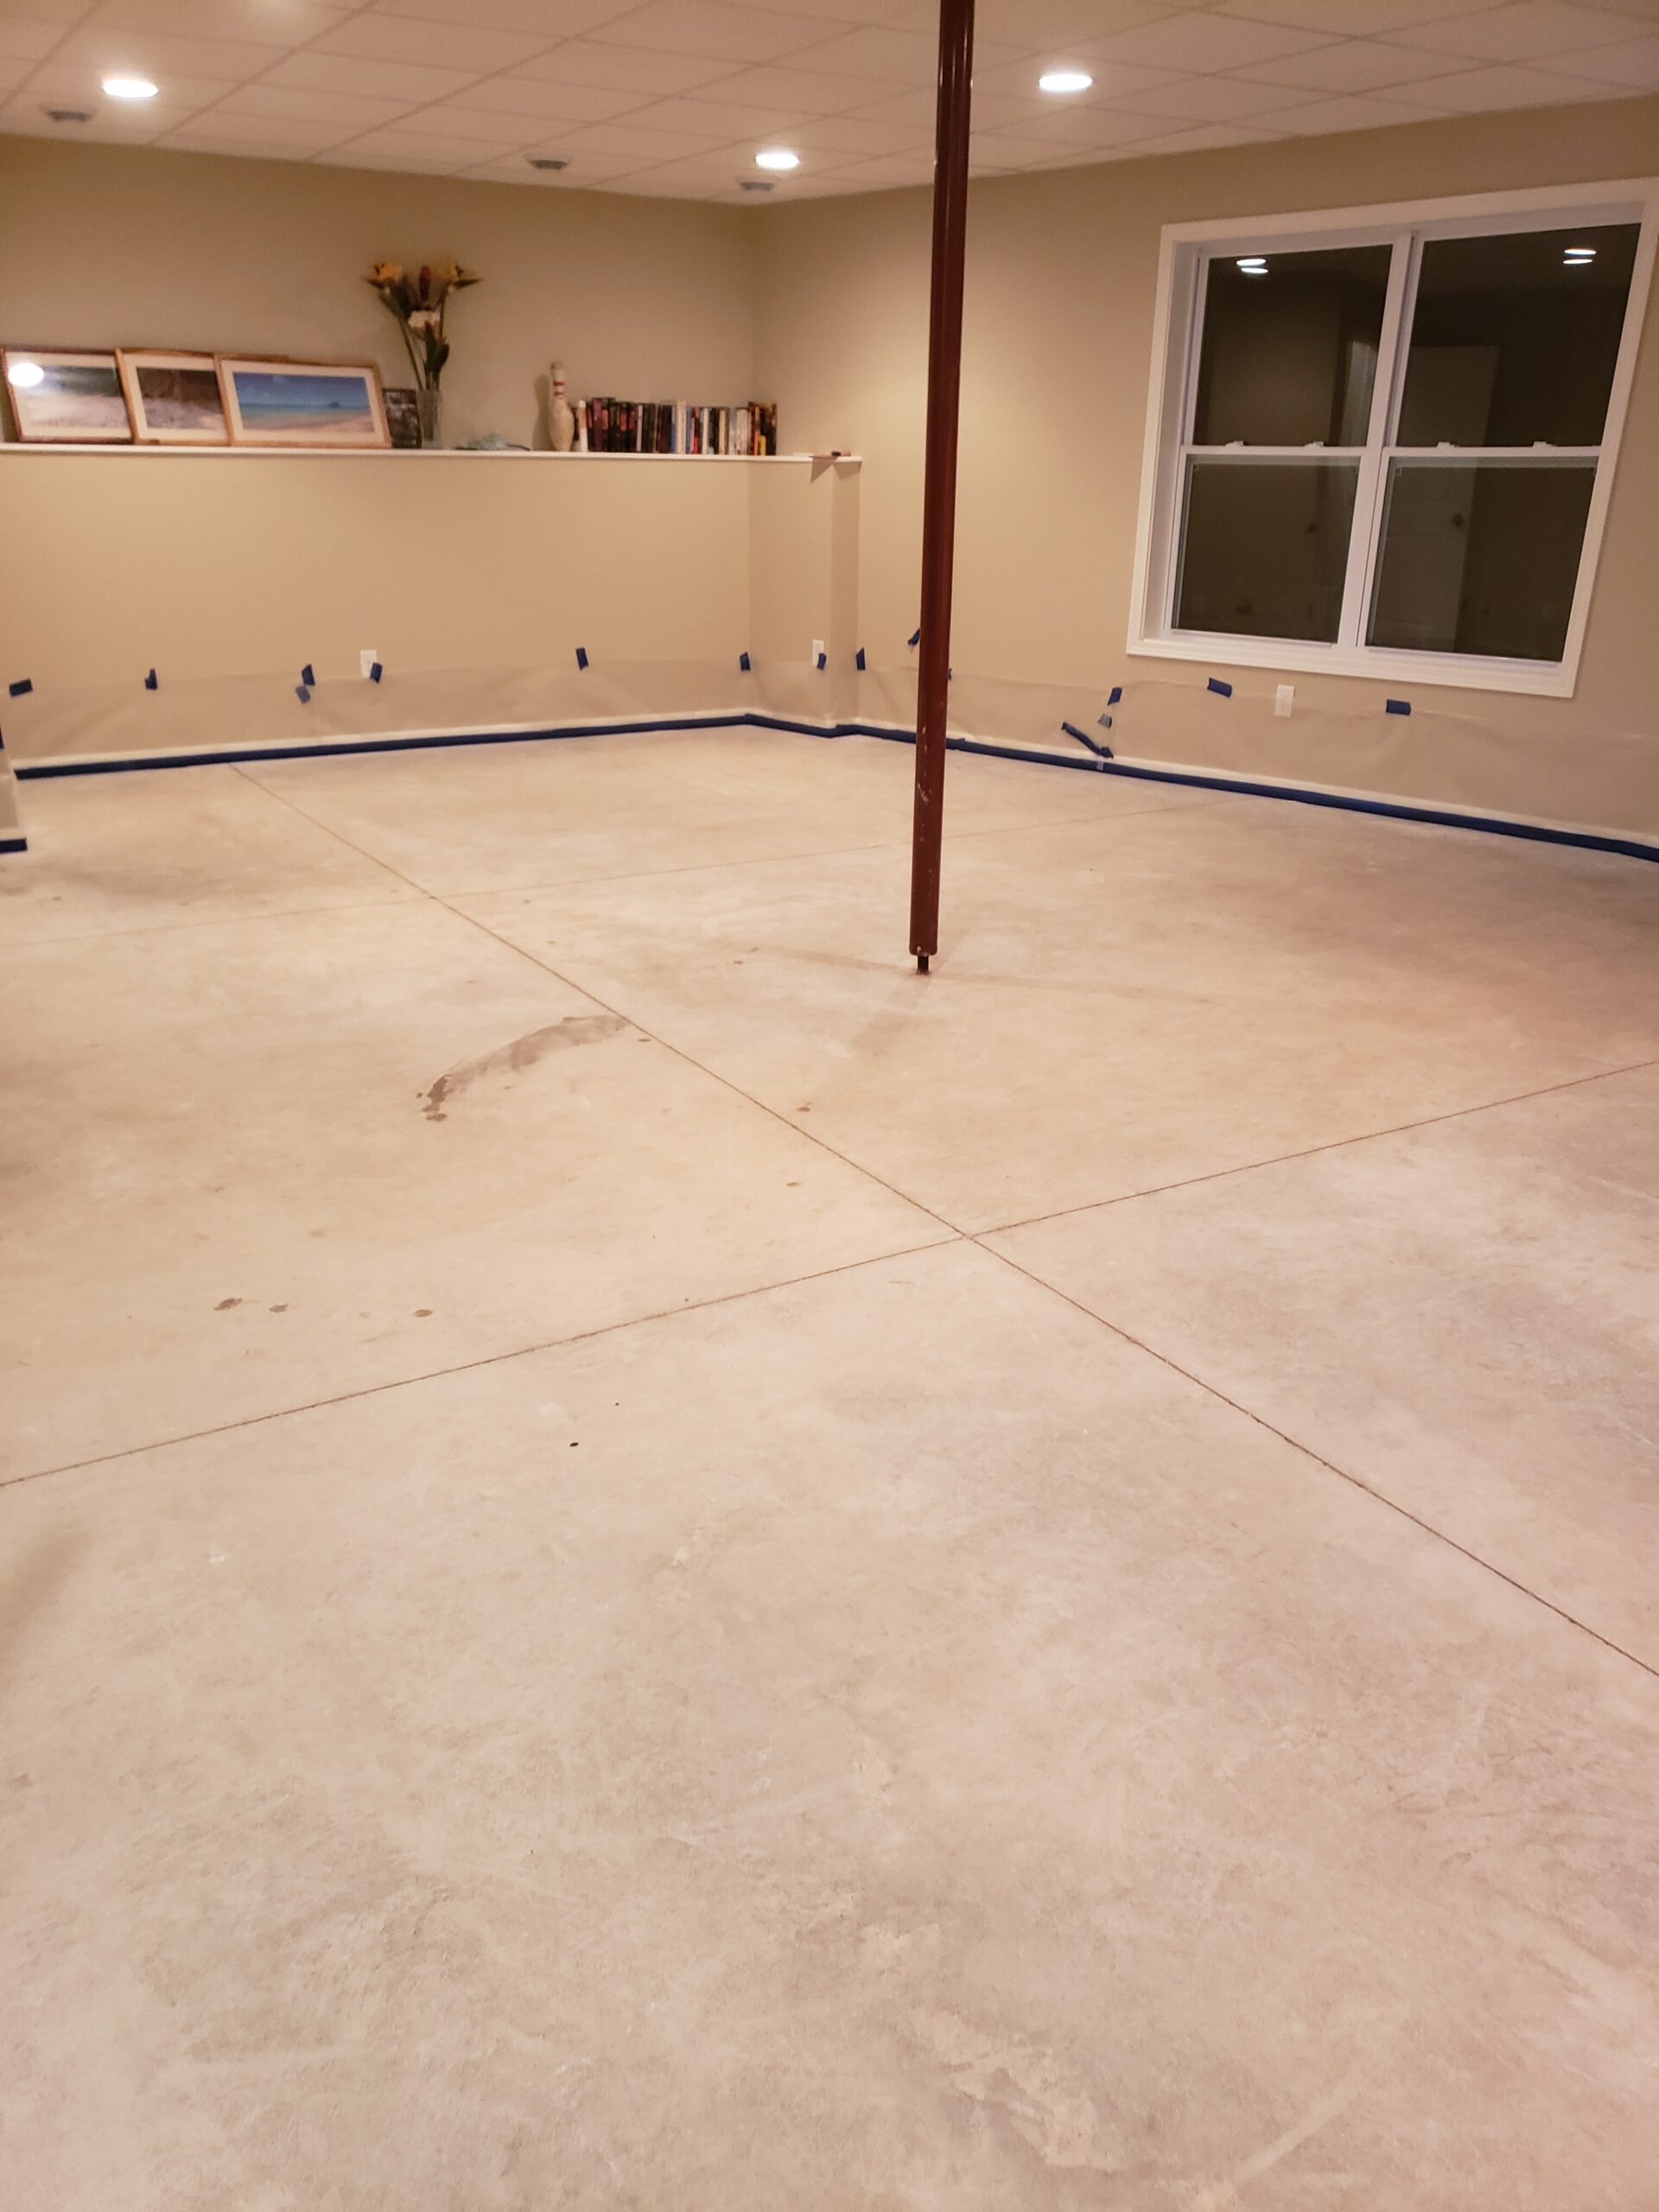
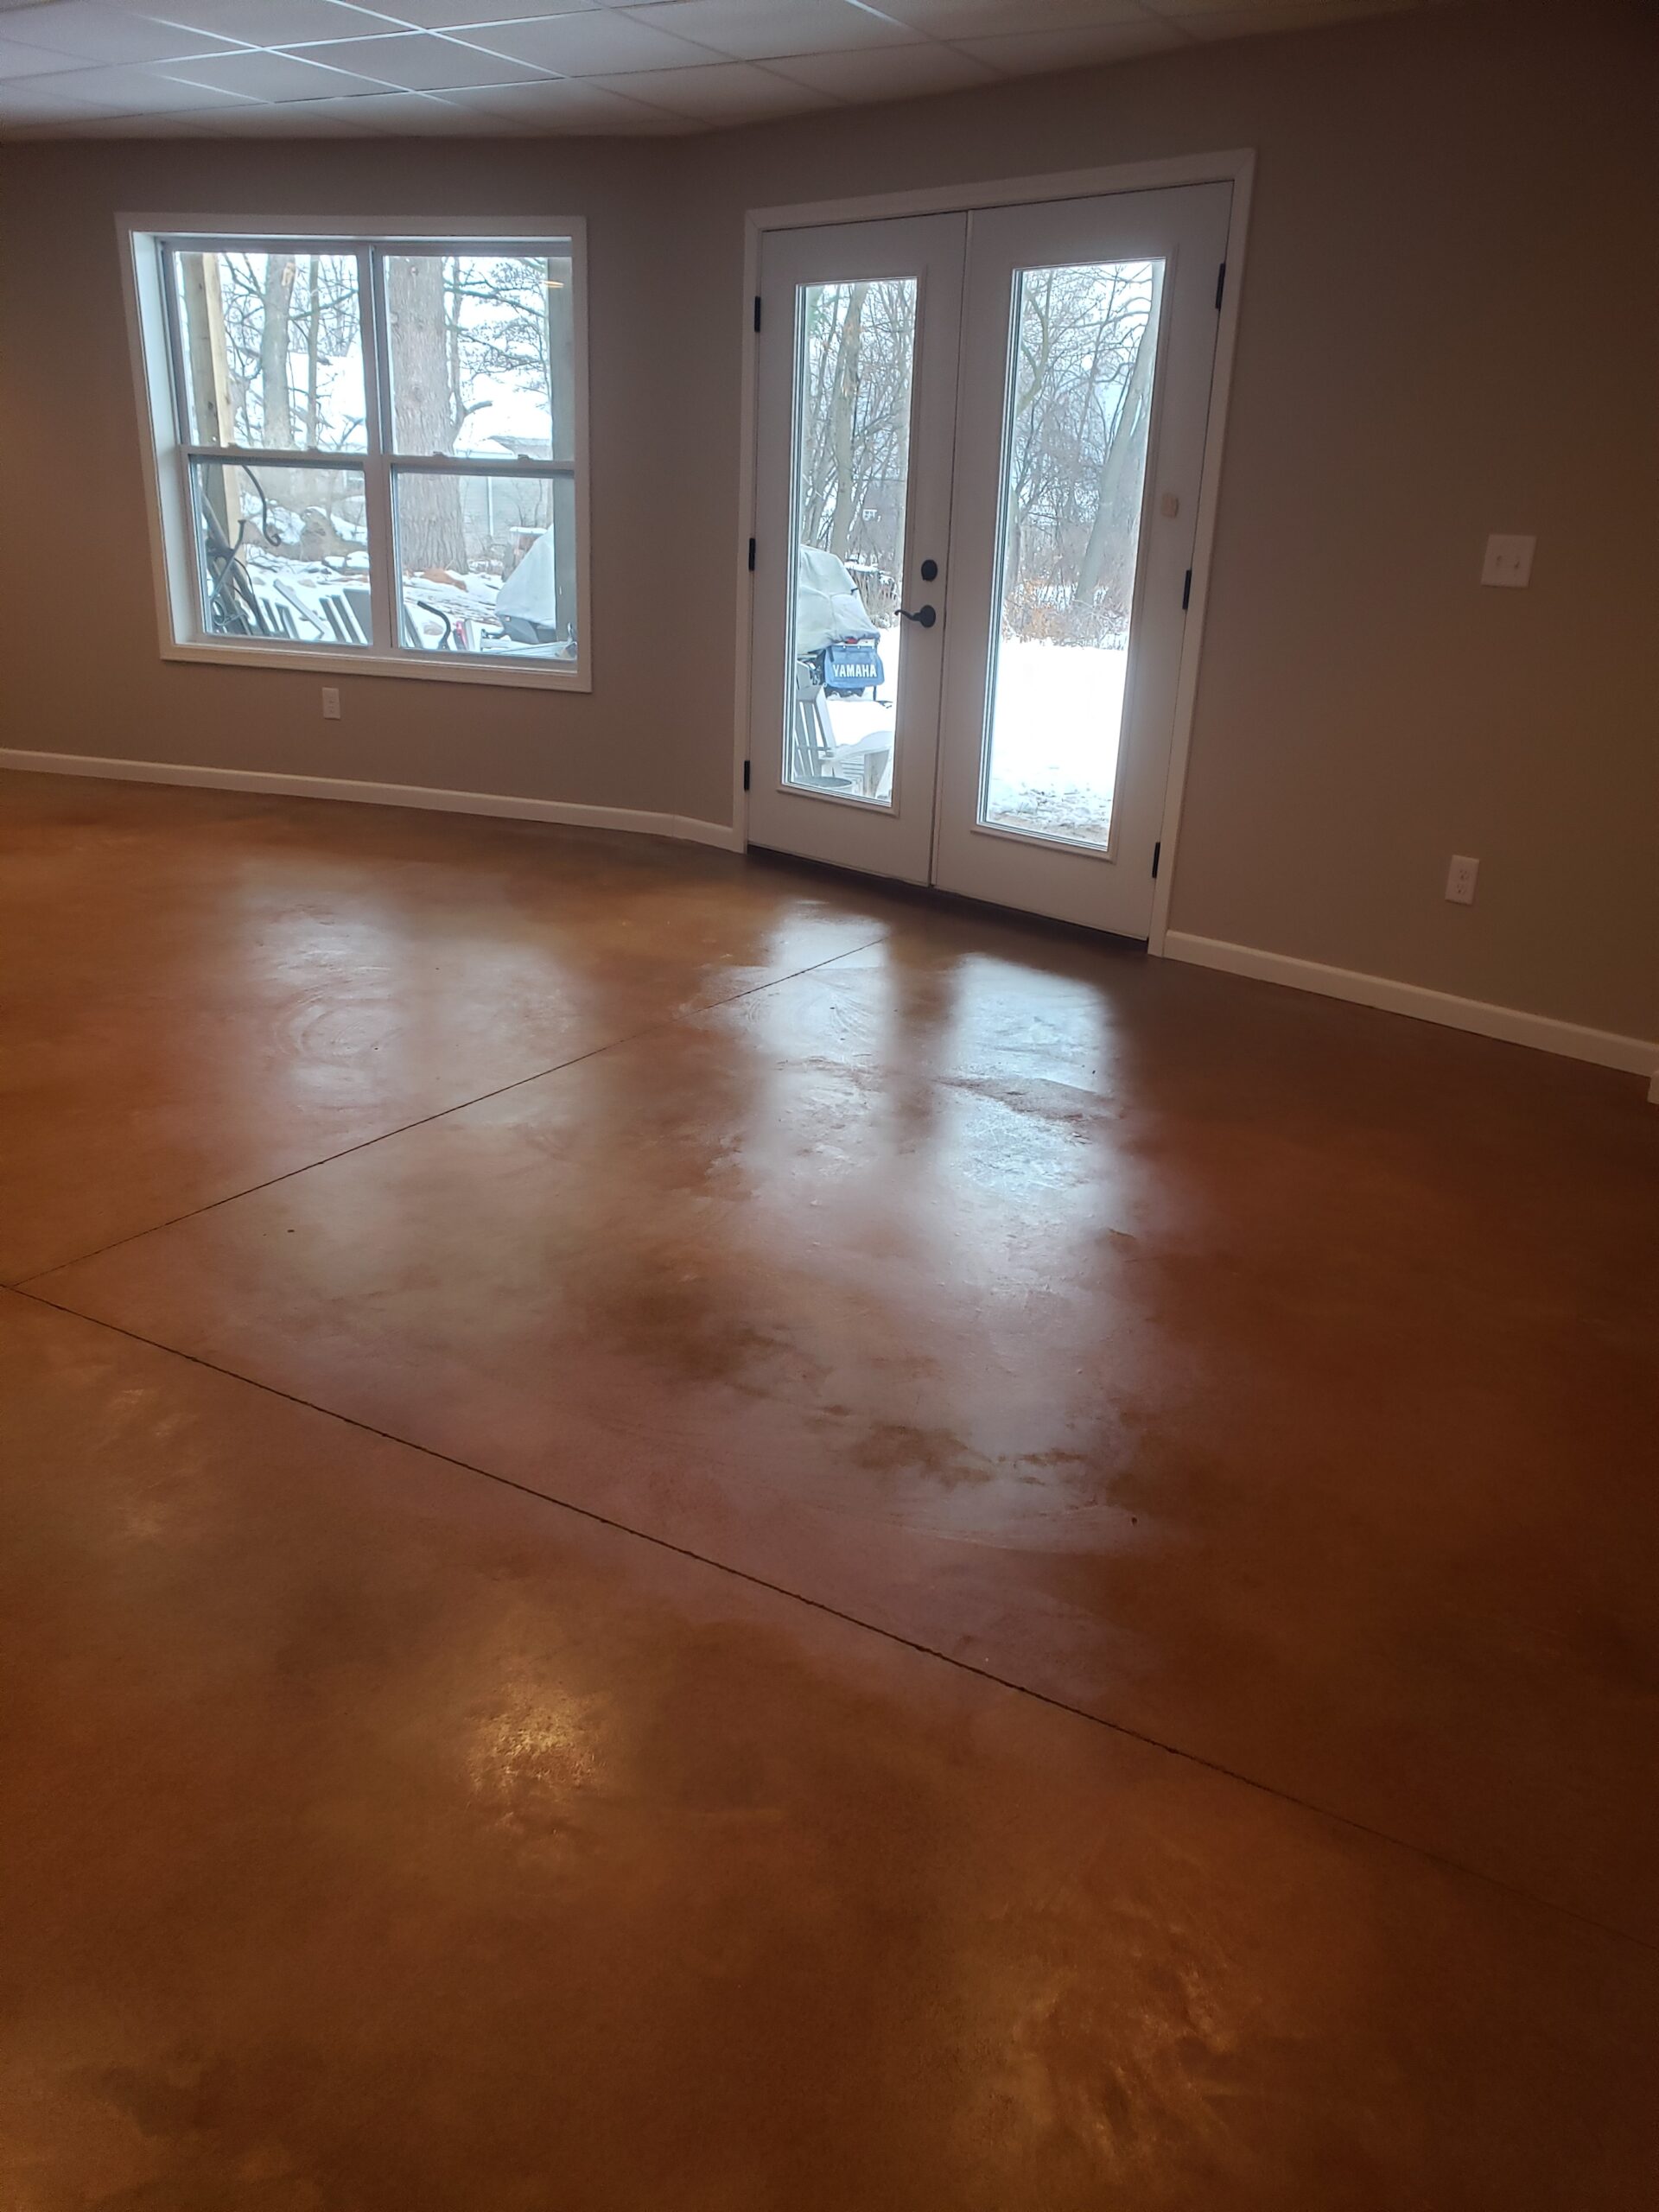
This project provides an excellent example of the beauty and ease of a weekend DIY home flooring transformation. The homeowners embarked on a journey from cleaning to sealing their concrete floor, all within the span of three days. Opting for two coats of our Malayan Buff acid stain, they achieved the exact color intensity they desired. By applying a sealer, they further enhanced the floor’s durability, with plans for a second coat given its striking results. Personal tips include using a smaller brush for corner applications, proper ventilation during sealing, and patience in allowing ample airing out time. Truly a testament to the power of DIY!
Project Info:
- Project Completed In: 3 day(s)
- Estimate of Square Footage: 425 sq. ft.
- Project Description:
We cleaned the floor in Friday evening. Saturday we sprayed on the acid stain, letting the first cost dry. After about 5 hours we decided we wanted it a bit darker so we sprayed a 2nd coat. Then that evening we neutralized it and the color is exactly as we want it. Sunday we sprayed on the sealer. We plan on applying a second coat of sealer since we only applied a thin coat and have a lot leftover. - Personal Tips:
We used a smaller paintbrush to apply the acid stain and sealer before spraying to get into the corners and hard to reach places. Also we had to open window, turn and on fans to air out the sealer. Being that the weather is so cold we left the house. It took around 8 – 10 hours to air out, so keep that in mind if you use the solvent sealer. But really, this is so easy to do with such great beautiful results! - Direct Colors Products Used:
1 Gal. Malayan Buff DIY EverStain™ & EasySeal™ Gloss Kit
1 Gal. Malayan Buff EverStain™ & EasySeal™ Gloss Kit
1 Qt. Malayan Buff EverStain™
1 Qt. EasySeal™ Gloss
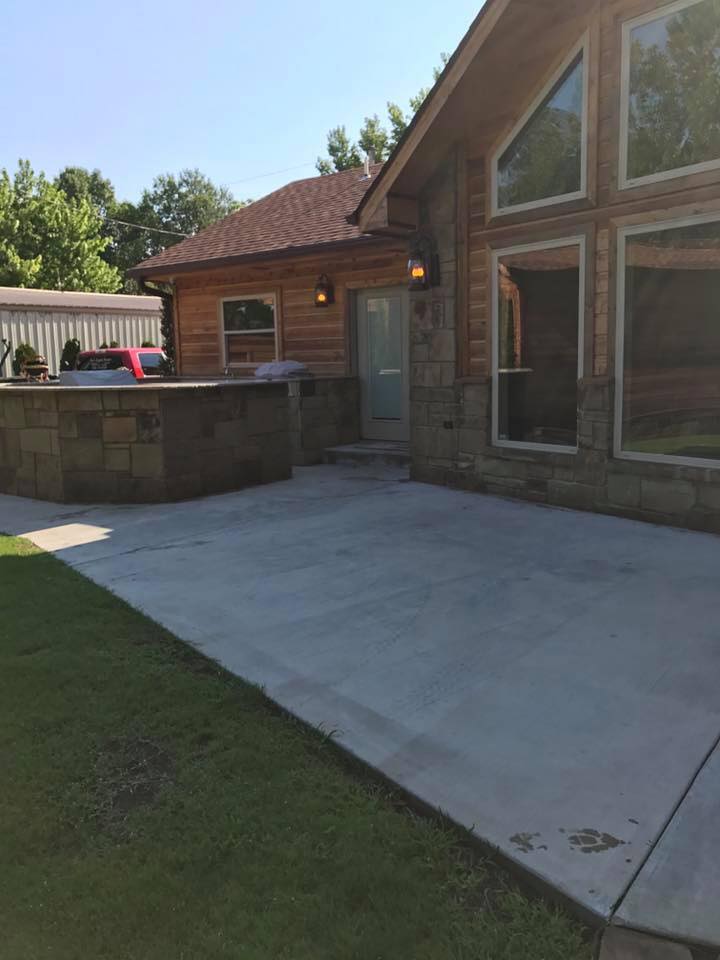
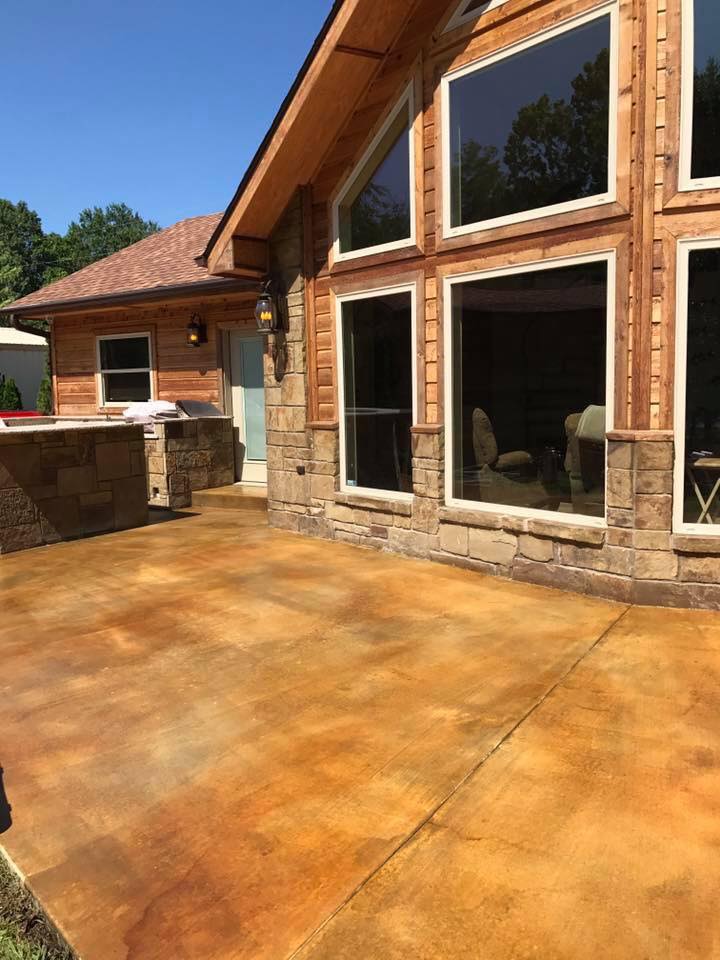
Golden Retreat: Malayan Buff-Stained Patio
This patio was transformed with the warm, earthy tones of Malayan Buff acid stain, a simple yet elegant choice that brings a golden glow, creating a serene and inviting outdoor space.
Malayan Buff Oasis: Back Porch Fire Pit Haven
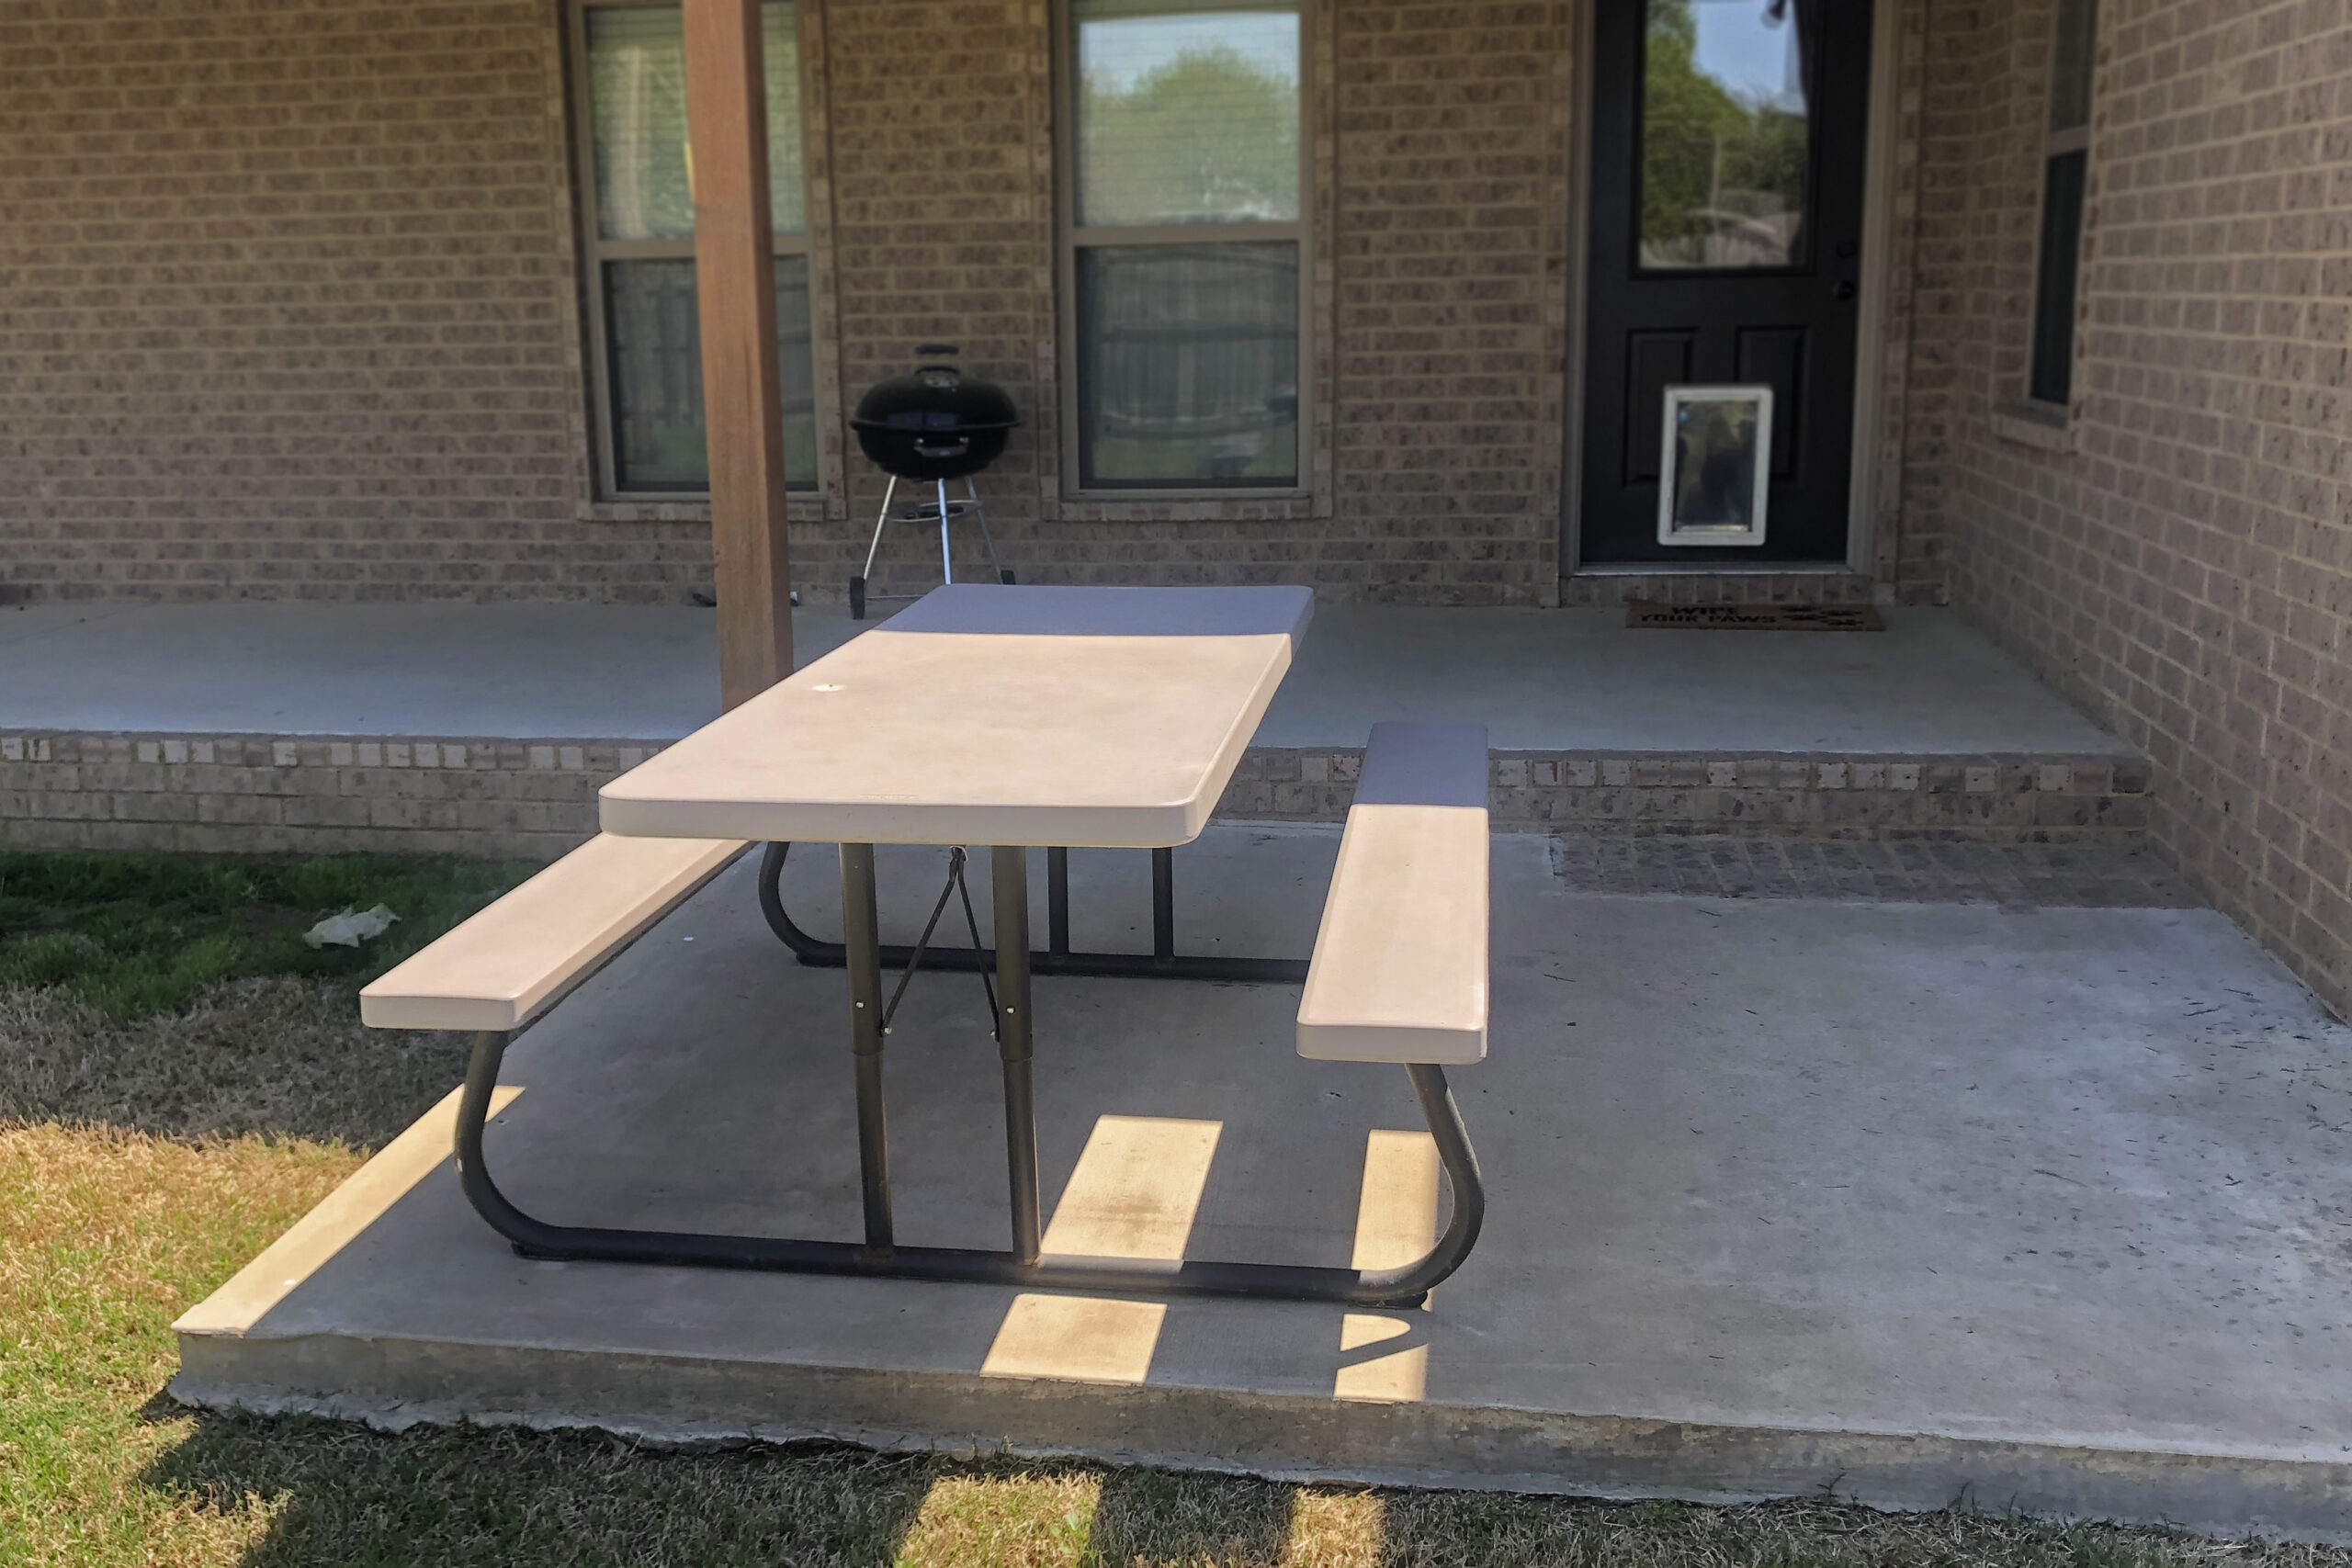
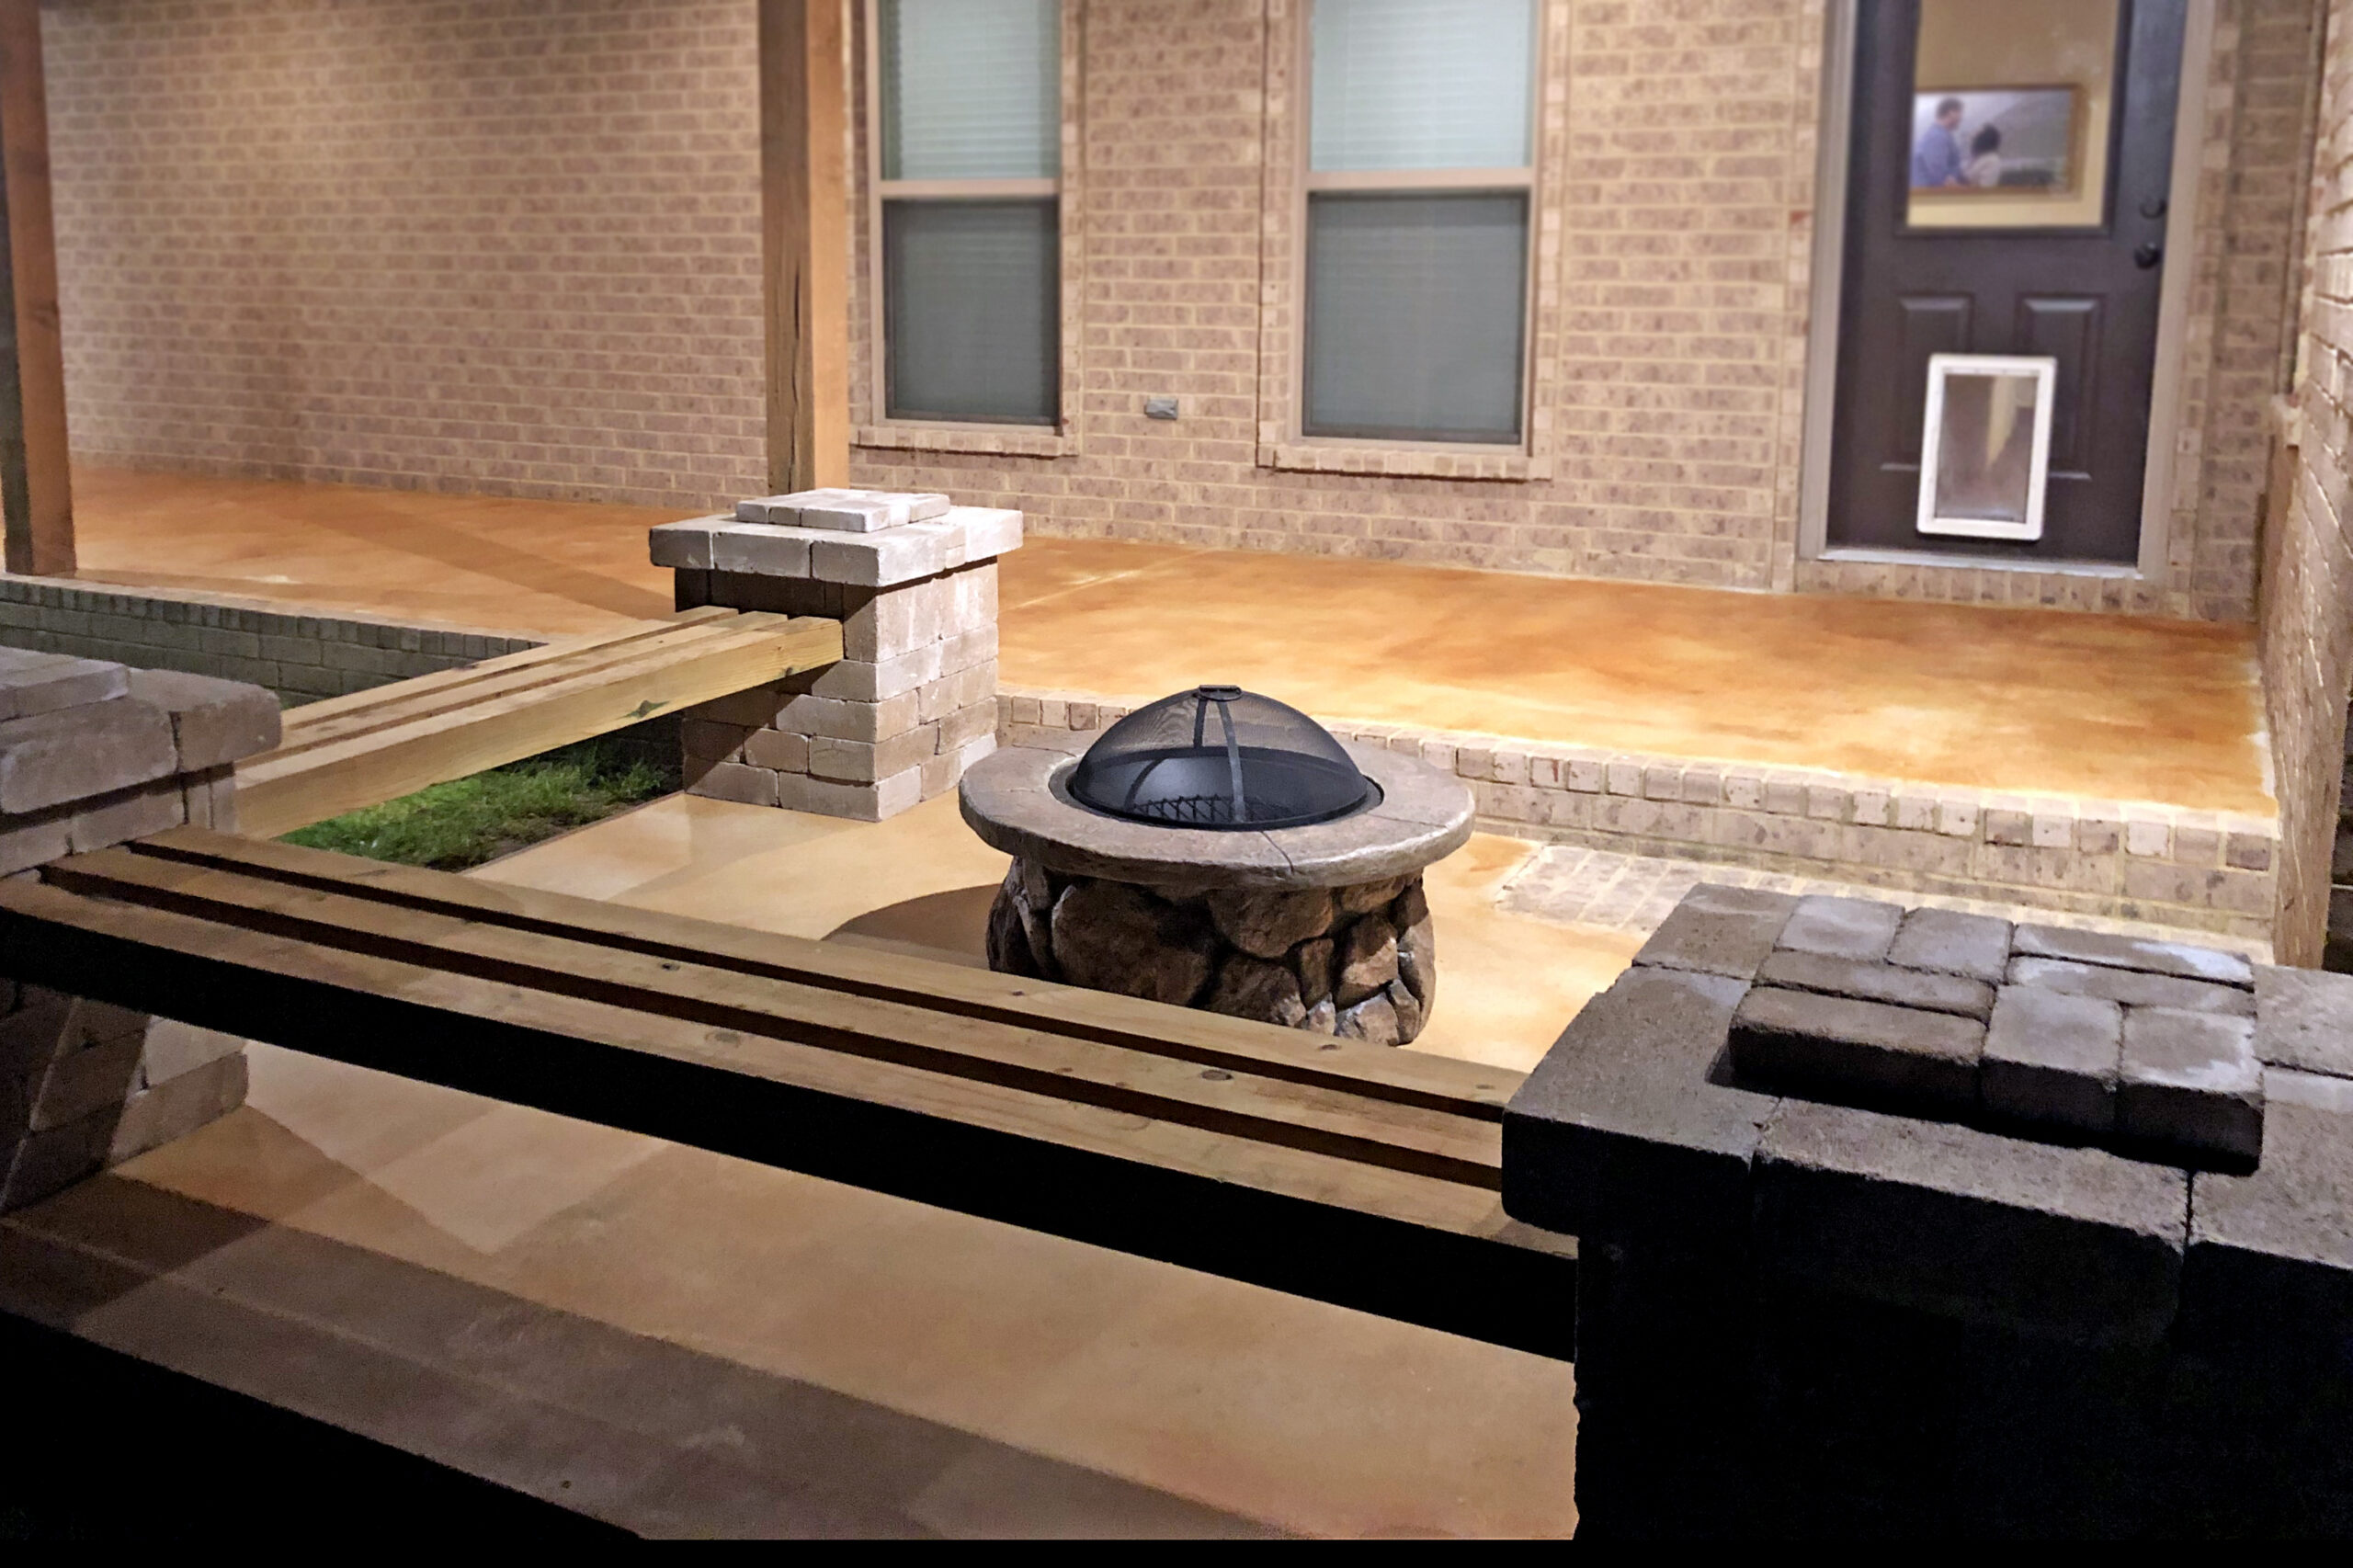
This warm and inviting back porch fire pit area was brought to life with the rich, golden hues of Malayan Buff acid stain. It’s the perfect spot for relaxing and making memories.
Project Info:
- Project Completed In: 3 day(s)
- Estimate of Square Footage: 350 sq. ft.
- Project Description:
We stained our back porch area with malayan buff stain - Personal Tips:
Don’t be afraid to spray generously and it is such an easy process!
The solvent works much better in my opinion. - Direct Colors Products Used:
1 Gal. Malayan Buff DIY EverStain™ & EasySeal™ Satin Kit
1 Gal. Malayan Buff EverStain™ & EasySeal™ Satin Kit
Barn to Beauty Parlor
From hay and hooves to brushes and bows, this transformed barn now shines as a pet grooming haven. Visit our Avocado Stain Gallery for more details and inspiration.
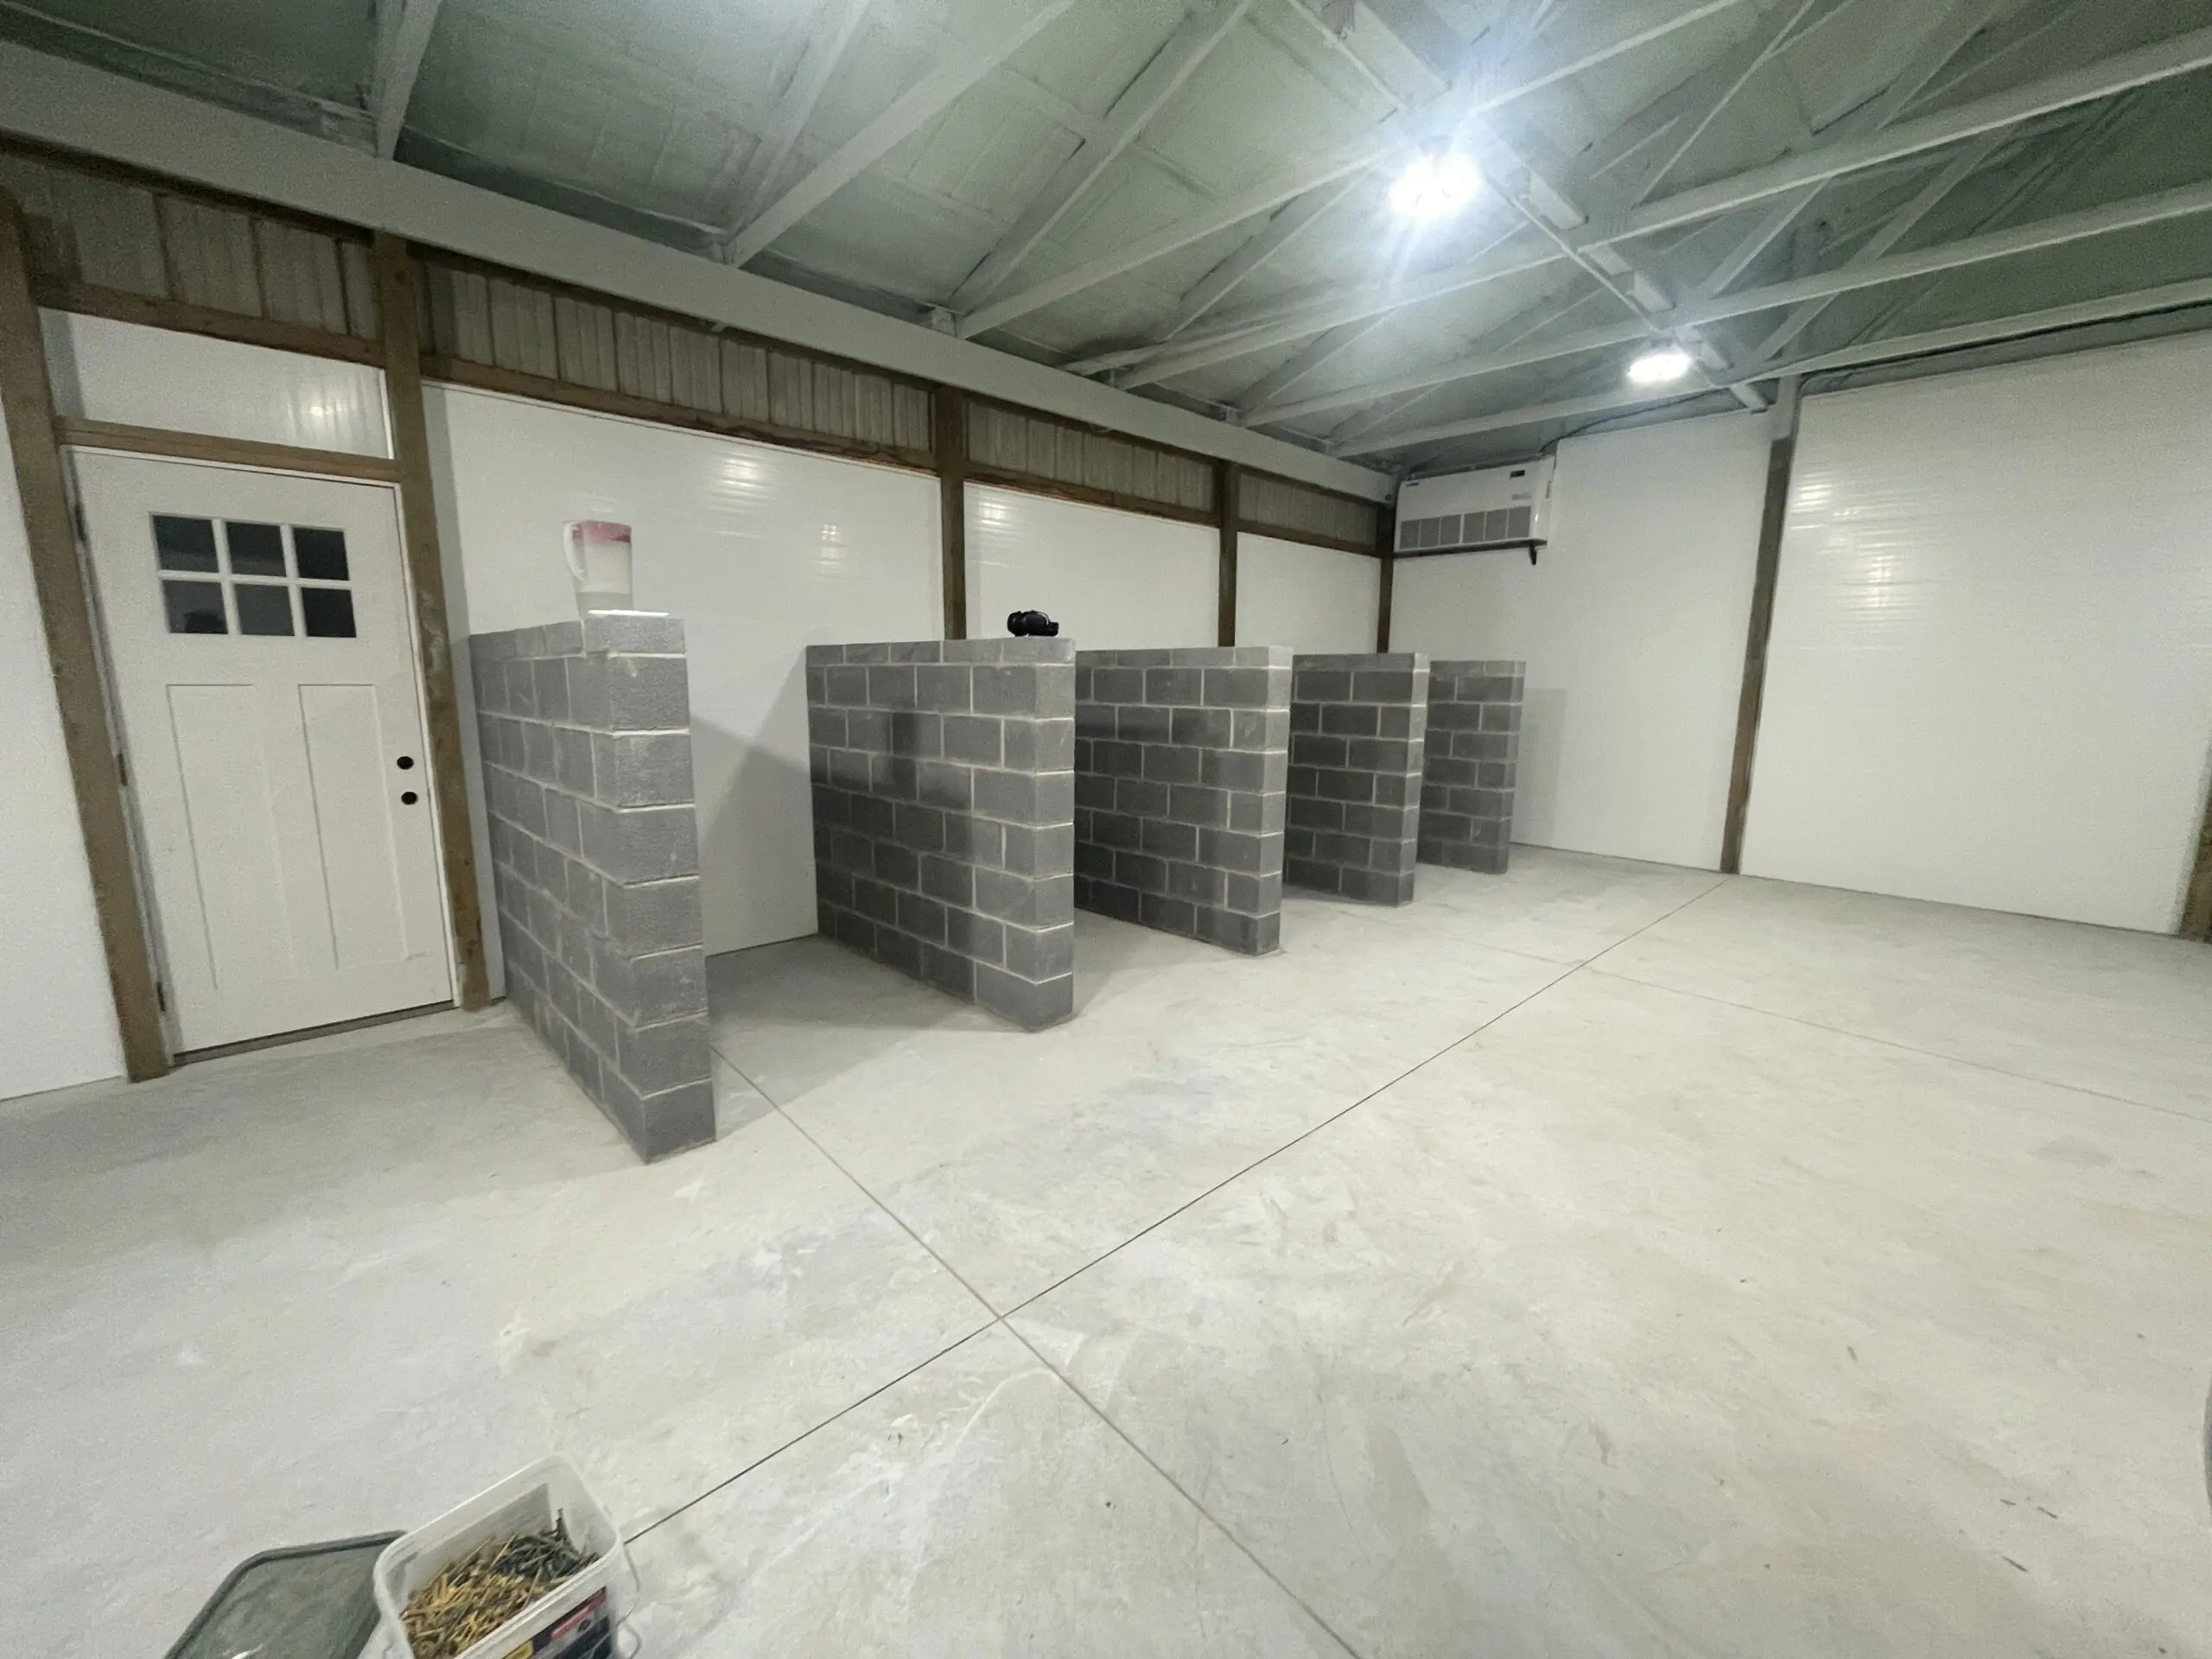
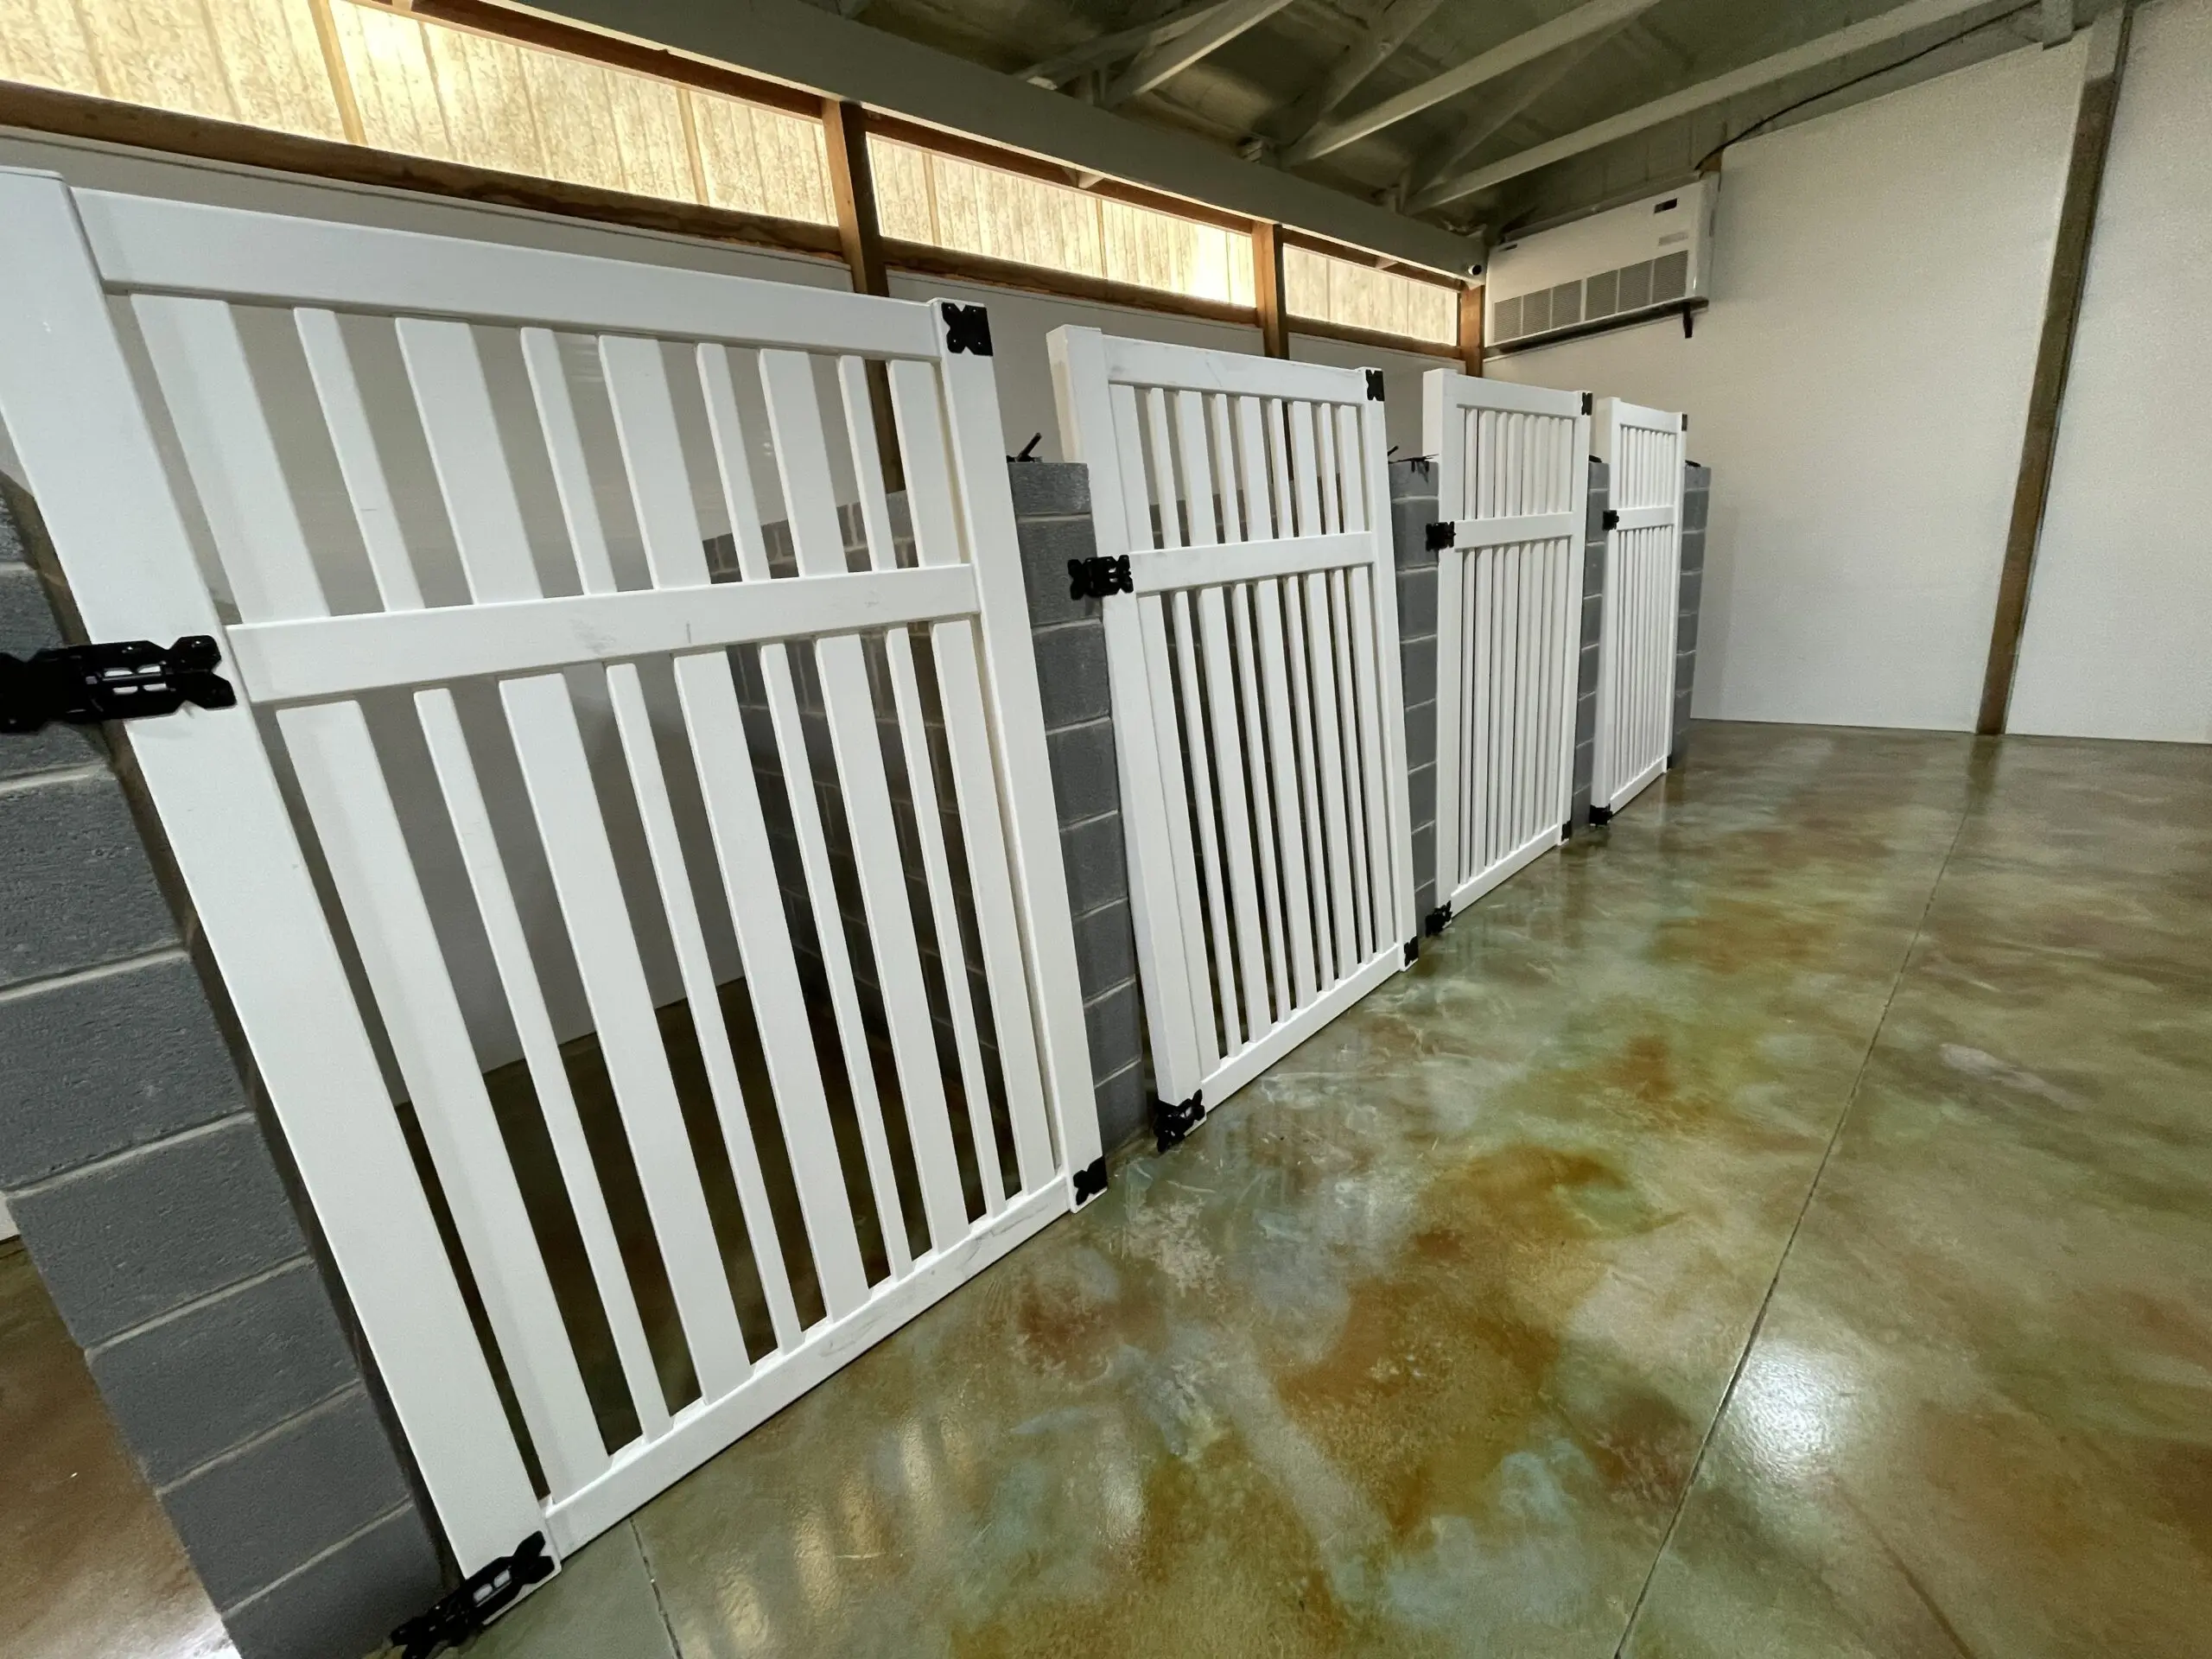
Project Info:
- Project Completed In: 4 day(s)
- Estimate of Square Footage: 900 sq. ft.
- Project Description:
Etched, sanded, rinsed, Malayan buff base, and avocado on top then sealed 🙂 - Personal Tips:
The stain will be much richer after sealing and if sanding is necessary, adding a little water is so helpful. - Direct Colors Products Used:
5 Gal. CitrusEtch™ Concrete Etcher
3 x 1 Gal. Avocado EverStain™
5 Gal. Malayan Buff EverStain™ & EasySeal™ Gloss Kit
OxiGrip™ Anti-slip Additive
Patina-Inspired Shop Floor
A novice acid stain user transformed his shop floor using a layered technique with Malayan Bluff and Avocado from EverStain™, achieving a patina look that perfectly complements his rusted walls. Visit our Avocado Stain Gallery for more details and inspiration.
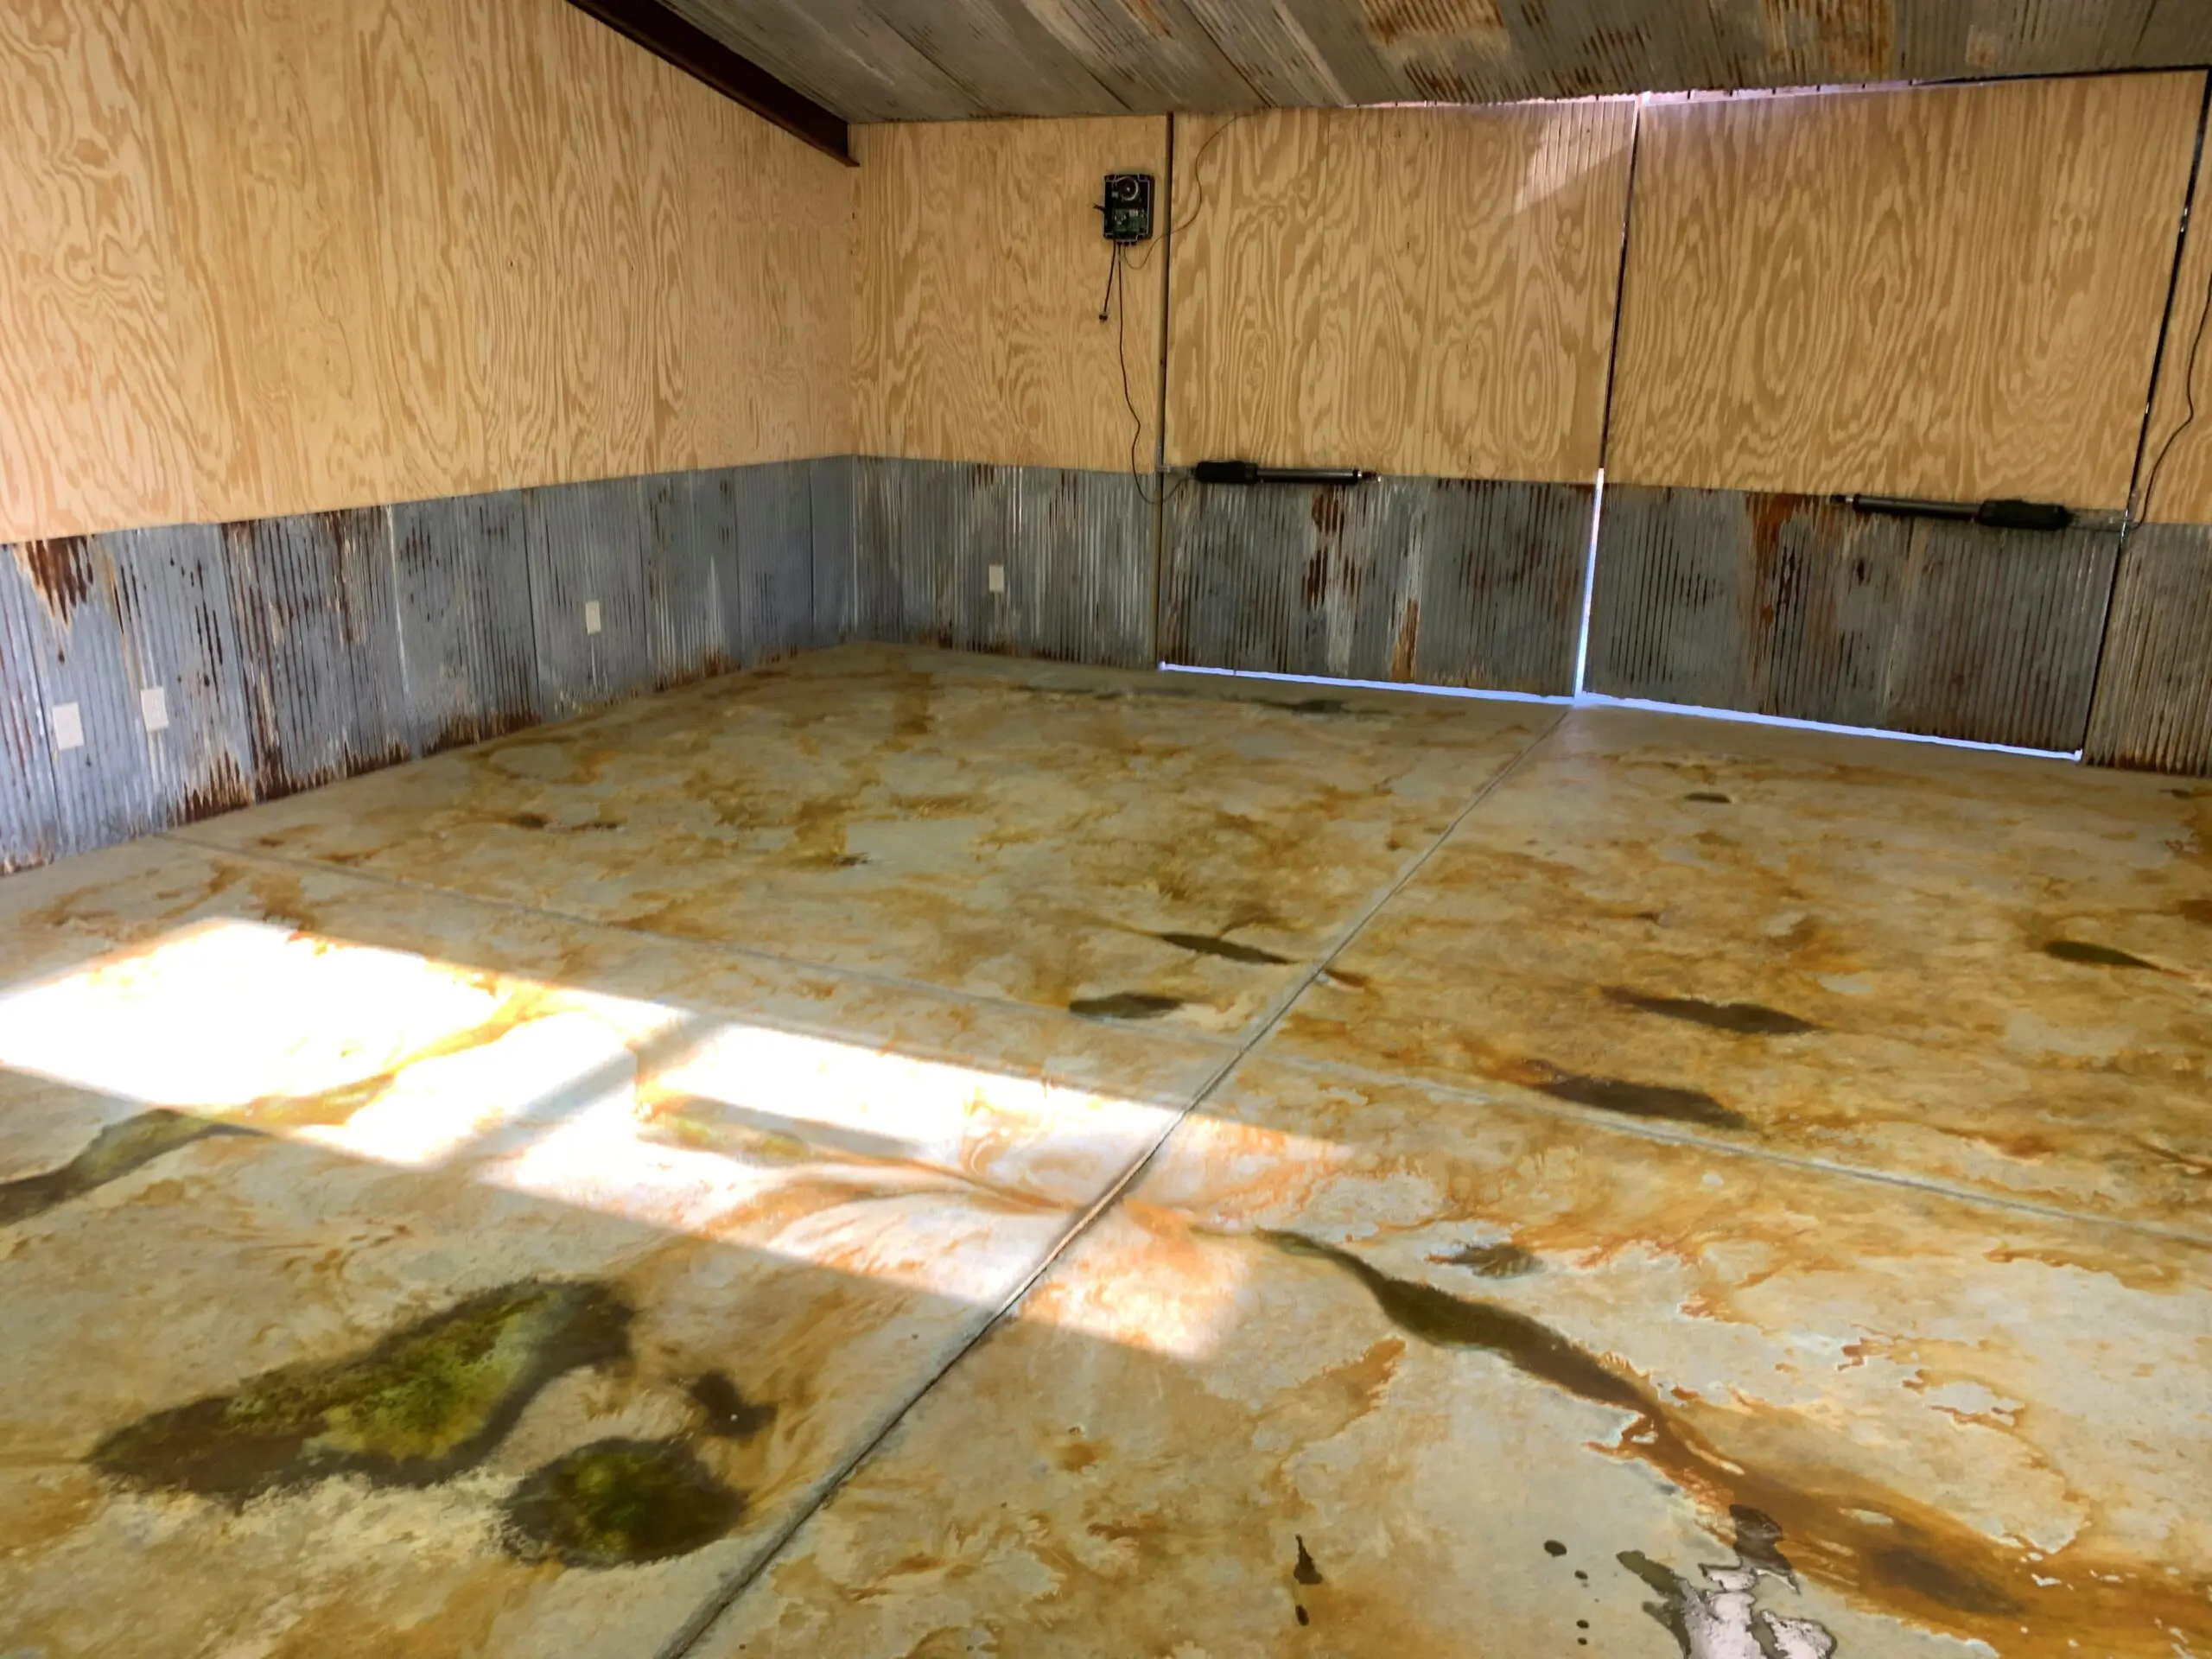
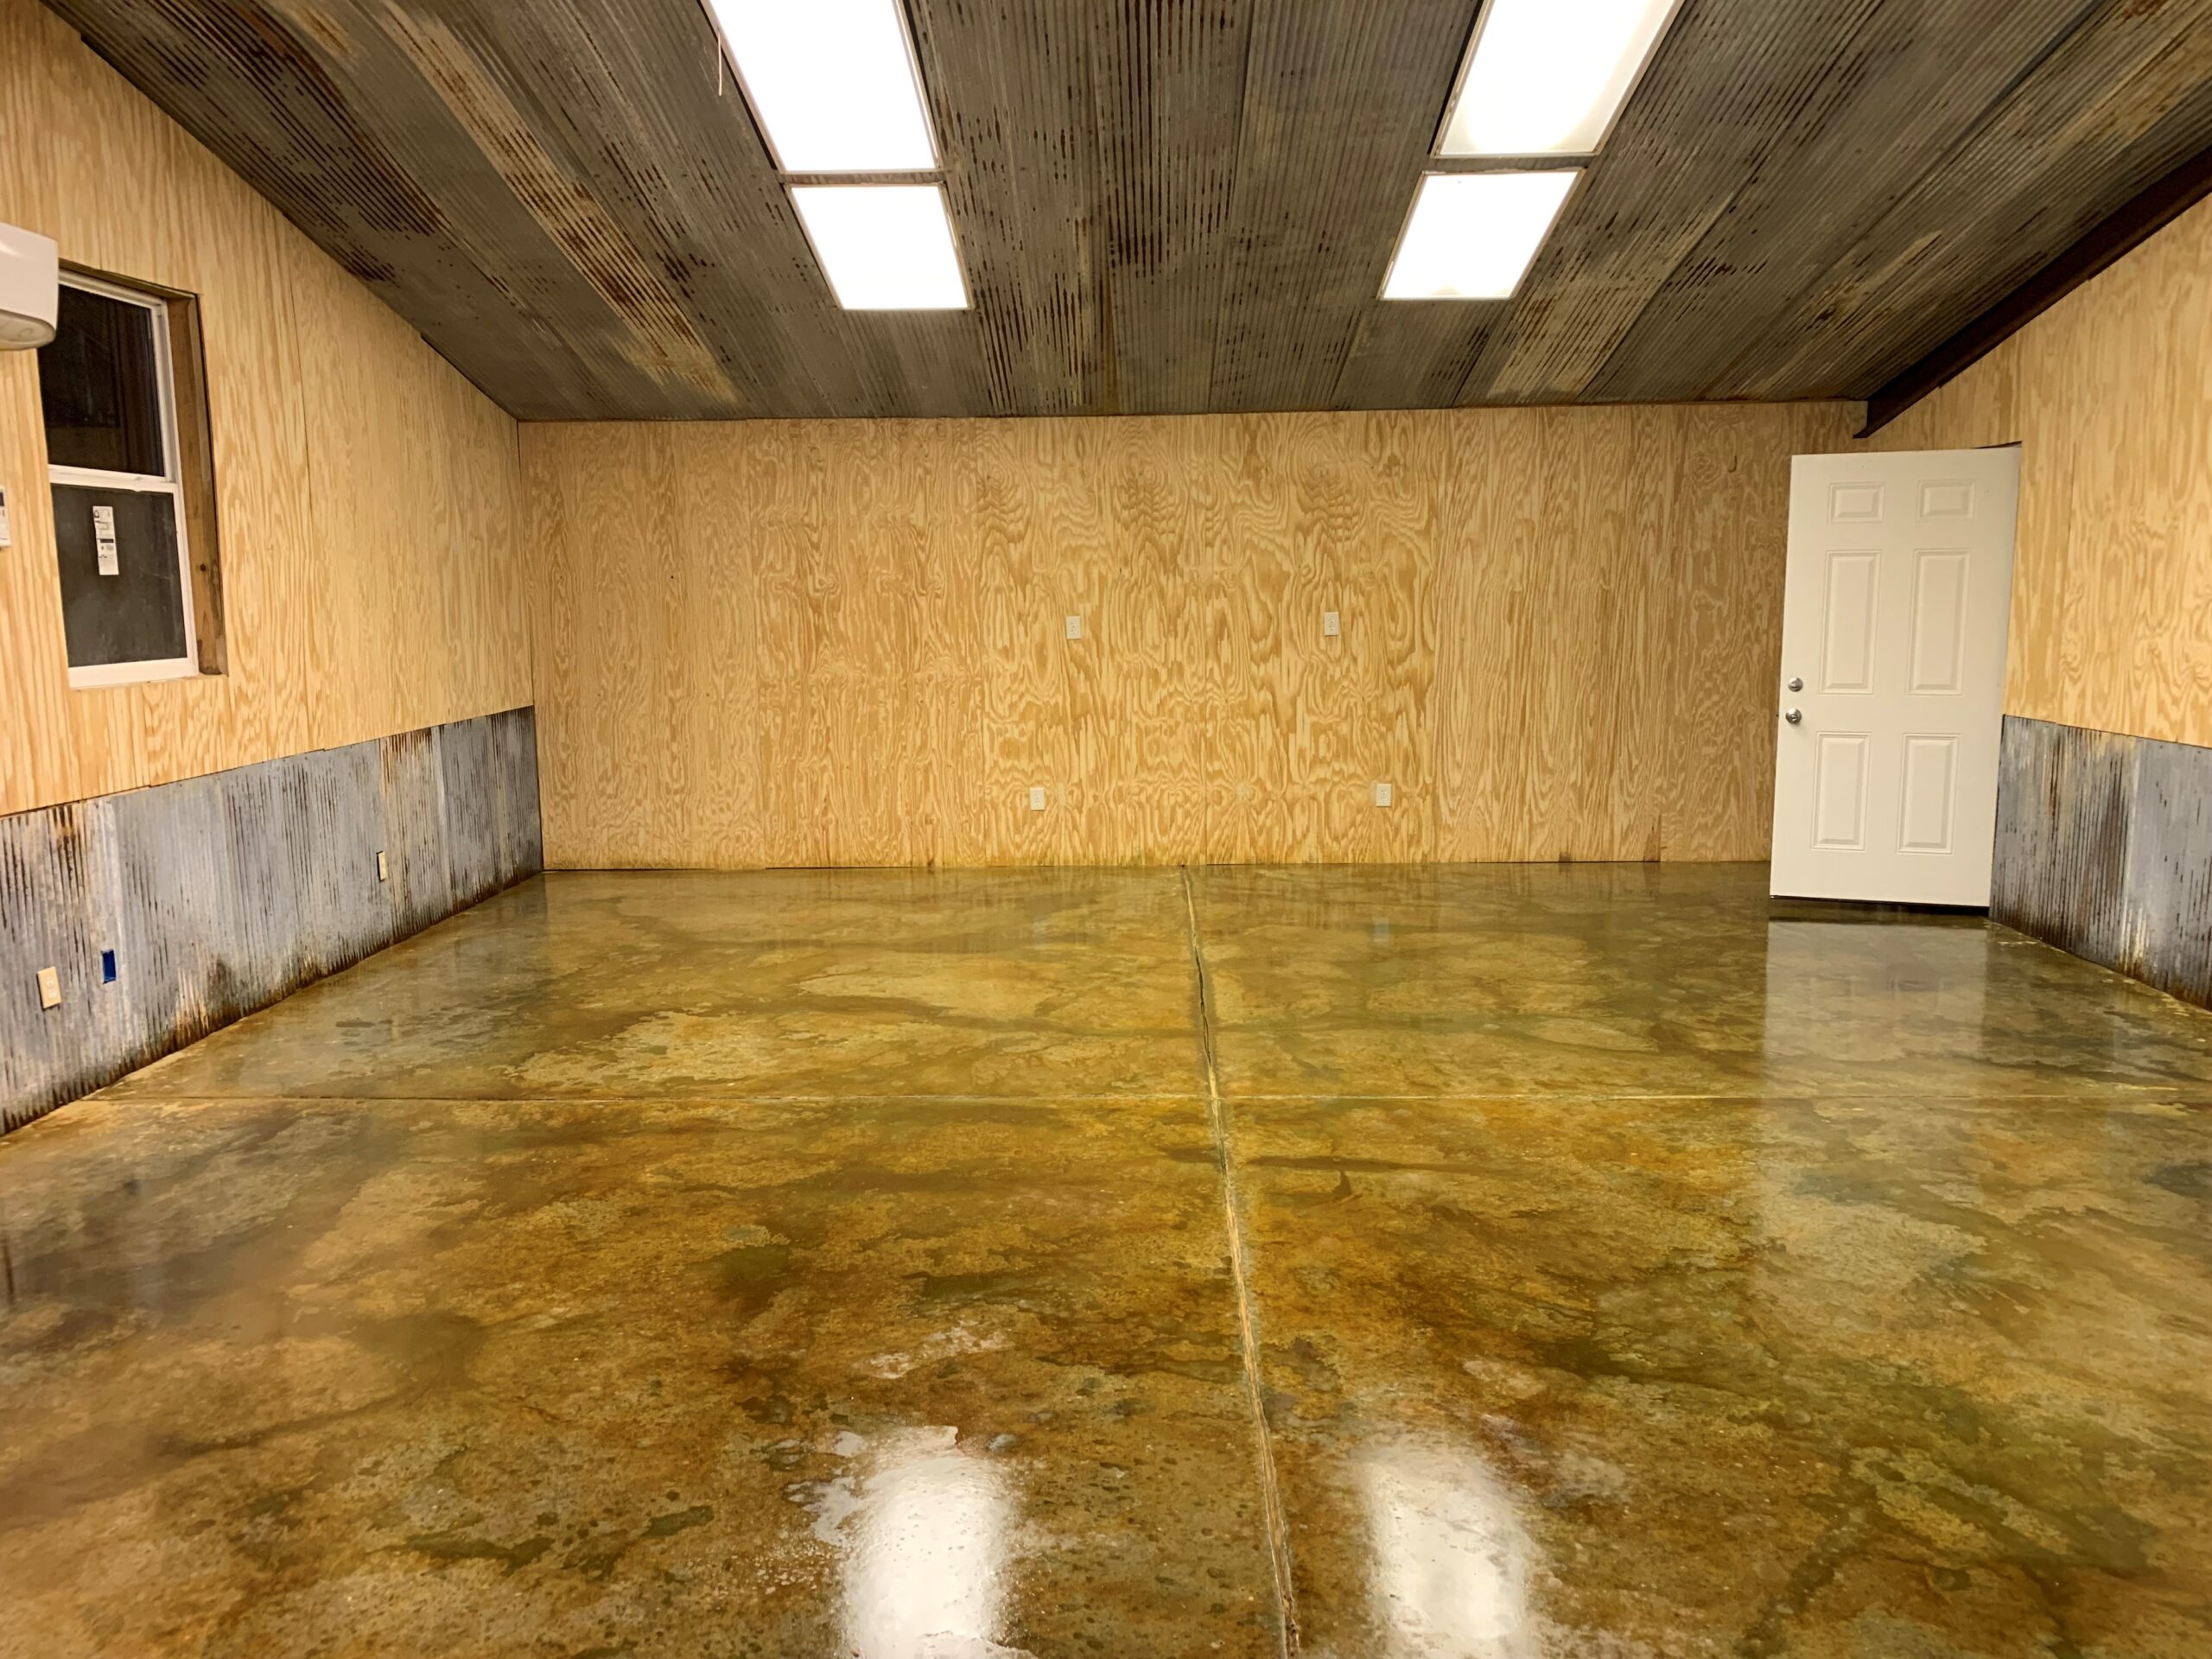
Project Info:
- Project Completed In: 3 day(s)
- Estimate of Square Footage: 625 sq. ft.
- Project Description:
First time working with acid stain and I learned a lot through the process. My shop floor turned out awesome! I was going for a patina look with the rusted walls and nailed it! - Personal Tips:
First, study the preparation tips outlined in the direct colors how to guide. Make sure you are prepared and have the time to follow each step to get the desired results.
Second, study the application and dry time in the how to guides to make sure you have the time to spray and neutralize within the timeframe recommended for the chosen colors ( I didn’t realize different colors had different dry times and ended up out in my shop neutralizing and cleaning till midnight one night.
Lastly, Don’t be discouraged by what the floor looks like before sealing. It will gain its color with the sealer. I thought mine was going to turn out terrible until I got the sealer on it!
DONT FORGET THE SPIKE SHOES AND USE THEM DURING ETCHING SO YOU DO NOT HAVE FOOTPRINTS TO CLEAN UP AND SAND. - Direct Colors Products Used:
5 Gal. CitrusEtch™ Concrete Etcher
3 x 1 Gal. Malayan Buff EverStain™ & EasySeal™ Gloss Kit
1 Gal. Avocado EverStain™ - Other Products Used:
Harbor freight 1.25 gallon sprayer
Spike shoes from amazon.
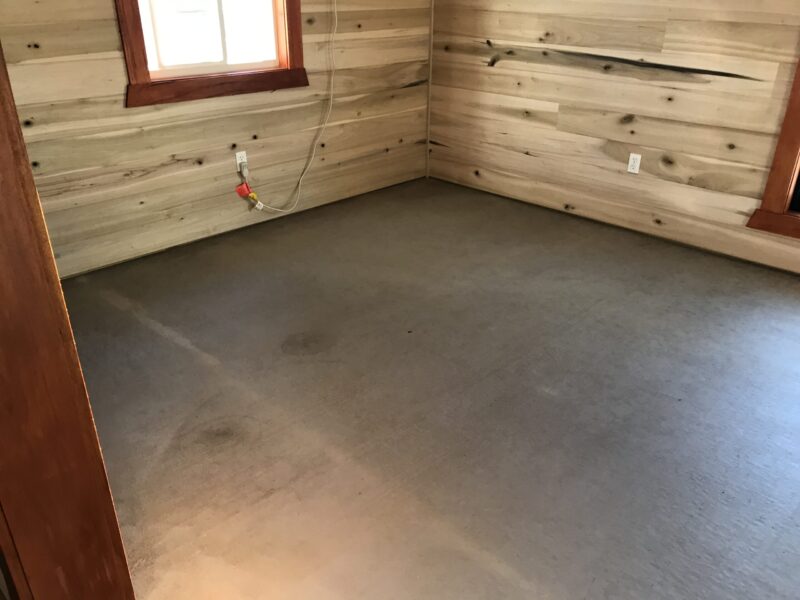
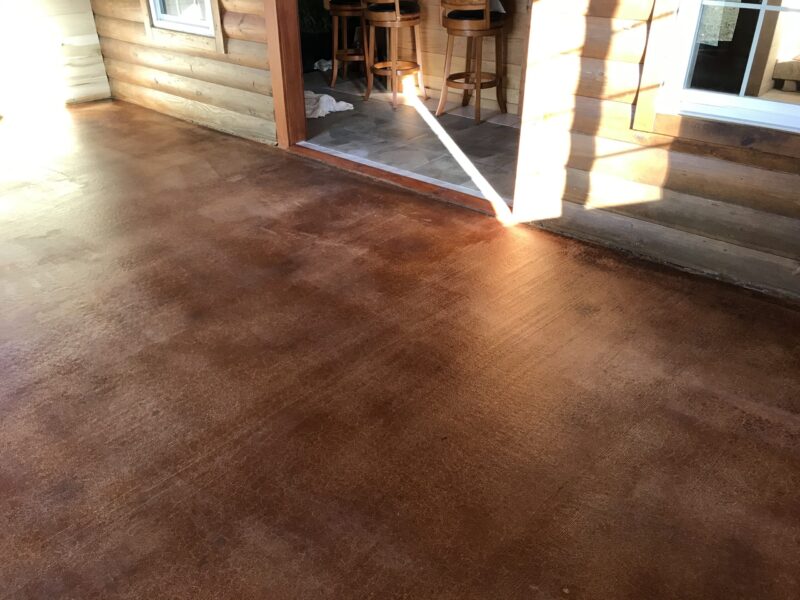
Rustic Retreat: Malayan Buff and Cola Acid Stain Project
This a cabin extension gets a charming update with Malayan Buff and Cola EverStain™ acid stains. This blend creates a warm, rustic ambiance, perfect for a cozy cabin feel. Visit our Cola Stain Gallery for more details and inspiration
Project Info:
- Project Completed In: 3 day(s)
- Estimate of Square Footage: 304 sq. ft.
- Project Description:
This is an addition on a cabin. - Personal Tips:
The solvent works much better in my opinion. - Direct Colors Products Used:
1 Gal. Malayan Buff DIY EverStain™ & EasySeal™ Gloss Kit
1 Gal. Cola EverStain™ & EasySeal™ Gloss Kit
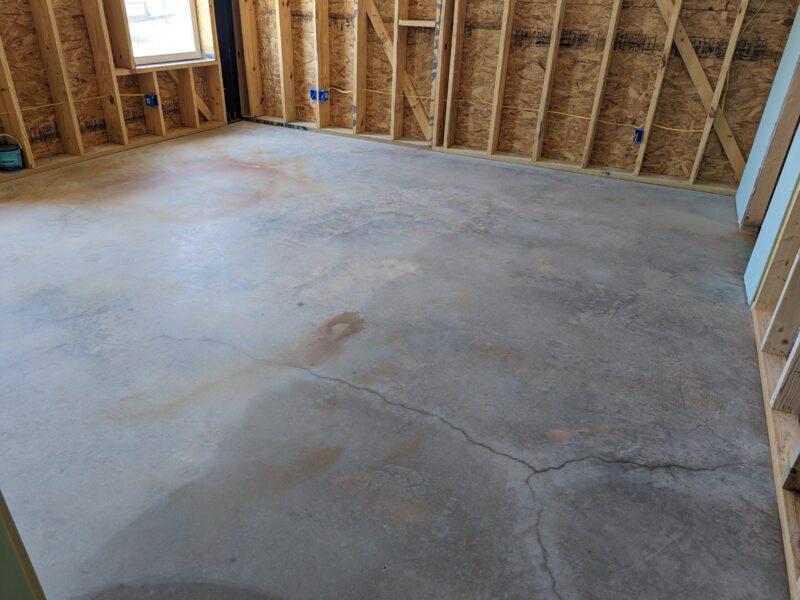
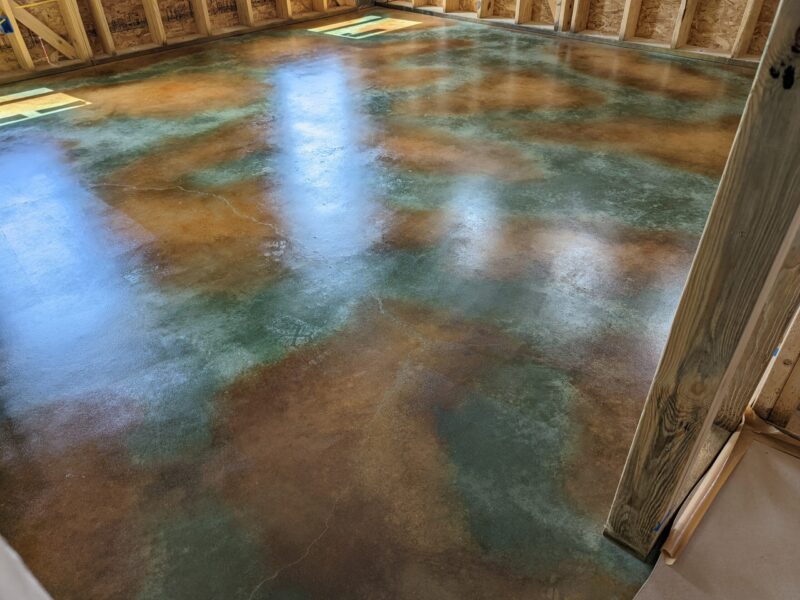
Dual-Tone Floor Design in a Barndominium Master Suite
In this project, a casita’s master suite within a barndominium was refreshed with a floor makeover. Our Malayan Buff and Seagrass Acid Stains were expertly applied to create a striking, two-tone effect. The result is a unique, eye-catching master suite floor that adds character to the barndominium. Visit our Seagrass Stain Gallery for more details and inspiration.
Project Info:
- Project Completed In: 4 day(s)
- Estimate of Square Footage: 200 sq. ft.
- Project Description:
Building a barndominium that consists of a casita on one side and the main house on the opposite side, this is the floor in the Master of the casita. - Personal Tips:
When it comes to the sealer, I found it best to spray on with a pump sprayer and then go over it with a moist paint roller with a light touch, to even it all out. - Direct Colors Products Used:
1 Gal. CitrusEtch™ Concrete Etcher
1 Gal. Seagrass EverStain™ & AcquaSeal™ Satin Kit
1 Gal. Malayan Buff EverStain™ Acid Stain
1 Gal. ProWax Polish™ Satin
Farmhouse Flair: Barndominium Flooring Upgrade with Malayan Buff and Desert Amber
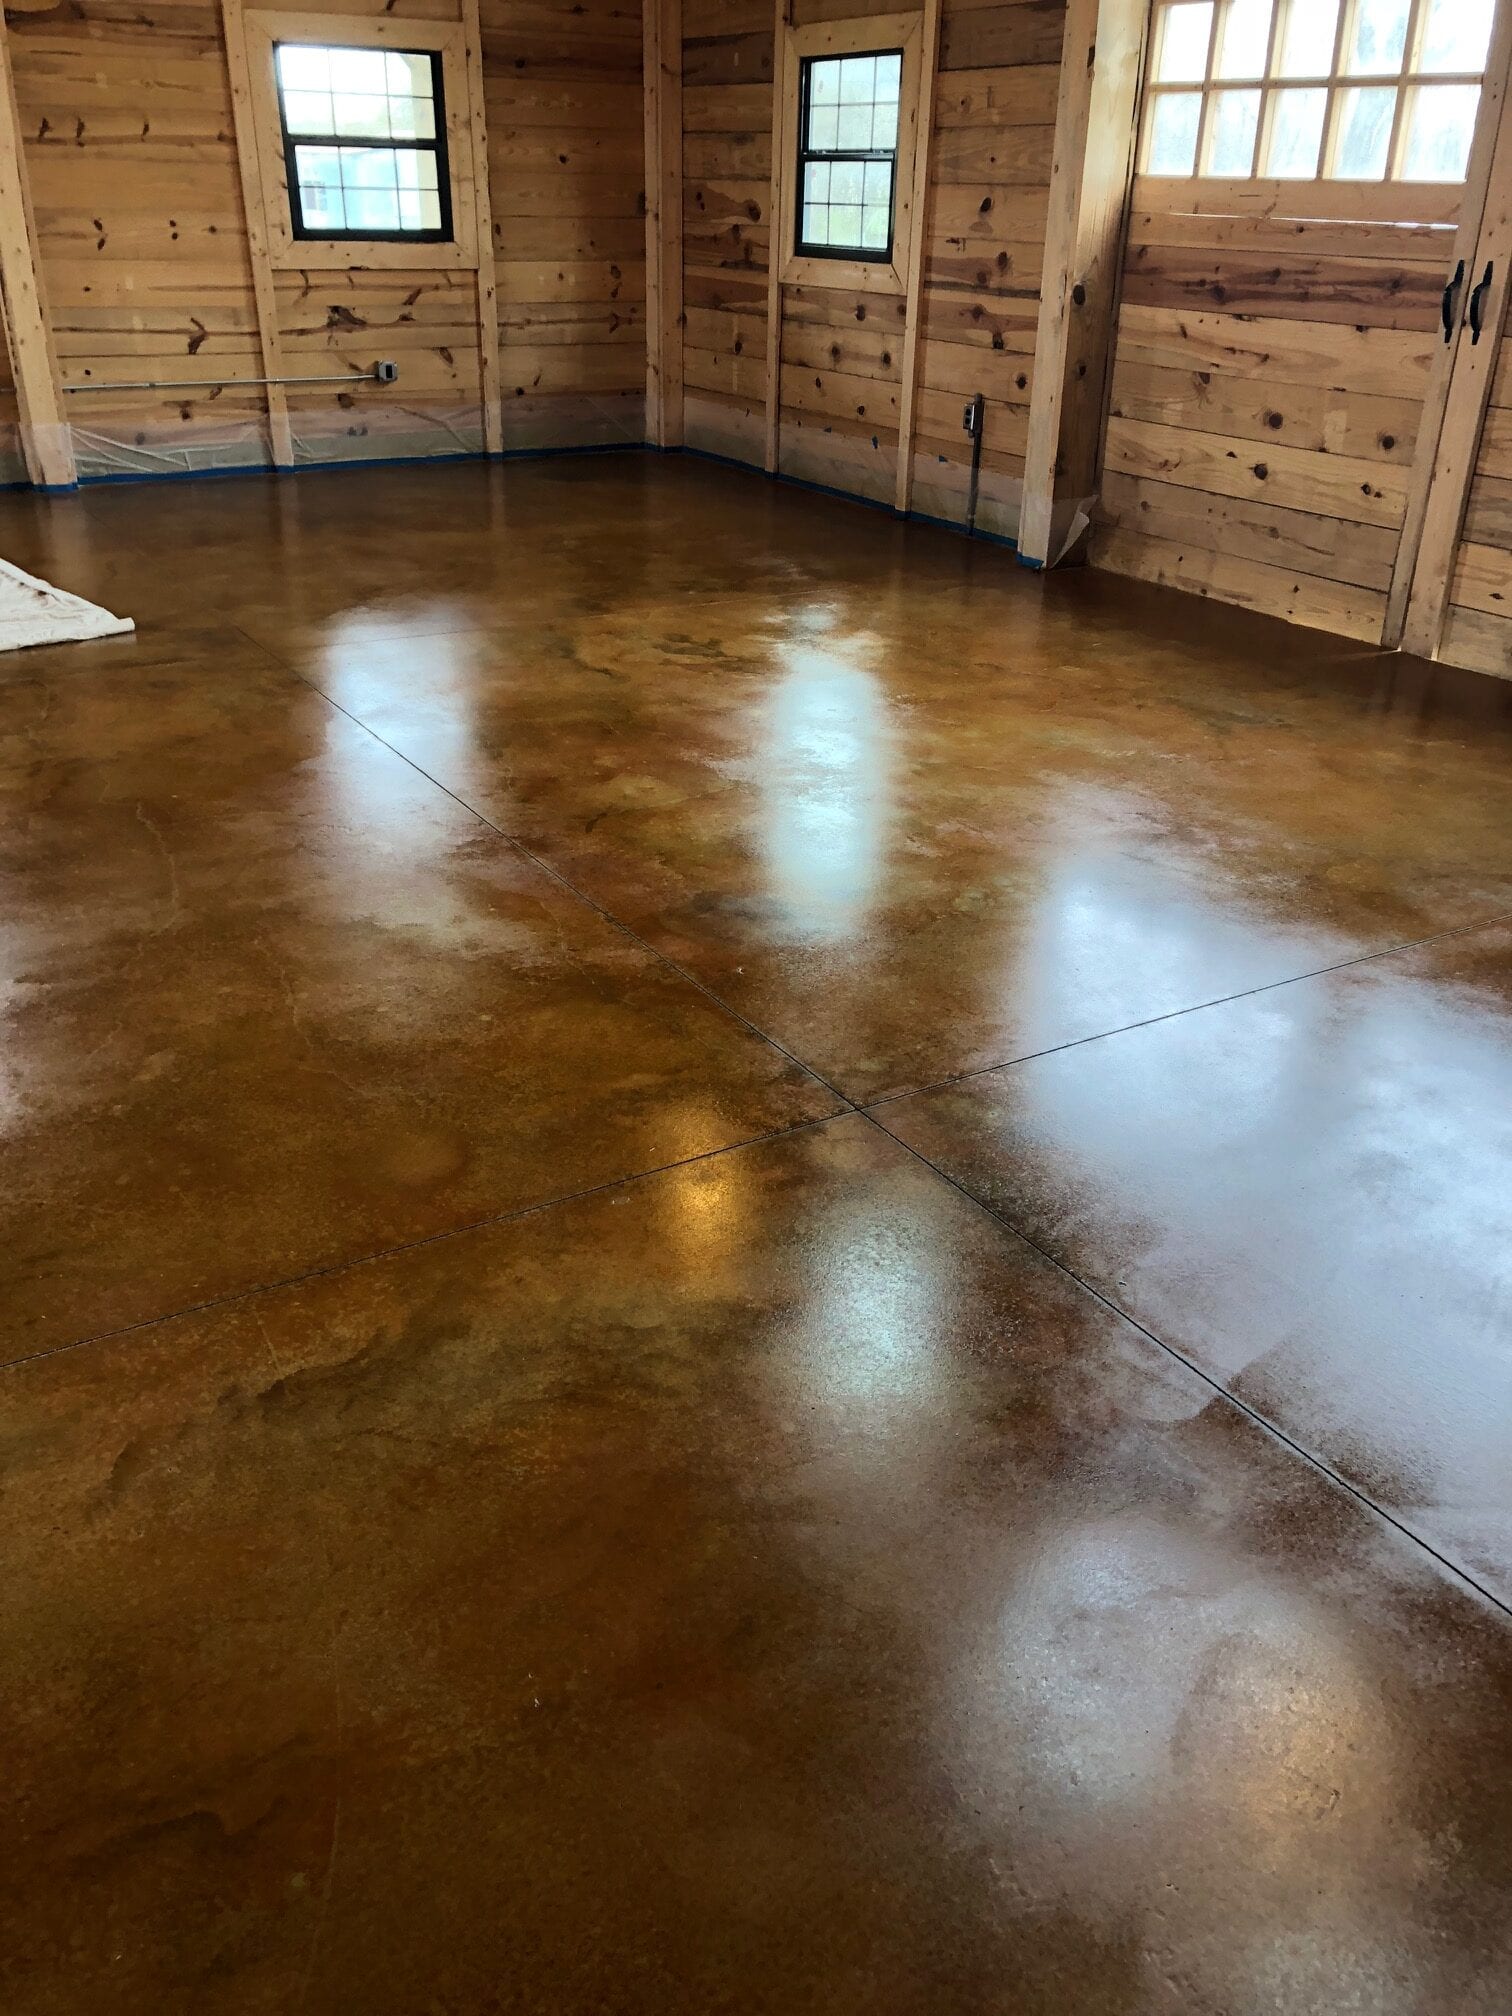
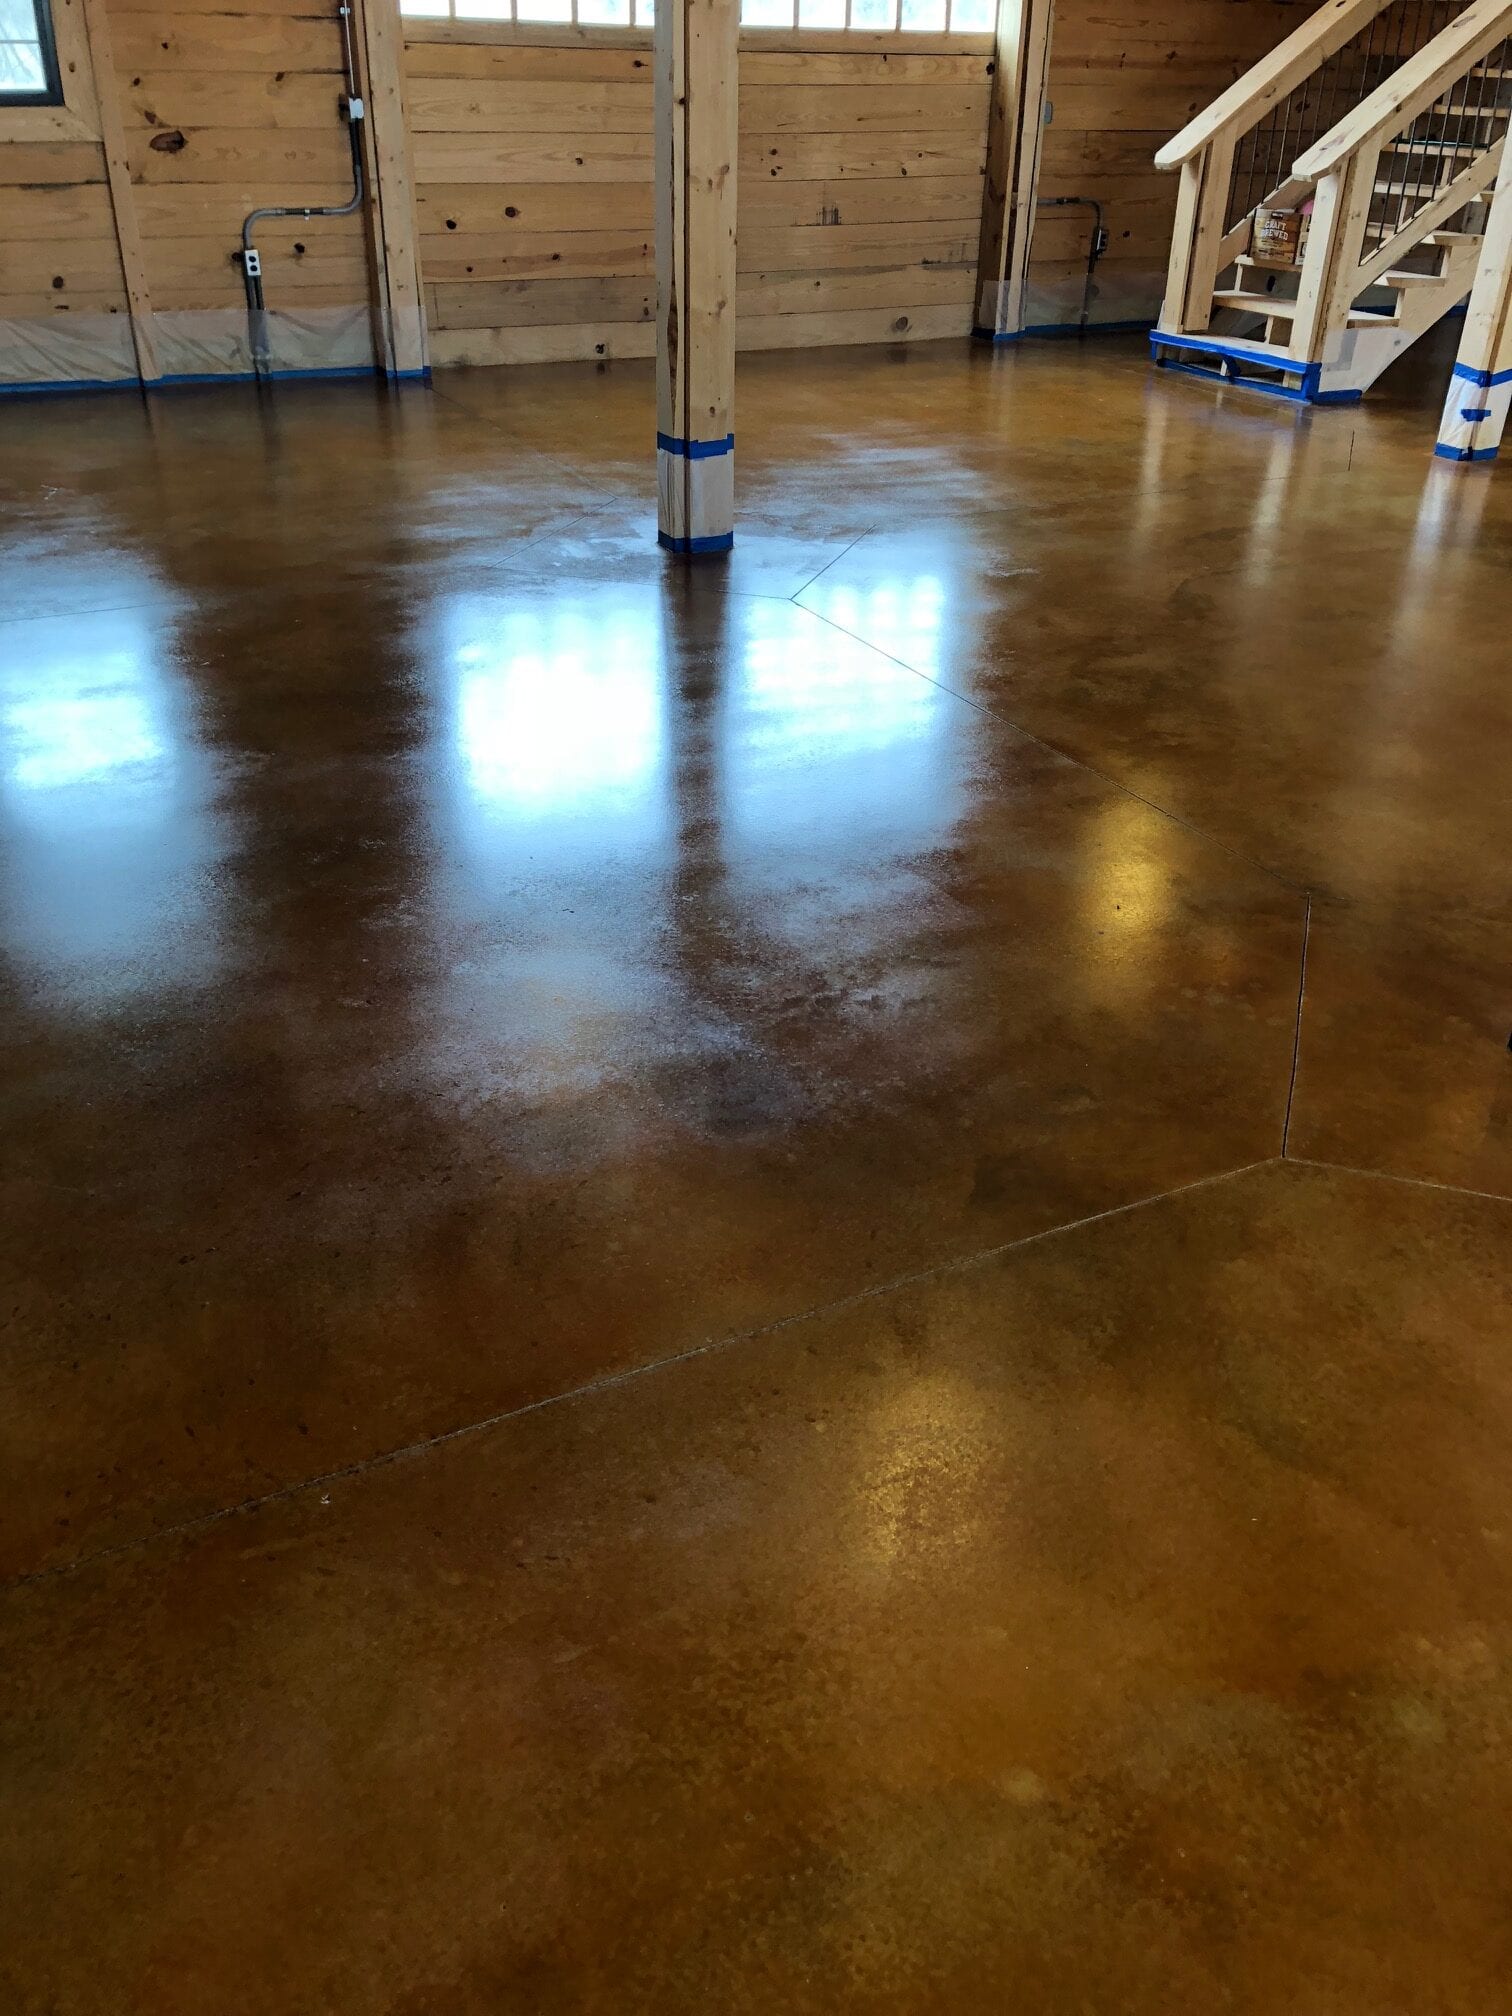
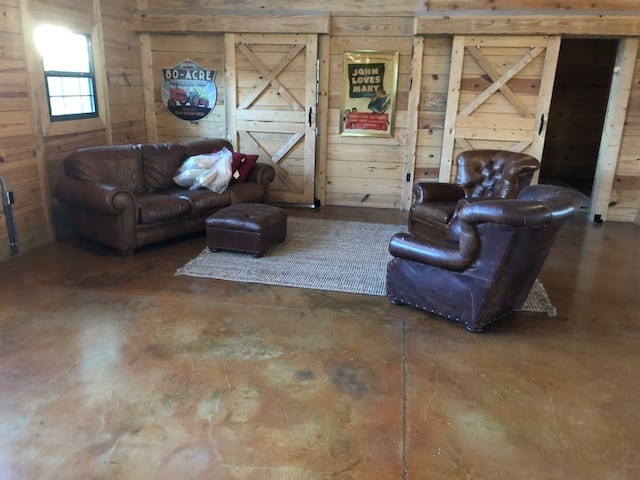
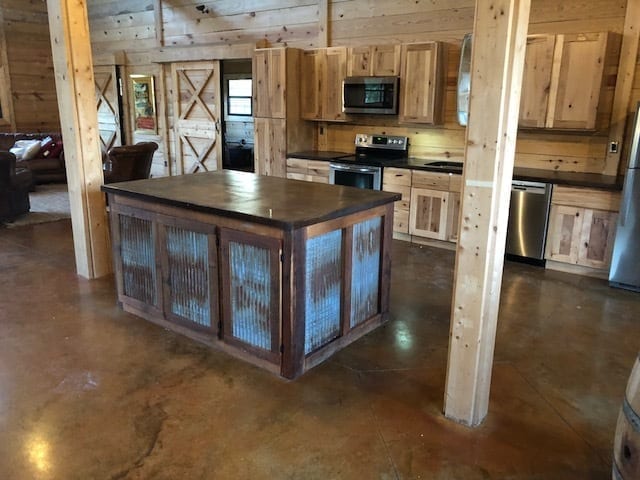
Get ready to be charmed by this rustic farmhouse-style Barndominium revamp! Our DC customer used a combination of Malayan Buff and Desert Amber to create a warm and inviting living space. This earthy and homely acid stain works wonders from the bathroom to the kitchen, bringing a uniform and cozy vibe throughout the entire house. Have a look, and you might find the inspiration you need for your next flooring project!
Trust The Process
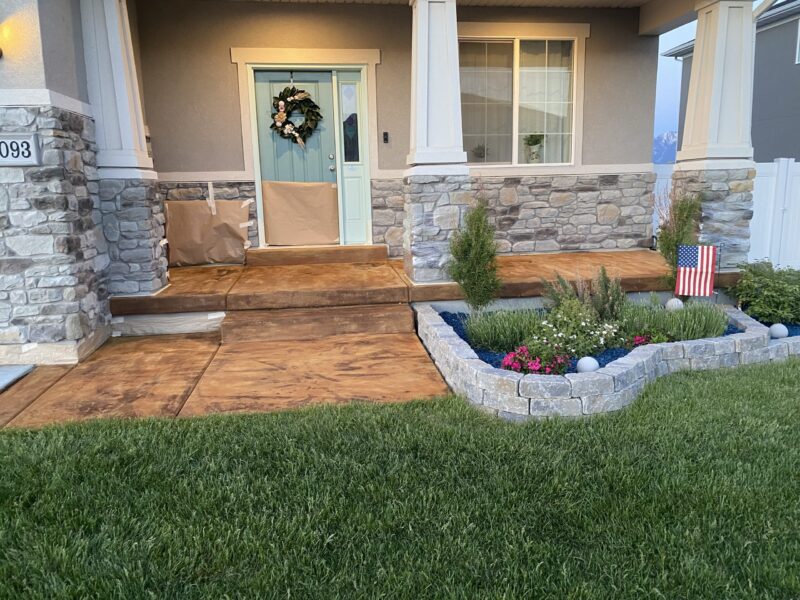
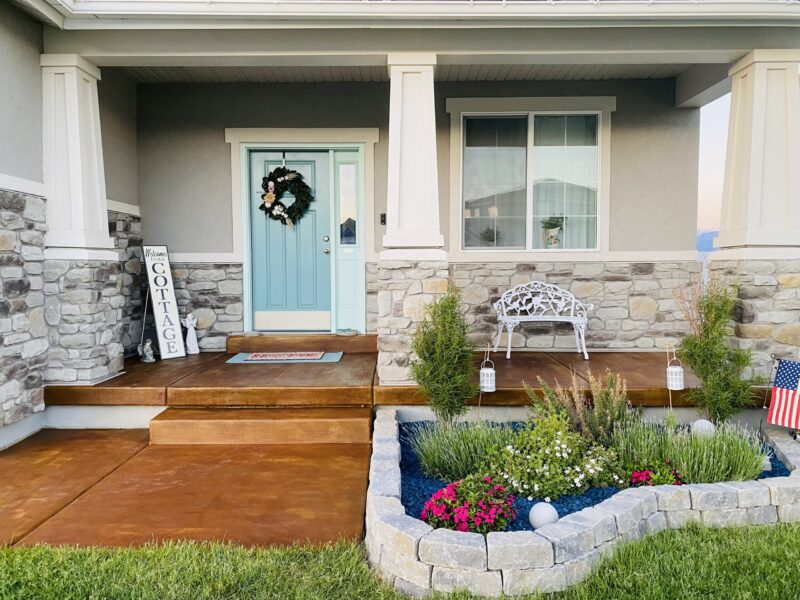
This DC customer dressed up their back patio and concrete front porch with acid stain. Since the home was a new construction less than two years old, they made it a point to seal their concrete afterward. Amazing things can happen when you trust the DIY process!
Project Info:
- Project Completed In: 3 day(s)
- Estimate of Square Footage: 300 sq. ft.
- Project Description:
We stained our back patio plus front porch in one project. Our house was a new construction built less than 2 years ago and concrete was not sealed. Concrete blankets were used during curing process which left some marks on concrete that we didn’t like but they took stain nicely. - Personal Tips:
Make sure you use sprayer with plastic nozzle, acid reacts with metal.
Cover rocks in your landscape as they may have lime in them and can get stained.
Plastic will not stain but wipe it off right away so it is easier to clean up.
Have a bucket close to you sprayer so you can put a nozzle in it as those things tend yo drip or spray after you stopped the trigger.
Trust the process, concrete will look dull and patchy until washing step.
You can still scrub some finish with the broom and baking soda water at that point.
Then let it dry f or a day before sealing.
- Direct Colors Products Used:
Porch was done with Malayan buff and then diluted Cola, wet on dry, Cola was also spread out with a broom for a mottled look. Both neutralized after about 22 hours, washed and left to dry for a day before sealer. - Other Products Used:
Foundation Armor ax25 pool deck and patio sealer (high gloss, with wet look).
Patio Pop: Vibrant DIY Concrete Fountain
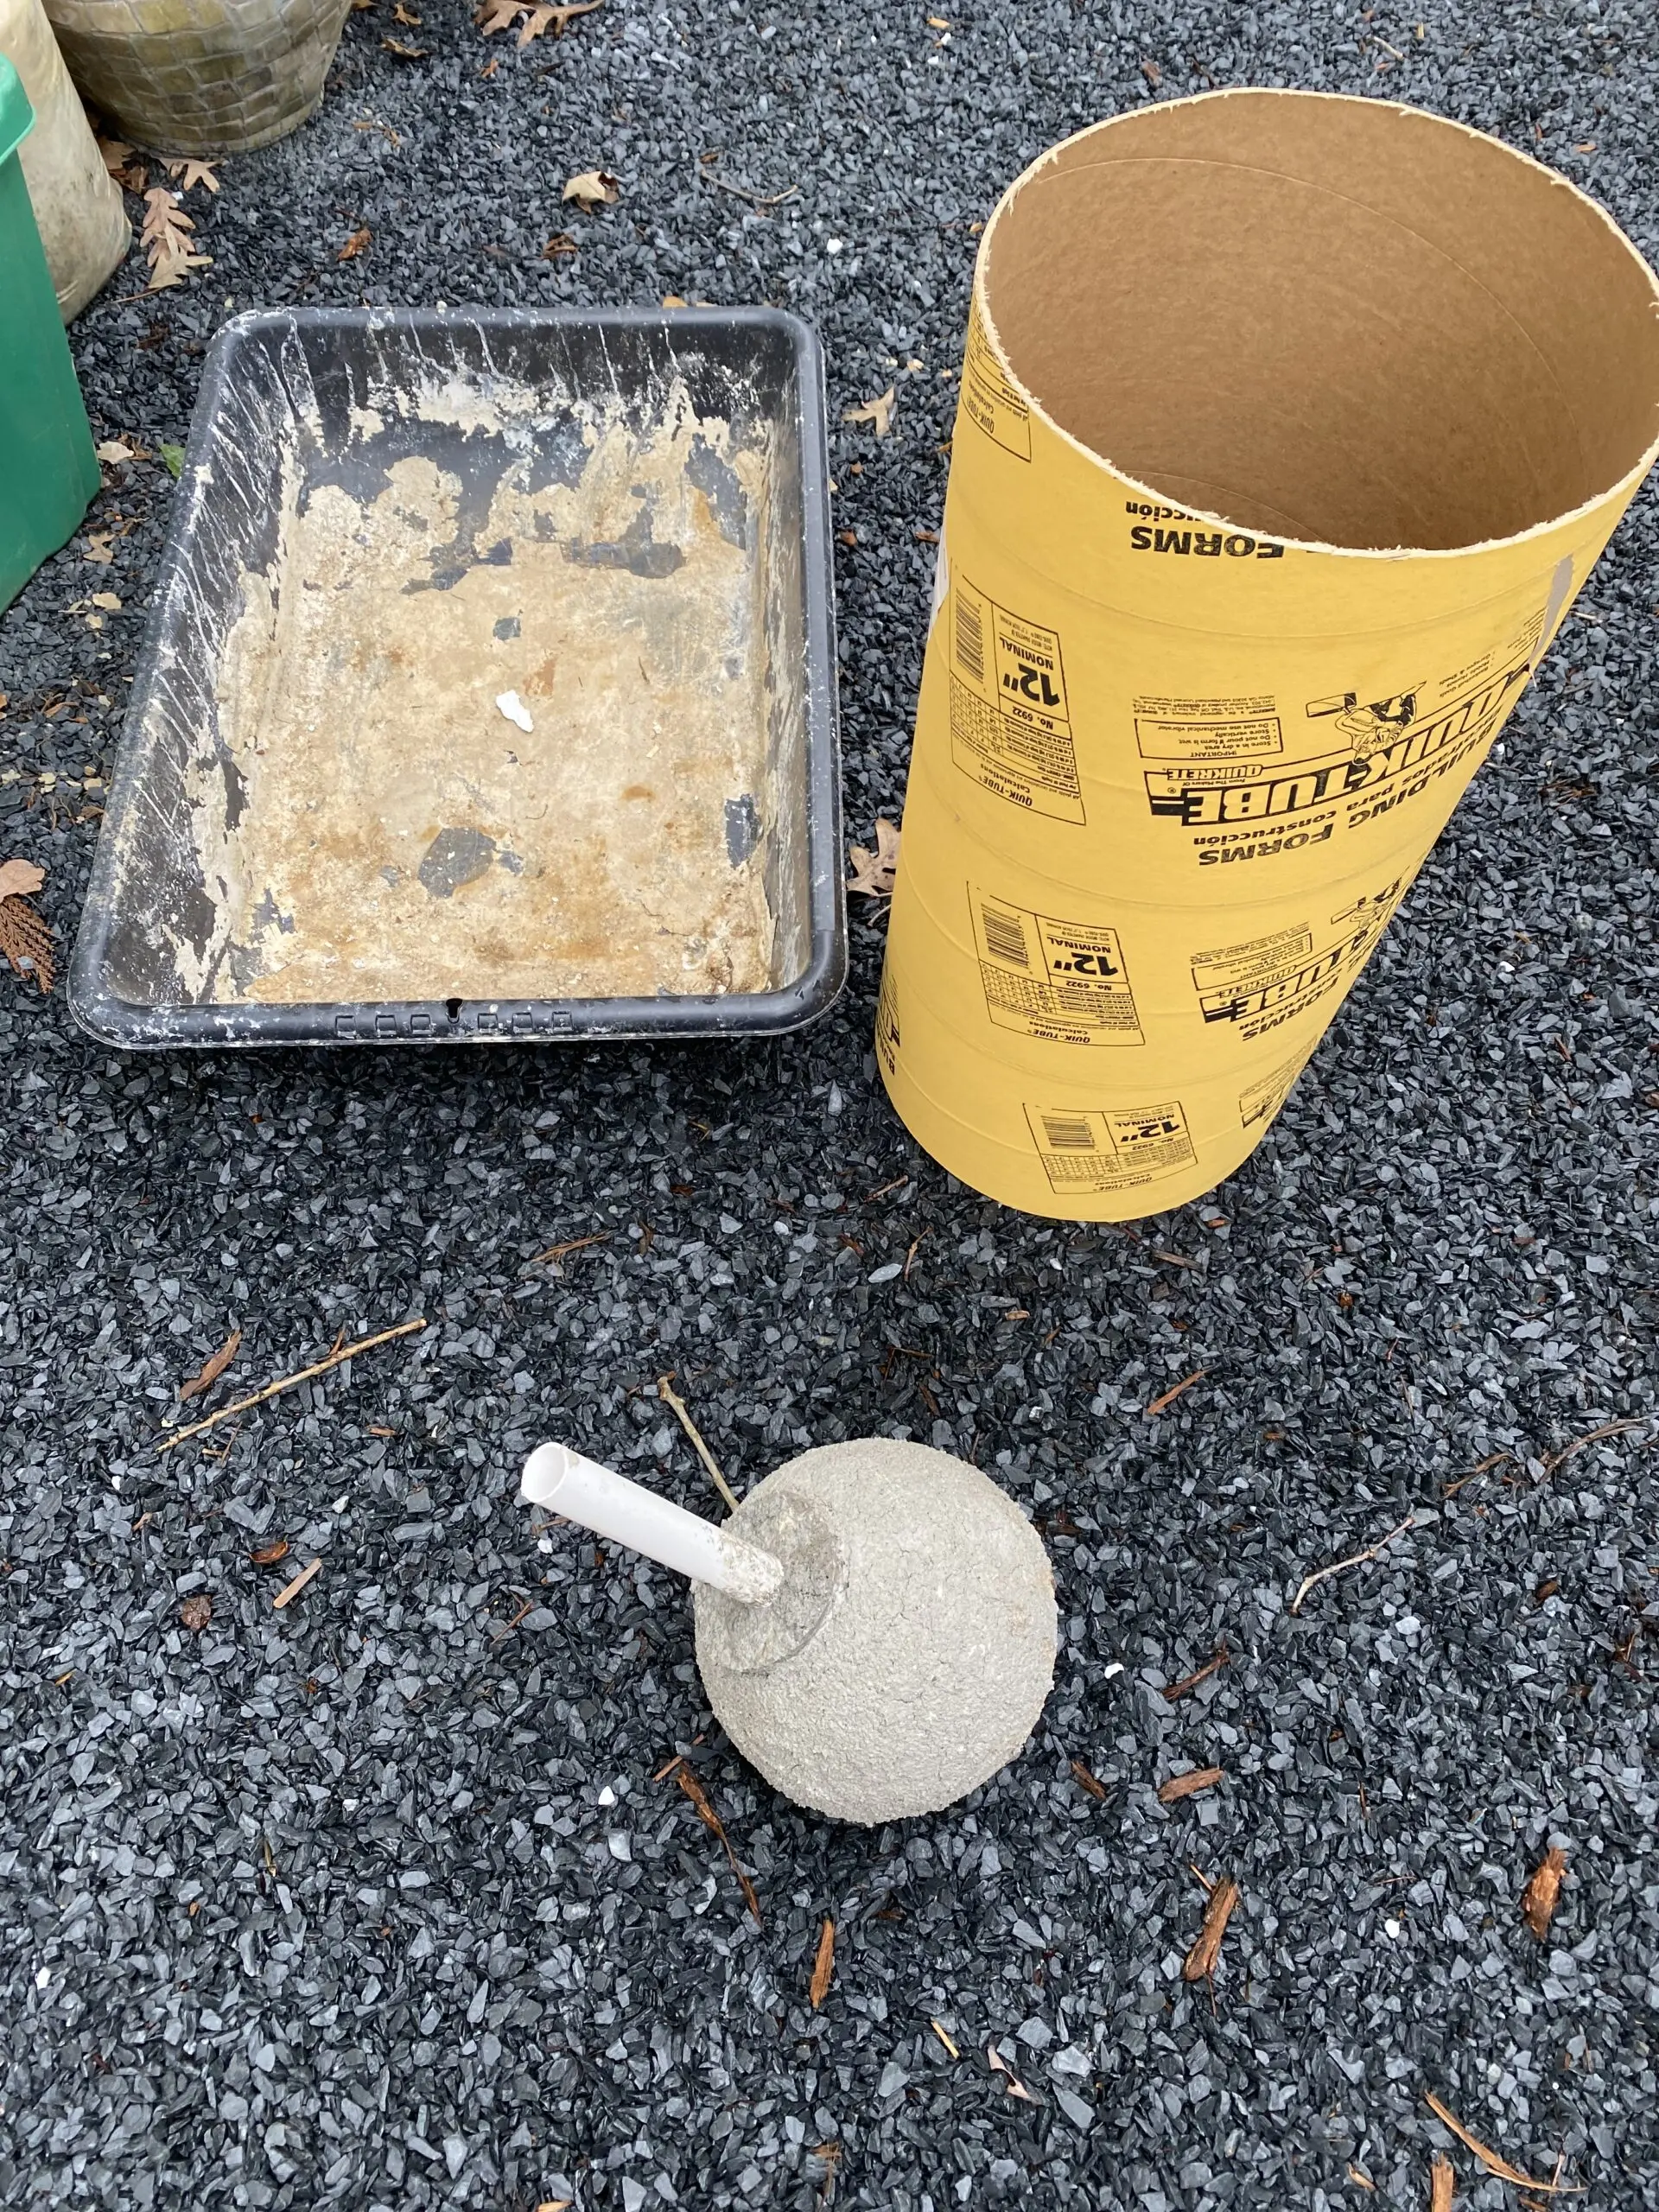
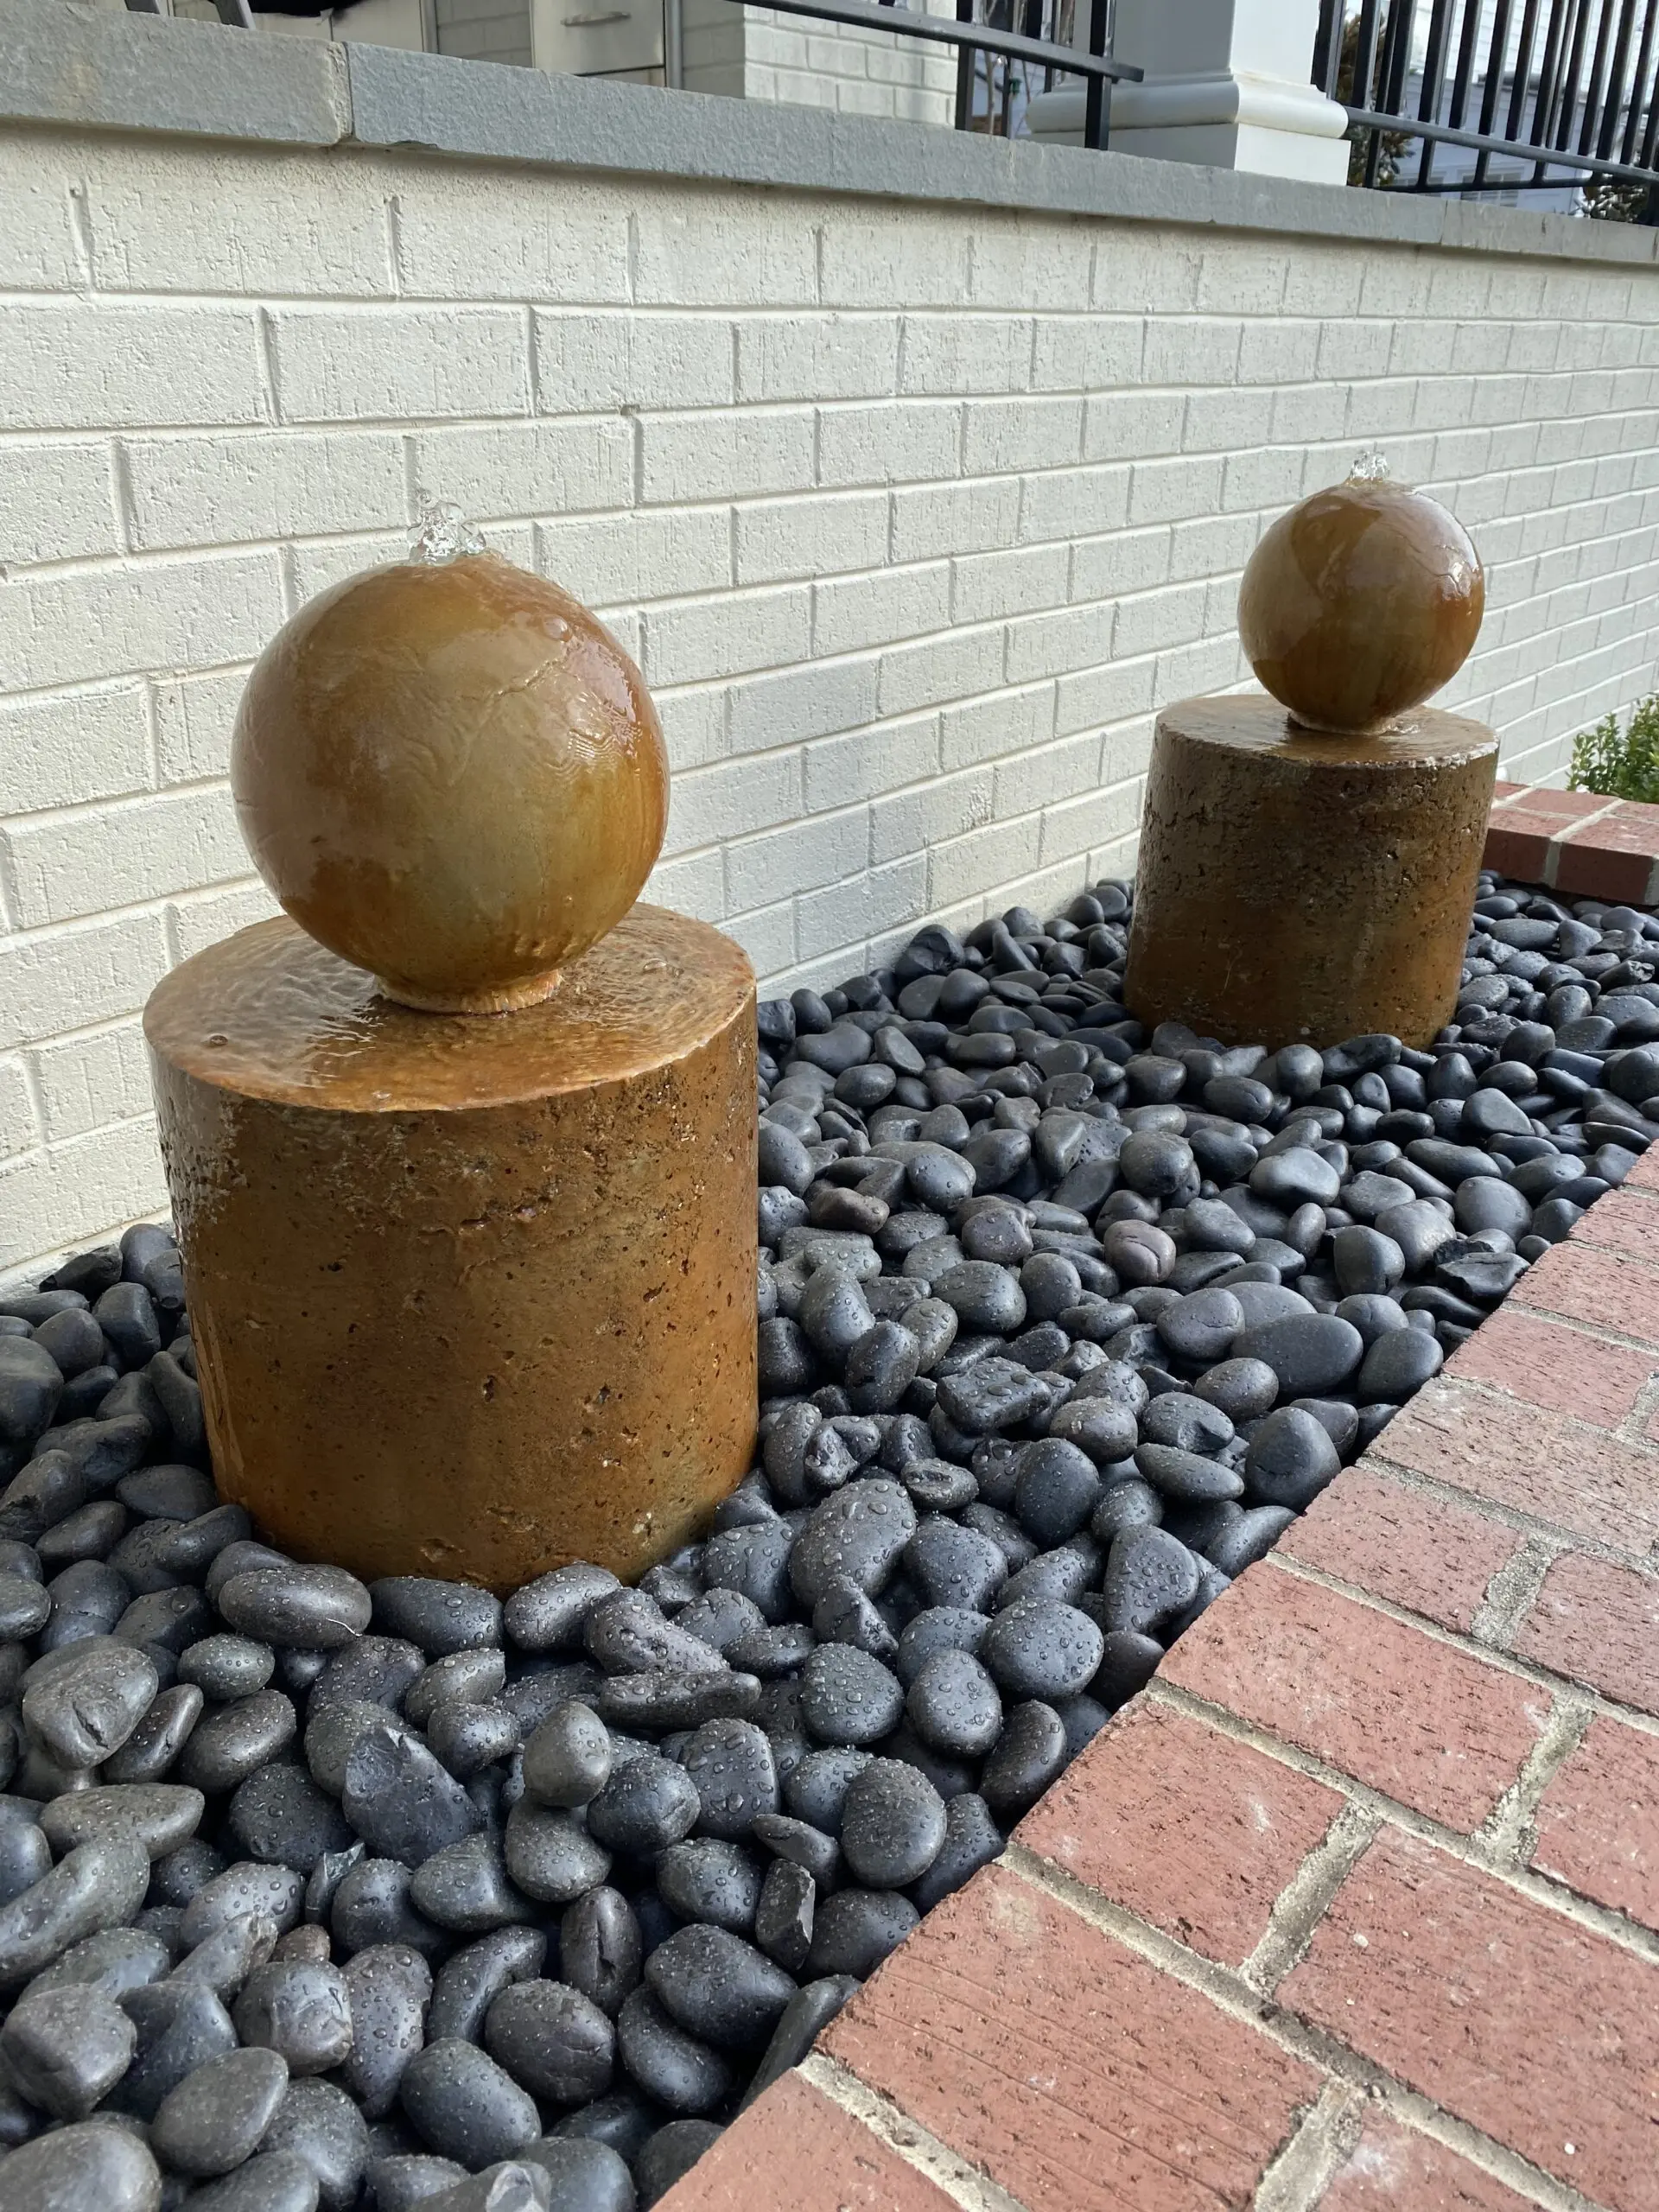
Get inspired by this unique DIY concrete fountain project! Using EverStain’s Malayan Buff and Desert Amber, this DIYer turned an ordinary fountain into a vibrant backyard centerpiece. Handy tips like using spray bottles and a sponge for color blending helped them achieve this stunning result. For a full step-by-step guide, be sure to check out the blog, “How to Stain a Concrete Fountain: A Step-by-Step DIY Guide“.
Project Info:
- Project Completed In: 4 day(s)
- Estimate of Square Footage: 20 sq. ft.
- Project Description:
I wanted to create a concrete fountain for our back patio. I created molds for a concrete sphere using an 8-inch diameter glass globe for an overhead light, which I broke away after the concrete cured. I also created cylindrical stands with molds for concrete footings. Instead of ending with a drab gray color for my fountains, I wanted splashes of color (pardon the pun!).I used EverStain Malayan Buff and Desert Amber for my colors and the Deep Penetrating Matte Sealant. I love the rich colors this combination produced and how they pop off the painted brick of our patio. - Personal Tips:
The how-to videos were very helpful in understanding the ways the acids blend. With a spray bottle for each acid, the colors blended nicely together. I used a sponge to mottle a bit. When the fountains have water pouring over them, the colors really pop! - Direct Colors Products Used:
1 Qt. Desert Amber EverStain™
1 Qt. Coffee Brown EverStain™
1 Qt. Penetrating Sealer - Other Products Used:
Baking soda neutralizer
Spray bottles
Sponge
Paint brush
Bristled brush for cleaning
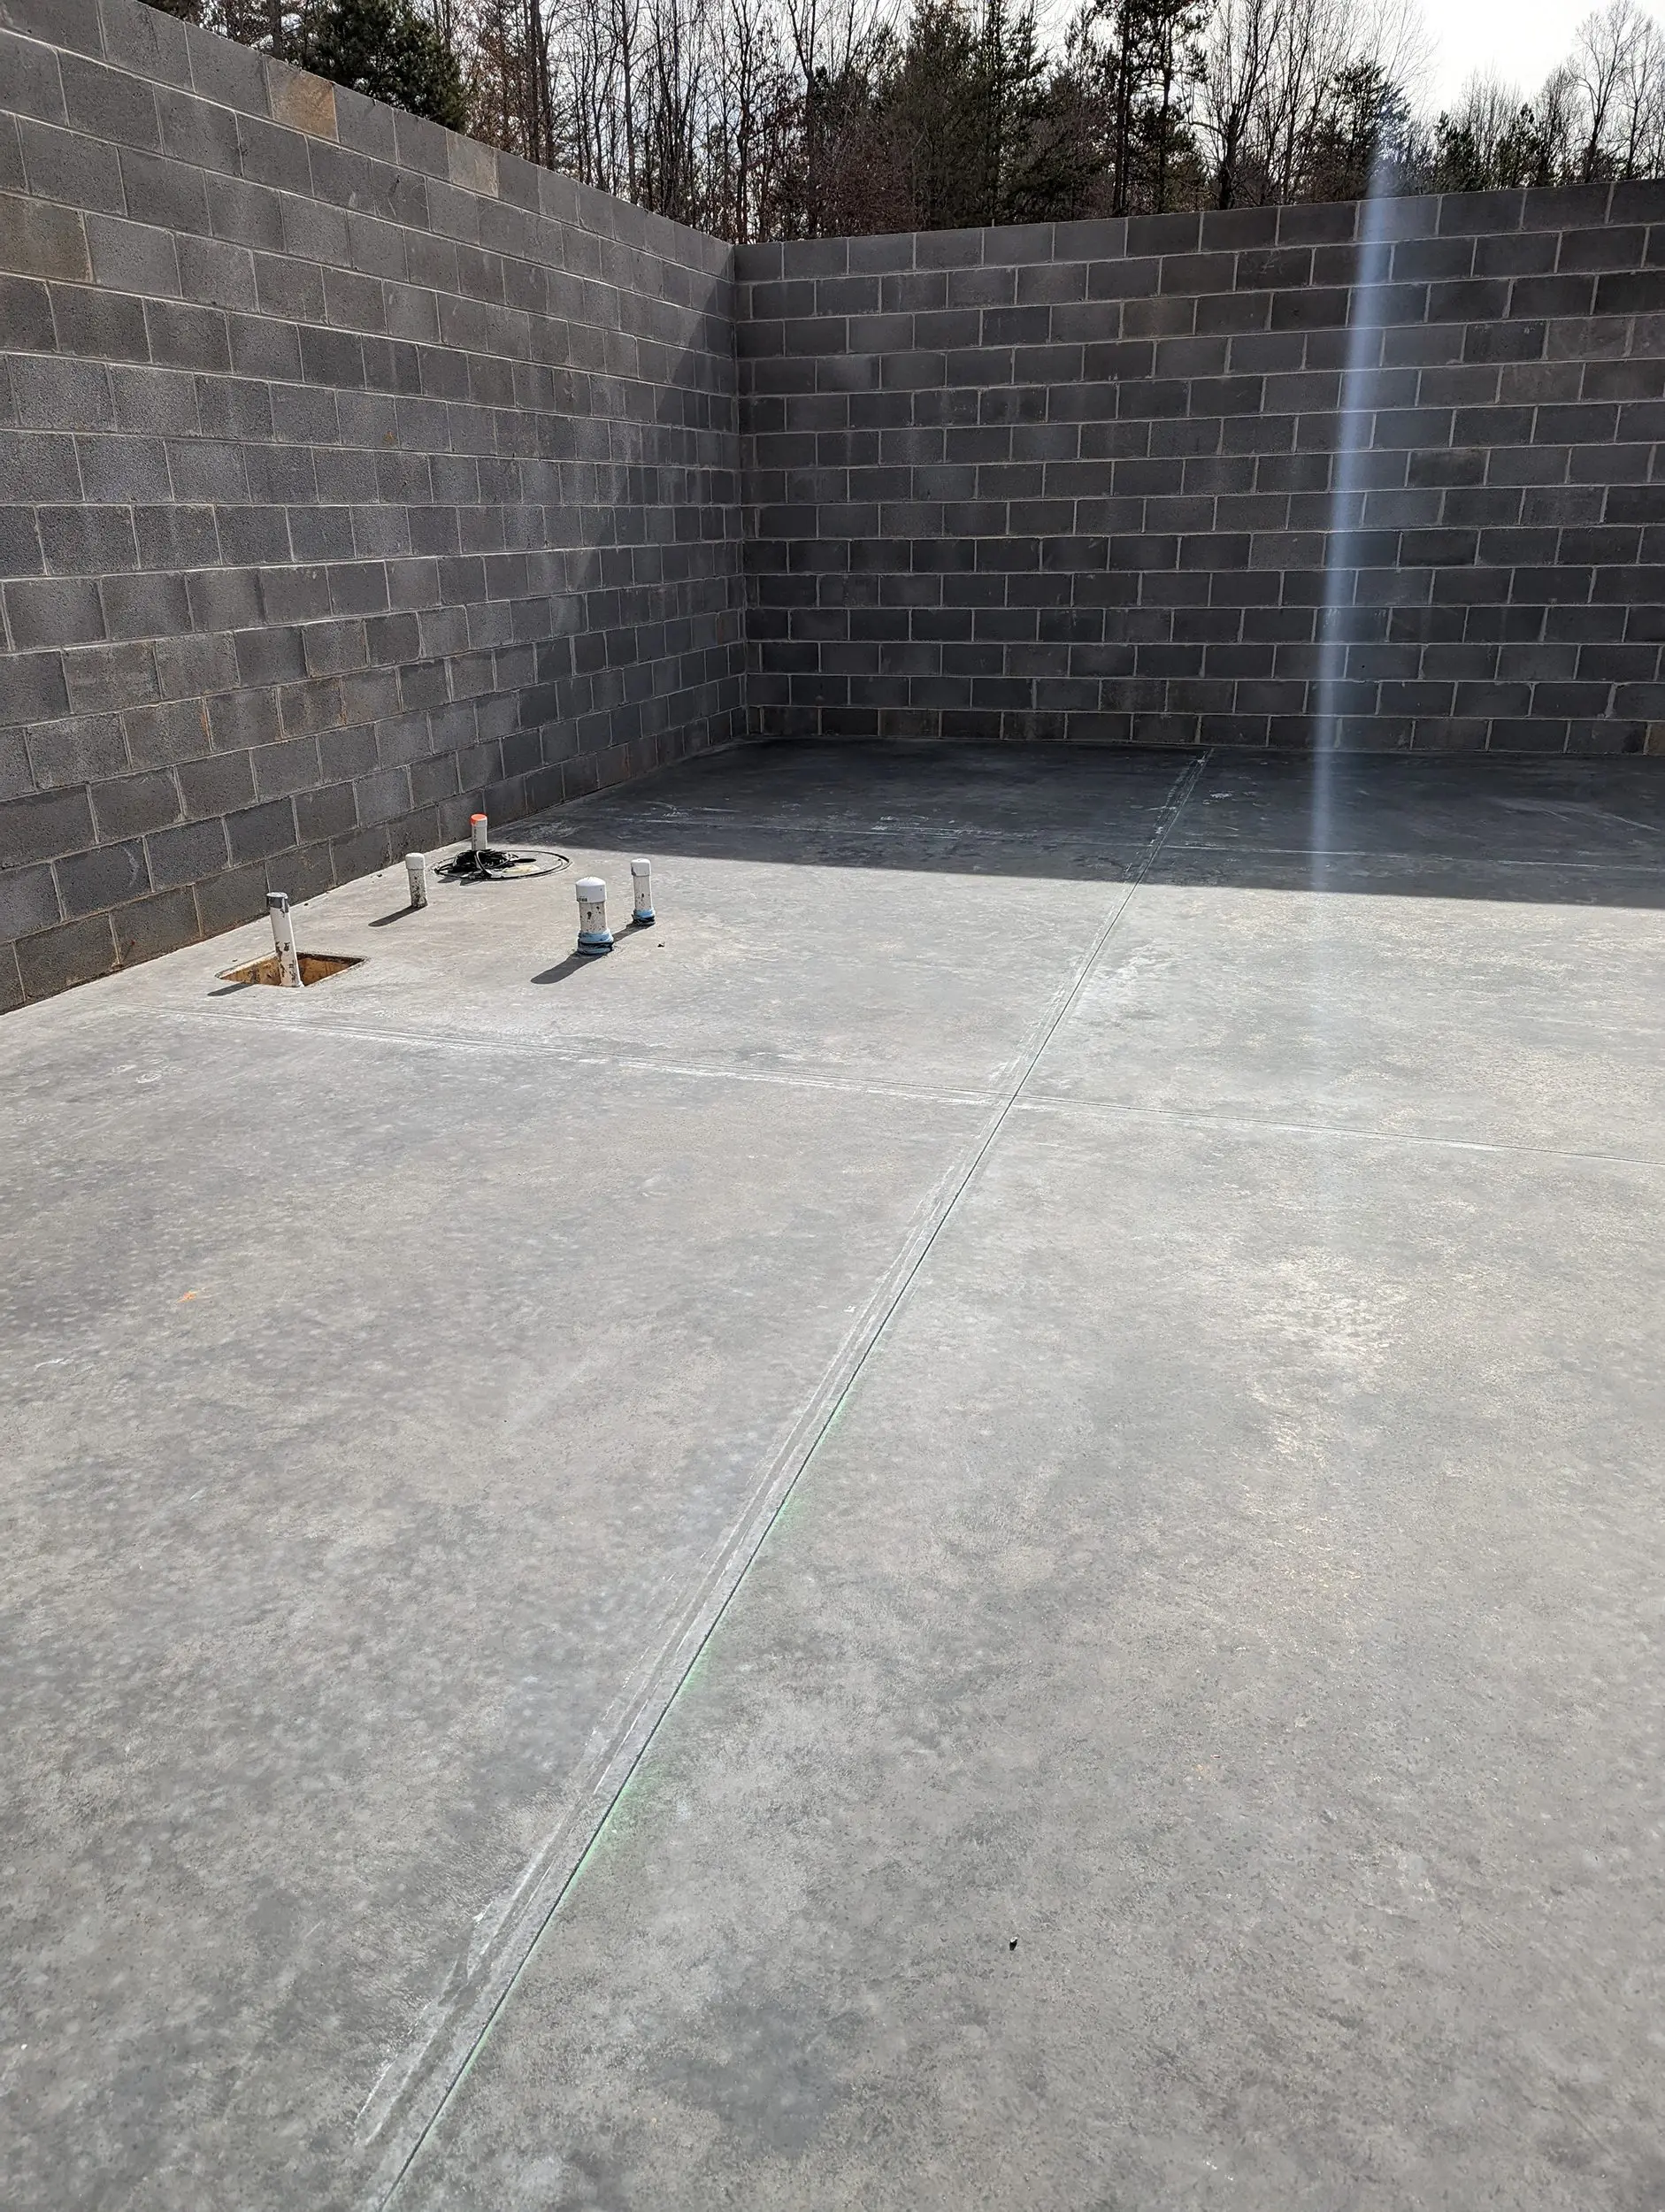
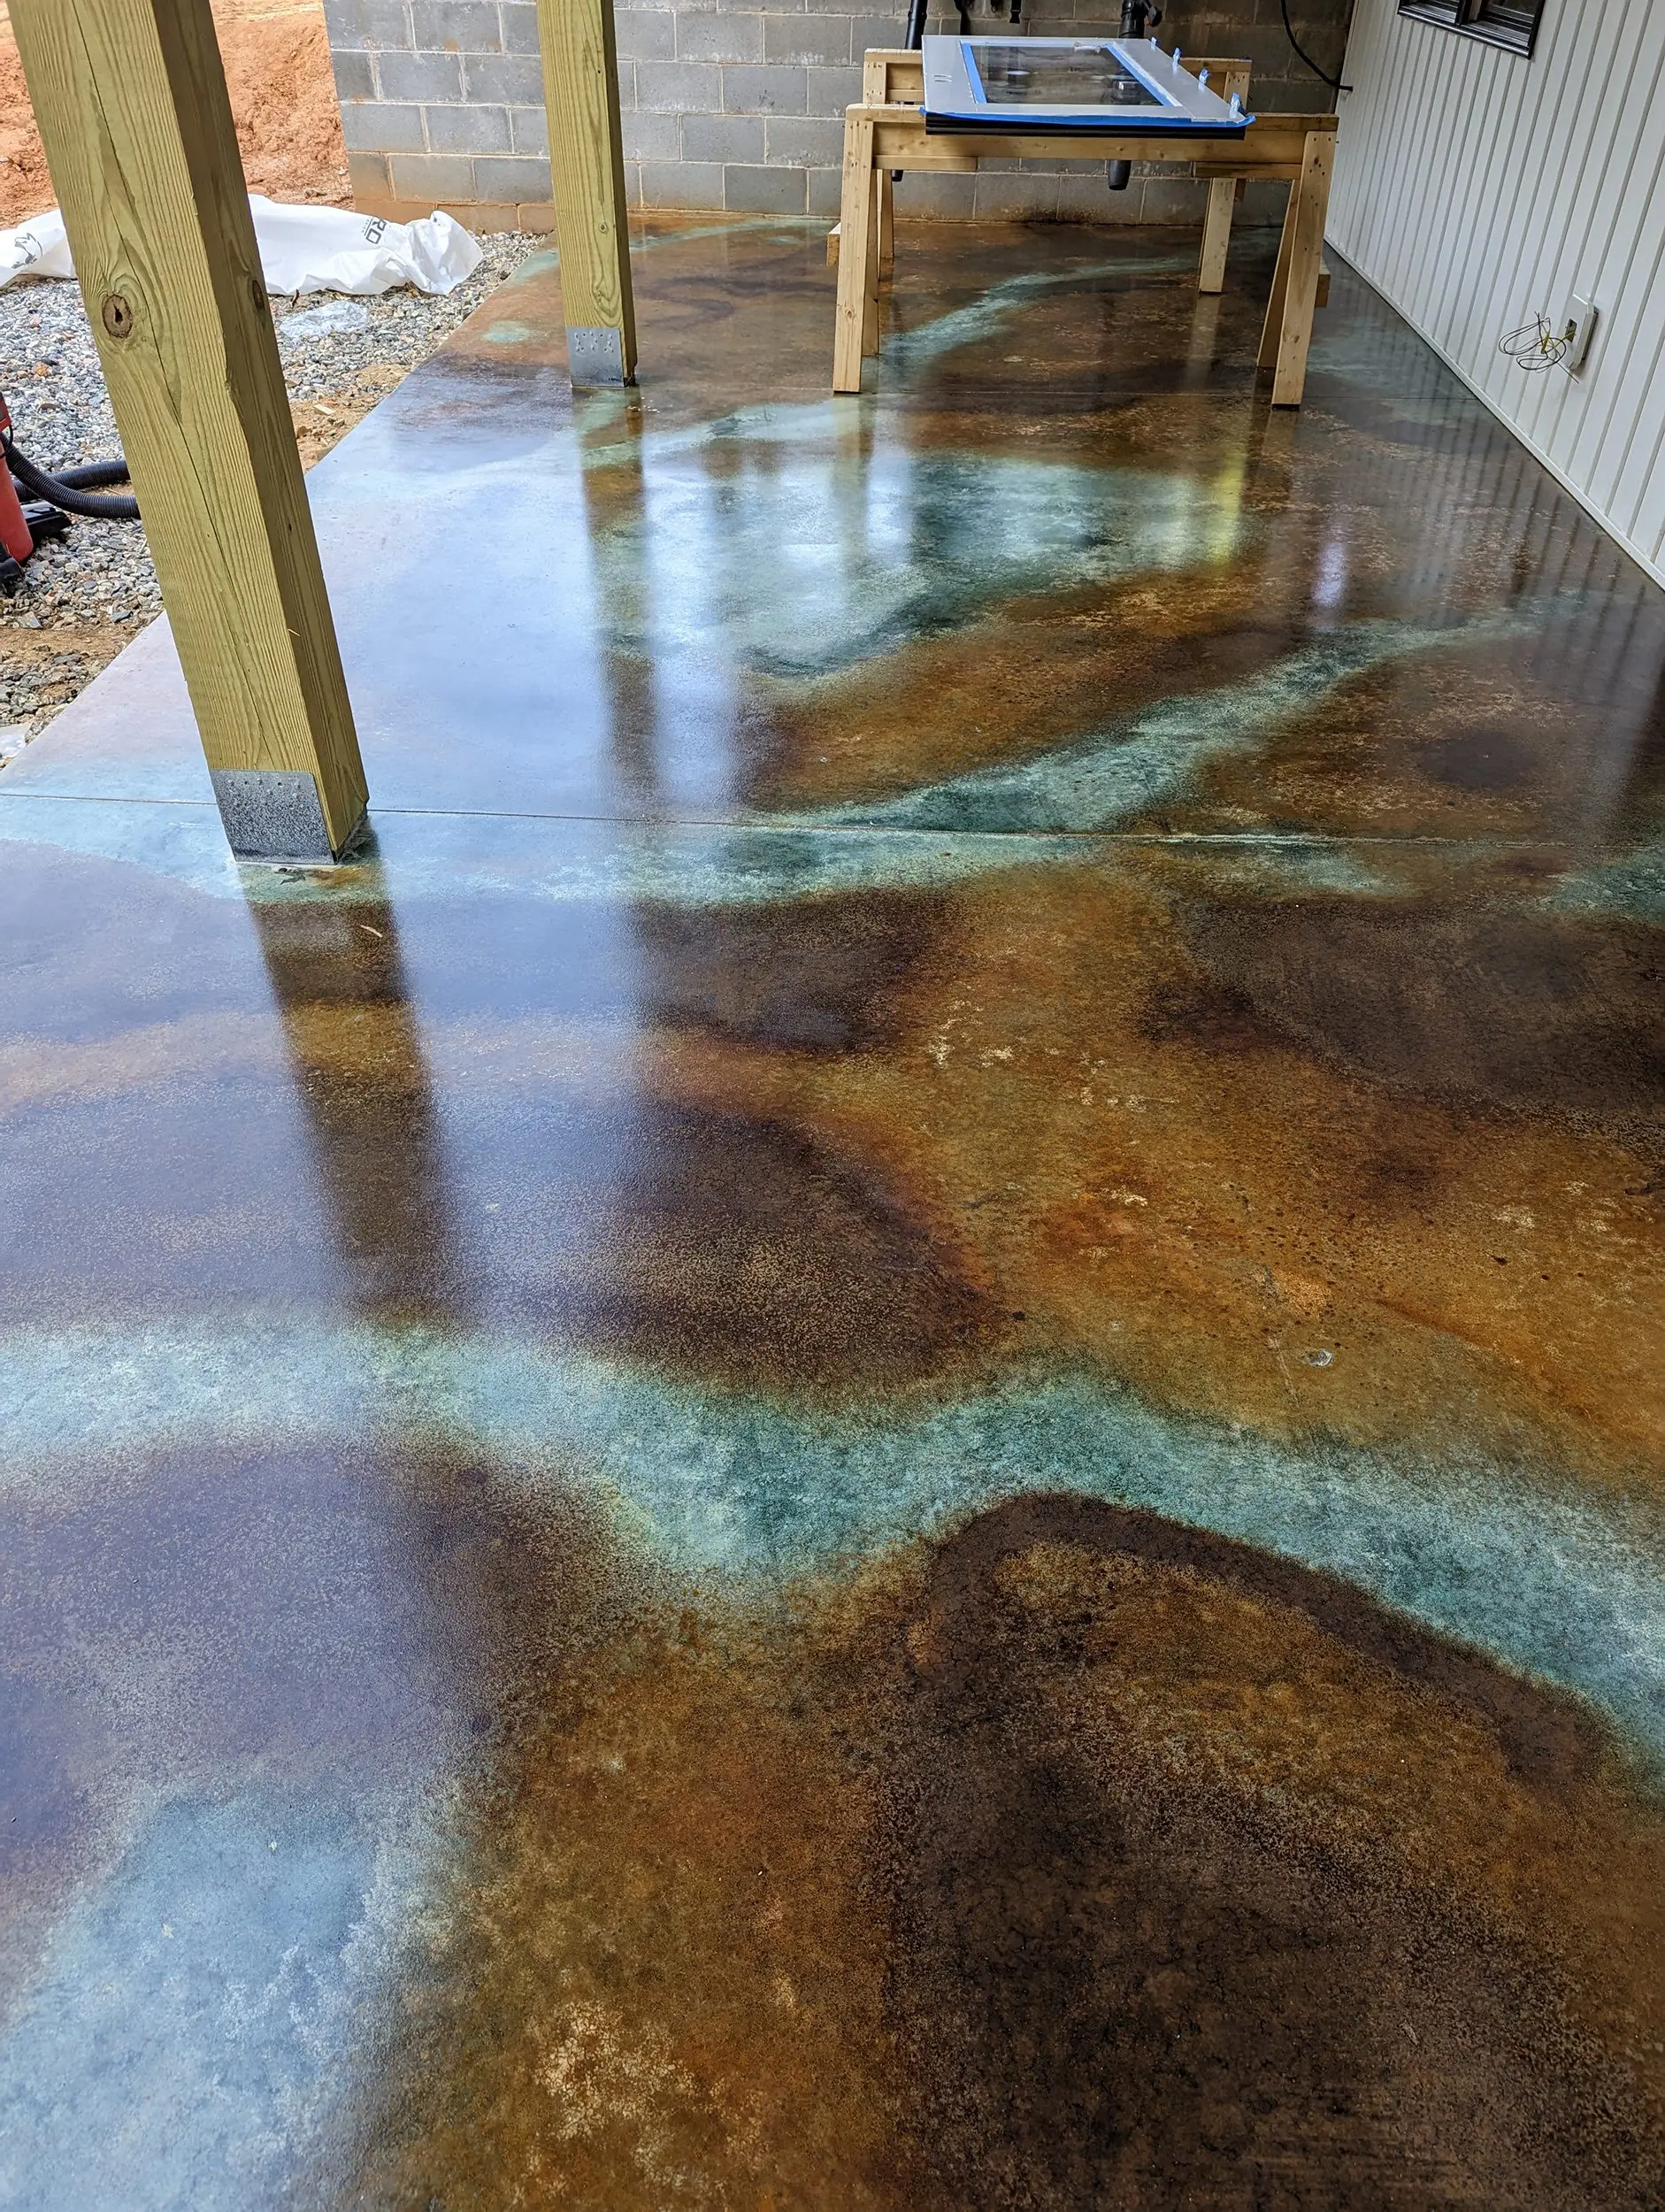
Multi-tone Acid Stained Basement Slab
This project involved the transformation of a new concrete basement slab in a newly built home. The result was a captivating multi-tone floor that added unique character to the basement space. By using a pump sprayer for each color and starting with the lighter shade for veins, the homeowners managed to create a layered, visually intriguing floor design that seamlessly blends the three chosen colors. Visit our Seagrass Stain Gallery for more details and inspiration!
Project Info:
- Project Completed In: 4 day(s)
- Estimate of Square Footage: 1760 sq. ft.
- Project Description:
We acid stained a new concrete basement slab for our new home. The slab is 2 months old at the time of staining. We used coffee brown, malayan buff, and sea grass colors then sealed with acqua seal gloss (2 coats), and prowax gloss (2 coats). - Personal Tips:
We put each color in a pump sprayer. We started with the lighter color (sea grass) to make the veins. We let it sit for about 10 min for the color to start to show up so we could tell very clearly where we had gone. We then filled in with the other 2 colors and overlapped the browns in many areas. - Direct Colors Products Used:
2 x 5 Gal. CitrusEtch™ Concrete Etcher
3 x 1 Gal. Seagrass DIY EverStain™ & AcquaSeal™ Gloss Kit
3 x 1 Gal. Malayan Buff EverStain™ & AcquaSeal™ Gloss Kit
3 x 1 Gal. Coffee Brown EverStain™ & AcquaSeal™ Gloss Kit
5 Gal. ProWax Polish™ Gloss
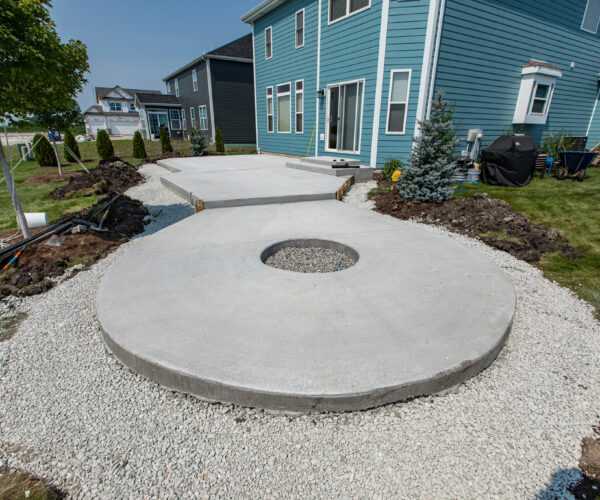
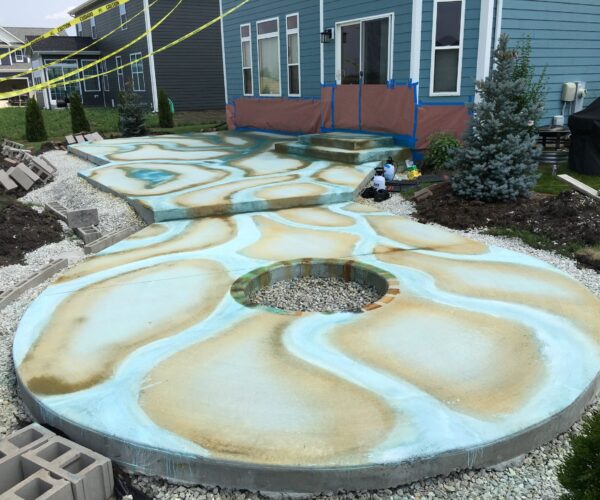
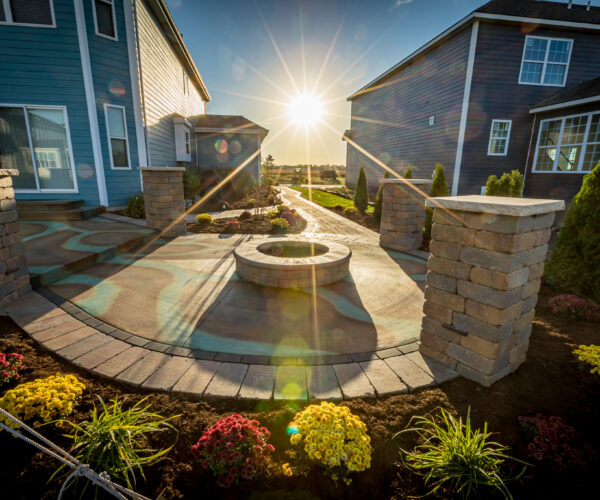
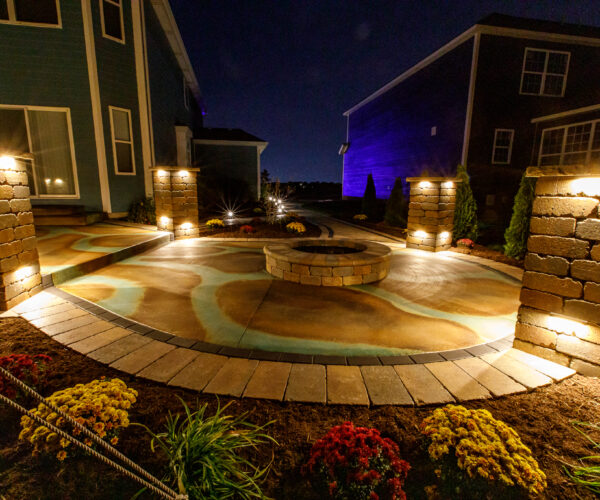
Stunning Stained Outdoor Space
If you want a concrete patio that you, your friends, and your family can enjoy, we’ve got you covered. In this guide, we’ll give you all the materials, steps, and tips you need to create the concrete patio of your dreams. Let’s get started.
Patio Perfection: A Concrete Facelift with Malayan Buff, Desert Amber, and English Red
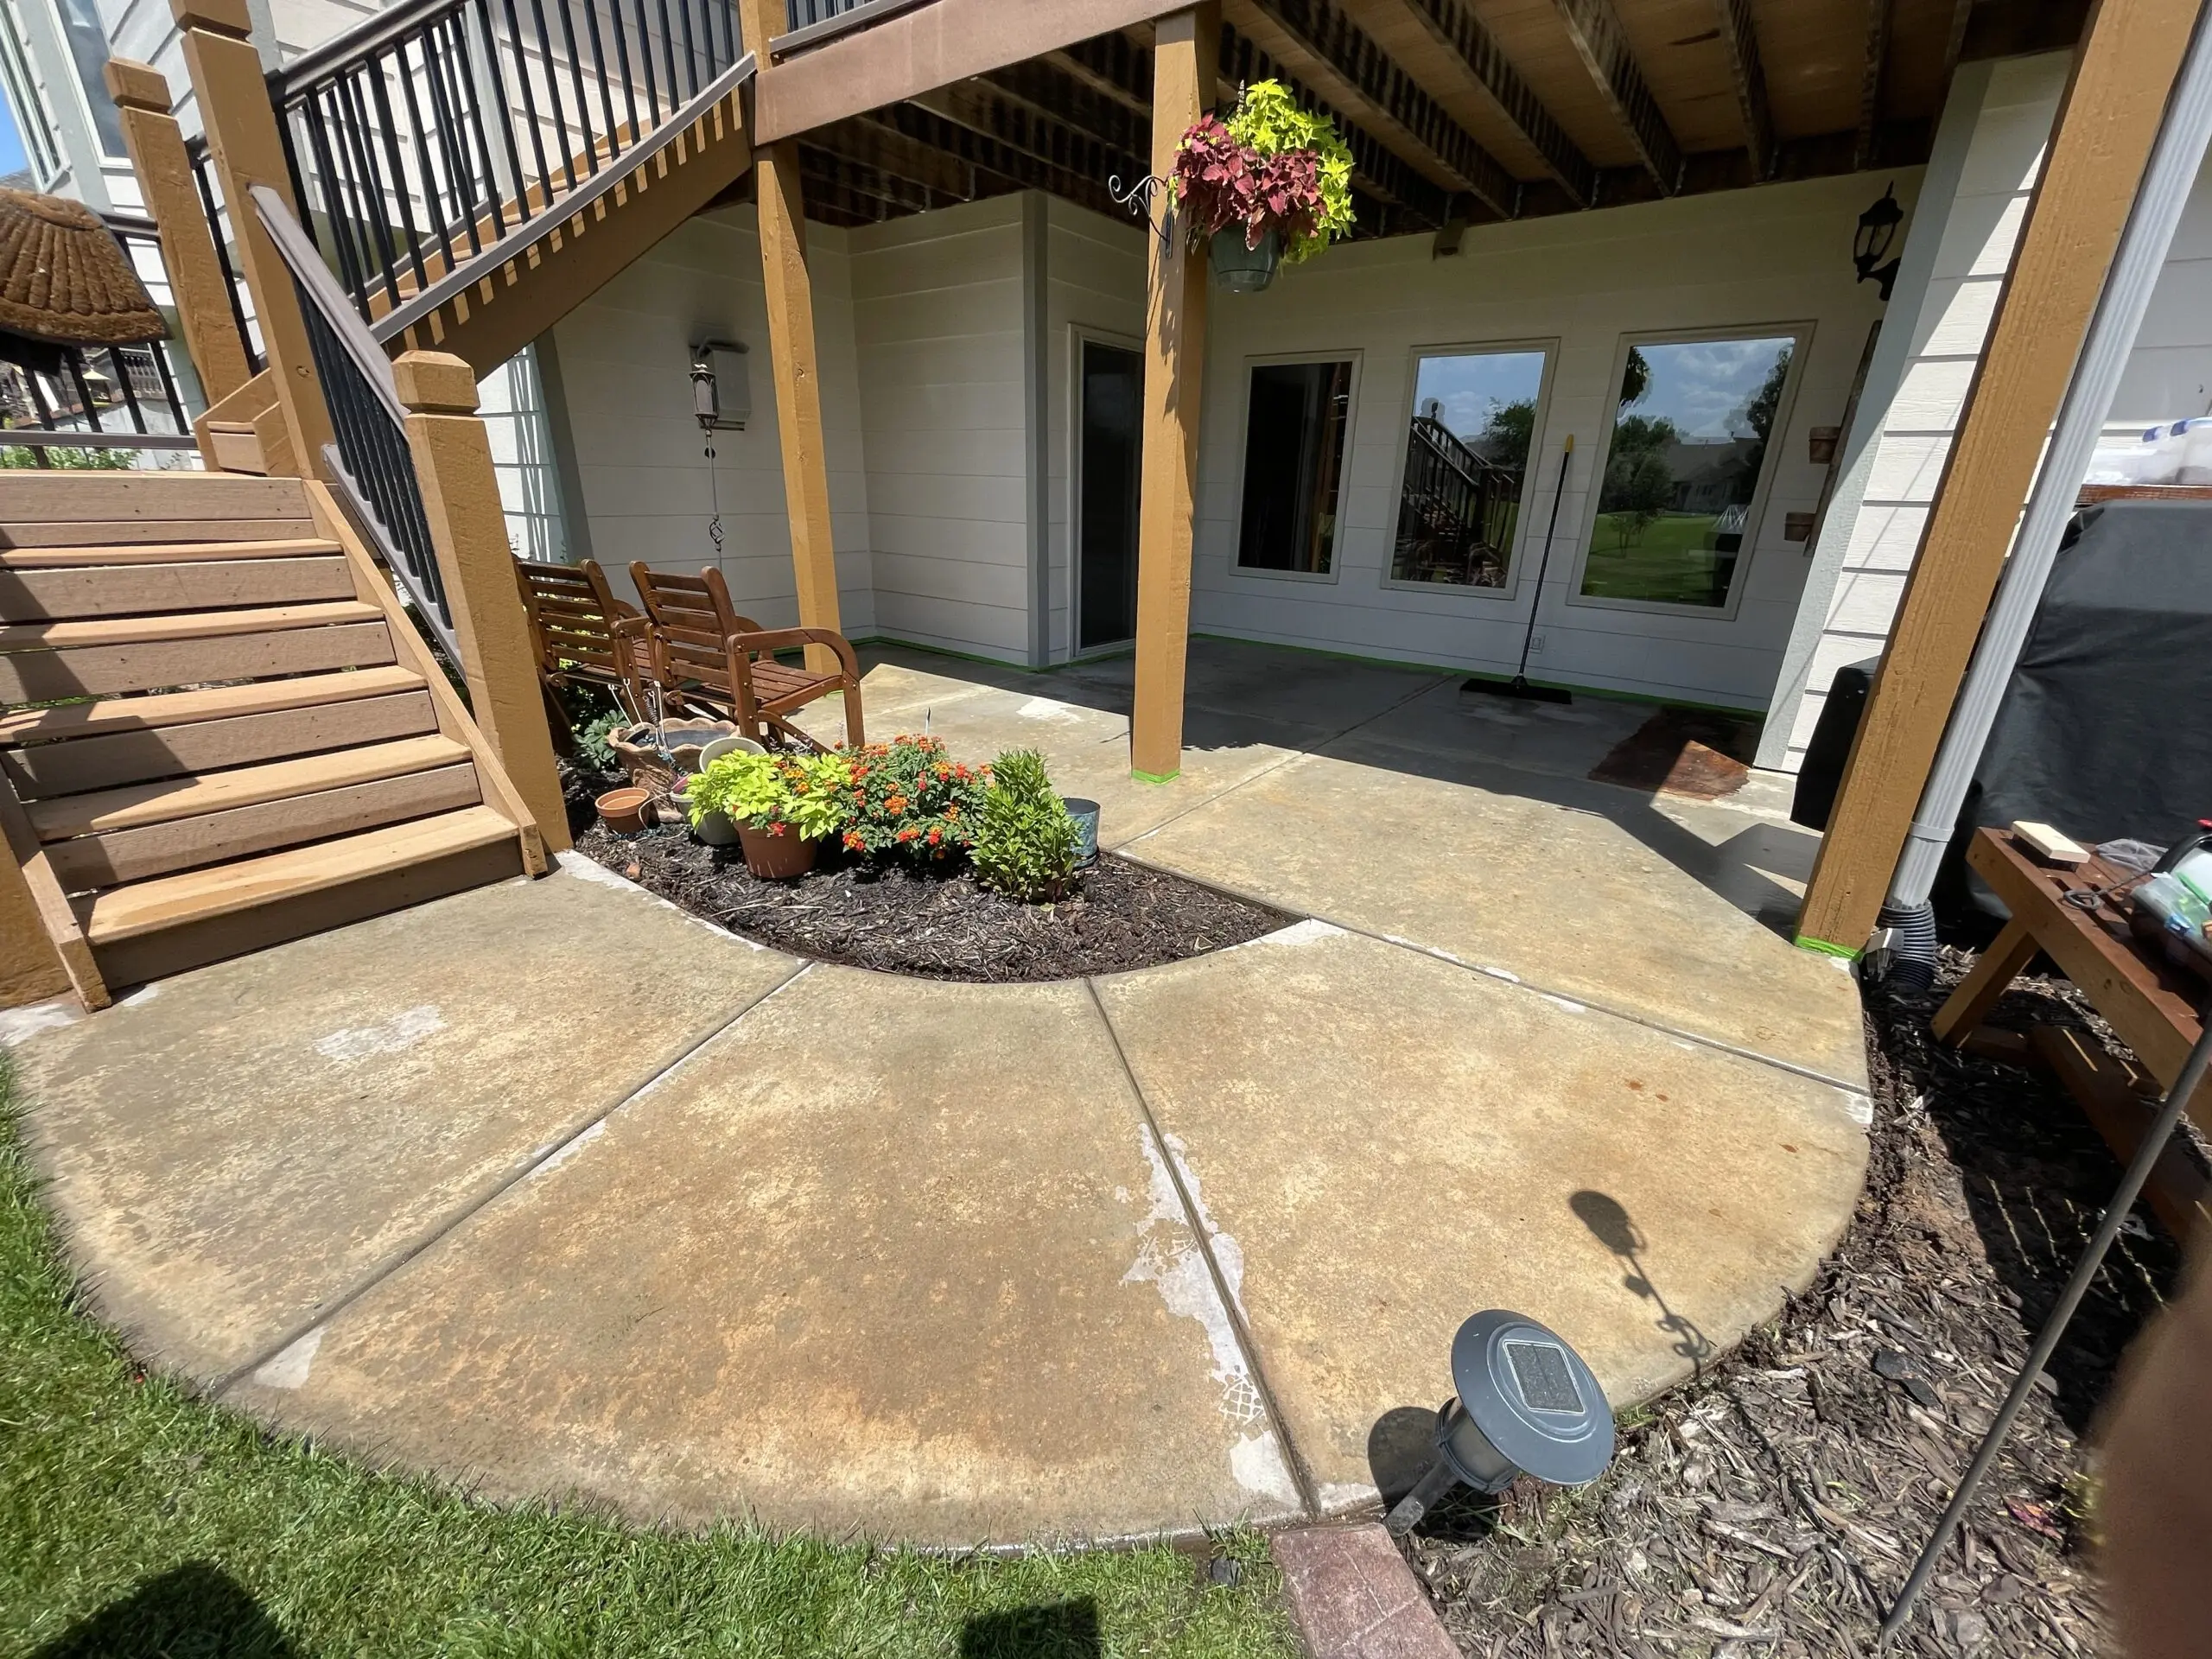
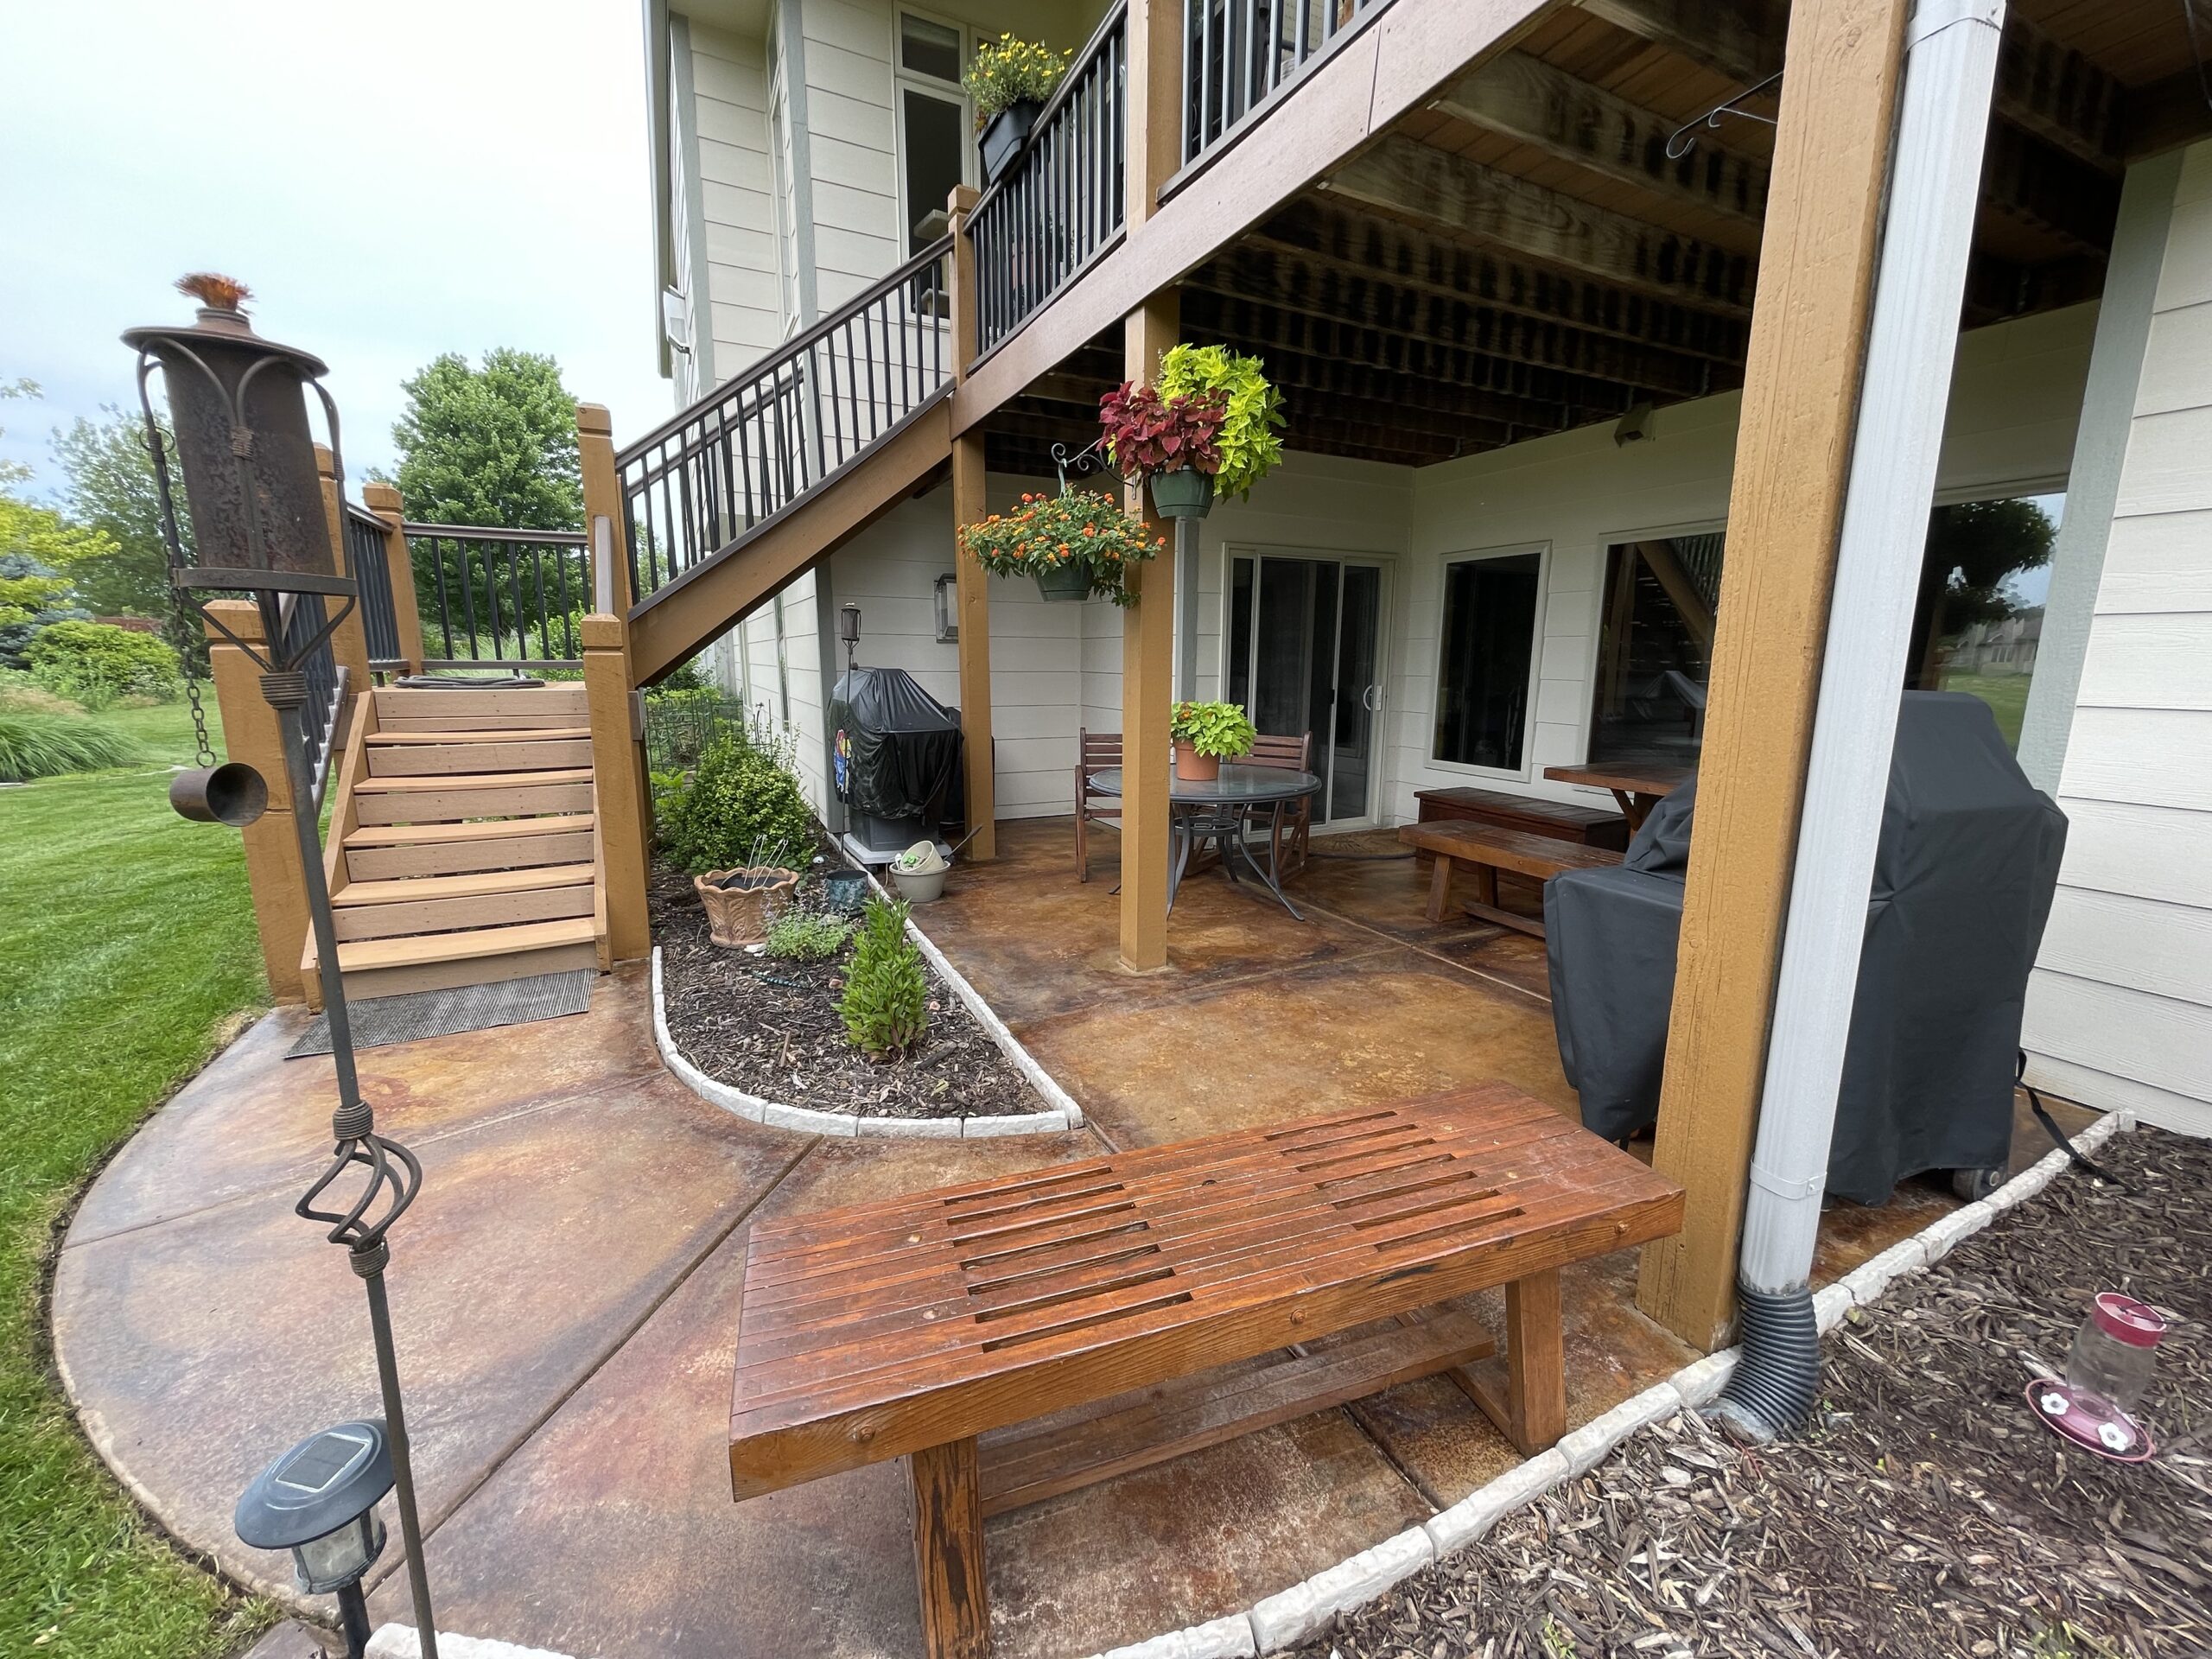
Ever wondered how a simple concrete patio can be transformed into a gorgeous outdoor living space? Here’s the answer! This DIYer took their 35-year-old patio from drab to fab using Everstain™ acid stains. Using spiked shoes and a sprayer, they applied Malayan Buff, Desert Amber, and English Red stains, creating a rich, wood-like grain effect. The staining process was followed by two coats of sealant for a lasting finish.
Project Info:
- Project Completed In: 4 day(s)
- Estimate of Square Footage: 225 sq. ft.
- Project Description:
My patio has some 35 year old redwood furniture that I decided to refinish which I did. Using Cabot’s wood finish and I sanded it down. After finishing noticing the gray concrete did not help appearance and I had bought some gel acid stain from direct colors pre-pandemic and never used them. Ended up getting Everstain Acid stain we 3 gallons of acid stain with neutralizer and sealant. I used some shoes with spikes and applied as directed by web site using a sprayer. Following advice of outlining the sections with the lighter color then using the Malayan buff filling in between the desert amber, then streaked it with the antique red to add dimension and almost create a look like grain in wood. I let it dry overnight to get maximum paint absorption then got it damp with light water and brushed with large broom. I then applied the sealant in 2 coats. The first coat was rolled on and the second was sprayed on. The most difficult part of project was moving the furniture off and back on patio. The prep work has to be done with power washing and taping up the sides of the house. - Personal Tips:
If you are going to spray use wide tape to block off things that you don’t want sprayed. I used 1 inch, probably should use wider if the wind catches it you got it on your house. - Direct Colors Products Used:
1 Gal. Desert Amber EverStain™ & EasySeal™ Gloss Kit
1 Gal. Malayan Buff EverStain™ & EasySeal™ Gloss Kit
1 Gal. English Red EverStain™ & EasySeal™ Gloss Kit
Hunter’s Haven: Kitchen Countertop Transformation with Acid Stain
Venture into the kitchen of a seasonal home turned hunting camp and witness a brilliant DIY transformation. The homeowner decided to create their own concrete countertops, choosing a striking blend of Coffee Brown, Desert Amber, and Seagrass acid stains. The result? Countertops that steal the show! Learn how trial, error, and embracing the unexpected led to this impressive result.
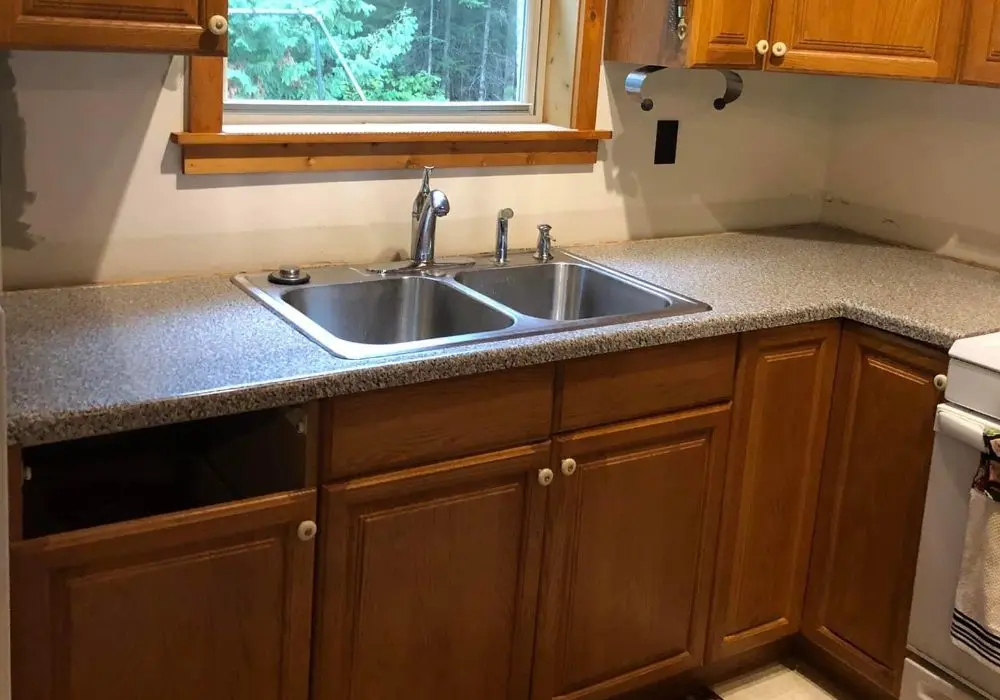
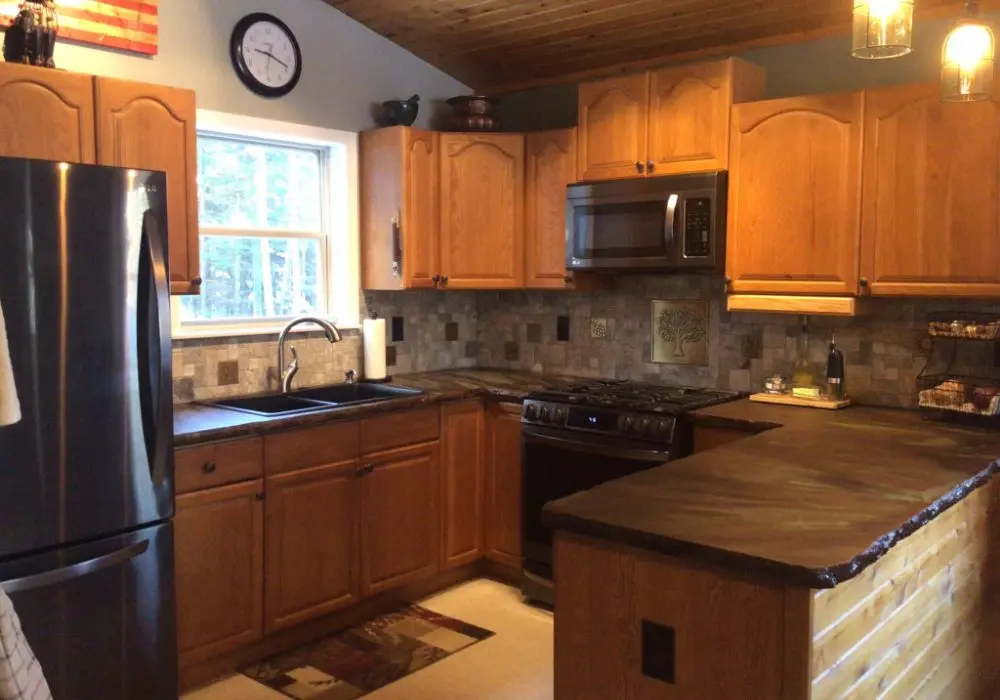
Project Info:
- Project Completed In: 180 day(s)
- Estimate of Square Footage: 40 sq. ft.
- Project Description:
We wanted to upgrade the kitchen in our ‘Hunting Camp’/seasonal home, and decided to create our own concrete countertops. Through much trial and error, testing of concrete and colors, we are finally done! Many of our test pieces have become park bench for ourselves and our friends.
Included are before, during and after pictures, plus one of the first park benches.
For the countertops, we used acid stain in Coffee Brown, Desert Amber and Seagrass. Through the testing, I learned to go easy on the Coffee Brown and to not be afraid of the Seagrass! I also learned to ‘just walk away’ and let the acid stain do its thing without overdoing it.
We love the final outcome and want to thank Direct Colors for their continued help and urgent assistance at each step along the way! Your customer service is top notch!
Personal Tips:
I would recommend doing small test pieces before a big project to figure out what color combinations and techniques you like. It is so important to know that, to a very large degree, you cannot control the final outcome, but with research, practice, and patience, anyone can do this. - Direct Colors Products Used:
1 Gal. Desert Amber DIY EverStain™ & AcquaSeal™ Satin Kit
1 Gal. Coffee Brown DIY EverStain™
1 Gal. Seagrass EverStain™
Basement Renovation with a Classic Touch
This project involved turning an old basement into an aesthetically pleasing living space using Malayan Buff, Avocado, and Seagrass stains. Visit Basement Renovation with a Classic Touch for more photos and details.
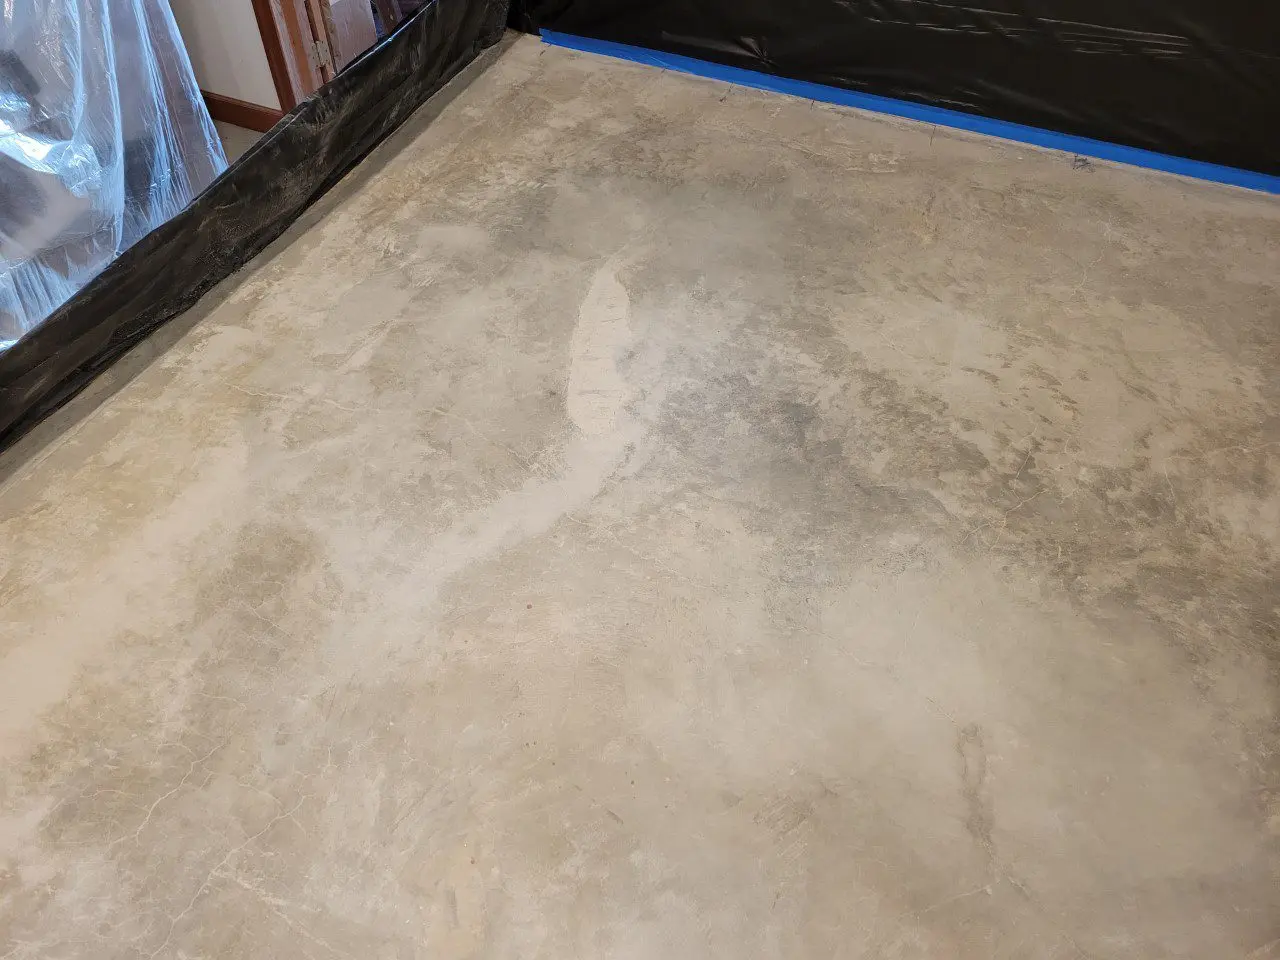
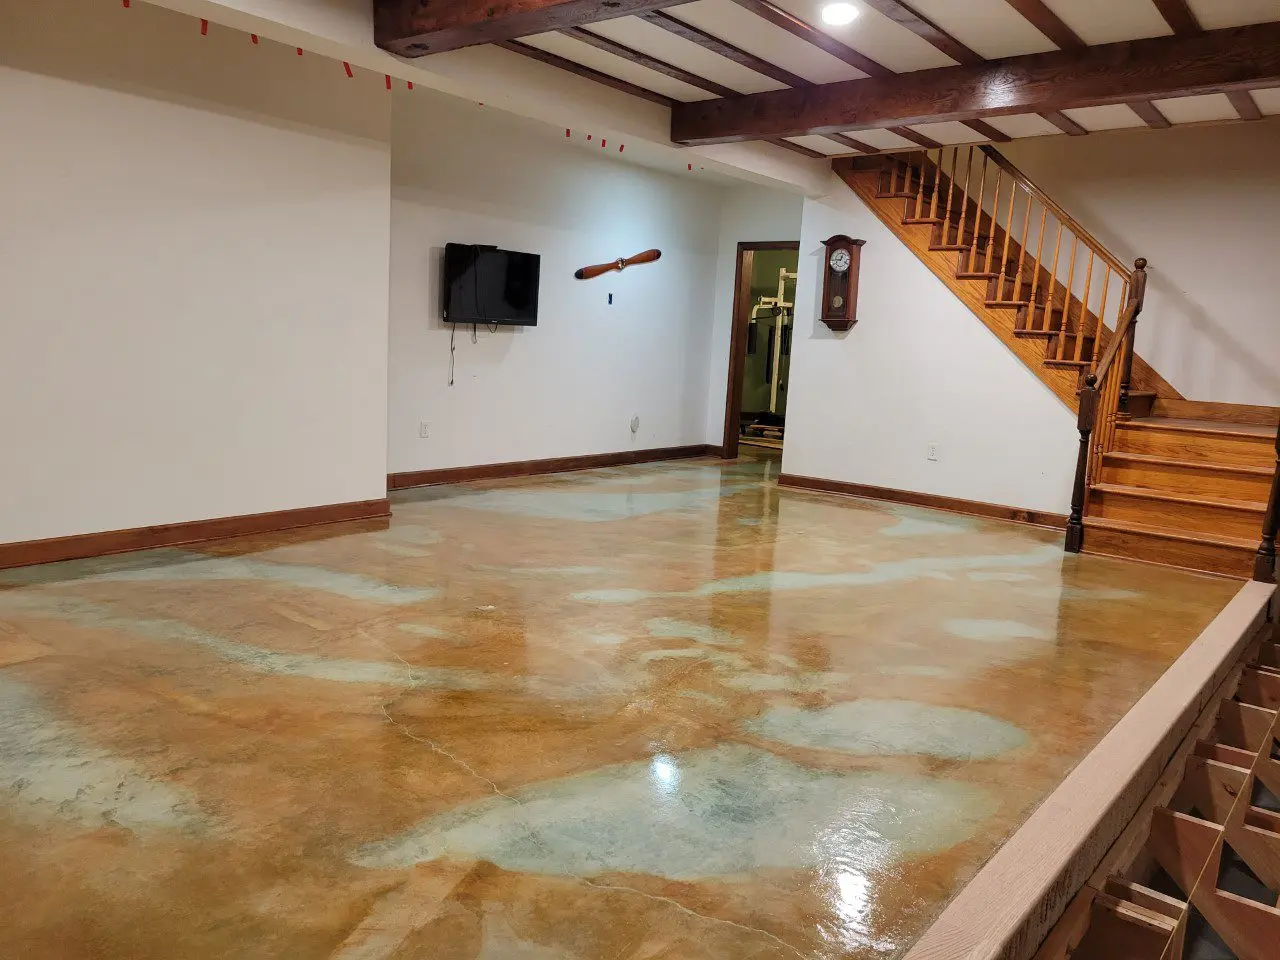
Project Info:
- Project Completed In: 15 day(s)
- Estimate of Square Footage: 700 sq. ft.
- Project Description:
I built the house 20 years ago with no intention of using the basement are as living space. Fast forward 20 years and I changed my mind. I investigated having contractors come in and apply epoxy coating. I also purchased several gallons (different colors) of “concrete stain” from the local big-box hardware store. I applied sample areas on my floor to get a visual feel to see if that was what I wanted. I was not happy with it as it just appeared to be paint. I also did not like the “garage floor” look of the epoxy coatings offered by the contractors. While I had seen Direct Colors concrete stain pictures during my research, I knew it would be more work on my part, and I was hoping for something easy. This once-in-a-lifetime project had to be done right the first time, as there was not going to be a second. I bit the bullet (mentally) and decided to do the concrete stain so I would like the outcome.
The floor had not been damaged but there are two small settling cracks. I chose to not patch repair the cracks as they were tight and after reading that different mortars can have different colors, I preferred having the sight of a tight crack than color changes due to mortar. I’m glad I did; I like the look and it is hardly noticeable.
When I built the house 20 years ago, I used this basement area to stain my woodwork. In the process I spilled wood stain many places on the concrete. Therefore, I knew I would have to sand the concrete to get past the existing wood stain. I was unsure if I would do it as a wet-sand job, or a dry sanding, so I prepped the area by putting plastic up around the perimeter. I rented a floor sander with the concrete sanding disc at the local big-box hardware store and started sanding. At first I tried an area using water, knowing this would keep the dust down. But with the water I could not see the condition of the sanded area due to the slurry, then I tried sanding an area dry. I was much more comfortable seeing the floor when dry sanding. I had the basement window open with a fan in it pulling the air out of the house, a full face respirator, and I had a vacuum connected to the sander. About half-way through the sanding I noticed it was taking a lot of work to make any progress. I deduced the sanding disc was worn out and I removed it and returned to the hardware store for an exchange. As I only rented the machine for one day, I was worried about losing time to make the one-hour round trip for the new disc. After returning with the new disc and using it I was glad to have it! The sanding went so much better with the new disc and did a great job. At the completion of sanding, I swept and vacuumed the entire area, including the walls. This included removing the perimeter plastic (put up for wet sanding), as it had collected a lot of dust. I had the doorway from the basement to the upstairs plastic and taped off, but after going upstairs, I found that the plastic/tape job was not adequate, as the concrete dust managed to work its way upstairs into the living areas. So I went into action cleaning that up before it got ground-in.
With the floor swept and vacuumed (several times), I prepped the area for staining. This included new perimeter plastic. I chose three different color stains, Malayan Buff, Avocado, and Seagrass. I used three spray bottles, so I could work my way across the floor using all three, applying colors per my design. Again, with a fan in the window and a respirator, and now spiked sandals, I put the stain down. Having previously purchased the stain sample kit, I knew I wanted to wait the full time for as much color to burn into the concrete. The following day I rinsed and scrubbed the concrete and wet-dry vacuumed it up. I had a garden hose into the area to make it convenient, this worked well. While the floor was still wet I decided I wanted more color. After the floor dried, I went back and applied more stain in certain areas. And the next day rinsed and scrubbed the floor, then gave the floor a full day to dry. I checked for any residue and noticed the floor still had a significant amount of residue, so I rinsed and scrubbed again. After the third rinse and scrub the residue was no longer noticeable.
The following day I swept and vacuumed, then applied the first coat of sealant using a hardware store damp-type mop. As recommended, I applied the sealant in a north-south direction initially. Then on the second day I applied east-west. I had a considerable amount of sealant remaining, although I had purchased the recommended amount for my square footage. I believe I was just applying coats lighter than expected. After the second coat dried, I applied another north-south coat.
Two coats of wax on top of it finished it, and it is so much better than I could have dreamed. I am very glad I chose to do the concrete stain, and not paint or epoxy. The job did take some work on my part, but it was entirely worth it. - Personal Tips:
More/bigger fans when dry sanding.
Don’t sand unless you have to.
Drywall mud must be removed down to bare concrete.
Rinse and scrub the acid residue until the floor passes the white-glove test.
I was able to do a few hours a day or every other day. There was no rush to “get it done”.
The quantities recommended are fairly accurate.
Have a spare acid sprayer available. You don’t want to be in the middle of spraying and have an issue. Cheap insurance.
- Direct Colors Products Used:
5 Gal. CitrusEtch™ Concrete Etcher
3 x 1 Gal. Malayan Buff EverStain™ & AcquaSeal™ Gloss Kit
2 x 1 Gal. Avocado EverStain™ & AcquaSeal™ Gloss Kit
1 Gal. Seagrass DIY EverStain™ & AcquaSeal™ Gloss Kit
1 Gal. ProWax Polish™ Satin
Modern Marble-Style Acid-Stained Concrete Transformation
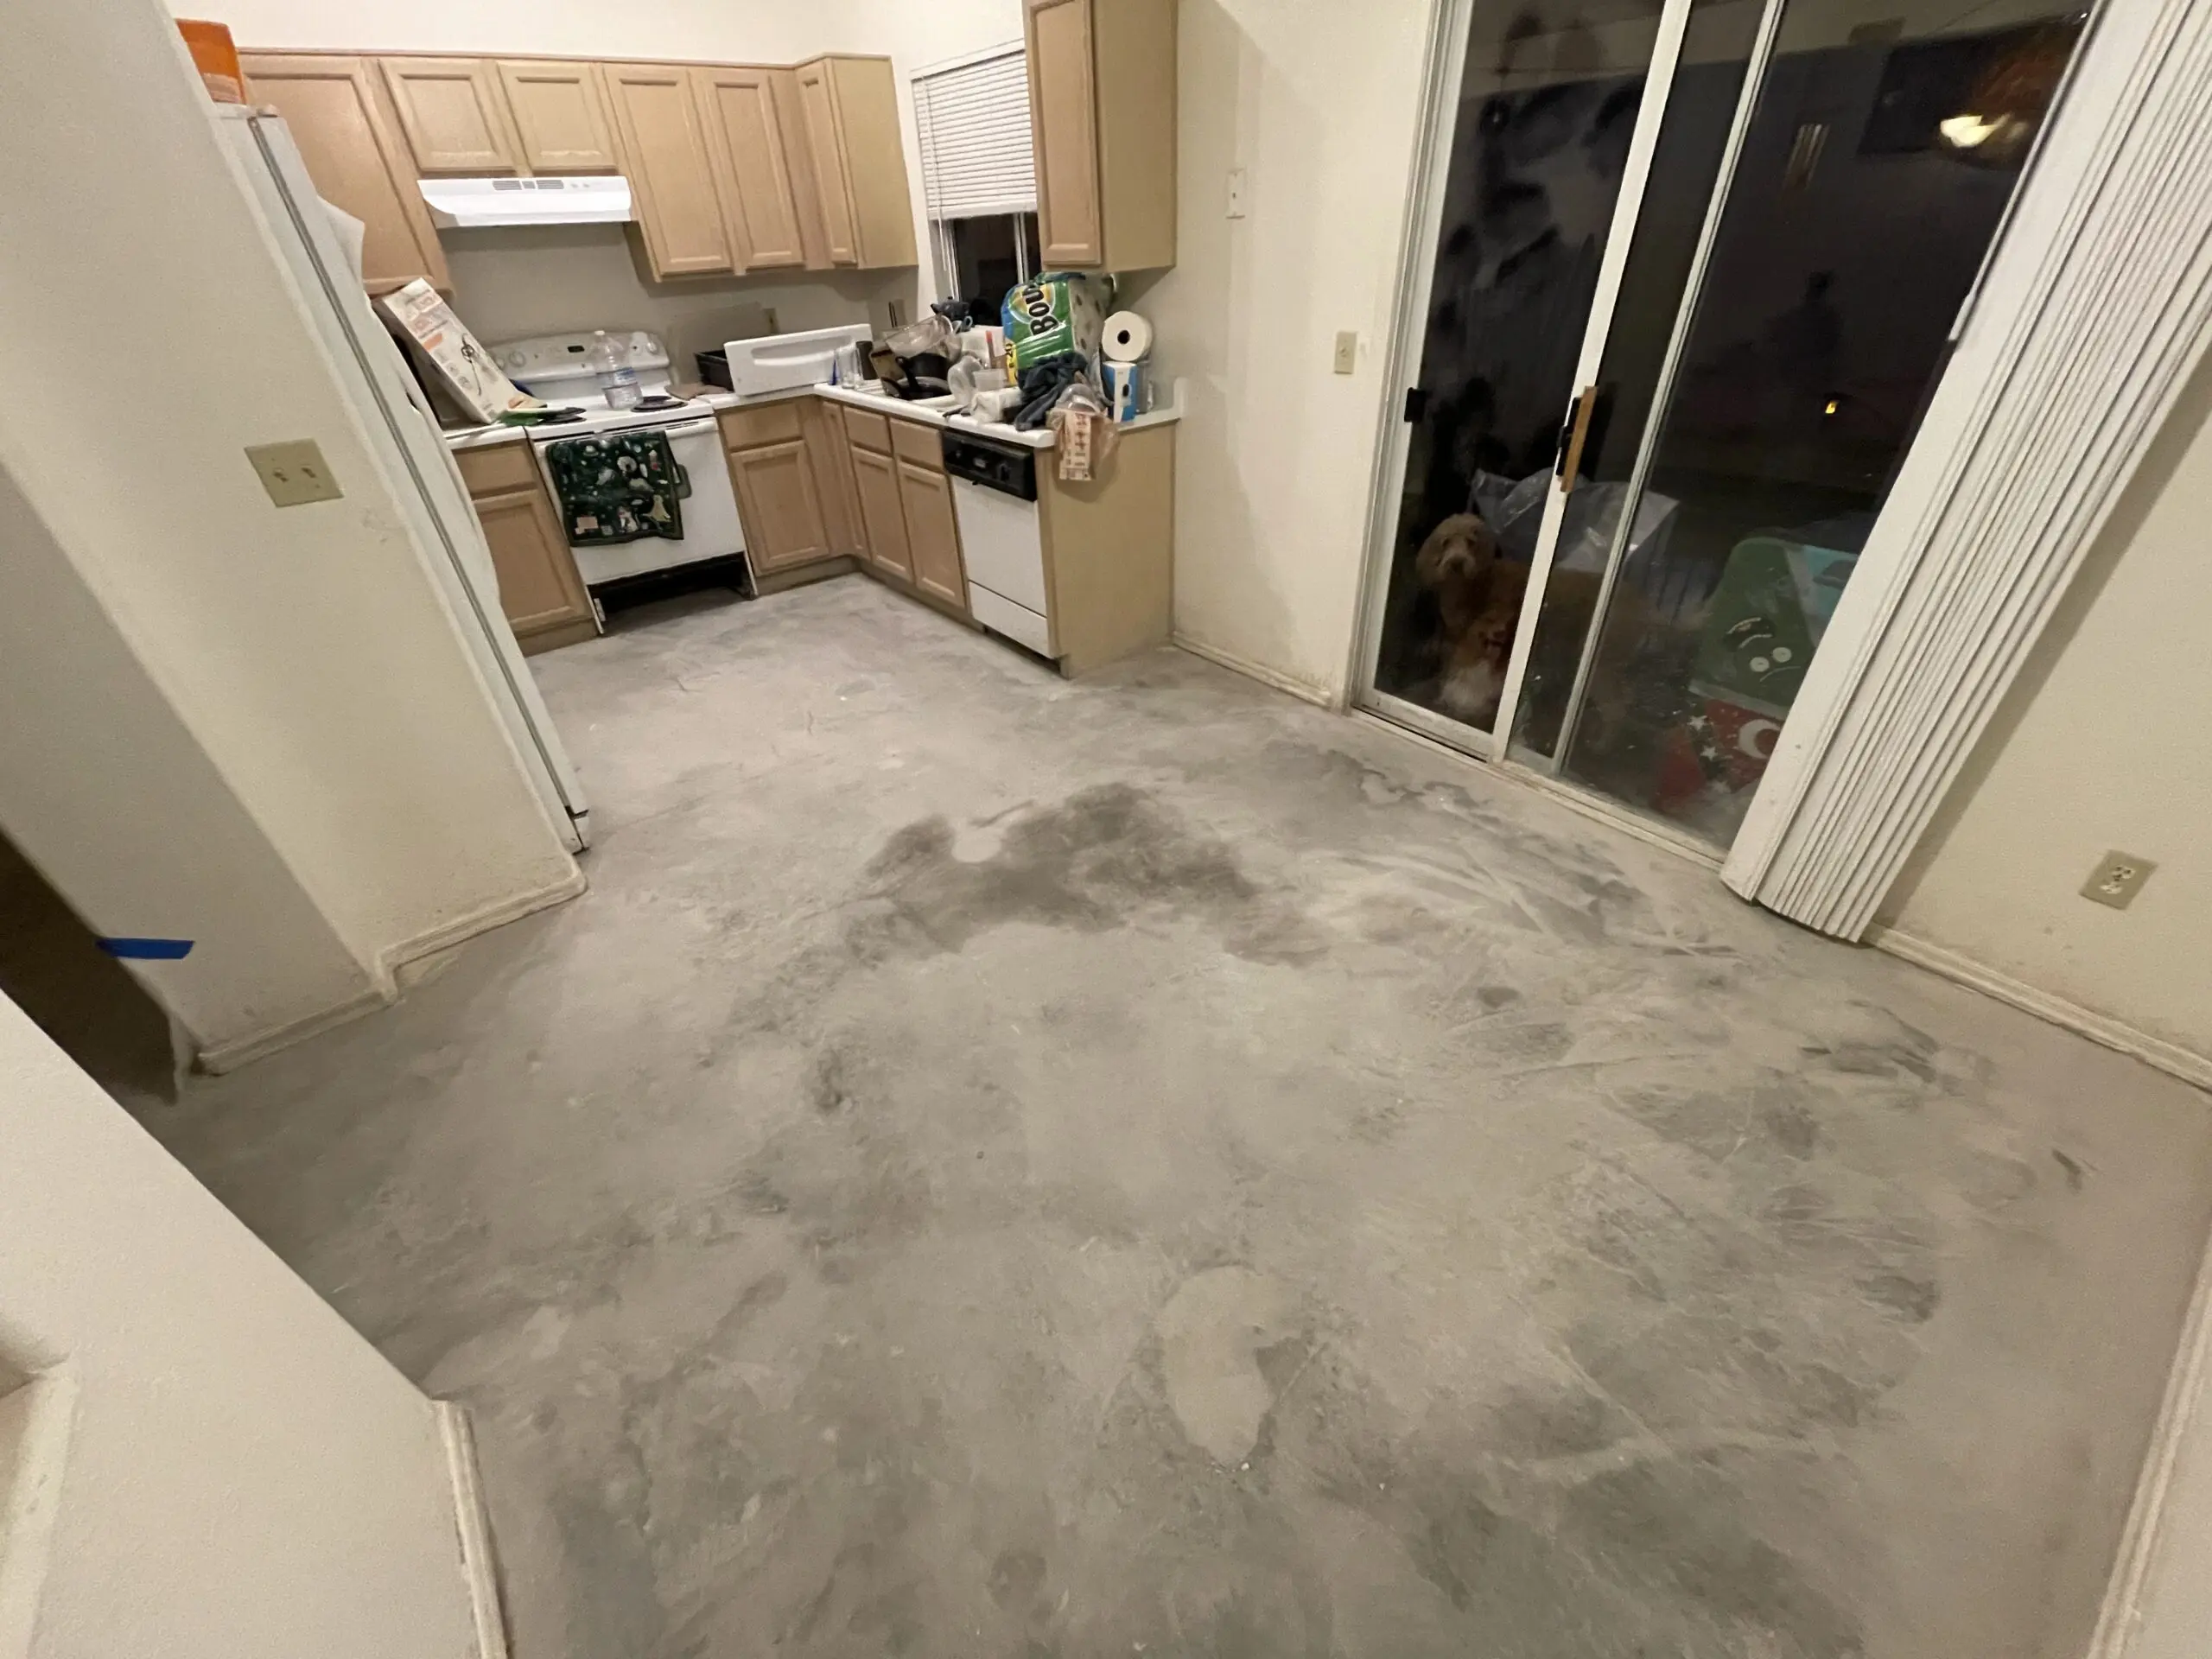
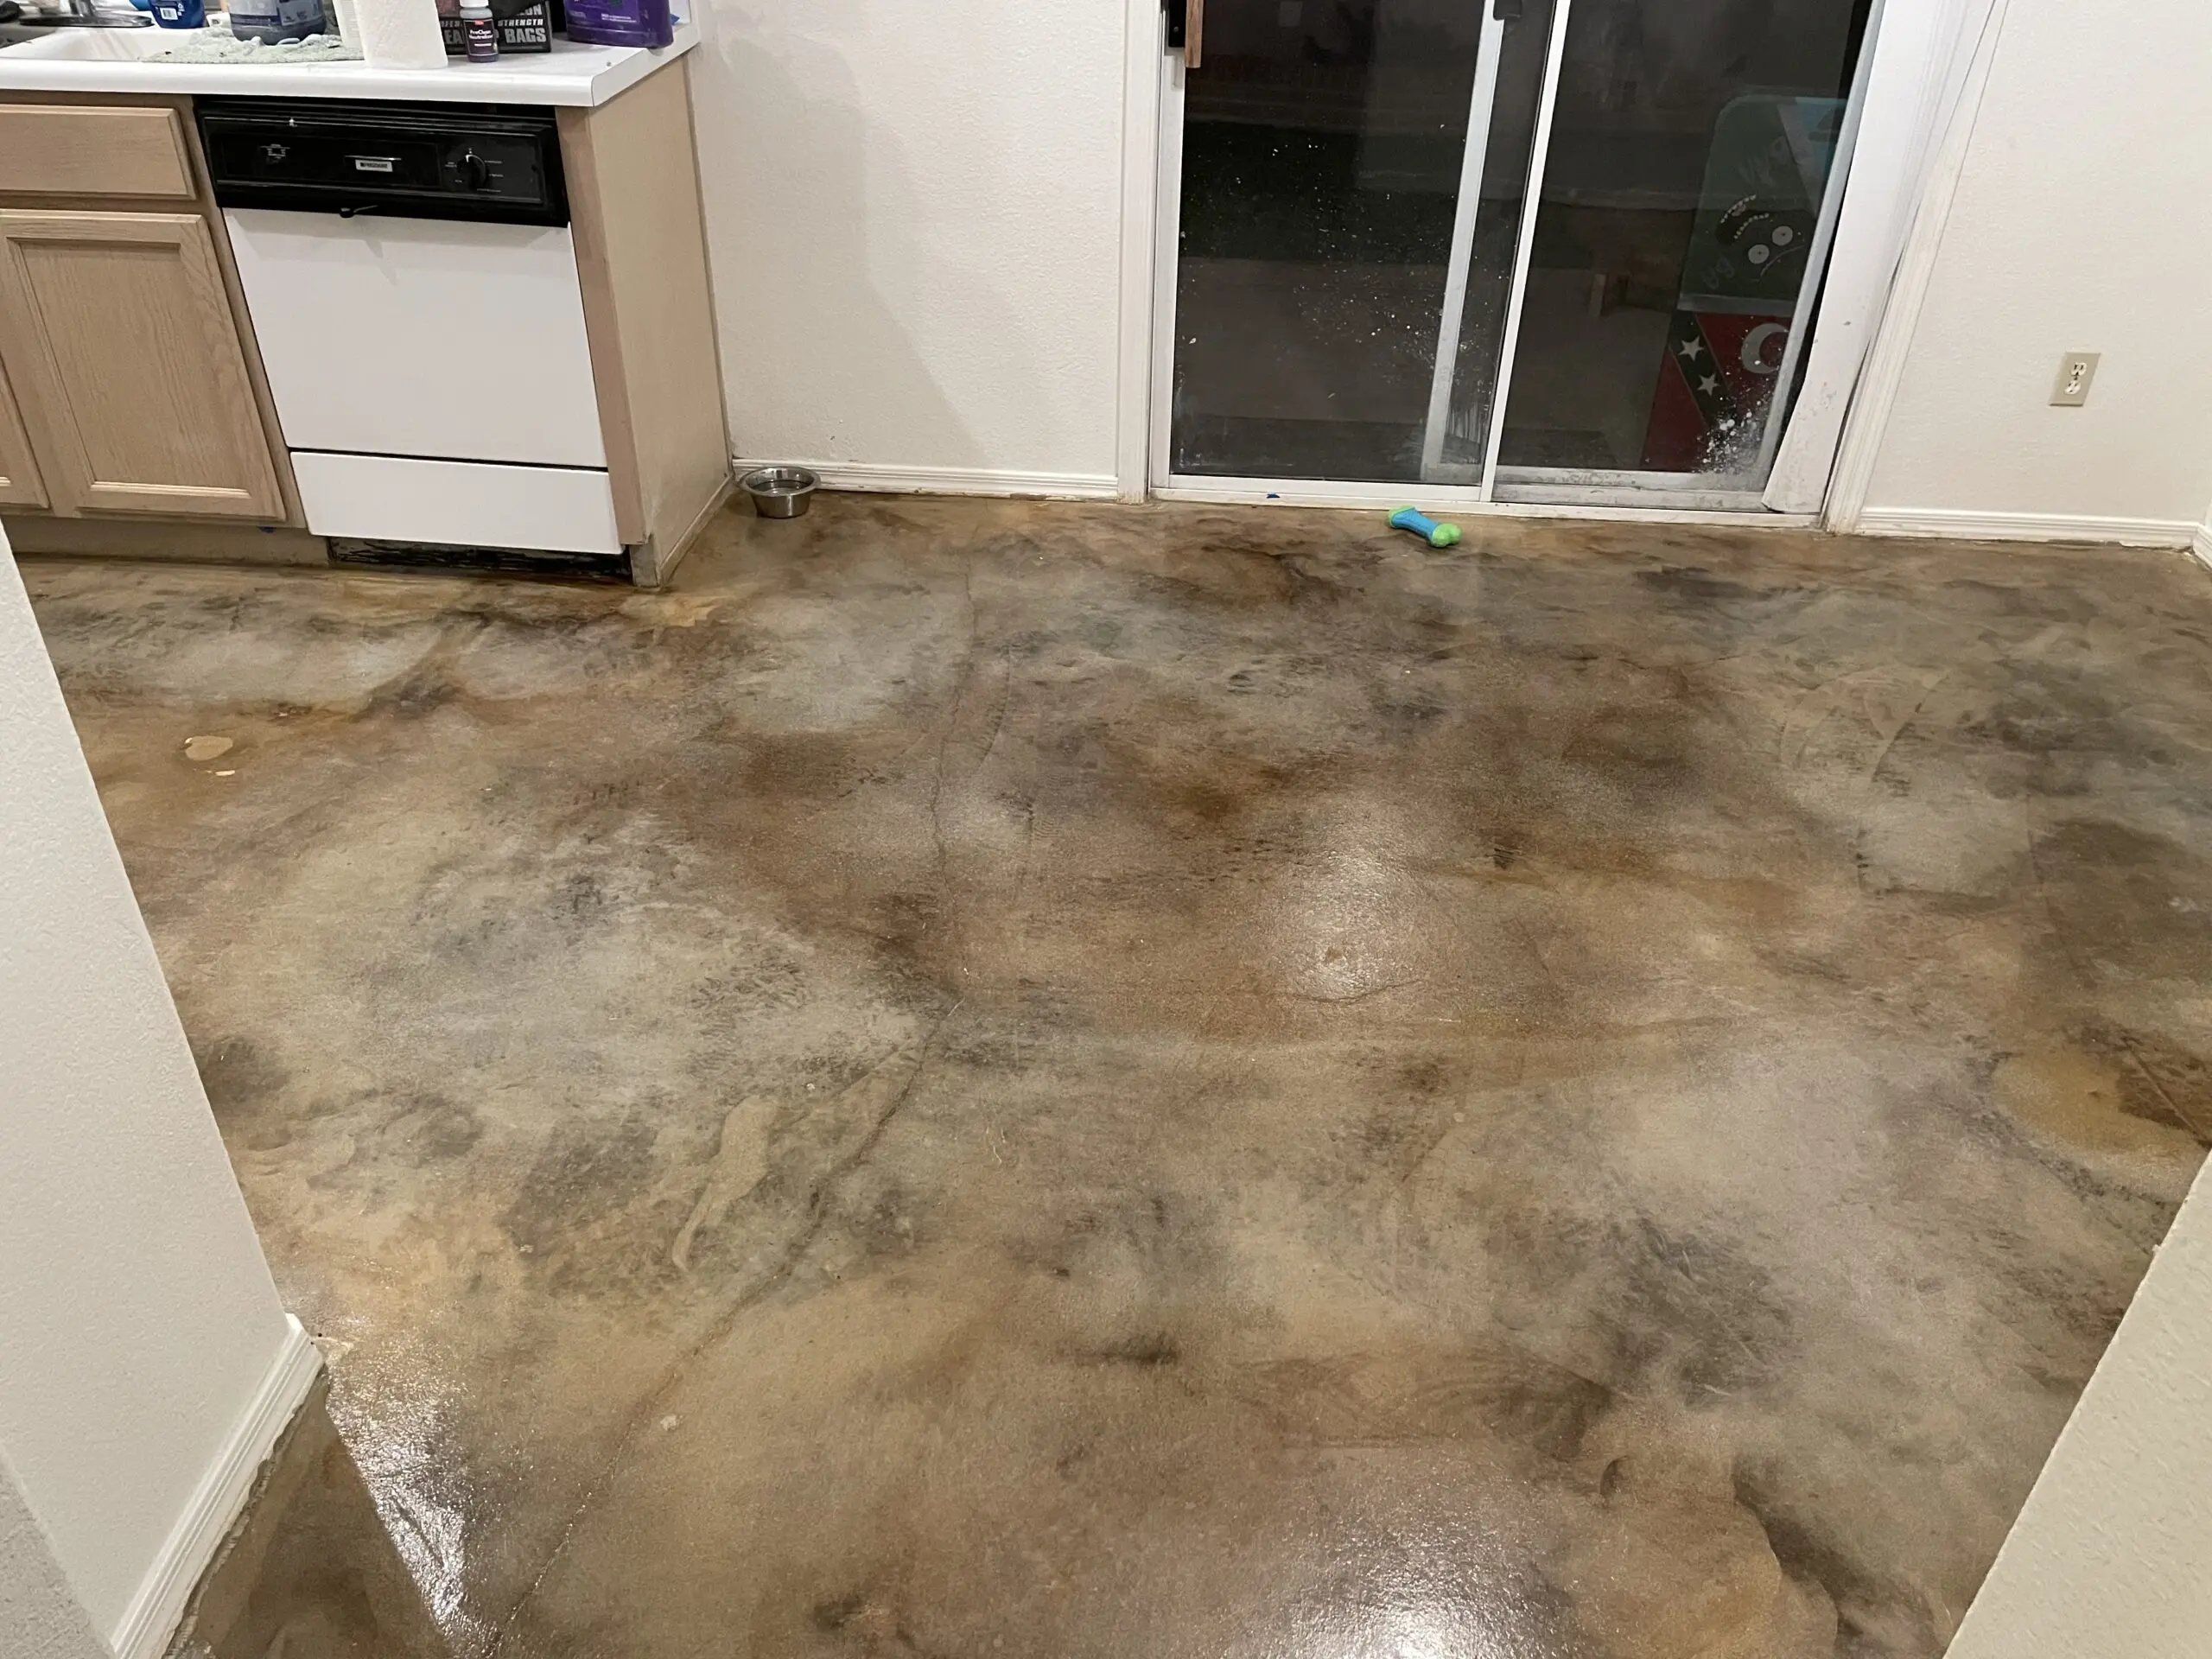
Seeking a modern and durable replacement for their old carpet and vinyl, the homeowners decided to go for a marble-style concrete acid stain for their living room, hallway, and kitchen. This project, which they hadn’t seen much of in their area, resulted in a beautiful, worn leather-like appearance that exceeded their expectations. Their experience offered key tips: renting a good floor polisher for older concrete, giving the acid ample time to react, using a shop vac and a squeegee for cleaning up after acid neutralization, allowing the sealer to completely process before waxing, and using a 3/8 roller instead of a sprayer for sealant application to avoid clogging.
Project Info:
- Project Completed In: 5 day(s)
- Estimate of Square Footage: 900 sq. ft.
- Project Description:
My wife and I had carpet that we were tired of, and wanted to replace it with something more modern that would be durable for 10+ years. We removed all the carpet we had in our living room and hallway and our vinyl in the kitchen to replace it with a marble style concrete acid stain. The acid stain was something we hadn’t seen in a lot of homes in our area but we’re impressed after doing more research so we felt it was the best option! - Personal Tips:
If your concrete is older and has paint/carpet adhesive rent a good floor polisher with a coating removal blade.Give the acid plenty of time to react to the concrete.A good shop vac was the biggest help. Especially when cleaning up after the neutralizing of the acid. With a squeegee to pull water.Take your time and allow the sealer to go through its entire process before waxing.Don’t use a sprayer for the sealer. The 3/8 roller is definitely the best option after having clogged two different sprayers trying to spray the sealer on. (Yes I removed the filters) - Direct Colors Products Used:
1 Gal. Seagrass EverStain™ & AcquaSeal™ Gloss Kit
2 x 1 Gal. Malayan Buff EverStain™ & AcquaSeal™ Gloss Kit
1 Gal. Black EverStain™ & AcquaSeal™ Gloss Kit
1 Gal. ProWax Polish™ Gloss - Other Products Used:
Floor polisher with coating removal tool
Shop vac
Angle grinder with diamond floor grinder blade (for the edges)
Squeegee (HUGE help with neutralizing)
Floor brush
Trim pad
Spike shoes
3/8 nap roller
Carpet-to-Concrete Transformation: A New Look with Acid Stains
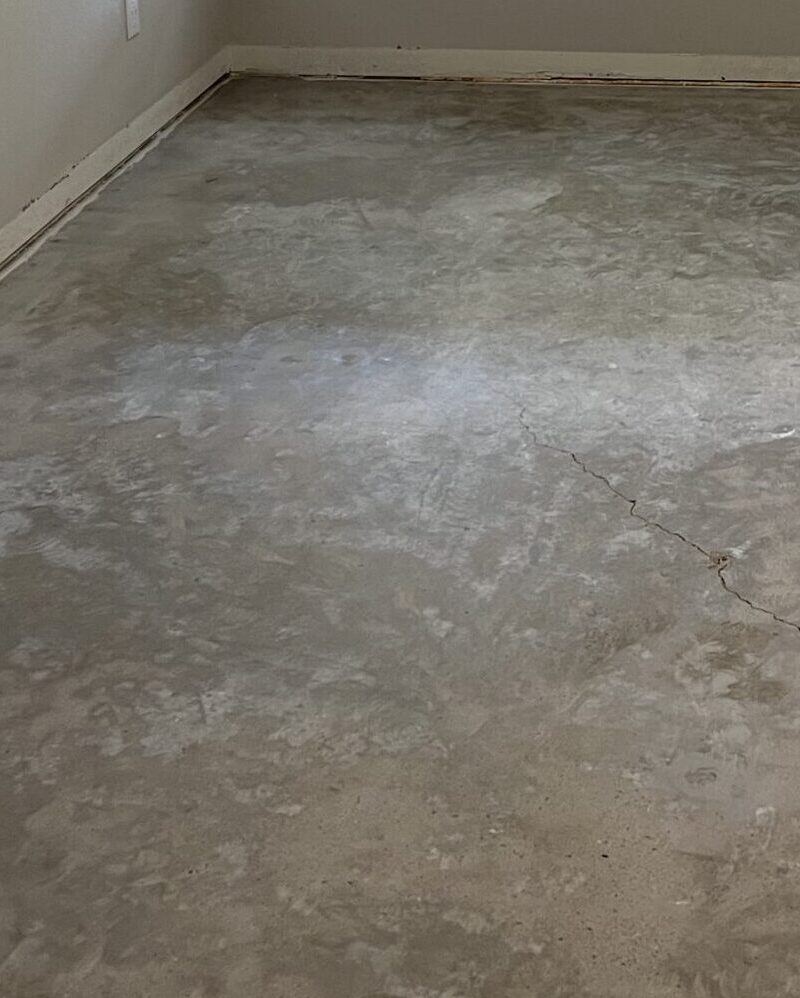
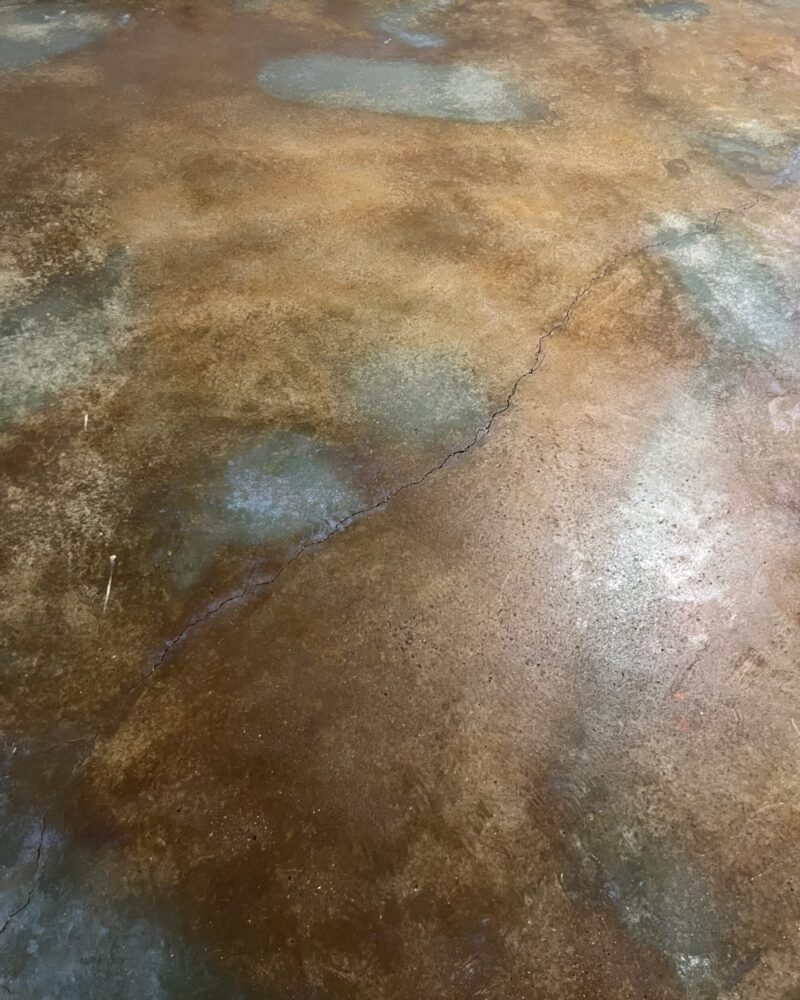
This project involved the removal of old carpeting and the careful preparation of the underlying concrete for a refreshing update. The homeowners sought a warm, earthy color scheme, so they opted for a blend of our Malayan Buff and Seagrass acid stains. Using the wet-on-wet technique, they achieved a vibrant and blended finish that transformed the floor. Despite the changing appearances at different stages, patience and trust in the process resulted in a beautiful end product.
Project Info:
- Project Completed In: 4 day(s)
- Estimate of Square Footage: 200 sq. ft.
- Project Description:
We removed the carpet and prepped the concrete prior to receiving the products. We wanted more of the brown colors with some of the seagrass blending in so we decided that the wet on wet technique would probably give us the look we were after. Once the color was on, we allowed it to sit around 5 hours then neutralized it. - Personal Tips:
We chose not to Etch the concrete. Take the time to really research everything on the website. It really helped the process go much smoother than we expected. Trust the process. Each stage the floor looked completely different but the end product is beautiful! - Direct Colors Products Used:
1 Gal. CitrusEtch™ Concrete Etcher
1 Gal. Seagrass DIY EverStain™ & AcquaSeal™ Satin Kit
1 Gal. Malayan Buff EverStain™ Acid Stain
1 Gal. ProWax Polish™ Satin
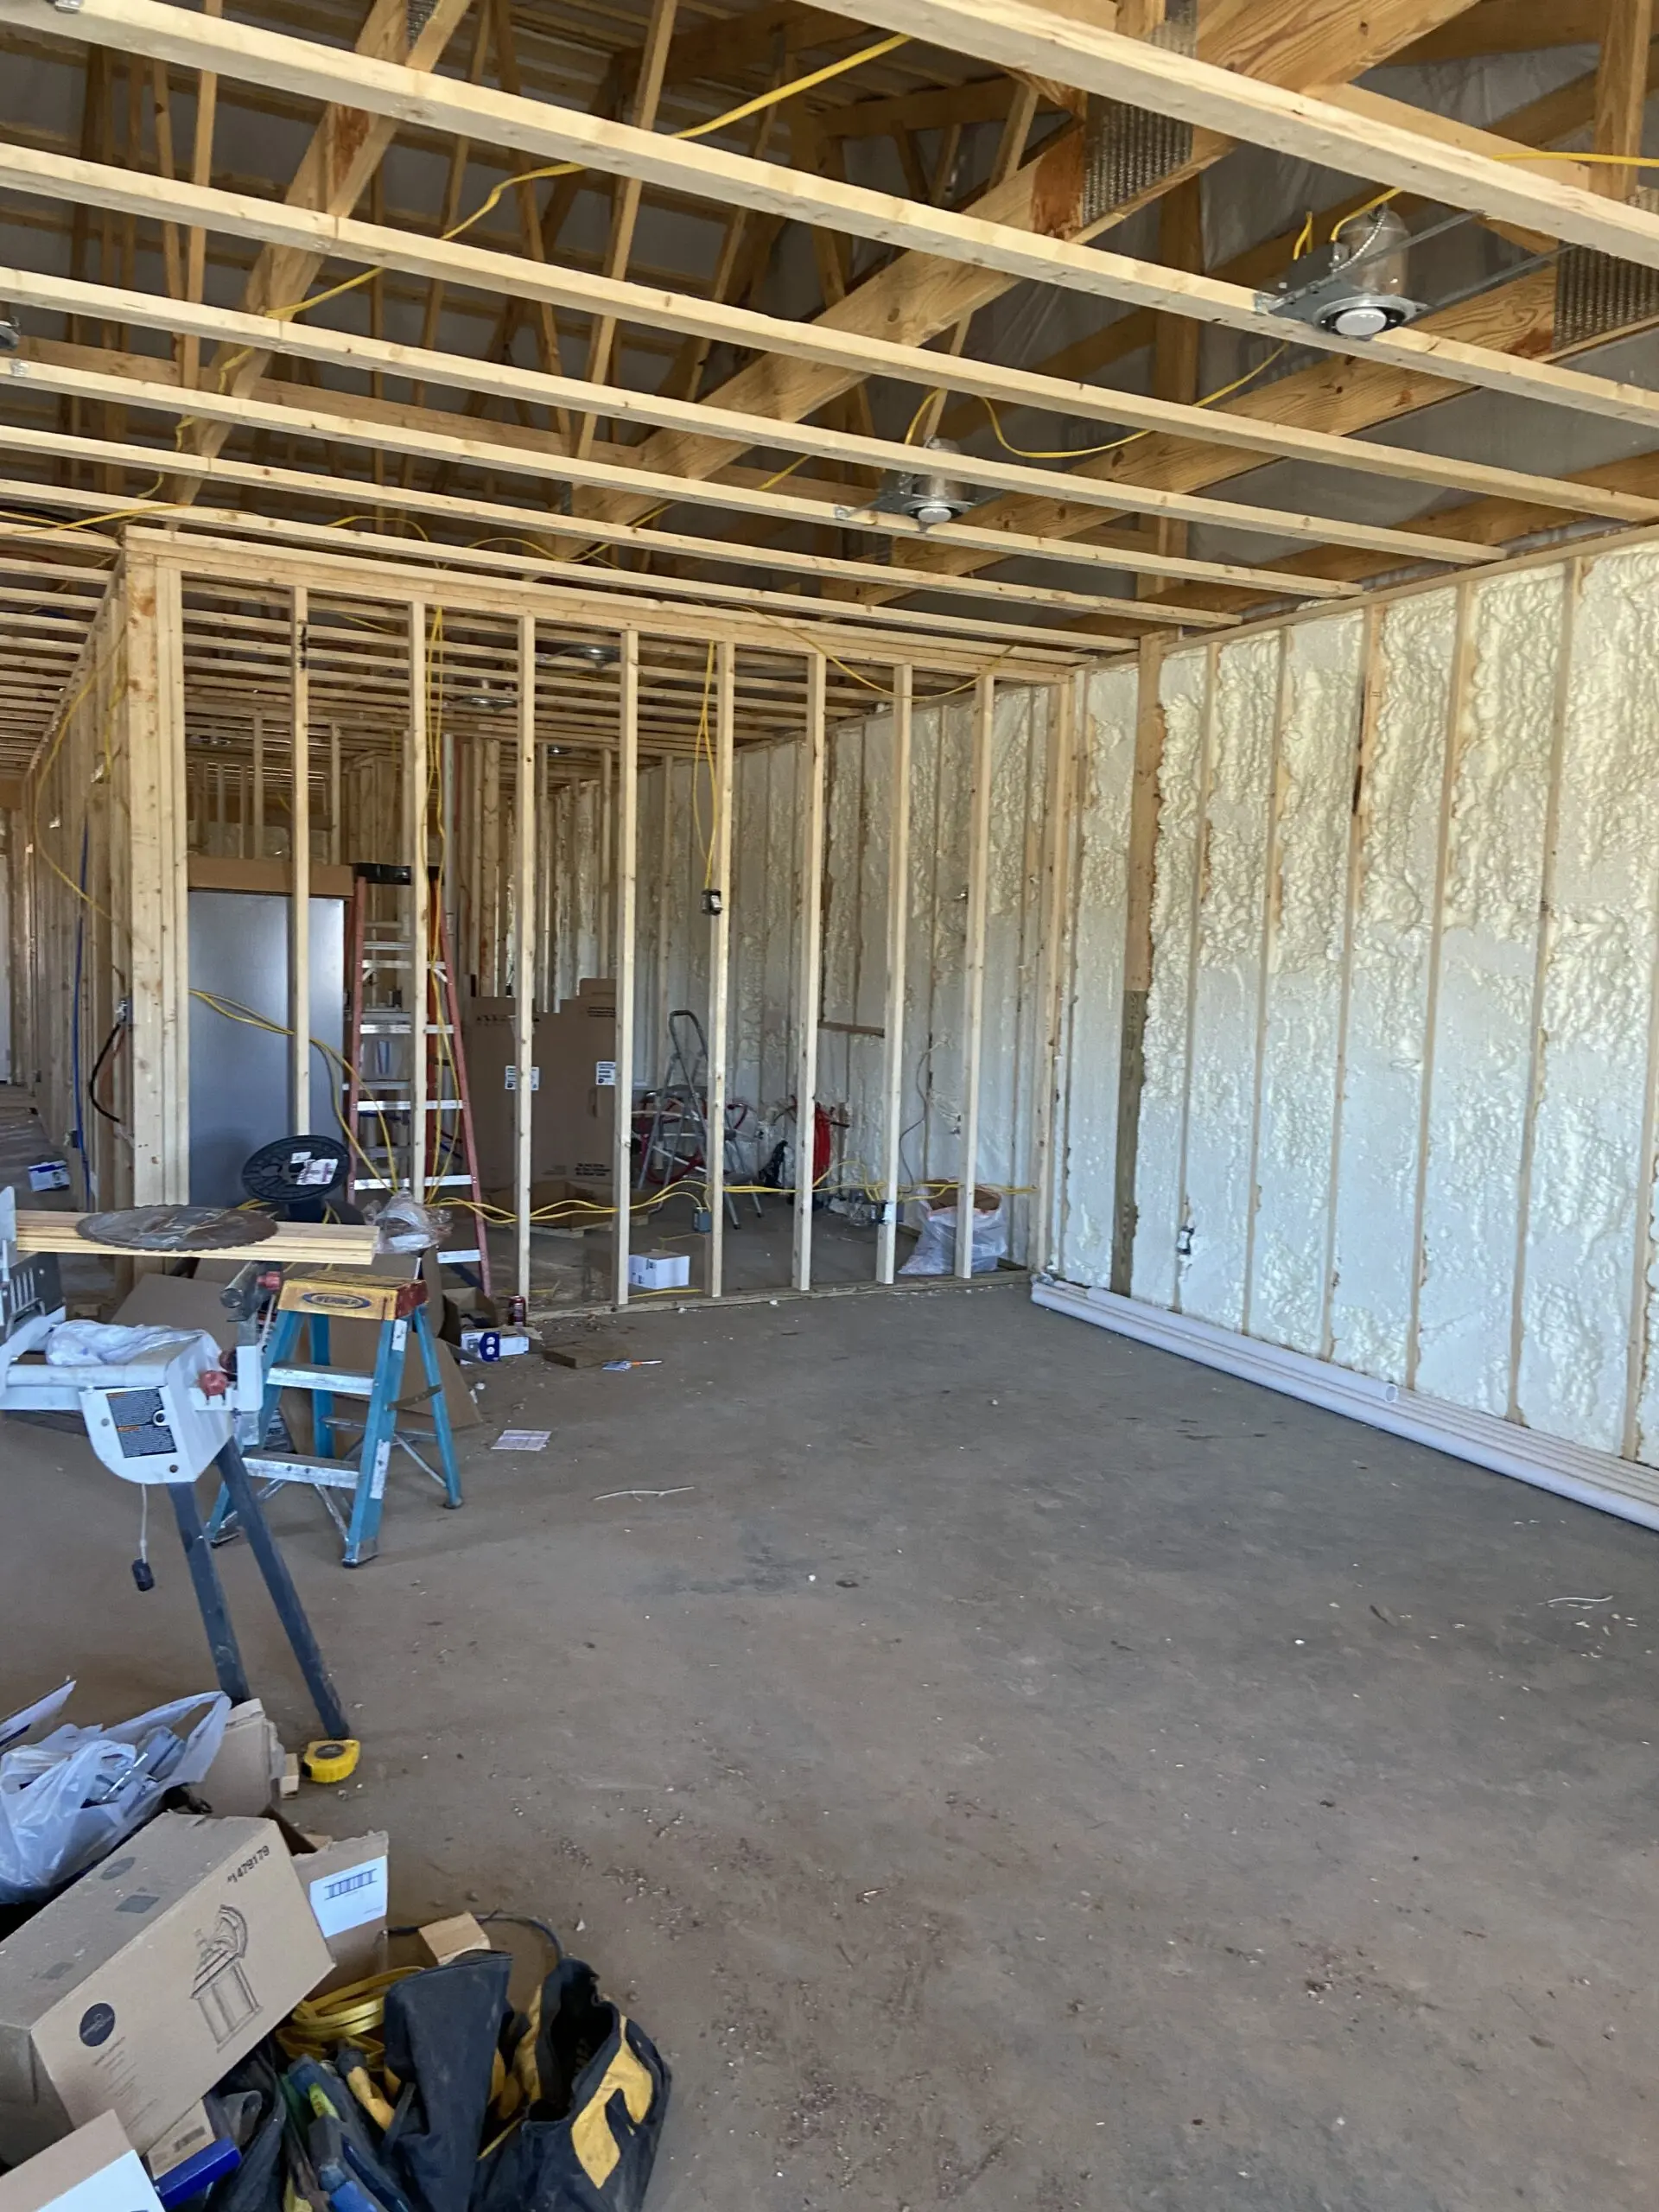
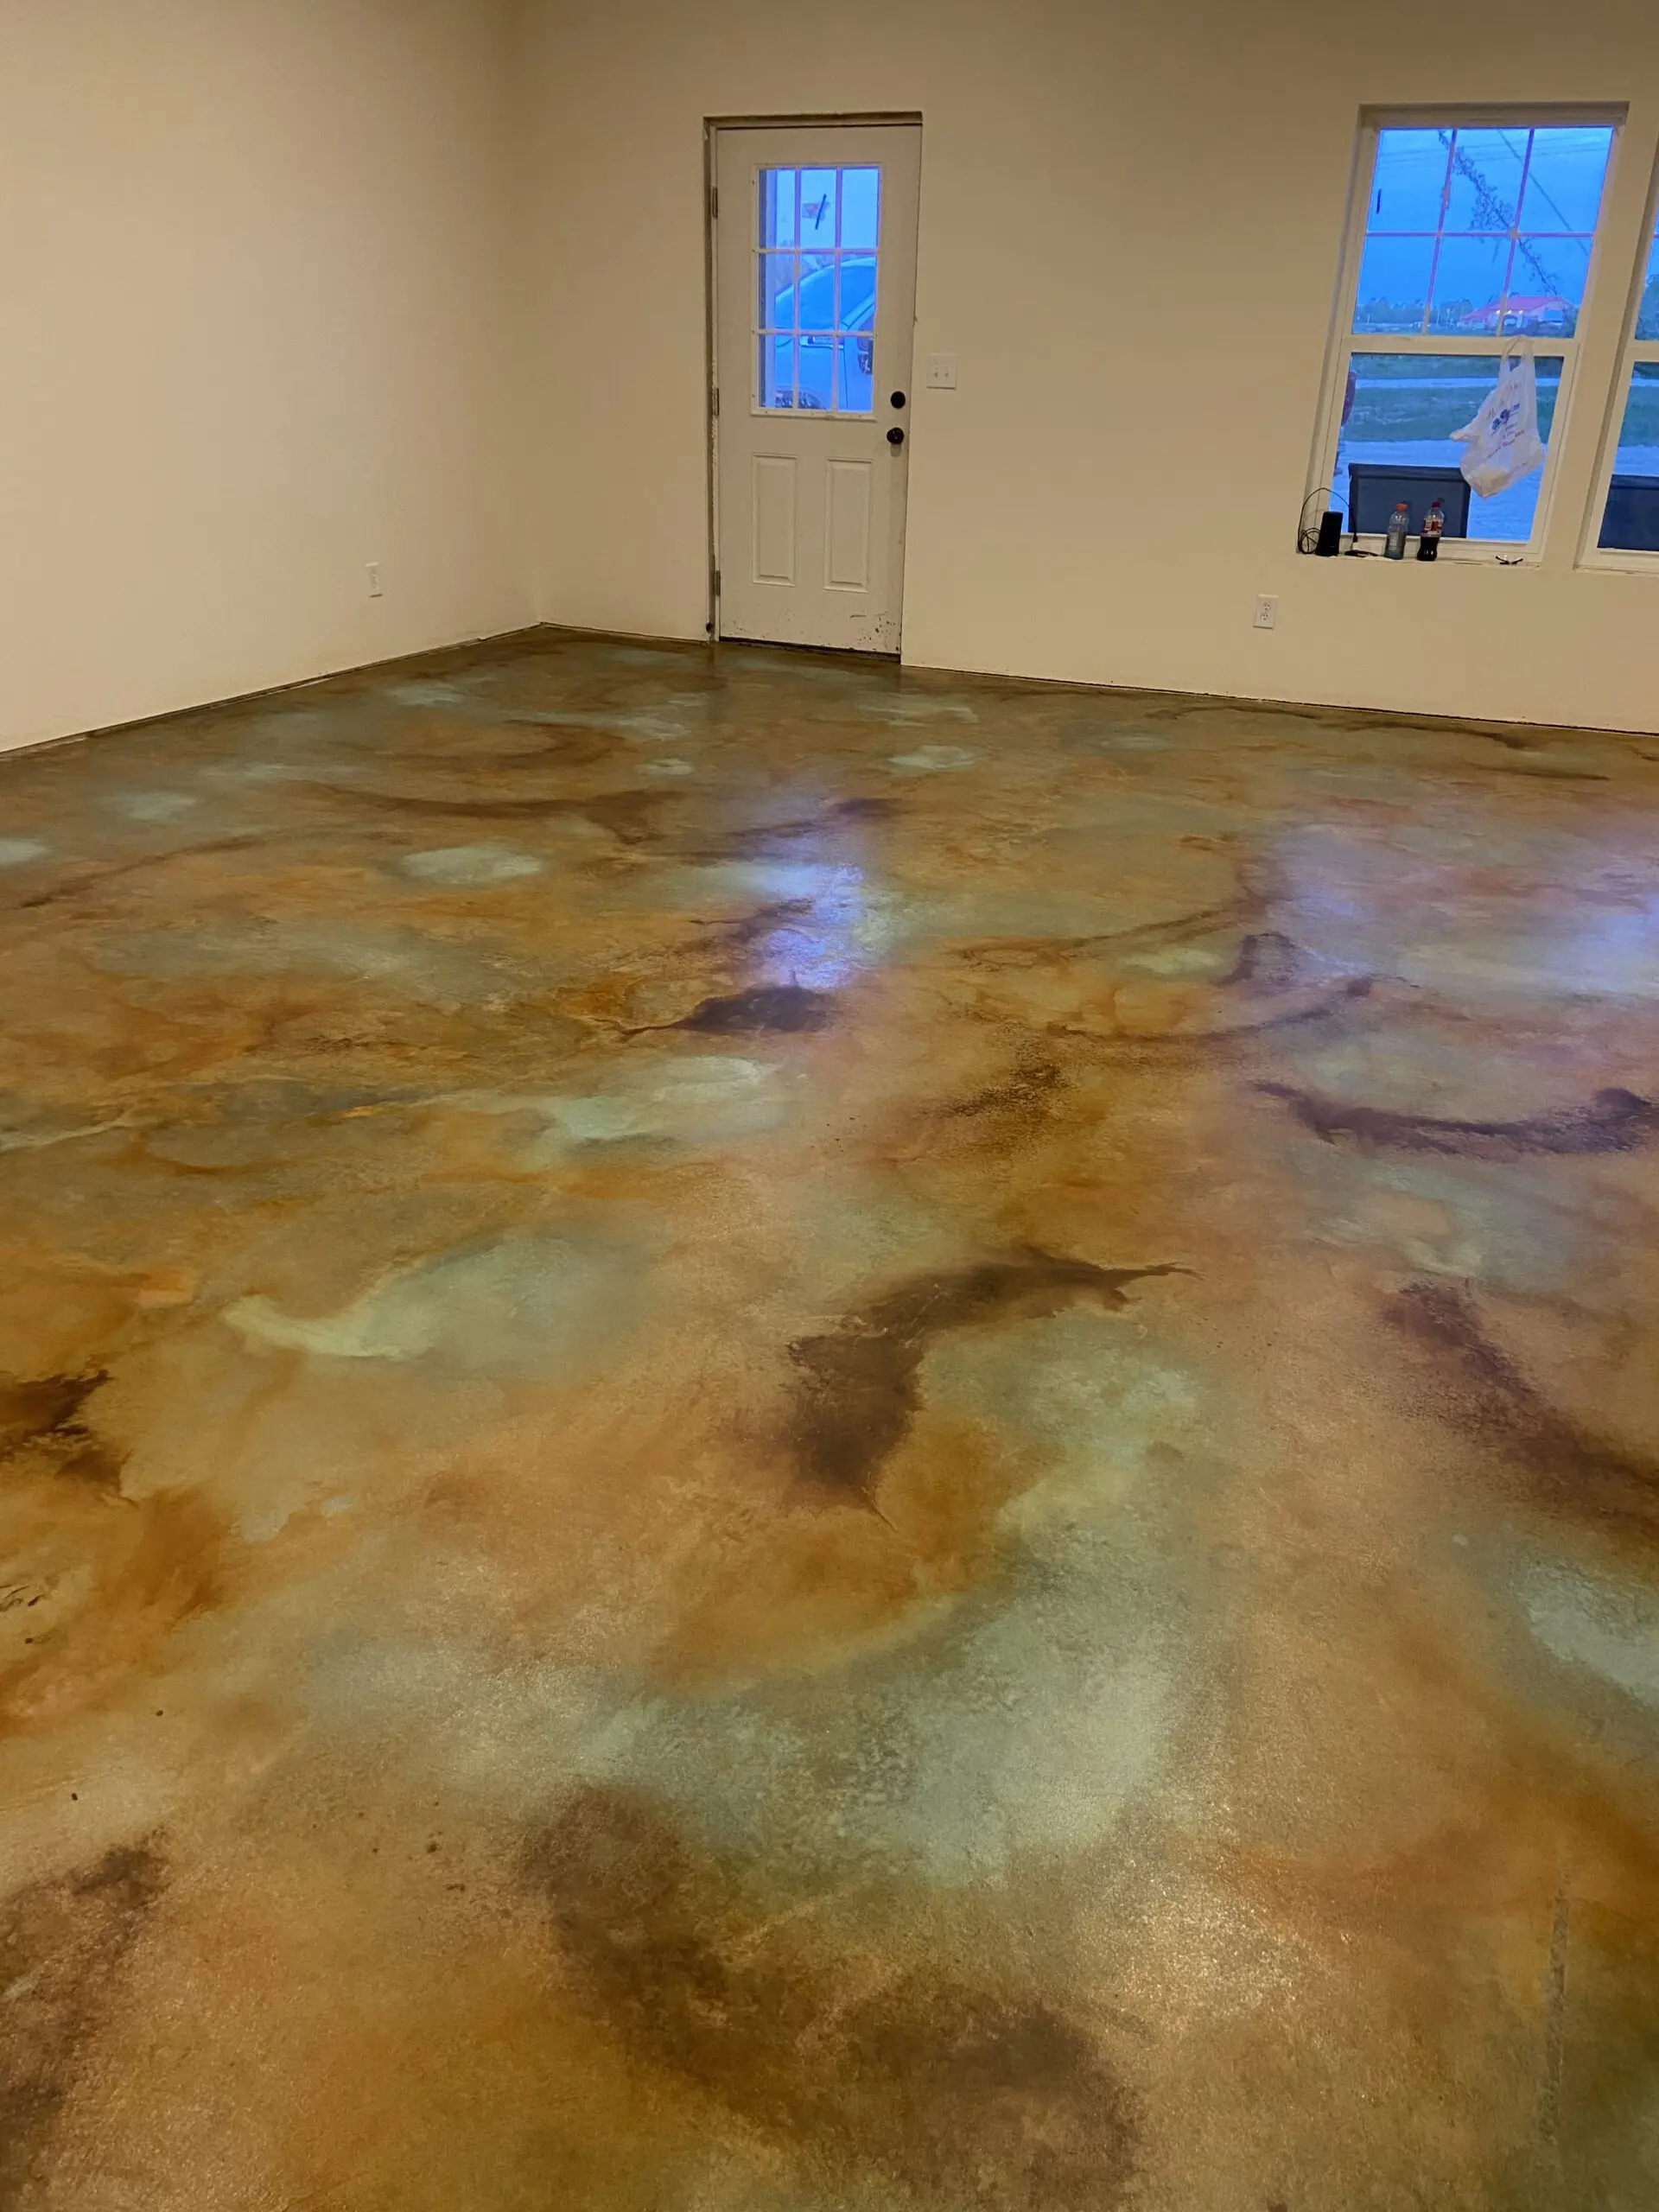
New House, Vibrant Stained Floors
This project revolves around the construction of a new house, with an emphasis on creating stunning stained concrete floors throughout the property. The homeowners utilized a blend of Seagrass, Malayan Buff, and Coffee Brown EverStain acid stains to give the floors an aesthetically pleasing, unique character.
Project Info:
- Project Completed In: 4 day(s)
- Estimate of Square Footage: 1800 sq. ft.
- Project Description:
Building new house, stained floors thru out the house. - Direct Colors Products Used:
1 Gal. CitrusEtch™ Concrete Etcher
5 Gal. Malayan Buff EverStain™ & AcquaSeal™ Satin Kit
4 x 1 Gal. Seagrass EverStain™ & AcquaSeal™ Satin Kit
3 x 1 Gal. Coffee Brown EverStain™ Acid Stain
5 Gal. ProWax Polish™ Satin
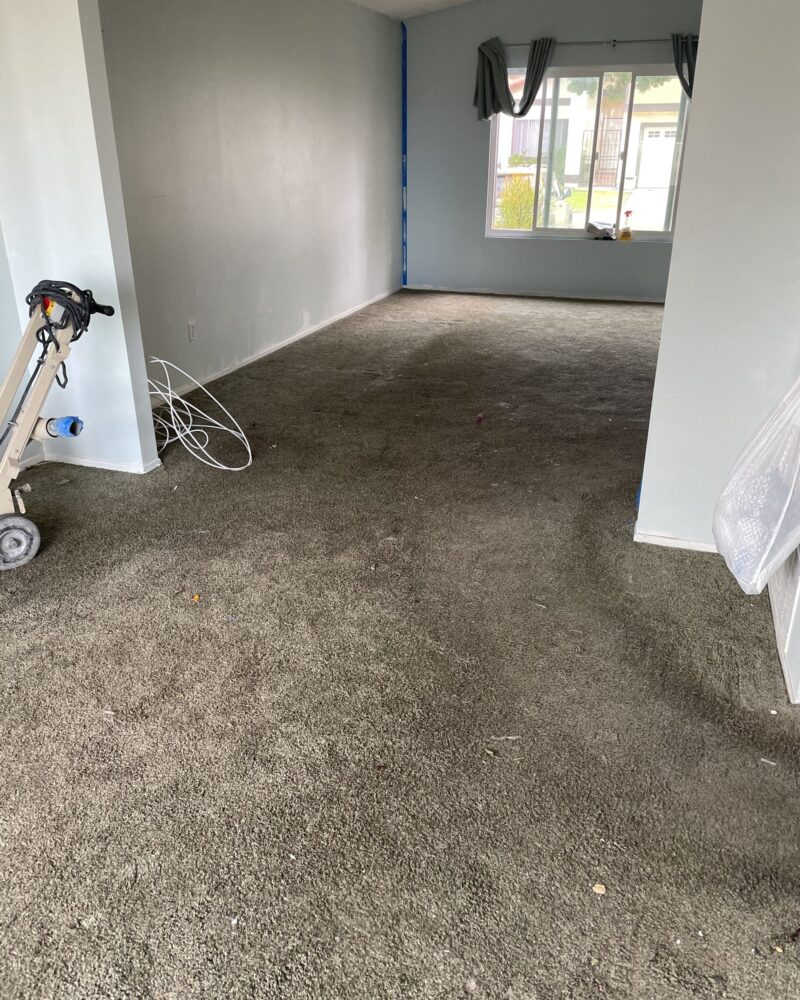
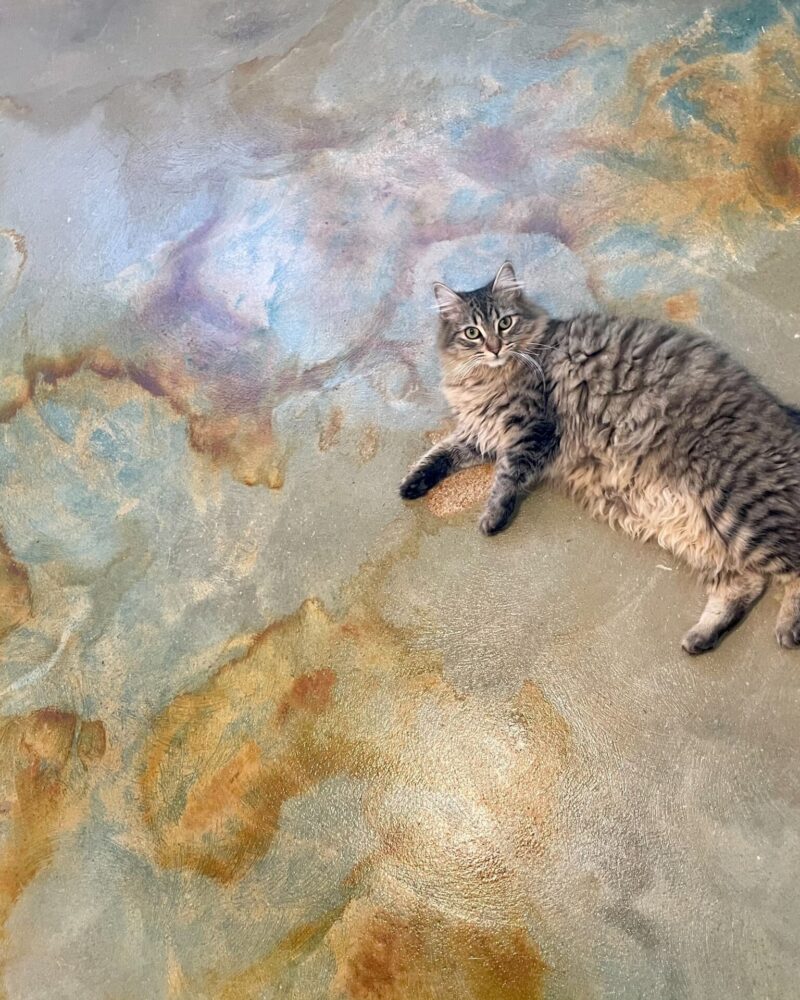
Layering Concrete Acid Stain Colors
Numerous acid stain colors may be layered, blended or applied to the same concrete slab to produce an array of effects, ranging from a dreamy “washed” appearance to a mottled psychedelic finish. This particular DC customer removed an old stained carpet and replaced that with a layering of three acid stain colors. They really chose to embrace the imperfections on their 40-year-old slab of concrete!
Project Info:
- Project Completed In: 7 day(s)
- Estimate of Square Footage: 1100 sq. ft.
- Project Description:
We stained the concrete of our entire downstairs living areas. This included two living spaces, kitchen, entry and hallway. Initially, we used a generic water based stain and were not satisfied with the results. We researched and found Direct Colors and ordered the EverStain Concrete Acid Stain in Malayan Buff, Cola, and Seagrass. The end result was absolutely beautiful and exactly what we wanted, - Personal Tips:
Prep work is very important. If you want great results, you have to put in the work.
Our project and experience with concrete staining was fun. We were working with a +40 year old slab so we kept in mind that the acid would change the concrete in different and unexpected ways. We also embraced the imperfections in the concrete and liked the character those imperfections added to our end product. - Direct Colors Products Used:
1 Gal. Malayan Buff DIY EverStain™ & AcquaSeal™ Gloss Kit
3 x 1 Gal. Malayan Buff EverStain™ & AcquaSeal™ Gloss Kit
1 Gal. Seagrass EverStain™ & AcquaSeal™ Gloss Kit
1 Gal. Cola EverStain™ Acid Stain
5 Gal. ProWax Polish™ Satin
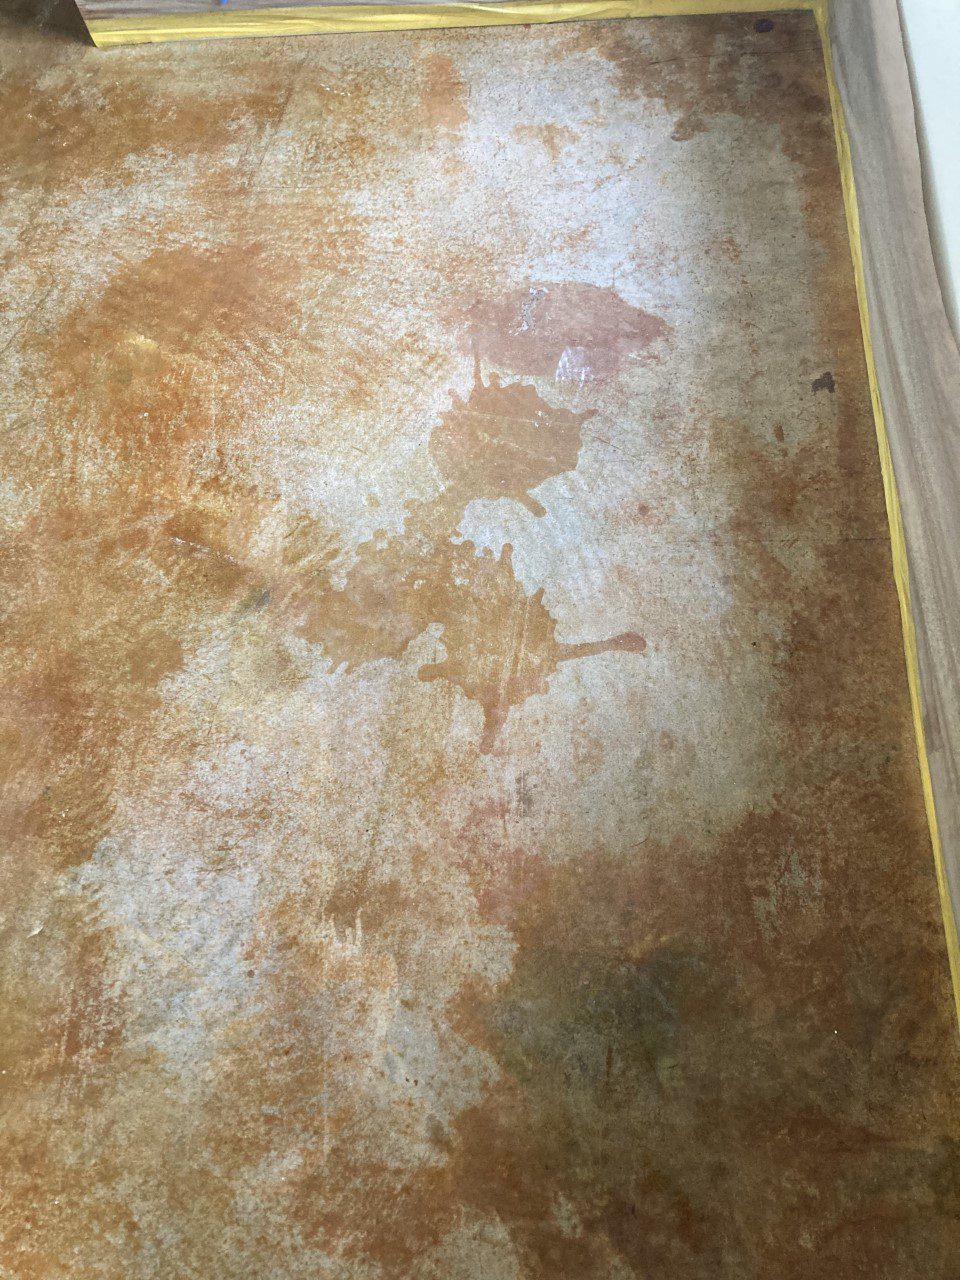
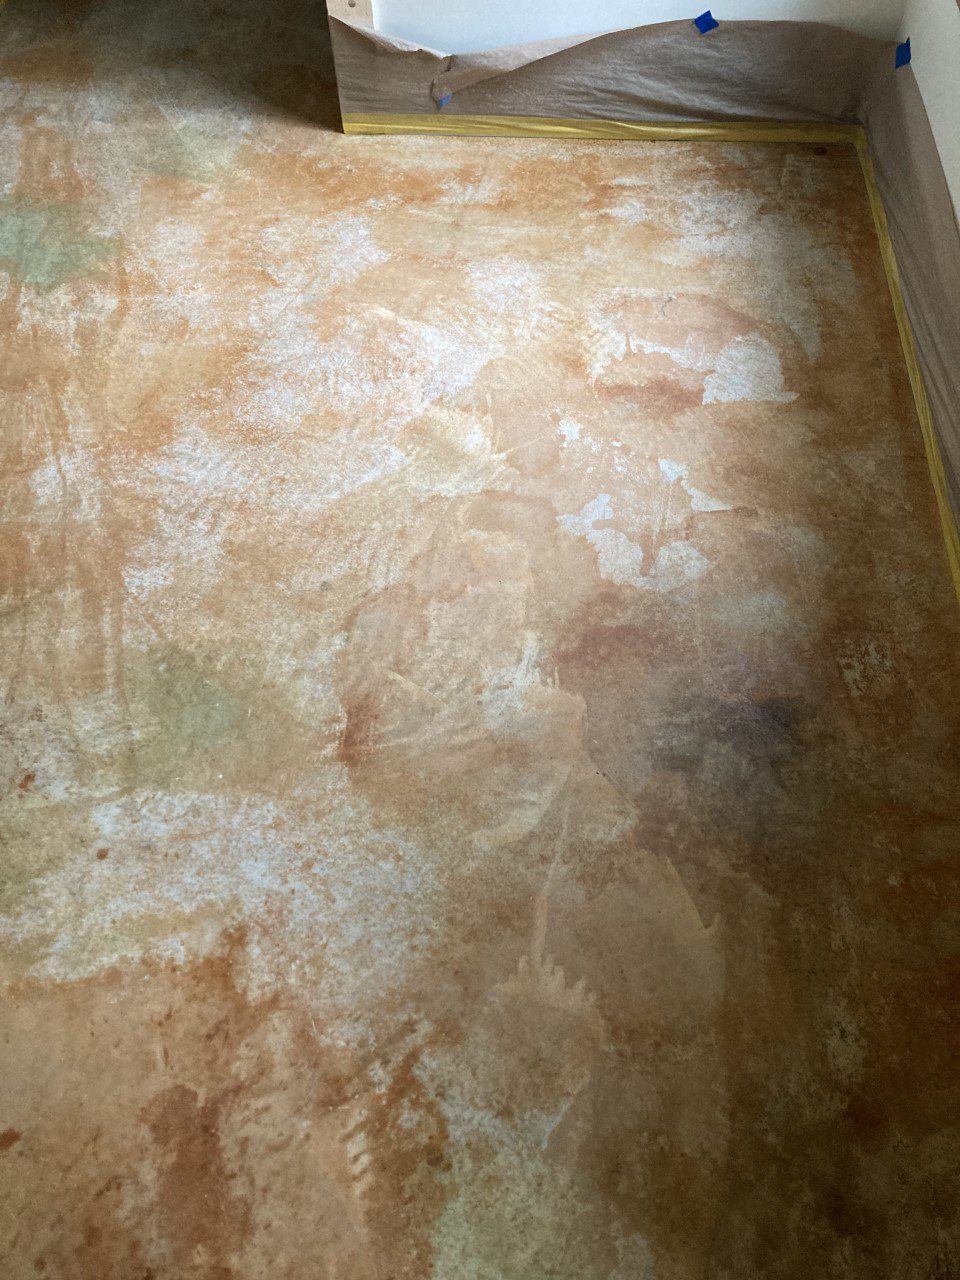
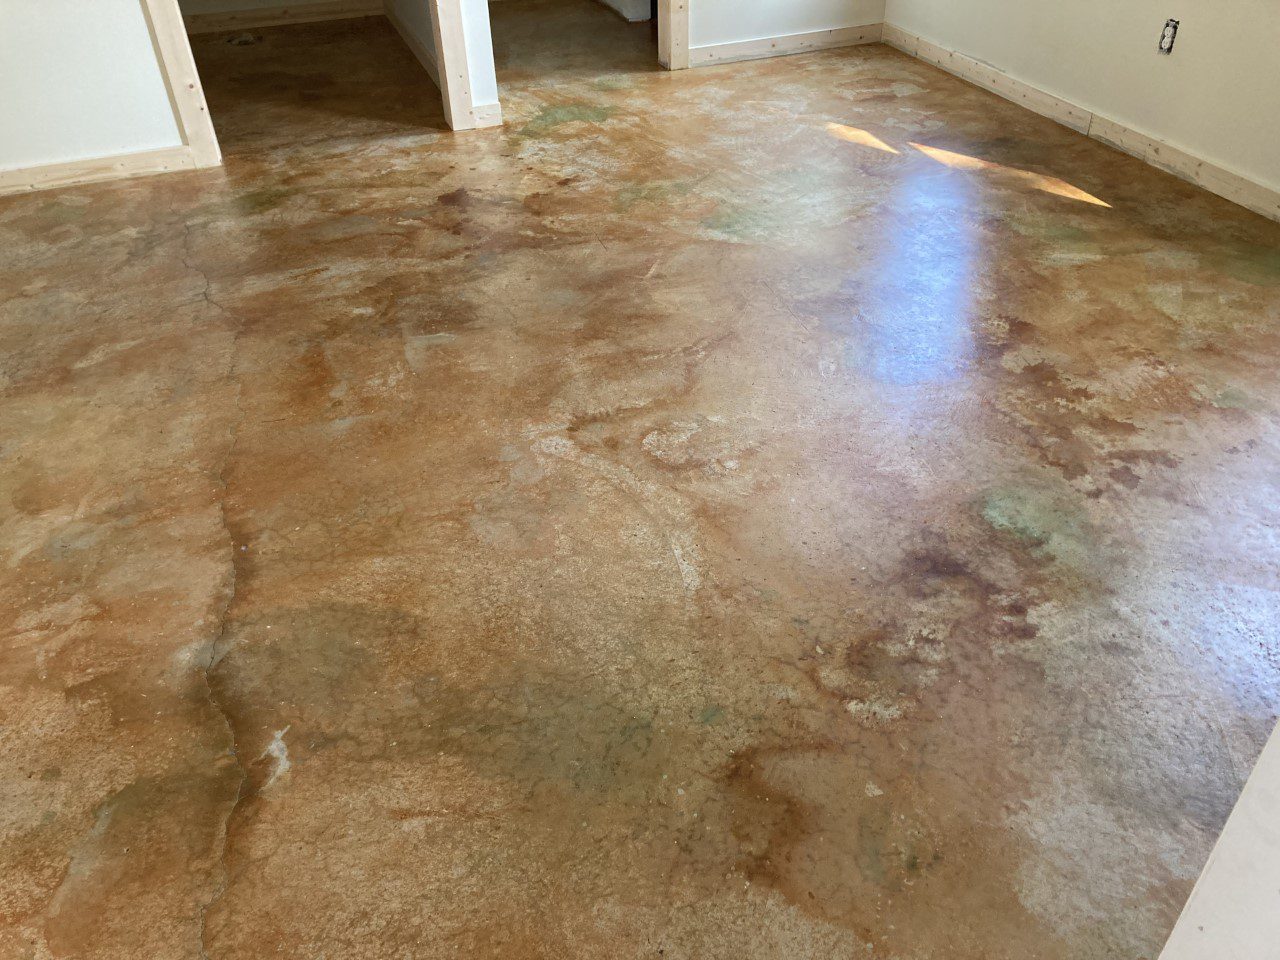
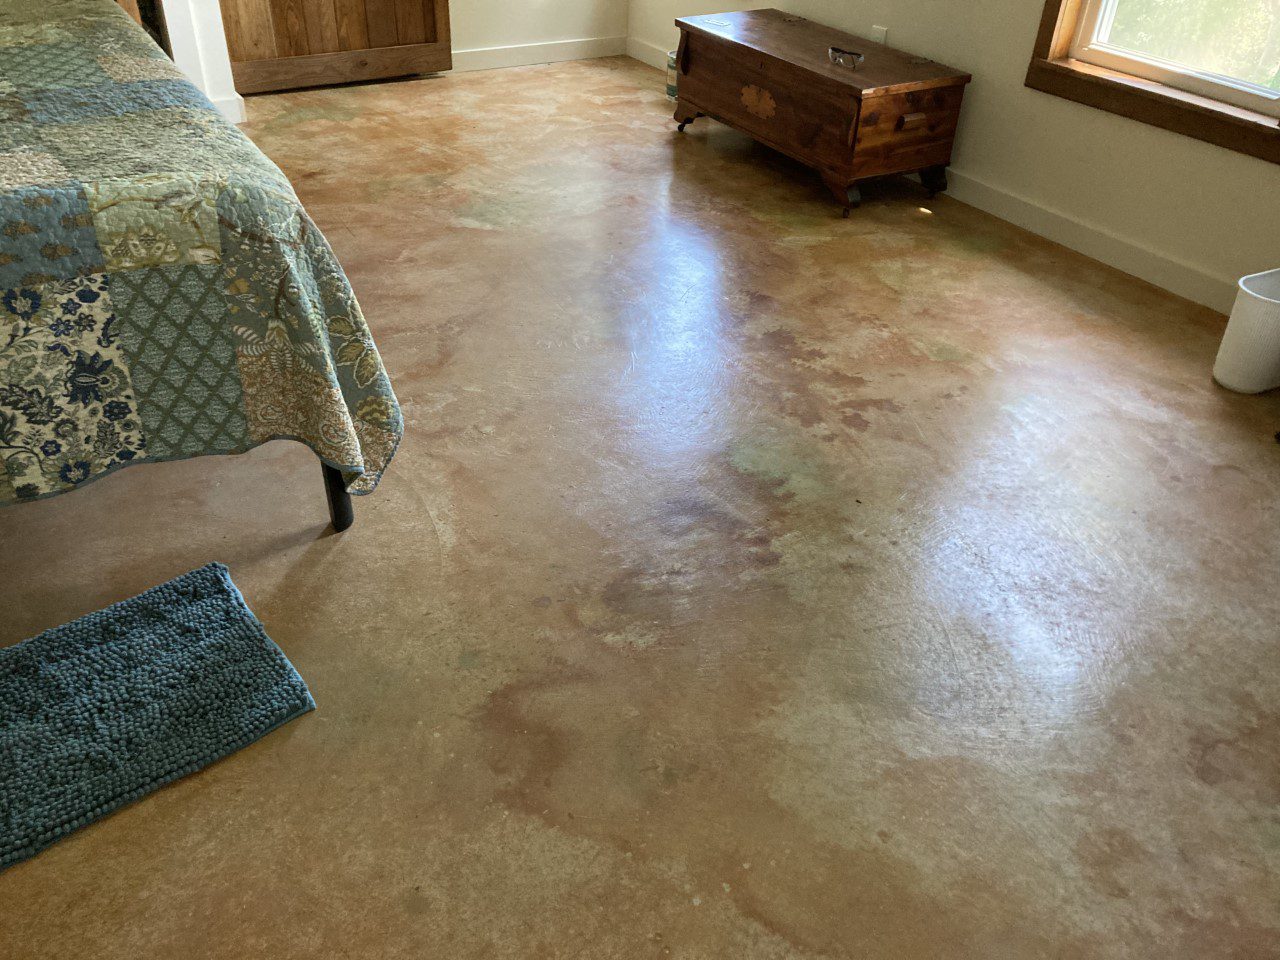
From Woodshop to Bedroom: A Concrete Flooring Makeover
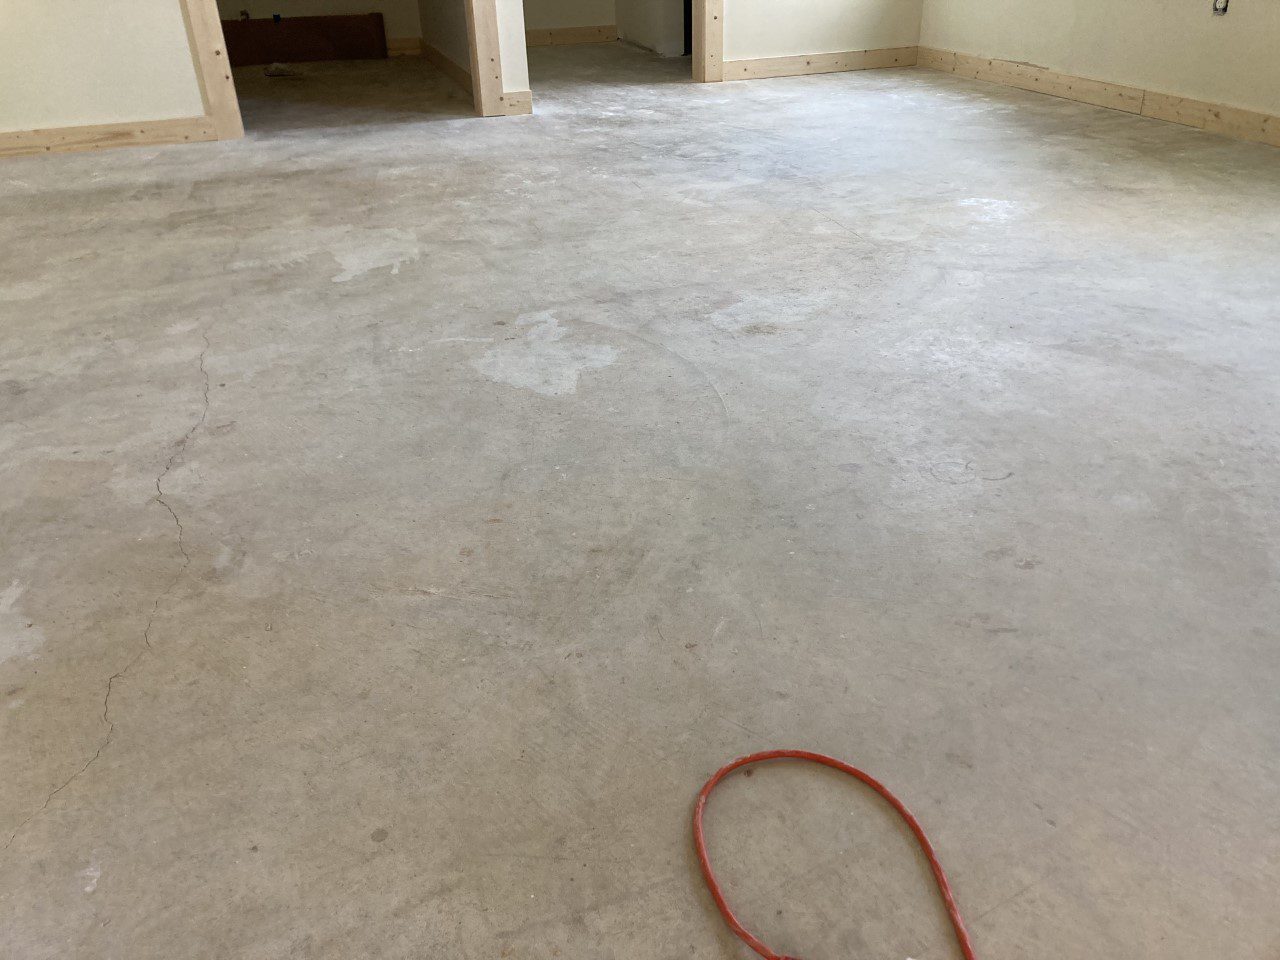
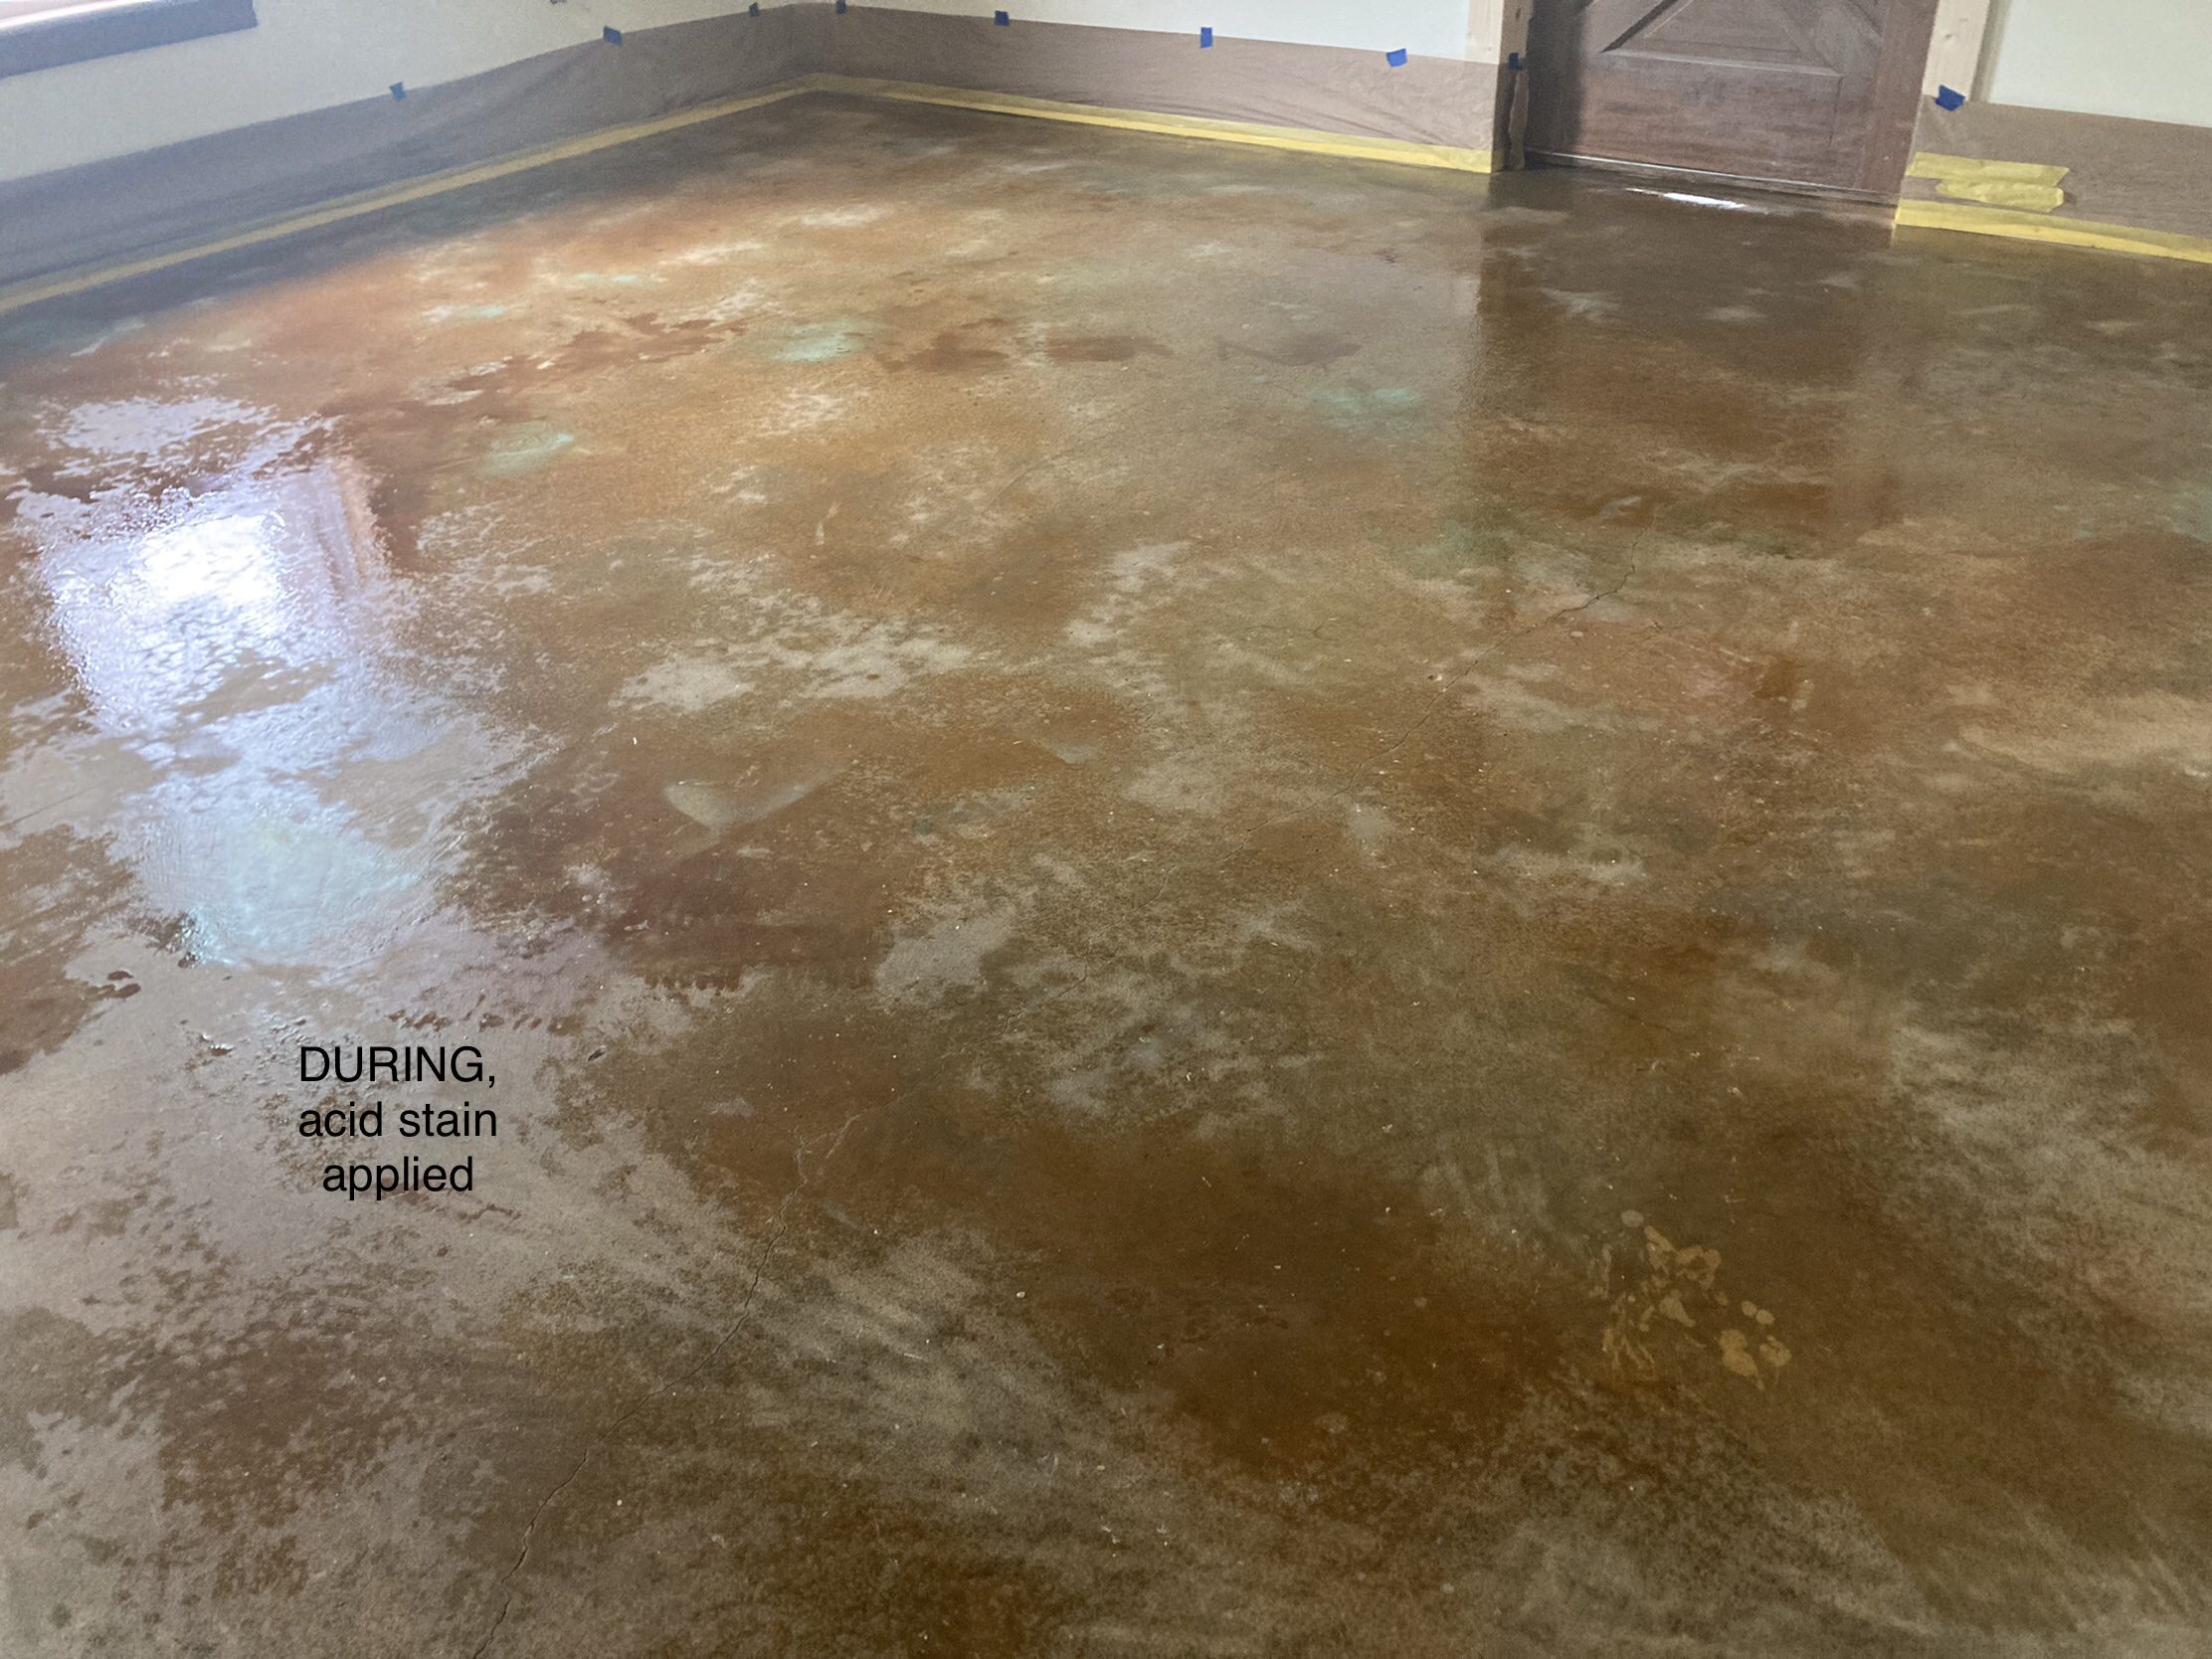
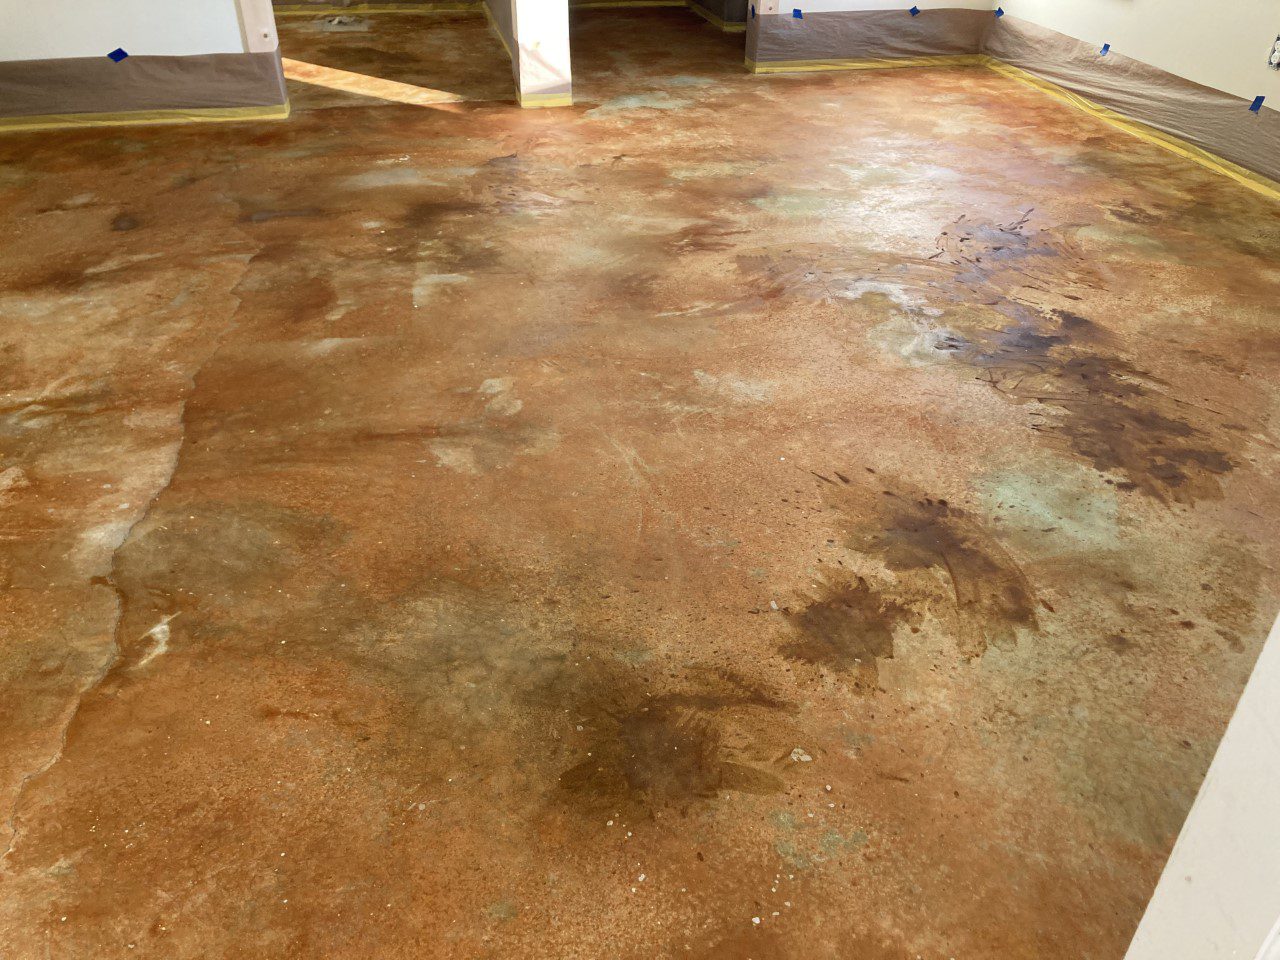
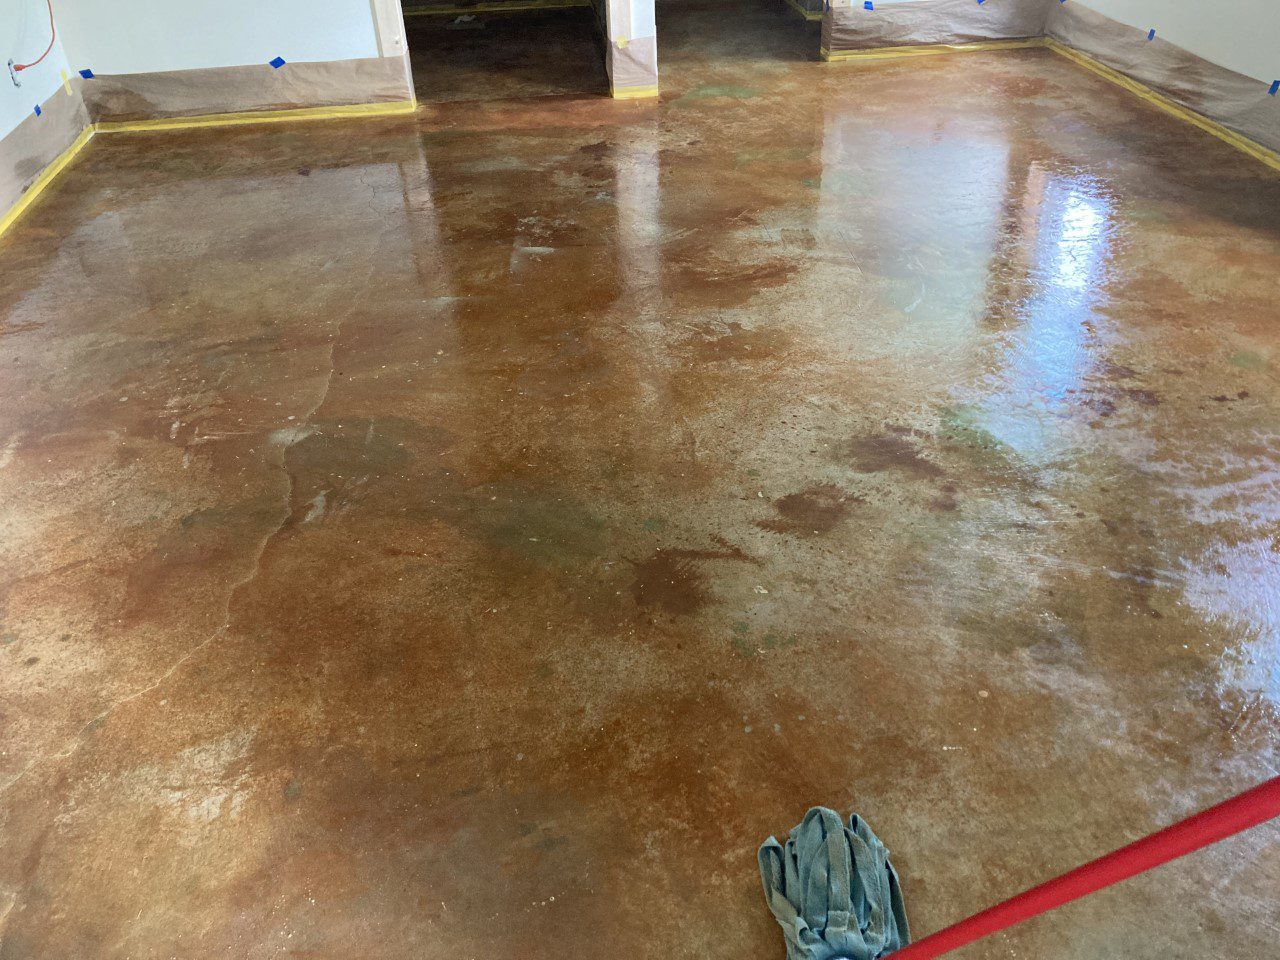
This project is a creative transformation of a 35-year-old woodworking shop into a cozy bedroom. The aged concrete floor, featuring a variety of textures, colors, and blemishes, was given a fresh lease on life with our acid stains. Despite stubborn spots and variations in the stain uptake, the end result is a beautifully organic-looking floor. It took two rounds of staining, diligent cleaning, and the use of ‘accent’ colors to achieve the desired result. This transformation shows the versatility of acid stains and the beauty that can be brought out of old, imperfect concrete.
There are numerous ways to fix or “adjust” the color of concrete and other common concrete acid stain problems like fading, seal bubbling, and seal “ghosting”.
Project Info:
- Project Completed In: 6 day(s)
- Estimate of Square Footage: 350 sq. ft.
- Project Description:
We converted a woodworking shop into a bedroom. The floors were 35 year old concrete with lots of variation, some cracks, paint smears, oil stains, and varnish. Good thing we wanted an “Organic” look since the concrete took the stain in a hugely varietal way!
We followed all instructions to clean and prepare the concrete, using soap, the CitrusEtch™ Concrete Etcher as well as many hours of scraping, sanding, etc.
But there were some spots that just refused to come up. So we used a few “accent” colors (from the sampler pack) to mask the problem areas.
One coat of Malayan Buff, then accent colors, then second coat of Malayan Buff. BUT! We should have sprayed on the Cola instead of dribbling it on! Seagrass worked out being “splashed” on but the Cola was too strong.
Also, there were places that the stain just didn’t take well. I had thankfully saved back one quart of the Malayan Buff, and after neutralizing and 11 rinses, we did another round of staining. I was much happier with the results after that. - Personal Tips:
2 people for the job is a must! One to be the Go-fer so you don’t have to keep putting on the shoes and shoe covers every time the water needs to be rinsed!
Invest in a really good mop system. We used a quick wring Cedar bucket and microfiber mop that could withstand the scrubbing.
We found it was important to clean that mop with soap after 3-4 mopping, as we would never have come up with clean enough water!
Overall with two beginners, we had 4 hours prep, 4 hours of hard trowel treatment plus mopping, 1 hour for each acid coating, 5 hours for neutralizing and mopping the first time, 2 hours for neutralizing the mopping the second time, and then just 1 hour or less for sealant coats (x2). - Direct Colors Products Used:
5 Gal. CitrusEtch™ Concrete Etcher
1 Gal. Malayan Buff DIY EverStain™ & AcquaSeal™ Satin Kit
1 Gal. Malayan Buff EverStain™ & AcquaSeal™ Satin Kit
4 Oz. Seagrass EverStain™ Acid Stain
4 Oz. Cola EverStain™ Acid Stain
1 Gal. ProWax Polish™ Satin


